The best way to cover a patio depends on one thing above everything else: what you actually need protection from. If your main enemy is afternoon sun, a pergola or retractable awning does the job well. If you want to sit outside during rain, you need a solid-roof patio cover attached to the house. If bugs are ruining your evenings, a screened enclosure is the answer. Most homeowners want a mix of these things, and the good news is you can get all of them with the right structure and a realistic plan.
Best Way to Cover a Patio: DIY Options, Steps, Tips

Felix Brennan
22 May 2026
Step 1: Clarify what you actually need (shade, rain, wind, or bugs)
Before you buy a single board or panel, spend five minutes thinking honestly about your patio's biggest problem. This single step will save you from building the wrong thing.
- Shade only: You want to cut glare and heat but airflow is important to you. A pergola with slats, a sail shade, or a retractable awning works perfectly here.
- Rain protection: You want to actually use the patio during a downpour. You need a solid roof, full stop. A pergola or shade sail will not cut it.
- Wind blocking: You want to knock down gusts without closing everything off. Partial walls, lattice panels, or a screen enclosure help here without making the space feel like a box.
- Bugs and pests: You want to sit outside without being eaten alive. A screened enclosure is the right tool, and it can still let in plenty of light and air.
- Year-round use: You want all of the above and you want to use the space in winter. A solid-roof attached cover with screen or glazed walls is the full solution.
It helps to walk out to your patio at the worst time of day, in whatever season bothers you most. Is it the 3 p.m. western sun? Is it the wind that blows every evening? Is it mosquitoes from dusk onward? That five-minute reality check shapes everything that follows. If rain is part of your list, there is more detail on drainage and slope planning further down in this guide, because water management is where most DIY patio covers go wrong. If you are mainly looking to block cold drafts and keep rain from soaking the space, plan your roof cover and drainage like you would for how to cover patio for winter.
Pick the right patio cover type for your situation
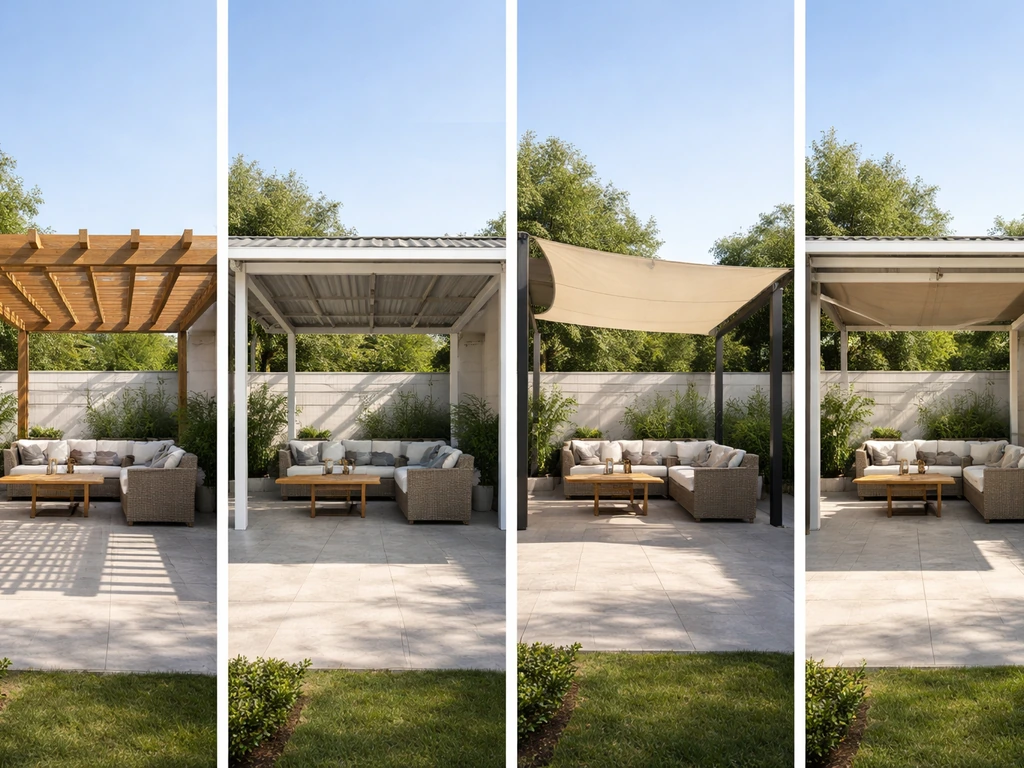
There are five main categories of patio covers, and they serve genuinely different purposes. Here is how they stack up.
| Cover Type | Best For | Rain Protection | Airflow | Typical DIY Difficulty | Rough Cost Range |
|---|---|---|---|---|---|
| Pergola (open slat roof) | Shade, aesthetics, airflow | None to minimal | Excellent | Moderate | $1,500–$6,000+ |
| Solid-roof patio cover (attached) | Rain, sun, year-round use | Full | Moderate (open sides) | Moderate–Hard | $3,000–$15,000+ |
| Retractable awning | Flexible sun and light rain shade | Light rain only | Good when retracted | Easy | $800–$4,000+ |
| Shade sail / sun shade | Budget sun blocking | None | Excellent | Easy | $50–$400 |
| Screened enclosure | Bug control, light wind, sun filter | None without roof | Good | Moderate–Hard | $2,000–$10,000+ |
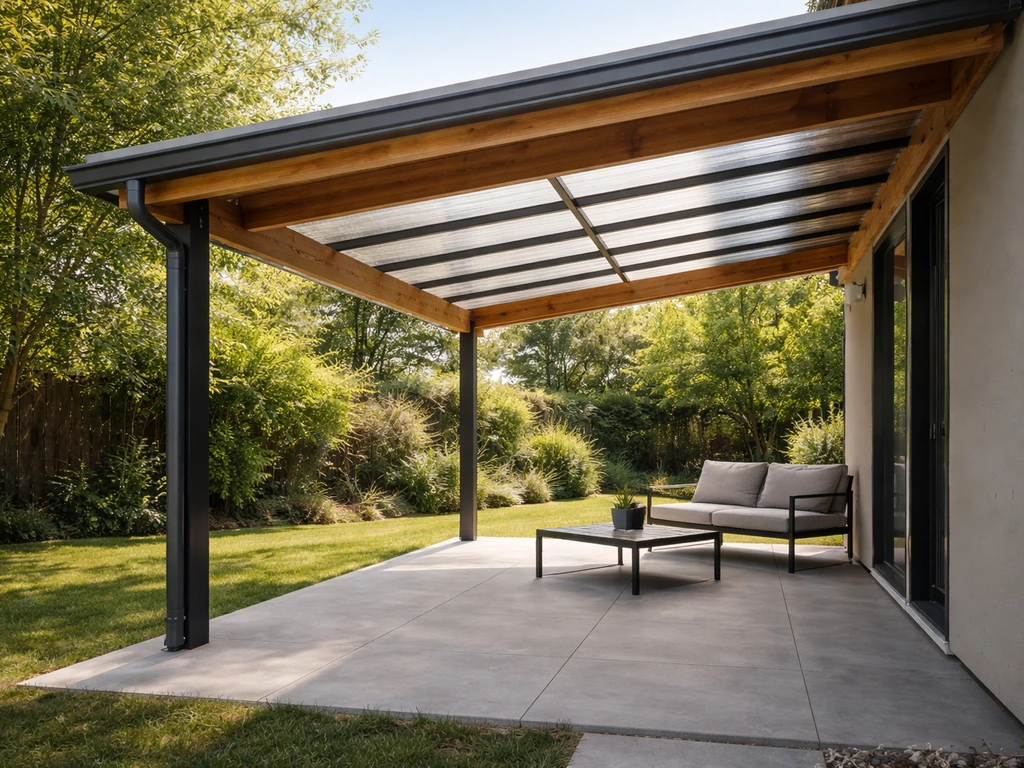
For most homeowners who want a genuinely usable outdoor room, a solid-roof attached patio cover wins. It gives you reliable rain protection, keeps the sun off, and can be paired with screen walls later if bugs are also a concern. Pergolas are a close second for people in dry climates or those who prioritize the open-sky feel. The key distinction: a pergola is designed for partial shade while keeping that open-air connection to the sky, while a solid-roof patio cover trades some of that airy feel for dependable weather protection.
Attached vs. freestanding: which is better?
Attached covers tie directly into the house wall or eave, which means one side is already supported and you only need to build posts for the outer edge. They are easier to waterproof where they meet the house, and they tend to be more stable. Freestanding structures like a detached pergola or gazebo give you more placement flexibility and do not require you to touch the house framing, but they need posts on all sides and their own anchoring. For most homeowners with a standard backyard patio up against the house, attached is the better starting point.
Measurements, layout, and drainage planning
Get your tape measure out before you do anything else. Knowing your exact dimensions early prevents you from buying the wrong materials, and it is the first thing any permit office or kit manufacturer will ask for.
- Measure the width of your patio along the house wall (this becomes the span of your cover).
- Measure the depth of the patio outward from the house (this determines how far your roof extends).
- Measure the height from the patio floor to the eave or soffit of the house. You need at least 7 feet 6 inches of clearance from the patio floor to the bottom of any roof structure above, which is the standard minimum for comfortable headroom and most awning installations.
- Check where your doors and windows open outward. Your cover cannot block door swing or reduce window clearance.
- Note any obstacles: downspouts, electrical boxes, gas meters, HVAC lines.
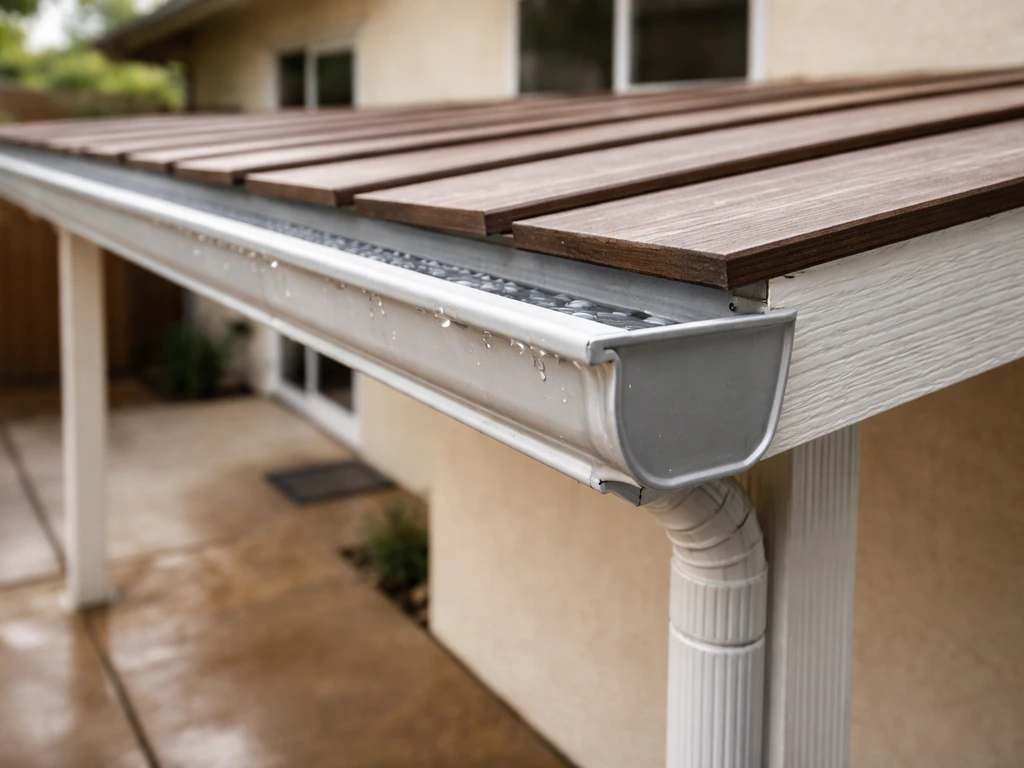
Drainage: the most skipped step
If your roof is flat, rain will pool on it and eventually either leak or cause structural damage. Every solid roof cover needs a slope of at least 1/4 inch of drop per foot of run. On a 12-foot-deep cover, that means the outer edge of your roof sits roughly 3 inches lower than the house connection point. Plan which direction that water will drain before you build, not after. A gutter along the outer beam is the cleanest solution. If you skip the gutter, make sure the drip line falls onto a permeable surface like gravel or landscaping, not straight onto a neighbor's fence or your patio slab. Many municipalities have stormwater rules about where roof runoff can go, so check that when you pull your permit.
Post placement and footprint
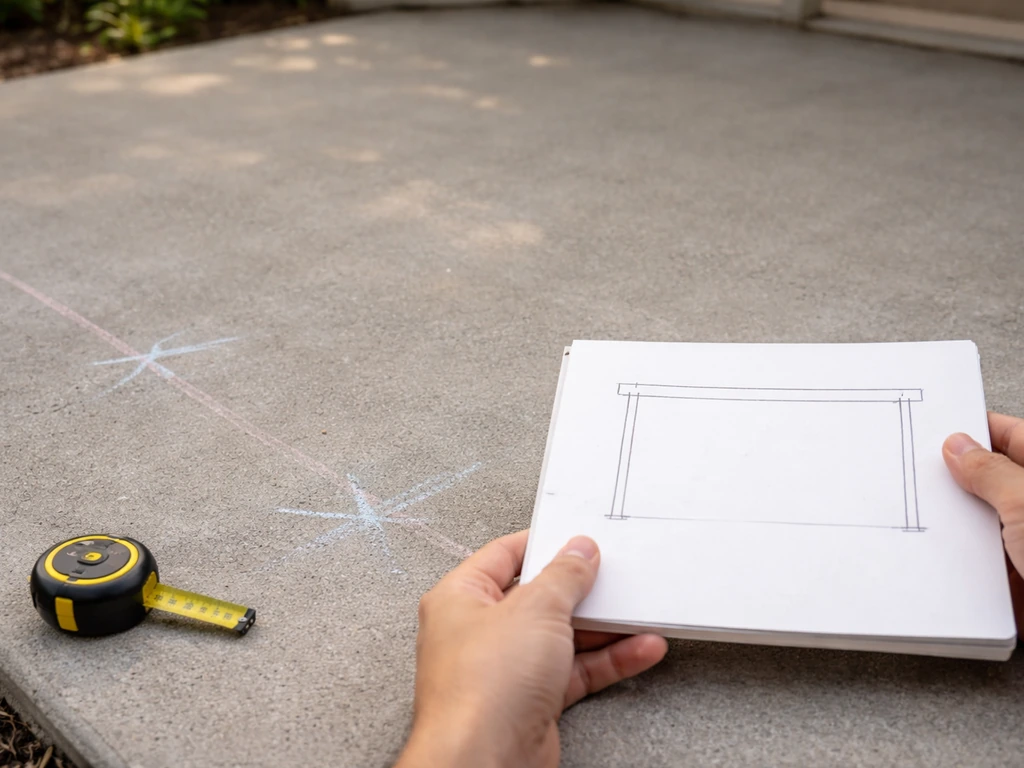
Sketch a simple overhead layout showing where posts will go. Most attached covers use two outer posts at the front corners, with a ledger board connecting to the house on the back edge. Larger spans (over 14 feet wide) may need an intermediate post. Leave a clear passageway of at least 3 feet between any roof overhang and an adjacent fence, wall, or property line. Many local codes require this, and some cities spell it out explicitly in their accessory structure guidelines.
Materials and budgeting: what to actually buy
Material choice shapes your budget, your build time, and how long the finished cover lasts. Here are the most DIY-friendly options with honest trade-offs.
Roofing panel options

Corrugated polycarbonate panels are the most popular DIY roofing material for patio covers, and for good reason. They are lightweight, easy to cut with a circular saw or jigsaw, and let in natural light while blocking UV. A quality UV-protected panel typically lasts 10 to 20 years depending on grade and installation. Hail damage is extremely rare because of the material's impact resistance, which matters if you live in a hail-prone region. Products like Palram's SUNTUF panels are designed specifically for DIY installation, come with a limited lifetime warranty, and can be found at most home improvement stores.
The main rule with polycarbonate panels: always install the UV-protected side facing the sun. The UV coating is only on one side, and installing it face-down will cause premature yellowing and cracking within a few years. Orient sheets so the upwind edge overlaps the downwind edge to shed water correctly.
| Material | Lifespan | DIY-Friendly | Rain Proof | Cost (per sq ft approx.) | Notes |
|---|---|---|---|---|---|
| Corrugated polycarbonate | 10–20 years | Yes | Yes | $1–$3 | Lightweight, lets in light, UV coat must face up |
| Aluminum patio cover kit | 20–30+ years | Yes (kit form) | Yes | $5–$12 | Low maintenance, many pre-engineered kits available |
| Wood (cedar/redwood) | 15–25 years with care | Yes | With roofing added | $3–$8 framing | Beautiful but needs regular sealing/staining |
| Corrugated metal (steel/aluminum) | 30–50 years | Moderate | Yes | $2–$6 | Durable, good in high wind, can be noisy in rain |
| Fabric/canvas (fixed awning) | 5–10 years | Yes | Light rain | $2–$5 | Not for heavy rain, needs seasonal care |
Framing and structural materials
For framing, pressure-treated lumber (PT pine, rated for ground contact at posts) is the budget-friendly standard. Cedar is a step up in aesthetics and natural rot resistance. Aluminum framing is the low-maintenance choice if you want something that never rots or warps, and most pre-engineered patio cover kits use it. For a typical 10 by 12-foot attached cover, expect to spend $600 to $1,500 on lumber and hardware alone at the DIY level, before roofing panels. Full aluminum kit systems for the same footprint run $1,500 to $4,000 for materials, with installation on top if you hire out.
Budget-stretching options
If budget is the main constraint, a shade sail or sun shade is the fastest and cheapest starting point, running $50 to $400 and installable in a few hours. It will not handle rain, but it cuts sun effectively and gives you a feel for the coverage you actually want before committing to a permanent structure. For a cheap patio cover that handles light rain, a simple corrugated polycarbonate roof on a basic wood frame can be built for under $1,000 on a small patio if you shop carefully and do all the work yourself.
Installation essentials: anchoring, structure, and roof slope
This is where DIY patio covers succeed or fail. The three most common mistakes are: posts that are not anchored properly, a roof with no slope, and a ledger board attached to the house incorrectly. Let us walk through each.
Anchoring posts correctly
Surface-mounting post bases to an existing concrete slab is fine for light pergolas in calm climates, but for anything you want to hold up in a real windstorm, posts should go into concrete footings dug below grade. The depth depends on your local frost line. In warm climates with a frost depth of zero, a code-compliant slab on grade may be acceptable for smaller loads, but check your local building department before assuming this applies to you. Skipping proper footings is the number one reason patio covers lean, rack, or fail in high winds. Where post anchors are used on existing concrete, use code-rated hardware and anchor bolts torqued to specification, not just lag screws into the surface.
Attaching the ledger to the house
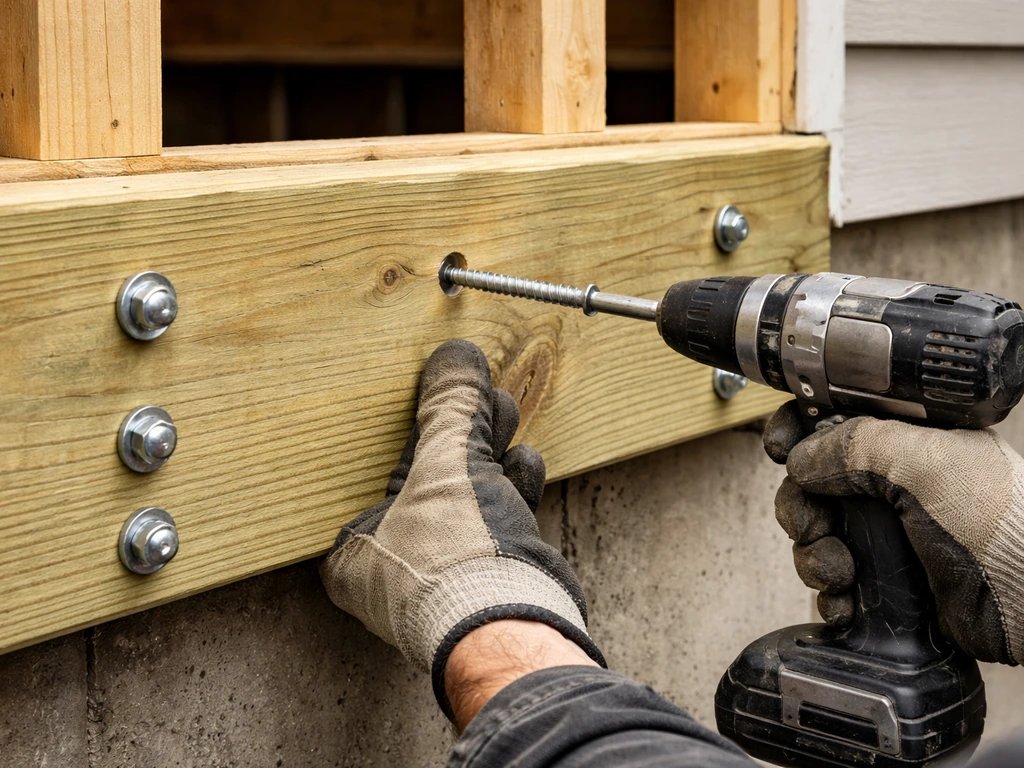
The ledger board is the beam that bolts to your house wall and carries half the roof load. Use structural lag screws or through-bolts into the house rim joist or wall framing, not just the siding or sheathing. Flash the top of the ledger with metal flashing tucked under the siding above it so water cannot get behind the ledger and rot the wall. This is a step many DIYers skip, and it causes hidden rot damage over years. If your house has stucco, EIFS, or fiber cement cladding, look up the specific flashing method for that cladding type before you start.
Installing polycarbonate panels
When fastening corrugated polycarbonate panels, pre-drill holes about 1/16 inch larger than the screw diameter. This is not optional. Polycarbonate expands and contracts with temperature changes, and tight holes will crack the panel over time. Use roofing screws with neoprene washers to seal the penetration. Keep screw spacing to roughly 12 to 18 inches. Overlap panel edges by at least one full corrugation ridge on the sides and at least 6 to 8 inches on end laps. Remember: UV side up, upwind edge on top.
Wind resistance
Wind loads on patio cover roofing and cladding are governed by engineering standards, and in many jurisdictions your permit-required plans must show compliance with the local wind design requirements. For homeowners in hurricane zones, high-wind coastal areas, or places that regularly see gusts above 90 mph, over-engineering the connections is smart. Use hurricane ties at every rafter-to-beam connection. If you are in a moderate climate, standard joist hanger hardware and correctly spaced lag screws into the ledger will handle typical wind loading. When in doubt, talk to a local structural engineer. A one-hour consultation is far cheaper than rebuilding after a storm.
Permits, safety, and when to call a pro
Most permanent patio covers require a building permit. This is not optional, and skipping it can cause serious problems when you sell your house or make an insurance claim. Patio covers are defined under building codes as one-story structures not exceeding 12 feet in height, and they fall under local zoning rules that control setbacks, lot coverage, and how the structure interacts with your property lines.
The permit process typically requires you to submit drawings showing the structure from foundation through roof, including dimensions, materials, and connection details. Some cities have pre-approved patio cover plan sets (ICC-ES pre-approved plans) that speed up the process significantly. If your city offers one, use it. The permit office will also tell you if your jurisdiction requires engineering for wind loads, which is common in coastal and high-wind areas.
Enclosing a patio with walls adds complexity. Under model building codes, enclosure walls must leave the open or glazed area of the longer wall plus one additional wall equal to at least 65 percent of the wall area below 6 feet 8 inches from the floor. That rule exists to keep the space classified as a patio enclosure rather than conditioned living space, which has a whole different set of requirements. If you want to fully enclose and heat the space, you are likely looking at a room addition permit, not a patio cover permit.
When to hire a pro instead of DIYing
- Your patio is on a second-story deck or elevated structure where falls are a serious risk.
- Your house has complex roof lines or the attachment point requires cutting into roof framing.
- You live in a high-wind or hurricane zone where structural engineering sign-off is required.
- You want electrical (lights, fans, outlets) integrated into the cover, which requires a licensed electrician.
- The project exceeds 200 square feet or involves footings in difficult soil conditions.
- You are not comfortable reading a building permit application or construction drawings.
For a straightforward attached patio cover on a ground-level slab in a moderate climate, a competent DIYer with basic carpentry skills can absolutely pull the permit and build it themselves. The permit process is more paperwork than obstacle. For anything more complicated, hiring a licensed contractor for at least the structural and electrical portions is worth the cost.
Maintenance and seasonal care to keep it looking good
A patio cover is a long-term investment, and a little routine care goes a long way. Here is what to do and when.
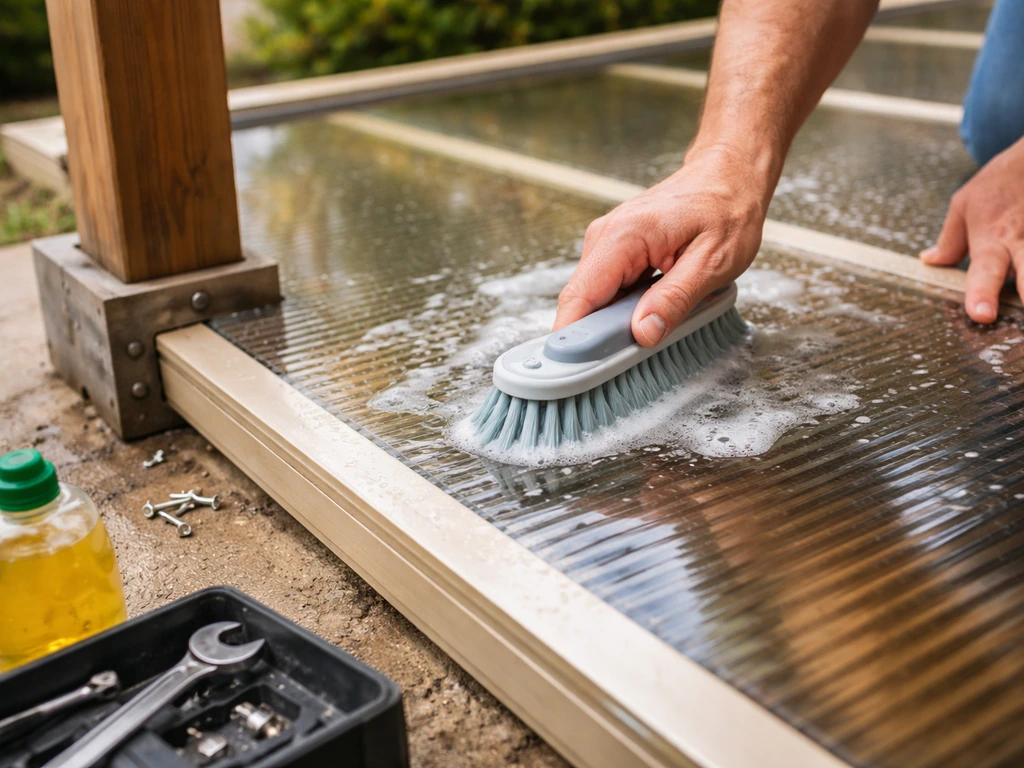
Cleaning polycarbonate panels
Polycarbonate is easy to scratch if you are not careful. Use mild dish soap or an ammonia-free glass cleaner (diluted vinegar or isopropyl alcohol also works). Never use ammonia-based cleaners, amine cleaners, or solvents like acetone, MEK, toluene, xylene, or methylene chloride. These will destroy the UV coating and cloud the panel surface. Avoid abrasive brushes, scrubbing pads, or squeegees with hard edges. Rinse with a low-pressure hose, apply soapy water with a soft cloth or microfiber pad, and rinse again. Do this once or twice a year, more often if you have heavy tree pollen or bird activity.
Wood frame care
If your frame is wood, inspect it every spring for soft spots, checking especially at post bases, ledger connections, and anywhere two pieces of lumber contact each other where water can sit. Stain or seal exposed wood every two to three years depending on your climate and how much sun and rain the structure gets. Cedar holds up longer between treatments than pressure-treated pine, but neither is maintenance-free.
Awning and retractable cover maintenance
If you added a retractable awning as part of your patio cover setup, lubricate the mechanical arms and pivot points twice a year (spring and fall) using dry silicone spray. Do not use WD-40 or oil-based lubricants, which attract dirt and gum up over time. Clean the fabric thoroughly at least once a year, and do a quick refresh monthly during heavy-use seasons. Make sure rain cannot pool on the fabric when extended, which is the most common cause of fabric damage and mold. Retract the awning in high winds and during storms whenever possible.
End-of-season checklist
- Inspect all fasteners, brackets, and ledger connections for rust or loosening.
- Clear gutters and drainage channels of debris before fall rains begin.
- Check roof panels for cracks, lifted edges, or failed sealant around screws.
- Re-seal or caulk any gaps where the ledger meets the house wall.
- Retract or remove fabric elements (awnings, shade sails) before heavy snow or ice storms.
- Treat wood surfaces if stain or sealant is looking thin or flaking.
- Test any lighting or ceiling fans for the next season.
Making it look and feel like a real outdoor room
Function comes first, but once the structure is solid and weather-tight, small design choices make a covered patio genuinely enjoyable to spend time in. Ceiling fans are one of the highest-impact additions you can make: a good outdoor-rated fan keeps air moving, cuts the effective temperature by several degrees, and helps with bugs. Make sure the fan is rated for damp or wet locations depending on how exposed your patio is.
Lighting matters more than most people expect. String lights on the beam perimeter, recessed LED puck lights in a solid roof, or a simple pendant over a dining table all make the space feel intentional and usable after dark. Run conduit while the structure is being built if you can, even if you are not installing lights immediately. It is far easier to add wiring later when you have a chase already in place.
For year-round comfort, consider adding screen panels on one or two sides rather than fully enclosing the space. If you are also trying to cover a railing, focus on choosing rail-safe panels or screens that match the cover style and still allow proper airflow. A screened wall on the prevailing wind side and the pest-heavy side gives you most of the protection without making the patio feel closed in. If you want to convert a covered patio to a full screen enclosure later, that is a natural next step from a solid-roof cover, and the two projects build on each other cleanly. Similarly, if rain coverage is your next goal after building a pergola, adding polycarbonate panels to an existing pergola roof is one of the most cost-effective upgrades available.
Start where your biggest pain point is. Build something that solves that problem well. Then layer in the other improvements as budget and time allow. A well-covered patio does not have to be built all at once to be worth it. If you are still figuring out how to cover an open patio, start by matching the cover type to your main issue, like sun, rain, wind, or bugs covered patio. If you want to extend your patio cheaply, start with budget-friendly upgrades like a shade sail or an inexpensive screen addition, then build toward a more permanent cover later extend my patio cheaply.
FAQ
Do I need both a slope and a gutter on a solid-roof patio cover?
You do need a slope to prevent pooling, but you do not always need a gutter. If your roof edge discharges onto an appropriate permeable area (gravel bed or landscaping) and splashback will not reach adjacent structures, a gutter may be optional. A gutter becomes the safer default when runoff could hit walkways, fences, or the foundation, or where stormwater rules restrict where water can go.
What size patio cover should I build for comfortable coverage?
Aim to cover not just the patio footprint, but also the main furniture zones. A common practical target is 3 to 4 feet of extra roof depth beyond the front edge of the seating area so people and cushions stay dry when rain comes at an angle. For wind-driven rain, add more overhang rather than relying on a higher ceiling clearance.
Can I attach a patio cover to siding instead of the house framing?
In most cases, you should not treat siding or sheathing as the structural connection. Use connection points into rim joists, studs, or other structural framing, then flash the ledger so water cannot migrate behind the ledger line. If you cannot verify what is behind the wall, remove a small inspection area or have a pro confirm framing locations before fastening.
How do I choose between polycarbonate and open-air shade like a pergola?
If you need real rain protection or bug reduction, polycarbonate or a solid roof system is usually the better match. If your main issue is hot sun and you still want airflow, a pergola or shade sail works well, but it will not stop sideways rain. A quick decision aid is to rank your top goal (rain, sun, wind, bugs) and pick the cover type that fully addresses #1, then add screens or panels only for #2.
What’s the right way to handle panel expansion and prevent leaks?
Use the pre-drilled oversized holes (about 1/16 inch larger than the screw diameter) and avoid over-tightening screws, so panels can move as temperatures change. Also ensure end laps and side overlaps are correct for water flow, and use roofing screws with neoprene washers to maintain the seal at each penetration. Misaligned overlaps or tight holes are two common causes of early cracking and weeping.
Is it okay to install a patio cover over an existing slab without leveling or checking the surface?
It can be risky. Before building, check that the slab is structurally sound and not tilted, cracked, or heaving, and confirm you can achieve the required roof slope with your framing. If the slab is uneven, you may need to shim or adjust the framing layout rather than forcing the roof flat and hoping the slope works out.
How far should my roof overhang be from a fence or property line?
At minimum, follow your local accessory structure setback rules, because they vary by jurisdiction. As a practical planning guideline used in many permits, keep a clear passage space (often at least 3 feet) between the roof overhang and an adjacent fence, wall, or property line. If you are near a boundary, measure and confirm early, since changing the ledger location later is expensive.
Can I DIY the electrical for lights or a ceiling fan under a patio cover?
You can often DIY low-voltage or pre-planned wiring, but line-voltage outdoor electrical and fan installations are frequently restricted or require permits depending on location. If you run conduit during the build, plan for weather-rated boxes, appropriate conductor type, and a damp or wet location rating for all fixtures. When in doubt, hire an electrician for the final connections and inspection.
Do I need a permit for a screened patio enclosure or only for the roof cover?
You often need additional permits once you add enclosure walls, even if the roof was permitted. Many jurisdictions treat an enclosure differently based on the percentage of wall coverage and whether openings are still considered “unconditioned patio” space. If you plan to add screens or walls later, ask the permit office whether your design will remain a “patio cover” or move into a different category.
How should I maintain polycarbonate so it stays clear and doesn’t fail early?
Avoid ammonia-based and solvent cleaners, and do not use abrasive pads that scratch the surface. Wash with mild soap or a non-ammonia glass cleaner, use soft cloths or microfiber, and rinse with low pressure. Also check annually for loose screws or washer compression, because movement and temperature cycling can relax fasteners over time.
What wind conditions should make me upgrade connections?
If you live in hurricane or high-wind coastal areas, or you routinely experience gusts above typical regional design values, use engineered connection hardware and consider having a local structural engineer verify the design. Even in moderate climates, any signs of racking risk (long spans, lightweight posts, poor ledger fastening) justify upgrading connections rather than relying on “standard” hardware.
What’s a common reason patio covers leak even when the roof looks right?
Ledger flashing and panel-to-house transitions are frequent culprits. If water can run behind the ledger board due to missing or improper flashing, you can get hidden rot without obvious surface leaks. Also verify overlap direction and ensure the roof drainage path directs water away from the house, not toward joints.
Next Articles

How to Cover Patio From Rain: DIY Options and Steps
DIY steps to cover patio from rain: choose awning, canopy or enclosure, plan pitch, flashing, overlap, drainage, sealing

How to Decorate a Long Narrow Patio: Layout Tips
Practical DIY layout and decor tips to widen a long narrow patio using zoning, furniture spacing, lighting, greenery, an

How to Decorate a Rectangular Patio Step by Step
Step-by-step plan to decorate a rectangular patio with smart layout, zones, furniture fit, lighting, plants, and seasona