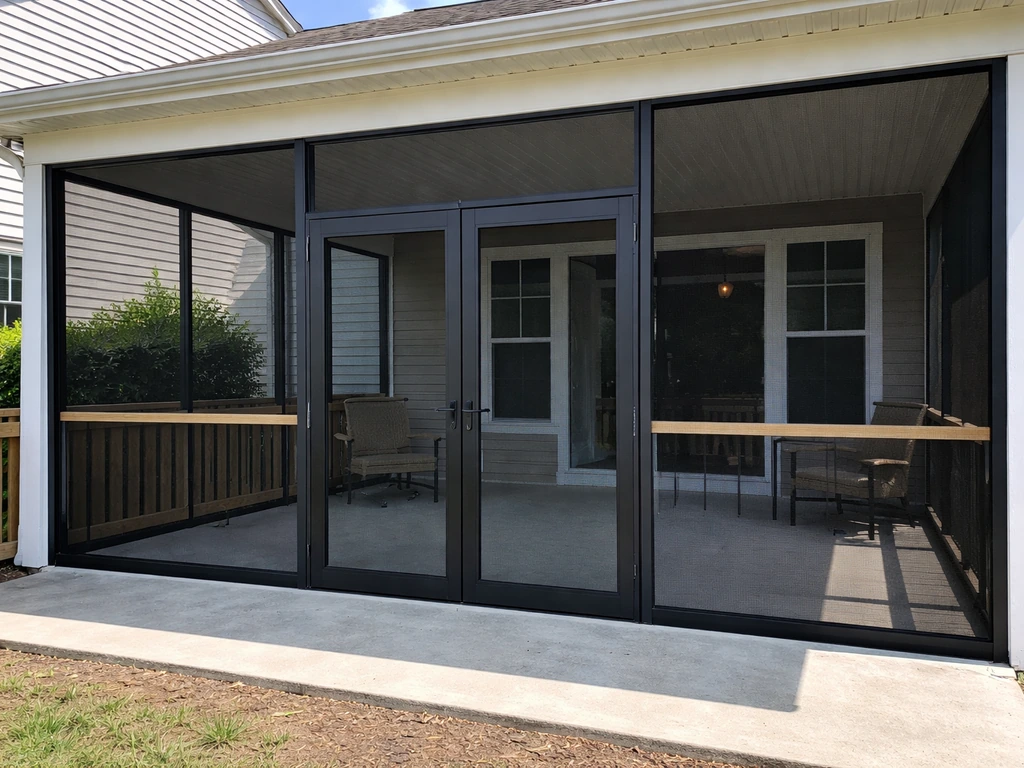
I turned our existing concrete patio into a fully screened enclosure in a single long weekend, and the whole project cost me around $800 in materials. The core workflow is straightforward: plan the enclosure type, measure the openings carefully, build or attach a frame, staple or spline the screen into panels, hang a door, then seal every gap so bugs stay out. If you already have a roofline over the patio, you're halfway there. This guide walks through exactly what I did, what I'd change, and what to watch out for at every stage.
How I Built a DIY Screened-in Patio Step by Step

Felix Brennan
13 May 2026
Choosing the enclosure plan that actually fits your patio
Before you buy anything, you need to decide what you're building. There are two main approaches: a fixed panelized screen system that mounts between your existing structural posts or walls, and a prefabricated screen-enclosure kit that brings its own framing, mesh, and door hardware as a complete package. I went with the panelized approach because I already had four existing 4x4 posts holding up a pergola-style roof. Kits make more sense if you're starting from scratch or want a guaranteed fit. Either way, the enclosure sits between existing structural supports; it's non-structural on its own, so you're relying on your existing posts, columns, or wall attachments to carry any load.
The other big decision is which sides to screen. You don't have to enclose all four sides. Lots of people leave one side partially open for access or airflow, especially if the patio backs up to a wall of the house on one side already. Think about where the wind and bugs typically come from at your place, and design around that. If you're working with a patio that has a more complex structure, or you want something that functions more like a true room, it's worth looking at how a screen room or even a three-season room compares to a basic screened patio enclosure before you commit to a plan.
One thing I learned early: very wide screen wall sections will flex and bow in the wind unless you break them up with additional vertical framing. Any run wider than about 8 feet benefits from a mid-span vertical divider to keep the screen tight and prevent wind damage. Plan those intermediate uprights into your layout from the start.
Measuring and layout before you buy a single thing
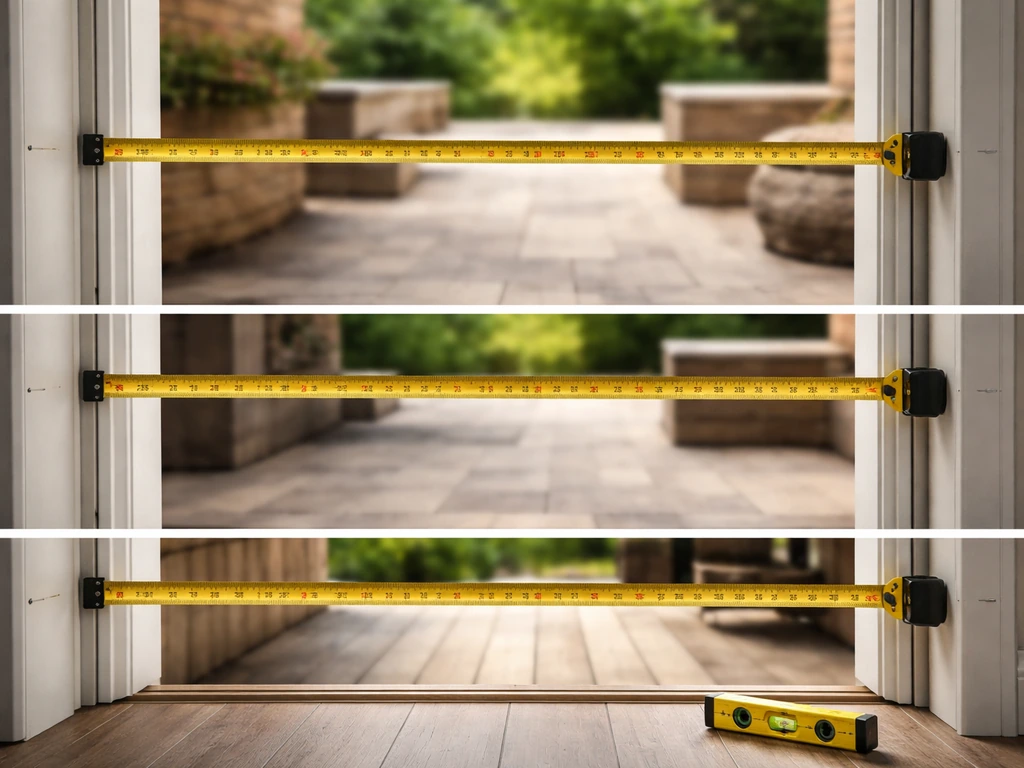
Get your measurements wrong and you'll be making two trips to the hardware store. The key rule: measure the finished opening you want to cover, not just the rough span between posts. ZOORSCREEN’s measuring guide similarly recommends taking the “final area” or panel opening measurements you want to cover and ordering based on that final area rather than estimates from rough opening or post spacing measure the finished opening you want to cover, not just the rough span between posts. If you're ordering prefab panels or a kit, you need the exact opening dimensions after your framing is in place, not estimates based on post spacing.
- Measure each opening's width and height at three points: top, middle, and bottom for width; left, center, and right for height. Use the smallest measurement if they vary, so panels or doors don't bind.
- Check for square by measuring diagonally corner to corner in both directions. If the two diagonals match, you're square. If not, note the difference and plan to shim or trim.
- Check for plumb on your existing posts using a level. An out-of-plumb post affects how your frame sits and how screen panels hang.
- Mark all measurements on a simple sketch. Label each opening individually because they're almost never identical, even on a patio that looks perfectly regular.
- For screen systems that require overlap (many spline systems specify a minimum 1-inch overlap on all sides), add that to your ordering dimensions so you don't end up short.
I also strongly recommend snapping a chalk line along the base of each opening to confirm the slab is level where your bottom rail or base channel will sit. My slab had about a half-inch drop over 12 feet, which I had to account for with a tapered shim under the bottom channel. Catching that before framing saved me a headache.
Materials, tools, and what screen to actually buy
Framing: aluminum vs wood
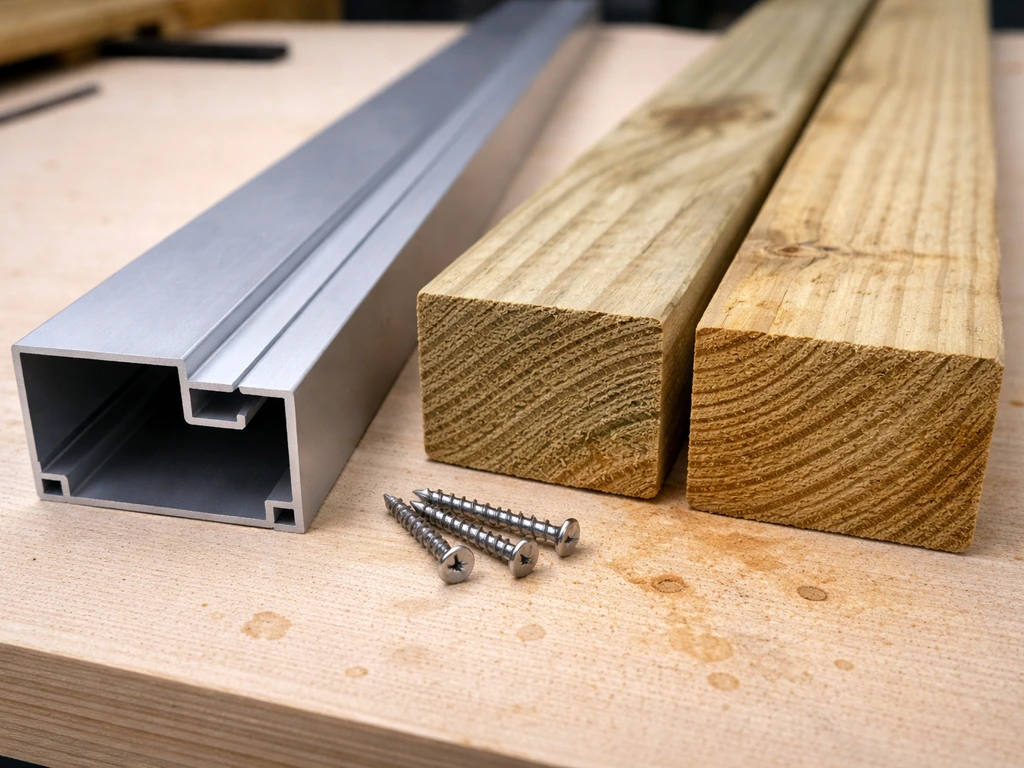
This is the most common debate for this project, and the honest answer depends on your budget and how long you want the enclosure to last. Aluminum screen framing doesn't rot, doesn't warp, and needs almost no maintenance. Pressure-treated wood is cheaper upfront, easier to cut with standard tools, and looks more traditional. If you're in a humid climate or near the coast, aluminum wins long-term. For a dry inland climate on a budget, treated lumber is perfectly reasonable.
| Factor | Aluminum Framing | Pressure-Treated Wood |
|---|---|---|
| Cost | Higher upfront | Lower upfront |
| Durability | Excellent, won't rot or warp | Good, can warp/rot over time |
| Tool requirements | Miter saw with metal blade | Standard woodworking tools |
| Appearance | Clean, modern | Traditional, paintable |
| Maintenance | Minimal | Periodic paint/stain needed |
| Best climate fit | Humid, coastal, wet climates | Dry, inland climates |
Screen mesh: fiberglass vs aluminum
For most patios, I'd go with aluminum insect screen mesh over fiberglass. Aluminum is more durable, less prone to stretching and tearing, and holds up better to pets and kids brushing against it. Fiberglass is cheaper and easier to work with for a first-timer since it's more forgiving when you're tensioning it, but it'll show dents and distortion over time. The standard mesh size for insect screening is 18x16 (strands per inch), which keeps out mosquitoes and most flying insects while letting plenty of air through. If you're in an area with very fine insects like no-see-ums, look for 20x20 mesh instead.
Screen attachment system and door
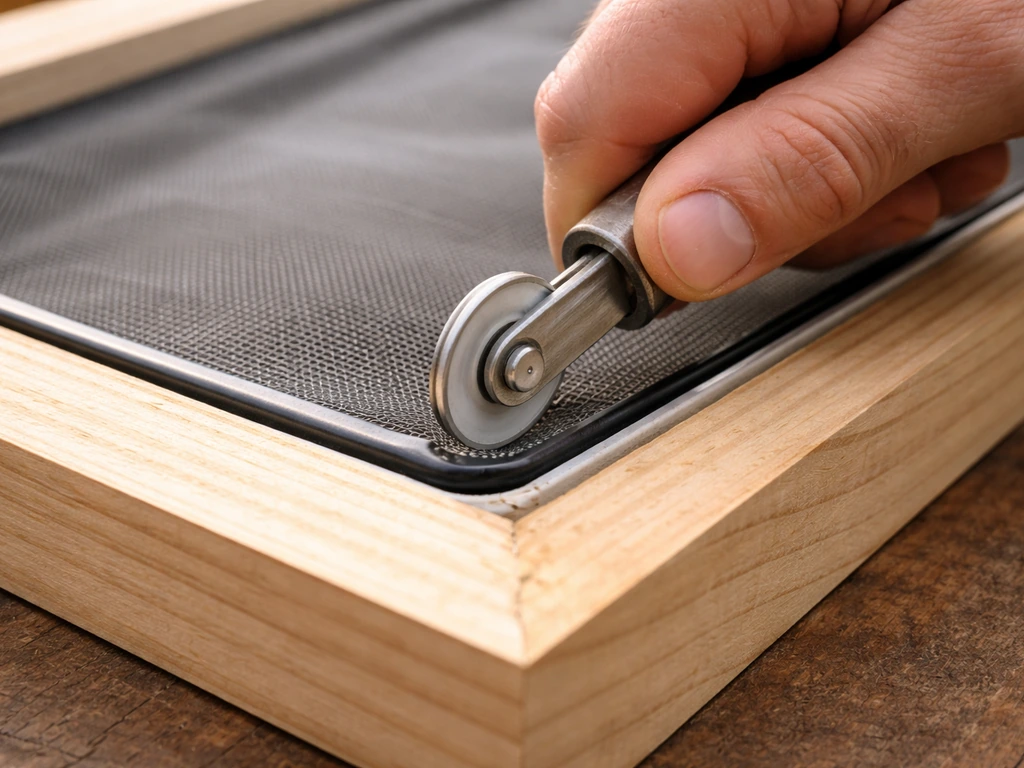
The most reliable DIY method for attaching screen to a wood frame is a spline-based system. You roll the screen over a channel groove, then press a flexible spline cord into the groove to lock the screen in place. When the spline locks in, the screen pulls tight automatically. Systems like Screen Tight and SCREENEZE take this further with a base channel you fasten to the frame first, then snap or slide a cap over it to sandwich the screen.
These systems are worth the slight extra cost because the cap hides raw edges and the result looks finished. Note that spline diameter matters: aluminum mesh typically needs a slightly larger spline than fiberglass, so check the manufacturer spec before ordering.
For the door, a standard aluminum screen door with a spring-closer is the simplest option and it comes with weatherstripping along the edges to seal gaps. Measure your door opening and buy the smallest size that fits if your opening is slightly irregular. A door that's a touch small can be shimmed; a door that's too wide will bind against the frame and gap at the edges.
Tools and hardware checklist
- Tape measure, pencil, and a good 4-foot level
- Circular saw or miter saw (metal-cutting blade if using aluminum framing)
- Drill and driver bits
- Spline roller (a must-have for screen installation)
- Utility knife for trimming screen
- Chalk line and square
- Caulk gun and exterior silicone or polyurethane caulk
- Wedge anchors and appropriate drill bit if anchoring new posts to concrete
- Post bases with standoff (if adding any new posts)
- Screen repair kit for after the fact
Site prep and what to check before framing starts
If your patio slab is in decent shape and you already have posts or a structure overhead, prep is mostly about confirming what you've got is solid enough to attach to. Push and pull on existing posts. Any movement means you need to reinforce the base connection before adding screen panels to them. A wobbly post will transfer stress to your screen frame and eventually rack the whole thing.
For uneven slabs, deal with it before framing, not after. A half-inch low spot can be shimmed under a base channel, but a significant slope or cracked slab that's heaving needs to be addressed or worked around in the design. I leveled my base channels with cedar shims and then caulked the gap between the shim and the slab with exterior silicone. Bugs will find any gap you leave unsealed at the bottom, so this step matters for function as much as structure.
If you're adding new posts to concrete, use a post base with a standoff that holds the post bottom above the concrete surface. Direct wood-to-concrete contact wicks moisture into the end grain and causes rot within a few years even with treated lumber. Drill into the concrete with a hammer drill, set wedge anchors (they're the strongest mechanical option for structural connections in concrete), and fasten the post base per the manufacturer's hardware schedule. Follow the minimum edge distances for anchor bolt placement so you don't crack the slab edge.
Building the frame and connecting it to the structure
The frame for each screen panel opening is essentially a rectangular border that your screen will attach to. If you're using a spline-based channel system, the channel itself becomes the face of the frame. If you're building a traditional wood frame, you're making a rectangular perimeter of 2x4 or 2x3 treated lumber for each opening, then attaching that to your existing posts and either the slab below or a ledger/header above.
Attach the top of each panel frame to an existing header, beam, or ledger board. The ledger is typically a horizontal board lag-bolted to the house wall, and your frame hangs from or butts up against it. Use structural screws or lag bolts here, not drywall screws. At the bottom, fasten the base channel or bottom rail to the slab using concrete screws or through a pressure-treated sill plate.
Before locking anything in, check each opening for square, plumb, and level. This is the step most first-timers rush, and it's where alignment problems start. If a corner is out of square, your screen panels will have gaps or wrinkles that no amount of tensioning will fix later. Take the time to square each opening and brace it temporarily before final fastening. For intermediate vertical dividers on wide spans, cut them to fit snugly between the top rail and bottom rail, then toenail or use metal framing connectors to secure them.
One thing to watch for: don't let the frame rack as you fasten it. Racking is when the rectangle distorts into a parallelogram, and it causes the wavy, uneven screen appearance that makes DIY enclosures look sloppy. Measure diagonals again after fastening each section. If they've shifted, adjust before the fasteners fully seat.
Installing the screen and getting it tight
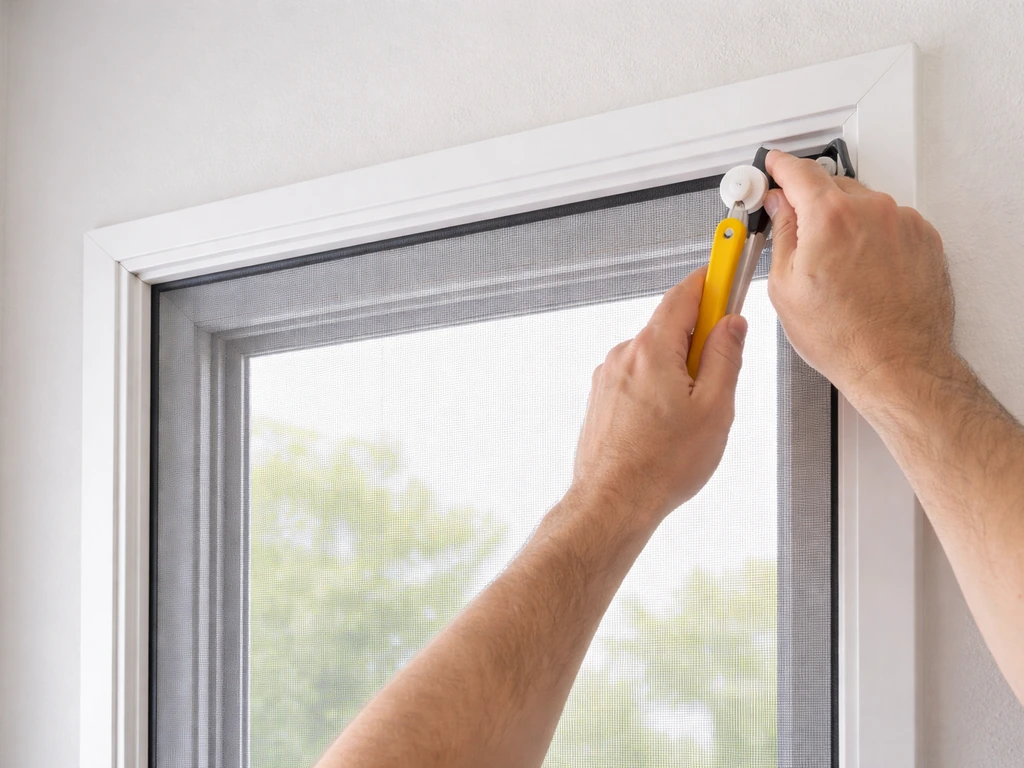
This is the part people are most nervous about, but it's actually pretty satisfying once you get the rhythm. Cut your screen mesh a few inches larger than each opening on all sides so you have material to work with. SNAPP installation guidance specifies a minimum 1-inch screen overlap on all sides of each opening for installation Cut your screen mesh a few inches larger than each opening on all sides so you have material to work with.. You'll trim the excess after the spline is in. Once your screens are installed and trimmed, you can move on to décor and comfort so your screened in patio feels like a room how to decorate screened in patio.
- If using a channel system, fasten all base channels to the frame first. For spline-groove systems, make sure the spline groove is facing the correct direction before you secure anything permanently.
- Lay the screen over the opening so it overlaps all edges by at least 1 inch on every side. Don't pull it tight yet.
- Start pressing the spline into the top groove using a spline roller, working from the center outward to the corners. The screen should begin to tension as the spline seats.
- Move to the bottom, gently pull the screen taut (not stretched to maximum, just firm), and run the spline in using the same center-outward motion.
- Do the two sides last, keeping consistent tension as you go.
- Once all four sides are done, trim the excess screen with a utility knife held at an angle so you cut cleanly at the outer edge of the spline.
- For cap-style systems (like SCREENEZE), slide or snap the vinyl or aluminum cap onto the base channel after the spline is seated to lock everything and cover the raw edge.
The door install comes after all the screen panels are in. Set the door frame in the opening, check for plumb, shim as needed, and fasten the hinges to the frame. Adjust the spring tension on the closer so the door swings shut firmly but doesn't slam. Check the weatherstripping on all four edges of the door and press it into full contact with the door stop. Any gap wider than a credit card will let in mosquitoes. If the door frame or opening isn't perfectly square, the weatherstripping will compensate for small imperfections, but a significant gap at a corner needs a shim or door stop adjustment before you call it done.
Weatherproofing, fixing common problems, and keeping it in good shape
Sealing gaps after install
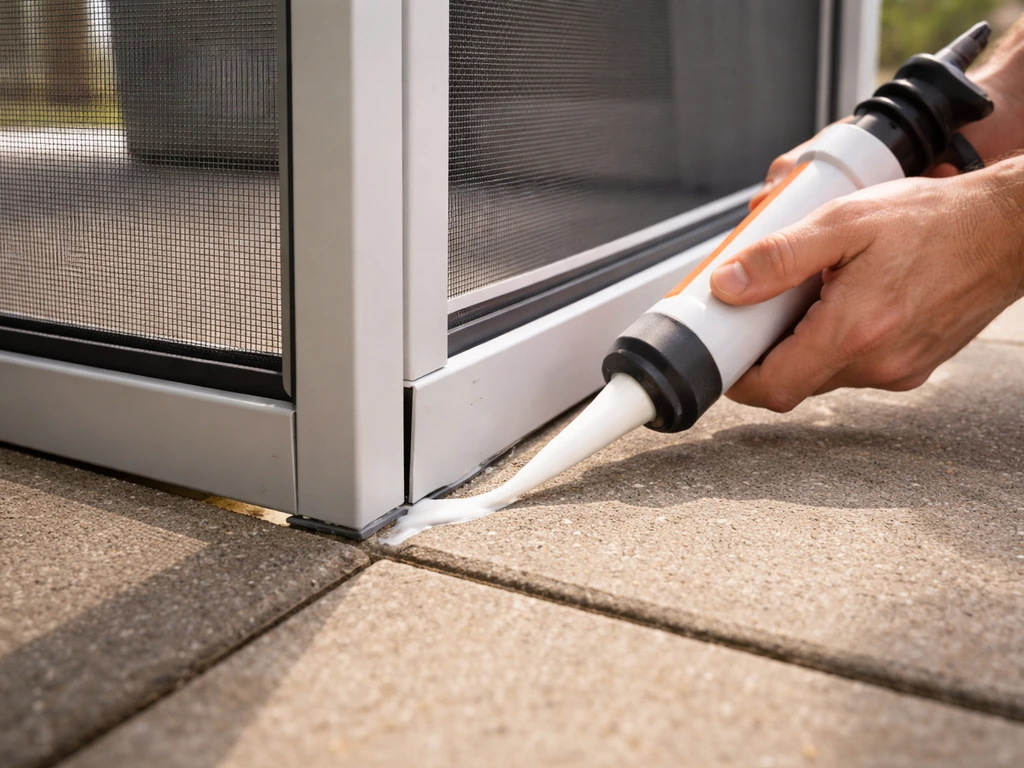
Once everything is up, do a bug-gap audit on a bright day by closing yourself inside the enclosure and looking for light coming through at edges, corners, and the base. With the framing, screening, and door installed, you essentially get the same comfort as a screened in porch with better bug control for your outdoor space. Any light gap is a bug gap. Seal the joint where the base channel meets the slab with exterior silicone caulk.
Do the same at the top where framing meets the existing structure, and at any corner joints where two frame sections meet. If you have a gap between the top of the screen frame and the roof structure overhead, use foam backer rod first to fill the gap, then caulk over it.
Common problems and how to fix them
- Screen is saggy or wavy: The spline didn't seat fully or the screen wasn't tensioned evenly. Pull the spline out of the worst section, re-tension the screen, and re-run the spline. It's tedious but fixable.
- Frame is racking (tilted parallelogram shape): Add a diagonal brace or metal angle bracket inside the frame at a corner, or fasten more securely to the existing structure. Prevention is easier than cure here.
- Door won't latch or rubs the frame: The door opening is probably not square. Adjust hinge placement (add a shim behind one hinge leaf) to shift the door and clear the rub point.
- Bugs getting in at the base: The slab isn't level and there's a gap under the bottom rail. Pack with foam backer rod and caulk, or add a vinyl sweep to the bottom of the door.
- Screen tears after a pet or impact: Keep a screen repair kit on hand with matching mesh. Small tears patch in minutes with adhesive screen tape or a patch kit. Larger damage means replacing the screen panel, which is straightforward once you've done it the first time.
Seasonal maintenance to keep it lasting
At the start of each spring and the end of each fall, spend 20 minutes doing a quick inspection. For true three-season comfort, add insulation, weatherstripping, and a clear plan for ventilation so the room stays usable as temperatures shift how to build a 3 season room on a patio.
Check all spline edges for any sections that have pulled loose or cracked, and press them back in or replace them early before a small pop becomes a big sag. Check hinge and latch operation on the door. If anything is stiff or starting to bind, a shot of silicone-based lubricant (not WD-40, which attracts dust) on the hinge pins and latch mechanism fixes it immediately.
Look for any rust starting on metal hardware and address it with a rust-inhibiting spray before it spreads. Also check the base channel where it meets the slab for caulk cracking or separating; reapply exterior caulk as needed to keep moisture and bugs out.
If you're in a region with heavy winters or severe weather, consider removing screen panels from exposed sections and storing them flat, or at least reinforcing any panel that faces prevailing winds with an extra intermediate vertical. Screen mesh holds up to normal wind well, but a sustained windstorm can pop spline and damage framing if panels are very large.
Your project checklist: before, during, and after
Before you start
- Confirm your existing patio has a roofline overhead or plan how you'll handle the top edge
- Check local permit requirements for screen enclosures (many jurisdictions don't require permits for non-structural enclosures, but verify)
- Measure every opening three times and draw a labeled sketch
- Decide on framing material (aluminum vs treated wood) and screen type (fiberglass vs aluminum mesh)
- Order screen mesh, spline, base channel/cap system, and door before starting framing
- Confirm existing posts are solid and base connections are sound
During the build
- Check square, plumb, and level at every framing stage before final fastening
- Use standoff post bases and wedge anchors for any new posts on concrete
- Break up any screen wall wider than 8 feet with an intermediate vertical
- Install screen panels starting at the top, then bottom, then sides
- Trim excess screen cleanly and snap or press all caps into place
- Hang door, check plumb, and adjust closer tension before calling it done
After install
- Do the light-gap audit from inside the closed enclosure
- Caulk all base-to-slab joints and frame-to-structure connections
- Test the door latch and closer; adjust as needed
- Lubricate all hinges and latches with silicone-based lubricant
- Stock a screen repair kit so small fixes don't turn into big replacements
- Schedule a 20-minute inspection each spring and fall
FAQ
Can I build a DIY screened-in patio if my patio cover is only partial (for example, a pergola over half the space)?
Yes, but you need to decide whether you are screening under the roof only or extending beyond it. Screen panels still need rigid top support, so for the uncovered side you either add a header/ledger to an existing structure, install additional posts tied into your frame design, or reduce the screened footprint so the enclosure is fully supported where it matters most.
What should I do if my openings are not square because my posts or walls are slightly out of line?
Re-square the opening using measurement and bracing before you lock in the frame. If the structural posts are misaligned, adjust your frame perimeter to true up the screen opening, then keep your top and bottom rails parallel. The key is preventing a diagonals mismatch from carrying into screen installation, since spline tension cannot correct a true geometry problem.
How do I keep the screen from loosening or popping out over time?
Use the correct spline diameter for your specific mesh type, press the spline in fully with consistent pressure, and avoid stretching the mesh excessively before trimming. During the first week after installation (after a couple of temperature swings), recheck spline edges and reseat any sections that lifted, then do your seasonal 20-minute inspections so small separations do not grow.
Is it safe to attach the frame directly to treated wood that is already outdoors and weathered?
You can attach to it if it is still solid and not split, punky, or detached. Otherwise reinforce first, because fasteners into degraded wood will loosen and cause racking. If the wood is older, check for soft spots by probing with a screwdriver, and replace any compromised sections before fastening screen framing or doors.
Can I use fiberglass mesh instead of aluminum, and what changes during installation?
You can, but plan for more visible dents and potential long-term distortion. During tensioning, fiberglass often needs more careful handling because it can stretch differently than aluminum. Also confirm your spline size and channel cap system, since spline diameter and compatibility are mesh-specific.
What’s the best way to deal with tiny gaps at corners and along the slab if I do not want bugs getting in?
Do a two-part seal. First, ensure the frame joints are tight and square so the screen sits flush. Then seal externally exposed joints using exterior silicone at the base channel-to-slab line and caulk at corner frame seams. If a top gap is larger than just a thin crack, use foam backer rod before caulking so the seal is not too shallow to hold.
Do I need to worry about drainage or water pooling at the bottom channel?
Yes. Even if the slab slopes slightly, ensure the bottom channel is seated so water can drain away from the joint you caulked. If you see standing water around the base channel, address the underlying slope or design the gap strategy before adding more caulk, since trapped moisture can undermine the seal and increase maintenance.
Should I install the door before or after the screen panels?
Install all screen panels first, then hang the door. This prevents the door opening from becoming an untracked reference point and helps you keep screen alignment consistent. When you mount the door, confirm the door opening is plumb and square, then adjust shims so the weatherstripping makes uniform contact on all four edges.
What’s the right mesh size to choose for very small insects like no-see-ums?
Use the finer mesh rating (commonly 20x20) for better exclusion of tiny insects. Keep in mind that finer mesh can slightly reduce airflow, so position your opening plan to prioritize ventilation where you want it most. Also verify your spline and framing system remains compatible with the finer mesh so it stays tight.
Can I leave one side partially open, and how do I prevent bugs from blowing in from that gap?
You can leave a side open for airflow, but reduce the path for direct bug entry by placing the opening where wind and insect traffic are typically lowest. Consider using a door or removable panel on that side if you want flexibility, and prioritize sealing all screened joints even on the partially enclosed sides.
What maintenance is actually worth doing after the first season?
Focus on the things that affect sealing and alignment: reseat or replace spline sections that lifted, re-caulk any base channel joints where silicone cracked, and check hinge and latch operation. Avoid general-purpose lubricants that attract dust, use a silicone-based lubricant on hinge pins and latch mechanisms only if they start to bind.
Next Articles

How to Decorate a Long Narrow Patio: Layout Tips
Practical DIY layout and decor tips to widen a long narrow patio using zoning, furniture spacing, lighting, greenery, an

How to Decorate a Rectangular Patio Step by Step
Step-by-step plan to decorate a rectangular patio with smart layout, zones, furniture fit, lighting, plants, and seasona
How to Decorate a Patio Wall: DIY Ideas and Mounting Tips
DIY patio wall decor for brick, stucco, wood, concrete, or siding with weatherproof mounting tips and maintenance.