The best way to decorate a patio wall is to start with what your wall is actually made of, then choose outdoor-rated decor that can handle your specific climate, and mount everything with the right hardware so it stays put. Brick, stucco, concrete, wood siding, and vinyl all need different fasteners and sealing approaches. Get that part right and almost any look you want is achievable: framed outdoor art, mirrors, wall shelves, string lights, privacy screens, or a mix of all of them.
How to Decorate a Patio Wall: DIY Ideas and Mounting Tips

Felix Brennan
29 Apr 2026
Start here: assess your wall before buying anything
Walk up to your patio wall and answer three questions: What is it made of? How much wall space do you have to work with? And what style do you actually want to live with? The answers drive every decision after this, so do not skip it.
Wall material matters more outdoors than it does inside because you are drilling into substrates that can crack, absorb water, or shift seasonally. Brick and concrete block are the most forgiving for mounting heavy items. Stucco over masonry is solid but requires masonry-rated anchors and a careful hand when drilling. Stucco over wood framing is more fragile and can crack if you rush. Lap siding and board-and-batten need screws driven into studs, not just sheathing. Vinyl siding is the trickiest because most decor should be mounted to the structural framing behind it, not the vinyl face itself, since vinyl flexes and cannot bear real load.
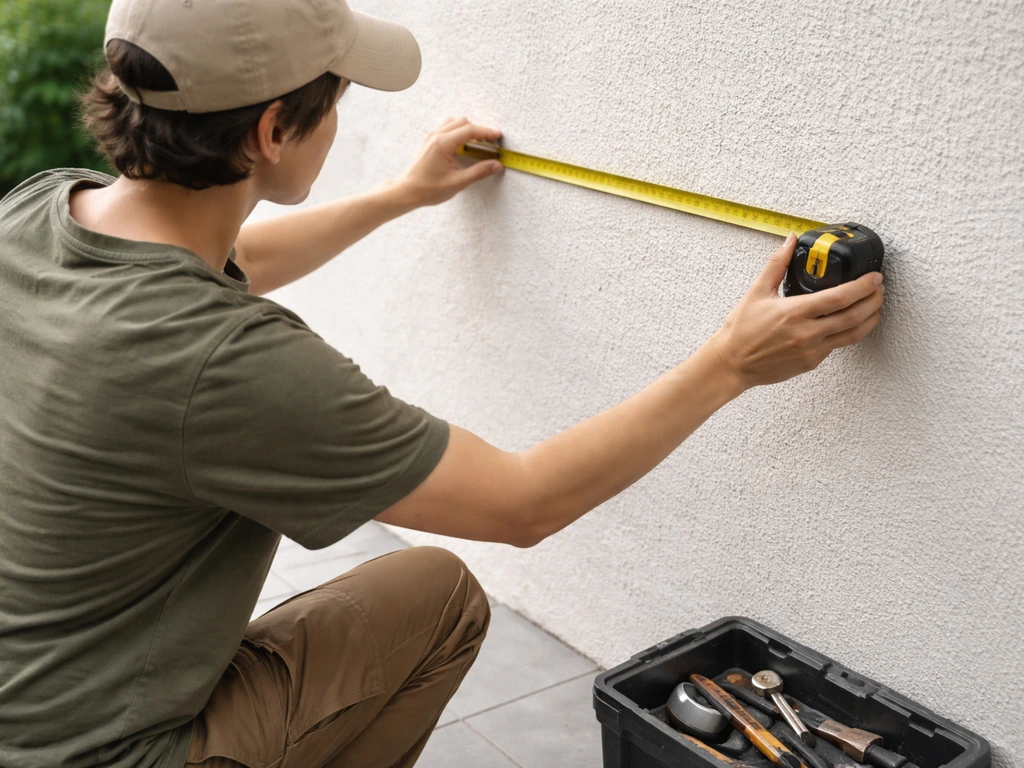
For size and style, measure your wall in feet, note the height from floor to soffit or roof edge, and take a photo on your phone. Tape an outline of any large pieces on the wall with painter's tape before you buy. A 3-foot wrought iron sign that looks great in a store can look lost on a 20-foot stucco wall, and a 24-inch mirror cluster might overwhelm a narrow 6-foot fence section. Knowing your wall dimensions before you shop saves real money.
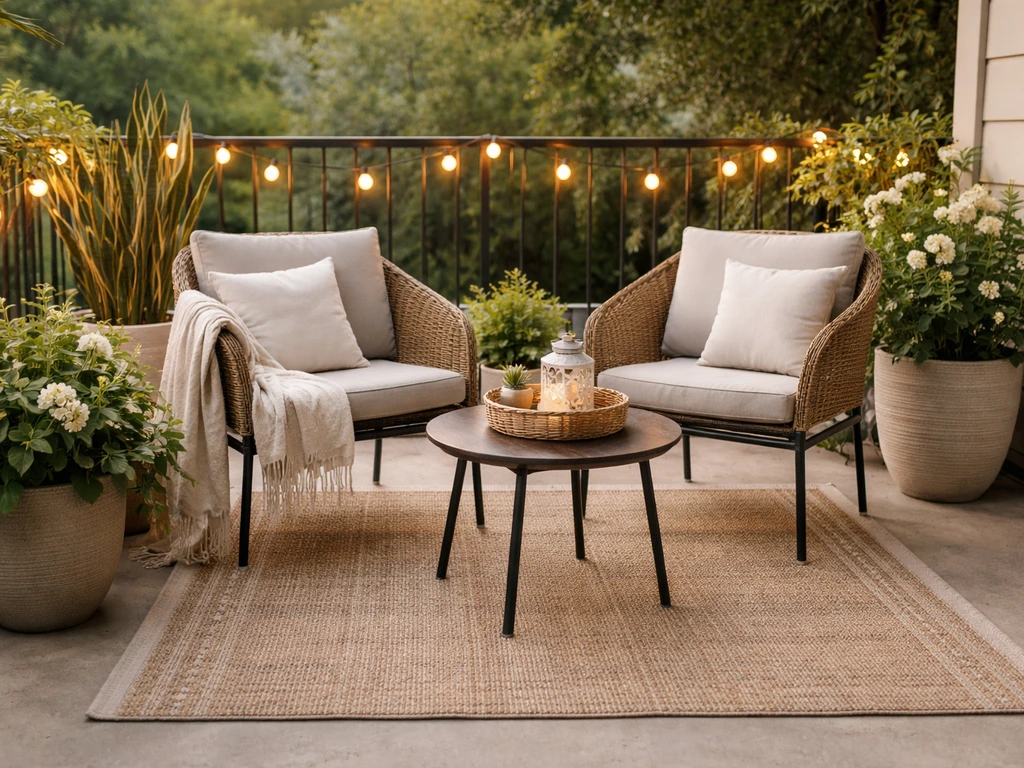
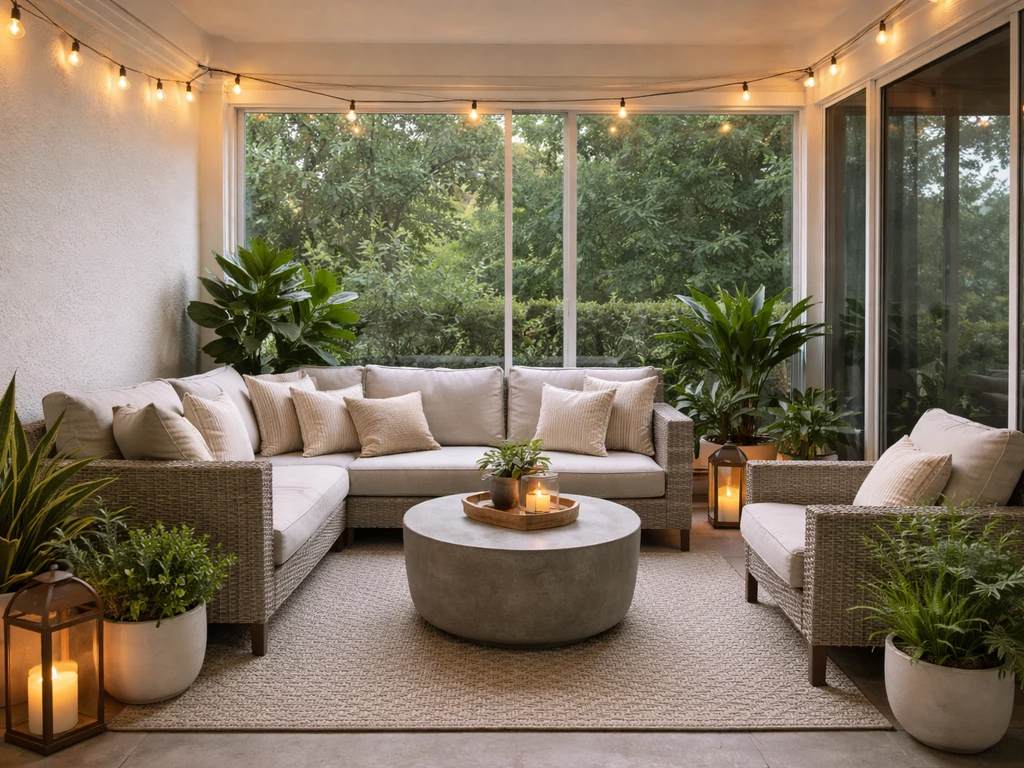
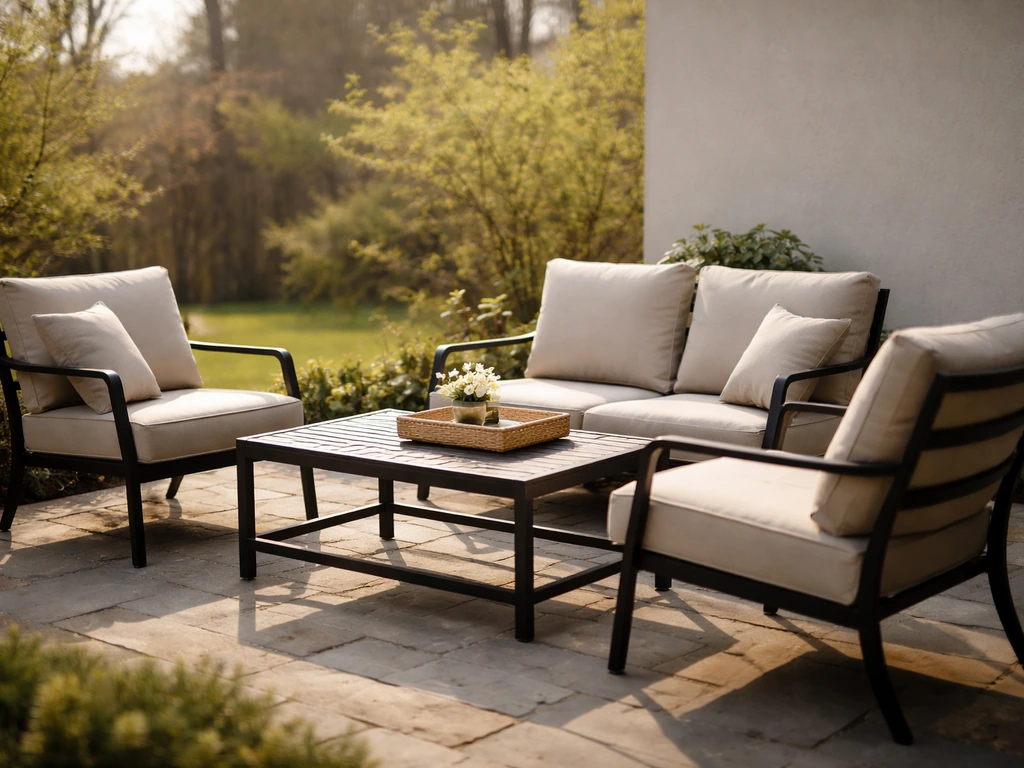
On style: think about how the patio is used, not just how you want it to look. A wall behind a seating area calls for something that creates ambiance: lighting, art, soft textiles. A side wall adjacent to a neighbor calls for privacy first, decoration second. A covered patio wall (like the back of a house under an overhang) has more flexibility than a fully exposed garden wall. Decorating a <a data-article-id="58F9F86C-B70D-455D-A0A9-ABDBF700974D">covered patio</a> is a slightly different challenge than an exposed one, and the same goes for enclosed patios, which have even more protection and design freedom. For a more exposed look on your uncovered patio, use the same outdoor-rated mounting and material rules, since the protection level is the main difference compared to covered patios how to decorate uncovered patio. If you want a cohesive look, start with a clear plan for how to decorate back patio walls using outdoor-rated pieces and the right mounting method. For a rectangular patio, you can use the same approach to plan your layouts and choose outdoor-rated pieces that fit the space.
Outdoor-safe materials: what actually survives rain, UV, and temperature swings
The single most common mistake people make when decorating a patio wall is buying indoor decor and hoping it holds up. It does not. UV, moisture, and heat cycling will warp wood frames, rust iron hardware, fade fabrics, and cause adhesives to fail within one season. Every item that goes on your patio wall needs to be specifically rated or treated for outdoor use.
Materials that hold up outdoors
- Powder-coated or galvanized steel: resists rust, holds paint well, and survives freeze-thaw cycles without cracking
- Teak, cedar, and redwood: naturally rot-resistant woods that stay stable outdoors when sealed annually
- Acrylic (not glass) mirrors: shatterproof, UV-stable, and about one-tenth the weight of glass, which matters for wall anchors
- Solution-dyed acrylic fabric (like Sunbrella): UV and mold resistant because the color is baked into the fiber, not printed on top
- Aluminum: lightweight, rust-proof, and available in most outdoor sign and shelf formats
- All-weather resin and polyresin: good for decorative pieces like wall planters or sculpted art panels
Placement rules are just as important as material choice. Direct sun exposure accelerates UV degradation on almost everything, so even fade-resistant fabrics and outdoor-rated art will last longer if they get some shade during peak afternoon hours. Moisture is the other big factor. Anything mounted flush against the wall with no airflow gap can trap water behind it, which eventually damages both the decor and the wall surface. Leave at least a quarter inch of clearance behind flat-mounted pieces wherever possible, and seal any wall penetrations (drill holes, conduit entries) with silicone rated for exterior use. Neutral-cure silicone is the go-to for most exterior sealing; acid-cure silicone can cause problems on masonry and some metals.
DIY decor ideas: art, mirrors, shelves, and signs

These are the easiest wins for a patio wall because they go up in an afternoon and instantly change how the space feels. Here is how to approach each one.
Framed outdoor art
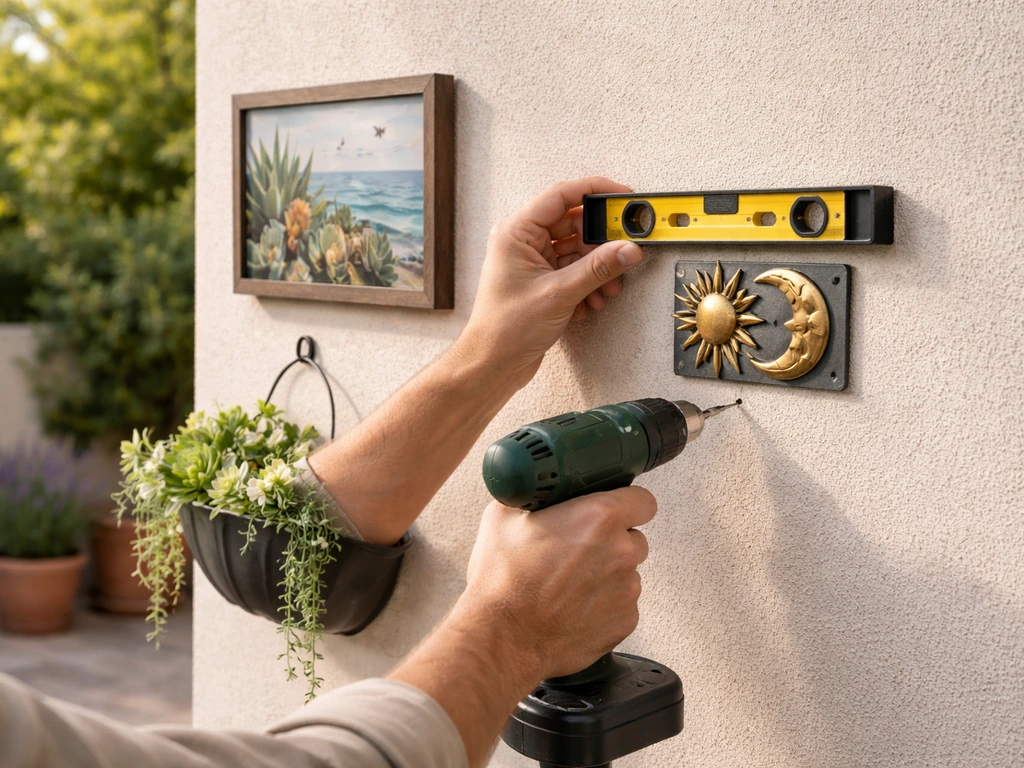
Look for canvas prints or metal art panels sold specifically as outdoor pieces. Outdoor canvas prints are typically sealed with a UV-protective coating, and the frame is either powder-coated metal or sealed wood. If you are framing your own piece, use acrylic glazing instead of glass (lighter and shatterproof), seal the back of the canvas with a rigid backing board to protect it from humidity shifts, and make sure the frame corners are joined with exterior-grade adhesive. Group multiple pieces in a gallery arrangement for a more finished look. Three to five pieces of varying sizes feel more intentional than one lonely piece centered on a large wall.
Outdoor mirrors
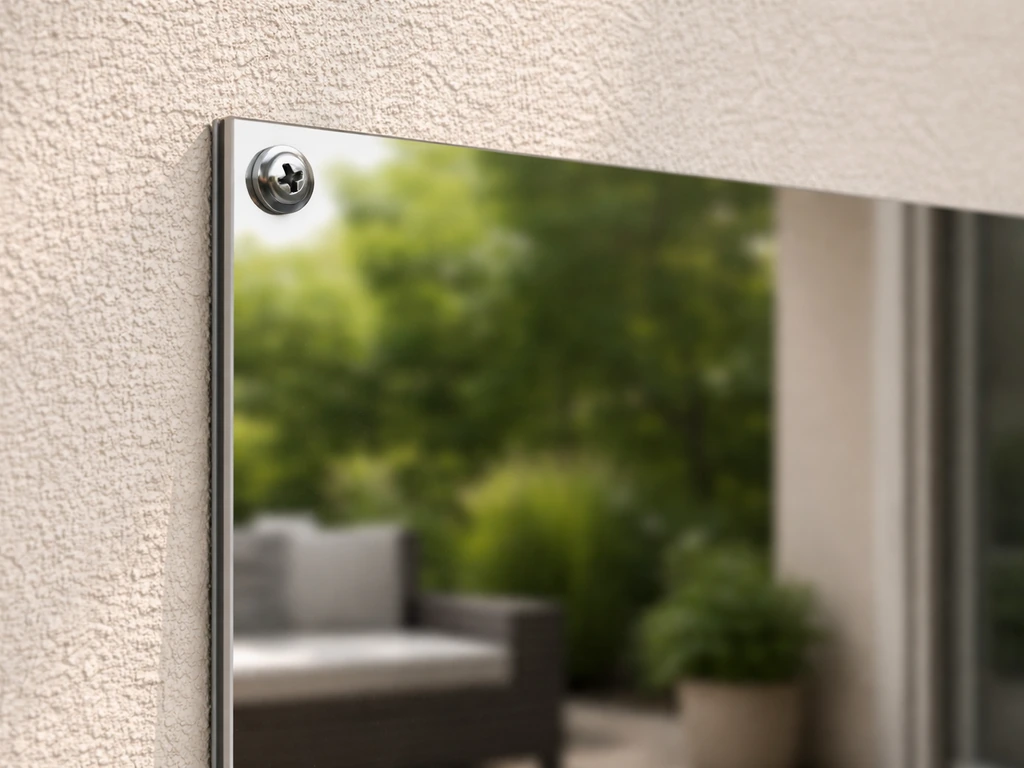
Acrylic mirrors are the right call for patio walls. They are lightweight enough that a single masonry anchor or screw into a stud handles the load, and they will not shatter if a door slams nearby. Mount them using J-brackets or the manufacturer's supplied hardware, making sure the bracket arrows or orientation marks are pointing up as the instructions indicate. Mirrors do double duty on small patios: they reflect light and greenery, making a narrow back patio feel significantly larger. One 24-by-36-inch mirror centered at eye level (about 57 to 60 inches from floor to center) on a fence or siding wall can transform the perception of space.
Wall-mounted shelves and planters
Floating shelves on a patio wall are functional and decorative at the same time. Use powder-coated steel brackets with cedar or teak boards, or buy pre-made outdoor shelving units. For planters, wall-mount brackets rated for the planter's full wet weight (soil plus plant plus water) are essential. A 12-inch terra cotta pot with wet soil can easily weigh 15 to 20 pounds, so check bracket load ratings before you buy. Stagger planter heights along the wall rather than lining them all up at the same level for a more layered, intentional look.
Metal signs and decorative panels
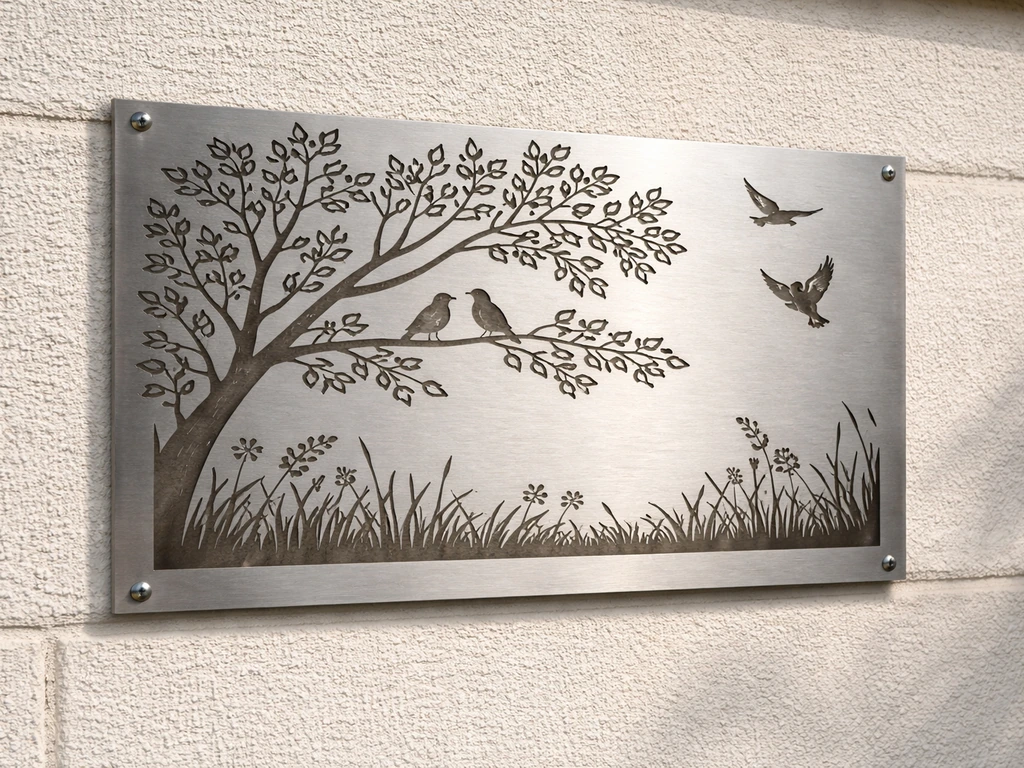
Laser-cut metal signs, decorative iron panels, and dimensional letter signs are some of the easiest items to mount and some of the most durable. Most come with pre-drilled mounting holes, which makes installation straightforward. Powder-coated or raw steel with a clear coat finish holds up well. Avoid raw iron without any finish coating; it will rust and stain your wall within one rainy season.
Textiles and functional upgrades: curtains, shade panels, and privacy screens
Wall-adjacent textiles do a lot of work on a patio: they add color and softness, create privacy, block wind, and cut direct sun. The key is choosing fabric and hardware that are built for outdoor conditions.
Outdoor curtains
Solution-dyed acrylic is the strongest choice for curtains in full sun. Polyester outdoor fabric is a budget-friendly alternative but fades faster. Avoid anything labeled only as "water-resistant" without UV protection claims since UV degradation causes fabric to break down structurally, not just aesthetically. For hardware, use stainless steel or powder-coated curtain rods and rings. Rust from the rod or rings will stain the fabric and the wall long before the fabric itself gives out. Mount curtain rod brackets into studs or masonry, not just into siding or stucco surface. Curtains in a full breeze put real lateral load on the brackets.
Shade panels and privacy screens
Woven privacy screens (also called shade cloth panels) attach to fence walls or to posts along the patio edge with zip ties or grommets. They come in multiple opacity levels, typically 70%, 80%, and 90% blockage, and work well as both a privacy solution and a decorative backdrop for planters or lights. For a more polished look, framed lattice panels or slatted wood screens can be wall-mounted using standoffs that hold them a half inch off the wall surface. This gap prevents moisture from getting trapped and lets air circulate. If you are working on an enclosed or covered patio, you have more flexibility with lighter-weight decorative screens since they are not taking direct weather exposure.
Lighting and seasonal styling
Lighting is probably the highest-impact upgrade you can make to a patio wall for the cost and effort involved. Done right, it changes how the whole space feels after dark.
String lights
UL-listed string lights rated for outdoor use are the standard to buy. Look for the UL listing mark and confirm they are rated for wet locations if your wall gets direct rain exposure, or damp locations if they are under a covered overhang. Plug-in LED string lights with IP65 or higher ratings handle rain and humidity reliably. Run them along the top of a wall, drape them in a zigzag pattern across the wall face, or use them to outline an architectural feature like a niche or archway. Mount them to the wall using screw-in hooks rated for exterior use or small cup hooks driven into mortar joints on brick (not the brick face itself, which can crack).
Wall lanterns and sconces
Hardwired wall sconces are a longer project and may need a licensed electrician depending on your local codes, but they deliver the most polished result. For a DIY-friendly version, solar-powered wall sconces have improved significantly and work well on south- or west-facing walls that get enough sun to charge them. Whether hardwired or solar, buy fixtures listed for wet locations if they will be exposed to rain, or damp locations for covered patios. After mounting, run a bead of silicone sealant around the base of the fixture where it meets the wall to prevent water from wicking behind it. Do not use acrylic caulk here; it cracks with temperature swings and does not stay flexible.
Seasonal refreshes
One of the easiest ways to keep your patio wall looking intentional year-round is to plan for seasonal swaps. Keep your fixed elements like shelves, lighting, and mirrors in place, and rotate the accent pieces: swap in warm-toned lanterns and dried botanicals in fall, weatherproof wreaths or garland in winter, bright planters and citrus colors in spring, and cooler blues and greens in summer. This approach also makes it easy to pull things inside before a storm or at the end of the season without disrupting your whole setup.
Mounting and installation: the part most people rush
Getting the mounting right is what separates a wall that looks intentional from one that looks like an afterthought. If you want to know when to uncover patio furniture, plan your swap schedule around the first big weather changes so everything stays protected until it is safe to set out again. It also keeps your decor from pulling out of the wall after the first hard rain.
Choosing the right anchor for your wall type
| Wall Type | Best Anchor/Fastener | Key Notes |
|---|---|---|
| Brick or concrete block | Tapcon masonry screws or sleeve anchors | Use a carbide-tipped masonry bit; drill to exact embedment depth per anchor spec |
| Stucco over masonry | Tapcon or wedge anchors into the masonry base | Carbide bit required; avoid cracking stucco surface by drilling slowly |
| Stucco over wood frame | Screws into studs through stucco | Locate studs first; regular drywall anchors will fail |
| Poured concrete | Sleeve anchors or Tapcon concrete screws | Hammer drill needed; 5/32-inch bit for 3/16-inch Tapcon as a common example |
| Wood siding/framing | Exterior lag screws or structural screws into studs | Must hit studs, not just sheathing; use exterior-rated screws only |
| Vinyl siding | Screws driven through vinyl into studs behind | Vinyl cannot bear load; always fasten into framing |
For masonry walls, a hammer drill is non-negotiable. A standard drill will wander and overheat on brick or concrete, and the hole it produces will not hold an anchor correctly. Use a carbide-tipped ANSI-standard masonry bit sized specifically for the anchor you are installing. For example, a 3/16-inch Tapcon requires its specified bit diameter, and you need to drill to the exact embedment depth specified on the packaging. Too shallow and the anchor will not engage fully; too deep and you risk cracking the substrate.
Mounting height and spacing
For wall art and mirrors, center the piece at 57 to 60 inches from the floor to the center of the piece. This is the standard gallery height used in interior design and it reads naturally outdoors too. For items above seating like a shelf or string of lights, go higher: 72 to 80 inches from the floor keeps things from feeling oppressive over seated guests. For a gallery wall arrangement, keep spacing between pieces consistent at 2 to 4 inches for a tight, curated look or 6 to 8 inches for a more relaxed spread. If you are working with a long, narrow patio, use the same spacing rules to keep visual rhythm and avoid making the space feel cramped how to decorate a long narrow patio. Use painter's tape to map it all out on the wall before drilling a single hole.
Sealing holes and penetrations
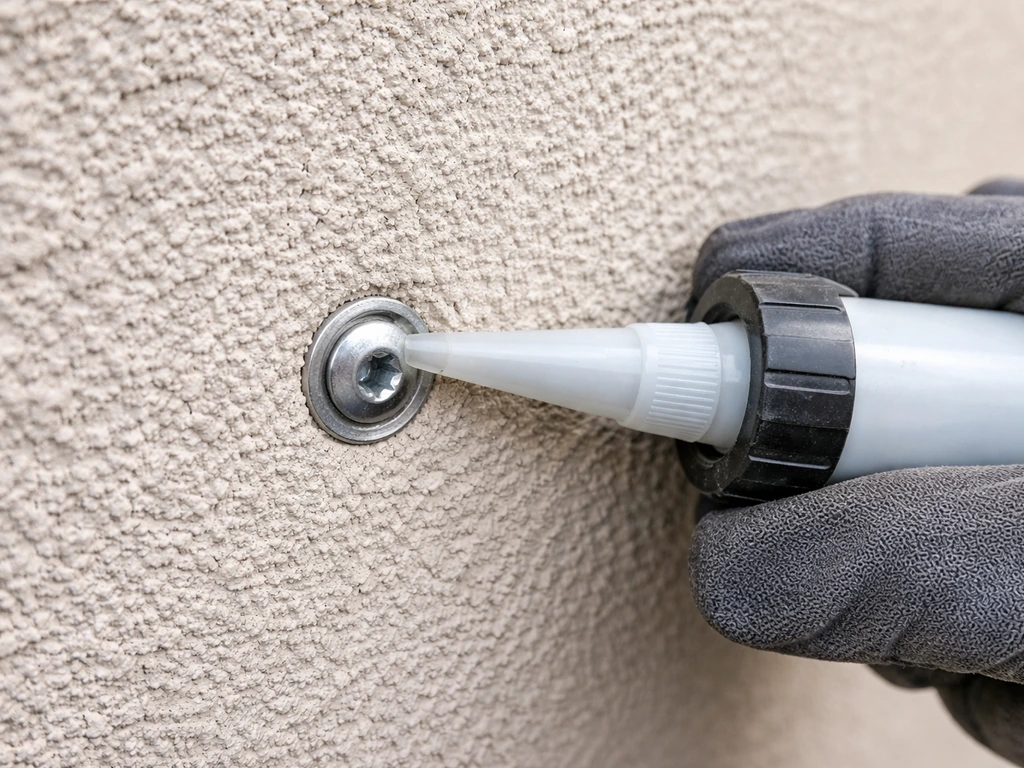
Any hole you drill in an exterior wall is a potential water entry point. On masonry and stucco, apply a small bead of neutral-cure silicone sealant around the anchor head after installation. For light fixtures and anything with wiring, seal the entire perimeter of the fixture base with silicone after mounting. On wood or vinyl siding, use exterior-grade butyl or silicone sealant around any fastener that penetrates through to the sheathing or framing. Check these seals once a year; silicone typically lasts 10 to 20 years but can peel at the edges if the wall surface was dirty or wet when you applied it.
Keeping it looking good: maintenance, cleaning, and your swap-out schedule
Even the best outdoor decor needs a little attention to stay looking sharp through years of weather. The good news is that a simple annual routine handles most of it.
Cleaning
Wipe down metal pieces, mirrors, and signs with a damp cloth and mild soap at the start of each season. For outdoor fabric like curtains or shade panels, brush off debris first, then hand wash or hose down with a mild soap solution and let it air dry completely before re-hanging. Do not leave wet fabric folded or bunched; that is how mildew starts even on mold-resistant fabric. For acrylic mirrors, use a soft cloth only since paper towels can scratch the surface.
Hardware checks and resealing
Once a year in spring, pull out every mounted piece and check the anchors and fasteners. Look for rust on screw heads, loose anchors, cracked caulk around fixture bases, and any sign that water has been getting behind the piece. Tighten anything loose. Replace any anchor that has lost grip. Re-apply silicone sealant anywhere the bead has cracked or pulled away from the wall. This is also when you reseal any bare wood shelves or frames with an exterior wood sealant to keep them from absorbing moisture through the coming season.
Storage and seasonal swaps
In climates with hard winters, bring in anything that is not rated for freeze-thaw cycling. Acrylic mirrors are fine outdoors in winter, but canvas art, fabric panels, and decorative planters with absorbed moisture can crack or delaminate in a hard freeze. Store textiles dry in a breathable storage bag, not a sealed plastic bin that traps humidity. For lighting, string lights can typically stay up through winter if they are rated for wet locations, but check that the sockets and plugs are not collecting standing water. A simple schedule of: bring in delicate pieces before the first hard freeze, do a full inspection and clean in early spring, then rotate accent pieces with the seasons will keep your patio wall looking intentional all year long.
FAQ
What outdoor decor looks good on a patio wall if I do not want to drill holes?
Choose items that do not require wall penetration, like freestanding trellises, floor-mounted planters, or command-style outdoor hooks used only for lightweight pieces. If you want wall art without drilling, consider leaning framed outdoor art against the wall or using UV-resistant outdoor canvas mounted to a removable rail that screws into studs only once.
How do I tell whether my patio wall is safe for heavy wall decor like shelves or mirrors?
Look for what is behind the surface, studs on siding or sheathing on wood, and load-bearing masonry on brick or concrete. If you are unsure, use a stud finder where applicable, and for masonry start with anchors rated for the specific substrate and weight, not the product’s generic “outdoor” label.
Can I mount decor directly into stucco or do I need to anchor into something else?
Often you need masonry-rated anchors and sometimes you must reach the masonry behind the stucco for real holding power, especially for shelves or mirrors. If the anchor kit specifies “masonry penetration,” follow that depth exactly, because relying on stucco thickness alone can lead to loosening over time.
What should I do if I hit wiring, a conduit, or unknown plumbing while drilling?
Stop immediately and do not “work around it.” Use a proper in-wall detection method first, then reroute mounting points to nearby studs or safe masonry zones. For anything near electrical fixtures, consult a licensed electrician rather than improvising.
How much clearance should I leave behind flat-mounted signs or panels?
Plan for at least a quarter inch gap behind flush-mounted items where airflow can reduce trapped moisture. If the item comes with no standoffs, add exterior-rated spacers or standoff mounts so water cannot pool behind the decor, especially after rain.
What caulk should I use to seal outdoor holes, and where does it matter most?
Use neutral-cure silicone for exterior wall penetrations, especially around anchor heads and fixture bases. Avoid acrylic caulk for areas that experience temperature swings, because it tends to lose flexibility and can crack, creating a new water entry path.
Do acrylic mirrors really hold up better than glass mirrors outside?
They do, mainly because they are lightweight and do not shatter. Still, acrylic can scratch, so avoid abrasive cleaners and paper towels, and wipe with a soft cloth only. Also confirm the mounting hardware is rated for wind load if the mirror is near a walkway where it can catch gusts.
What is the safest way to mount curtain rods on a wall with stucco or brick?
Anchor into structural material, not just the surface coating. For stucco, use masonry-rated mounting points and correct bit size, for brick use mortar joints if the hardware design calls for it, and for both use stainless or powder-coated hardware to prevent rust staining fabric and wall surfaces.
How can I prevent wall-mounted string lights from failing after heavy rain or wind?
Use UL-listed lights rated for the correct location type (wet versus damp) and mount with exterior-rated screw-in hooks or cup hooks where recommended. Keep slack minimal so wind does not pull on the connections, and check the first few mounting points for loosening after the first major storm.
Why do some outdoor shelves pull away even when the anchors look fine at first?
Common causes are using the wrong anchor type, drilling to the wrong depth, and loading shelves with wet planters that exceed the bracket rating. Verify load rating includes soil wet weight, match anchor specifications to the substrate, and do a yearly fastener check before the heavy season.
How should I adjust my plan for a covered versus exposed patio wall?
Exposed walls get the harsher UV and rain cycles, so prioritize fade-resistant outdoor materials and the most reliable sealants. Covered patios allow lighter decorative screens or fabric options, but you still need exterior-rated hardware and airflow clearance behind flush items because moisture can linger under overhangs.
How often should I inspect and reseal the mounts and silicone?
At least once per year, ideally at the start of spring. Look for peeling edges or cracks around anchor heads and fixture bases, and reapply silicone beads anywhere the seal has pulled away. Early re-sealing is especially important if you notice damp spots or discoloration on the wall.
Can I leave outdoor decor up through winter in cold climates?
Only if items are rated for freeze-thaw cycling. Acrylic mirrors can usually stay up, but canvas, fabric panels, and planters that absorb water can crack or delaminate. If you keep string lights up, confirm wet-location ratings and remove any sections where plugs collect standing water.
Next Articles
How to Decorate a Back Patio: DIY Plan, Layout, and Ideas
Step-by-step DIY guide for decorating a back patio with layout, durable materials, shade, privacy and a starter shopping
How to Decorate an Enclosed Patio: Step-by-Step Guide
Step-by-step plan to decorate an enclosed patio with durable furniture, lighting, rugs, plants, and easy seasonal mainte
When to Uncover Patio Furniture: Timing and Readiness Guide
Learn when to uncover patio furniture after winter and how to check dryness, mildew, rust, and next-step cleaning