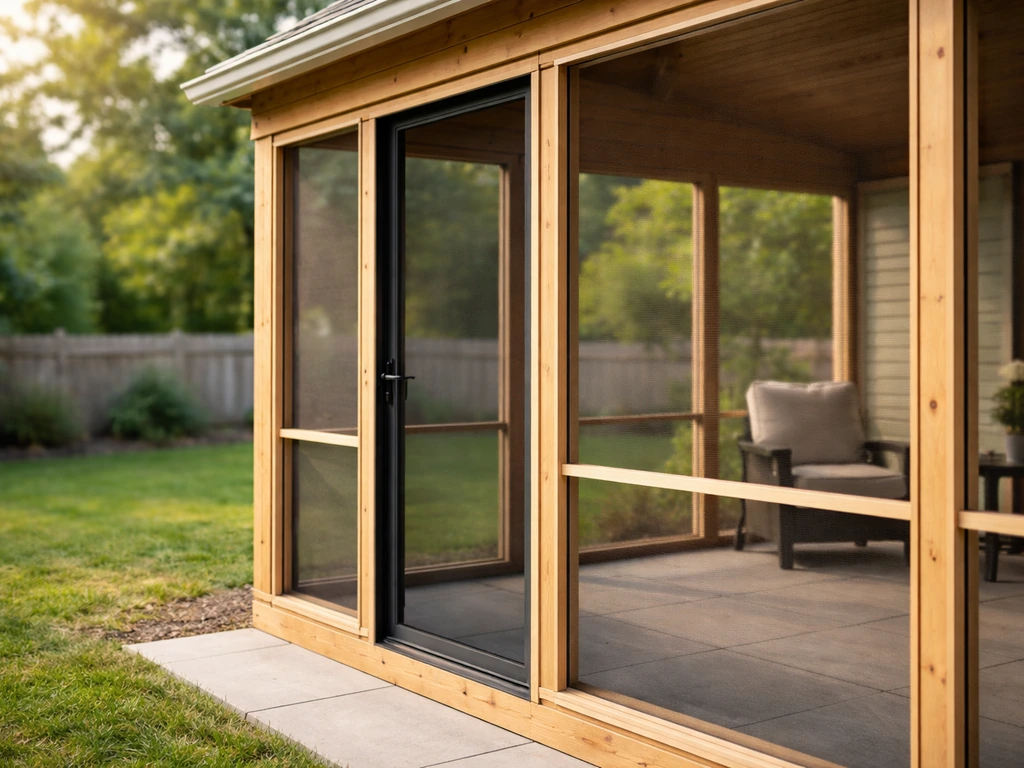
You can build a screened patio yourself in a weekend or two by framing out wall openings with pressure-treated lumber or aluminum channel, stapling or spline-rolling screen mesh into those frames, and hanging a screened door at your entry point. The whole project costs anywhere from $300 to $1,500 depending on patio size, the screen system you choose, and whether you're working with an existing covered patio or starting from scratch. If you already have a roof or cover overhead, you're halfway there, the walls and door are the main work left.
How to Build a Screened Patio: DIY Step-by-Step Guide

Felix Brennan
13 May 2026
Decide your patio layout and enclosure approach
Before you buy a single board, figure out exactly what you're enclosing and how. This one decision shapes everything else: your material list, your framing method, and how long the project will take. There are two fundamental approaches to think through.
Attached vs. freestanding
An attached screened patio ties into your house on at least one side. The upside is structural simplicity, your home provides one wall and part of the roof load. The trade-off is that the connection point has to be done right: any ledger board or beam you bolt into the house must land on solid framing, not just siding. If that attachment isn't properly engineered, you're transferring load to a weak point. A freestanding screened enclosure stands completely on its own with posts anchored to footings. This option makes more sense when attaching to the house would be awkward due to roofline angles, second-story overhangs, or siding materials that are difficult to penetrate. The downside is that freestanding structures need footings deep enough to handle wind loads, which usually means digging below the frost line in colder climates.
Retrofit vs. new build
A retrofit means you already have a covered patio slab and a roof or pergola overhead, you're just adding screened walls around the perimeter. If you already have an existing patio, focus on the retrofit steps first, then follow the rest of the framing, screen panel, and weatherproofing sections to turn it into a screened-in porch how to build a screened-in porch on existing patio. This is the most common DIY scenario and honestly the most manageable one. If you want more privacy beyond basic screening, review how to build a privacy screen for patio and choose a mesh or panel layout that blocks sightlines while still keeping airflow. A new build means you're starting with an open concrete slab or bare ground and constructing the full structure including posts, beams, roofing, and then screen walls. If that's your situation, get the roof in place first and treat the screening as the final phase. This guide covers both, but the step-by-step framing section is especially useful for the retrofit approach since that's where most homeowners get stuck. ScreenHouse’s 2x2 screened enclosure installation guide also walks through a kit-based wall sequence, such as walls-only layouts when the roof is already in place blank" rel="noopener noreferrer">This guide covers both, but the step-by-step framing section is especially useful for the retrofit approach since that's where most homeowners get stuck.. If you're looking at converting a fully enclosed space rather than just screening it, that's a different scope, closer to what's involved in converting a patio to a sunroom.
Think about sun, shade, and wind now
Orientation matters more than people realize. A west-facing screened patio in a hot climate can feel like a sauna by 4 p.m. in summer if you don't account for it. Think about which direction your worst afternoon sun and prevailing winds come from before you finalize which walls get screened and which might need solid panels, shade screening, or both. We'll talk about solar screen mesh options in the materials section, it's worth knowing that some screen types block up to 65% of solar heat while still letting air through.
Pick materials and screen type
Your two big material categories are the framing system and the screen mesh itself. Get both right and the installation goes smoothly. Mix up the compatibility and you'll be re-doing work.
Framing options
- Pressure-treated lumber (2x4 or 2x6): The most DIY-friendly option. Works with standard construction techniques, holds fasteners well, and is easy to cut and adjust on-site. Paint or stain it to match your house.
- Aluminum screen channel systems (like Screen Tight or ScreenHouse kits): These are modular systems where U-shaped aluminum track snaps or screws onto your existing framing, and the screen rolls right into the groove. Less visible hardware, cleaner look, and purpose-built for screening. Great for retrofit projects where the structure is already in place.
- Cedar or redwood: A premium lumber choice that resists rot and looks beautiful, but costs more and still needs finishing to last outdoors.
- Steel or powder-coated aluminum posts: Used in more permanent or commercial-style enclosures. Overkill for most DIY patios but worth knowing about for coastal or high-wind areas.
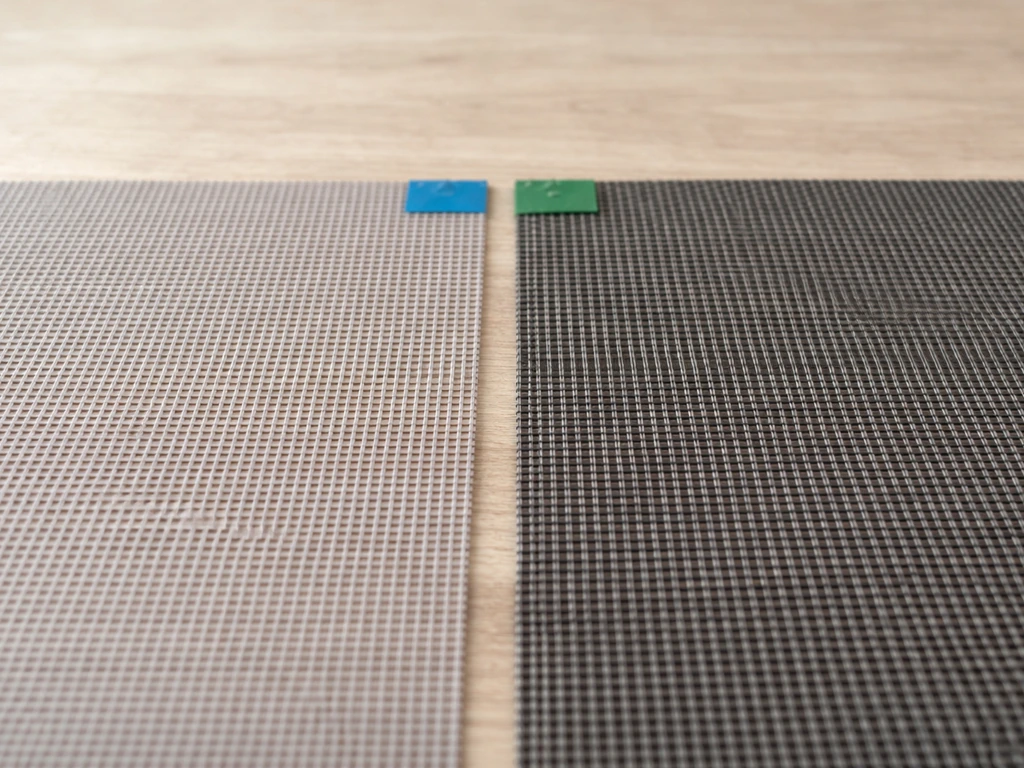
Screen mesh types, match the mesh to your situation
| Screen Type | Best For | Key Feature |
|---|---|---|
| Standard fiberglass insect screen (18x14 mesh) | General use, mild climates | Affordable, easy to work with, good airflow |
| Pool & Patio fiberglass mesh (18x14 or 18x16) | Patios and porch enclosures | Heavier duty than window screen, made for larger spans |
| No-See-Um screen (20x20 mesh) | Areas with gnats, sand flies, or tiny insects | Tighter weave blocks smaller insects, slightly reduces airflow |
| Solar insect screening (PVC-coated fiberglass) | Hot, sunny climates | Blocks up to 65% of solar heat, keeps space cooler |
| PetScreen (vinyl-coated polyester) | Homes with dogs or cats | Tear-resistant, much stronger than standard mesh |
For most patio enclosures, a pool-and-patio-weight fiberglass mesh is the right starting point. It's purpose-built for larger openings (unlike standard window screen), holds up to outdoor conditions, and is forgiving to work with. If you live somewhere with tiny biting insects, step up to a 20x20 No-See-Um mesh. If your patio bakes in afternoon sun, the solar screening is worth the extra cost.
Spline, the part everyone gets wrong

Spline is the rubber or vinyl cord you press into the channel groove to lock the screen in place. Using the wrong size is one of the most common DIY mistakes, and it results in screen that pops out or sits loose. The correct spline diameter depends on your specific framing channel and the thickness of your screen material. As a baseline: Screen Tight's original system uses 0.175-inch rubber spline for standard fiberglass screen and 0.160-inch spline for aluminum or specialty screens like PetScreen. Thicker mesh products like TuffScreen or solar screening typically need a slightly smaller spline to account for the extra thickness the mesh itself adds inside the groove. Always check the manufacturer's compatibility guide for your specific channel system before buying spline, Phifer, ADFORS, and Screen Tight all publish free compatibility charts online.
Hardware and trim
- Galvanized or stainless screws (deck screws work well for lumber framing)
- Screen spline and a spline roller tool (also called a screen rolling tool or screen awl)
- Corner trim or corner caps (for clean inside and outside corners)
- Drip edge or flashing trim at the top of screen panels where they meet the roofline (Trim-Tex's i DRIP TRAC style products have built-in weep holes and a flashing edge to manage water runoff)
- Screen door kit including hinges, latch, and a door closer spring
Tools, prep, and measurements for a clean fit
Tools you'll need
- Tape measure and pencil
- Speed square and level (4-foot level is ideal)
- Circular saw or miter saw for lumber cuts
- Drill and driver bits
- Spline roller tool
- Utility knife or roller-knife for trimming screen
- Staple gun (optional, for staple-method installations)
- Ladder if your patio ceiling is above 8 feet
Measure carefully and check for square
Measure every opening you plan to screen at least twice: width at the top, width at the bottom, and height on both sides. Patios are notorious for not being perfectly square, especially older slabs that have settled. If your top and bottom widths differ by more than a quarter inch, you need to account for that in your frame cuts. To check for square on any opening or frame, measure diagonally corner to corner in both directions. If those two diagonal measurements match, you're square. If they don't, you'll need to rack the frame slightly until they do before fastening anything permanently. This corner-to-corner check saves a lot of headaches later when you're trying to get screen panels to lie flat.
When measuring for trim and corner pieces, don't just use the opening width. Inside corners and outside corners need to be measured as separate segments, not as a single continuous run, because the trim pieces need to overlap or miter cleanly at each corner. Measure from corner to corner rather than wall to wall for each individual piece.
Build the frame and install perimeter trim
This is the core structural work. We'll walk through both the lumber-framing approach (most flexible, good for new builds and odd-sized openings) and the aluminum track approach (fastest for retrofit projects).
Lumber framing method
- Install a bottom plate along the slab perimeter. Use pressure-treated 2x4 and anchor it to the concrete with concrete screws or masonry anchors every 24 inches. This is your base for the screen wall.
- Install top plates or attach to existing beam. If your patio has a roof beam running at the top of the wall opening, you can attach directly to it. If not, install a top plate parallel to the bottom plate.
- Add vertical studs at each corner and at regular intervals (typically every 36 to 48 inches, or wherever you want panel breaks). Each screened panel needs framing on all four sides — top, bottom, and both uprights.
- Check that each frame section is plumb and square before fastening permanently. Use your level on the vertical studs and your diagonal measurement trick for each panel bay.
- Once all framing is up, install any corner trim or cap pieces to cover exposed lumber ends and give the structure a finished look.
Aluminum track (channel) method
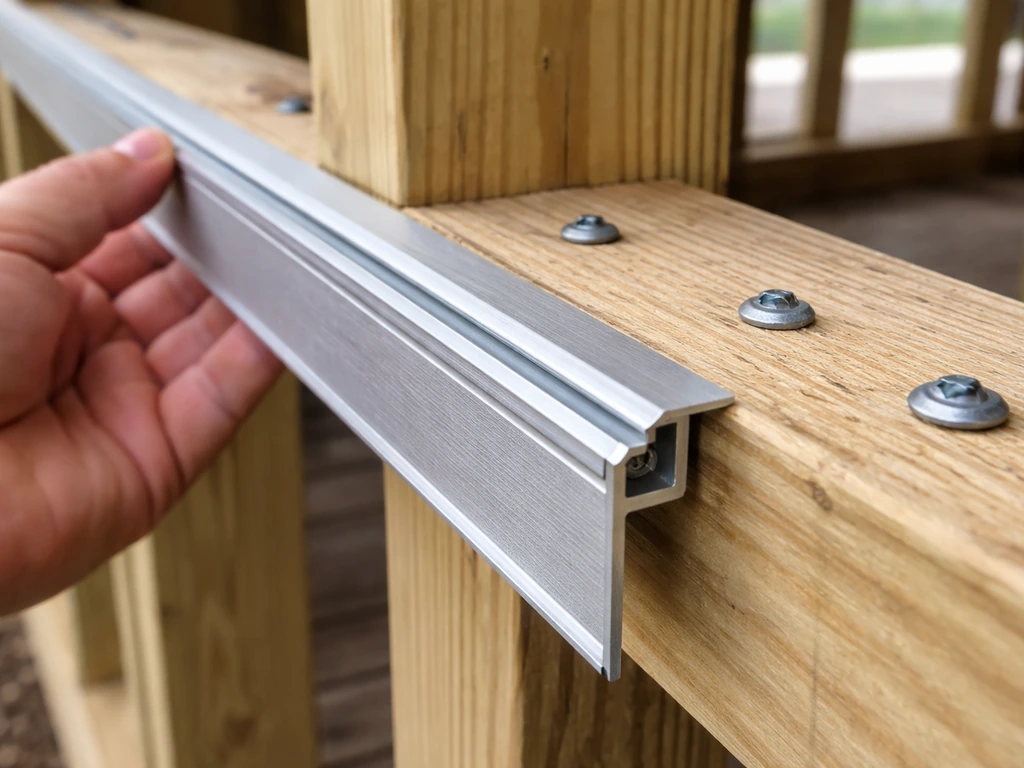
- Drive screws into your existing porch framing at the marked locations around each opening, leaving the screw heads slightly proud of the surface (about 1/8 inch out) so the channel can snap over them.
- Test-fit a small piece of your aluminum channel over one screw before committing — if it doesn't seat flush, adjust the screw depth.
- Snap or slide the aluminum U-channel over the screws around the full perimeter of each opening. The channel's spline groove should face inward (toward the opening) on all four sides.
- Check that channels are level and aligned, especially at corners where two channel pieces meet.
- Install any transition trim where the channel meets the roofline, slab edge, or house wall.
Install screen panels and finish corners and edges
The spline-roll method (works with both lumber and channel framing)
- Cut your screen mesh about 3 to 4 inches larger than the opening on all sides. You'll trim the excess after it's secured.
- Lay the screen over the opening and let it hang loosely. Starting at one top corner, lay the rubber spline on top of the screen and directly over the channel groove.
- Use your spline roller tool to press the spline (with the screen sandwiched underneath it) into the groove. Work from the corner outward toward the opposite corner — don't start in the middle.
- Move to the opposite side and pull the screen taut before pressing that spline in. Taut but not stretched — you want it flat and smooth, not drum-tight (drum-tight screen can distort the mesh).
- Work around all four sides, keeping consistent tension. If you see a wrinkle forming, back the spline out of that section and re-roll it with slightly different tension.
- Once all four sides are splined, use a utility knife or roller-knife to trim the excess screen flush along the outside edge of the spline groove. Run the blade at a slight angle away from the groove to avoid cutting into the spline itself.
Handling corners and roofline edges
Corners are where DIY screened patios usually look either sharp or sloppy. At inside corners where two screen panels meet, use a dedicated inside corner cap or miter the trim pieces to meet cleanly. At outside corners, outside corner trim covers the exposed ends of both channel pieces. At the roofline, make sure your top channel or framing piece is fastened to the roof structure (not just to siding or a fascia board), and consider installing a drip edge trim piece so rain runoff goes over the top of your screen panels rather than behind them.
Add a door and weatherproof the enclosure
Installing a screen door
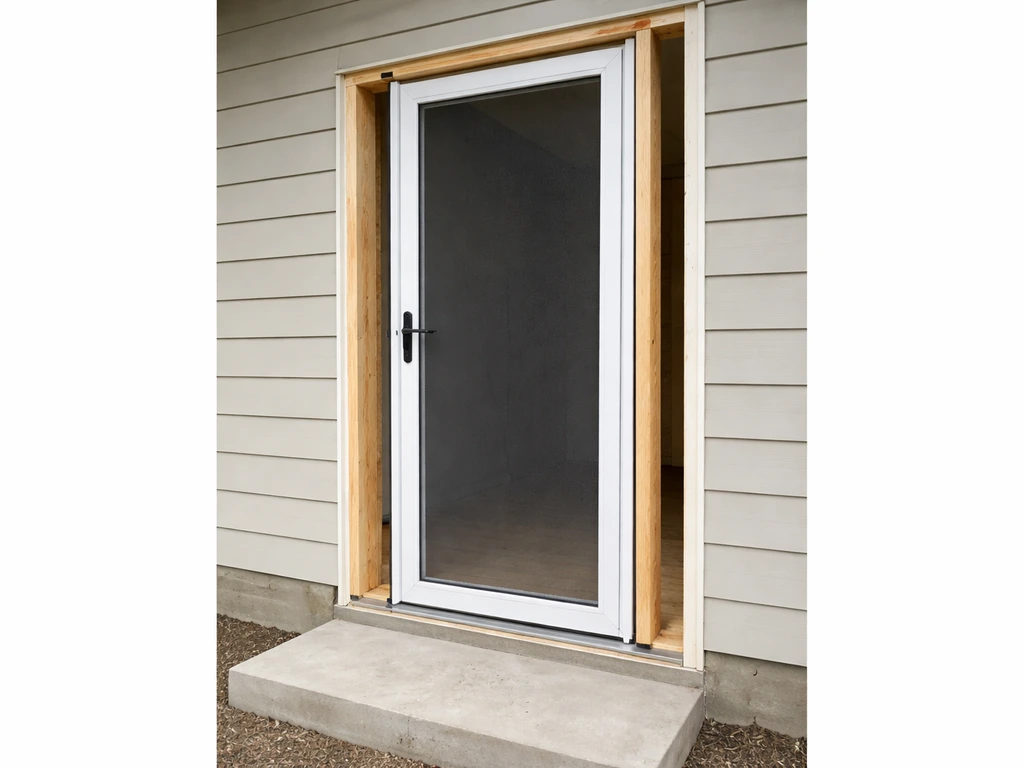
A pre-hung screen door kit is the easiest approach. Standard screen door widths are 32 and 36 inches, measure your planned opening and frame it to match. The door opening needs a solid wood frame: two vertical posts, a header at the top, and a threshold or sill at the bottom. Mount the hinges on the same side as your house entry point or wherever traffic flow makes sense. Install the latch and strike plate on the opposite side, and attach a door closer (a simple spring or pneumatic closer) so the door shuts automatically behind people. This is essential, a screen door that stays open defeats the entire purpose of the enclosure.
Weatherproofing the screened enclosure
- Seal the gap between your bottom plate and the concrete slab with exterior caulk or a foam sill gasket before fastening the plate down. This stops insects and water from getting under the framing.
- At the roofline junction, apply flashing or use a drip-edge track (like the i DRIP TRAC style) so water sheds outward over the screen rather than running behind it. Products with built-in weep holes are especially good at this joint.
- Caulk any gaps where the frame meets the house wall, beam, or existing structure. Use paintable exterior caulk and tool it smooth.
- Check the door threshold — add a door sweep if there's a visible gap at the bottom.
- In climates with hard freezes, consider whether you want removable screen panels for winter storage. Some channel systems are designed to allow screens to pop out seasonally.
Common DIY mistakes, troubleshooting, and your next-step checklist
Mistakes that cause the most re-work
- Wrong spline size: Using spline that's too thin means the screen pops out. Too thick and you can't seat the spline at all. Match your spline diameter to your channel system and screen type before buying.
- Not checking for square: Frames that aren't square produce screen panels with wrinkles or gaps in one corner that no amount of tension will fix.
- Skipping the bottom plate anchor: Framing that isn't fastened to the slab shifts over time and pulls screen panels loose.
- Attaching to the house incorrectly: If you're tying your screened patio to the house, the attachment must land on actual structural framing, not just the exterior sheathing or siding.
- Over-tensioning the screen: Pulling screen too tight distorts the mesh pattern, strains the spline, and can bow lightweight aluminum channels. Taut is right. Drum-tight is wrong.
- No door closer: Sounds minor, but every time that door stays open, bugs get in. Install the closer during initial door installation, not as an afterthought.
- Ignoring permit requirements: Some municipalities require permits for screened enclosures, especially if you're adding footings or modifying the roofline. Check with your local building department before starting.
Troubleshooting quick-reference
| Problem | Likely Cause | Fix |
|---|---|---|
| Screen pops out of groove | Spline too thin or groove too wide | Replace with correct diameter spline for your channel |
| Screen has wrinkles or sags | Uneven tension during installation or frame not square | Remove spline, recheck frame for square, re-roll with even tension |
| Bugs getting in at corners | Corner trim not sealed or panels not fitting flush | Add corner cap trim and caulk any visible gaps |
| Water pooling behind top trim | No drip edge at roofline | Install flashing or drip-edge track at top of screen panels |
| Door doesn't latch properly | Frame not plumb or strike plate misaligned | Check door frame with level, adjust strike plate position |
| Bottom of screen panel gaps from slab | Bottom plate not anchored or settled | Re-fasten plate to slab, caulk the joint |
Your actual first steps for today
- Walk your patio and sketch a simple layout showing which sides you're enclosing, where the door will go, and whether you're attaching to the house or going freestanding.
- Measure every opening: width top and bottom, height left and right. Write it all down and double-check with diagonal measurements for square.
- Decide on your framing system (lumber vs. aluminum channel track) based on your budget and how finished you want it to look.
- Choose your screen mesh based on your biggest concerns — bugs, sun, or pets — using the comparison table above.
- Look up your local permit requirements before purchasing materials. A quick call to your building department takes five minutes.
- Build your shopping list: framing lumber or channel kit, screen mesh roll, correct-diameter spline, spline roller tool, fasteners, corner trim, drip-edge trim, and door kit.
- Order or source materials and aim to have a complete delivery before your build weekend so you're not making hardware store runs mid-project.
If you're working with an already-enclosed patio structure and just want to understand the screened wall options in more detail, the retrofit screening approach described here pairs well with thinking through the full enclosure scope, whether you're doing just screens, adding walls, or eventually considering a more fully enclosed conversion. If you’re wondering how to enclose a screened patio, start by choosing the enclosure scope, then work through framing, screen type, and door placement retrofit screening approach. The core skills are the same: measure carefully, match your materials to your system, and take the frame work seriously before a single foot of screen gets unrolled.
FAQ
Do I need a permit or inspection to build a screened patio?
Often yes, especially for attached structures, roof modifications, or any work that changes a home’s load path. Before you start, confirm local rules for patio enclosures, zoning setbacks, and whether a screen door counts as an exterior entry requiring specific hardware or egress clearances.
Can I attach an attached screened patio to siding instead of solid framing?
You generally should not. Even if it feels solid, siding and fascia are not designed for structural loading. Your ledger or channel should fasten into studs, beams, or other rated framing members, and if you are unsure, ask for a quick engineer or contractor review of the attachment plan.
What’s the best screen choice if I’m worried about both bugs and heat?
Use a mesh that matches the conditions, not just the insect size. No-See-Um helps with tiny insects, while solar screening targets heat gain. If you’re combining goals, prioritize the mesh’s solar rating and verify it will work with your spline and channel system (compatibility matters for both performance and fit).
How do I keep screens from sagging over larger spans?
Sagging usually comes from too-light framing or undersized openings for the screen system. For bigger openings, use the recommended framing member size and spacing for the screen mesh you chose, and keep the frame square during fastening so the mesh has even tension.
What should I do if my patio slab is out of square?
Don’t force the frame to the opening. Use the corner-to-corner diagonal check, then “rack” the frame during dry fitting until both diagonals match before you permanently fasten. If the mismatch is severe, you may need to adjust one panel plan or add shims at specific frame locations.
How far below the frost line should footings be for a freestanding screened enclosure?
The correct depth depends on your region’s frost depth and local building practices. Use local frost-depth requirements rather than guessing, and make sure your post anchors are rated for outdoor and wind loads. If wind exposure is high, consider increasing footing size or post spacing beyond minimums.
Can I reuse existing screen mesh or frames if I’m converting an area later?
It’s usually not worth it. Old mesh often loses tension or stretches unevenly, and spline sizes may not match newer channel profiles. If you plan future upgrades, install frames sized for the eventual scope and treat the screen system as a replaceable last-phase component.
What’s the most common spline mistake, and how can I avoid it?
Using the wrong spline diameter for your specific channel and screen thickness, leading to screens that pop out or sit loose. Avoid this by confirming compatibility for your exact channel brand and screen product, then buying the matching spline before cutting panels.
How do I measure for corner trims correctly?
Measure each trim segment from corner-to-corner rather than assuming a single run equals the full opening width. Inside and outside corners typically require different overlap or miter angles, so splitting the measurement prevents gaps where trims meet.
Is a spring screen door closer enough, or do I need a heavier closer?
It depends on door weight, screen mesh resistance, and wind exposure. A closer should reliably bring the door fully shut and keep it from staying ajar. If the door feels heavy or your enclosure catches gusts, choose a closer rated for the door’s weight and confirm it mounts securely to the solid wood frame.
How can I prevent water from getting behind the screen panels at the roofline?
Use a drip edge or runoff trim approach so water sheds over the top of the screen channel rather than channeling behind it. Also ensure your top channel is fastened into roof structure, not just siding or fascia, so water and wind loads are handled correctly.
What are good ways to handle prevailing wind direction when deciding what to screen?
Screen all sides that need protection, but consider leaving sections more open or using a different panel type where gusts hit hardest, especially if you notice blowing dust or leaves. Cross-flow reduces moisture buildup, so plan your openings to avoid trapping damp air behind the enclosure.
Next Articles
Do It Yourself Screened-In Patio: Step-by-Step Build Guide
DIY screened-in patio build guide with materials, tool lists, step-by-step framing, screen install, door, sealing, and u

How to Decorate a Long Narrow Patio: Layout Tips
Practical DIY layout and decor tips to widen a long narrow patio using zoning, furniture spacing, lighting, greenery, an

How to Decorate a Rectangular Patio Step by Step
Step-by-step plan to decorate a rectangular patio with smart layout, zones, furniture fit, lighting, plants, and seasona