Designing a covered patio comes down to four decisions made in order: what type of cover you actually need, how big and where it goes, what it's built from, and how you'll make it livable year-round. A good next step is to compare cover options and decide what you can cover your patio with for your climate, budget, and desired level of protection what can i cover my patio with. How to cover a small patio starts with choosing a cover type that matches how much rain and sun you need to block. Get those four things right and the rest of the project follows naturally. Skip any one of them and you'll end up with a structure that leaks, wobbles, looks awkward on the house, or costs twice what it should have.
How to Design a Covered Patio: Step-by-Step Guide

Felix Brennan
7 May 2026
Open shade cover or solid roof? Pick your cover type first
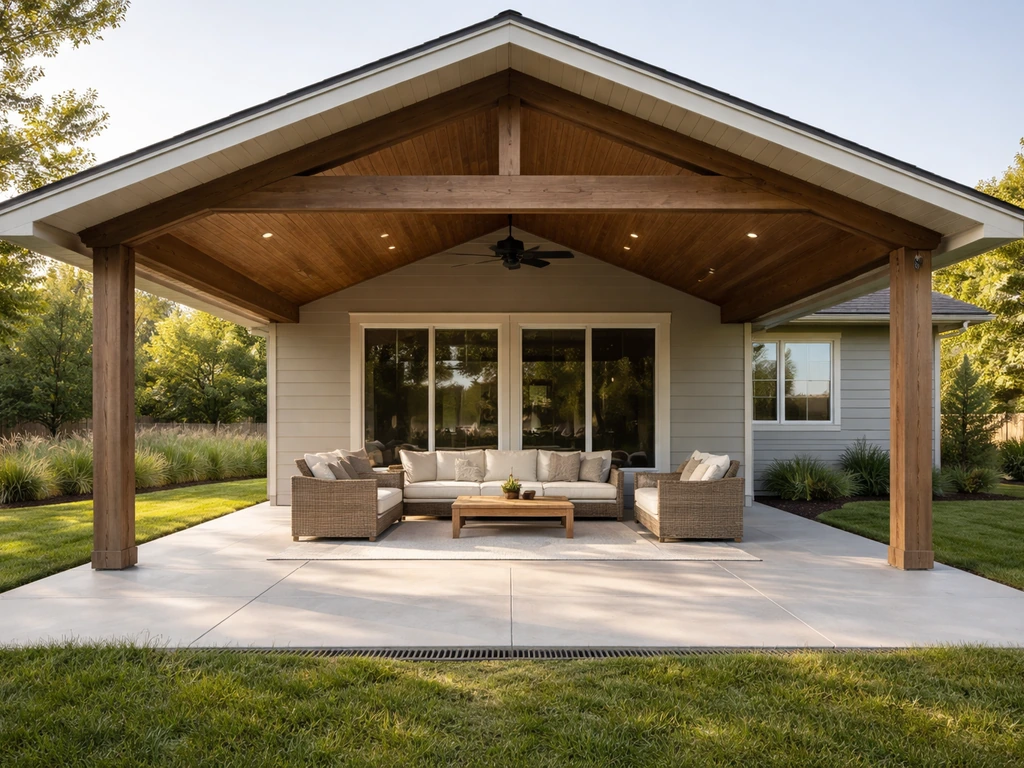
This is the single most important design decision because it drives every other choice. Open or slatted covers (pergolas, lattice roofs) give you airflow, dappled light, and a lower price tag. Solid or semi-solid covers (aluminum panel systems, polycarbonate roofs, wood-framed shingle roofs) give you real rain protection and the ability to actually use the patio in bad weather. A lattice roof typically runs $4,100 to $9,200 depending on size and framing, while a fully roofed and screened enclosure can cost $50 to $175 per square foot. Four-season glass enclosures push to $200 to $400 per square foot. Those numbers matter early because they shape what's realistic for your budget.
Think honestly about your climate and how you use the space. If you live somewhere with hot summers and mild rain, a pergola or lattice cover might be all you need. If you want to use the patio from spring through fall in a rainy or windy region, a solid roof with optional screen panels is the better investment. And if you want a true year-round outdoor room, you're looking at a full enclosure with insulated panels and climate control. Each step up adds cost but also adds usable days per year. The right answer is the one that matches your actual lifestyle, not the prettiest picture online.
| Cover Type | Rain Protection | Airflow | Typical Cost Range | Best For |
|---|---|---|---|---|
| Pergola / lattice roof | Minimal | Excellent | $4,100–$9,200 | Shade, aesthetics, mild climates |
| Solid aluminum panel roof | Full | Moderate (with vents) | $20–$50/sq ft installed | Year-round use, low maintenance |
| Polycarbonate panel roof | Full | Moderate | $15–$35/sq ft installed | Natural light, moderate climates |
| Wood-framed shingle roof | Full | Low (enclosed feel) | $25–$55/sq ft installed | Matching existing house roofline |
| Screened enclosure (solid roof) | Full | Good (screen mesh) | $50–$175/sq ft installed | Bug-free outdoor rooms |
| 4-season glass enclosure | Full | Climate-controlled | $200–$400/sq ft installed | Year-round heated/cooled room |
Site planning: measurements, layout, and connecting to the house
Start with a tape measure and a sketch before you touch anything else. Measure the patio slab or deck area you're working with, then decide how much of it you want to cover. Most attached patio covers connect to the house via a ledger board bolted to the exterior wall, so you also need to measure the height of the wall where the ledger will land, the distance from the house wall to where the outer posts will stand, and the existing roof overhang. That overhang measurement matters because many local guidelines cap how far a patio cover can extend beyond the house wall or specify a maximum overhang, with 12 inches being a common limit referenced in residential permit guidelines.
For an attached cover, the ledger height determines your roof pitch and your finished ceiling height. Most permit guidelines require a minimum of 6 feet 8 inches from finished floor to the bottom of any beam, so plan your ledger height with that clearance in mind. Aim for the ledger to sit high enough that the outer edge of the roof still drains away from the house even after accounting for pitch. A common target is to set the ledger so the finished roof has at least a 1-in-12 slope, which is the minimum you need for most roofing materials to shed water reliably.
Sketch the post layout at the same time. Posts should align with your beam span and rafter spacing, which your local permit table will specify by material and species. Phoenix's residential patio cover guidelines, for example, include specific span and spacing tables for Douglas fir members. Even if you're not in Phoenix, those tables give you a useful framework: typical rafter spacing runs 16 to 24 inches on center, and beam spans between posts are usually kept to 8 to 12 feet for standard lumber sizes. Wider spans need bigger beams or engineered lumber, which adds cost and sometimes requires a structural engineer's stamp.
Ledger connection and flashing
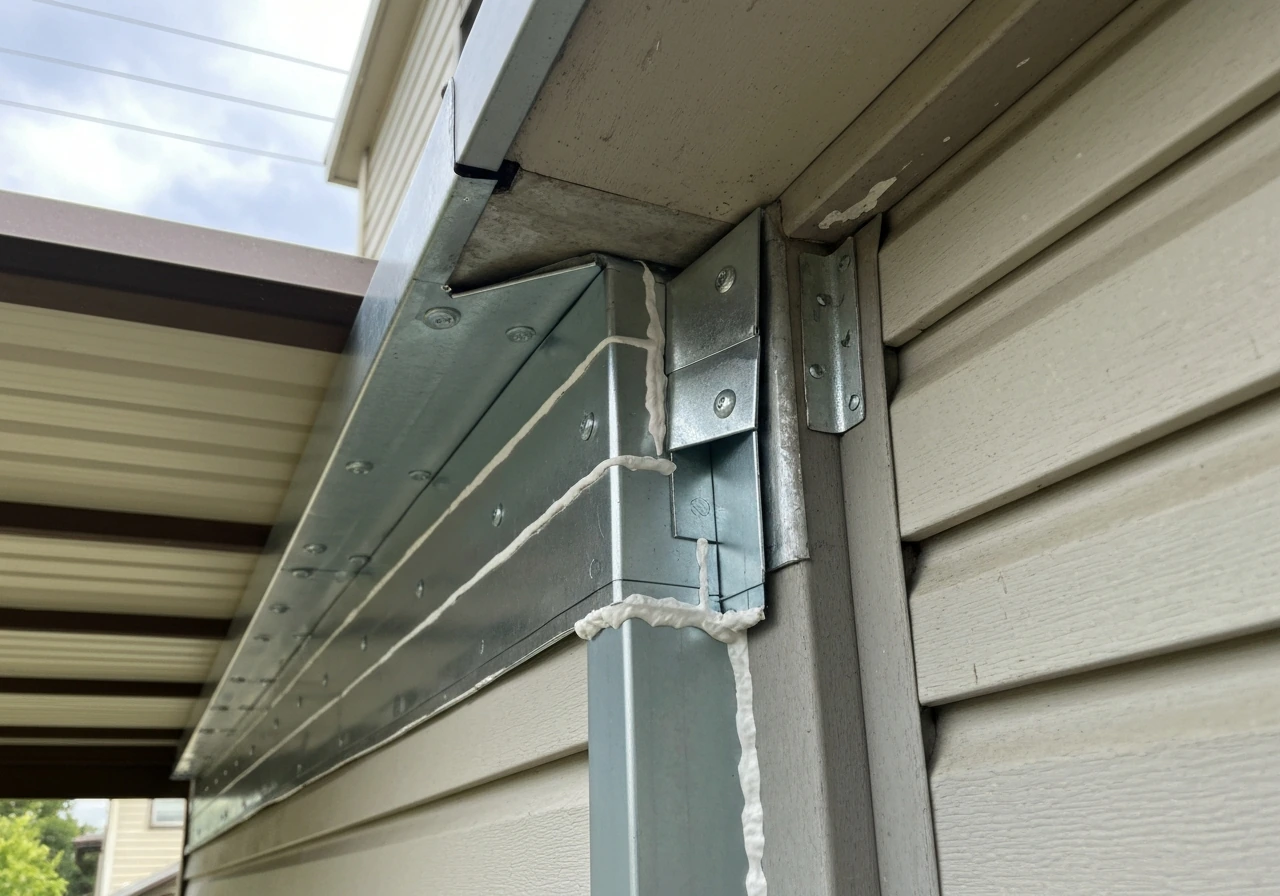
The ledger-to-house connection is where most patio cover water damage starts. The IRC addresses ledger flashing specifically (section R507.9.1.5 for decks, and the same principles apply to patio covers), requiring that flashing integrate with the home's water-resistive barrier so water can't sneak behind the ledger and rot the wall framing. In practice, this means removing a course of siding above where the ledger will sit, installing Z-flashing that tucks under the siding above and laps over the ledger face, and caulking any gaps. If your house has stucco, you need to cut a clean horizontal line and use a flexible flashing membrane. This is one of those details that is cheap to do right the first time and extremely expensive to fix after the fact.
Choosing your materials: wood, aluminum, steel, and poly
Each material has a real-world trade-off between upfront cost, long-term maintenance, and structural performance. Here's an honest breakdown of the four most common systems.
Wood framing
Pressure-treated lumber or naturally rot-resistant species like cedar and redwood are the go-to for DIYers because the skills and tools are familiar, lumber is available everywhere, and wood accepts paint or stain to match your house. The downside is ongoing maintenance: wood needs to be repainted or resealed every few years, and it's vulnerable to moisture and insects if you skip that upkeep. Permit-ready wood patio covers typically use Douglas fir or Southern Yellow Pine at specific grades, and your local jurisdiction will specify fastener requirements. Budget for stainless or hot-dipped galvanized hardware throughout since standard zinc screws will corrode outdoors.
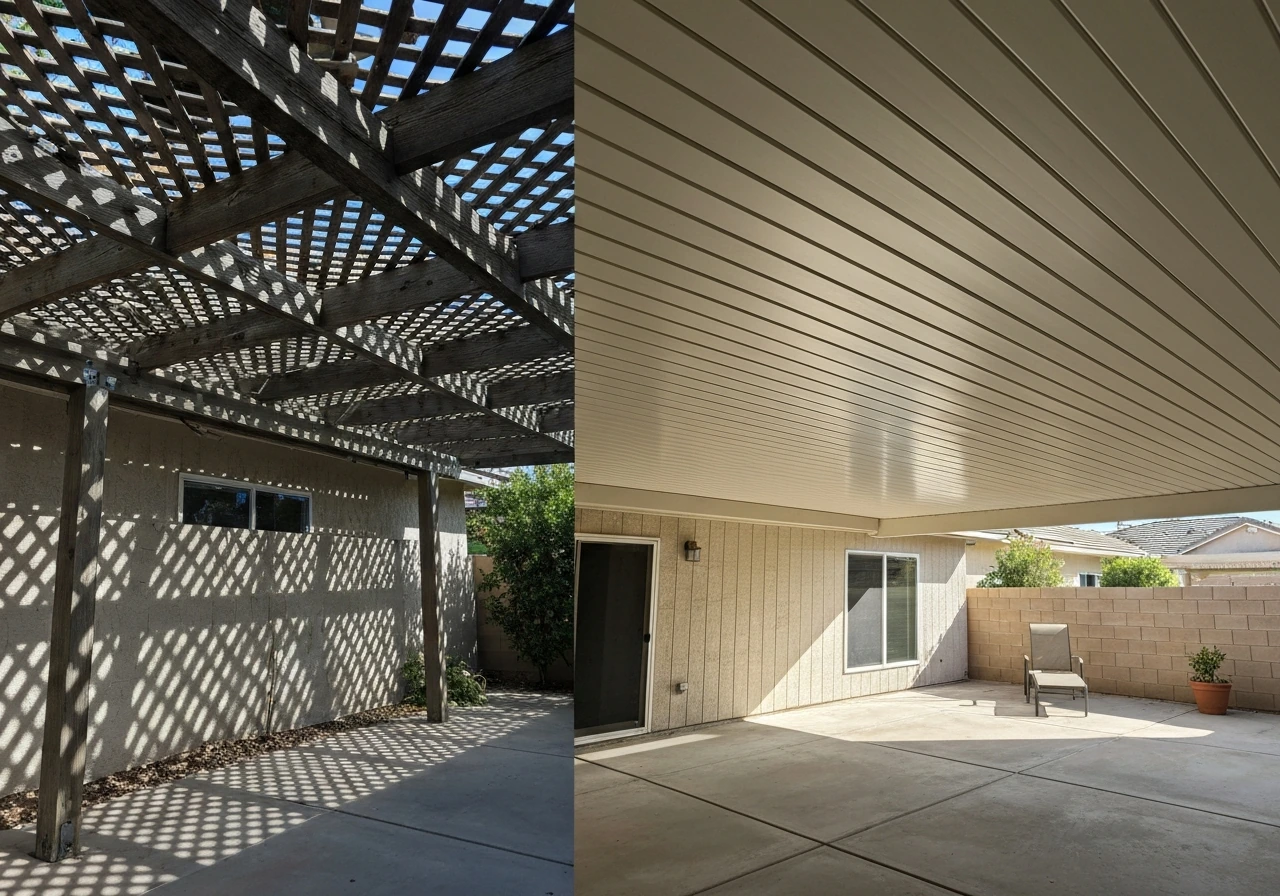
Aluminum panel systems
Aluminum patio cover systems are the most popular choice for homeowners who want a low-maintenance solid roof. Aluminum naturally forms a protective oxide layer that resists corrosion, which means it won't rust through the way steel does and won't rot like wood. Installed costs run roughly $20 to $50 per square foot. Lifespan is typically 25 to 50 years with minimal upkeep beyond periodic cleaning. The trade-off is that aluminum panel systems have a specific look (usually horizontal tongue-and-groove panels or solid extruded sections) that may not suit every architectural style, and they can be noisy in heavy rain unless you choose insulated panels.
Steel framing
Steel gives you the strongest spans for the least material, which matters for large open patio covers or commercial-style designs. The problem is corrosion: unlike aluminum, steel will rust if the protective coating is damaged, and touch-up painting becomes a recurring maintenance task in humid or coastal climates. Steel is most practical when the spans are too large for standard lumber or aluminum extrusions, or when you want an industrial aesthetic. If you go with steel, specify galvanized or powder-coated sections and plan on inspecting the coating every two to three years.
Polycarbonate panels
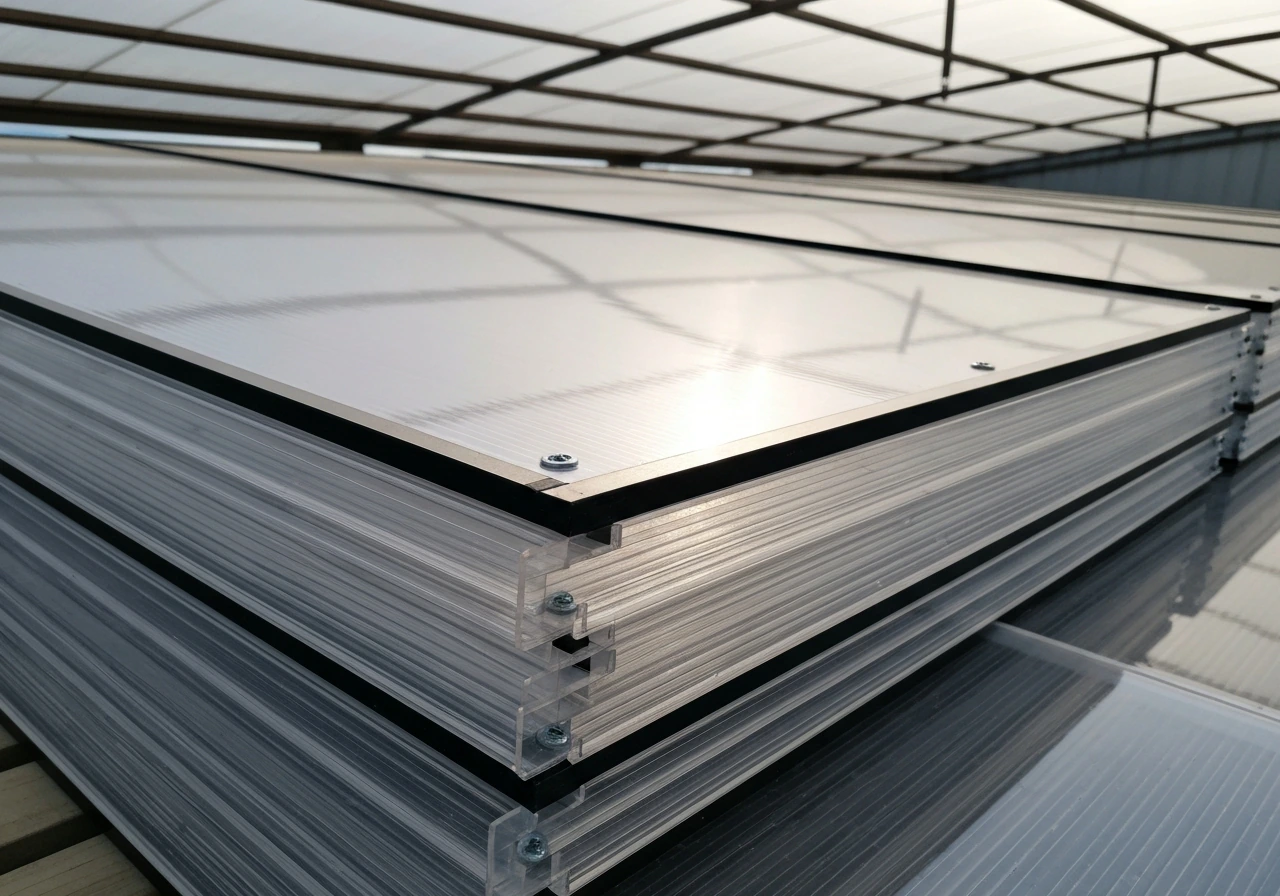
Polycarbonate is the right choice when you want a covered roof that still lets in natural light. Twin-wall or multi-wall polycarbonate panels are lightweight, easy to cut, and provide some insulating value. Lifespan is roughly 10 to 20 years depending on UV exposure and how well you maintain the surface. Polycarbonate scratches more easily than glass and can yellow or cloud over time if you use harsh cleaners. The manufacturer guidance is simple: rinse first, then clean with warm water and a mild soap, never abrasive pads. One important note for covered patios: seal the open channel ends of twin-wall panels with tape or end caps so insects and moisture don't get inside the cells.
Roof design: slope, drainage, insulation, and wind
A flat roof on a patio cover is a slow-motion disaster. Even a modest 1-in-12 slope is enough to shed water, but 2-in-12 to 3-in-12 is better for most roofing materials and gives you more margin in heavy rain. Slope the roof away from the house so water runs toward the outer edge and into gutters, not back toward your foundation or wall.
Gutters and drainage
Size your gutters based on two things: the drainage area (length times width of the roof section feeding each gutter run) and the roof pitch, which affects how fast water moves off the surface. For most residential patio covers, 4-inch K-style gutters handle normal loads, but if you're in a high-rainfall area or covering a large area, step up to 5-inch or 6-inch gutters. Forbes Home’s gutter-sizes guide links gutter sizing to the roof and fascia setup and notes that larger gutters can handle heavy rainfall more effectively. Downspout placement matters: space downspouts no more than 20 to 30 feet apart and direct them well away from the foundation. This is not the place to cut corners because pooling water next to a post footer is how you get heaving, rot, and structural movement over time.
Insulated vs non-insulated roofing
If you're in a hot climate and plan to use the patio on summer afternoons, an insulated aluminum roof panel (foam-core sandwich panel) makes a meaningful difference in comfort compared to a single-skin metal roof. The foam core reduces heat transfer and also deadens rain noise significantly. Insulated panels cost more upfront but reduce the load on any ceiling fan or cooling system you add later. In cooler climates where the goal is extending the season into fall and spring, insulated panels also help retain warmth from a patio heater.
Wind load design
Wind is the structural force most homeowners underestimate on patio covers. Under ASCE 7-16 (the wind load standard referenced by most building codes), design starts with your area's basic wind speed, then factors in an exposure category based on your site's surroundings: open terrain like a field gets a more severe exposure than a suburban lot surrounded by trees and buildings. In hurricane-prone coastal areas, basic wind speeds can exceed 150 mph, and that changes everything from post size to connection hardware. Even in moderate-wind inland areas, uplift on a roof is significant. Use hurricane ties or code-approved rafter-to-beam connectors throughout, and make sure post bases are properly anchored to concrete footings. This is one area where the permit review process actually helps you: the inspector will catch undersized connections before they fail in a storm.
Permits, safety, and what this project actually costs
Nearly every jurisdiction requires a building permit for an attached patio cover, and most require one for freestanding covers above a certain size too. The permit process typically checks setbacks from property lines, maximum structure height (commonly capped at 12 feet for residential patio covers), and structural compliance with your local wind and snow load requirements. Permit costs average around $800 for patio enclosure work nationally, though they vary widely. Hayward, CA, Escondido, CA, and Phoenix, AZ all have specific patio cover permit checklists that include requirements like existing roof framing details, wall framing type, and post-to-beam connection specs. Even if your city's checklist isn't online, the categories are almost always the same: site plan, floor plan with dimensions, elevation showing height, and a framing plan with member sizes.
On budget: a basic open lattice or pergola cover for a typical 200 to 300 square foot patio runs $4,100 to $9,200. A solid aluminum panel roof for the same area runs roughly $4,000 to $15,000 installed depending on complexity. Add a full screened enclosure and you're at $10,000 to $35,000 or more. A four-season enclosure on a larger patio can easily exceed $50,000. DIY labor saves real money on the framing and finishing work, but electrical, concrete footings, and complex ledger connections are areas where hiring a licensed pro is worth the expense to do it right and pass inspection.
DIY vs hiring a contractor
The honest answer is that the framing portion of a wood or aluminum patio cover is within reach for a confident DIYer with basic carpentry skills, especially if you're working from a permit-ready plan. What commonly trips people up is the ledger flashing (do it wrong and you cause hidden water damage for years), electrical work (always hire a licensed electrician for new circuits), and concrete footing pours in difficult soils. A hybrid approach works well for most homeowners: pull the permit yourself, hire out the footings and electrical, and handle the framing, roofing, and finishing work yourself. That approach typically saves 30 to 40 percent compared to a full contractor build.
Screening, enclosure, lighting, fans, and climate control
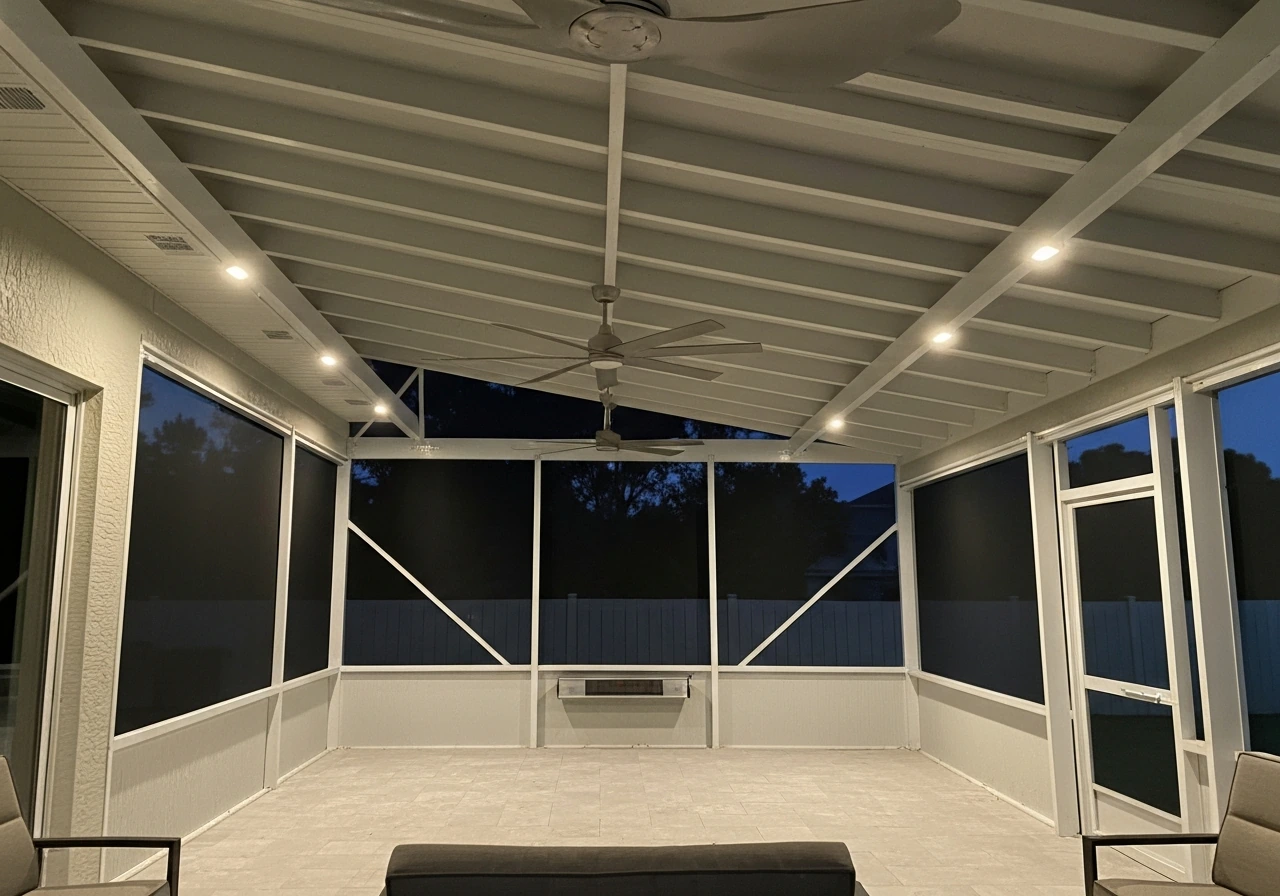
Once the roof structure is up, the biggest upgrade you can add is screening. A screened patio cover gives you bug protection and partial wind control without sacrificing airflow. For screen material, aluminum mesh is more durable and rigid than fiberglass but costs about a third more and is slightly harder to install without wrinkles. Fiberglass is more forgiving for DIY installation and resists denting. In humid coastal climates, fiberglass with a good mildew-resistant coating is often the better long-term choice. If you want flexibility, motorized retractable screens let you open the sides fully on nice days and close them against insects, wind, or afternoon sun, which connects naturally to the broader question of how to cover patio sides as a separate project. For the patio sides, the right approach often depends on whether you want privacy, shade control, and weather protection without blocking airflow how to cover patio sides. If you are trying to cover back patio sides for more weather protection, start by matching the opening size and choosing screen, panels, or curtains that work with your roof design how to cover patio sides. If you also want to think about how to cover patio sides on an apartment patio, plan your screening and enclosure options early so they integrate with the roof structure. Next, focus on side coverage options like fixed panels, retractable screens, or glass enclosures to block wind and rain where you need it most how to cover patio sides. If you want to build something similar in The Sims 4, use these same covered-patio planning ideas to choose the right roof and layout how to make a covered patio in sims 4.
For lighting, any fixture mounted under a covered patio must be rated for at least damp locations, and fixtures that could be exposed to rain splash (near open sides) must be wet-rated. Outlet boxes must also be rated for damp locations, with listed weatherproof covers. These aren't suggestions; they're NEC requirements that your inspector will check. The same rule applies to ceiling fan boxes: use a fan-rated outlet box (not a standard light box) and choose a fan that's explicitly listed as damp-rated for enclosed covered patios or wet-rated if the sides are open. A fan with a 52-inch blade span is a good starting point for a 12-by-16-foot covered patio.
For climate control beyond fans, the most practical additions are a ceiling-mounted infrared patio heater for cool evenings and a misting system or evaporative cooler for hot climates. Infrared heaters mount directly to the ceiling joists and plug into a 240-volt outlet (hire an electrician for this). Misting systems attach to the perimeter framing and connect to a hose bib with a pressure regulator. Neither requires major structural changes if you plan the electrical and plumbing rough-in before the ceiling panels go up. Trying to retrofit both after the roof is finished is frustrating and expensive.
Finishing touches and keeping it all working year-round
Once the structure is complete and passed inspection, finishing the space is what turns a covered patio into an actual outdoor room. Paint or stain all exposed wood within a few weeks of completion before the sun bleaches the surface and moisture gets into end grain. For aluminum systems, touch up any scratched powder coat with manufacturer-matched touch-up paint to prevent surface corrosion at cut edges. Run a bead of paintable exterior caulk along the ledger flashing seam, around any post base trim, and at any penetration through the roof panels.
Maintenance is genuinely simple if you stay on schedule. Here's what to plan for each season.
- Spring: Clean gutters and check downspout drainage, inspect ledger flashing for any caulk cracking or separation, clean screen panels with mild soap and water, and check all post-base hardware for corrosion.
- Summer: Rinse polycarbonate panels with clean water before scrubbing to avoid scratching, check ceiling fan blades and motor housing for wasp nests, and inspect screen mesh for small tears before they become large ones.
- Fall: Clean gutters again after leaf drop, touch up any paint or stain on wood members, check rafter-to-ledger connection hardware for rust if you have steel fasteners, and clear debris from the roof surface.
- Winter (applicable climates): If you get snow load, clear heavy accumulation from polycarbonate or thin aluminum panel roofs promptly, check that downspouts aren't blocked by ice dams, and inspect screen frame corners for frost heave separation.
For painted aluminum systems, mildew is the most common cosmetic issue. A diluted bleach solution (one part bleach to four parts water) removes most mildew staining without damaging the paint. Rinse thoroughly afterward and let it dry before applying any touch-up coating. For fabric shade elements like attached awnings or shade sails, clean per the manufacturer's schedule and apply a mildew-inhibiting treatment at the start of each humid season.
The bottom line is that a well-designed covered patio holds up for decades with very little effort if you build it right the first time. The investment is in the planning: right slope, right flashing, right hardware ratings, and a structure sized for your actual wind and snow loads. Get those details right and the patio becomes one of the most-used spaces in your home, regardless of season.
FAQ
How do I decide whether I need a permit for my covered patio if it is small or freestanding?
Check whether the cover is attached to the house, how high it is at the roof edge, and whether it changes site drainage. Even small freestanding structures can trigger permits in many jurisdictions based on roof height, permanent footings, or enclosure elements like screens. If you are unsure, call the permit counter with your rough dimensions and the cover type you chose, open or solid, so they confirm up front rather than after construction
What slope should I plan for if my roof is mostly flat, but I cannot raise the ledger much?
If you are constrained on ledger height, prioritize achieving at least a 2-in-12 slope for covered patio roofs, especially with solid aluminum panels or polycarbonate. If you cannot reach that, redesign the layout, reduce the run length between drains/gutters, or use a different panel system rather than relying on a near-flat roof, because small slope errors cause pooling around post bases and along panel seams
Do I need gutters on a covered patio, or can I rely on roof runoff?
If the cover extends near landscaping, steps, or foundations, gutters usually become necessary. A simple runoff edge often dumps water where you least want it, around footings and walkways. Size gutters based on drainage area for each run, then keep downspouts directed away from the foundation, ideally to a splash pad or approved drainage path
What is the most common framing mistake that causes a covered patio to leak or sag over time?
Misaligning the beam and rafter layout so the roof panels do not land on consistent support points. That leads to fastener pull-out, panel deformation, and water channels that develop at seams. Another frequent mistake is using the wrong fasteners at the ledger or panel edges, which can loosen under vibration and wind uplift
How do I choose between an attached patio cover and a freestanding one?
Attached covers usually cost less and integrate cleaner with roof drainage, but they require correct ledger flashing and careful wall water management. Freestanding designs can avoid ledger flashing on some houses, but they demand stronger post anchoring and a design that handles wind without wobble. If your existing exterior wall has repeated leaks or hard-to-flash finishes, freestanding may reduce risk even if it costs more
What should I do about water where the roof meets the house, especially with stucco?
Plan for a clean, straight cut line and use a compatible flexible flashing approach for the stucco finish, then integrate it with the house water-resistive barrier. Do not rely on caulk alone at the ledger. Caulk is a gap filler, the flashing is the water barrier, correct lapping direction matters for each layer
Can I waterproof the ledger flashing after construction if I realize I did it wrong?
It is usually not a simple fix because the wall surface, siding or stucco, and sometimes framing details must be opened to correct the flashing integration. If you suspect improper flashing, inspect for early signs like staining behind siding seams, soft drywall below the ledger line, or moisture at beam penetrations before finishing work makes it harder to access
Which material is best if I care most about noise during rain?
Insulated aluminum panels reduce both heat transfer and rain noise compared with single-skin metal. Polycarbonate can also feel quieter than bare metal, but it can transmit sound depending on panel thickness and how it is supported. If noise is a top concern, choose insulated panels or add insulation or damping layers where your design allows, then keep panel spans within manufacturer limits
Is polycarbonate okay for covered patios, or does it yellow and scratch too easily?
It is workable, especially with twin-wall panels and careful cleaning, but you must accept cosmetic wear over time from UV exposure and micro-scratches. Use mild cleaners only, rinse first, avoid abrasive pads, and seal the open panel channels with end caps or tape to prevent insects and moisture migrating into the cells
How often should I inspect connections and post bases?
Do a visual check at least twice per year, and after any major wind or storm event. Look for rust at steel, paint coating breakdown, loose trim around posts, and any evidence of water staining near post footers. If you have enclosures, also check screen track alignment and drainage paths so trapped water does not build up at corners
Can I add electrical outlets or a ceiling fan later, after the roof panels are installed?
You can, but it is often difficult and more expensive because you must preserve weatherproofing at penetrations. Better practice is to run conduit and rough-in boxes before closing the ceiling, then use damp-rated fixtures and listed weatherproof covers. If you retrofit later, expect to remove sections of paneling or access the framing to do flashing correctly
What type of patio heater and mounting approach works best with a covered patio?
Ceiling-mounted infrared heaters are typically the cleanest option because they heat people and surfaces rather than the air. However, they must be anchored to structure, not only paneling, and they require appropriate electrical service, hire a licensed electrician for any new 240-volt circuit work
How can I improve comfort in hot climates without making the patio feel enclosed?
Use insulated roof panels, then combine them with side screening strategies that preserve airflow. For example, keep upper airflow open with a roof that blocks sun and heat, and use retractable screen panels on the sides so you can close them only when needed for insects or late-day sun
What is the easiest way to prevent mildew on covered patio materials?
Design for drainage and airflow first, then schedule cleaning at the start of humid season. For painted aluminum, mildew often responds to a diluted bleach wash followed by thorough rinsing. For fabric shade elements, follow the manufacturer schedule and apply mildew-inhibiting treatment, do not wait until stains are embedded
How do I avoid buying the wrong size gutters and downspouts for my patio cover?
Do a simple roof section breakdown, calculate the drainage area feeding each gutter run, and adjust for roof pitch. Then place downspouts so no run relies on long wait times for water to leave, commonly keeping downspouts spaced within about 20 to 30 feet for typical residential roof cover situations. If your layout is complex, consider upsizing gutter size rather than increasing downspout spacing
Next Articles

How to Decorate a Long Narrow Patio: Layout Tips
Practical DIY layout and decor tips to widen a long narrow patio using zoning, furniture spacing, lighting, greenery, an

How to Decorate a Rectangular Patio Step by Step
Step-by-step plan to decorate a rectangular patio with smart layout, zones, furniture fit, lighting, plants, and seasona
How to Decorate a Patio Wall: DIY Ideas and Mounting Tips
DIY patio wall decor for brick, stucco, wood, concrete, or siding with weatherproof mounting tips and maintenance.