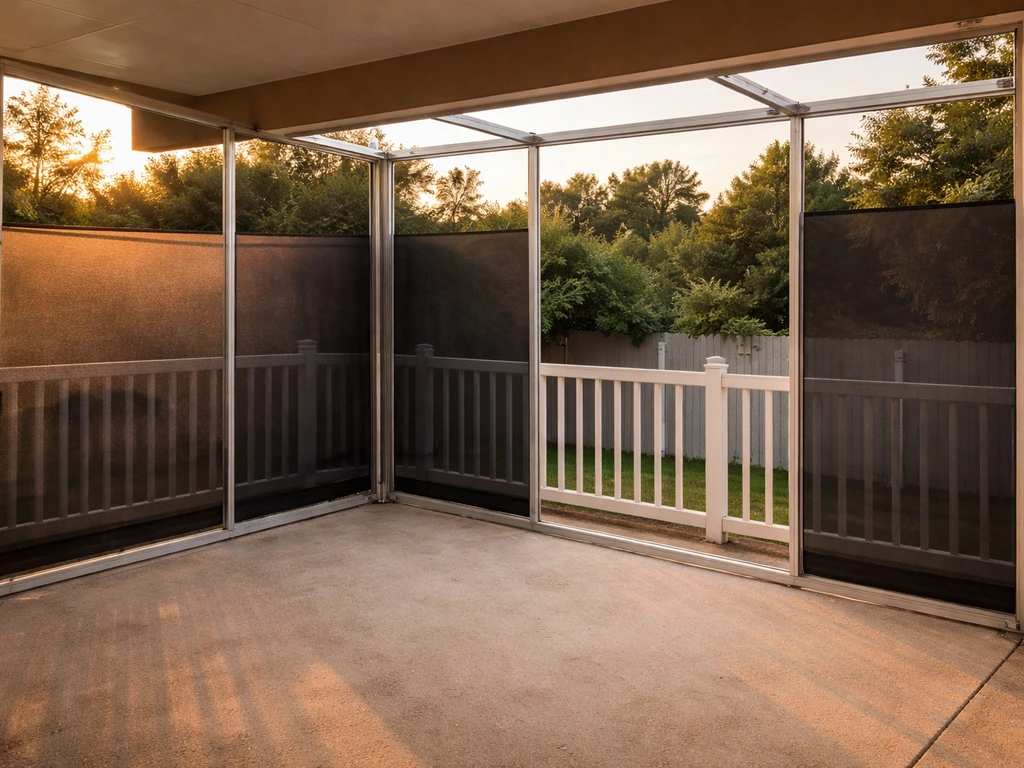
The best way to enclose a patio depends on one thing: what you're trying to keep out. Bugs? A screened enclosure gets the job done cheaply and stays breezy. Rain, wind, or cold? You need vinyl panels or glass. Most homeowners land on a screened enclosure for a first project because it's the most DIY-friendly, costs the least, and still transforms an exposed slab into a genuinely usable outdoor room. From there, you can layer in vinyl windows or glass panels later if you want more weather protection. This guide walks through the whole process: picking the right type, measuring and planning, getting permits, building the frame, installing your enclosure material, and finishing it out without the common mistakes that cause rework.
How to Enclose a Patio: DIY Steps, Costs, and Options

Felix Brennan
13 May 2026
Choosing the Right Enclosure Type

There are four main options: screen mesh, vinyl panels, polycarbonate panels, and glass. Each hits a different balance of cost, protection, airflow, and DIY difficulty. Here's how they actually compare.
| Type | Best For | Weather Protection | Airflow | DIY Difficulty | Rough Cost (Materials) |
|---|---|---|---|---|---|
| Screen mesh | Bug control, ventilation | Low (no rain/wind seal) | Excellent | Easy | $4.50–$1.20/sq ft |
| Vinyl panels (4-track) | 3-season use, wind/light rain | Moderate | Good (panels slide open) | Moderate | $30–$70/sq ft installed |
| Polycarbonate panels | Sun/rain protection, lightweight | Moderate–High | Low (fixed panels) | Moderate | $15–$40/sq ft |
| Glass (sunroom-style) | Full weatherproofing, year-round | High | Low (designed vents only) | Hard/Pro recommended | $80–$400/sq ft |
Screened enclosures use fiberglass or polyester mesh secured into aluminum extrusion frames with a rubber spline pressed into a groove. This is the classic Florida-style lanai setup and it's genuinely manageable as a DIY project. Polyester screen mesh runs about $0.70–$1.20 per square foot in materials, and adding mesh screens to an existing structure costs roughly $4.50 per square foot in materials alone. Vinyl 4-track panel systems (like EZE-Breeze style products) slide up and down like windows and give you real wind and light-rain protection while still letting you open everything up in good weather. Glass enclosures are essentially sunrooms and usually need a contractor, engineer sign-off, and a more serious permit process. If your goal is a comfortable three-season patio, start with screens or vinyl. If you want year-round heated space, budget for glass and a licensed builder.
Which Type Fits Your Situation
- Bug control only: fiberglass or polyester screen mesh in an aluminum frame
- Wind and light rain protection: vinyl 4-track panel system over an existing covered patio
- Sun and glare reduction on a south-facing patio: polycarbonate or shade screen panels
- Small patio with a tight budget: pre-cut screen panel kits or temporary curtain/screen systems
- Year-round comfort with heat and AC: glass sunroom enclosure (budget and permit process increases significantly)
Sizing and Planning Your Specific Patio
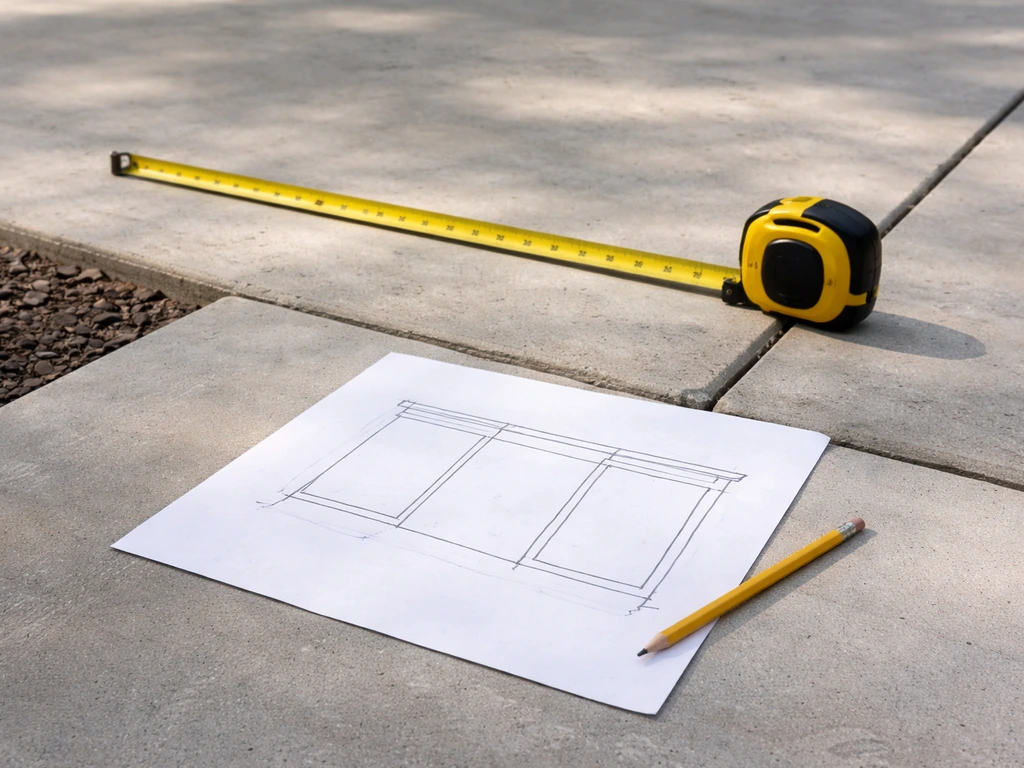
Before you buy anything, spend 30 minutes measuring and sketching your patio. Bad measurements are the number one cause of material waste and installation headaches. The approach differs slightly depending on whether your patio is already covered, fully open, or very small.
Covered Patios
A covered patio (one that already has a roof or pergola overhead) is the easiest starting point because you already have the top structure. You're essentially filling in the sides. Measure each open bay's width and height from the inside edge of the existing posts or beams. This is your "daylight opening." For vinyl panel systems, manufacturers like EZE-Breeze use an "outside mount" sizing method where you measure the daylight opening and then apply a small deduction (usually spelled out in the product's ordering guide) to get your actual panel order size. Get that deduction figure from your specific product before ordering.
Open and Uncovered Patios
If your patio has no existing roof, you need to build a roof or pergola structure before you can enclose the sides. If your patio is fully open, start by planning that roof or pergola first, since it forms the base for building a shelter over the patio build a roof or pergola structure. This adds cost and complexity but gives you full control over the design. Measure the full footprint (length x width) and note which edges are adjacent to the house, which face the yard, and which see the most wind, sun, or rain. South and west faces get the most sun and afternoon heat. Prevailing wind direction matters for deciding where to put operable panels versus fixed screens.
Small Patios
Small patios (under 100 square feet) are actually the friendliest to enclose because you're working with fewer linear feet of framing and screen material. Standard screen panel kit sizes often fit small patio bays without custom cutting. The tradeoff is that small spaces can feel cramped if you choose heavy framing or opaque panels. Lighter aluminum framing and standard fiberglass screen mesh keep the space feeling open. Also check your HOA rules if you have one. Small patio enclosures on townhomes or condos often have appearance restrictions even when they don't require a city permit.
Key Measurements to Take Before You Plan
- Overall patio footprint: measure length and width at the slab or deck edge
- Height from floor to roof/beam underside at each corner (note if it varies)
- Width of each open bay between posts or walls
- Distance from patio to any bedroom windows (critical for egress compliance)
- Location of doors, gates, or walkways that need to be preserved as egress points
- Substrate at the base: concrete slab, wood deck, or pavers (affects anchoring method)
DIY Enclosure Options and Materials List
The most practical DIY path for most homeowners is a screened enclosure using aluminum extrusion framing and fiberglass mesh secured with spline. Aluminum extrusion screen systems are sold in kit form or as individual components and are designed specifically for this use. The spline-and-groove method is forgiving for beginners: you roll the screen over the frame and press a rubber spline rope into a groove channel using a spline roller tool, which locks the screen tightly in place. You don't need to sew, staple, or glue anything.
Standard DIY Screened Enclosure Materials List
- Aluminum extrusion frame channels (top rail, bottom rail, vertical uprights, and intermediate verticals for large spans)
- Fiberglass screen mesh (18x14 or 18x16 weave for standard insect control; petscreen mesh if you have dogs)
- Rubber spline (sized to match your extrusion groove, typically 0.140" or 0.160")
- Spline roller tool
- Screen door frame kit and hardware (hinges, spring closer, latch)
- Corner connectors or miter cut fittings for aluminum extrusion
- Concrete anchors or wood screws depending on your base substrate
- Silicone caulk or weatherstripping for the base and top connections
- Level, tape measure, drill, hacksaw or miter saw with metal-cutting blade
Materials for Vinyl Panel (4-Track) Systems
- 4-track vinyl panel system sized to your daylight opening (order from manufacturer with your measurements)
- Top and bottom track channels
- Mounting screws appropriate for your substrate (masonry anchors for concrete, structural screws for wood)
- Shims for leveling
- Foam weatherstripping for track-to-frame gaps
- Silicone sealant for top and side perimeters
- Level and plumb bob (or laser level)
For a budget-conscious approach, you can also enclose a patio temporarily using outdoor curtain panels, zip-tied screen mesh panels, or tension-mounted systems. If you want to keep it short-term, these temporary enclosures are a practical way to get coverage without committing to a permanent frame enclose a patio temporarily. These won't hold up to serious weather and they won't satisfy a permit inspection, but they're a low-cost way to test out how you'll actually use an enclosed space before committing to a permanent build. That's a separate route worth considering if you're still deciding, and there are dedicated options for that approach covered in guides specifically about temporary patio enclosures.
Step-by-Step Construction Process
Step 1: Check Permits Before You Touch a Tool
This is the step people skip and then regret. In most jurisdictions, a patio enclosure requires a building permit. Hayward, California explicitly states that both patio covers and patio enclosures require a building permit. Collier County, Florida requires permit applications with a checklist for screen enclosures. The permit process typically involves submitting a simple site plan showing your patio dimensions, the enclosure footprint, and proximity to property lines and the house. In areas with high wind risk (most of coastal Texas and Florida, for example), your design may need to meet specific wind-load criteria. Texas's guidelines for aluminum screen enclosures reference IRC Appendix H design wind-load tables, which your local building department can walk you through.
One critical thing to check regardless of where you live: your enclosure cannot block a bedroom egress window. El Monte’s Patio Enclosure document includes egress-related notes tied to California Residential Code adoption, which can affect how you position or limit an enclosure near a blank" rel="noopener noreferrer">bedroom egress window. Multiple California jurisdictions (Hayward, blank" rel="noopener noreferrer">Solano County, El Monte) all flag this in their patio enclosure guidance, and it's a standard building code concern everywhere. If a bedroom window faces your patio, the enclosure must either stop short of that window or include an opening that keeps the egress path clear. Measure this before you design anything.
Step 2: Prep Your Patio Surface and Existing Structure
Clean the slab or deck surface thoroughly. Inspect existing posts, beams, and the roof structure for rot, loose fasteners, or soft wood. Your new enclosure will attach to these, and a weak attachment point will cause the enclosure to rack or pull away within a season or two. Tighten or replace any loose hardware. If you're on a wood deck, verify the ledger connection to the house is solid. On a concrete slab, plan your anchor locations now and mark them with chalk.
Step 3: Frame the Enclosure
For a screened enclosure, you're building a rectangular frame of aluminum channels around each open bay. Set your bottom sill plate first, anchored to the slab or deck. Plumb and level is non-negotiable here. A frame that's even slightly out of square will make your screen installation look wavy and will cause doors to bind. Use a quality level at every step and cross-measure your diagonals (they should match to confirm square). For large screen spans wider than about 4 feet, you need intermediate vertical members to prevent screen billowing and wind damage. This is a commonly overlooked step that causes screen failures in the first storm.
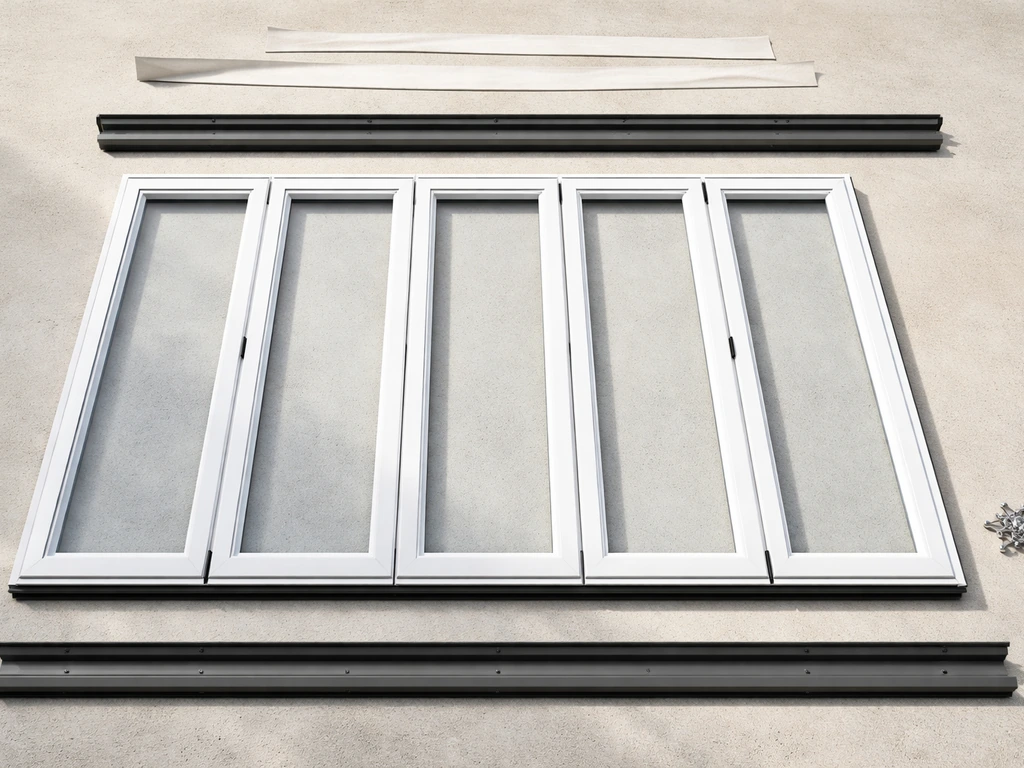
If you're installing a vinyl 4-track panel system into an existing covered patio opening, you're primarily mounting the track system rather than building a full frame. The same plumb/level/square rule applies just as strictly. EZE-Breeze's installation instructions are explicit that the unit must be kept plumb, level, and square for the sliding panels to operate correctly. If your opening isn't perfectly square (most aren't), you shim to compensate before fastening the tracks permanently.
Step 4: Install the Screen Mesh or Panels
For screen mesh: cut your mesh about 2 inches larger than the frame opening on all sides. Lay it over the frame, starting at one corner. Use the spline roller to press the rubber spline into the groove channel on one side, stretching the screen taut as you go. Work opposite sides in sequence (top then bottom, then sides) to keep tension even. Trim the excess mesh flush with the frame edge using a utility knife. The screen should be drum-tight with no sags or wrinkles. If you see wrinkles, pull the spline back out on that side and re-roll with more tension.
For vinyl panel systems: slide the panels into the tracks per the manufacturer's sequence (usually bottom track first, then top). Test the operation before you fasten anything permanently. Panels should slide smoothly without binding. If they bind, recheck your level and square. For glass panels or fixed polycarbonate panels, follow the manufacturer's glazing instructions. If your project involves any fixed glass panels, verify that glass in hazardous locations (near doors, low to the floor, or in large fixed panes) meets IRC R308 safety glazing requirements, which typically means tempered or laminated glass.
Step 5: Frame and Hang the Door
Every enclosed patio needs at least one door for egress and convenience. For screened enclosures, aluminum screen door kits are inexpensive and install in about an hour. Frame the door opening as a separate bay in your aluminum framing, plumb and square. Hang the door with the hinges on the inside and install a spring closer so it self-latches. A door that swings open and stays open will let in every mosquito in the neighborhood. For vinyl or glass enclosures, the door is usually a matching sliding or hinged unit from the same system.
Step 6: Seal and Finish
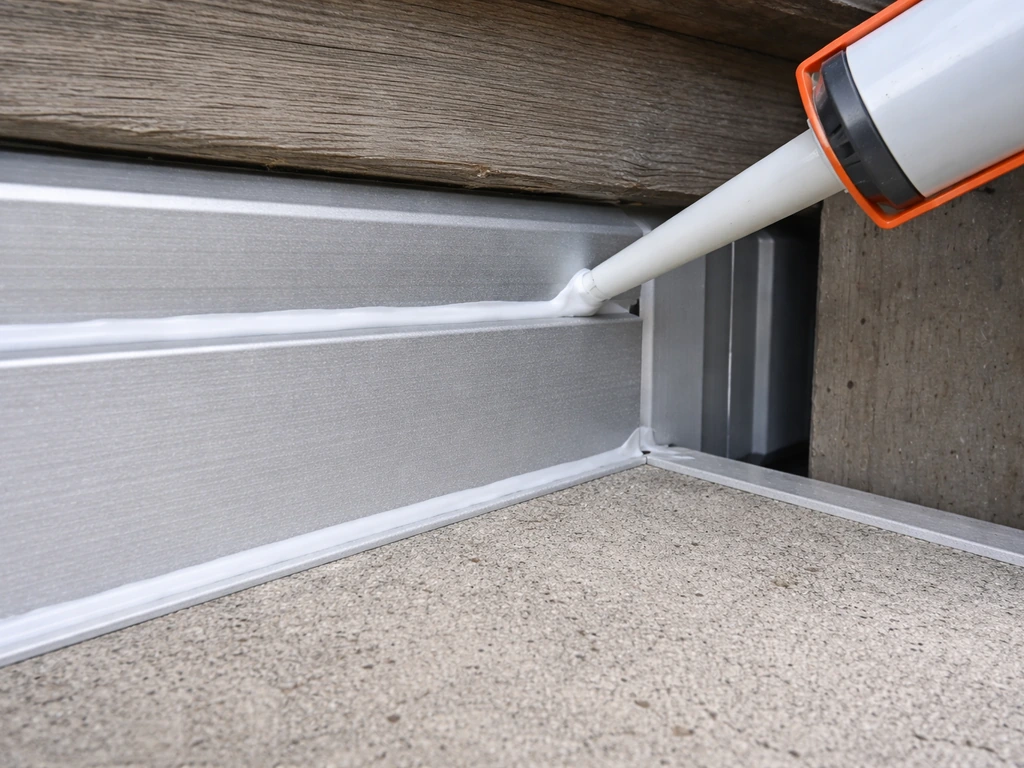
Run a bead of silicone caulk along the top rail where the enclosure meets the existing roof or beam. Seal the base rail where it meets the slab or deck. These two joints are where water and bugs enter if you leave them open. On vinyl panel systems, also seal the track perimeter at the wall connections. Add weatherstripping at the door frame. Step back and look at every joint from outside during daylight: any gap you can see light through is a gap bugs and wind will exploit.
Enclosing for Comfort: Bugs, Wind, Shade, and Weather
Getting the enclosure type right for your comfort goals matters more than any single construction detail. Here's how to approach each common problem.
Bug Control
Standard fiberglass insect screen (18x14 mesh) blocks mosquitoes, gnats, and most flying insects. The screen mesh works only as well as the sealing around it, so the caulk and weatherstripping step above is not optional. Common failure points are the door gap at the bottom and the joint where the top rail meets the roof. If you're in a high-mosquito area, use 18x16 mesh (tighter weave) and add a door sweep. Pet owners should use petscreen (vinyl-coated polyester), which is much heavier and resists claw damage.
Wind Protection
Screen mesh slows wind but doesn't stop it. For real wind protection, you need vinyl panels or glass. If you live in a high-wind area (coastal regions, tornado-prone states, or at elevation), check whether your enclosure design meets local wind-load requirements before you build. Texas's building guidance for screen enclosures specifically references design wind loads using IRC Appendix H tables. If your area has design wind speeds above 115 mph, you'll likely need engineer-stamped drawings for your permit application. Even in moderate climates, adding intermediate vertical framing members to screen bays dramatically reduces screen billowing and tearing in normal storms.
Shade and Sun Control
Standard fiberglass screen filters about 20–30% of sunlight, which takes the edge off but won't keep a south-facing patio cool in summer. For serious shade, use solar screen fabric (also called sun screen or shade screen), which blocks 60–90% of solar heat gain. It's installed exactly like regular screen mesh but is much denser. The tradeoff is reduced visibility outward. Polycarbonate roof panels are another option for overhead sun control if you're also building a roof, and twin-wall polycarbonate diffuses light nicely without total blockage.
Weatherproofing
If you want protection from rain and cold, screened enclosures alone won't get you there. Vinyl 4-track panel systems handle light to moderate rain reasonably well and are the most popular DIY upgrade for covered patios in three-season climates. If you want to enclose a patio on a budget, start with screen mesh or vinyl panels and choose a scope that matches how much weather protection you truly need. Glass enclosures provide the most complete weather seal but are effectively a small addition to your home, not just a patio enclosure. They significantly increase cost, permitting complexity, and construction time. If year-round weatherproofing is the goal, it's worth reading up on what's involved in building a full patio enclosure with walls and windows, since it's a meaningfully different project scope than a screened enclosure.
Cost, Timeline, and Mistakes to Avoid
Realistic Cost Ranges
Material costs scale heavily with enclosure type. Mesh screen materials for an existing structure run about $4.50 per square foot in materials (not counting labor if you hire out). Polyester screen fabric alone is roughly $0.70–$1.20 per square foot. A DIY aluminum-framed screened enclosure on a 200-square-foot covered patio might run $900–$2,500 in materials depending on door count and mesh quality. Vinyl 4-track panel systems cost significantly more because of the panel hardware. Fully enclosed glass or windowed room additions range from $80–$400 per square foot installed, which on even a modest 150-square-foot patio puts you at $12,000–$60,000. Foundation needs, window quality, and whether you're converting an existing screened structure versus building from scratch are the biggest cost drivers at the high end.
Timeline Expectations
- Permit approval: 1–6 weeks depending on your jurisdiction and whether revisions are needed
- Materials procurement: 1–3 weeks for standard aluminum screen kit; 3–6 weeks for custom-sized vinyl panel systems
- DIY screened enclosure (existing covered patio, 200 sq ft): 1–2 weekends for two people
- DIY vinyl panel system (4–6 bays): 1 weekend plus a day for sealing and adjustments
- Glass or full sunroom enclosure: 2–8 weeks of active construction, typically contractor-led
Common Mistakes That Cause Rework
- Skipping the permit: Unpermitted enclosures can require full removal before a home sale and won't be covered by homeowner's insurance if they cause damage.
- Not checking the egress window rule: Building an enclosure in front of a bedroom window is a code violation that inspectors catch immediately.
- Out-of-square framing: Even a quarter inch of out-of-square at the frame means screen wrinkles, binding doors, and panel systems that won't operate correctly.
- Undersized intermediate framing: Large screen bays without intermediate verticals will billow, warp, and eventually tear in wind.
- Ordering vinyl panels without manufacturer deductions: Measuring the daylight opening and ordering that exact size is wrong. Every manufacturer has specific cutback dimensions you must apply.
- Skipping the caulk step: Gaps at the top rail and base rail are the main entry points for water and bugs, and they're completely preventable.
- Using drywall screws in concrete or masonry: Use concrete anchors or masonry screws rated for the substrate. Drywall screws will pull out.
- Trying to convert an enclosure to a habitable room without additional permits: Patio enclosures are for outdoor recreational use. Converting to living space (adding heating, insulation, electrical) requires separate permits and code compliance.
The good news is that a basic screened enclosure on an existing covered patio is genuinely one of the more achievable weekend DIY projects for a homeowner with basic tool experience. Get your measurements right, pull the permit, keep your framing plumb and square, seal the perimeter, and you'll end up with a patio you can actually use from spring through fall without being eaten alive or blown out of your chair. If you want to go further with a full build on an open patio or a weatherproofed enclosure with walls and windows, the planning phase is longer but the core approach is the same: measure carefully, check the rules, build square, and seal everything.
FAQ
When I measure for how to enclose a patio, what dimensions should I use, the opening or the overall frame?
Use “daylight opening” for the actual clear space between posts or beams, not the outside frame dimensions. Then check the specific product’s outside-mount or inside-mount sizing method, because some vinyl and track systems require a small deduction to keep panels from rubbing at full extension.
Can I enclose a patio using only fixed panels, with no operable windows or panels?
Yes, but you must keep clear air paths for airflow and emergency egress. If you add fixed panels, avoid covering any bedroom egress window, and plan at least one operable section or door-sized opening that allows evacuation without forcing someone through a sliding jam.
What’s the biggest mistake that causes a screened patio enclosure to still let in bugs?
Check the door hardware type and seal strategy. If you use a screen door, make sure it has a bottom sweep or skirt that contacts the sill, and verify the frame is plumb so the door closes without a persistent gap that defeats bug control.
How do I prevent screen sagging and vinyl doors or panels from binding?
For screen mesh, billowing usually comes from not adding intermediate vertical framing when the bay exceeds the manufacturer’s guidance (often around 4 feet). For vinyl or track systems, binding happens when the tracks are not level or square, so you should test panel travel before permanently fastening.
Do I always need a permit to enclose a patio, even if it’s just screens or vinyl panels?
In most places, yes. Even if your enclosure seems minor, many jurisdictions require a building permit for patio enclosures, and wind-load requirements can increase the design requirements. When in doubt, submit the plan early so you can adjust the frame layout before ordering materials.
Are temporary patio enclosures acceptable if I’m not ready to build a permanent one yet?
You usually cannot rely on zip-tied or curtain-style solutions as a “trial” substitute for a permitted structure. Temporary enclosures can be useful to test layout and sun exposure, but they typically will not pass inspection or hold up in high winds and heavy rain.
What should I do about water runoff when I enclose a patio?
Plan your roofline and drainage first. If your existing roof is absent or low-slope, you may need flashing and gutters so water does not run behind the enclosure or saturate the slab edges and wood posts.
If I want polycarbonate or glass for how to enclose a patio, where do safety glazing rules come into play?
Use the code-required safety glazing guidance, especially near doors and where people could strike large fixed panels. A practical rule is to treat low panels, sidelights, and large fixed glass areas as safety-glazing zones, then choose tempered or laminated products that meet local requirements.
How do I choose anchors and attachment points for how to enclose a patio on a slab versus a deck?
If your patio is on a concrete slab, anchor locations need to be marked and planned before you build, because you cannot easily “reposition” after drilling. If you’re on a wood deck, confirm the ledger and structural connection are solid, and use the correct fasteners for the deck-to-house interface.
What enclosure layout works best for comfort on hot or windy sides of the patio?
For best comfort and usability, you should prioritize one door plus an operable ventilation option in the hottest direction. South and west exposures often need more shade or reduced solar gain, so consider solar screen mesh overhead or adding operable panels on the windward side for cross-ventilation.
Next Articles
Do It Yourself Patio Enclosures: Step by Step Guide
Step-by-step guide to DIY patio enclosures and screen enclosures, from planning and framing to doors, sealing, and upkee

How to Decorate a Long Narrow Patio: Layout Tips
Practical DIY layout and decor tips to widen a long narrow patio using zoning, furniture spacing, lighting, greenery, an

How to Decorate a Rectangular Patio Step by Step
Step-by-step plan to decorate a rectangular patio with smart layout, zones, furniture fit, lighting, plants, and seasona