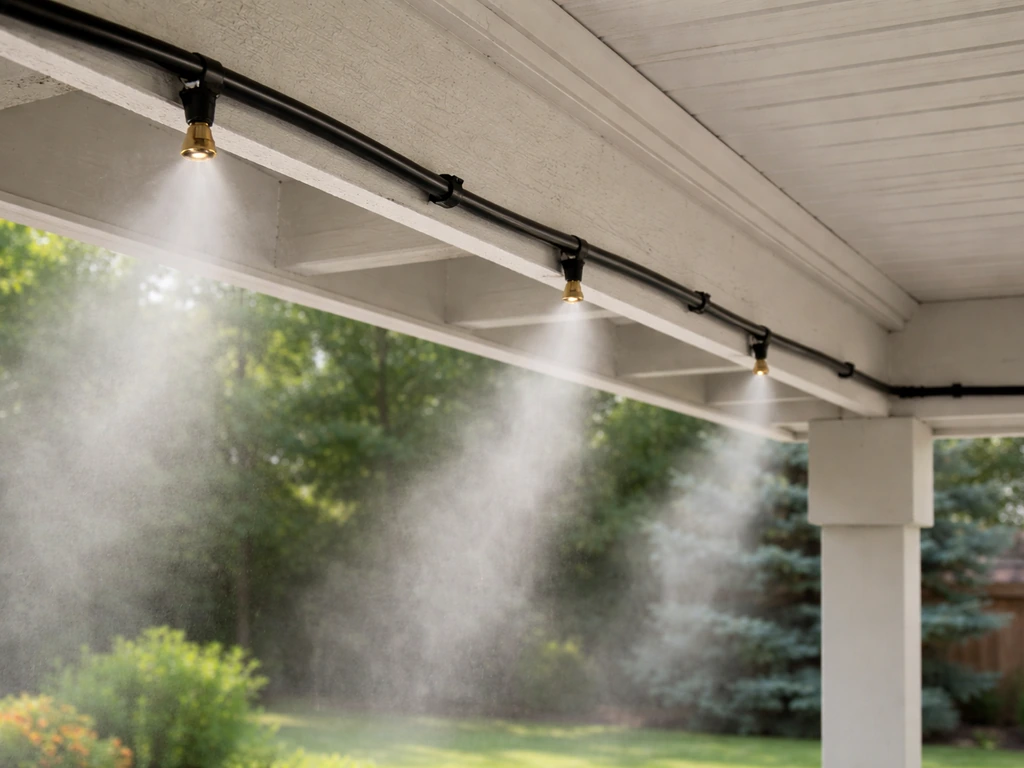
To install misters on a patio, you mount a misting line (either flexible tubing or rigid rail sections) along an overhead structure at 8 to 12 feet high, space nozzles roughly every 2 feet, connect the line to your water supply through a filter and optional pump, then tune pressure and nozzle orientation until you get a fine, evaporating mist rather than a wet spray. The whole job takes a few hours for most patios and costs anywhere from $30 for a basic hose-fed kit to a few hundred dollars for a pump-driven high-pressure system. If you are wondering how to build a patio mister on a budget, the choice between hose-fed and pump-driven parts will guide the rest of your plan.
How to Install Misters on a Patio: Step by Step Guide

Felix Brennan
22 May 2026
Planning your patio misting layout

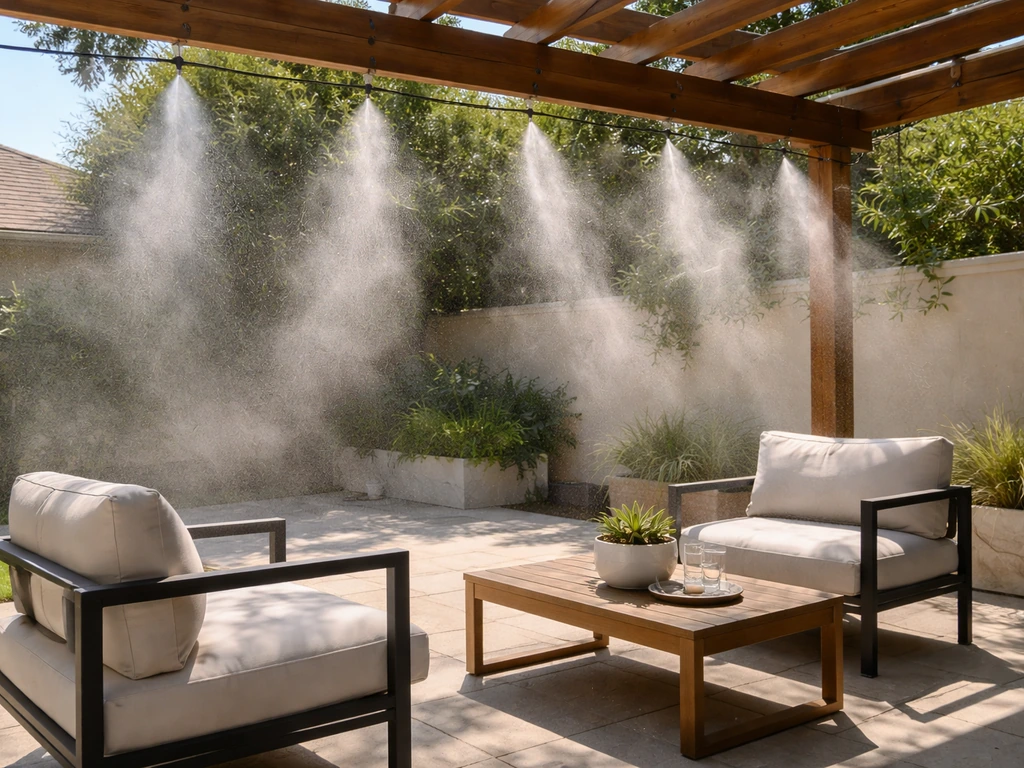
Before you buy a single fitting, sketch your patio and mark where you want the mist to fall. The most common mistake is under-planning coverage, which leaves hot pockets or over-saturates one spot. Height is the first thing to nail down: aim for 8 to 12 feet off the ground. At that height, the fine droplets have enough hang time to evaporate before they reach furniture or people. Going higher than 14 feet usually means the mist dissipates too far above the zone where people actually sit. Going lower than 8 feet means you and your guests get damp.
For nozzle spacing, a reliable starting rule is one nozzle every 2 feet along each line. If your patio is wide enough to need multiple parallel lines, space those lines at least 6 feet apart for a fully open patio. For a roofed patio with open sides (the most common screened or covered setup), use 12 feet between parallel runs. If one or more sides are enclosed, push that spacing to 14 feet so the contained air doesn't become a fog chamber. These numbers matter because too many nozzles in a confined space will saturate rather than cool.
Draw a simple overhead diagram with your patio dimensions, mark the mounting points (porch beam, pergola rafters, fascia board, or screen frame), and count how many nozzle tees you need. Add up the total linear footage of tubing. Having this sketch before you shop saves you at least one return trip to the hardware store.
Choosing your components and water supply
Patio misting systems fall into two camps: low-pressure garden-hose-fed systems and high-pressure pump-driven systems. Each has a legitimate use case, and choosing the wrong one is the main reason people end up with a damp patio instead of a cool one.
| System Type | Pressure Range | Droplet Size | Best For | Typical Cost |
|---|---|---|---|---|
| Garden hose / low-pressure | 40–80 PSI (household supply) | Larger droplets, some misting | Humid climates, screened patios, budget builds | $20–$60 for a kit |
| Mid-pressure with regulator | 160–250 PSI | Finer mist, partial evaporation | Semi-enclosed patios, moderate heat | $80–$200 |
| High-pressure pump (1000 PSI) | Up to 1000 PSI | Very fine droplets, full evaporation | Hot dry climates, open patios, serious cooling | $200–$600+ |
For most homeowners tackling a screened or covered patio as a DIY upgrade, a mid-pressure or basic high-pressure kit hits the sweet spot. Standard 1/2-inch drip irrigation tubing works fine for low and mid-pressure systems. High-pressure systems require purpose-built high-pressure tubing and compression fittings rated for the load. Do not mix low-pressure fittings into a high-pressure setup.
Your water supply can run from a garden hose bib or a dedicated 1/2-inch schedule 40 pipe line. If you are using a pump, position it close to both the water spigot and a 120V GFCI outlet. High-pressure pumps typically draw around 14 amps, so a dedicated circuit is worth considering if you are running other outdoor equipment on the same breaker.
Nozzle selection ties directly to mounting height and climate. Finer orifice nozzles (smaller opening, finer droplets, measured in microns) evaporate completely in the air, which is what actually cools. Larger orifice nozzles produce coarser droplets better suited to situations where complete evaporation is not the goal. For overhead patio cooling, lean toward finer droplet nozzles, and if your mounting height is on the taller end of the range, a slightly larger orifice helps droplets travel downward far enough before evaporating.
Tools and materials checklist
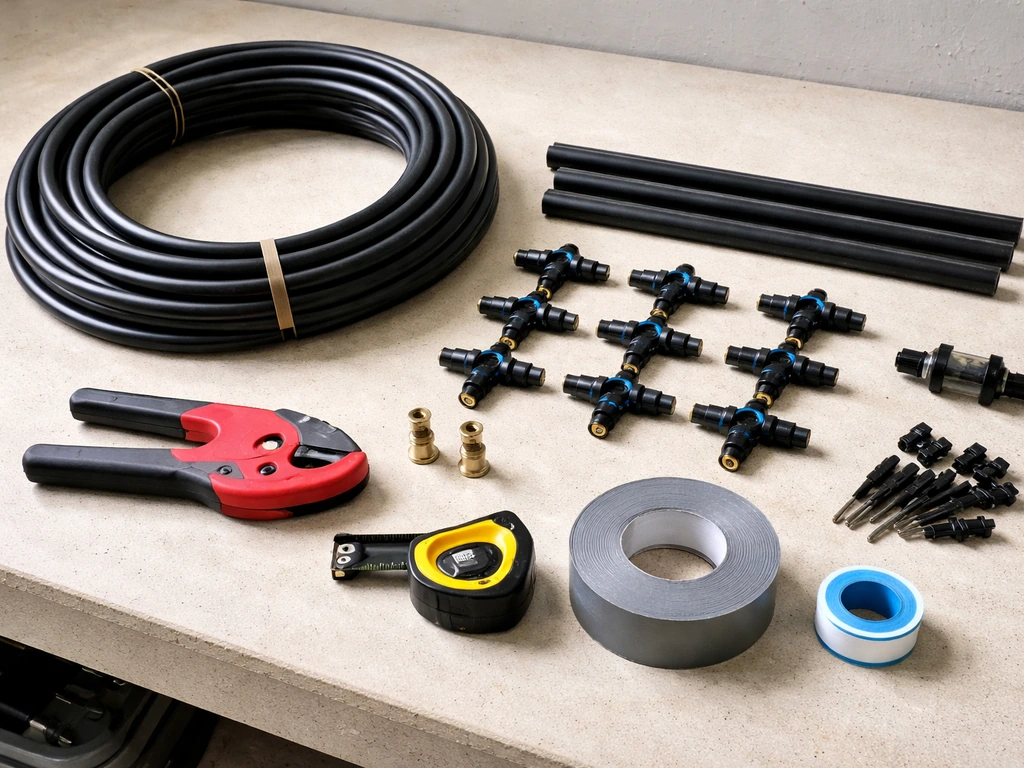
- Misting tubing (1/2-inch drip irrigation tubing for low/mid-pressure, or rated high-pressure tubing for pump systems)
- Misting nozzle tee fittings (one per nozzle location, at 2-ft spacing)
- Misting nozzles (matched to your pressure and orifice size needs)
- End cap for the final tubing end
- Compression fittings and couplers (rated for your system pressure)
- Inline filter/strainer (stainless mesh recommended for high-pressure systems)
- Pressure regulator (if running a pump system or if household pressure exceeds 80 PSI)
- Pump and pressure gauge (for high-pressure setups; check pump specs against your outlet circuit)
- Solenoid valve and compatible timer (optional but highly recommended for automated control)
- Tubing cutter or sharp utility knife
- Teflon tape (for threaded fittings only, not compression fittings)
- Stainless steel hose clamps or UV-resistant zip ties
- Mounting brackets or misting rail hooks
- Drill with masonry or wood bit (matching your mounting surface)
- Stainless steel screws or lag bolts appropriate for the mounting material
- Tape measure and pencil
- Bucket and towels for testing
Step-by-step installation: mounting, running lines, and connecting fittings
Step 1: Mark and mount your line path
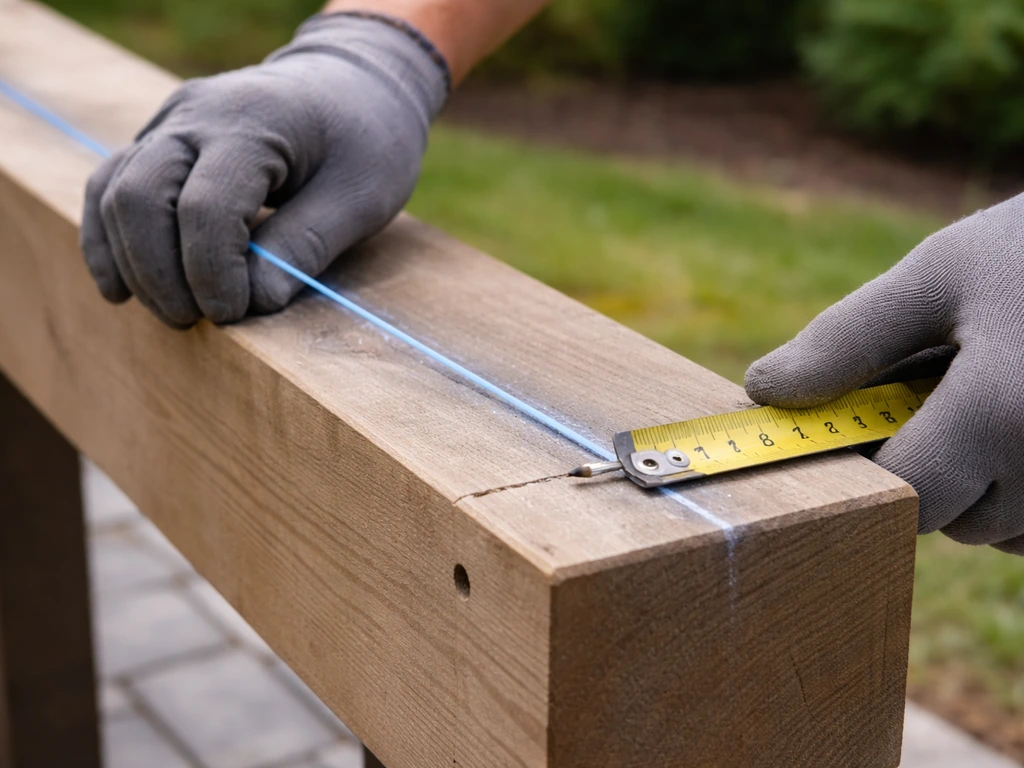
Start at the water source end and mark your mounting points along the beam, fascia, or frame at your chosen height (target 10 to 12 feet). Use a chalk line or tape measure to keep the run level. Drill pilot holes and install mounting brackets or hooks at roughly 2-foot intervals, or wherever structural members land. On a screened patio frame, you can often clip the tubing directly to the top frame rail with UV-resistant zip ties or purpose-made misting line clips.
Step 2: Cut and run the tubing
Always cut tubing square and perpendicular, never at an angle. An angled cut is one of the most common causes of leaks at tee fittings because the fitting cannot seat properly against the tube wall. Use a dedicated tubing cutter if you have one; a sharp utility knife works but requires extra care. Roll the tubing out along your marked run and seat it into the mounting brackets or clips as you go. Leave a few extra inches at the water source end so you have room to work with fittings.
Step 3: Install nozzle tees
At each 2-foot nozzle location, cut the tubing and insert a nozzle tee fitting. Compression-style tees push and lock onto the tubing ends without tools. For high-pressure systems, make sure you are using compression fittings rated for 1000 PSI and do not add Teflon tape or pipe dope to the compression sleeve threads. The seal on a compression fitting is made by the ferrule squeezing against the tubing and the fitting body, and adding tape or sealant can actually prevent that mechanical seal from forming correctly. Save Teflon tape for any NPT threaded connections such as where the line connects to the filter, regulator, or pump inlet, and use a double wrap on those threaded joints.
Step 4: Attach the filter and water supply connection
Install the inline filter between your water supply and the misting line. If you are DIY wiring your patio misting system, choose the right filter and placement first so your mister output stays consistent Install the inline filter. Thread it onto the supply fitting with a double wrap of Teflon tape and hand-tighten plus a quarter turn with pliers.
For hose-fed systems, this is typically a 3/4-inch to 1/2-inch reducing fitting at the bib. For pump systems, attach the filter before the pump inlet, then run the outlet line from the pump to the misting tubing. If your kit includes a pressure gauge, attach it to the pump outlet before you increase pressure for the first time so you can monitor the system as you dial it in.
Step 5: Cap the end and seat all nozzles
Thread an end cap onto the final tee or tubing end (use Teflon tape here). Then thread each misting nozzle into its tee by hand until snug. Most nozzles are brass with a 10/24 thread and tighten with a small wrench or by hand. Do not overtighten or you will crack the brass seat. For now, leave the nozzles pointed straight down. You will aim them during tuning.
Routing through a screened or enclosed patio structure
If you are working on an enclosed or screened patio, you will likely need to route the supply line through or along the frame to reach the hose bib. Keep the tubing tight against the frame using clips, and use a rubber grommet if the line passes through a hole in any panel or post so it does not abrade over time. If you are extending an existing system or adding a second run for wider coverage, you can tee off the main supply line with a standard compression tee before it enters the patio enclosure. This is exactly the kind of project that DIY misting system builders and patio misting system builders tend to address when working with larger or more enclosed spaces.
Tuning pressure, nozzles, and mist coverage
This step is where most installations either succeed or disappoint. Turn on the water slowly and walk the line looking for drips at fittings before you focus on the mist itself. Once the line is holding pressure with no visible leaks, watch how the mist behaves. Good mist should look like a light fog and should largely disappear before it reaches sitting height.
If you want the best results, follow a do it yourself patio misters approach and tune everything from pressure to nozzle aim before you call it finished. If droplets are visibly falling and landing on surfaces, you have one of three problems: pressure is too low, nozzle orifices are too large, or the mounting height is too low.
For pump systems, increase pressure gradually while watching the gauge. Do not exceed the system's rated maximum (1000 PSI for most high-pressure pumps). For hose-fed systems, a pressure regulator set to 40 to 60 PSI gives a consistent baseline. Adjust from there based on what you see.
Now adjust nozzle angle. Nozzles should be aimed toward the center of the space, not outward toward the edges. Pointing them away from where people sit dramatically reduces cooling effect because most of the mist evaporates before it reaches the occupied zone. A slight inward angle of 10 to 15 degrees from vertical works well for most overhead installations. If one zone is staying too wet while another is too dry, rotate the affected nozzles to redirect coverage and also check whether any two nozzles are aiming directly at the same spot.
Electrical, filtration, and safety checks
If your system includes a pump, a solenoid valve, or a timer, connect these to a 120V GFCI-protected outlet. This is not optional. Outdoor pump systems run near water, and a GFCI outlet is the protection that prevents a serious electrical hazard. High-pressure pumps typically draw around 14 amps, so check that the circuit can handle the load without competing with other high-draw appliances. If your outdoor outlet is already running a patio heater or power tools, put the misting pump on its own circuit.
A solenoid valve wired to a timer is the most convenient upgrade you can add to any misting system. It lets the system run automatically during peak heat hours and shut off at night without you touching anything. The solenoid (often listed as a component in pump kit manuals) sits in the water line and opens or closes based on a 24V signal from the timer. Wire it to a low-voltage timer or a smart plug with scheduling if you want simple automation without extra low-voltage wiring.
On the filtration side, the inline filter is doing real work and needs attention. Plan to replace or clean the filter mesh every 3 to 6 months under normal water conditions, or sooner if you have hard water, sediment, or well water. A clogged filter starves the nozzles of flow and causes uneven misting across the line. Stainless mesh filters can usually be rinsed and reused. Sediment cartridge filters need replacement.
Also do a quick water management check before you consider the job done. Make sure the misting line is positioned so that any drip from fittings or nozzles drains away from the patio floor, electrical boxes, and wood structural members. Water pooling near a post base or dripping onto a wood beam will cause rot over time. Adjust bracket positions if needed to keep the line slightly tilted toward a drainage direction.
Testing, maintenance, and getting the system through winter
Testing for leaks and coverage
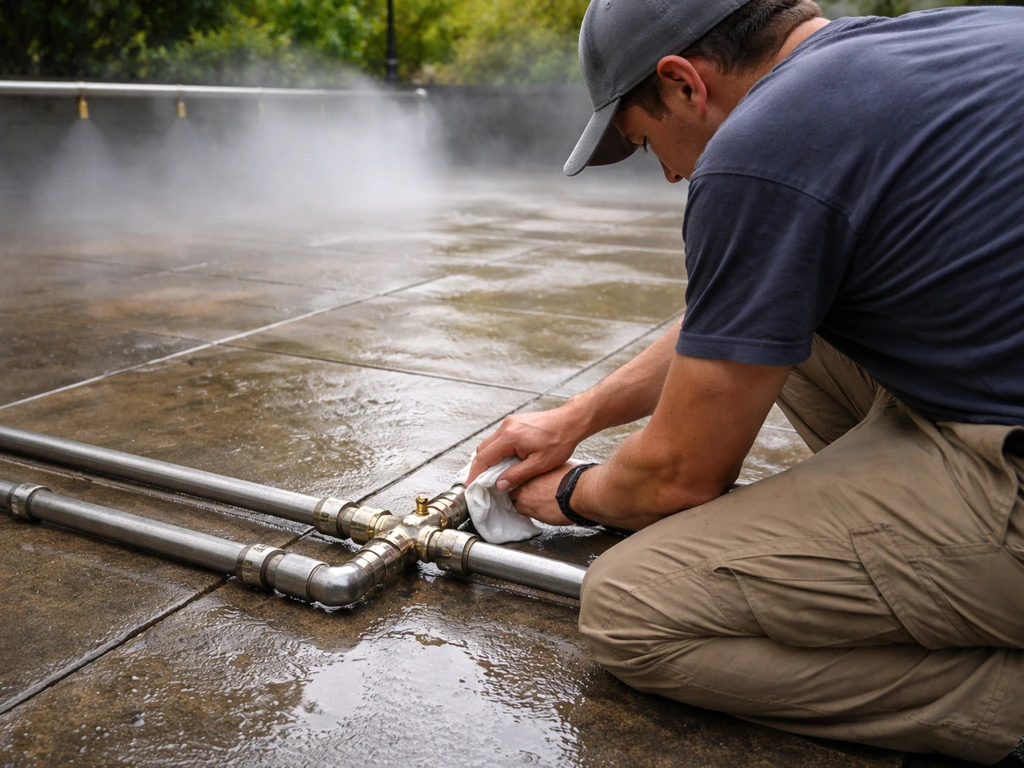
Run the system for a full 10 minutes and then walk every fitting. Look for drips, weeping at tee connections, and spray from any spot other than a nozzle orifice. Wipe down fittings with a dry cloth and watch for moisture returning. Any fitting that weeps needs to be re-seated. For compression fittings, that usually means disconnecting, inspecting the tubing end for squareness, and reconnecting. For threaded fittings, add another layer of Teflon tape and retighten.
For coverage, walk the patio during operation and note any areas where the mist is not reaching, feels too wet, or is blowing away. Make adjustments to nozzle aim and, if needed, add a nozzle tee to fill a gap. An organized test is more useful than guessing: split the patio into zones mentally and check each one before moving on.
Ongoing maintenance
Nozzles are the part most likely to cause problems over a season. Mineral deposits and hard water scale clog the tiny orifice and change the spray pattern. Clean nozzles by removing them from the tee and scrubbing the tip with an old toothbrush or fine wire brush. For stubborn scale, soak the nozzle in white vinegar for 30 minutes before scrubbing. Inspect nozzles at least once mid-season and replace any that are cracked or where the orifice has visibly enlarged from wear.
Winterizing so nothing cracks
If you live anywhere that sees freezing temperatures, winterize the system before the first frost. Water left in lines and fittings will expand when it freezes and crack tubing, split fittings, and potentially damage a pump. The basic process is: shut off the water supply, disconnect the supply line from the source, drain as much water as you can by gravity, then use a portable air compressor to blow out the remaining water from the outlet end of the line.
Repeat the blow-out cycle at least twice to clear water from any low spots. For pump systems, drain the inlet tubing going to and from the filter, then disconnect the outlet line from the pump and blow that section out separately. Store the pump indoors if temperatures will drop below freezing.
In milder climates where light frosts are rare, you can sometimes leave the system installed but drain it fully and remove the nozzles for indoor storage. Either way, do not skip the blow-out step if you are in a true freeze zone. A $5 investment in compressor time is much better than replacing a set of fittings and tubing every spring.
At the start of each new season, reinstall or re-check all nozzles, replace the filter if it has been in service for more than six months, flush the line before first use, and check all mounting brackets for corrosion or loosening. A pre-season check takes about 20 minutes and means your system is working perfectly by the first hot day rather than needing repairs when you actually want to use it.
FAQ
Can I mix tubing and fittings from different misting kits (low-pressure and high-pressure)?
Yes, but only if the misters kit is designed for that pressure level. If you try to use low-pressure tubing and compression tees on a high-pressure setup, you risk leaks or weakened connections. Confirm the rated PSI for every component (tubing, tees, fittings, nozzles) before mixing brands or pressure classes.
What should I do if the mist blows away instead of cooling the seating area?
Instead of guessing, do a quick drift check by aiming a few test nozzles slightly inward and running the system while you observe mist at sitting height. If mist is being blown away, adjust nozzle angle first (10 to 15 degrees inward) and then consider adding wind shielding or relocating a line, because pressure increases often make wetness worse without improving coverage.
How long should I run patio misters each time (and how do I avoid over-wetting)?
Most DIY systems should not be run continuously for long stretches because constant mist can over-wet wood, cushions, and nearby walls. If you use a timer or smart plug, start with short cycles (for example 5 to 10 minutes) and adjust based on humidity and how wet the patio floor gets, so you get cooling without pooling.
One section of my patio misters is weak. How do I troubleshoot before I re-install anything?
Check the system for partial clogs first: a clogged nozzle or dirty inline filter usually causes weak misting in only sections, not across the entire line. Replace or clean the inline filter, then remove and inspect the nozzles that are near the underperforming area.
How can I prevent drips from accumulating on posts, beams, or furniture?
Use the highest mount points and keep lines as level as possible, then add small intentional drainage at the end. If you see recurring drips, re-seat the specific connection, and ensure the line is routed so condensation and fitment weeping drain away from electrical boxes and wood posts.
What’s the best way to fix a hot, dry pocket next to an area that gets too wet?
Aim the nozzles inward and avoid aiming any nozzle directly at a specific furniture edge or walking path. If you still get a wet spot, rotate only the affected nozzles and, if needed, add a targeted tee in the dry zone rather than changing every nozzle direction.
Why does my mister output change when other sprinklers or hoses are running?
If your water source has low flow or inconsistent pressure, hose-fed systems often produce uneven mist. Use the system’s suggested baseline pressure (40 to 60 PSI with a regulator for many hose-fed setups) and consider a pump kit if the source cannot hold steady pressure when other outdoor taps are running.
Are there special considerations for installing misters under a roof or inside a screened patio?
For enclosed or screened patios, plan the line routing so the mist supply hose is protected from abrasion (use clips and grommets) and so overspray does not accumulate on the screen frame. Also confirm the nozzle orientation does not aim outward toward the open sides, because enclosed setups can trap humidity and increase dampness.
How should I expand an existing patio mister system without redesigning everything?
Yes. If you ever need to extend coverage or add a second parallel line, tee off the main feed before it enters the enclosure, and keep spacing rules consistent for that patio type. After extension, repeat the full tuning process (pressure, nozzle aim, and leak check), since additional length can reduce pressure at the far end.
How do I find and fix leaks at tee fittings or threaded connections efficiently?
If water is leaking only during pressurization, start at the leak source closest to the water supply and work outward. For compression fittings, disconnect and re-cut the tubing square, then reconnect. For threaded joints (like filter and regulator connections), reapply Teflon tape correctly and retighten, because under-taped threads often seep.
What’s the safest way to clean clogged nozzles if I have hard water?
For nozzle cleaning, avoid forcing debris through the orifice. Remove the nozzle, scrub the tip, and if you use vinegar for scale, rinse thoroughly and let it dry before reinstalling so you do not leave residue that can alter spray pattern later.
What are the key steps to winterize a patio mister if I get freezing temperatures?
In freezing regions, winterize before the first frost, but also protect the pump and any electrical components from moisture when draining. Store the pump indoors if temperatures drop below freezing, and blow out remaining water lines twice, especially from low spots where water can collect.
Next Articles
Do It Yourself Patio Misters: A Build-Ready Guide
Build-ready guide to DIY patio misting: pick system, place nozzles, install plumbing, filter and maintain for safe cooli

How to Decorate a Long Narrow Patio: Layout Tips
Practical DIY layout and decor tips to widen a long narrow patio using zoning, furniture spacing, lighting, greenery, an

How to Decorate a Rectangular Patio Step by Step
Step-by-step plan to decorate a rectangular patio with smart layout, zones, furniture fit, lighting, plants, and seasona