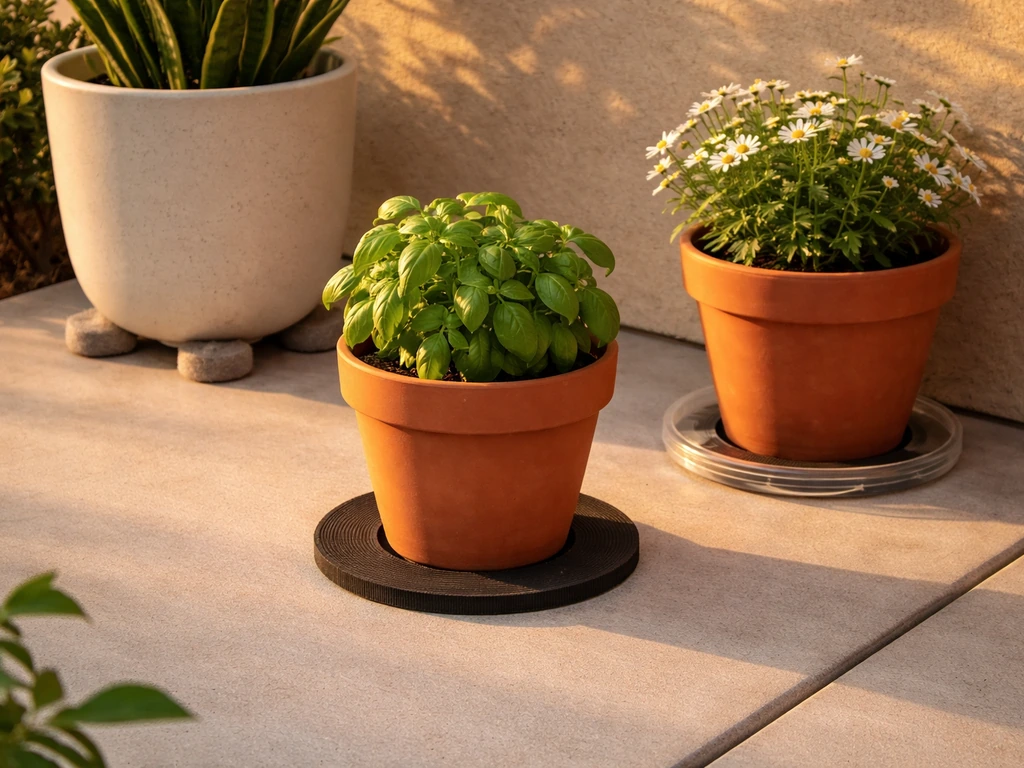
The easiest way to protect your patio from plant pots is to never let a pot sit directly on the surface. If rain is regularly hitting your patio, focus on drainage and keep pots elevated so standing water cannot collect on the surface. Get the base off the ground with pot feet, rubber risers, or a breathable mat, and put a tray or saucer underneath to catch drainage. That one change stops most of the staining, rust rings, scratches, and algae problems before they start. Everything else in this guide builds on that basic move and gets more specific depending on your patio material and how serious you want to get.
How to Protect Patio From Plant Pots: DIY Fixes

Felix Brennan
12 May 2026
What plant pots actually do to your patio (and why it keeps happening)
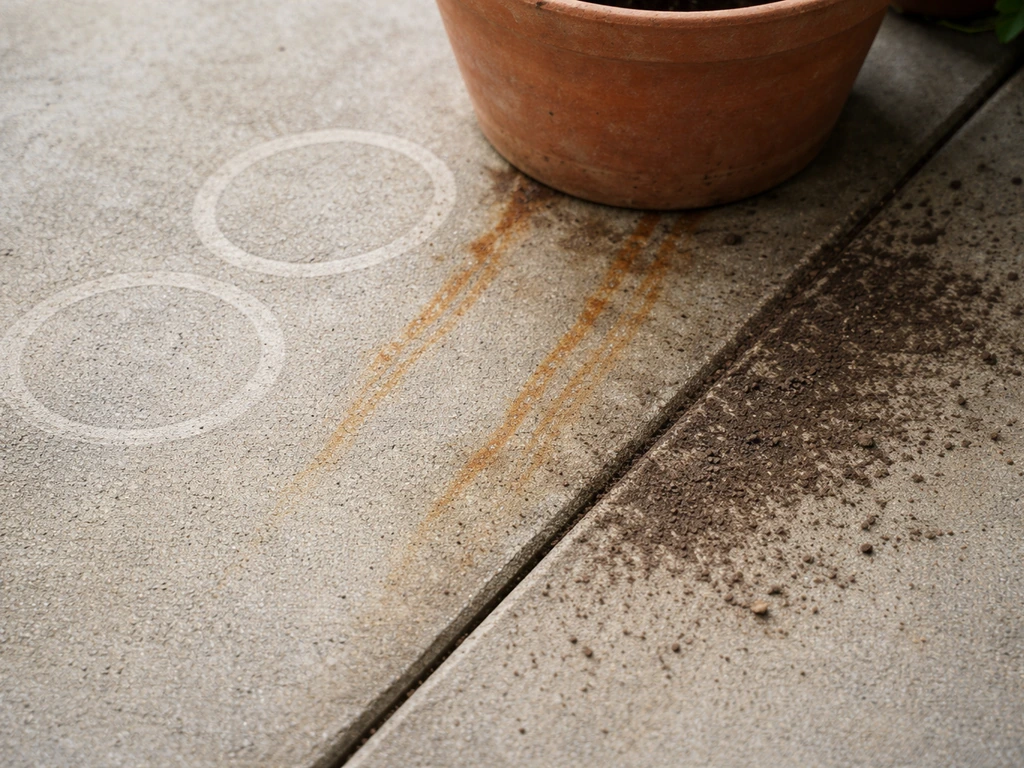
Before fixing the problem, it helps to know exactly what you're dealing with. Pot damage on patios usually falls into four categories, and most people are seeing at least two of them at once.
- Round water stains and mineral rings: These show up where a pool of water sits under or around the pot base and evaporates slowly. The minerals and organic residue in that water concentrate at the edge as it dries, leaving a distinct outline that gets darker with each wet/dry cycle.
- Rust spots: Orange or reddish-brown marks usually mean you have metal pot feet or a metal pot base making contact with your surface. When moisture hits iron or steel, it oxidizes and transfers that rust directly to concrete, stone, or tile.
- White powdery haze (efflorescence): This one looks like someone dusted your patio with chalk. Water moving through porous masonry or concrete carries soluble salts to the surface. When the moisture evaporates, those salts crystallize and leave behind a powdery white deposit. Trapped drainage under a pot accelerates this badly.
- Scratches, scuffs, and abrasion: Dragging a heavy pot even a few inches leaves marks. Gritty soil or sand caught under the base acts like sandpaper. Rough pot bases on tile or polished stone are especially destructive.
- Algae and mold buildup: Dark green or black patches under pots are almost always algae or mold fed by the constant moisture. They don't just look bad — they make the surface slippery and can be tough to fully remove once established.
The common thread is moisture sitting in contact with your patio surface for too long. Fix the moisture situation and you fix most of these problems simultaneously.
Pick the right protection layer under and around your pots
There's no single product that works for every situation, but there are a few reliable options that cover most setups. Here's how to think about each one.
Pot feet and risers
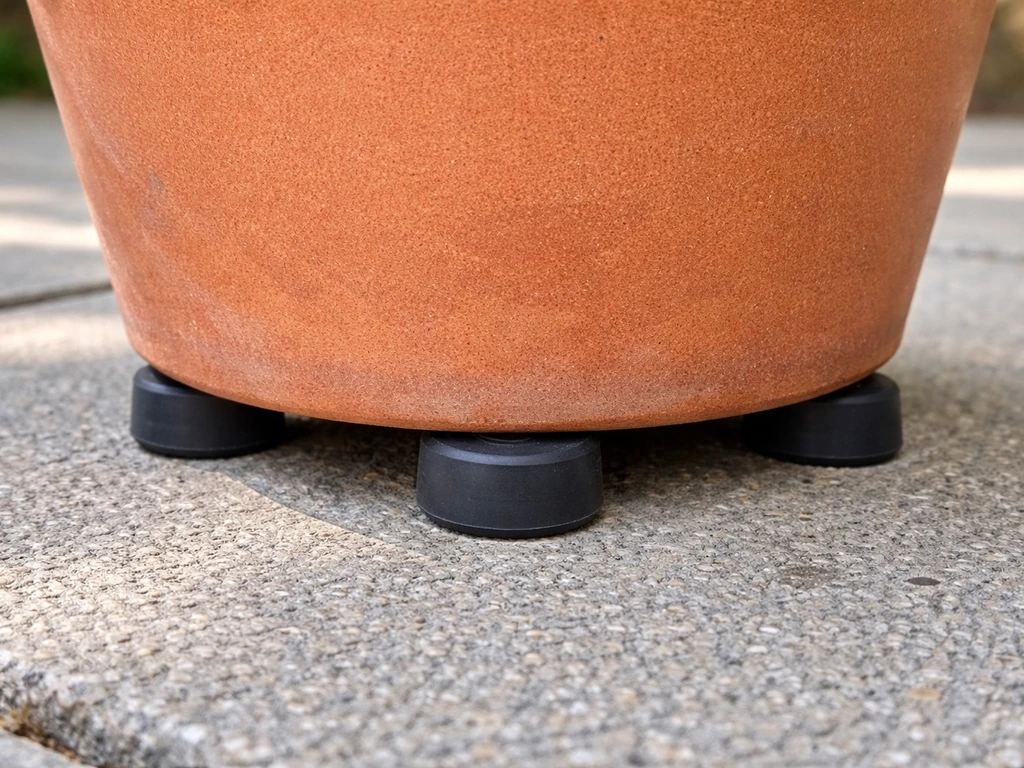
Pot feet are small, non-porous lifters, usually ceramic, rubber, or plastic, that sit under your container and raise it off the surface by about half an inch to an inch. That gap lets air circulate underneath, allows water to drain away instead of pooling, and stops direct surface-to-pot contact entirely. This is the single most effective thing you can do. Use at least three per pot for stability. Avoid metal pot feet unless they're powder-coated or stainless, because plain iron or galvanized feet will rust and make your staining problem worse.
Rubber and silicone pot mats
Rubber plant mats with drainage ridges or holes serve a slightly different purpose than pot feet. They cushion the surface from abrasion and scratching, and the raised texture keeps the pot base from sitting flush against your patio. Look for mats with drainage channels built in rather than a solid flat base, a solid rubber mat with no drainage just creates a new moisture trap. These work especially well on wood and composite decking where you want scratch protection alongside moisture management.
Saucers and drip trays
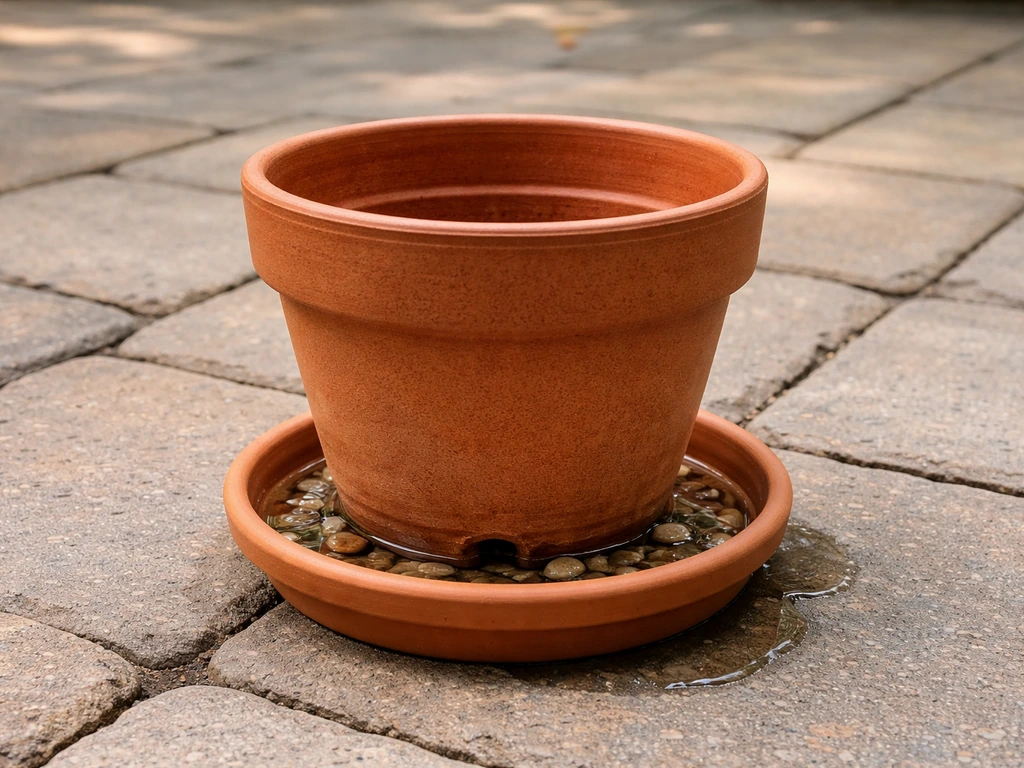
A saucer catches overflow from drainage holes and prevents that mineral-loaded water from hitting your patio at all. The key detail here is to blank" rel="noopener noreferrer">not let water sit in the saucer permanently. blank" rel="noopener noreferrer">Empty it after heavy rain or watering. A saucer that stays half-full for days is just a slower version of the original problem. For pots you water frequently, use a saucer in combination with pot feet so there's airflow even when the saucer has some water in it.
Drip liners and breathable under-pot mats
For larger containers or planters that are too heavy to lift onto pot feet easily, a breathable woven mat (similar to landscape fabric) cut to size under the base can reduce direct mineral transfer. These work best as a supplement to other methods, not as a standalone solution. They let some moisture pass through while reducing direct contact. Avoid non-breathable plastic sheeting directly under pots, it traps water and makes efflorescence significantly worse.
Managing moisture and drainage so water doesn't wreck your surface
Elevation alone won't fully protect your patio if the drainage situation is a mess. Here's how to make sure water is moving away from your surface instead of soaking into it.
- Always use pots with drainage holes. Pots without drainage holes turn into water reservoirs that eventually overflow around the base. If you have a decorative pot you love that has no hole, use it as an outer sleeve and put a drilled nursery pot inside.
- Position pots so water drains toward the patio edge or a drain point, not toward walls, grout lines, or seams. Even a very slight natural slope helps.
- Keep pot bases away from grout lines, expansion joints, and surface seams. These are the most porous and vulnerable points on most patios, and water funnels directly into them.
- Empty saucers after rain or watering. Don't let standing water sit under or around a pot for more than a day or two.
- In enclosed patios or screened patio spaces where rain doesn't wash things clean naturally, wipe down the area under pots more frequently since there's less natural rinsing action.
- During periods of heavy rainfall, consider moving pots temporarily or adding overflow drainage channels if you're finding water accumulates around pot clusters.
Efflorescence, that white powdery haze, is almost entirely a moisture problem. Salts can only migrate to the surface when water is moving through the material. Eliminate the standing water source and you cut off the efflorescence cycle. Breathable sealers (more on those below) help too, but drainage management has to come first.
Stop scratches, scuffs, and abrasion from pot bases
Heavy pots on hard patio surfaces are a real scratch risk, especially terracotta, concrete pots, and anything with a rough unglazed base. A few simple steps eliminate most of this damage.
- Felt pads work well for lighter pots on smooth tile, polished stone, or glazed surfaces. Stick them to the pot base rather than the patio surface so they stay in place when you move the pot. Check them every season — cheap adhesive felt compresses, peels, and can actually trap grit underneath, which then acts as an abrasive.
- Rubber pads or silicone bumpers are more durable than felt for heavy pots and for outdoor use where moisture degrades adhesives. Rubber handles freeze-thaw cycles better too.
- Lift pots to move them; don't drag. Put down a temporary piece of scrap carpet or a folded moving blanket under the pot before sliding it even a short distance.
- Clear loose sand or grit from under pot areas before setting pots back down. Coarse particles caught under a heavy container will grind into most surfaces under the weight.
- For very large planters or raised beds that don't move often, a permanent rubber mat underneath does double duty as scratch protection and moisture barrier.
What works best on each type of patio surface
Different patio materials have different vulnerabilities, so it's worth tailoring your approach. Here's a quick breakdown of what to prioritize on each surface type.
| Patio Surface | Main Risks from Pots | Best Protection Approach | Sealer Recommendation |
|---|---|---|---|
| Concrete (plain or brushed) | Mineral stains, efflorescence, rust, algae | Pot feet + saucer, keep away from cracks and control joints | Breathable penetrating silane/siloxane sealer |
| Stamped concrete | Staining and color fading, efflorescence trapping in texture | Pot feet essential, avoid saucers that overflow on textured surface | Breathable acrylic sealer rated for stamped concrete |
| Pavers (concrete or clay) | Efflorescence in joints, algae in gaps, staining | Pot feet, keep pots off joint lines, improve joint drainage | Breathable paver sealer; avoid film-forming sealers that trap salts |
| Natural stone (flagstone, slate) | Mineral etching, rust, staining from tannins and fertilizer | Pot feet plus saucer, no metal feet, use rubber pads for scratch risk | Penetrating stone sealer; test in hidden area first |
| Tile (ceramic or porcelain) | Grout staining, efflorescence in grout, scratching on glazed surface | Felt or rubber pads for scratch protection, keep off grout lines | Penetrating grout sealer; avoid surface film sealers on tile |
| Wood or composite decking | Moisture rot, mold, staining from tannins, scratching | Rubber drainage mat essential, lift off surface, empty saucers religiously | Wood: deck stain/sealer. Composite: usually no sealer needed, focus on drainage |
A note on sealers: breathable (vapor-permitting) sealers are almost always the better choice for patio surfaces under plant pots. Film-forming sealers that create a solid top coat can trap moisture and actually make efflorescence worse if water is getting underneath from pot drainage. Penetrating silane/siloxane sealers let moisture vapor escape while still repelling water and blocking salt migration from above.
Already have stains or damage? Here's how to fix it first
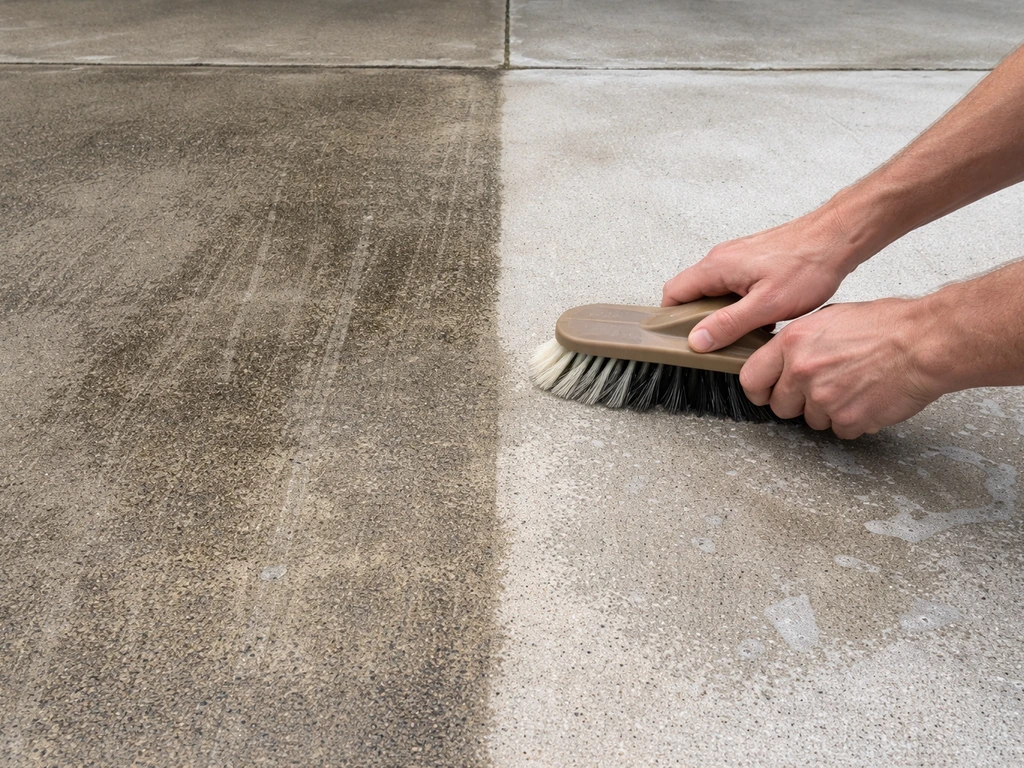
If you're reading this after the damage has already happened, don't skip straight to sealing over it. Sealing stained or contaminated concrete locks the problem in. Clean the surface properly first, let it dry completely, and then protect it going forward.
Mineral and water stains
For general mineral staining and hard water rings, start with a pH-neutral outdoor cleaner and a stiff brush. For tougher calcium or mineral deposits, a diluted white vinegar solution (roughly 1 part vinegar to 3 parts water) applied and left for 10 to 15 minutes before scrubbing works on most concrete and pavers. Avoid acid-based cleaners on natural stone, they etch the surface.
Efflorescence (white powdery haze)
Dry-brush loose efflorescence off first with a stiff natural-bristle brush. For heavier deposits, a dilute muriatic acid wash works on concrete and brick (follow all safety precautions: protective eyewear, gloves, work outdoors). After removing the efflorescence, rinse thoroughly and let the surface dry for at least 48 hours before applying any sealer. Applying sealer too soon traps residual moisture and salts and causes the problem to reappear.
Rust stains
Rust stains from metal pot feet respond well to oxalic acid-based cleaners, which are widely available at hardware stores. Apply the product as a paste or poultice, let it dwell as directed (usually 15 to 30 minutes), then scrub and rinse. For stubborn rust staining on concrete, you may need two applications. Once cleaned, replace any plain iron or steel pot feet immediately with powder-coated, ceramic, or stainless alternatives.
Algae and mold
Oxygen bleach (sodium percarbonate) is the most patio-friendly option here. It removes green, red, and black algae and mold without bleaching out color or harming nearby plants the way chlorine bleach can. Mix per package directions, apply to the damp surface, let it work for 15 to 20 minutes, scrub, and rinse. Always rinse any runoff away from lawn areas and planters you want to keep. Products like Simple Green OxySolve are specifically formulated for this kind of outdoor surface cleaning.
Sealing after cleaning
Once your surface is clean and fully dry, a penetrating breathable sealer protects against future staining and makes the surface much easier to clean. For concrete, an acrylic sealer rated as breathable and UV-resistant is a solid all-around choice. Apply only when temperatures are above 50°F and the surface has been dry for at least 24 to 48 hours. Allow the sealer to cure before putting pots back, most penetrating sealers reach light foot traffic readiness in 4 to 6 hours and full cure within 24 to 48 hours. If you're switching sealer brands or types, check compatibility first and remove old sealer if recommended.
Smart placement and maintenance to stay ahead of problems
The protection setup you install today only stays effective if you keep up with it. Here's what a simple maintenance routine looks like in practice.
Placement rules that prevent recurring damage
- Keep pots at least 2 to 3 inches away from walls, posts, and fencing to allow airflow and prevent moisture from concentrating at the junction.
- Never place pots directly over expansion joints, grout lines, or seams. Water draining from a pot sitting over a joint goes straight into the joint and accelerates cracking and efflorescence.
- Group pots on a dedicated mat or tray system rather than scattering them across the patio floor with no protection. This makes maintenance easier and contains the moisture footprint.
- Rotate pot positions every few weeks in summer to let the patio surface dry out completely beneath each pot. This interrupts algae and mold growth cycles.
- In a screened or enclosed patio, remember that surfaces don't get the natural rain-rinsing that open patios do, so mineral and biological buildup under pots accumulates faster. Check under pots more often.
Seasonal maintenance checklist
- Spring: Move all pots, sweep and clean the surface underneath, inspect for new staining or efflorescence, clean problem spots, and check that pot feet and mats are still in good condition.
- Summer: Empty saucers after watering and after rainstorms. Check felt or rubber pads for compression or peeling every month or two.
- Fall: Before leaving pots in place over winter (in mild climates) or bringing them inside, clean the whole patio surface and apply a fresh coat of breathable sealer if the last application was more than 1 to 2 years ago.
- Winter (cold climates): Remove pots or elevate them on sturdy risers. Freeze-thaw cycles are brutal on trapped moisture under a pot base — water expands when it freezes and can crack the surface below.
Protecting your patio from plant pots really does come down to a few consistent habits: lift pots off the surface, manage drainage, and clean up the area underneath regularly. If you have a broader patio protection plan in mind, guarding against rain, weathering, or seasonal exposure more generally, the same foundation of breathable sealers and good drainage applies across the board. For hurricane season, the same foundation of lifting the screen patio off standing water and managing drainage helps reduce damage and staining during heavy storms how to protect screen patio from hurricane. Getting the pot protection right is one of the most satisfying small upgrades you can make because you see the results immediately, and the patio stays looking sharp season after season with minimal ongoing effort.
FAQ
Do I really need pot feet under every pot, even small ones?
Yes, use lifters under every pot that sits on the patio, including small planters. Even a light pot can create a permanent moisture ring, especially after watering. A simple rule is to keep the base off the surface and ensure air can circulate underneath, three or more feet for stability (or a mat with built-in drainage).
What should I do if my saucer fills up after watering or rain?
Empty the saucer promptly after heavy rain or frequent watering, do not leave it half-full for days. If you use a saucer for overflow, combine it with pot feet so water is not trapped against the patio while the pot drains.
Can I use gravel, bricks, or wood scraps as a spacer under pots?
Avoid makeshift spacers like gravel or stacked pieces, they can rock, scrape, and create sharp contact points that increase scratching. If you need extra lift, use purpose-made pot feet or a breathable woven mat, then check that the pot is stable and level.
Will a solid rubber mat without drainage solve staining problems?
Not reliably. A solid mat can become a moisture trap because it cushions but does not provide a drainage pathway. Prefer a rubber mat with drainage ridges or holes, or use pot feet plus a saucer to keep airflow and prevent pooling.
Is it better to seal the patio first or clean the stains first?
Clean first. Sealing over stained, contaminated, or mineral-coated surfaces can lock the problem in and make it harder to remove later. After cleaning, let the surface dry completely before applying a breathable, vapor-permitting sealer.
How long should I wait before putting pots back after sealing?
Do not rush it. Penetrating breathable sealers typically need about 4 to 6 hours for light foot traffic and 24 to 48 hours for full cure. Wait at least that full cure window, then reintroduce pots on feet or mats so you keep moisture management working.
What if my patio is natural stone or pavers, can I use vinegar or acid cleaners?
Be careful. Vinegar and other acid cleaners can etch or damage natural stone. Use pH-neutral cleaners for stone, and avoid acid-based treatments unless you confirm the specific product is safe for that material and you follow the correct dilution and dwell time.
How do I handle rust stains if I already have plain metal pot feet?
Remove and replace them after you clean. Plain iron or galvanized feet will keep rusting and can worsen staining. Use an oxalic acid-based cleaner for rust, then switch to powder-coated, ceramic, or stainless pot feet so the problem does not return.
Is oxygen bleach safe to use around plants, and how should I apply it?
Oxygen bleach (sodium percarbonate) is generally safer for plant-safe outdoor cleaning than chlorine bleach, but you should still rinse and manage runoff. Apply to a damp surface, let it dwell 15 to 20 minutes, scrub gently, then rinse so runoff drains away from lawns and planters you want to protect.
Why do I keep getting algae or mold under pots even with lifting and mats?
Most recurring growth comes from moisture staying in contact longer than you think. Check that your drainage pathway actually works: saucers must be emptied, mats should have channels or breathability, and pot feet should not be placed on a puddling area. Also clean underneath periodically to remove nutrient buildup.
What’s the fastest way to stop efflorescence when you first notice it?
Focus on eliminating the moisture source that feeds salt migration. Dry-brush loose haze off first, then use an appropriate cleaner for the patio material, rinse thoroughly, and wait at least 48 hours before any sealing. If the pot setup still allows pooling, efflorescence will come back.
Next Articles

How to Decorate a Long Narrow Patio: Layout Tips
Practical DIY layout and decor tips to widen a long narrow patio using zoning, furniture spacing, lighting, greenery, an

How to Decorate a Rectangular Patio Step by Step
Step-by-step plan to decorate a rectangular patio with smart layout, zones, furniture fit, lighting, plants, and seasona
How to Decorate a Patio Wall: DIY Ideas and Mounting Tips
DIY patio wall decor for brick, stucco, wood, concrete, or siding with weatherproof mounting tips and maintenance.