You can repair a patio screen yourself in an afternoon. Small tears get patched with a self-adhesive kit or a woven patch. Larger damage or a failed spline means pulling the old screen out of the frame channel, cutting fresh mesh to size, and rolling new spline back in with a spline roller tool. If you need to fully replace the patio screen, the steps are similar but you will remove the old mesh and spline and install new components how to replace patio screen. The key is diagnosing the damage correctly first, because the fix for a 2-inch tear is totally different from the fix for a screen that keeps popping loose at the corners.
How to Repair a Screen Patio: Step-by-Step Fix

Felix Brennan
17 May 2026
Diagnose the damage before you buy anything
Walk the entire screen perimeter before reaching for your wallet. You're looking for three distinct problems, and they each have a different repair path.
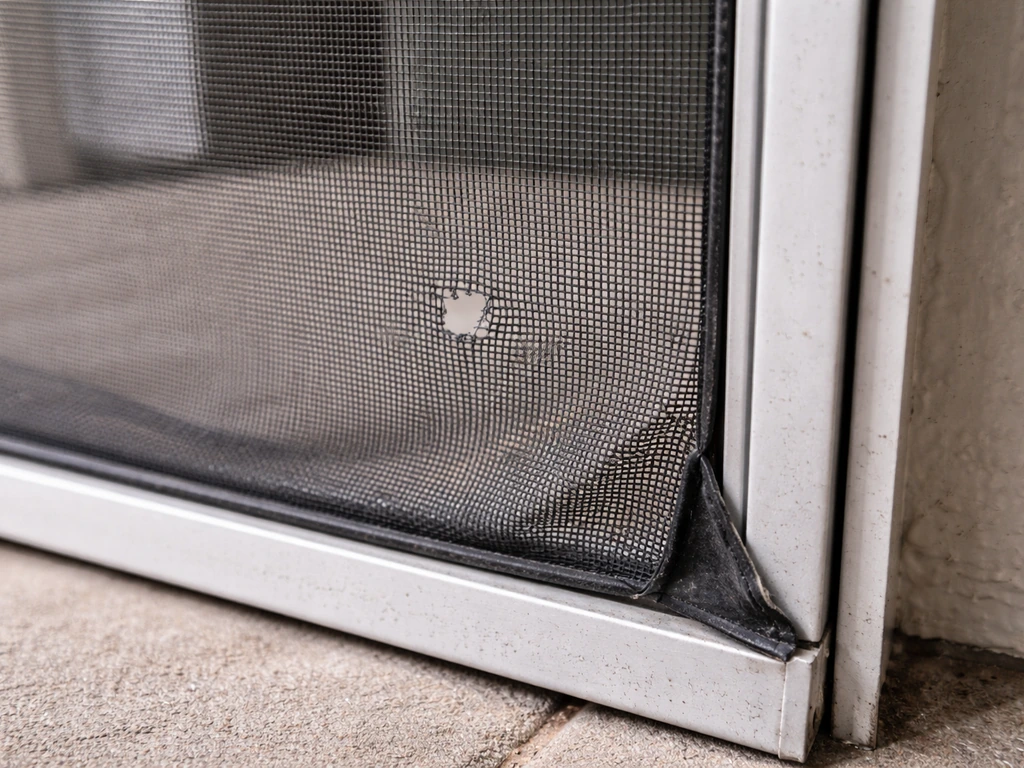
Small tear or puncture
If the mesh is torn but the screen still sits flat in the frame, the spline is still seated, and the hole is smaller than about 3 inches across, you're dealing with a simple puncture or tear. This is the easiest fix: patch it in place without disturbing the frame at all.
Loose, sagging, or flapping screen
Press the screen gently toward the frame. If it moves more than a quarter inch, or if you can see the spline has pulled out of the groove at a corner or along a side, the spline has failed. Loose screens vibrate in wind, which accelerates mesh wear and turns minor fraying into a full blowout fast. Sun, humidity, and temperature swings are the usual culprits. The fix here is a full rescreen: remove the old mesh and spline, and install new.
Warped frame or screen that won't seat properly
Try laying the frame on a flat surface. If it rocks or twists, the frame itself is warped. Ritescreen also advises that if the frame won't sit flat or twists, rescreening the entire screen is usually more reliable than forcing new mesh into a failing system [If it rocks or twists, the frame itself is warped. ](https://www.
ritescreen. com/blog/post/how-to-rescreen-window-screens. html). A warped or bent frame channel can't hold spline correctly no matter how carefully you install it, and the screen will pop loose or sag again quickly.
At that point, you're looking at a frame repair or replacement rather than just rescreening. Check the corners for cracks or separation too. If your screen repeatedly pops out of the channel even with new spline, the groove may be worn too wide to grip the spline diameter you're using.
A good rule of thumb: if two or more of these problems exist at once (torn mesh plus loose spline, or loose spline plus warped frame), don't waste time patching the mesh. Fix the underlying system first.
Tools and materials you'll need
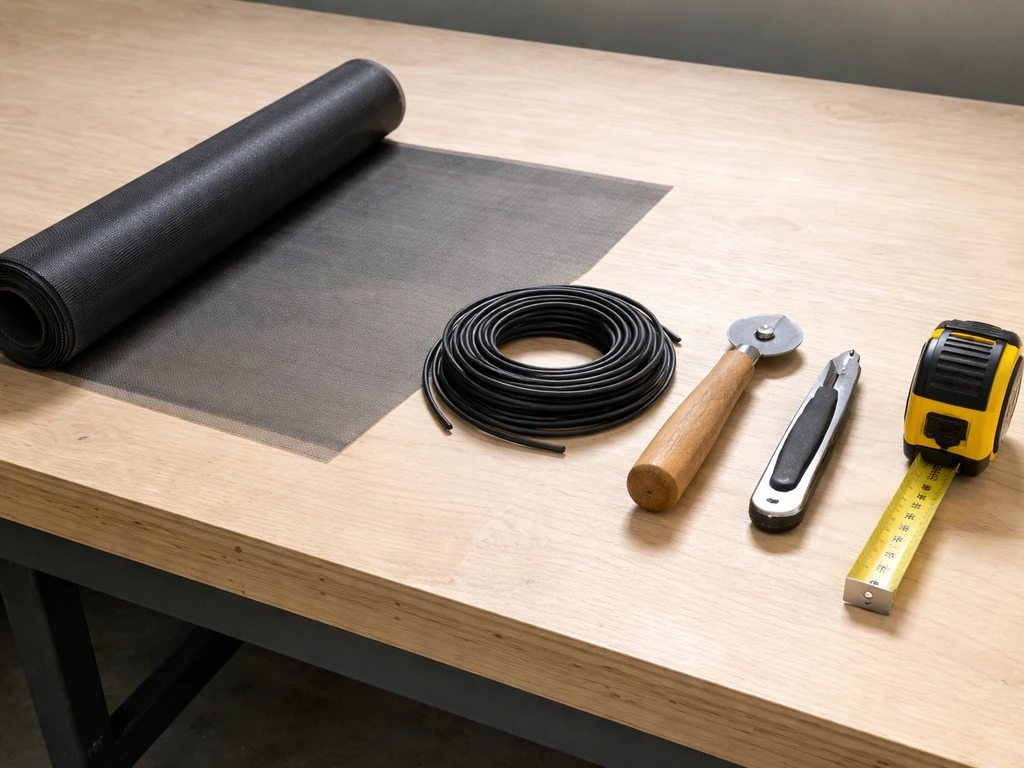
For a patch repair you need very little. For a full panel rescreen, gather everything on this list before you start so you're not running to the hardware store mid-project. If you're trying to build screen panels for a patio from scratch, the same rescreening steps and fit checks apply, just start with the right frame and spline sizing.
| Item | Used For | Notes |
|---|---|---|
| Replacement screen mesh | Panel replacement | Fiberglass for most patios; consider pet-resistant or solar mesh for high-wear or sun-heavy exposures |
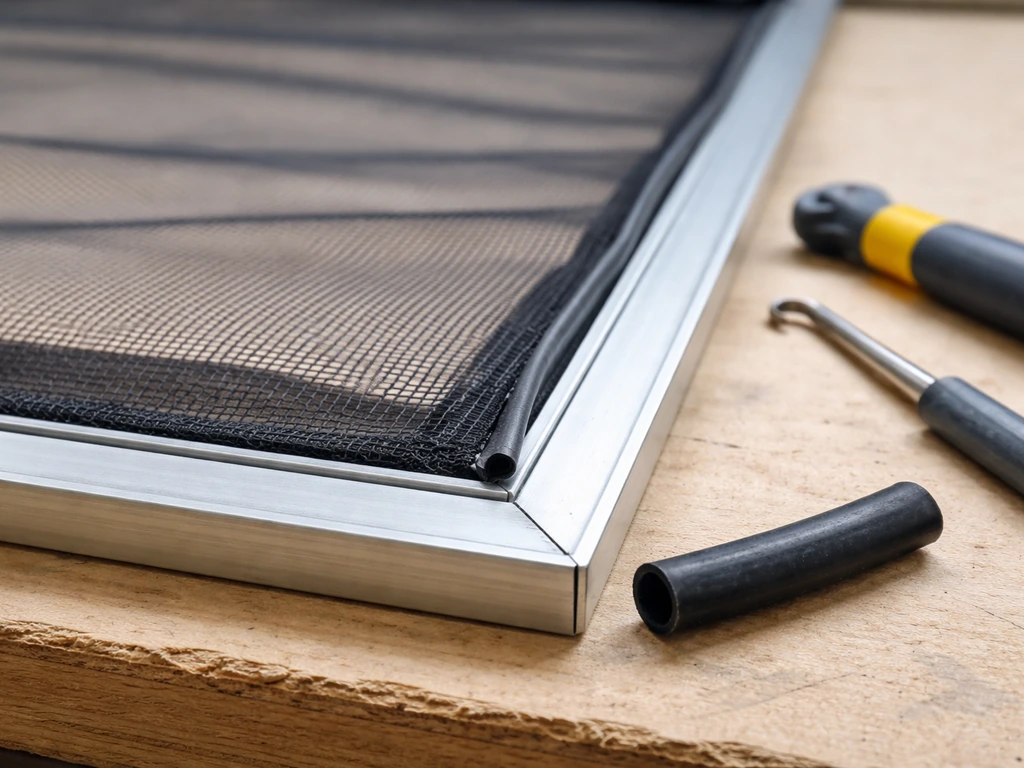
| Screen spline (correct diameter) | Holding mesh in frame channel | Measure your groove or bring old spline to match; thicker mesh needs one size smaller spline |
| Spline roller tool | Pressing spline into groove | Dual-end tool: concave end starts the spline, convex end seats it deeper |
| Utility knife | Cutting mesh and trimming spline ends | Fresh blade makes clean cuts without fraying |
| Flat-head screwdriver or spline removal tool | Prying out old spline | A plastic trim removal tool works without gouging aluminum frames |
| Tape measure and marker | Cutting mesh to size | Measure twice |
| Self-adhesive patch kit | Small tears only | Heat-activated versions (hair dryer) bond more reliably than cold-press |
| Scissors or tin snips | Cutting mesh to rough size | Snips for aluminum mesh; scissors for fiberglass |
| Clamps or a helper | Holding mesh taut while rolling spline | Binder clips on a workbench work fine for small panels |
On spline sizing: this is the most common mistake people make. Bring your old spline to the store and physically compare diameters, or measure the channel groove width and match it. Standard fiberglass screening typically uses spline around 0.140 to 0.160 inches in diameter, but thicker products like pet-resistant, solar, or heavy-duty mesh require one size smaller because the fabric itself takes up space in the groove. Using spline that's too thin means your screen will pop out. Too thick and it won't seat at all.
Remove the damaged screen and prep the frame
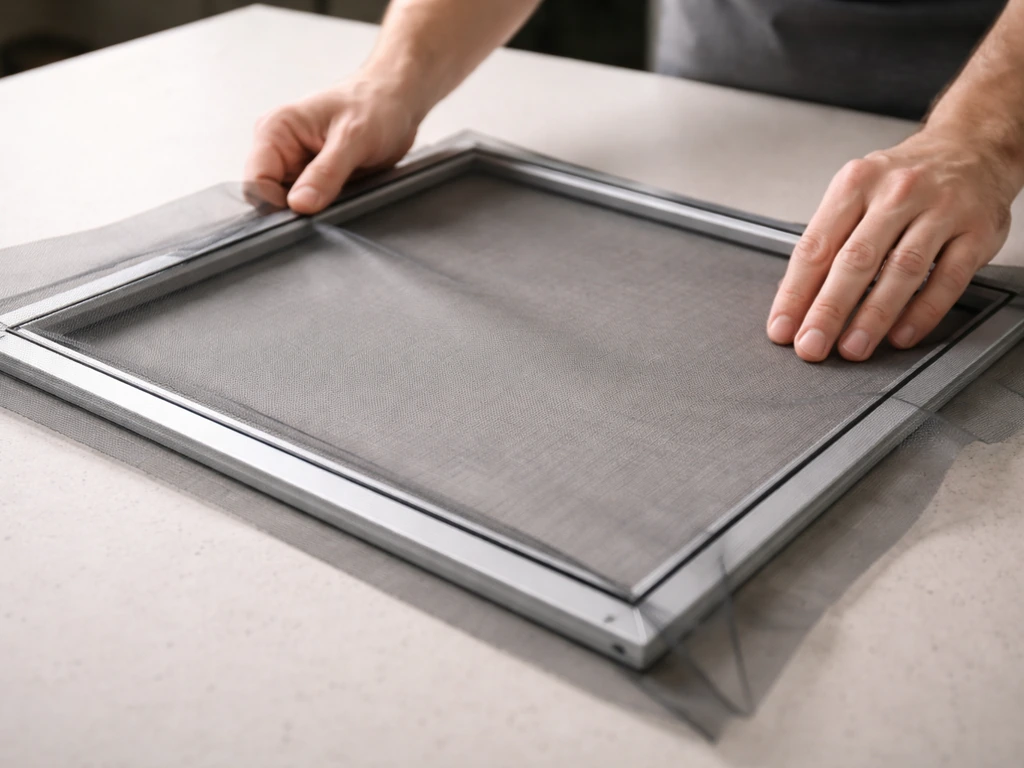
Whether you're patching a panel in place or doing a full rescreen, start by getting the panel out of the patio enclosure if possible. Working flat on a table gives you much better control than trying to fight gravity while the frame hangs in the wall.
- Pop the panel out of the patio opening by pressing at a corner or releasing any retaining clips or screws holding it in the frame track.
- Set the panel on a flat surface, screen side up.
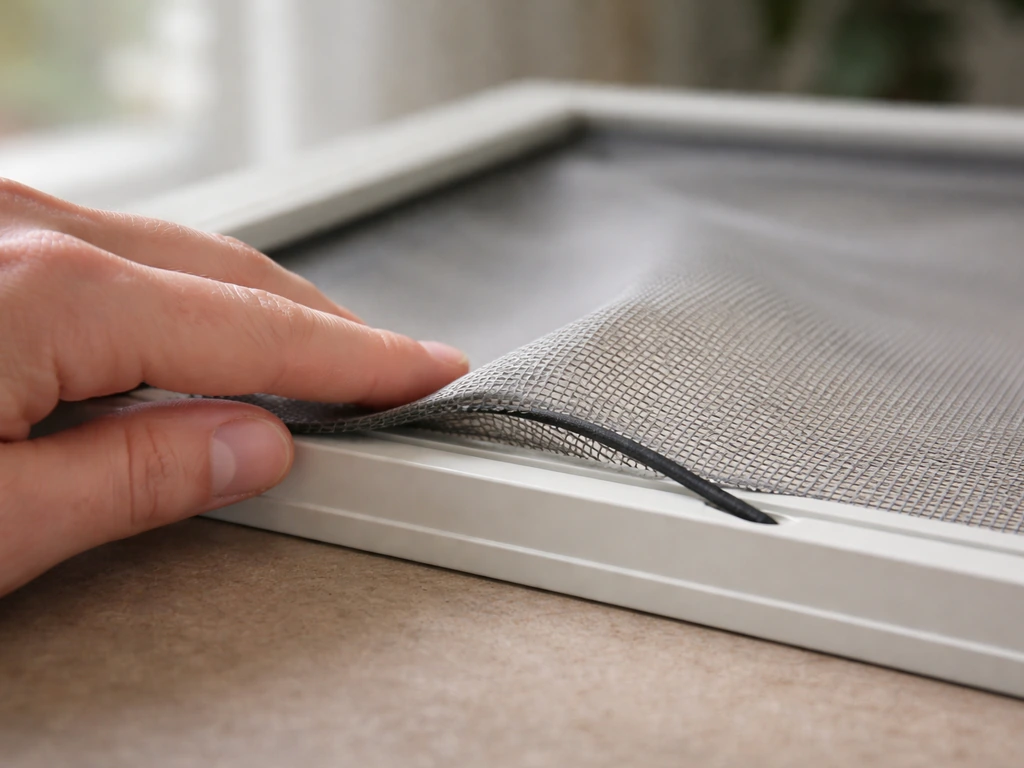
- Use a flat-head screwdriver or spline removal tool to pry up one corner of the spline. Work slowly along the groove to pull the spline out in as long a section as possible.
- Once the spline is removed, peel the old screen mesh off the frame.
- Inspect the spline groove: run your finger along the channel and check for cracks, deformation, or debris packed into the corners. Clean it out with a stiff brush.
- Check that the frame corners are tight. If any corners are loose or cracked, re-secure them before proceeding. A failing corner will make your new mesh sag no matter how well you tension it.
- Lay the frame on a flat surface and check for twist. If two opposite corners don't touch the surface at the same time, the frame is warped. You can sometimes press a mild warp flat with hand pressure, but a severely bent frame needs replacement.
Keep the old spline handy even if it's damaged. It tells you the correct diameter and material type to buy for the replacement.
Patch a small tear vs. replace the full panel
Patching a small tear (under 3 inches)
For a clean puncture or small rip where the surrounding mesh is still in good shape and the spline is fully seated, a patch is a fast and effective fix.
- Cut your patch material so it extends at least an inch beyond the tear in every direction. Bigger is better here.
- For a self-adhesive patch kit: peel the backing, center the patch over the tear, press firmly from the center outward to avoid air bubbles, then apply a hair dryer on medium heat for 30 to 60 seconds to activate the adhesive. This heat-bonding step makes a noticeably stronger hold than pressing alone.
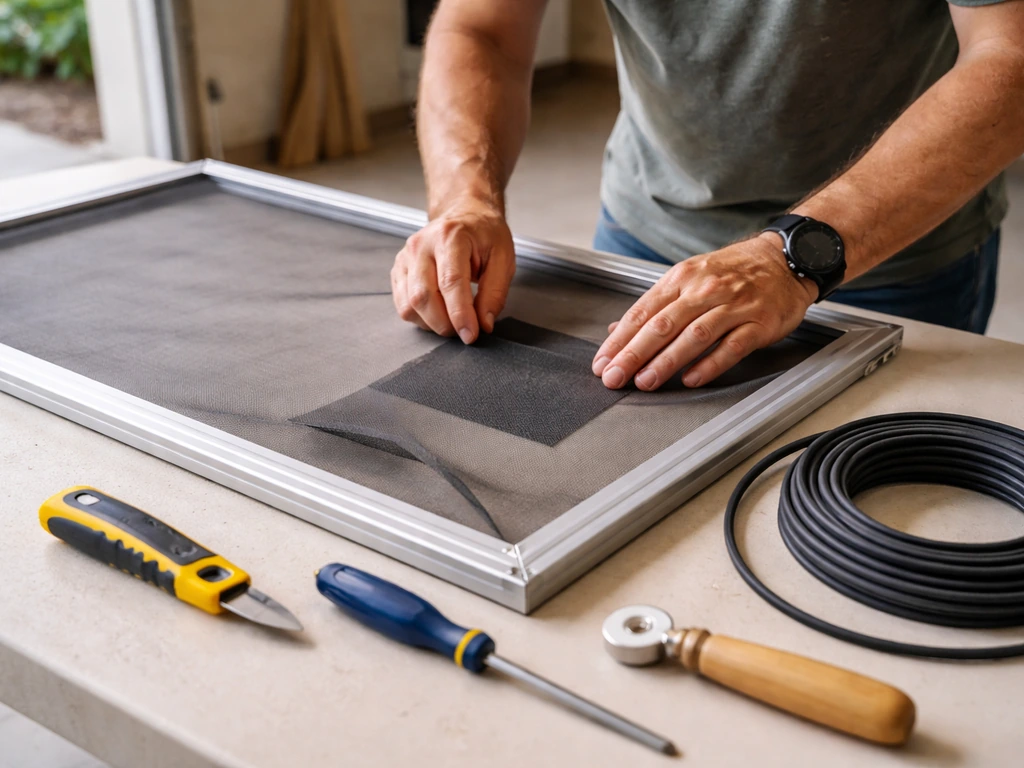
- For a woven fiberglass or aluminum patch: cut a square or rectangle of matching mesh slightly larger than the damage. Unravel a few strands around all four edges of the patch piece. Weave those loose strands through the existing mesh around the tear, then bend the strand ends flat against the screen to lock the patch in. This integrates the patch into the existing mesh rather than just sitting on top of it, which gives you a much longer-lasting repair.
- Smooth the patch flat and let it set before reinstalling the panel.
Honest note: patches on patio screens hold better than patches on window screens because patio screens typically experience lower pressure changes. But if the tear is in a spot that gets heavy wind or pet contact, plan to rescreen the panel properly within a season or two. A patch buys time, not permanence.
Replacing a full screen panel
Once the frame is prepped and clean, here's how to install new mesh correctly.
- Cut the new screen mesh about 2 to 3 inches larger than the frame opening on all sides. You want enough overhang to grip while you're working.
- Lay the mesh over the frame so it covers the entire opening with equal overhang on all sides.
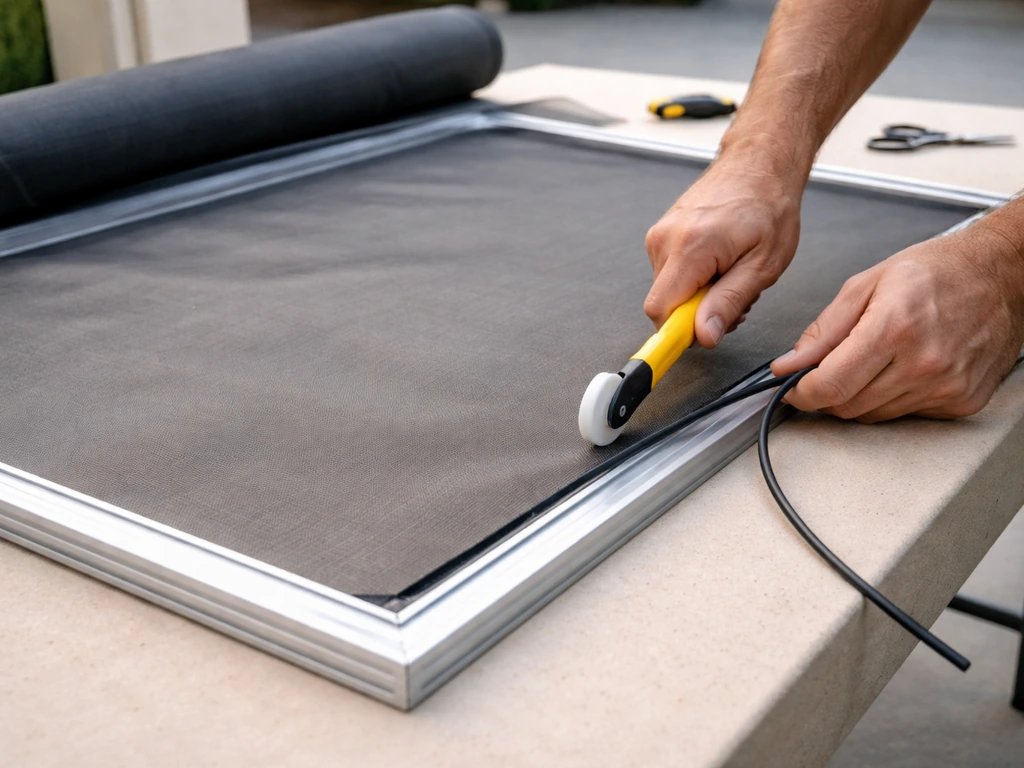
- Start at one corner. Use the concave end of your spline roller to press the spline into the groove at the corner, locking a small section of mesh in place.
- Work along one long side first, rolling the spline into the groove with steady, firm pressure. Keep the mesh taut but don't stretch it aggressively or you'll distort the weave.
- Move to the opposite long side next, pulling the mesh snug before rolling the spline in. This cross-tensioning approach reduces wrinkles.
- Finish the two short sides the same way.
- At each corner, cut the mesh diagonally at 45 degrees toward the corner of the frame. This removes the bunched-up excess and lets the mesh lie flat in the corner without folding over itself.
- Use the convex end of the spline roller to go back over the entire perimeter and press the spline deeper into the groove for a tight final seat.
- Trim the excess mesh close to the outer edge of the spline using a utility knife. One clean pass with a fresh blade gives you a neat edge without fraying.
- Use the utility knife tip to tuck the spline ends down into the final corner of the groove.
Reinstall and get a tight, wrinkle-free surface
Before you hang the panel back in the opening, hold it up and look at the mesh surface against a light source. You'll immediately see any areas where the mesh is baggy or the spline isn't fully seated. A correctly tensioned panel should look flat and even, with no visible sag or bunching near the corners. Heartland Owners’ “Patio Screen Installation and Adjustment Instructions” similarly emphasize keeping correct roller or tension adjustments so the rollers roll on as designed tensioned panel should look flat and even.
If you see a wrinkle running diagonally across the panel, that's almost always a tension issue at one corner. Pull the spline out of that section, re-lay the mesh with more outward tension on that corner, and re-roll the spline. It takes an extra five minutes and makes a big difference in how the finished screen looks and holds up.
Reinstall the panel into the patio opening by pressing it firmly into the track or frame channel. Check all four sides to confirm it's seated flush with no gaps between the panel edge and the surrounding frame. Any gap is an entry point for insects, which defeats the whole purpose of the repair. If the panel feels loose in the opening, check whether the retaining clips or screws are engaged correctly.
Troubleshooting common repair problems
Screen keeps tearing in the same spot
Repeated tears in one area usually point to a structural issue near that spot: a sharp edge on the frame, a screw head that's protruding, or a corner where the frame has cracked and is abrading the mesh. Inspect the frame edge where the tears originate. File down any burrs or sharp points before installing new mesh. If the problem is a protruding fastener, countersink it or replace it with a flush-head version.
Screen is still loose or saggy after rescreening
This almost always means the spline is the wrong size. If the spline is too thin for the groove, it can't grip the mesh tightly enough and the whole panel flexes. Remove the spline, measure the groove width accurately, and buy the correct diameter. Also check that you're using the right spline for your mesh type: thicker solar or pet-resistant screen requires one size smaller spline than standard fiberglass because the thicker fabric itself fills part of the groove.
Spline keeps popping out of the groove
If spline pops out after installation, the groove is either worn or the spline is too large in diameter. Try one size smaller. If the groove itself is visibly cracked, deformed, or has lost its channel shape, the frame needs to be replaced before any mesh installation will hold reliably.
Mesh is the wrong size or doesn't reach the corners
Always cut mesh at least 2 to 3 inches larger than the frame opening before you start. If you cut it too close and run out of overhang before finishing the perimeter, you'll either have to start over or end up with an undertensioned section. There's no fix for mesh that's cut too small: cut a new piece.
Gaps between the panel and the surrounding patio frame
Gaps at the panel edges after reinstallation usually mean the panel itself is slightly undersized for the opening (a manufacturing issue or a replacement panel that's the wrong size), or the retaining hardware isn't fully engaged. Double-check measurements against the opening before ordering replacement panels. If the original panel fit properly before the damage, the same size will fit again.
Prevent future damage with quick seasonal maintenance
The best patio screen repair is the one you don't have to do. A quick inspection twice a year, in spring and fall, catches problems before they become blowouts.
- Walk the entire perimeter of each panel and press lightly on the mesh. Any give or flutter means the spline is starting to loosen. Re-roll the spline on that section before the mesh tears.
- Check corners specifically: corners are where spline loosens first because they handle the most stress. If you can see daylight between the spline and the groove at a corner, fix it now.
- Look for UV degradation on older fiberglass mesh: chalky, brittle, or stiff sections mean the mesh is nearing the end of its life. Plan a full rescreen before the material starts failing under normal wind load.
- If you store seasonal screen panels, store them flat, not leaned against a wall. Leaning puts constant pressure on one edge and leads to warped frames and bent corners.
- Choose the right mesh material for your exposure. Standard fiberglass is fine for most covered patios. High-sun or windy locations benefit from solar or heavy-duty mesh. Homes with dogs or cats should use pet-resistant screen from the start, since repairing standard mesh after pet damage is a losing battle.
- After any major storm, do a quick walk-around and press-test each panel. Wind-driven debris can create micro-tears that aren't visible until they spread.
If you find yourself rescreening the same panels every one to two seasons, that's a sign something structural is wrong: a frame channel that's worn out, a corner bracket that's failing, or a screen type that's undersized for the conditions you're asking it to handle. Matching the right screen material to your specific patio environment, whether that's high UV, heavy wind, or pet traffic, makes a bigger difference in long-term durability than any repair technique.
For anyone dealing with a larger scope of damage across multiple panels, or a screen structure that was never quite right to begin with, the process of fully rescreening a patio or replacing individual panels follows the same core steps covered here but scaled up. And if your patio isn't yet enclosed and you're building from scratch, the framing and panel system decisions you make at that stage have a direct impact on how easy repairs will be down the road. If you're still thinking about the bigger project, see how to build patio screen enclosure for the framing and panel system choices that make repairs easier later.
FAQ
Can I patch a patio screen while leaving the frame and spline in place?
Yes, but only for limited damage where the spline is still seated and the surrounding mesh is solid. If the tear is near a corner where the screen pops loose, or if you see any spline gaps, patching will fail early and you should rescreen that panel instead.
How do I choose the right size for a patch on a patio screen?
Use a straightedge and plan to cover damaged areas with extra material, not just the visible hole. For best results, your patch should extend beyond the damaged edges enough that the mesh underneath stays flat, then press it firmly and avoid stretching the mesh to “hide” the tear.
What should I do if my screen keeps coming loose after a patch?
No. Loose panels usually mean the spline is failing, the spline diameter is wrong, the groove is worn, or the frame is warped. The quickest decision aid is to gently push the screen at multiple points, if it moves more than a small fraction of an inch at the perimeter, rescreen instead of patching.
Why does my spline keep popping out even when I think the diameter matches?
Stop and recheck spline diameter. The article’s rule of thumb is correct, but the key detail is to match the spline to the channel groove width and the mesh type (solar, pet-resistant, and heavy-duty often require spline sized one step smaller than standard fiberglass systems).
How can I tell if the frame itself is the problem, not the mesh or spline?
A warped frame can look “fine” from a distance, but it will still fail to grip spline consistently. Lay the frame on a flat surface and look for rocking or twisting, if it does not sit flat, repair or replace the frame before installing new mesh.
Repeated tears in the same spot keep happening, what’s the most likely cause?
Inspect for sharp causes along the exact tear location, including burrs on the frame edge, protruding screw heads, damaged corner hardware, and abrasion from cracked channel sections. File or countersink protrusions, then re-install new mesh to prevent the new screen from ripping in the same spot.
Why do my corners wrinkle or look uneven after installation?
Use at least a couple inches of extra mesh on every side. If you cut too close, you can end up with an undertensioned section and it will wrinkle or pull away, there is no reliable fix for mesh cut too small beyond starting with a new piece.
What should I do if I see a wrinkle that runs diagonally across the patio screen?
Check for diagonal wrinkles that point to unequal tension at a specific corner. The practical fix is to remove spline from that affected section, re-lay the mesh with outward tension at the corner, and re-roll the spline before reinstalling the panel.
How can I verify the mesh is tensioned correctly before reinstalling the panel?
Light exposure is a simple test: hold the screen panel up and look across the mesh surface. You’re looking for baggy areas, sag, or sections where spline is not fully seated, correct tension should look uniformly flat with no bunching near corners.
Do I need to worry about small gaps after I reinstall the patio screen panel?
Any visible gap between the panel edge and the surrounding frame is an insect entry point. Re-seat the panel by pressing it firmly into the track or channel on all four sides, and confirm the retaining clips or screws are fully engaged if it feels loose.
How do I decide whether to rescreen a single panel or address a whole-system issue?
If only one panel fails repeatedly, assume a localized structural issue or hardware problem near that area. If multiple panels require rescreening on a tight cycle, treat it as a system problem such as worn channel grooves, failing brackets, or using a screen type that does not match your patio conditions.
Can I fix a worn or damaged channel groove without replacing the frame?
If the spline is the wrong size, it will not grip reliably and the panel will flex and wear out quickly. If the groove is worn, deformed, or cracked such that spline cannot form a proper channel seat, replace the frame before installing new mesh so you do not repeat the same failure.
Does thicker specialty screening require different spline than standard mesh?
For pet-resistant, solar, or other thicker mesh, ensure you use spline sized appropriately for that mesh because thicker fabric occupies more of the groove. A mismatch is one of the fastest ways to create a screen that either won’t seat or flexes and pops out.
How long will a patio screen patch usually last?
Patches can hold longer on patio screens than on interior window screens, but wind zones and pet contact shorten patch life. If the damaged area is in a high-stress spot, plan a proper rescreen sooner rather than relying on a patch for the long term.
Should I remove the screen panel to repair it, or can I do it in place?
If possible, remove the panel and work flat. Gravity makes it harder to keep even tension while you roll spline, and an uneven roll is a common source of sagging and early spline failure.
Next Articles
How to Replace a Patio Screen Step by Step DIY Guide
Step-by-step DIY guide to replace patio screen panels or door screens, with measuring, tools, install, and troubleshooti

How to Decorate a Long Narrow Patio: Layout Tips
Practical DIY layout and decor tips to widen a long narrow patio using zoning, furniture spacing, lighting, greenery, an

How to Decorate a Rectangular Patio Step by Step
Step-by-step plan to decorate a rectangular patio with smart layout, zones, furniture fit, lighting, plants, and seasona