To disconnect a patio propane or butane setup, turn off the appliance first, then close the cylinder valve by turning it clockwise until it stops, then unscrew the regulator coupling counterclockwise by hand only. That's the core sequence, and in most cases it takes about two minutes with zero tools. The rest of this guide covers how to do it safely, what to do if something doesn't go as planned, and how to store and check everything before you reconnect later.
How to Disconnect Patio Gas Safely Step by Step

Felix Brennan
29 Apr 2026

Before you touch anything: safety checks and identifying your setup
Before you start loosening anything, take 60 seconds to understand what you're working with and make sure the conditions are safe. Most patio gas setups fall into one of two categories: a portable propane cylinder (the standard 20 lb tank you'd use on a grill, patio heater, or fire pit) or a smaller butane canister (common with tabletop appliances and portable burners). The disconnection process is similar for both, but the fittings look different, so it helps to know which one you have.
Do a quick visual check before anything else. Look for any existing damage on the hose, like cracks, kinks, or soft spots. Smell the air around the tank and hose connection. If you detect a strong gas odor before you've even started, don't proceed. Get everyone away from the area, avoid any ignition sources (no phones, no light switches), and ventilate the space. A faint smell after you begin disconnecting is normal and expected, but a strong smell before you start means something is already leaking and you need to treat it as an emergency.
- Make sure the grill, heater, fire pit, or other appliance is completely off and has cooled down
- Check that you're working in a well-ventilated outdoor area, not in an enclosed garage or shed
- Look for any open flames or ignition sources nearby and eliminate them
- Identify your cylinder type: standard propane tank (larger, vertical, with a handwheel valve on top) or butane canister (smaller, often horizontal, with a piercing or push-fit connector)
- Locate the regulator: it's the round or oval device that connects the hose to the tank valve, usually with a threaded coupling or a quick-connect fitting
- Check whether your regulator uses a QCC1 (Type 1) connection (a large, hand-tightened nut that screws onto the tank valve) or an older POL fitting (a smaller left-hand threaded brass fitting that requires a wrench)
The QCC1 style is the most common on grills, heaters, and fire pits made in the last 20 or so years. It has a large plastic or metal coupling nut that you can tighten and loosen by hand. The older POL fitting is less common today but still shows up on some older tanks and appliances. If you're not sure which you have, look at the coupling: if it has a large hand-friendly nut, it's almost certainly QCC1. If it's small, brass, and recessed into the tank valve, it's POL and you'll need an adjustable wrench.
Tools and materials you'll likely need
For most standard patio propane setups with a QCC1 regulator, you genuinely don't need any tools at all. But it's smart to have a few things on hand before you start, especially if the fittings haven't been disconnected in a while.
- Adjustable wrench or channel-lock pliers (for POL fittings or stubborn connections that won't budge by hand)
- Leak detection spray or a small bowl of soapy water and a brush (for checking connections before and after)
- Thread seal tape (PTFE/Teflon tape, yellow gas-rated type) if you plan to reconnect and suspect thread wear
- Protective valve cap or dust cap for the tank valve once disconnected
- Clean cloth or rag for wiping down fittings
- Tank transport cap or collar if you're moving the cylinder anywhere
- Nitrile gloves (optional but useful, especially if it's cold or the fittings are grimy)
Shut off the gas and stop appliance flow correctly
Getting the shutdown sequence right matters. If you skip a step or do them out of order, you can trap pressurized gas in the hose and make the disconnection harder and more dangerous. Follow these steps in order.
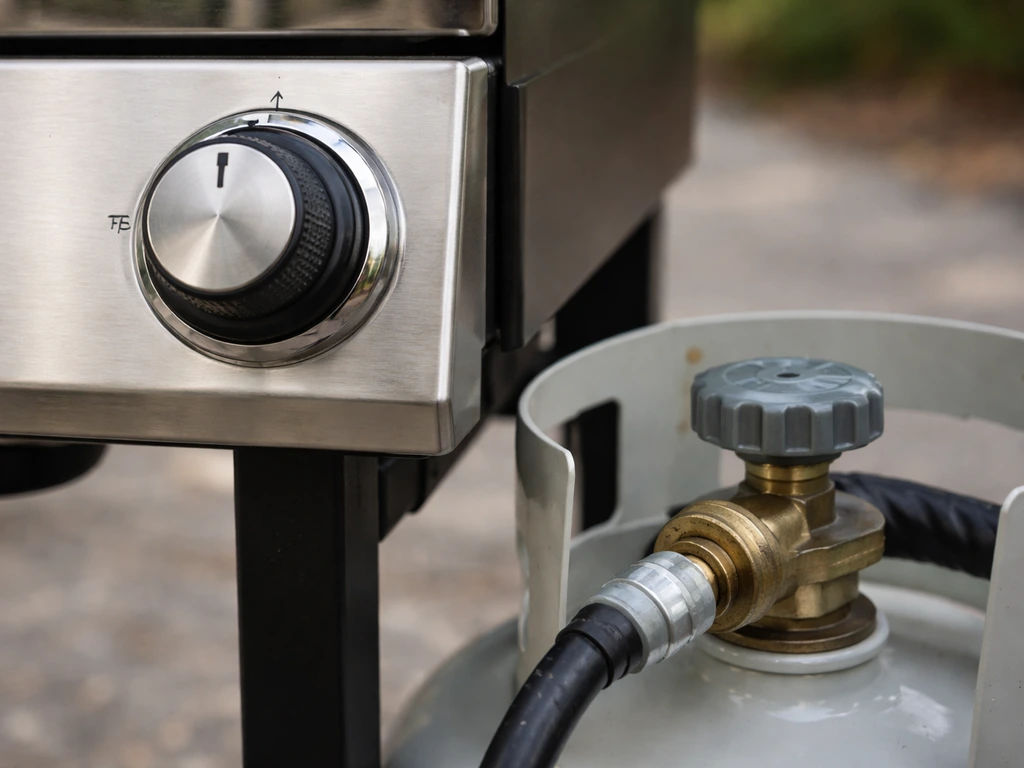
- Turn off the appliance completely: close every burner knob on your grill, heater, or fire pit. Make sure no flames are present and all knobs are in the OFF position.
- Close the cylinder valve: locate the handwheel on top of the propane tank. Turn it clockwise (right) until it stops turning. Don't force it, just firm and snug. This cuts off gas flow from the tank itself.
- Burn off residual gas: if it's a grill, turn the burners back on briefly to burn off the gas remaining in the hose. Wait until the flames go out on their own, then turn the burner knobs back to OFF. Skip this step for heaters and fire pits since burning off residual gas on those can be tricky and isn't always necessary.
- Wait 30 seconds: give any pressure in the line a moment to equalize. You'll hear a slight hiss fade out if there was any residual pressure.
- Double-check: confirm the appliance knobs are all back in the OFF position and the tank valve is closed before moving on to the physical disconnection.
Disconnecting the regulator and hose from the cylinder
With the gas shut off and the line depressurized, you're ready to physically disconnect. Here's the step-by-step for the most common QCC1 connection type, followed by notes for POL fittings and quick-connect styles.
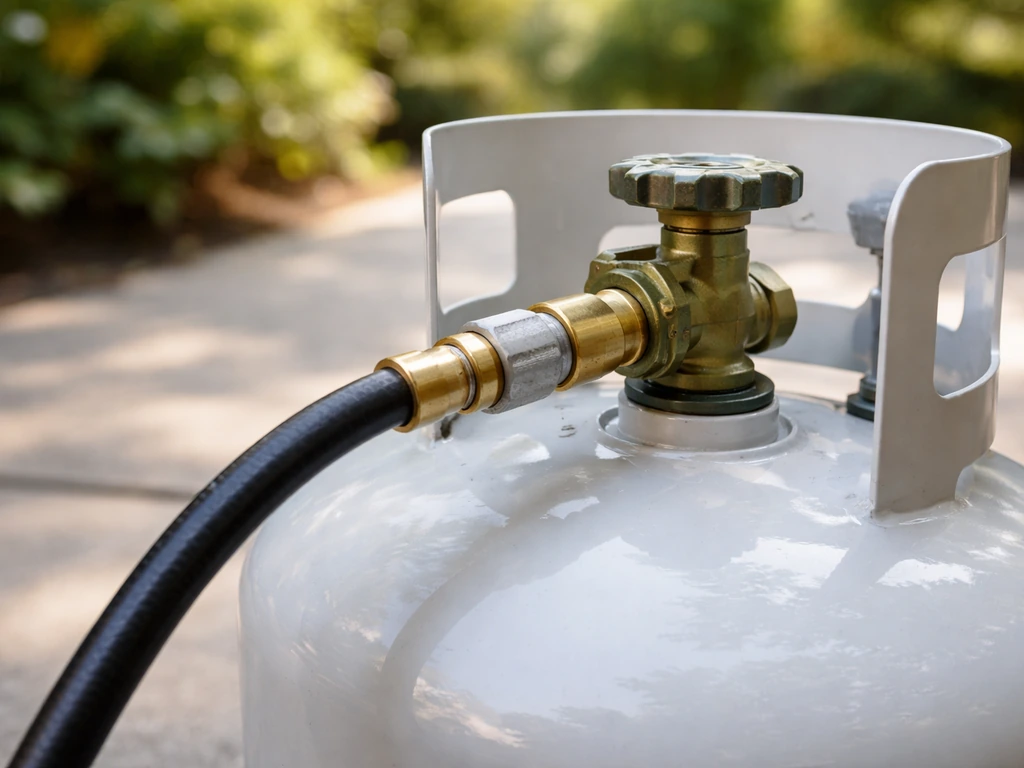
QCC1 regulator (most common, hand-tight nut)
- Confirm the tank valve is fully closed (clockwise) and the appliance is off.
- Grip the regulator coupling nut, the large nut where the hose meets the tank valve.
- Turn the coupling nut counterclockwise (left) using hand pressure only. No tools. Weber's official guidance and most manufacturers specify hand-only for this connection, and using a wrench risks damaging the plastic coupling or cross-threading the fitting.
- The nut will unscrew after a few turns and separate from the tank valve. You may hear or smell a brief puff of gas as the last bit of pressure escapes. This is normal.
- Pull the regulator coupling straight back and away from the valve.
- Set the hose and regulator aside so the open end doesn't pick up dirt or debris.
POL fitting (older tanks and some specialty appliances)
POL fittings use a left-hand thread, which means you turn the fitting clockwise to loosen it (the opposite of normal). Use an adjustable wrench and turn clockwise to unscrew. These fittings can be tight, especially if they haven't been touched in years. Apply steady pressure without jerking. Once it breaks free, it will unscrew quickly.
Quick-connect or bayonet fittings (common on butane canisters and some tabletop appliances)
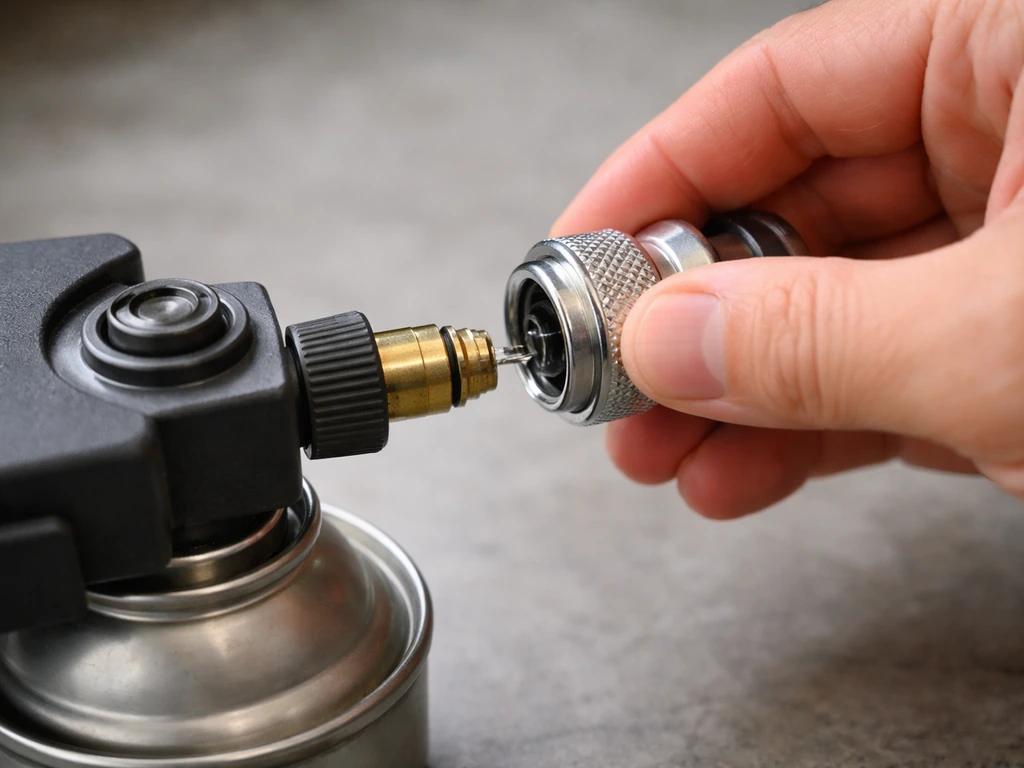
These fittings use a push-and-twist or push-and-pull mechanism. Look for a collar or release ring on the fitting. Usually you press the collar in or lift a locking tab, then pull or twist the hose coupling to release it. The canister will typically depressurize automatically when disconnected if the valve is integrated into the fitting. Always refer to your specific appliance manual for this type since the exact mechanism varies by brand.
If something goes wrong: stuck fittings, freezing, adapters, and leaks
Things don't always go smoothly, especially with outdoor equipment that's been sitting through seasons of rain, heat, and cold. Here's how to handle the most common problems.
The coupling won't turn by hand
If the QCC1 coupling feels frozen in place, first check that you're turning it in the right direction (counterclockwise to loosen). If you're sure of the direction and it still won't budge, the threads may be corroded or the fitting may have been over-tightened. Wrap the coupling in a warm (not hot) damp cloth for a minute to help break any corrosion. Then try again with firm, steady hand pressure. If it still won't move, use a strap wrench rather than pliers or a metal wrench, since a strap wrench is less likely to crack a plastic coupling. Avoid gripping the regulator body itself since you could damage internal components.
Freezing regulator or icy fitting
In cold weather, regulators can ice up due to the pressure drop across the regulator causing rapid temperature drop, a process called auto-refrigeration. If the regulator or fitting feels ice cold or is visibly frosted, do not use a torch or heat gun to warm it. Warm water poured gently over the fitting is safe. Once the frost clears and the fitting warms up slightly, try again. If the regulator continues to freeze during normal use before you even attempt to disconnect, that can indicate it's undersized or faulty.
Adapter mismatch or wrong fitting type
Sometimes a previous owner or installer used an adapter to connect mismatched equipment, and you may not realize it until you start trying to disconnect. If you see a brass adapter between the hose coupling and the tank valve, check whether the adapter is threaded into the tank valve or the hose coupling. In most cases the adapter will unscrew with the hose once the main coupling is released. If it stays on the tank valve and you want to remove it, use an adjustable wrench and turn counterclockwise. Never force-fit a coupling onto an adapter that wasn't designed for it.
You hear hissing or smell gas during disconnection
A very brief hiss right as the coupling separates is normal, just residual pressure escaping. But if you hear continuous hissing after you've closed the tank valve, or if a strong gas smell doesn't clear within 30 seconds of moving away from the connection, stop. Back away from the area, avoid any ignition sources, and ventilate. If the hissing is coming from the tank valve itself after it's supposedly closed, the valve may be faulty. Do not attempt to repair a faulty tank valve yourself. Call your propane supplier or take the tank to an exchange location.
Cross-threaded connections
If the coupling feels like it's spinning freely but not making progress (or feels like it's catching and grinding), it may be cross-threaded. Resist the urge to force it. Try rocking the coupling very slightly while backing it out. Once fully removed, inspect the threads on both the coupling and the tank valve for burring or flattening. Cross-threaded connections that have visibly damaged threads should not be reused. Replace the regulator and hose assembly if the coupling threads are compromised, and check whether the tank valve needs service.
When to stop and call a pro
Call a professional or contact your propane supplier if you smell gas and can't identify or eliminate the source, if the tank valve doesn't fully close or continues to hiss after closing, if you see visible damage to the cylinder itself (dents, rust, bulging), or if the coupling is physically stuck and a strap wrench doesn't work. Propane exchange programs at hardware stores and grocery stores are also an easy option if you simply need to swap a problematic tank rather than troubleshoot the valve.
After disconnect: caps, storage, transport, and checking before you reconnect
Cap the valve and protect the hose
Once the hose and regulator are disconnected, put the plastic or brass protective cap back on the tank valve. Most tanks come with one, and if you've lost it, a replacement is a couple of dollars at any hardware store. This keeps debris and insects out of the valve seat and protects the threads. For the regulator end of the hose, a small plastic cap or even a clean cloth tucked over the coupling opening will keep dirt out.
Storing and transporting the cylinder safely
- Always store propane cylinders outdoors or in a well-ventilated area, never in an enclosed garage, basement, or living space
- Keep the cylinder upright, secured so it can't tip over
- Store away from heat sources, direct sunlight for extended periods, and anything that could cause sparks
- When transporting in a vehicle, keep the cylinder upright and secure it so it can't roll, and transport it in the trunk or truck bed rather than the passenger cabin if possible
- Make sure the valve cap is on and the valve is fully closed before transport
- Don't leave a cylinder in a hot vehicle for extended periods
Checking for leaks before you reconnect
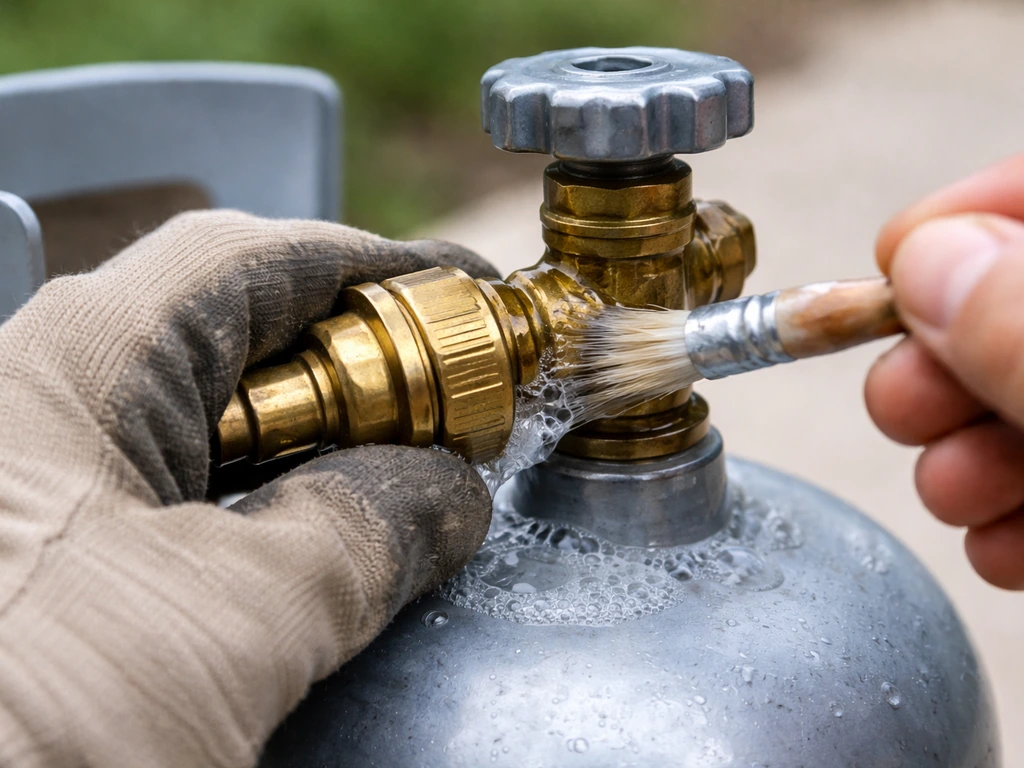
Before reconnecting the regulator after storage or after any disconnection, do a quick leak check. Reconnect the coupling hand-tight, open the tank valve slowly about a half turn, and apply soapy water or leak detector spray to all connection points, including the coupling nut, the hose fittings at both ends, and any joints in the line. Bubbles mean gas is escaping and the connection needs to be tightened, re-seated, or the component replaced. Only light the appliance after you've confirmed no bubbles appear and the soap solution stays flat.
Basic hose and regulator maintenance
While you have everything disconnected, it's worth spending a minute inspecting the hose and regulator for wear. Run your fingers along the hose and look for cracks, soft spots, abrasion damage, or any point where the hose has been kinked repeatedly. Hoses that show cracking in the outer rubber layer or any physical damage to the braid should be replaced. Most regulator and hose assemblies for standard patio equipment cost between $15 and $40 and are straightforward to replace. If your regulator is more than 10 years old or has been stored in harsh conditions, replacing it proactively is cheap insurance.
One thing worth noting: if you're doing this disconnect as part of a larger patio project, like <a data-article-id="EA568B44-49B3-4730-9F6C-6C53A06974B2">enclosing your patio</a>, adding screening, or reconfiguring your outdoor layout, it's a good opportunity to think about where your gas appliances will live in the new setup. If you are enclosing or screening the space, see our guide on how to fence off a patio so you can plan the layout around the gas equipment safely. If you're enclosing the space, learn how to fence in apartment patio areas so the layout stays safe around your gas appliances. Positioning your grill or heater with enough clearance from any new walls, screens, or enclosure panels is something to plan before you reconnect everything. Getting the gas side sorted first makes the rest of the project cleaner. If your larger patio project includes building a privacy wall, plan the gas line routing and clearances first using this guide, then come back to reconnect safely. For additional guidance specific to apartment patio setups, see our walkthrough on how to close off an apartment patio.
Quick reference: the full disconnect sequence
| Step | Action | Notes |
|---|---|---|
| 1 | Turn off appliance | All burner knobs to OFF, no active flames |
| 2 | Close tank valve | Turn handwheel clockwise until firm stop |
| 3 | Burn off or vent residual gas | Turn grill burners on briefly until flame dies, then off |
| 4 | Wait 30 seconds | Let line pressure equalize |
| 5 | Unscrew regulator coupling | Counterclockwise, hand only (QCC1); clockwise with wrench (POL) |
| 6 | Pull coupling clear | Brief gas puff is normal; strong hiss means stop |
| 7 | Cap the tank valve | Plastic or brass protective cap |
| 8 | Protect hose opening | Cap or clean cloth over regulator end |
| 9 | Store cylinder upright outdoors | Valve closed, cap on, away from heat and ignition |
| 10 | Leak check before reuse | Soapy water or spray on all connections after reconnecting |
FAQ
Can I disconnect patio gas while the appliance is still on or hot?
No. Turn the appliance off first and let it cool completely before you close the cylinder valve and start loosening the regulator. Disconnecting while burners, heaters, or fire pits are still operating increases leak risk and can damage hoses and seals.
What if I do not have the protective cap for the tank valve after disconnecting?
Use a proper replacement cap if possible, but if you temporarily cannot, keep the valve opening covered with a clean, non-lint cloth or a clean plastic cover. Do not use tape directly on the valve threads, and avoid anything that could leave fibers or adhesive in the valve seat.
Is it okay to use a torch or heat gun if the QCC1 coupling is frozen?
Avoid open flame or heat guns. The article recommends warm (not hot) damp cloth for corrosion and warm water for icing, which reduces damage risk and avoids heating the regulator in a way that can worsen problems or introduce ignition sources.
How long should I wait after closing the tank valve before disconnecting?
Give it a short pause after closing so pressure equalizes and residual gas dissipates outdoors. If you still smell strong gas around the connection or notice persistent hissing, treat it as a leak and stop rather than trying to proceed.
What does “left-hand thread on POL” mean in practice?
For POL fittings, loosen by turning clockwise, not counterclockwise. If you accidentally turn the normal way, you can tighten the connection further or make it harder to separate, so confirm the fitting type before you apply force.
Can I loosen the regulator coupling with pliers or a metal wrench if it is stuck?
Prefer a strap wrench (for QCC1) and the correct wrench type (adjustable wrench for POL). Pliers or gripping the regulator body can crack plastic components or damage internal parts, especially if the fitting has been corroded.
The coupling seems to spin freely, but it will not come off. What should I check first?
Stop trying to force it and look for cross-threading or a damaged coupling. The article advises rocking slightly while backing it out, then inspecting threads. If threads are burring or flattened, replace the regulator and hose assembly rather than reusing it.
Can I disconnect the hose if I smell gas but the appliance is off?
If you smell strong gas before you begin or cannot eliminate the source quickly, do not continue disconnecting. Move away, ventilate, avoid ignition sources, and contact your propane supplier. A faint residual odor right as the coupling separates is different from a continuing strong leak.
Do I need to do a leak test every time I reconnect, even if nothing changed?
Yes. After reconnecting, reconnect hand-tight and open the valve slowly, then check all connection points with soapy water or leak detector spray. This catches issues like a slightly mis-seated coupling or a hose that shifted during storage.
How should I inspect the hose before reuse if it was disconnected for months?
Run your fingers along the full length and look for cracks, soft spots, abrasion, and kink history. Replace hoses if the outer rubber layer is cracking or if the braid shows physical damage, since a compromised hose can leak even when the fittings are tight.
Can I store the tank and regulator disconnected in any position?
Store the tank upright and keep the valve protected with the cap. Keep the regulator and hose protected from dirt and pests using the provided caps or clean covers, and avoid storing where the hose can be crushed or repeatedly kinked.
Is propane exchange at a store a good option if my tank valve seems faulty?
Yes, especially if the tank valve does not fully close or continues to hiss after closing. The article recommends not repairing a faulty tank valve yourself, and exchanging can replace the problematic cylinder instead of troubleshooting the valve.
Next Articles

How to Decorate a Long Narrow Patio: Layout Tips
Practical DIY layout and decor tips to widen a long narrow patio using zoning, furniture spacing, lighting, greenery, an

How to Decorate a Rectangular Patio Step by Step
Step-by-step plan to decorate a rectangular patio with smart layout, zones, furniture fit, lighting, plants, and seasona
How to Decorate a Patio Wall: DIY Ideas and Mounting Tips
DIY patio wall decor for brick, stucco, wood, concrete, or siding with weatherproof mounting tips and maintenance.