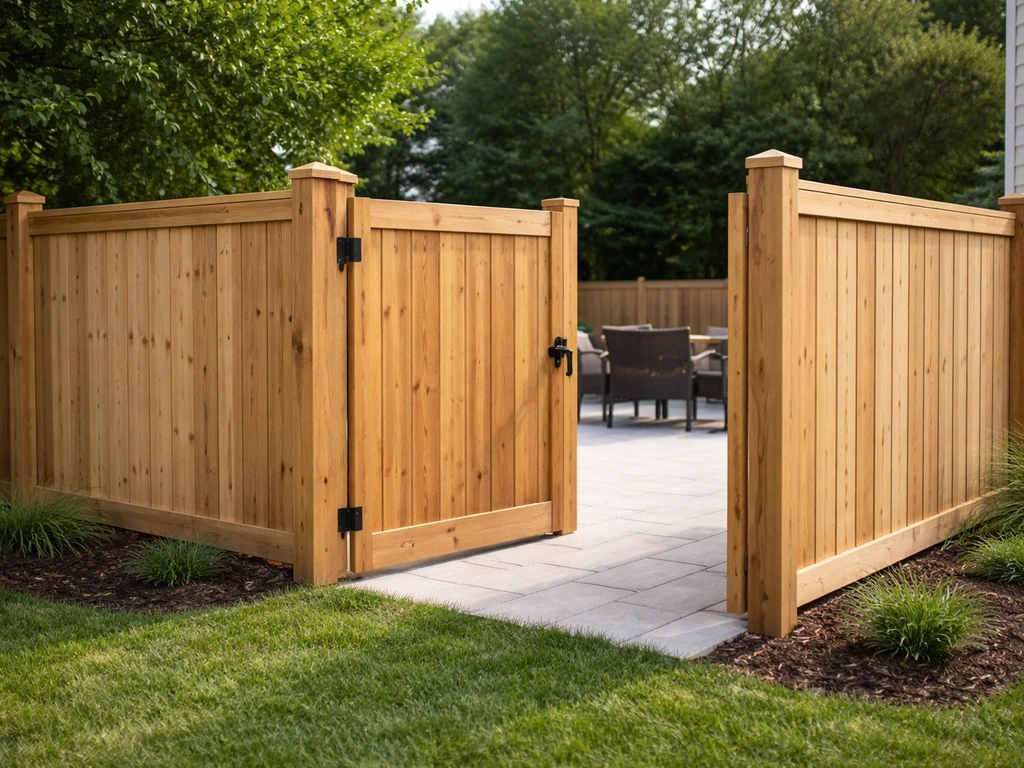
You can fence off a patio yourself in a weekend or two by setting posts in concrete footings, installing your chosen panels or screen infill, and hanging a gate that actually swings and latches cleanly. The key decisions are why you're enclosing the space (privacy, pet safety, wind, or all three), which material fits your climate and budget, and whether your local municipality needs a permit before you break ground. Get those three things sorted first, and the physical build is very manageable for a confident DIYer.
How to Fence Off a Patio: DIY Steps, Materials, and Tips

Felix Brennan
29 Apr 2026
Start with your real purpose: privacy, safety, or weather

Before you buy a single board, write down the one or two problems you're actually trying to solve. That decision drives every choice that follows, including height, material, and whether you need a solid panel or an open screen.
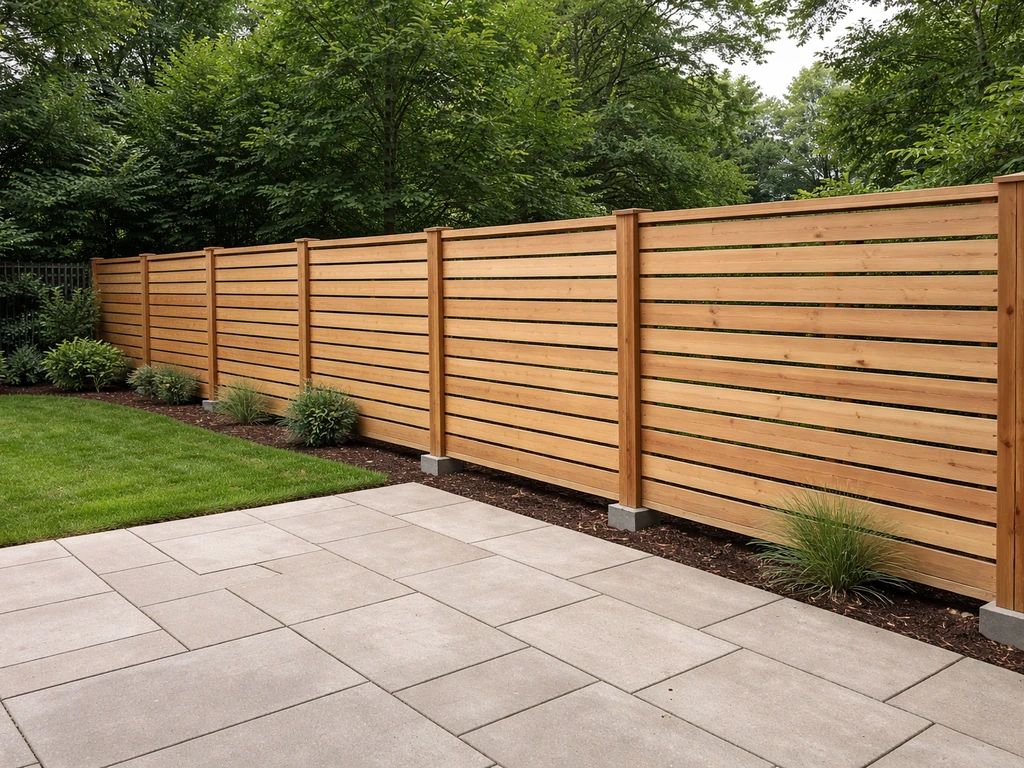
- Privacy from neighbors or a street: You want a solid or near-solid panel at least 6 feet tall on the sight-line sides. A semi-privacy style with small gaps still blocks most views while reducing wind load on the structure.
- Keeping pets or kids contained: Height matters less than having no gaps at the bottom and a self-latching gate. A 4-foot fence stops most dogs; for jumpers or toddlers, go 5 to 6 feet.
- Wind and sun control: A solid fence deflects wind hard and can create turbulence right behind it. Semi-privacy or lattice panels let controlled airflow through, reducing structural stress and keeping the patio more comfortable in gusty climates.
- Debris and visual clutter: Even a low decorative fence or screen panel along one side can carve out a defined outdoor room without a full enclosure.
Most people land on a combination: solid panels on the neighbor-facing sides, a gate on the entry side, and maybe a shorter decorative section along the front. Sketch a simple overhead layout of your patio on paper and label which sides need what. That sketch becomes your materials list. If you're working with an apartment patio or a rented space with landlord restrictions, the approach shifts significantly toward temporary or freestanding options rather than post-in-concrete construction.
Pick your fencing style and material
The four materials most people choose for a patio enclosure are wood, vinyl, aluminum, and screen or fabric panel systems. Each has a genuine sweet spot, and none is universally best.
| Material | Best For | Lifespan | Maintenance | Cost (relative) | Notes |
|---|---|---|---|---|---|
| Pressure-treated wood | Privacy, customizable height, budget builds | 15–25 years with care | Stain or seal every 2–3 years; quality sealers claim up to 10 years protection | Low–Medium | Heavy; needs solid footings; looks great painted or stained |
| Vinyl | Low-maintenance privacy, humid or coastal climates | 20–30 years | Rinse with a garden hose; vinyl-safe cleaner for stains; no painting | Medium–High | Can yellow over time in intense UV; avoid abrasive pads or pressure washers |
| Aluminum | Decorative borders, pool-adjacent areas, long lifespan | 20+ years | Occasional cleaning and touch-up paint on chips | Medium–High | Less privacy than wood/vinyl in standard picket styles; very rust-resistant |
| Screen or fabric panels | Sun/wind filtering, light privacy, seasonal use | 3–10 years depending on UV exposure | Rinse off, inspect for tears annually, replace panels as needed | Low | Not a security fence; great paired with a partial solid frame |
For a typical suburban patio where privacy is the main goal, pressure-treated wood gives you the most flexibility at the lowest material cost. Vinyl is the better long-term pick if you genuinely hate maintenance tasks. Aluminum is worth considering if the enclosure borders a pool (it meets most pool-fence code requirements and doesn't corrode). Screen or fabric panel systems are a good lightweight option if you're mainly blocking afternoon sun or light wind and want something you can swap out seasonally.
Solid vs. semi-privacy panels
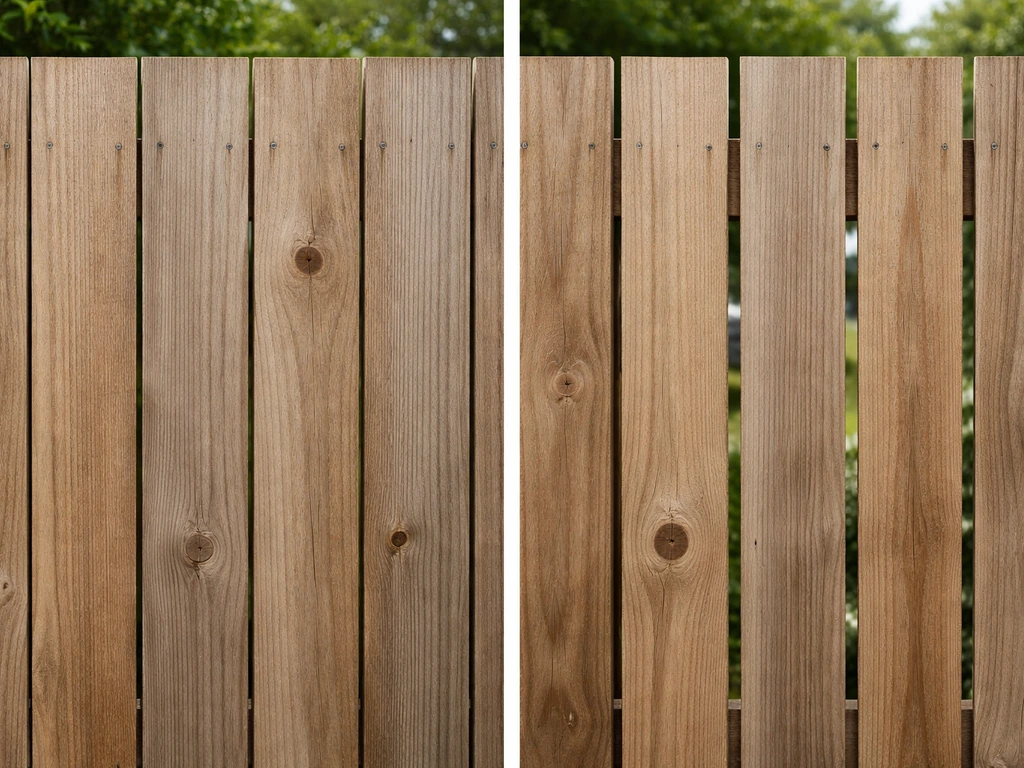
Solid panels block sight lines completely but act like a sail in high winds, putting real stress on your posts and footings. Semi-privacy panels with small gaps between boards or slats reduce that wind load significantly while still blocking most direct views. If you live somewhere with frequent afternoon gusts, semi-privacy is often the smarter structural choice, not just a design compromise.
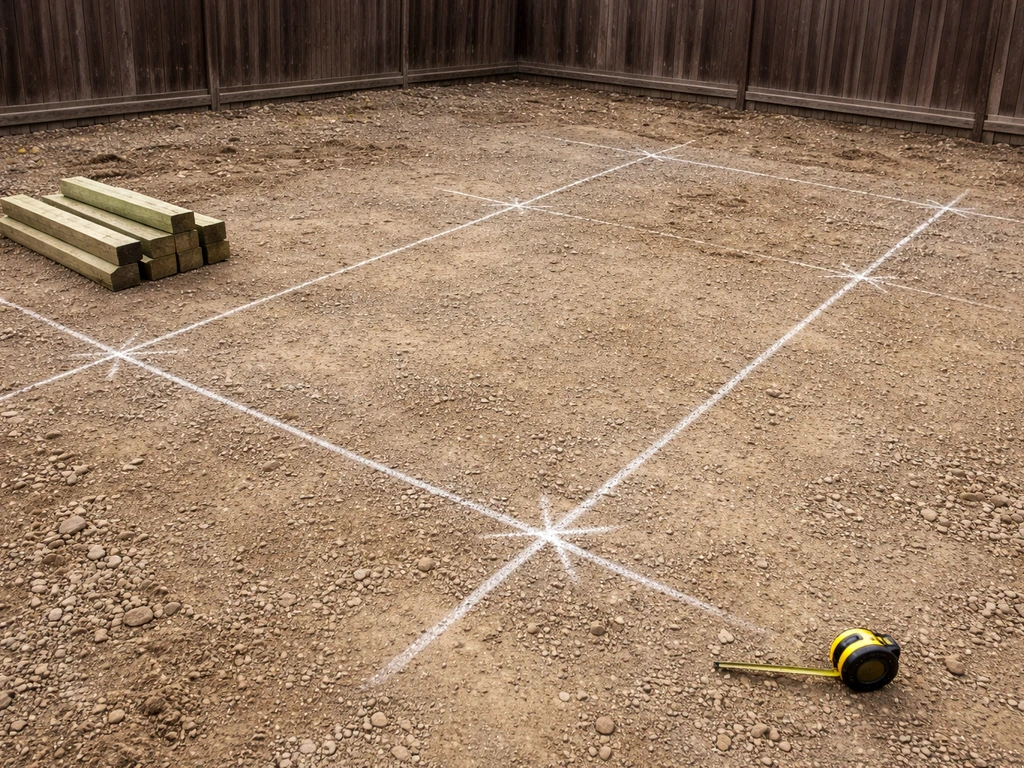
Measure the patio boundaries and plan around obstacles
Grab a 25-foot tape measure and a notepad. Walk the perimeter of your patio and record the length of each side you plan to fence. Then note every obstacle: an existing wall, a garden bed, a spigot, a step down to the yard, or an uneven grade along any run.
- Measure total linear feet for each side. Round up to the nearest foot.
- Mark where you want your gate opening. Typical single pedestrian gates are 36 to 48 inches wide. Gates wider than 48 inches need an extra diagonal brace or a double-gate design to prevent sag.
- Identify where posts will land. Standard post spacing is no more than 8 feet on center, but matching your panel widths exactly saves cutting. Most pre-made fence panels are 6 or 8 feet wide, so lay out posts to hit those increments.
- Check for underground utilities before you dig. In the US you can call 811 for a free locate service. Do this at least 3 business days before you dig.
- Handle uneven ground. You have two options: follow the grade (panels angle with the slope) or step the fence (panels stay level and step down in increments). Stepping looks cleaner on a patio perimeter and is easier to seal against gaps at the bottom.
- Note any existing patio wall, pergola post, or house wall you can tie into. Attaching a fence end to a solid wall saves you a post and adds rigidity.
Once you have measurements and post locations sketched out, count your posts, panels, and gate hardware and build your materials list. Add 10 percent to lumber and panel quantities for cuts and mistakes. Concrete: figure one 50-pound bag of fast-setting concrete mix per post hole as a starting point, scaling up for deeper holes or larger diameters. Quikrete's blank" rel="noopener noreferrer">fast-setting concrete mix datasheet is designed to achieve final set in about 20 to 40 minutes.
Build a secure frame: post layout and footings
This is the part of the job that determines whether your fence is still standing straight in five years or leaning after the first hard winter. The post-in-concrete method is the most reliable approach for a permanent patio enclosure, and the sizing math is straightforward.
Post hole sizing
The diameter of your hole should be roughly three times the diameter of the post. For a standard 4x4 post (actual 3.5 inches), that means a hole about 10 to 12 inches across. For a heavier 6x6 post at a gate location, go 15 to 18 inches. Depth matters most: aim for at least 24 inches below grade for a 6-foot fence, and always dig below the local frost line. In cold climates, an underdepth post will heave and lean as the ground freezes and thaws. Check your local code for the exact requirement; 24 inches is a common minimum in moderate climates, but some areas require more.
Setting posts in concrete
- Dig all holes to depth, then add 6 inches of gravel at the bottom of each hole for drainage.
- Set the post, check plumb on two faces with a level, and brace it in position with 2x4 braces staked into the ground. Don't skip the bracing; a post that moves while concrete sets will never be truly plumb.
- Pour fast-setting concrete mix dry into the hole around the post (following the bag instructions), then add water. Or mix in a wheelbarrow and pour wet. Fill to about 3 inches below grade so you can cover the top with soil.
- Slope the top of the concrete slightly away from the post so water drains away rather than pooling at the wood.
- Let posts cure at least 24 to 48 hours before attaching any panels or rails. Fast-setting mixes are workable in 20 to 40 minutes but reach real strength overnight.
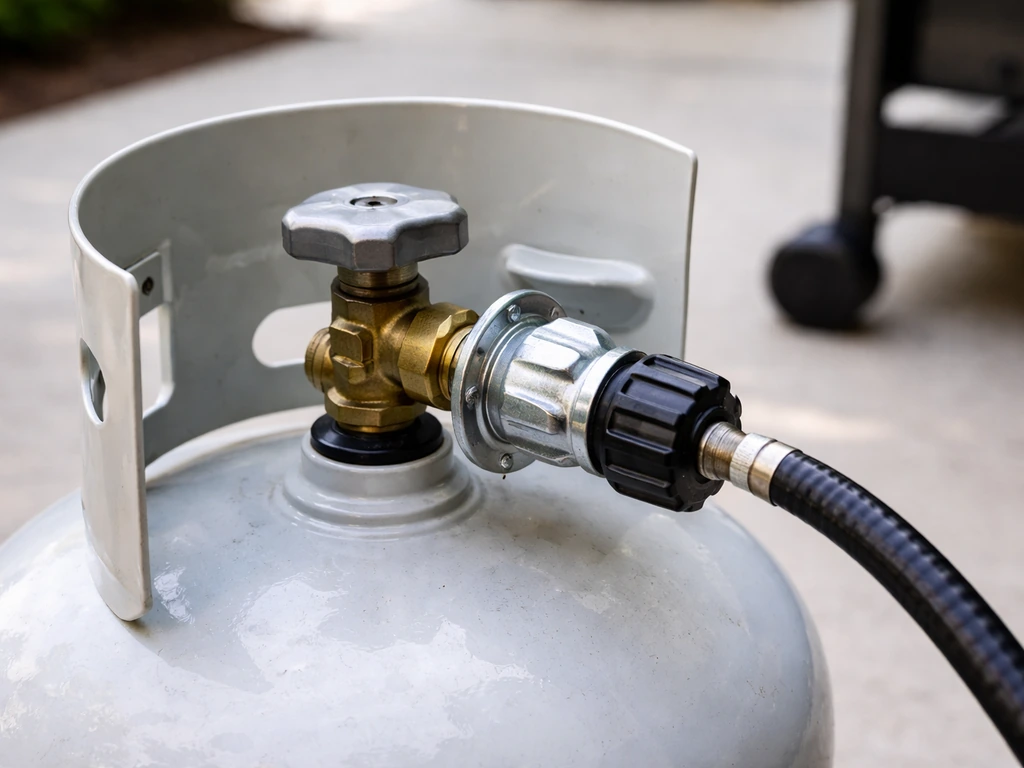
Gate posts deserve extra attention. If you use a gas grill or patio heater connected to a patio gas line, you may need to know how to disconnect patio gas safely before doing any work nearby. A solid-wood gate or a wide vinyl gate puts serious leverage on its posts every time it swings. Use 4x4 posts at minimum for lightweight gates, and step up to 6x6 posts for any heavy wood gate or a gate opening wider than 4 feet. The extra post mass isn't overkill; it's what keeps the gate from dragging on the ground two years from now.
Attach the rails
For a wood fence, two horizontal rails (one near the top, one near the bottom) are standard for panels up to 6 feet tall. Add a middle rail for taller panels or if your infill boards are thin. Use structural screws or through-bolts at each rail-to-post connection, not just nails. Level each rail before fastening.
Install panels, screens, and a gate that actually works
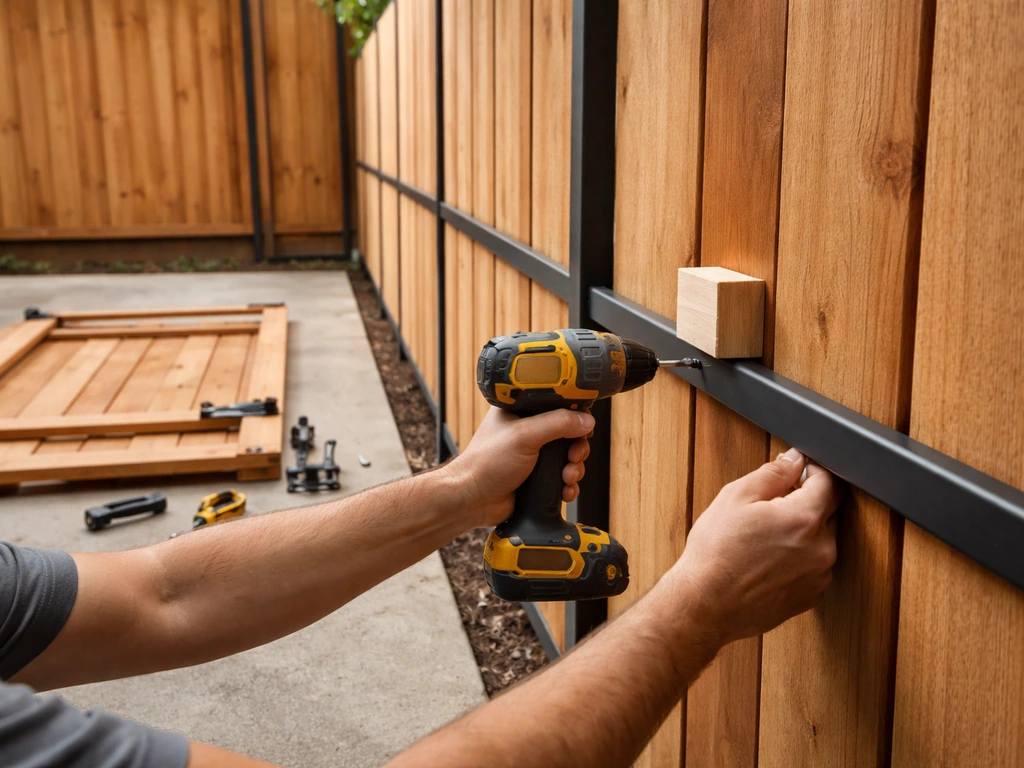
Attaching panels or boards
For individual fence boards, work from one end and use a spacer block to keep gaps consistent if you want a semi-privacy look, or butt boards tight for full privacy. Fasten each board with two screws per rail, keeping screws back at least 3/4 inch from board edges to prevent splitting. For pre-made panels (wood or vinyl), drop the panel into the post channels or attach with manufacturer-supplied brackets. Check level as you go; a panel that starts slightly off will look worse the further you get.
Hanging the gate
This is where most DIY patio fences get sloppy, so take your time. Hinge placement and gap clearance are the two things that determine whether a gate swings freely forever or starts dragging within a season.
- Attach hinges to the gate frame first, then hold the gate in the opening at the correct height (typically a 2-inch gap at the bottom for clearance over a patio surface).
- Target a gap of 5/8 to 3/4 inch between the latch post and the latch side of the gate. This gives enough clearance to open and close easily without slop.
- Use a level to confirm the gate is plumb before drilling hinge screws into the post. Misaligned hinges are the number-one cause of gates that sag, drag, or fail to latch.
- Install the latch at a comfortable height (typically 42 to 48 inches from ground for adult use). If the enclosure has any role in keeping children or pets in, place the latch high enough that a child can't reach it, or choose a flip-over style latch that requires deliberate adult action.
- If this enclosure adjoins a pool, check whether your local code requires a self-closing, self-latching gate. Many jurisdictions do, and those requirements are enforced.
Finishing details that make a real difference
- Cap all post tops with a post cap to shed water. An uncapped post soaks up rain from the end grain and rots from the top down.
- Caulk or trim any gap where the fence meets an existing house wall to block drafts and critters.
- If you're using wood, apply a stain or sealer before or immediately after installation. End cuts especially absorb moisture fast; brush sealer onto every cut end.
- For screen or fabric panel systems, use stainless or coated staples and tensioning hardware. Loose screen billows in wind and tears at attachment points.
- Add a door sweep or threshold strip at the base of the gate if you need to close the gap against small pets or debris.
Permits, safety rules, and a simple maintenance routine
Do you need a permit?
Most municipalities don't require a permit for a fence under 6 feet tall, but you need to confirm this with your local building department before you dig a single hole. Some cities draw the line at 6 feet exactly: in Mansfield, TX, for example, any fence portion exceeding 6 feet in height requires a permit. HOA communities often have their own rules on top of city codes. Brambleton HOA, as one example, limits privacy screens attached to a deck to no more than 3 feet above the deck railing, capping total height at 6 feet from the deck floor. These restrictions vary enormously by location, so a quick phone call or website check saves you from having to tear down work you already did.
Property line setbacks are the other common requirement. Many codes require a fence to sit 1 to 2 feet inside your property line, not on it. Have your survey handy or talk to your neighbor before you set posts near a shared boundary.
Safety considerations
- Call 811 (in the US) before digging to locate underground utilities. This is free and legally required in most states.
- If any part of the patio is adjacent to a pool, verify pool-fence codes in your jurisdiction. These typically require a fence at least 48 inches tall, no gaps wider than 4 inches, and a self-closing, self-latching gate.
- If the enclosure is attached to the house, check that you're not blocking an emergency egress window or a required exit path.
- Deck-adjacent fences or screens generally need to meet guard rail height requirements: the IRC sets a minimum of 36 inches for most residential decks, though local adoption varies.
Seasonal maintenance checklist
A fenced patio is a low-maintenance project once it's up, but a quick once-over each spring and fall keeps it in good shape for years. A privacy wall for a patio also benefits from checking fasteners and keeping panels properly aligned so airflow and visibility stay controlled year-round.
- Wood fences: inspect for soft spots, rot at post bases, and cracked boards each spring. Re-stain or re-seal any bare wood. A quality fence stain or sealer applied to sound wood can protect for up to 10 years, but most DIYers see better results with a light recoat every 2 to 3 years on exposed surfaces.
- Vinyl fences: rinse with a garden hose to clear dirt and pollen. For stubborn stains, use a vinyl-safe cleaner. Avoid abrasive scrub pads, harsh solvents, and high-pressure washers, which can scratch or cloud the finish. Check for rust stains from metal hardware and treat with a vinyl-safe rust remover.
- Aluminum fences: wipe down annually and touch up any chipped paint immediately to prevent corrosion at the bare spot.
- All fence types: check post bases for soil movement, especially after the first winter post-installation. Tap posts to feel for looseness. Tighten all gate hardware screws. Test gate latch and hinge function; apply a drop of oil to metal hardware to prevent rust and stiff movement.
- Screen and fabric panels: inspect for tears, stretched sections, or detached edges. Replace damaged panels rather than patching, especially if they're sun-facing. UV-exposed fabric typically degrades faster than shaded sections.
If you're working with a rental or apartment patio rather than a homeowner situation, the whole approach shifts toward freestanding or non-permanent structures. If you need a temporary solution, focus on freestanding panels, snap-on screens, and adjustable mounts to close off the patio without drilling close off an apartment patio. The permit, post-in-concrete, and gate hardware steps above all assume you own the space and can make permanent modifications. For renters, the same design logic applies but the execution needs to be anchored-without-damage or truly freestanding. That scenario has its own planning considerations worth walking through separately before you commit to any materials. For renters, that means you typically need to rely on freestanding enclosures or temporary systems rather than a permanent build apartment patio.
FAQ
How high can I fence off my patio without permits?
Many areas treat fences under a specific height as exempt, but the threshold is not always 6 feet and can differ by whether the fence is solid, on a corner lot, or near a right-of-way. Call your local building department and ask for the fence height rule plus any privacy screen or deck attachment limits, since HOA rules can be more restrictive than city code.
Should I install the fence exactly on the property line?
Usually no. Common requirements ask you to keep the fence 1 to 2 feet inside your property line (or use an easement-aware setback). Use your survey or ask for a boundary marking before digging, and avoid setting posts on or across shared boundaries where neighbors or easements may be impacted.
What is the best way to measure for posts when the patio edges are uneven?
Measure each run from a fixed corner of the patio, then mark post locations to account for slopes or steps down to the yard. If the grade changes along a fence line, plan your fence to follow the ground with a stepped profile, or use posts and brackets sized for that drop, rather than forcing a single level board height.
Can I use a smaller hole depth or diameter to save time and concrete?
Avoid it for a permanent enclosure. Depth affects frost heave risk, and width affects how well the post stays aligned. The typical guidance is to dig below the local frost line and use a hole roughly three times the post diameter, then verify local code, especially in colder climates.
What should I do if my patio is close to a pool or needs code-compliant safety?
Assume pool areas have stricter requirements, including specific gate latching and opening restrictions. Aluminum can be a good option because it tends to resist corrosion, but you still must check local pool-fence regulations and ensure the gate hardware and clearance meet those rules.
How do I prevent a gate from sagging or dragging over time?
Use appropriately sized gate posts, keep the post-to-post alignment tight, and pay attention to hinge placement and gate clearance (especially at the bottom). For heavy gates or wide openings, step up to larger posts and consider a hinge-side support strategy, since sag usually starts where leverage and movement are highest.
Is semi-privacy fencing actually sturdier than full privacy panels?
Often yes. Solid panels act like a sail in wind, which increases stress on footings and posts. Semi-privacy with controlled gaps reduces wind load while still blocking most direct views, which can extend how long the fence stays plumb after repeated gusts.
Should I use rails and screws or just nails for fence boards?
Use structural fasteners, not nails, at rail connections, and keep screw spacing consistent. Structural screws or through-bolts at each rail-to-post joint hold alignment better, and predrilling and proper edge spacing reduces splitting, especially with pressure-treated wood.
How much spacing should I leave between individual boards for a semi-privacy look?
Choose a consistent gap and measure with a spacer block so every board line is uniform. The right gap depends on how much airflow you want and how much view you want blocked, but consistency matters as much as the exact number, because uneven spacing looks worse than slight view changes.
What maintenance should I plan for after installing a patio fence?
Plan quick checks in spring and fall: look for loose fasteners, panels that shifted out of level, and any post movement at the base. For wood, inspect for early splitting or finish wear, and for vinyl or aluminum, confirm brackets and rails remain tight so wind does not work them loose.
What are good renter-friendly ways to fence off a patio without drilling permanent footings?
Use freestanding panels, adjustable mounts, and snap-on screen systems designed for temporary setups. Aim for a design that is stable on the patio surface without permanent fasteners, and confirm landlord or building rules before installing any anchors or brackets.
What if I have a gas grill or patio heater near the enclosure?
Before you work around lines or valves, identify whether any appliance is connected to patio gas and follow safe shutoff and disconnect steps if you need to move components. Keep any new fencing and gate hardware positioned so you do not interfere with gas access points, service shutoffs, or manufacturer clearances.
How do I decide between wood, vinyl, aluminum, and screen panels for my climate?
Match the material to your biggest pain point. If you want low upfront cost and flexibility, wood often works best; if you want minimal upkeep, vinyl is a strong option; for corrosion resistance near pools, aluminum is frequently preferred; for sun and light-wind control with easier seasonal changes, screen or fabric systems can be the simplest.
Next Articles
How to Build a Privacy Wall for Patio: Step-by-Step DIY
Step-by-step DIY plan to build a patio privacy wall, choosing materials, permits, footings, framing, finishes, and maint
How to Disconnect Patio Gas Safely Step by Step
Step-by-step guide to disconnect patio gas safely, tools, valve shutdown, hose/regulator removal, leak checks, and troub

How to Decorate a Long Narrow Patio: Layout Tips
Practical DIY layout and decor tips to widen a long narrow patio using zoning, furniture spacing, lighting, greenery, an