Build a simple framed enclosure with a hinged front door and vented top panels. That single design handles 90% of patio trash can situations: it hides the bin, keeps pests out, handles rain, and still lets you roll the can out on trash day in about 10 seconds. Whether you go with a basic wood frame and lattice panels or a more finished cedar-and-screen cabinet that matches your screened patio, the core build is the same. This guide walks you through every decision, measurement, and step so you can start cutting wood this weekend.
DIY Patio Trash Can Build Guide for Your Outdoor Space

Felix Brennan
3 Jul 2026
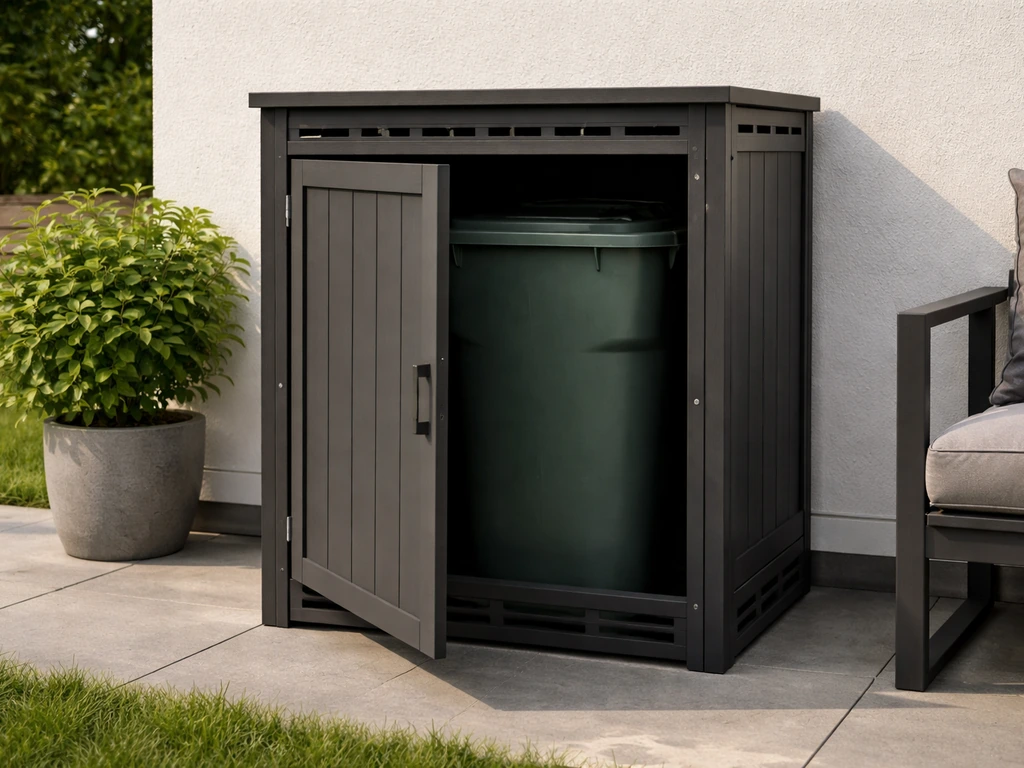
Figure out which trash can setup actually fits your patio
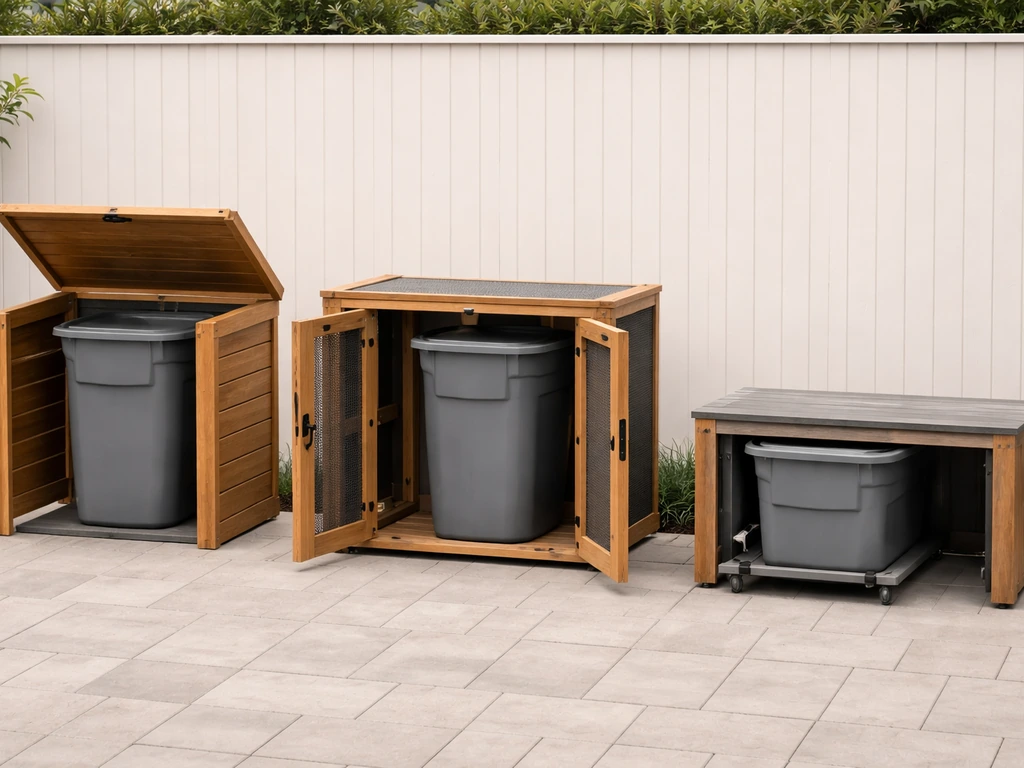
Before you cut anything, you need to decide which of the three main formats makes sense for your space. They solve slightly different problems, and picking the wrong one wastes time and materials.
The bin cover (simplest)
This is just a hood or sleeve that wraps around the outside of one or two cans. No door, no full frame. It disguises the bins and blocks direct sun (which dramatically cuts odor on hot days) but it doesn't lock out raccoons, and it doesn't drain rain away from the can lid. Good option if you have a small patio, your bins live under a covered roof already, and pests aren't a big issue where you live.
The framed enclosure (most practical)
A three-walled or four-walled framed box with a hinged door at the front is the workhorse design we'll focus on in this guide. It keeps bins fully contained, works with a latch to stop raccoons, can be vented at the top to control odor, and drains correctly if you angle the floor or add a gap at the bottom. It also looks intentional on a patio rather than like an afterthought. Plan for a Saturday and a half to build one, roughly 6 to 10 hours depending on your skill level and whether you're matching it to existing patio trim.
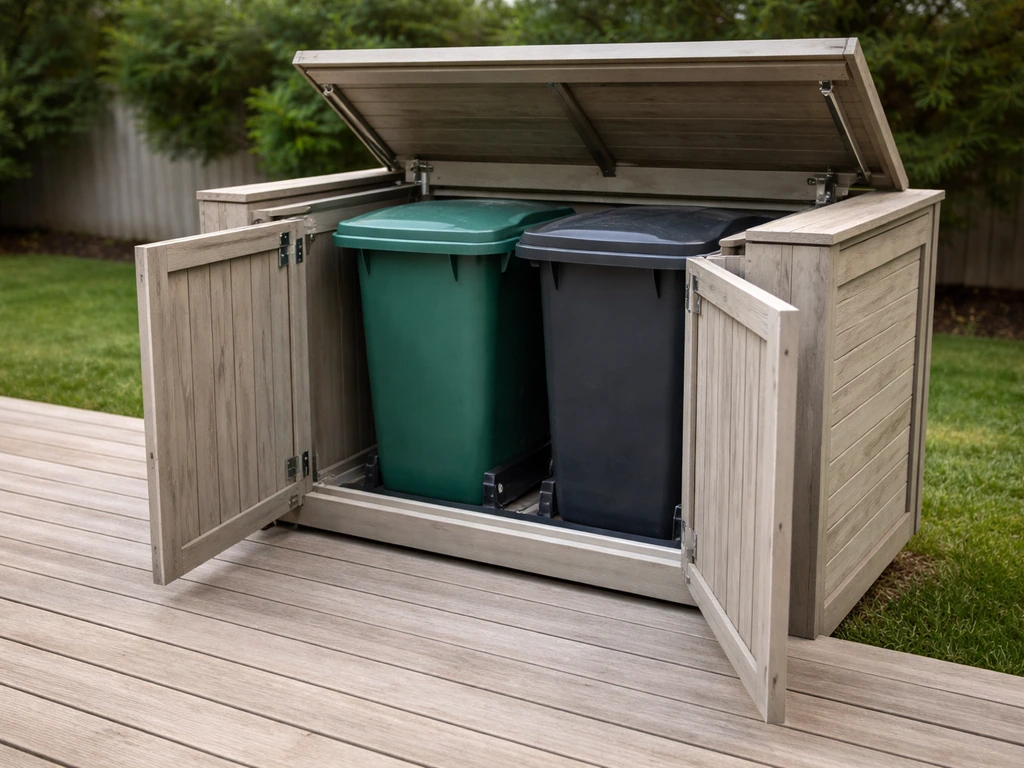
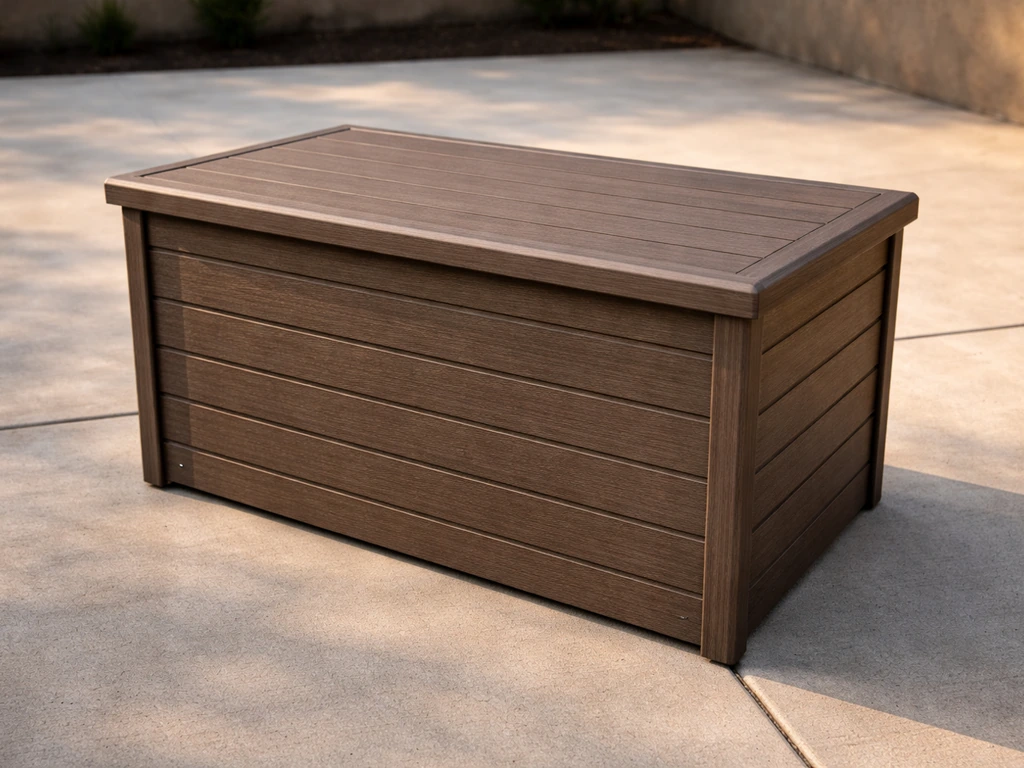
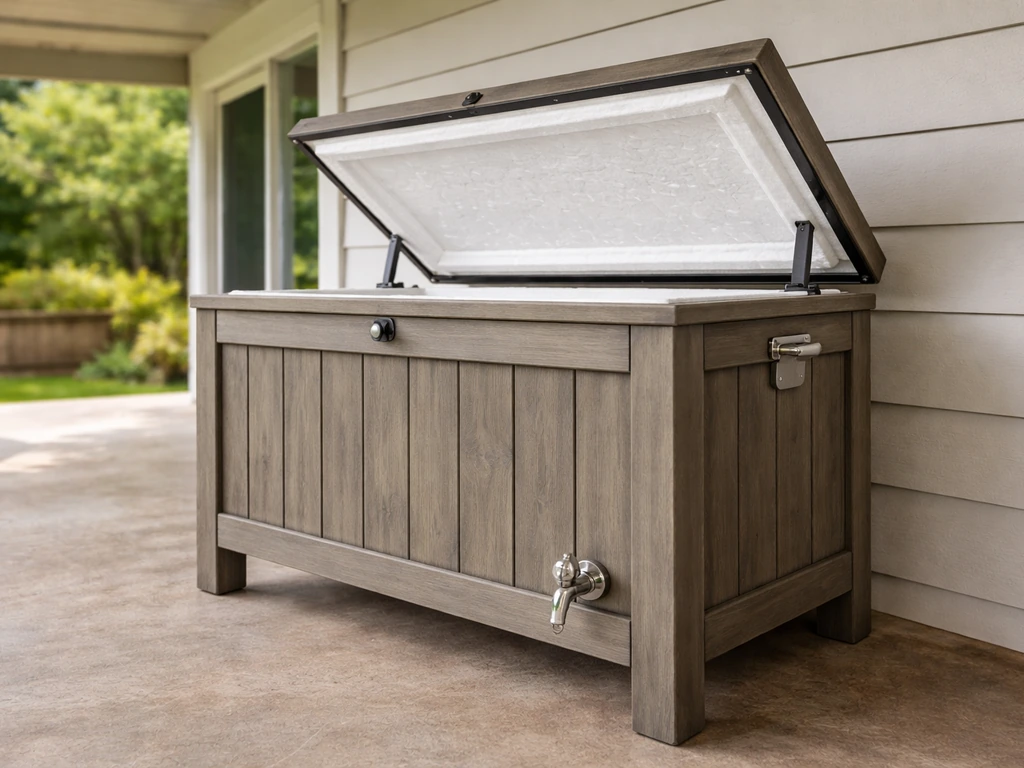
The hideaway or roll-out cabinet (most polished)
This is a tighter, furniture-style box with a lift lid or full-swing double doors that integrates into a deck bench or patio storage wall. It looks the most finished and is great if your patio doubles as outdoor living space where guests will see the area. The tradeoff is complexity, it's a harder build, costs more, and requires precise measurements so the lid or doors clear properly. If a patio storage box project sounds appealing to you, that direction pairs well with this style of trash can enclosure. If you want the same build style for bulk items or gardening tools, you can adapt these steps into a patio storage box for extra covered space trash can enclosure.
| Style | Best for | Difficulty | Approx. cost (materials) | Pest/rain protection |
|---|---|---|---|---|
| Bin cover/sleeve | Small patios, covered areas, minimal pests | Easy | $20–$60 | Low |
| Framed enclosure with door | Most patios, one or two cans, year-round use | Moderate | $80–$200 | High |
| Hideaway/roll-out cabinet | Visible living spaces, integrated patio builds | Hard | $150–$350+ | High |
Measure your bin and your patio placement before anything else
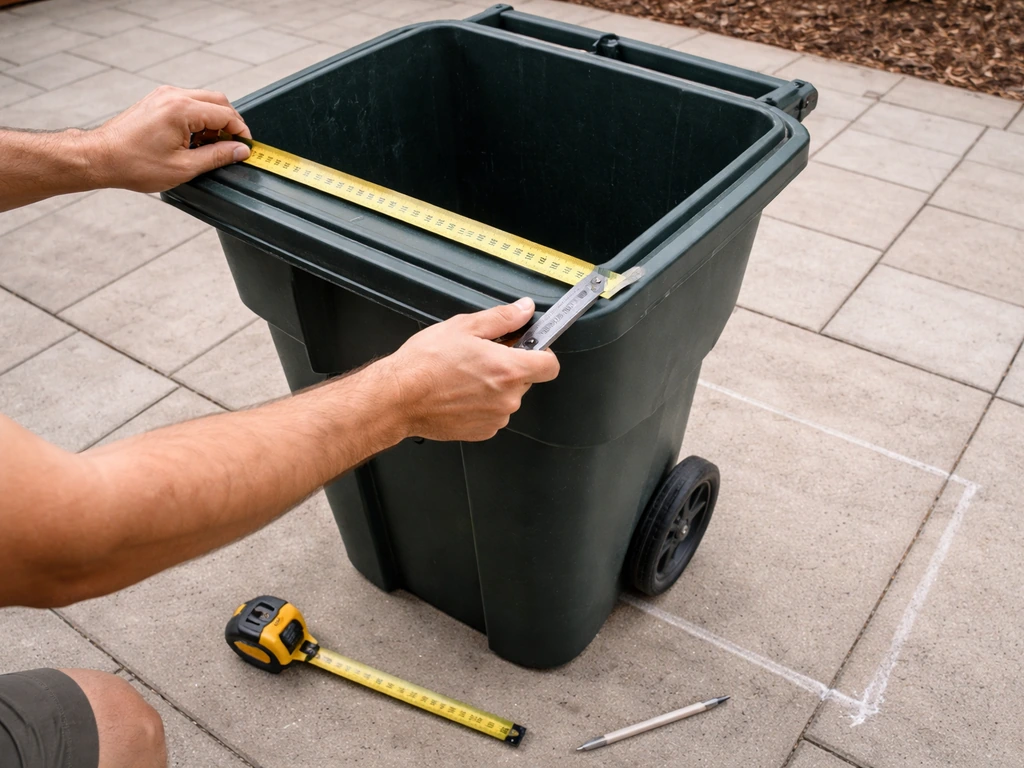
Bad measurements are the number-one reason DIY enclosures end up either too tight to use or too big and awkward-looking. Measure your actual trash cans first, not a standard size. A typical 32-gallon rollout can runs about 20 inches wide by 22 inches deep by 36 inches tall with the lid closed. A 96-gallon cart is closer to 28 inches wide by 34 inches deep by 46 inches tall. Write down your specific numbers and add 3 to 4 inches on each side for clearance, plus 6 inches of headroom above the lid, you need room to pull the bag out without hitting the top of the enclosure.
For placement on the patio, keep these guidelines in mind. Stay at least 5 feet away from any window, doorway into the house, or combustible wall, that's a standard spacing recommendation from municipal trash enclosure guidelines and it also just makes practical sense for odor and pest management.
The City of Palo Alto’s trash enclosure guidelines recommend keeping the enclosure at least 5 feet away from windows, doorways, or combustible walls to support odor and pest management and reduce related impacts at least 5 feet away from any window, doorway into the house, or combustible wall.
You want the enclosure's door to face outward toward the street or alley access path, not toward your seating area. The door should swing a full 180 degrees so you can slide the can out without fighting the enclosure.
- Measure bin width, depth, and height with the lid closed and add 3–4 inches clearance on each side
- Add 6 inches of vertical clearance above the closed lid for bag removal
- Keep the enclosure at least 5 feet from windows, exterior doors, and combustible walls
- Orient the door opening toward your trash pickup path, not toward seating
- Check that the door can swing open 180 degrees without hitting a wall, railing, or gate
- If you're on a screened or covered patio, confirm airflow won't be blocked in the corner you're choosing
- For two-can enclosures, add both can widths plus 4 inches of shared clearance between cans, plus wall thickness on each side
Sketch a quick top-down floor plan on paper before you buy materials. Mark where the bin sits, where the door swings, and how far the enclosure extends from the patio wall or railing. This takes 10 minutes and saves a lot of recutting later.
Materials and tools for a weatherproof outdoor build
For a framed enclosure that will survive multiple seasons, stick to materials rated for exterior use from the start. Pressure-treated lumber (PT) for the frame, with cedar or composite boards for the siding/panels, is the most reliable and budget-friendly combination. Cedar naturally resists rot and insects without treatment. Composite decking boards work as panel material if you want something that never needs painting. Aluminum angle stock and rust-proof hardware are good upgrades if you're near the coast or in a humid climate, aluminum enclosures genuinely don't rust or warp the way even treated wood eventually can.
Lumber and panel materials
- 2x4 PT lumber for the main frame posts and rails (pick straight pieces — sight down the length before buying)
- 1x6 or 1x8 cedar boards for siding panels, or composite deck boards as an alternative
- 1/2-inch exterior-grade plywood for the roof panel if you want a solid top (or cedar slats for a slatted roof that sheds water and ventilates)
- Pressure-treated 2x2 or 1x2 strips for door frame and stop trim
- Lattice panels or 1/4-inch screen mesh for the ventilation gap at the top of each wall
Hardware
This is where a lot of DIY outdoor projects fail early. Use hot-dip galvanized fasteners (conforming to ASTM A153 or A653) for pressure-treated lumber, the copper compounds in PT wood corrode regular zinc-plated screws within a season or two. If you're building with cedar or in a saltwater environment, stainless steel screws (304 or 316 grade) are the right call. Do not mix metals: galvanized fasteners with galvanized connectors, stainless with stainless. For hinges and latches on the door, use heavy-duty stainless steel exterior-rated hardware. A spring-loaded or gravity latch that keeps the door closed hands-free is worth the extra few dollars because a door that blows open in the wind defeats the whole point.
- 3-inch hot-dip galvanized or stainless deck screws for framing
- 1-5/8-inch stainless screws for attaching siding boards to frame
- 2–3 heavy-duty stainless steel exterior hinges per door (3 hinges for doors taller than 36 inches)
- One heavy-duty gate latch with padlock capability (for raccoon deterrence)
- Post base hardware if anchoring to a concrete patio surface
- Exterior silicone caulk or polyurethane sealant for sealing joints and roof edges
- 5mm galvanized or fiberglass screen mesh for ventilation panels
Tools you'll need
- Circular saw or miter saw
- Drill/driver with bits
- Tape measure, speed square, and pencil
- Level (2-foot and 4-foot)
- Clamps (4 minimum)
- Staple gun (for screen mesh)
- Caulk gun
- Sandpaper (80 and 120 grit) and paintbrush for finish coats
How to build it: frame, walls, roof, and door
These steps cover a standard three-walled framed enclosure with a hinged front door, the most practical design for most patios. If you're building a freestanding four-walled version away from a wall or fence, just add a fourth wall using the same framing method as the side walls.
Step 1: Cut and assemble the frame
- Cut four vertical corner posts from 2x4 PT lumber to your target enclosure height (bin height plus 6 inches of clearance, plus roof thickness — usually 48 to 54 inches total for a standard 32-gallon can setup).
- Cut top and bottom horizontal rails for the back wall and both side walls from 2x4 PT. Bottom rails sit on the ground or patio surface; top rails connect the post tops.
- Assemble each wall panel flat on the ground: lay the two posts parallel, then attach top and bottom rails between them using two galvanized screws per joint. Use a speed square to confirm 90-degree corners before fastening.
- Stand the back wall upright and brace it temporarily. Attach the two side walls to the back wall posts using 3-inch screws through the side post into the back post face. Check level and plumb before driving all fasteners.
- If anchoring to a concrete patio, use expansion anchors or post base brackets to secure the bottom rails. If sitting on pavers, use ground anchors or secure to an adjacent wall/fence with L-brackets.
Step 2: Add wall panels and ventilation gap
- Attach your siding boards (cedar, composite, or pressure-treated) horizontally or vertically to the frame using 1-5/8-inch screws. Leave a 1/8-inch gap between boards for drainage and expansion — don't butt them tight together.
- Leave a 3 to 4-inch open gap at the very top of each wall panel, just below where the roof will sit. This is your ventilation zone.
- Staple 5mm galvanized or fiberglass screen mesh across these top gaps on all three walls. This allows airflow to carry odors out while blocking insects and birds — the same screened-ventilation approach used in commercial trash enclosures.
Step 3: Build and attach the roof
- Cut a roof panel from 1/2-inch exterior plywood, or assemble a slatted cedar roof by spacing 1x4 boards with 1/2-inch gaps for drainage. The roof should overhang each side by 2 to 3 inches to shed water away from the walls.
- Pitch the roof slightly (about 1/4 inch per foot of run) toward the front or back — away from any adjacent patio wall — so rain drains off the back edge rather than pooling.
- Attach the roof panel to the top rails using 2-inch screws from above. If using plywood, cover the top surface with roll roofing material or exterior caulk all seams generously to prevent water infiltration.
Step 4: Frame and hang the access door
- Measure the opening between your two front corner posts and build a door frame from 2x2 or 2x3 PT lumber that is 1/2 inch narrower than the opening on each side and 1/2 inch shorter top and bottom (for swing clearance).
- Fill the door frame with the same siding boards or a single sheet of exterior plywood, attaching boards to the door frame the same way as the wall panels.
- Mount two or three heavy-duty stainless steel hinges on one side of the door frame. Mark the hinge locations on the adjacent post, pre-drill pilot holes, and attach. A door wider than 24 inches needs three hinges to prevent sagging.
- Test the swing: the door should open 180 degrees flat against the side wall. If it binds at the top or bottom, trim as needed with a plane or circular saw.
- Attach your exterior gate latch on the opposite side from the hinges. A latch that requires deliberate lift-and-pull to open is more raccoon-resistant than a simple magnetic catch. Add a hasp if you want padlock capability.
- Install a door stop (a short strip of 1x2 trim) on the inside of the door opening so the door doesn't swing inward and bump the trash can.
Weatherproofing, odor control, pest management, and drainage
Building the box is only half the job. Getting the long-term details right is what separates an enclosure that still works well in year three from one that smells, attracts pests, and warps by the second summer.
Sealing out water
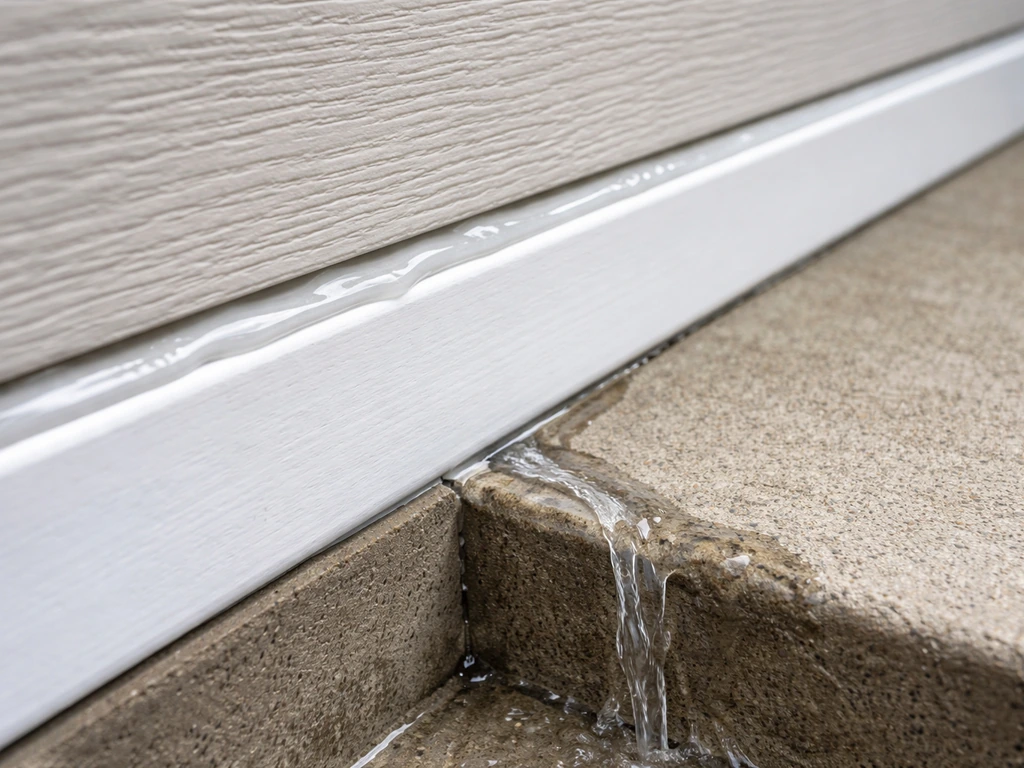
Run a bead of exterior silicone caulk along every joint where the roof meets the walls, where the corner posts meet rails, and anywhere two pieces of wood create a horizontal ledge where water can pool. For exterior perimeter sealing, joint and expansion/connection joint guidance calls for using a weatherproofing silicone sealant to help prevent water intrusion where materials meet [silicone caulk along every joint](https://www. dow. com/en-us/pdp.
dowsil-813-silicone-weatherproofing-sealant. 547234z. html). Exterior polyurethane sealant (like Titebond WeatherMaster or a comparable product) handles joint movement well as the wood expands and contracts seasonally, silicone is better for gaps near screen mesh because it stays flexible.
Don't caulk the bottom of the wall panels shut: you want a small gap at grade so any water that gets in can drain out rather than sitting inside.
Drainage under and around the enclosure
If your enclosure sits on a patio slab, position it so any liquid (from rain getting in, or condensation from the can) drains toward the outer edge of the slab and away from the house. If you can slope the surface under the enclosure even 1/4 inch per foot toward the open front, that helps. Avoid positioning the enclosure in a corner where water collects. If the enclosure sits on pavers or gravel, you're in good shape, liquid drains naturally. The goal is to never let standing water sit under the can, since that breeds odor and eventually attracts pests.
Keeping pests out
The enclosure itself is your first line of defense, but the latch matters more than most people expect. Raccoons are smart enough to lift simple magnetic latches, a latch that requires a deliberate two-step motion (lift then pull) stops most of them. Screen all ventilation gaps with 5mm or smaller gauge mesh and check periodically for any holes where boards have shrunk or warped apart. On the can itself, use heavy-duty bags, double-bag particularly odorous waste, and tie off bags securely before putting them in the can. Even small pinhole leaks in bags drip food residue that draws ants and flies through the smallest gaps. Keep the lid of the actual trash can closed and latched even inside the enclosure.
Odor control inside the enclosure
Ventilation is the most important odor control feature you can build in, it's why the screened gap at the top of each wall matters. If you also want to cool drinks in the same patio setup, see our guide on how to make a patio cooler. Hot, stagnant air inside a sealed box concentrates odors fast, especially in summer. If your patio is in a particularly sunny spot, consider adding a second ventilation strip along the bottom of the wall panels (just above the drainage gap) so air can move through the enclosure rather than just accumulating at the top. A simple baking soda pack or activated charcoal sachet hung inside the enclosure helps in peak summer months.
Finishing to match your patio style
A trash enclosure that looks like a random wood box clashes with even a basic patio setup. The good news is a few simple finishing choices make it look like it belongs there.
Paint, stain, or natural finish
If your patio has painted trim, fencing, or a screened enclosure, match the enclosure to that color. Two coats of exterior paint with a primer coat underneath is the most durable finish for cedar or PT wood. If you prefer a natural wood look, use a penetrating exterior wood stain (not a film stain), it soaks in and doesn't peel, which means less maintenance. Apply stain before assembling the door if you can, so the backs of all boards get coated. Let PT lumber dry for at least 30 days before painting or staining, fresh PT is still wet from the treatment process and won't hold finish well.
Panel style options that match screened patio elements
- Horizontal shiplap boards: modern, clean look that matches most contemporary patio enclosures and privacy screens
- Vertical board-and-batten: traditional and works well with cottage or farmhouse patio styles
- Lattice panels: allow even more airflow and match pergola or arbor lattice details on the patio
- Screen panel inserts: if your patio has screened walls, mirroring that screen-frame aesthetic on the enclosure ties it into the overall enclosure design
Optional upgrades worth considering
- Add a small planter box or window box to the top or side of the enclosure to soften the look and draw the eye to something other than 'this is hiding trash'
- Install a simple rope handle on the door exterior for easier one-hand opening when your hands are full
- Add a small hook or clip inside the enclosure for a spare bag roll so replacement bags are always right there
- If you live in a very sunny climate, a light-colored or reflective roof finish keeps the interior cooler and reduces odor — related to the same principles behind keeping a patio cool in summer
Maintenance checklist and quick troubleshooting
A well-built enclosure needs very little ongoing attention, but a short maintenance routine keeps it working and smelling fine year after year. Set a reminder to do a quick check each season.
Monthly
- Rinse the inside of the trash can itself with a hose, let it drain fully, then disinfect with a cleaning spray before putting in a fresh bag — aim to do this at least once a month to prevent odor buildup
- Check the latch and hinges for any stiffness or corrosion and spray with silicone lubricant if needed
- Inspect the screen mesh panels at the top of the walls for any holes, tears, or gaps that could let pests in
Each season
- Check caulked joints and reapply anywhere you see cracking or separation
- Look at the roof panel edge for signs of water damage or warping and touch up paint or sealant as needed
- Tighten any loose screws, especially on the door hinges — seasonal wood movement loosens fasteners over time
- Check the base of the structure for rot or insect activity, particularly at any points where wood contacts the ground
Common problems and fixes
| Problem | Likely cause | Fix |
|---|---|---|
| Door won't close or latches crooked | Frame racked or hinge screws loose | Tighten hinge screws, add a diagonal brace inside the door frame, or plane the binding edge |
| Enclosure smells even when empty | Not enough ventilation or standing water inside | Enlarge ventilation screen gaps, check drainage slope, add charcoal deodorizer |
| Raccoons or pests getting in | Latch too simple or gap in screen mesh | Upgrade to a two-step latch, repair or replace screen mesh, check for gaps at base |
| Wood warping or cracking in first season | PT lumber used before it dried out, or no sealant on end cuts | Seal all end-grain cuts with end-grain sealer before assembly next time; apply stain or paint ASAP |
| Door swings open in wind | Door stop missing or latch not strong enough | Add a door stop on the inside, upgrade to a heavier spring latch, or add a secondary hook-and-eye catch |
| Water pooling inside the enclosure | Flat floor or no drainage gap at base | Add a slight slope under the can, lift the enclosure floor on small PT spacers, or add a 1-inch gap at the base of the wall panels |
The whole project is genuinely doable in a weekend. Measure your cans this evening, sketch the layout on paper, and put together your materials list tonight. With straight lumber, the right hardware, and the ventilation and drainage details handled upfront, you'll have an enclosure that looks like it was always meant to be part of the patio, and one that actually keeps the pests, odors, and mess under control for years.
FAQ
Can I build a DIY patio trash can enclosure for 2 bins side by side, and do the dimensions change?
Yes. Use the same framed enclosure depth, but increase the frame width by the sum of both bin widths plus clearance on each side. Keep headroom above each lid (not just above the tallest bin) so you can pull bags out without hitting the roof. If you add one shared door, plan the latch location so both cans remain accessible from the same opening.
What kind of ventilation should I use if my top panels are covered by a roof overhang?
Even under an overhang, odors and moisture still build inside. Keep ventilation at the highest practical area (near the top) and consider adding a second lower airflow strip just above the drainage gap, so air can cycle through instead of pooling. Cover vents with 5mm or smaller mesh to block pests.
Should the door have a gap for airflow, or will that let in pests and rain?
For pest control, avoid large openings around the door. Instead, rely on the vented top panels and mesh-covered vent areas. If you need an air path, use small screened gaps rather than a wide door clearance, and ensure the bottom area still has a drainage gap.
How do I prevent the enclosure from warping if I live in a humid climate or near the coast?
Prioritize rust-proof hardware and materials rated for exterior moisture. Use aluminum angle stock and exterior-rated, rust-resistant fasteners if salt air is a factor. Also keep caulk out of the bottom joints so any water that gets in can drain away instead of being trapped against the frame.
My patio is on a slab, how can I improve drainage if I cannot slope the ground?
You can still improve drainage by positioning the enclosure so it drains toward the exterior edge of the slab, and by making sure water does not pool in the corner. If possible, add thin patio leveling shims or a slight base stand so the interior base is not sitting in a low spot. The key is to keep condensation and rainwater from remaining under the can.
Is it safe to build the enclosure directly on pavers or should I add a base?
It usually works well on pavers or gravel because liquid drains naturally. If your pavers are uneven, level the support points first so the door swings properly and the roof meets the walls without gaps. Also ensure there is still a small drainage gap at panel grade, not a sealed base that traps water.
What should I do if my trash can does not roll out smoothly after the build?
Re-check clearance around the sides and front, and verify your door swing arc is unobstructed when the can is at full extension. If the enclosure is slightly too tight, adjust by trimming the door frame or relocating hinges, rather than forcing the can, which can damage the hinge alignment over time.
Do I need a special latch for raccoons, or will any magnetic latch work?
Magnetic latches are often defeated because raccoons can test and lift them. Use a two-step style latch that requires a deliberate lift then pull action. If the door can blow open in wind, add a spring-loaded or gravity latch so it stays closed hands-free.
How often should I inspect the mesh and caulk, and what am I looking for?
Check at least once each season. Look for mesh tears, board shrinkage that opens pinholes, and any caulk gaps forming at roof-to-wall transitions or along horizontal ledges where water can pool. Re-seal only the failing areas, and keep the bottom panel gaps open for drainage.
Can I use the enclosure for recycling bins or yard waste instead of trash?
Yes, but adjust for weight and access. Recycling bins are often more irregular in shape, so measure clearance carefully and confirm the door still clears when you pull bins out fully. For yard waste, consider extra odor control, because wet leaves and clippings generate stronger smells and condensation.
What is the fastest way to choose the right format if I am unsure whether I need a full enclosure?
If you have frequent pests, uncovered storage, or you need rain protection with the lid staying closed, choose the three-walled workhorse with a hinged door. If your area is covered and pests are minimal, a wrap-around sleeve may suffice, but it will not provide the same rain handling or raccoon resistance.
How can I reduce odor without modifying the frame or adding new hardware?
Use odor-absorbing packs inside (baking soda or activated charcoal) and ensure the bin lid stays latched when inside the enclosure. Also double-bag very odorous waste and tie off bags completely, because even small bag leaks attract insects and odors regardless of ventilation.
Next Articles
How to Make a Patio Storage Box: DIY Step-by-Step
Step-by-step guide to build a durable patio storage box: plan size, choose weatherproof materials, waterproof lid, and f
How to Make a Patio Cooler: DIY Ice Chest Guide
Build a DIY patio ice chest with insulation, weatherproof lid, sizing tips, drainage, and maintenance for longer cooler

How to Keep Patio Cool in Summer: DIY Shade and Cooling
Step-by-step DIY shade, airflow, and misting tips to keep an outdoor patio cool, open or covered, fast