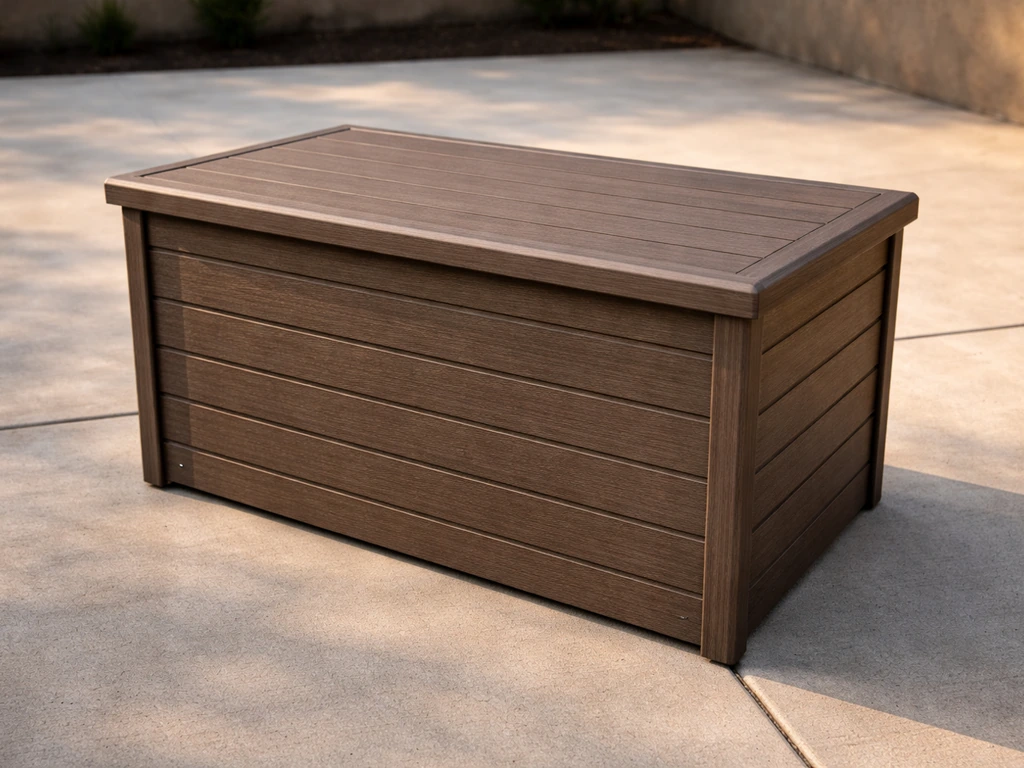
You can build a solid, weatherproof patio storage box in a weekend using pressure-treated lumber, exterior-grade fasteners, and a few basic tools. A cooler-style storage solution can keep beverages and snacks closer to the action while still protecting them from weather patio cooler. Plan for a box roughly 48 inches wide by 24 inches deep by 24 inches tall as a starting point, that size fits most patio cushions, pool accessories, and outdoor gear without taking over your patio. Add a slatted, elevated base for drainage, a hinged lid with a drip edge, and a coat of exterior sealant, and you'll have something that outlasts anything from a big-box store.
How to Make a Patio Storage Box: DIY Step-by-Step

Felix Brennan
27 Jun 2026
Plan your size and location first
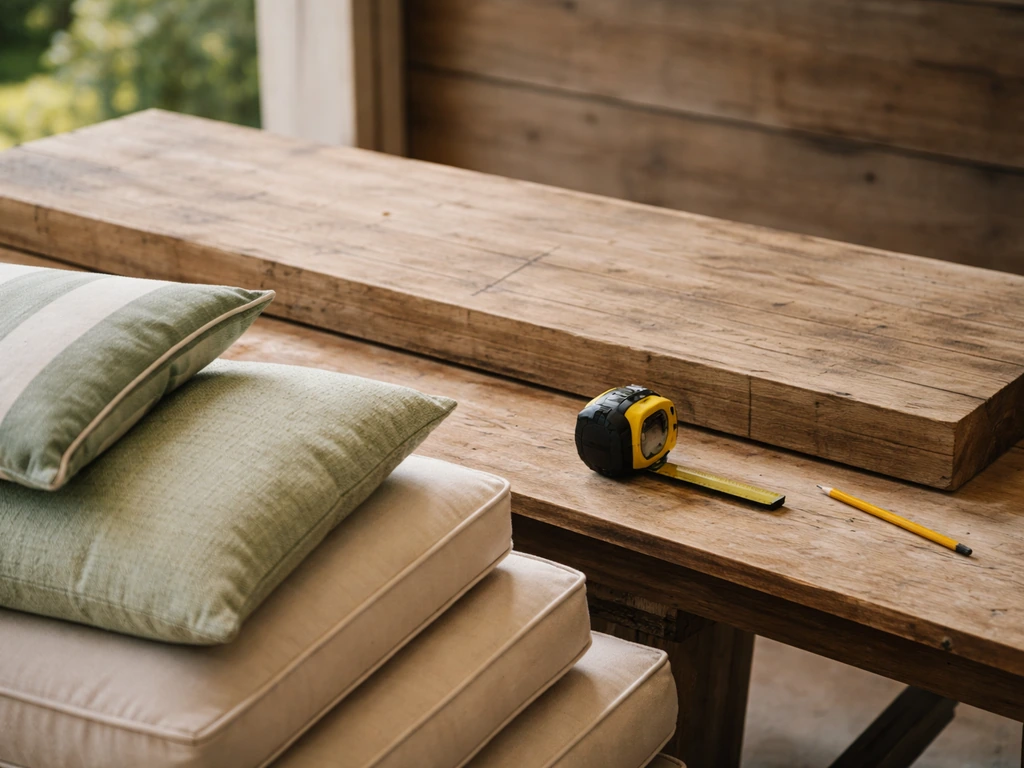
The most common mistake people make is guessing at dimensions. Before you cut a single board, pull out the items you actually want to store: chair cushions, throw pillows, pool floats, towels, a hose reel. Lay them on the ground and measure the pile. That gives you a real volume target, not a guess. A standard patio cushion for a loveseat runs about 44 inches long, 22 inches wide, and 4 inches thick, so a box interior of at least 46 x 22 x 20 inches handles them without cramming. If you're storing larger items, add 2 to 4 inches of clearance in each direction.
For location, think about three things: access, drainage, and aesthetics. If you are trying to cool a patio in a humid climate, focus on airflow and shading so the space stays comfortable without trapping moisture cool patio in a humid climate. You want the box close enough to your seating area to be useful, but not blocking foot traffic. Avoid placing it directly against a wall or fence with no airflow behind it, trapped moisture accelerates rot. Avoid low spots on the patio where water pools after rain. A flat, slightly elevated surface is ideal. If your patio surface slopes, plan to compensate with your base so the box sits level.
If your patio doubles as an entertaining space, consider sizing the lid so it can also serve as extra seating. A lid built to handle 250 to 300 pounds of load just requires a sturdy frame and thicker top panels, worth doing if you want the box to earn its footprint.
Choosing materials that actually hold up outside
Wood options
Pressure-treated lumber (PT) is the go-to for outdoor structural use. It resists rot and insect damage, and with proper maintenance it can last 10 to 15 years or longer. The trade-off is that it needs sealing on cut ends and a protective finish coat every couple of years. Cedar is a step up aesthetically and naturally rot-resistant, but it costs more. Avoid standard construction lumber (SPF, whitewood) entirely for anything that will live outside, it will rot within a season or two without heroic amounts of sealer.
Composite decking boards are an excellent choice for the lid and side panels if you want a low-maintenance finish. They won't rot, check, or splinter. The downside: they're heavier, require specific saw blades (a fine-tooth carbide blade, and for Trex specifically, the manufacturer recommends their own TrexBlade), and they cost roughly 2 to 3 times as much as PT lumber per linear foot.
Fasteners: don't get this wrong
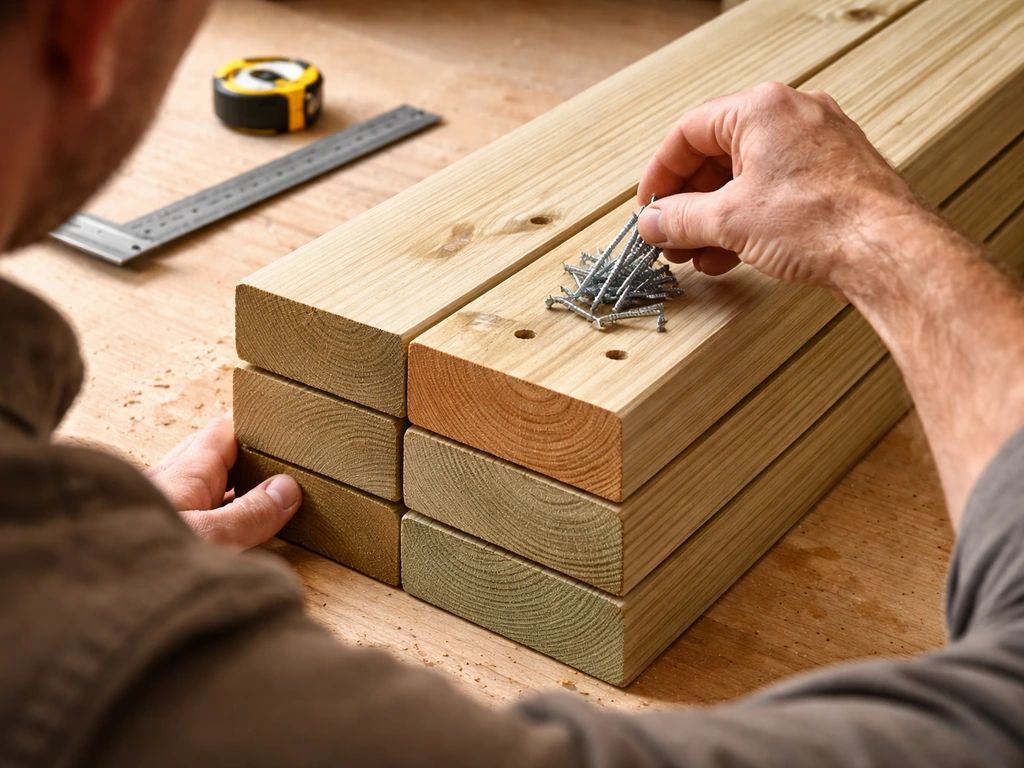
Standard zinc-plated screws will corrode within months when used with pressure-treated lumber. The chemicals in PT wood accelerate corrosion in lesser metals. Per the International Building Code, fasteners in contact with pressure-treated wood must be hot-dipped zinc-coated galvanized (minimum ASTM A653 Type G185), stainless steel, silicon bronze, or copper. For a small project like this, spending a few extra dollars on hot-dipped galvanized or stainless deck screws is the right call. Use 3-inch screws for framing connections and 1-5/8-inch screws for panel attachment.
Sealants and finishes
Every cut end of pressure-treated lumber needs to be treated with an end-cut sealer. Preservative treatment doesn't fully penetrate to the board center, so a fresh cut exposes relatively unprotected wood to moisture and pests. Products like Outlast Q8 Log Oil or Sansin Protect-a-Cut are formulated specifically for this. Apply it to every cut end before assembly. For overall surface protection, a penetrating exterior wood oil or deck stain rated for PT lumber gives you good moisture resistance without peeling. Exterior-grade silicone sealant handles fixed joints and any gaps where water could collect.
Quick material comparison
| Material | Durability | Maintenance | Cost | Best For |
|---|---|---|---|---|
| Pressure-treated pine | 10–15+ years | Seal every 2 years | Low | Frame, base, full box build |
| Cedar | 15–20+ years | Oil annually | Medium | Sides and lid if budget allows |
| Composite decking | 25+ years | Rinse occasionally | High | Lid panels, visible side panels |
| Resin/HDPE panels | 20+ years | Wipe down | Medium–High | Lid or side infill panels |
Tools, safety, and your build checklist
Tools you'll need
- Circular saw with a 40-tooth carbide blade (fine-tooth carbide if cutting composite)
- Drill/driver with bits and a countersink bit
- Speed square and tape measure
- Clamps (at least 4, ideally 6)
- Sandpaper or random orbital sander (80 and 120 grit)
- Paint brush for sealant/finish application
- Safety glasses, dust mask rated N95 or better, and work gloves
Wear your dust mask and safety glasses every time you cut or sand PT lumber. Wood dust from cutting or sanding is a real health hazard, both from the wood itself and from the preservative chemicals. Work outdoors or in a well-ventilated space, and never burn PT lumber scraps.
Cut list for a 48" x 24" x 24" box
| Part | Material | Size | Qty |
|---|---|---|---|
| Base frame long sides | 2x4 PT | 48" | 2 |
| Base frame short sides | 2x4 PT | 21" | 2 |
| Base cleats (interior cross supports) | 2x4 PT | 21" | 3 |
| Floor slats | 5/4x6 PT or composite | 21" | 7–8 |
| Corner posts | 4x4 PT | 22" | 4 |
| Side rails (top and bottom, long sides) | 2x4 PT | 48" | 4 |
| Side rails (top and bottom, short sides) | 2x4 PT | 16" | 4 |
| Side panels/boards | 5/4x6 PT or composite | Cut to fit | As needed |
| Lid frame long sides | 2x4 PT | 50" | 2 |
| Lid frame short sides | 2x4 PT | 24" | 2 |
| Lid decking boards | 5/4x6 PT or composite | 24" | 7–8 |
| Lid drip edge strip (front and sides) | Aluminum drip edge or 1x2 PT overhang | 50" + 2x25" | 3 |
Build order checklist
- Cut all pieces to length and treat every cut end with end-cut sealer; let dry
- Assemble base frame rectangle and attach interior cleats
- Install floor slats on top of cleats with 1/4-inch spacing for drainage
- Attach corner posts to base frame
- Install side rails top and bottom between corner posts on all four sides
- Attach side panel boards to the side rails
- Assemble lid frame as a separate rectangle
- Attach lid decking boards to lid frame
- Install hinge hardware on back of box and lid
- Attach drip edge or overhang boards to lid perimeter
- Install lid support (chain, gas piston, or lid stay)
- Sand, seal, and finish all surfaces
- Install weatherstripping and any locking hardware
Building the frame and base, getting drainage right
The base is the part most builds get wrong, and it's where rot starts. Never place the box flat on a concrete or paver surface. You want at least 2 inches of clearance underneath, ideally around 4 inches, to allow air to circulate and prevent ground moisture from wicking into the bottom boards. On a flat patio, you can achieve this with pressure-treated 2x4 feet/skids or concrete blocks at the corners. On soil or gravel, use concrete deck blocks.
Build your base frame from 2x4 PT lumber: two long sides at your chosen length and two short sides cut to fit inside them. Add interior cleats spaced roughly 16 inches apart across the short dimension. The floor slats then lay across these cleats, running in the same direction as the long dimension. Leave a 1/4-inch gap between each floor slat, this allows any moisture that gets inside to drain out rather than pool. The slats sit on top of the cleats, so there's also natural airflow under the floor itself.
For the walls, set 4x4 corner posts into the base frame corners and secure them with structural screws or through-bolts. Top and bottom rails between posts on each side give you a solid frame to attach side panels to. Butt joints work fine here if you predrill and countersink to avoid splitting. Make sure every framing connection gets at least two screws in different planes so the box doesn't rack under load.
Lid and hinge design that works in real weather
The lid is your first line of defense against rain and it takes the most mechanical wear. Build it as a separate, sturdy frame, don't just attach boards with no backing or they'll sag and warp. A 2x4 perimeter frame with one or two cross supports in the middle gives the lid enough rigidity to hold a person sitting on it if needed.
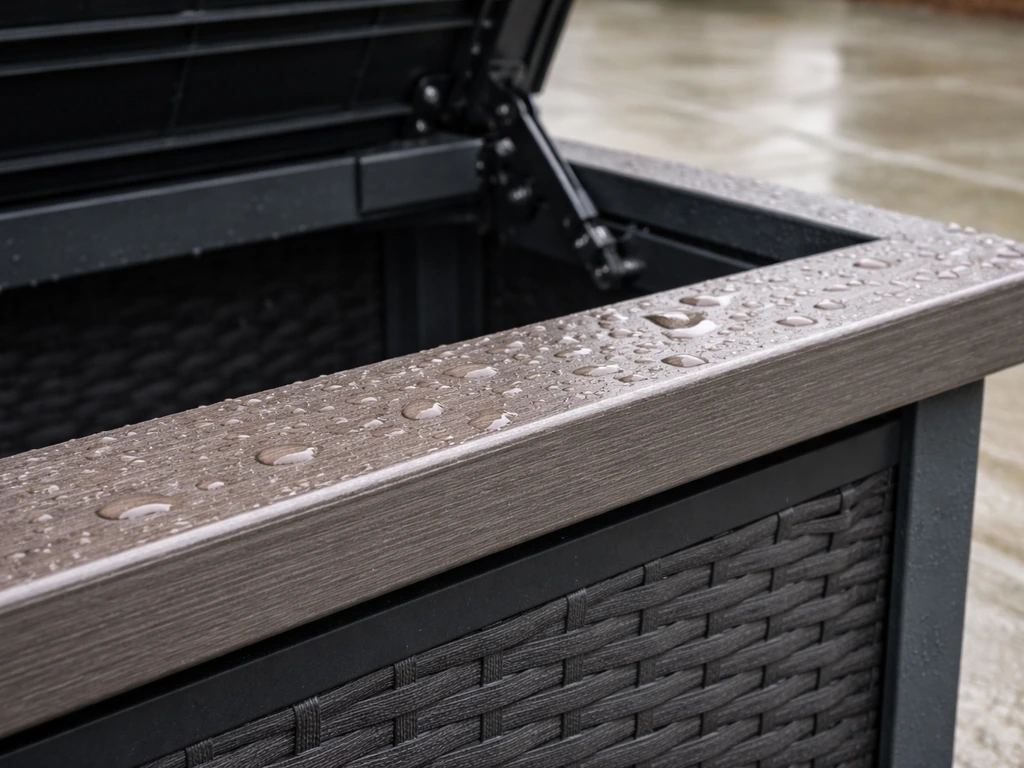
For the lid overhang, extend the decking boards at least 1 inch past the box sides on the front and both ends. This acts like a drip edge, directing rainwater away from the joint between lid and box walls rather than letting it run straight into the gap. You can also install aluminum drip edge flashing along the perimeter of the lid underside, this is the same material used on roofs to shed water away from fascia, and it works perfectly here for the same reason.
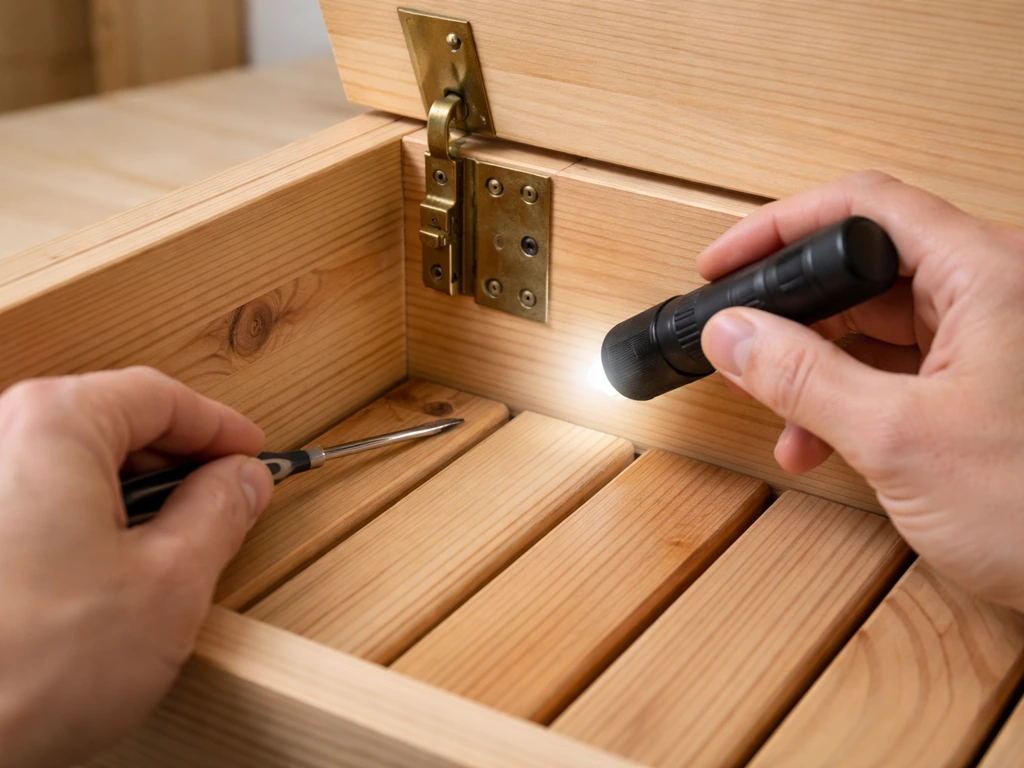
For hinges, a continuous piano hinge (also called a piano hinge) running the full width of the back is the most weather-resistant option for a patio box lid, it distributes the load evenly and seals the gap along the hinge line better than spaced butt hinges. Use stainless steel only. Standard zinc-coated hinges will rust visibly within one season outdoors in most climates. Two large stainless butt hinges (3-inch or larger) are an acceptable alternative if you can't find a continuous hinge in the right size.
Add a lid support so the lid stays open while you dig around inside. A chain lid stay is the simplest and cheapest option, two screw eyes and a length of stainless steel chain. Gas-spring lid stays (the same mechanism used on hatchbacks) are a cleaner upgrade and easier to operate with one hand. Either way, don't skip this, a heavy lid falling unexpectedly is a real safety hazard. Finally, a simple draw hasp latch on the front keeps the lid from blowing open in wind.
Weatherproofing, waterproofing, and pest control
"Weather-resistant" and "waterproof" are not the same thing. A box can shed rain in normal conditions but still let in water during wind-driven rain if joints are unsealed or the lid gap is too wide. Address this on three levels: sealing fixed joints, gasketing the lid, and treating all surfaces.
blank" rel="noopener noreferrer">Run a bead of exterior-grade silicone sealant along every fixed joint inside the box, where side panels meet the base, where corner posts meet rails, anywhere there's a seam water could track along. This also closes up gaps that insects use to get inside. Closed-cell foam weatherstripping along the inside top edge of the box walls (where the lid sits) creates a soft seal when the lid closes. It's inexpensive, easy to apply, and makes a real difference in keeping both water and bugs out.
If your patio is in a region that gets sustained wind, think about where the box sits. An open patio with wind from one direction means the front and sides take the most rain pressure. Orient the lid hinge toward the prevailing wind so wind pushes the lid closed rather than forcing it open. A locking hasp adds extra security against wind gusts.
For insects and rodents, the combination of elevated base (no direct ground contact), sealed joints, and a gasketed lid does most of the work. If you're in a termite-prone region, that's one more reason to use PT lumber throughout rather than untreated cedar or pine for structural parts. Avoid storing anything organic that might attract pests, and periodically inspect the floor slats, they're the most exposed structural element.
Putting it together and making it last
Assembly tips that save headaches
- Predrill every screw location in the side panels — PT lumber splits easily near edges without predrilling
- Clamp pieces together before driving screws so nothing shifts mid-fastening
- Check for square at every frame stage by measuring corner to corner diagonally — both measurements should match
- Countersink screws slightly so they sit flush or just below the surface, then fill with exterior wood filler before finishing
- Apply end-cut sealer to every fresh cut before that board goes into the assembly, not after
- Dry-fit the lid before installing hinges to confirm it closes flush with even gaps all around
Finishing it out
Once assembled, sand all exposed surfaces lightly with 120-grit sandpaper to remove any mill glaze (a thin surface layer that prevents finish absorption). Apply two coats of a penetrating exterior wood oil or deck stain, letting the first coat dry fully before the second. Pay extra attention to the lid top, the base underside, and the inside floor slats, these are the areas that see the most moisture. Let the finish cure for at least 48 hours before loading the box.
If you're building for a patio that also pulls double duty as an entertaining space, this is also the point to consider adding rope handles to the side panels, anti-tip feet on the base, or a coat of exterior paint over the stain for a look that matches your furniture. Function comes first, but a finished surface also adds years of protection.
A simple maintenance plan to keep it going
Once a year, give the box a thorough inspection. Check the floor slats for any soft spots or discoloration that indicates moisture damage. Inspect the hinge screws, even stainless hardware can work loose over time as wood expands and contracts seasonally. Tighten or replace any loose fasteners. Reapply exterior wood oil or deck stain every two years, or sooner if water stops beading on the surface. Touch up any cracked sealant at joints with a fresh bead of silicone. These 30-minute annual checkups will add years to the life of the box.
A well-built patio storage box slots naturally into a broader organized outdoor space. If you're also thinking about how to manage heat and comfort on your patio in warmer months, the storage box can do double duty as a bench seat near your shade setup, a nice way to get more function out of the same footprint. Whatever you store inside, a box that's built right, sealed well, and maintained simply will outlast anything pre-made at a fraction of the replacement cost.
FAQ
How do I calculate the interior size I actually need for my items?
Measure the largest items you want to store and include the “pile effect” by laying them on the ground, then measure length and depth of the footprint. Add clearance on all sides (typically 2 to 4 inches per direction) so bulky items can slide in and out without forcing the lid shut. If you store soft items like cushions, factor in thickness changes when they’re compressed (usually 10 to 20 percent).
Should the lid be built to open all the way, or is a smaller opening okay?
A lid that swings fully open makes loading easier and reduces how long the opening stays exposed. If you use a chain or gas-spring stay, verify the hinge line clears patio furniture and that the lid does not hit adjacent walls or planters. For tighter patios, you can shorten the lid overhang slightly, but keep a drip edge on the front and ends to prevent water tracking at the joint.
What’s the best way to keep rain from getting inside through the hinge area?
Even with a drip edge, wind-driven rain can blow along the lid seam. Use a continuous piano hinge and run sealant anywhere fixed joints meet, especially along the inside of the hinge mounting area. Also use gasketing on the inside top edge so the lid compresses evenly across the hinge line, not just at the front.
Can I place my patio storage box directly on concrete?
Avoid direct contact. Even on concrete, moisture can wick up into the bottom boards and accelerate rot. Use skids or corner supports to create at least 2 inches of clearance, ideally around 4 inches, and keep air moving under the base. If you only have pavers, use concrete deck blocks at the corners rather than setting the base flat.
What fasteners and metal parts should I avoid for outdoor PT lumber projects?
Avoid standard zinc-plated screws and regular hinges. PT chemicals accelerate corrosion in lesser metals, so use hot-dipped galvanized (ASTM A653 Type G185 minimum), stainless steel, silicon bronze, or copper for anything that contacts the lumber. For hardware like hinges and lid stays, stainless is the safest choice.
How do I prevent warping and sagging on the lid over time?
Most lid issues come from weak support. Build a rigid lid frame (2x4 perimeter plus at least one or two cross supports) and attach boards to a true backing, not just to the surrounding rails. After construction, keep the lid sealed on the underside and apply extra finish to the top surface and inner slats, since those areas see the most moisture cycling.
What should I use to seal cut ends and seams, and where exactly should I apply it?
Seal every cut end immediately after trimming before assembly, since the treated protection doesn’t fully reach the board center. For seams and fixed joints where water could travel, apply exterior-grade silicone sealant on the inside of the box along panel-to-base and post-to-rail connections. Don’t rely on stain or wood oil to seal joints, they mainly protect exposed surfaces.
If my patio slopes, how can I make sure the box sits level?
Plan the base so the top frame is level even if the patio is not. Use different-height supports at the corners (skids or blocks) rather than forcing the box to rock. Before attaching walls, check level across the base frame in both directions, then confirm the lid sits evenly when closed.
Can I store plants, firewood, or other organic items in a weatherproof box?
It’s risky. Even with good sealing, organic items increase the chance of insects and rodents and can trap moisture against the floor slats. If you must store anything organic, use containers to keep it off the wood and inspect more frequently. For termite-prone areas, keep structural lumber PT and avoid storing attractants.
How often should I reapply finish, and how do I know when it’s time?
Reapply penetrating exterior oil or deck stain about every two years, but use “water behavior” as your trigger. If water stops beading and starts soaking in, the finish is failing and it’s time to recoat. Prioritize the lid top, base underside, and inner floor slats, because those areas absorb moisture fastest.
What maintenance checks matter most during the first year?
Do an inspection early after seasonal expansion and contraction. Check hinge screws and any hardware fasteners for looseness, then look for cracks in silicone sealant at joints and along the lid edge. Pay special attention to floor slats for discoloration or soft spots, since they are the most exposed structural elements.
Next Articles
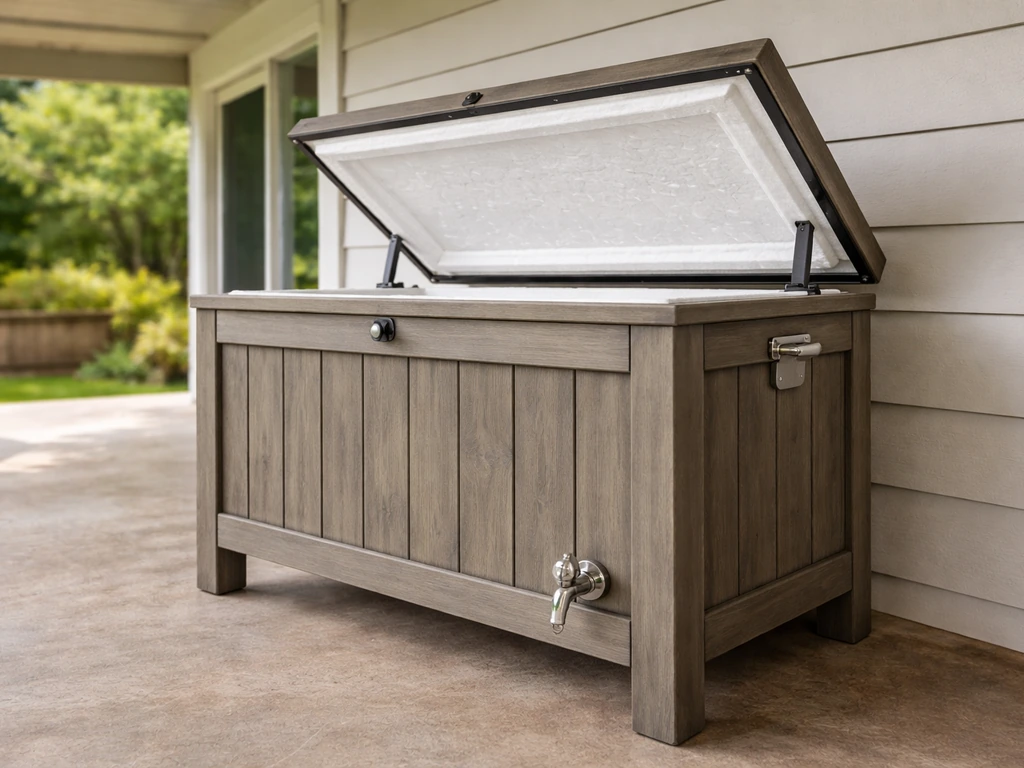
How to Make a Patio Cooler: DIY Ice Chest Guide
Build a DIY patio ice chest with insulation, weatherproof lid, sizing tips, drainage, and maintenance for longer cooler
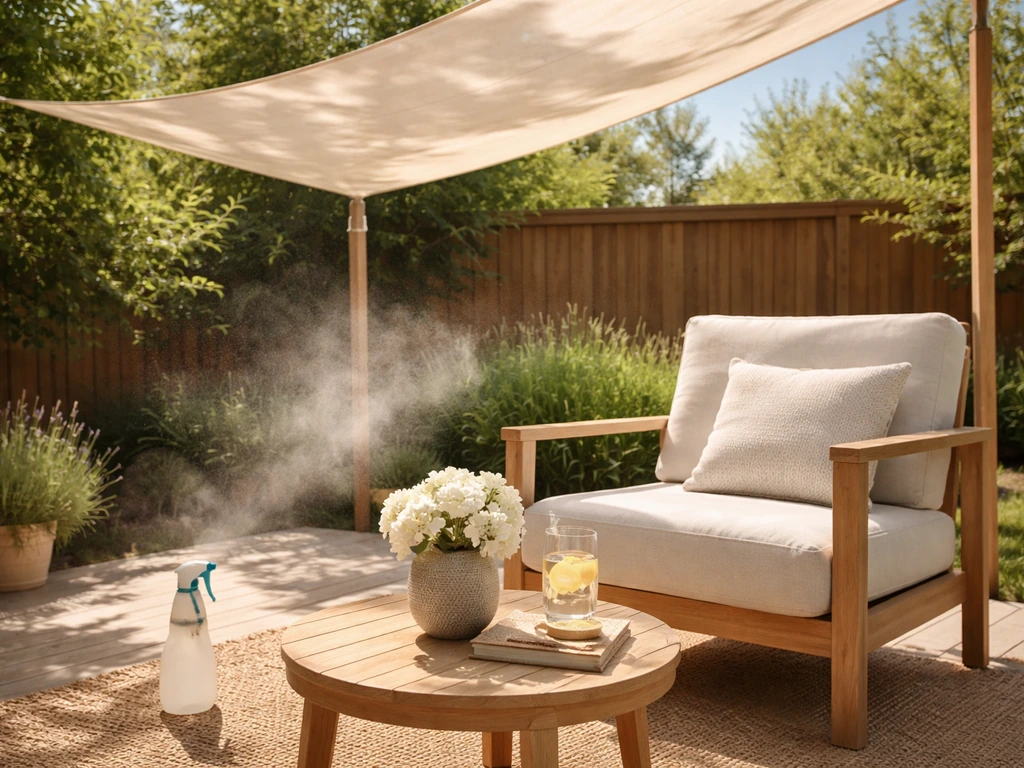
How to Keep Patio Cool in Summer: DIY Shade and Cooling
Step-by-step DIY shade, airflow, and misting tips to keep an outdoor patio cool, open or covered, fast

How to Decorate a Long Narrow Patio: Layout Tips
Practical DIY layout and decor tips to widen a long narrow patio using zoning, furniture spacing, lighting, greenery, an