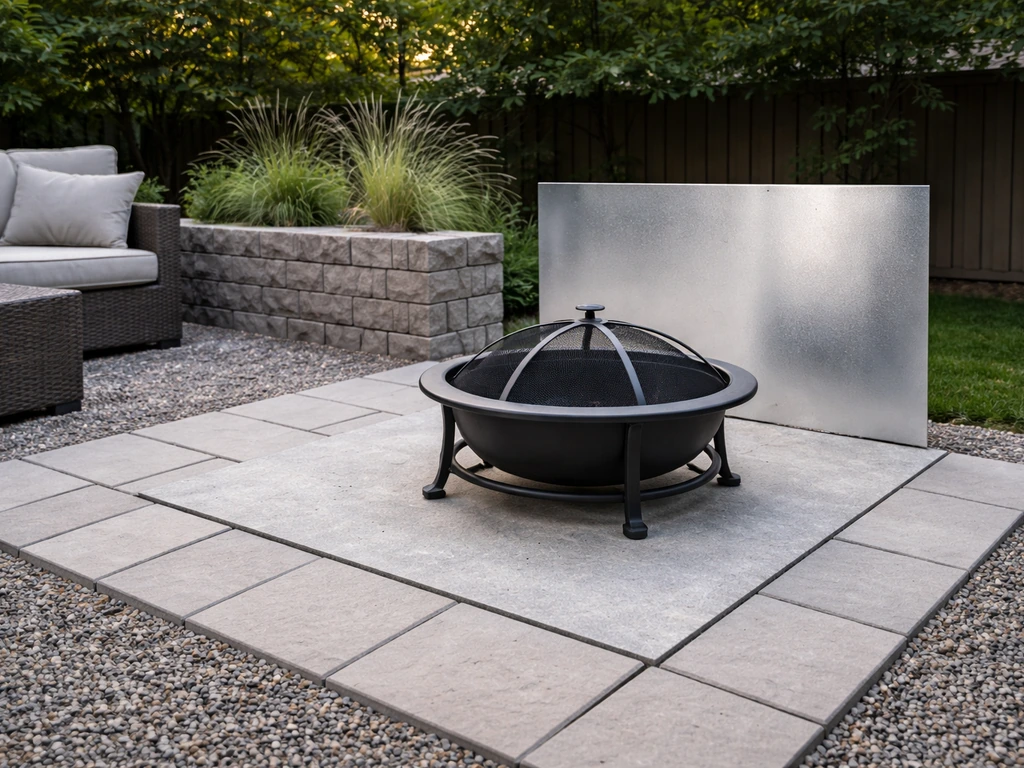
To protect your patio from a fire pit, you need three things working together: a non-combustible base under and around the pit, at least 10 feet of clearance between the fire and any structure (25 feet is the code standard in most jurisdictions), and a spark screen to contain embers. Get those three right and you've addressed the biggest risks. Everything else in this guide helps you dial in the details based on your specific patio surface, nearby structures, and whether you're working with an open or enclosed outdoor space.
How Do I Protect My Patio From a Fire Pit

Felix Brennan
29 Jun 2026
Why patio protection actually matters with fire pits
There are two separate things trying to damage your patio when a fire pit is running: radiant heat and embers. People often focus on one and ignore the other, which is how you end up with a cracked concrete slab or a scorch mark on a composite deck.
Radiant heat is the slow, steady warmth radiating outward and downward from the fire. It doesn't need a spark to cause damage. Over a single evening, that consistent heat can crack pavers, blister composite decking, warp wood, and degrade the adhesive in outdoor rugs placed too close to the pit. The bigger the fire, the wider the radiant heat zone.
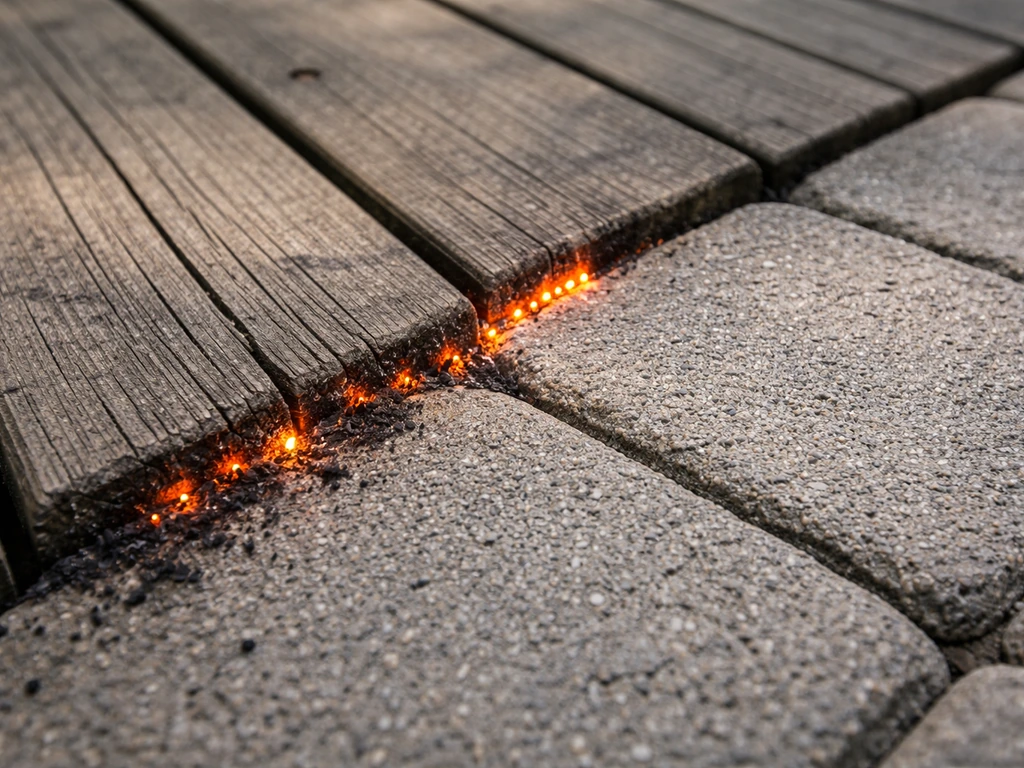
Embers and sparks are the immediate fire hazard. A single wind gust can carry a live ember 10 to 20 feet before it lands on a chair cushion, a wood deck board, a pile of leaves, or a screen panel on an enclosed patio. This is the mechanism behind most fire-pit-related patio fires. If you have any kind of patio enclosure, screen panels, or shade sail overhead, ember management becomes even more critical because those materials can catch and hold a spark long enough to ignite.
Start by identifying your patio surface and nearby combustibles
Before you move anything or buy anything, walk your patio and take an honest inventory. The right protection approach depends almost entirely on what you're working with.
Patio surface types and their risk level
| Surface Type | Heat Risk | Ember Risk | Notes |
|---|---|---|---|
| Wood decking (natural or composite) | High | High | Most vulnerable; requires rated fire pit pad and manufacturer approval before placing any fire pit |
| Concrete slab | Medium | Low | Can crack from heat cycling; needs a base under the pit to distribute heat |
| Brick or natural stone pavers | Low-Medium | Low | Generally heat-tolerant, but thin or poorly set pavers can crack; still benefit from a base pad |
| Gravel or decomposed granite | Low | Low | One of the safest surfaces; good drainage and no combustibility |
| Tile (ceramic or porcelain) | Medium | Low | Thermal shock can crack glazed tile; avoid placing a pit directly on tile without a heat shield |
| Outdoor rugs on any surface | High | High | Remove any rug within 10 feet of the fire pit before lighting |
Nearby combustibles to identify
- Wood or vinyl fencing within 25 feet of the planned fire pit location
- Overhead structures: pergolas, shade sails, patio covers, roof overhangs
- Screen panels or screen enclosures on a screened patio
- Patio furniture with fabric cushions or synthetic materials
- Potted plants, especially in plastic containers or with dry mulch on top
- Decorative wood elements like privacy walls or planter boxes
- Dry grass, mulch beds, or landscaping close to the patio edge
Write these down or take a photo. You'll reference this list when you're laying out clearances in the next step.
Create a safe non-combustible zone around your fire pit
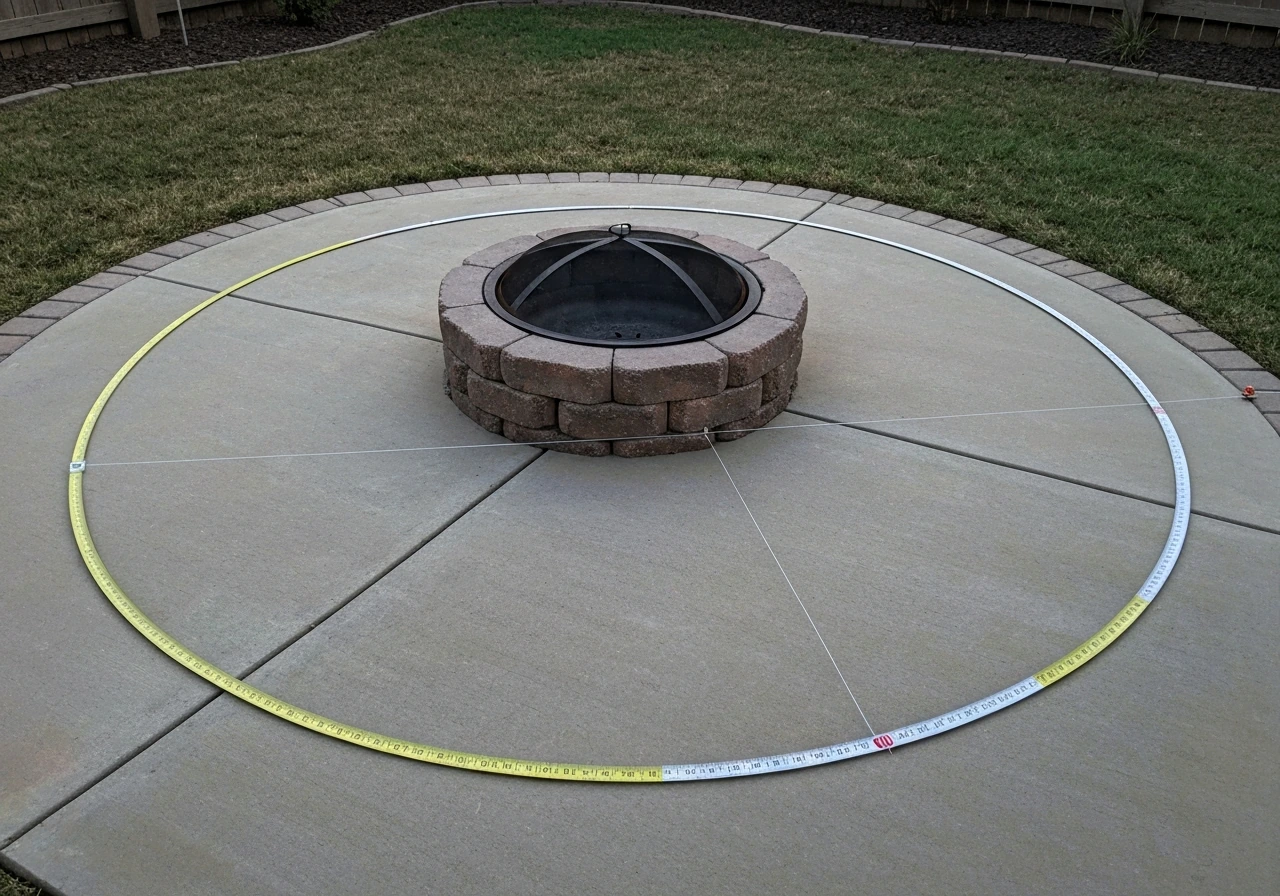
This is the most important step and the one most people skip. The International Fire Code sets the recreational fire setback at 25 feet from any structure or combustible material. The Kansas State Fire Marshal cites a minimum of 10 feet as the absolute floor, with 25 feet as the preferred standard. A recreational fire, per NFPA 1, is defined as one where the fuel area is no larger than 3 feet in diameter and 2 feet in height. If your fire is bigger than that, the hazard zone grows accordingly.
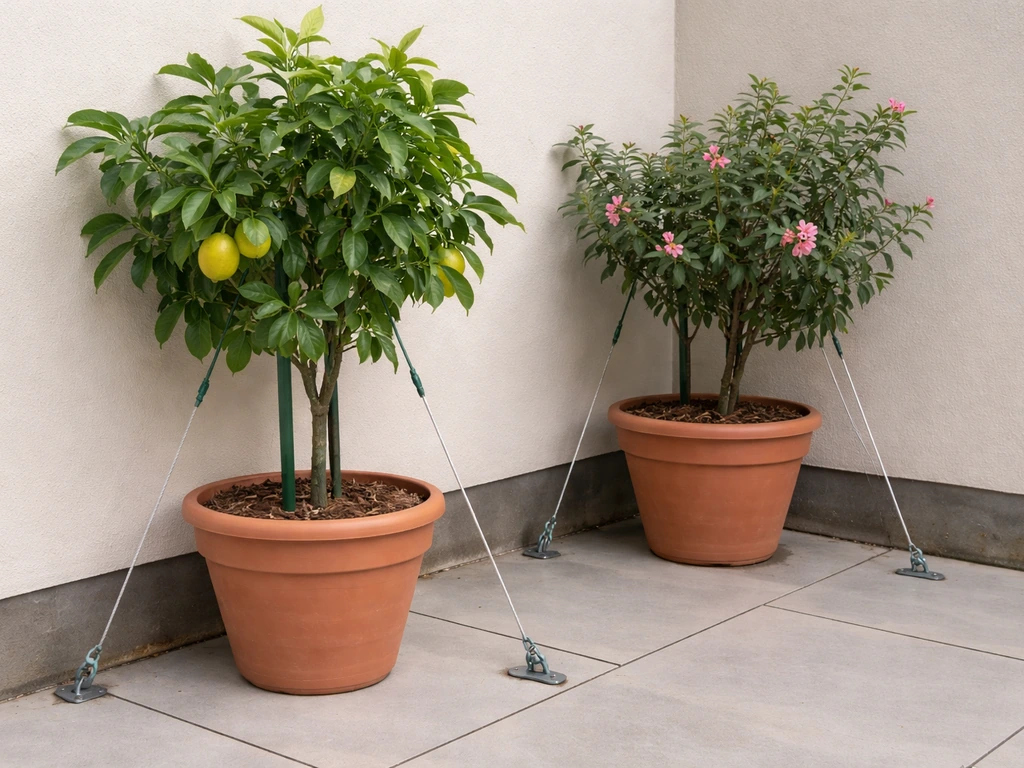
In practical terms for a typical backyard patio, here's how to think about it: measure 10 feet in every direction from the outer edge of your fire pit, not the center. That 10-foot radius becomes your minimum clearance zone. Kansas State Fire Marshal guidance recommends keeping a backyard fire pit at least 10 feet from structures or neighboring yards, with 25 feet preferable blank" rel="noopener noreferrer">at least 10 feet away from any structure or neighboring yard. Everything inside that zone should either be non-combustible (pavers, gravel, concrete) or removable (furniture, cushions, rugs, plants). You can use the same 10-foot clearance idea to place patio plants farther from the fire pit so they are less likely to get hit by wind-blown embers and topple keep patio plants from blowing over. If your patio can't physically accommodate 10 feet of clearance from your house, fence, or overhead structure, you need to move the fire pit to a different location.
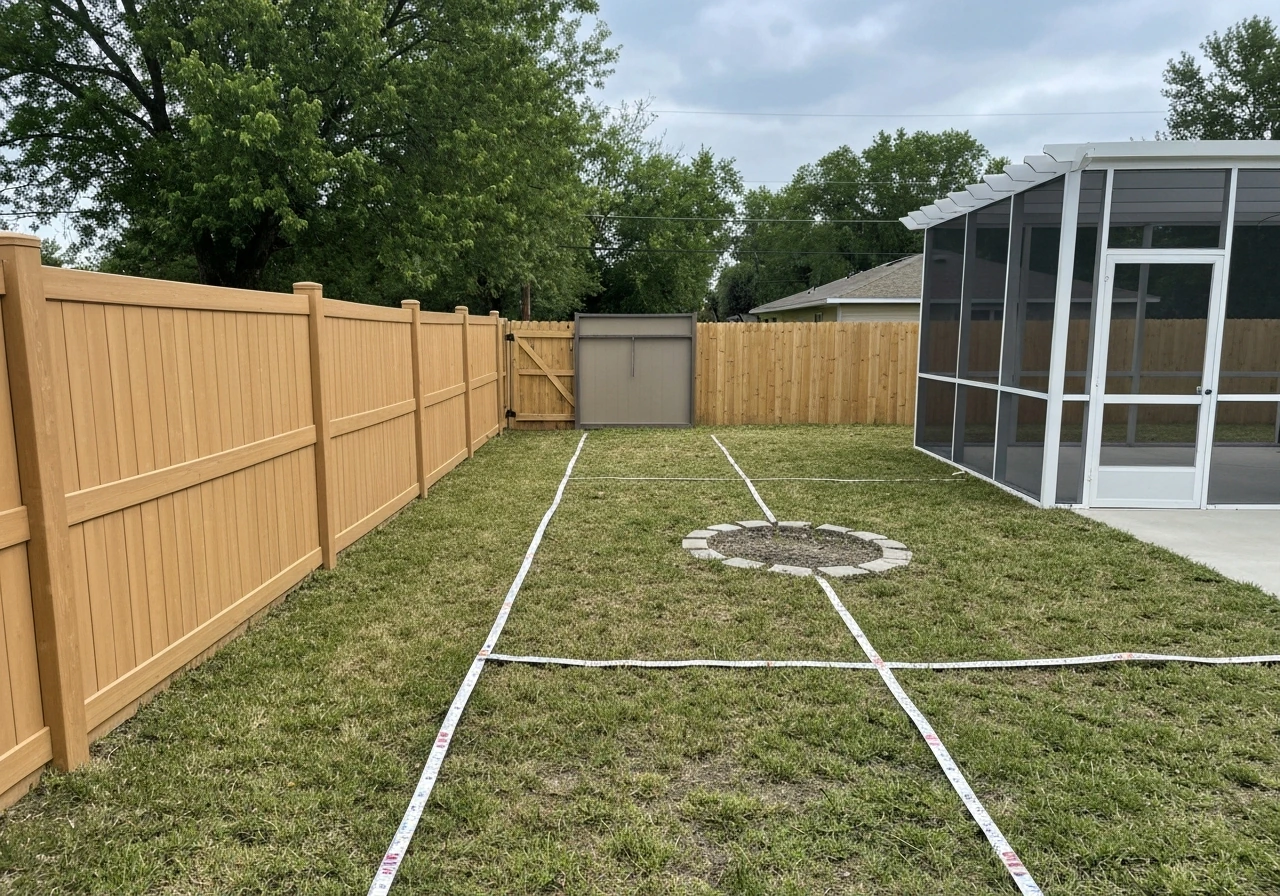
How to measure and lay out your clearance zone
- Set your fire pit in its intended position (don't light it yet).
- Tie a string or use a measuring tape to mark a 10-foot radius around the outer edge of the pit.
- Walk the full circle and note anything combustible inside that radius.
- Check overhead: if there's a pergola, roof overhang, shade sail, or tree branch within 10 feet directly above the fire, that's a clearance violation too.
- Move the pit or remove combustibles until the zone is clear.
- For added safety, mark the 25-foot radius and check for structures like the house wall, wood fencing, or a neighbor's shed.
If you're working with a small patio, this measurement exercise sometimes reveals that a wood-burning fire pit simply isn't safe for that space. A propane or natural gas fire pit table produces far less radiant heat and virtually no embers, which is worth considering if you're tight on clearance.
Heat shielding and fire pit base options
A fire pit sitting directly on your patio surface will transfer heat downward into whatever it's resting on. Over time, this degrades the surface and can cause structural cracking in pavers or concrete. On a wood or composite deck, direct contact with a burning fire pit is a fire risk, full stop. You need something between the fire pit and the surface.
Fire pit pads and heat-resistant mats
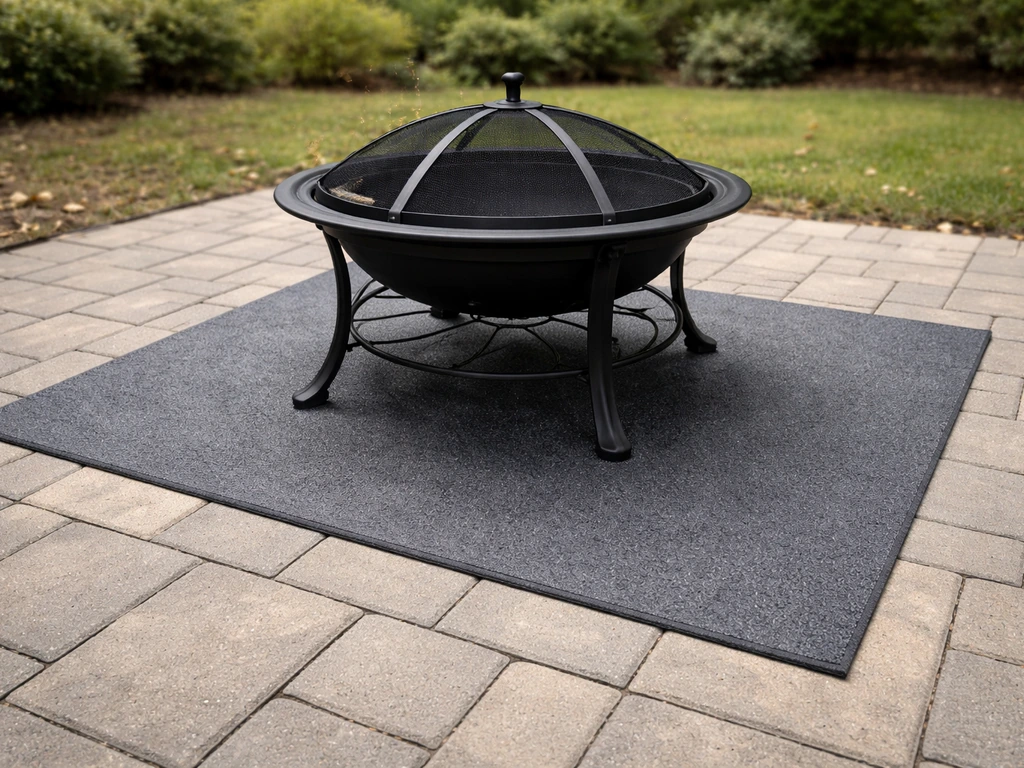
Fire pit pads (sometimes called deck protectors or fire pit mats) are designed to absorb and deflect radiant heat away from the surface below. Look for pads rated for high-heat applications, typically made from fiberglass, carbon felt, or similar fire-resistant materials. They come in round and square shapes, usually in sizes ranging from 36 inches to 67 inches in diameter. For most standard fire pits, a 48-inch pad gives you good coverage. Place the pad flat on your patio surface, set the fire pit centered on top of it, and you've addressed the direct heat transfer problem. On a wood or composite deck, this is non-negotiable.
Paver base and non-combustible landing zone
A more permanent and more attractive solution is to build a dedicated paver pad for your fire pit. Lay a 6- to 8-foot square (or circle) of concrete pavers, brick, or natural stone in the area where your fire pit will sit. Use a sand or gravel base beneath the pavers for stability and drainage. This non-combustible landing zone eliminates the radiant heat risk to the surrounding surface and also defines the fire pit area visually, which helps guests understand the safety perimeter. If your patio is already all-paver or concrete, a fire pit pad is still useful to reduce heat transfer to the specific area under the pit.
Legs, stands, and airflow
If your fire pit has legs, make sure they're raising the bowl at least a few inches off the surface. This airflow gap reduces heat transfer significantly. If your fire pit sits directly on a flat bottom plate with no legs, it will run hot underneath. In that case, a heat shield pad is essential, or you can set the pit on a few inches of sand or gravel inside a defined paver ring to create that buffer.
Ember and spark containment
Embers are unpredictable. You can have a calm evening turn into a spark-throwing problem the moment a piece of wood shifts or a breeze picks up. Containment is the answer.
Spark screens
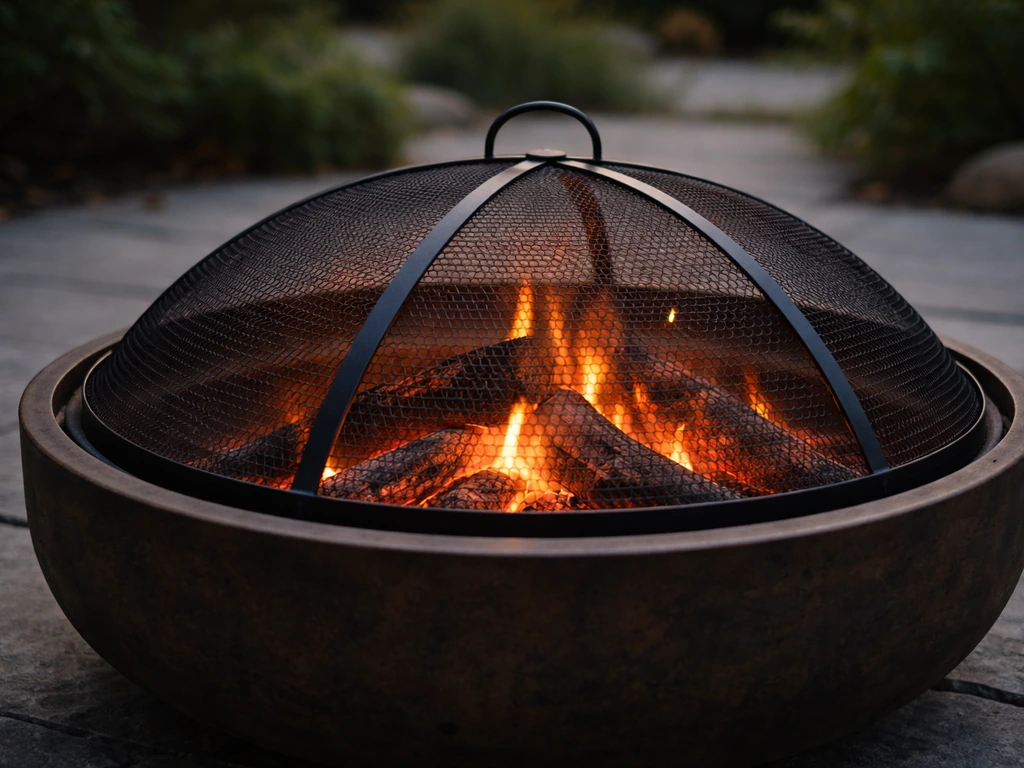
A spark screen or mesh cover sits over the top of the fire pit bowl and physically catches embers before they can float away. Most fire pits designed for wood burning either come with one or have a compatible screen available. If yours didn't come with one, buy one that fits your pit's diameter, and make sure the mesh is fine enough to actually catch small embers (look for a mesh screen rather than just a decorative lid). Keep the screen on whenever the fire is burning, and only remove it briefly to add wood.
Wind direction and fire pit placement
Wind is the number one factor that turns a spark screen from a complete solution into a partial one. In windy conditions, embers can still escape around the edges of a screen or through gaps when you're adding fuel. Before you light the fire, check which direction the wind is blowing and confirm that downwind of the fire pit is clear of combustible materials and structures for at least 25 feet. Don't position the pit so that wind consistently blows toward your house, your screen enclosure, or your wood fence. If your patio has a prevailing wind direction (most do), factor that into your permanent placement decision.
Never use a wood-burning fire pit on a breezy or windy evening without a spark screen in place. If winds pick up significantly while the fire is going, extinguish it rather than try to manage it. Keep a bucket of water or a garden hose nearby any time the fire is lit.
Fuel management inside the pit
Stay within the recreational fire size limits: fuel area no larger than 3 feet in diameter and no taller than 2 feet in height. A fire that's too big for the pit is the fastest way to produce out-of-control embers and radiant heat that exceeds what any mat or screen can handle. Burn dry, seasoned hardwood when possible. Wet or green wood produces more smoke and more popping sparks.
Protecting nearby structures and patio enclosures
If your patio has any kind of enclosure, screen panels, overhead cover, or structural rails nearby, the fire pit protection calculus changes. These elements are often made of materials that look durable but are very vulnerable to heat and embers.
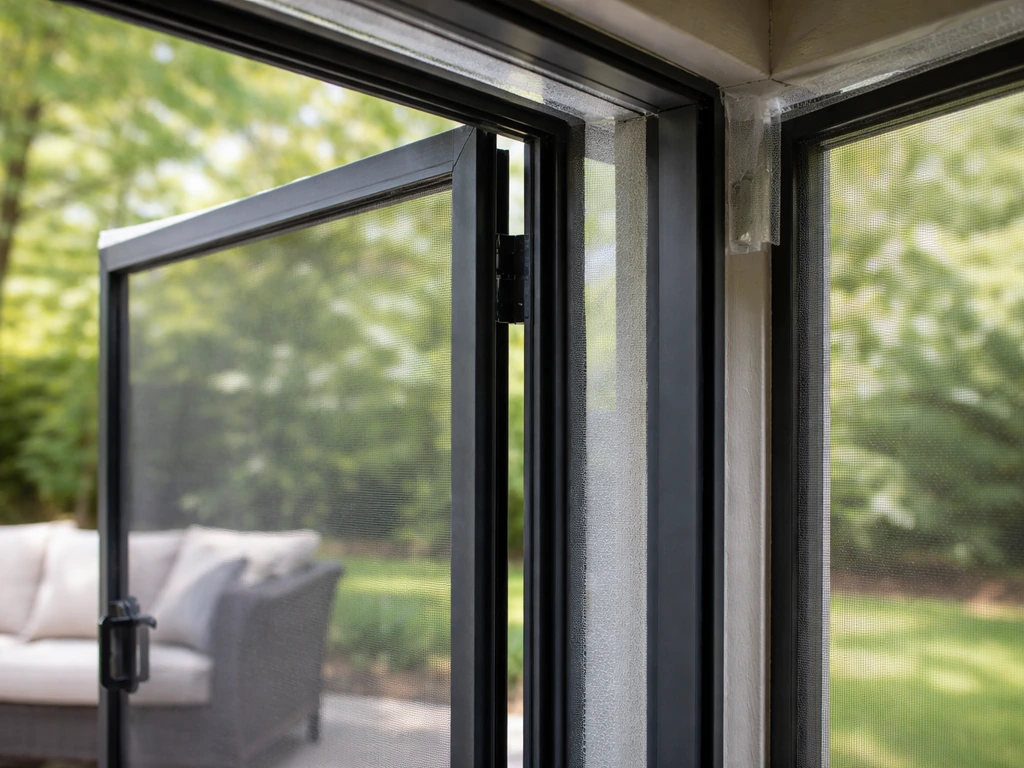
Screen enclosures and screened patios
This is the situation that requires the most care. Standard fiberglass or aluminum screen mesh is not fire-resistant. A single ember landing on a screen panel can burn through it almost instantly. If you have a screened patio enclosure, a wood-burning fire pit should never be operated inside the enclosure or close enough to a screen wall that embers could reach it. The practical rule: maintain the full 10-foot clearance from any screen panel, and keep a spark screen on the pit at all times. Better yet, position wood-burning fire pits entirely outside the screened area and enjoy them from a safe distance. If the fire pit is the center of your outdoor gathering inside an enclosure, a propane or natural gas fire table is a dramatically safer choice because it produces no embers and significantly less radiant heat.
Deck rails, pergola posts, and wood trim

Wood or composite deck rails and pergola posts can be scorched by sustained radiant heat even without a direct ember contact. Keep these structures outside your 10-foot clearance zone. If your patio layout makes this impossible, consider installing a heat-reflective barrier (a sheet of cement board or a non-combustible panel) between the fire pit and the rail. This isn't a permanent fix for a bad layout, but it can reduce the heat exposure enough to protect the material during use.
Patio furniture, cushions, and accessories
Position seating chairs no closer than 3 feet from the outer edge of the fire pit, but keep cushions, throw blankets, and fabric accessories well outside the 10-foot zone. Synthetic fabrics like polyester are especially vulnerable to embers because they melt rather than char, and a melted synthetic on a person is a serious burn hazard. Any furniture with fabric cushions should stay at least 6 to 8 feet from the fire. If you're hosting people and pulling chairs in close, remind guests to set cushions aside.
Overhead clearance
Overhead hazards get overlooked because people focus on what's around the pit, not above it. A pergola roof, shade sail, low-hanging tree branch, or roof overhang within 10 feet directly overhead is a real fire risk from rising embers and heat. If you also want to block rain, consider a weatherproof cover or covered pergola so the fire protection setup stays dry and safe block rain on patio. If you can't achieve 10 feet of clearance overhead, don't use a wood-burning fire in that spot. This is especially relevant on enclosed or covered patios where roof structure sits low.
Your pre-burn checklist
Run through this before your first fire of the season (or before any burn if your setup changes). It takes about five minutes and it's the difference between a relaxing evening and a preventable problem.
- Measure clearances: confirm 10 feet from the fire pit edge to the nearest structure, combustible material, or overhead obstruction. Aim for 25 feet from your home's wall.
- Check your base: verify the fire pit pad, paver base, or non-combustible surface is in place and centered under the pit.
- Inspect the spark screen: make sure it fits the pit, has no holes or gaps, and is clean of debris.
- Remove combustibles from the zone: pull outdoor rugs, cushions, chair pads, doormats, and any potted plants with dry mulch out of the 10-foot radius.
- Check wind direction: confirm the wind isn't blowing directly toward your house, fence, screen enclosure, or any other combustible structure.
- Confirm fire size limits: plan to keep fuel no wider than 3 feet in diameter and no taller than 2 feet in the pit.
- Have a water source ready: a garden hose or a 5-gallon bucket of water should be within arm's reach before you light the fire.
- Check local burn rules: some municipalities have burn bans in effect during dry or high-wind conditions. A quick check takes 30 seconds.
- Know your extinguishing plan: have a clear, practiced method for putting the fire out quickly if conditions change.
If you're planning a longer-term upgrade, think about making the non-combustible landing zone permanent with a dedicated paver pad, installing a fire pit with a built-in spark screen and raised bowl, or switching to a propane or gas fire table if your patio layout makes the clearance requirements hard to meet consistently. Choosing a covered or gas-based fire pit setup can also reduce how often rain and runoff get directed onto the patio propane or gas fire table. These upgrades remove the guesswork from every burn and make the whole setup safer by design rather than by memory.
One more thing worth noting: if you're working on a broader patio improvement project at the same time, whether that's adding a screen enclosure, installing a new roof or pergola, or managing wind and rain exposure, fire pit placement needs to be part of that planning conversation from the start. If you want to learn how to bug proof your patio from embers, plan your placement and protections before you light the first fire. The clearances that are easy to maintain in an open patio can become impossible after you've added walls or overhead structure. Design the fire pit zone before you build around it, not after.
FAQ
Can I use a fire pit on a patio umbrella base or near a patio cover if I keep distance from the house?
Distance from the house is not enough. You also need overhead clearance (at least 10 feet to roof structure, pergola beams, shade sails, or nearby tree limbs). If embers can rise into overhead materials, a spark screen will not fully protect the roof or fabric-like surfaces. If you cannot maintain overhead clearance, switch to a gas fire table or relocate the pit.
What should I do if my spark screen fits loosely and I see gaps around the rim?
A loose-fitting screen is a common failure point, wind can push embers through the gaps when you add fuel or when logs shift. Use a screen specifically sized for your pit diameter, and confirm it seats evenly across the rim. If you cannot get a proper fit, do not operate the pit, the safer option is to replace the screen or use a different fire pit designed for ember control.
Is it safe to put a fire pit on gravel or decorative stone without building a paver pad?
Often it is safer than putting the pit directly on patio decking, but it depends on the pit base and heat transfer. Loose stone can shift and create hotspots, and radiant heat can still degrade nearby materials. For best results, create a stable non-combustible landing zone with pavers or a properly rated heat-resistant pad, and keep the pit centered so the heat stays within the protected area.
Do I need a spark screen for a propane or natural gas fire pit?
Many gas fire tables have built-in controls like venting, flame guards, or enclosed burner assemblies that greatly reduce embers. However, you should still follow the manufacturer guidance for any mesh covers or protective components. If your model includes an accessory cover, keep it in place during operation, and treat surrounding fabrics and plants as heat exposures even with no embers.
How do I protect pavers or concrete if my patio is already non-combustible?
Non-combustible does not mean heat-proof. Radiant heat can still crack pavers over time, and heat can also dry and degrade grout or sealants. Use a heat-rated pad or a dedicated paver landing zone beneath the pit, and make sure the pit is not sitting flush on a single point or flat plate without an airflow gap.
What is the safest way to handle wind when a fire pit is already lit?
If wind increases significantly or you see embers blowing beyond the protected zone, extinguish the fire rather than trying to “manage” it. Keep a bucket of water or hose ready, and avoid adding fuel in stronger gusts. Also check downwind clearance before lighting so you are not relying on luck.
Can I burn treated wood, construction scraps, or yard debris in my fire pit?
It is risky and often unsafe. Treated or painted wood can produce toxic smoke and can throw unpredictable embers, yard debris like leaves can ignite suddenly and spread embers, and wet wood increases popping. Stick to dry, seasoned hardwood when possible, and remove flammable debris from the clearance zone before lighting.
What if my patio cannot fit a full 10-foot clearance around the pit, what are my options?
If you cannot maintain the minimum clearance zone, relocating the pit is the safest first move. If layout prevents it, consider switching to a propane or natural gas fire table, using a more enclosed burner system, and maximizing the protection under and around the pit with a dedicated non-combustible pad. Still, overhead clearance must be addressed, and you should not operate a wood-burning pit where you cannot meet the clearance requirements.
Should I place the fire pit on the same side as my seating, downwind of the house?
Typically you want the opposite, place the pit so prevailing wind does not carry embers toward your house, screen panels, or fences, and so downwind areas stay clear of combustibles for the required distance. If wind direction flips frequently in your yard, treat that as a warning sign and plan for using the pit only during calmer conditions.
How do I reduce risk if I have plants, outdoor rugs, or furniture that I want to keep in place during gatherings?
Plan for removal or temporary repositioning during burns. Even if rugs are non-flammable, they can get heat-damaged, and fabric cushions are more vulnerable than people expect. Use the protected perimeter as a hard rule for anything soft or movable, keep them well outside the clearance zone, and remove them before lighting.
Is a higher fire pit or deeper bowl automatically safer for my patio?
Not necessarily. A deeper bowl can change where embers land, but it does not eliminate radiant heat. If the fire is larger or throws embers more aggressively, the hazard zone still expands. Safety depends on staying within the recreational fire size limits, maintaining clearance in all directions including overhead, and using a properly fitted spark screen.
Next Articles

How to Block Rain on Patio: Step-by-Step Fixes and Options
Diagnose rain entry and install patio roof, awnings, curtains, or pergola panels with proper pitch, gutters, sealing.
How to Keep Patio Plants From Blowing Over: DIY Fixes
Step-by-step DIY fixes to stop patio plants blowing over, from staking and anchors to windbreaks and better plant choice
How to Bug Proof Your Patio: DIY Fixes That Work
DIY steps to bug proof a screened patio with gap sealing, screen repairs, door upgrades, netting, and seasonal maintenan