The fastest fix is to add weight to the base of your pots, stake tall plants, and move containers out of the direct wind path. Those three moves alone will stop most tipping. But if wind is a recurring problem on your patio, there are smarter long-term solutions that go beyond propping up individual plants every time a storm rolls through. With the right approach, you can learn how to bug proof your patio from wind damage and keep plants upright season after season smarter long-term solutions. This guide walks you through both.
How to Keep Patio Plants From Blowing Over: DIY Fixes

Felix Brennan
23 Jun 2026
Why patio plants keep blowing over
Understanding the cause makes it much easier to pick the right fix. Most tipping comes down to four things working against you at once.
Wind exposure and turbulence
Open patios act like wind tunnels, especially at corners and along walls where airflow gets compressed and speeds up. A plant sitting in the middle of an exposed patio catches wind from every direction. Corners and gaps between structures are often worse than fully open spaces because wind deflects around solid barriers and creates turbulence right at the edges, exactly where a lot of us place our planters for aesthetics.
Pot weight and geometry
A lightweight plastic nursery pot filled with dry potting mix is almost begging to tip. Container stability depends heavily on shape and total mass. Wide, low-profile pots with a heavy base resist tipping far better than tall, narrow ones. A pot that's too large for the plant also causes trouble in a different way: excess soil stays wet longer, which can damage roots and undermine the plant's ability to anchor itself firmly inside the container.
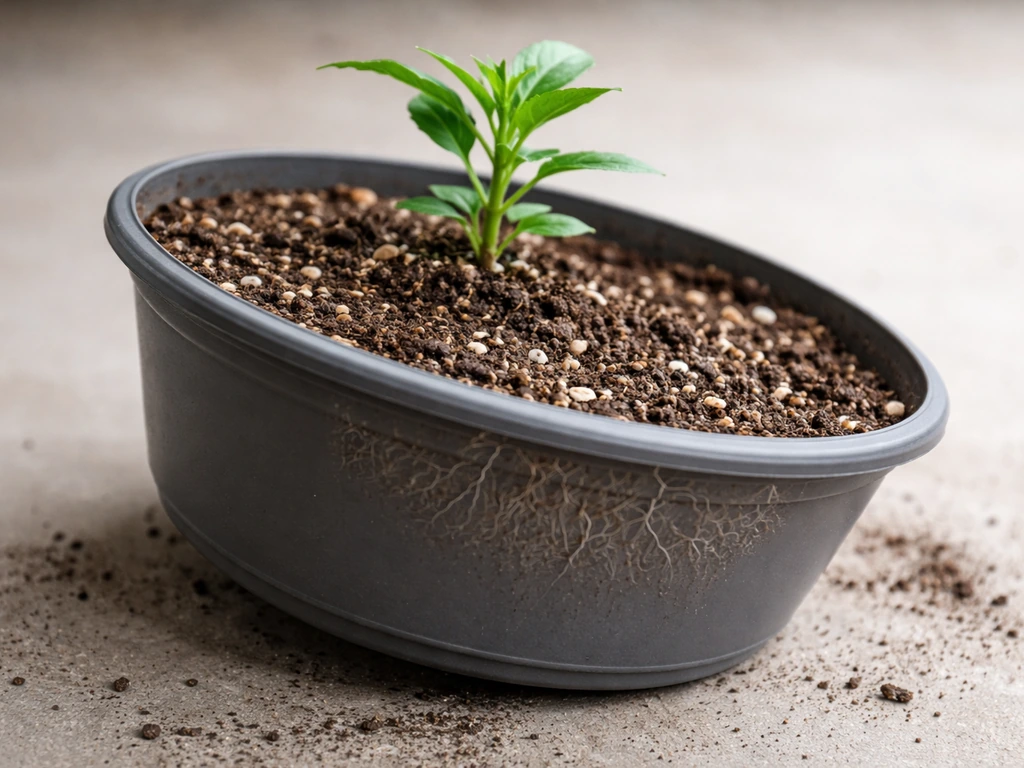
Root anchoring
Roots grip the inside of the pot and hold the plant upright from the inside out. When a plant is newly potted, roots haven't spread into the new soil yet, so the plant can actually rock or tip within the pot. Root-bound plants have the opposite problem: roots circle around the bottom and sides, restricting healthy growth and making the plant structurally weaker over time. Either way, poor root anchorage means the plant has less resistance to tipping forces.
Plant height and leaf area

Tall, leafy plants with a small root ball or a lightweight pot are top-heavy by design. A large-leafed tropical in a 10-inch pot is going to act like a sail. The more leaf surface area catching wind, and the higher the plant's center of gravity, the more leverage the wind has to tip the whole thing over.
Fast fixes you can do right now
If a storm is coming tonight or your plants tipped over this morning, here's what to do immediately.
Stake and tie tall plants
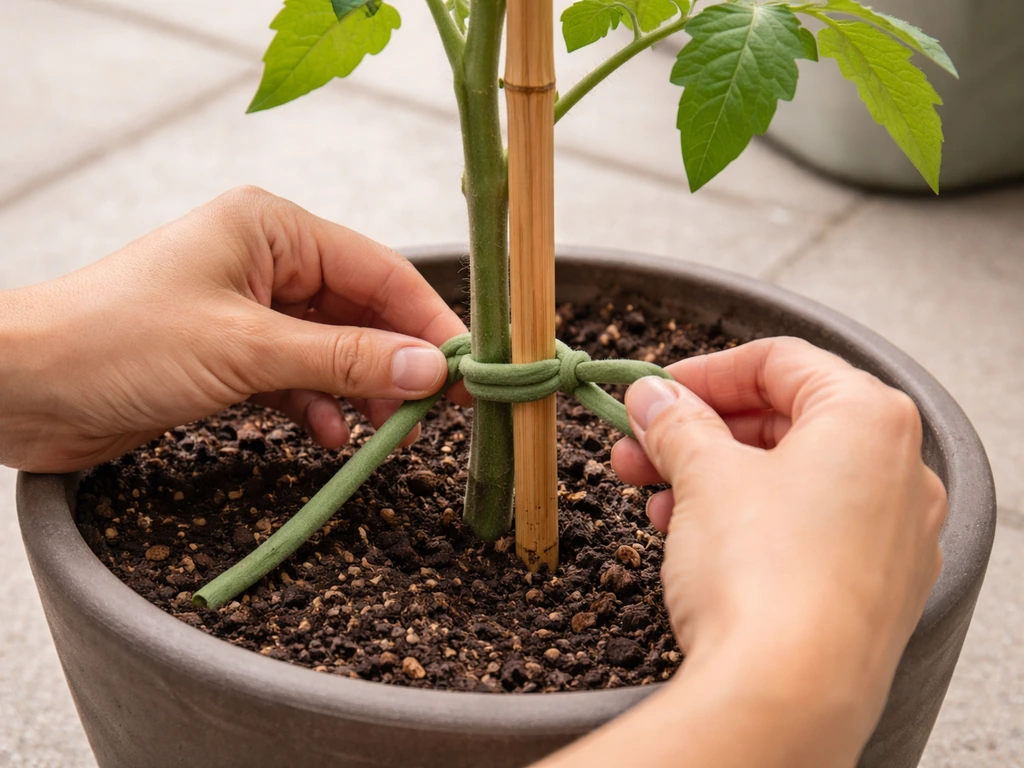
Push a sturdy bamboo stake or metal garden stake into the pot right next to the main stem. Place it close but not so close that you're stabbing through the root ball. Tie the stem to the stake using soft twine or fabric garden ties, [looping in a figure-8 pattern: circle each tie around the stake, cross the ends, and loop around the stem](https://ipm. ucanr.
edu/PMG/GARDEN/PLANTS/CULTURAL/staking. html). That figure-8 keeps the stem from rubbing directly against the stake and reduces abrasion. Tie firmly enough to provide support but loosely enough that you can slip a finger between the tie and the stem.
The goal is stabilization, not immobilization. Check ties every few weeks since plants grow and ties can become tight enough to girdle the stem. Use [materials designed to prevent girdling damage](https://extension. umn.
edu/planting-and-growing-guides/staking-and-guying-trees) when tying or supporting trees and plants, since proper staking methods keep attachments from strangling stems.
Move pots out of the wind path
Repositioning is free and often more effective than any anchor. Move vulnerable containers against a wall, into a corner where two walls meet (but away from the turbulent edge), or behind larger furniture that blocks prevailing wind. Cluster plants together so they shelter each other rather than standing alone in the open.
Add weight to the base
Swap lightweight plastic pots for terra cotta, ceramic, concrete, or stone containers. Even setting a plastic pot inside a heavier decorative outer pot makes a real difference. If you want to keep your current pots, add a layer of gravel or stones to the bottom 2 to 3 inches of the pot before adding potting mix. It lowers the center of gravity and adds ballast. You can also set heavy saucers or flat paving stones on top of the pot's drainage saucer to keep things from skidding around.
Use pot feet, saucers, and anti-tip stands
Pot feet and wide-base plant stands lower the plant's profile and increase contact with the ground surface, which reduces rocking. Wide, flat saucers create a broader footprint. On smooth patio surfaces, stick non-slip rubber pads under the saucer to prevent sliding. These are quick wins you can pick up at any garden center for a few dollars.
Longer-term solutions worth planning
If you're tired of re-staking the same plants every spring, it's worth investing a little time in setups that hold up season after season.
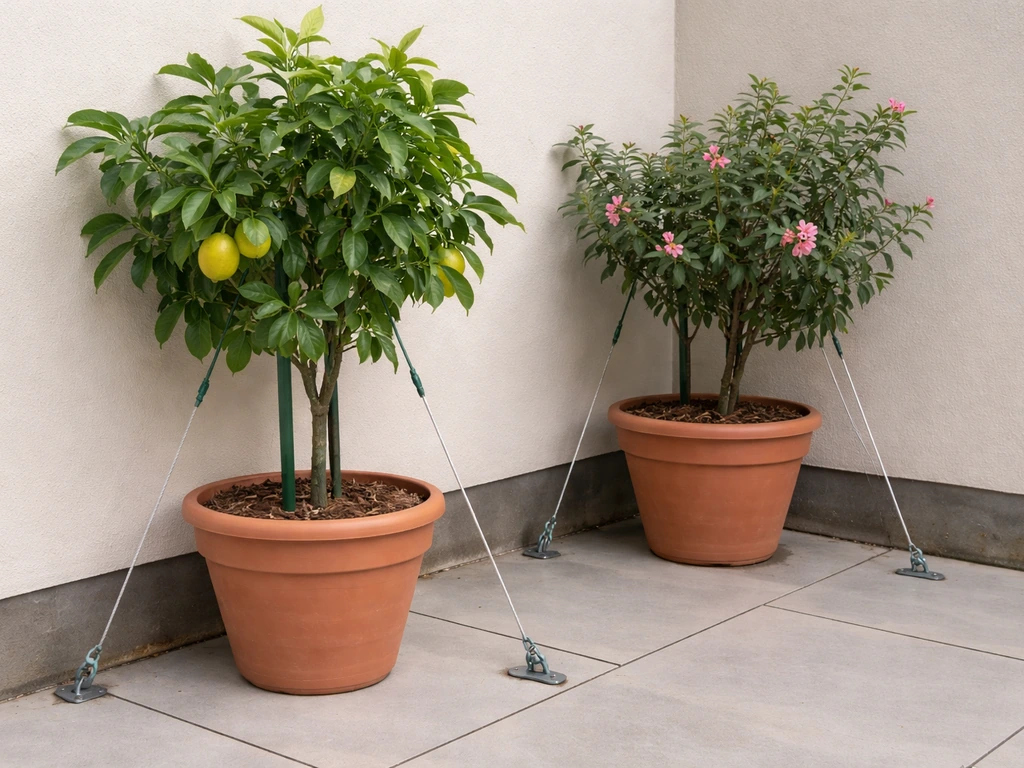
Anchor planters to the patio surface
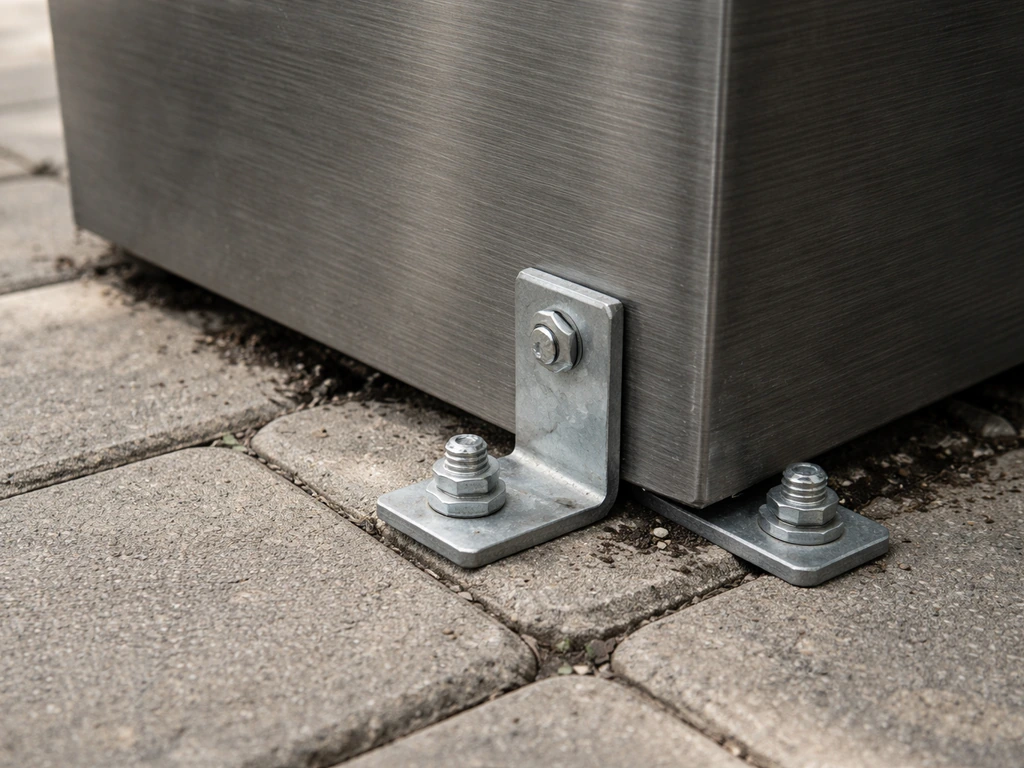
Heavy planters can be physically anchored to concrete or paver surfaces using L-brackets, planter anchor brackets, or through-paver hardware. For concrete slabs, drill anchor bolts into the slab and attach a bracket that clips or bolts to the planter. For paver patios, you can use paver-edge brackets or drill through the paver itself. The method you choose depends on how permanent you want the installation and whether you're willing to drill into your hardscape. Bracket-and-anchor systems are especially worth it for large decorative planters, raised planter boxes, or pots that sit in particularly exposed corners.
Use cages, trellises, and plant supports
Wire cages, bamboo teepees, and wall-mounted trellises give climbing and tall plants a structural framework to grow into. A plant woven through a cage or tied to a trellis becomes part of a connected structure that's much harder to knock over than a single stem in a pot. Trellises mounted to a patio wall or fence post are especially stable because they anchor to a fixed surface. Tie plants to supports firmly but loosely, checking regularly to avoid any single tie strangling a stem as the plant grows.
Move plants into the ground where possible
In-ground planting is always more stable than container growing. If you have a planting bed along the patio edge or a border strip next to the pavers, move large perennials, ornamental grasses, and shrubs into the ground. Root systems spread much wider and deeper in the ground, making them far more resistant to tipping. In-ground plants also require less watering in summer, which is a bonus.
Soil, potting mix, and spacing adjustments that improve stability
The stuff inside the pot matters more than most people realize, both for plant health and for wind resistance.
Use the right potting mix
High-quality, well-draining potting mix is non-negotiable for container plants. Avoid using garden soil, which compacts in pots and suffocates roots. A porous potting mix supplies roots with the air, water, and nutrients they need to spread and grip the inside of the container. Well-rooted plants are naturally more stable because the root mass creates resistance against rocking. Skip the cheap bags and invest in a quality mix with good structure.
Don't let plants become root-bound
A pot-bound plant has roots circling around the bottom and sides, which restricts healthy growth and weakens the plant structurally. When repotting, knock the plant out of its container and check the roots. If they're circling or matted at the outside, cut the circling roots and loosen them before moving to the next size pot. Skipping up by roughly 2 inches in pot diameter at a time is a good rule of thumb. A plant with a healthy, spreading root system is much harder to tip over than one with a tangled, restricted root ball.
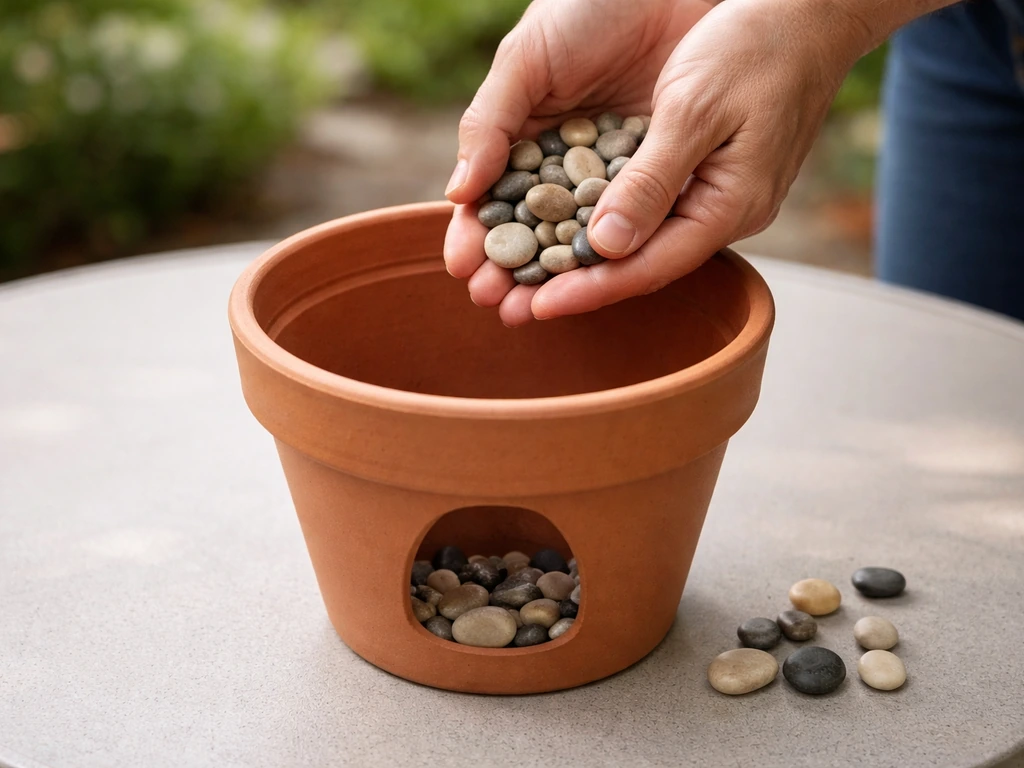
Use weight-adding materials in the bottom of pots
For containers that need to stay lightweight for moving but benefit from a heavier base when stationary, add a 2 to 3 inch layer of pea gravel, coarse sand, or small stones to the bottom of the pot before adding potting mix. This shifts the center of gravity downward. It also improves drainage, which benefits root health. Just make sure the pot has adequate drainage holes so water doesn't pool above the gravel layer.
Group and space plants strategically
Instead of spreading containers across open patio space, cluster them into groups. Taller plants placed on the windward side shelter shorter ones behind them. Dense groupings create a micro-environment that reduces wind speed between pots. This also looks better than lone plants dotted around an open patio, and it reduces watering frequency since grouped pots lose less moisture to evaporation. Think of it as planting in layers: tall at the back, medium in the middle, low at the front.
Tackling wind at the whole patio level
Fixing individual plants helps, but solving the wind problem at the patio level is a smarter long-term investment. You can apply the same safety-first thinking to your fire pit setup by keeping clear, noncombustible space around it and using heat-resistant barriers patio level. If wind is strong enough to tip plants regularly, it's also making your patio uncomfortable to spend time on. Addressing it structurally protects everything out there, not just the planters.
Install a windbreak
A windbreak doesn't eliminate wind, it redirects it, lifting airflow over and around the protected area. The key to making it work is porosity. A fully solid fence or wall creates turbulence and downwash on the leeward side, which can actually make conditions worse for plants right next to it. A porous windbreak with roughly 50 to 60 percent open area (like a slatted fence, lattice panel, or dense hedge) slows wind without creating the turbulent downdrafts that solid walls generate. Also watch out for gaps at the ends: wind deflects around short windbreaks and increases speed at the edges, so extend your windbreak well past the area you're trying to protect on both sides.
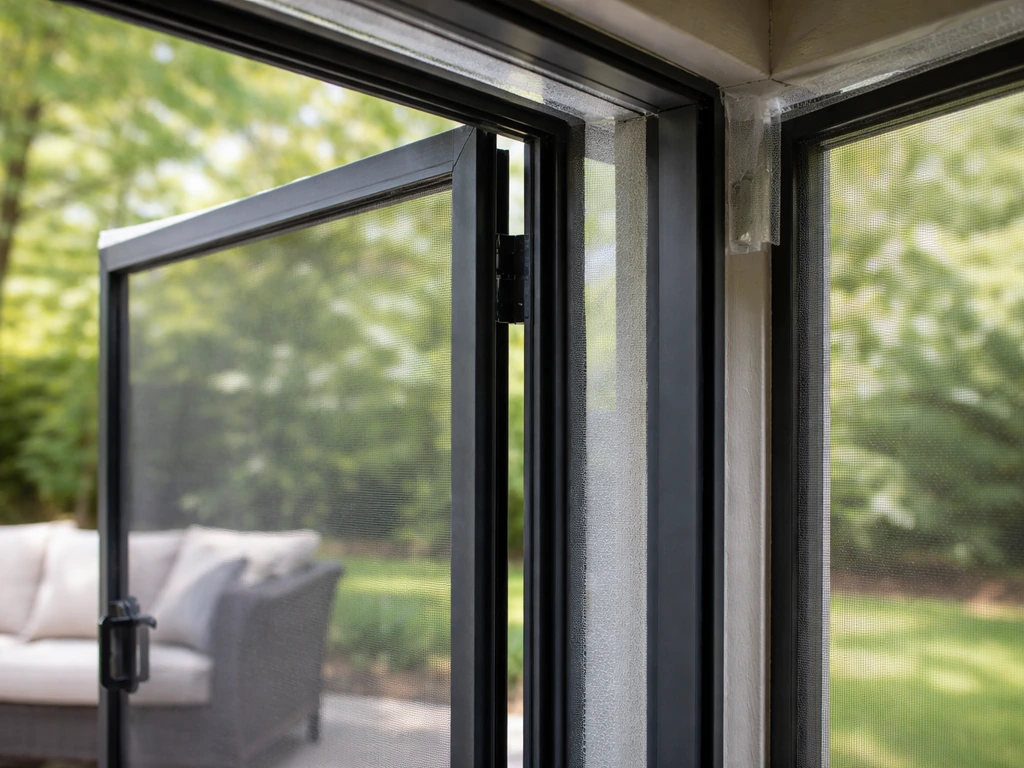
Add a screened enclosure or patio cover
A screened patio enclosure is the most effective way to create a wind-sheltered outdoor room. Screens block most wind-driven debris and significantly reduce wind speed inside the enclosure, making it comfortable for both you and your plants. Patio covers (attached roofs, pergolas with shade cloth, or solid panel covers) reduce vertical wind pressure and rain exposure simultaneously. If you're already dealing with rain blowing onto the patio, combining a cover with side screening solves both problems at once.
If rain is also blowing onto your patio, make sure your patio cover or enclosure blocks wind-driven water too, not just rainfall how to block rain on patio. These are bigger projects, but they transform a breezy, exposed slab into a genuinely sheltered outdoor room you can use in almost any weather.
Use existing structures strategically
Before spending money on new structures, look at what you already have. The wall of your house, an existing fence, a pergola, or even a large piece of outdoor furniture can act as wind deflection if you position plants thoughtfully behind it. Place your most wind-vulnerable containers in the lee of these existing structures, not in the open center of the patio.
Choosing wind-tolerant plants and smarter container setups
Some plants are just built for windy conditions. If you're constantly fighting to keep a particular plant upright, switching to a more wind-tolerant variety in a better container setup is an easy long-term win.
Plants that handle wind well
Wind-tolerant plants tend to share a few traits: flexible stems or branches that bend without snapping, smaller or narrower leaves that catch less wind, and compact growth habits that keep the center of gravity low. Good choices for patio containers in windy spots include ornamental grasses (which flex beautifully in the wind), lavender, rosemary, sedums, agapanthus, geraniums, and most succulents. Avoid large-leafed tropicals like elephant ears, cannas, and banana plants in exposed spots unless you're prepared to stake them heavily or move them in high winds.
Container setups that resist tipping
| Container Type | Wind Resistance | Weight | Best For |
|---|---|---|---|
| Concrete or hypertufa | Excellent | Very heavy | Permanent plantings, exposed corners |
| Glazed ceramic | Good | Heavy | Medium-sized plants, semi-sheltered spots |
| Terra cotta | Good | Medium-heavy | Herbs, succulents, compact perennials |
| Fiberglass (wide base) | Moderate | Light | Large plants where you need to move the pot |
| Lightweight plastic | Poor | Very light | Sheltered spots only, or double-potted inside heavier outer pot |
The recommendation is simple: match your windiest spots with your heaviest, widest-base containers, and save the lightweight pots for sheltered areas or double-pot them inside something heavier. If rain is getting into your patio area, focusing on drainage and weatherproofing steps can stop pooling and water intrusion from ruining the space how to stop rain coming into patio. A wide, low-profile concrete planter with a wind-tolerant ornamental grass is going to sit exactly where you put it through nearly any weather.
Size the pot correctly
Bigger isn't always better. A pot that's significantly too large for the plant stays wet in the unused soil zones, which can harm roots and keep the plant from establishing firmly. But a pot that's too small gives roots nowhere to spread and anchor. A good rule: choose a container where the plant's root ball fills roughly two-thirds of the pot volume, with room to grow. A properly sized pot with a well-established root system provides far better internal anchorage than an oversized pot with a small, loosely seated plant.
A practical action plan by urgency
Here's how to prioritize everything above depending on how much time and budget you have.
| Timeframe | Action | Cost Range |
|---|---|---|
| Today | Stake tall plants, move pots behind walls/furniture, group containers together | Under $20 |
| This week | Swap lightweight pots for heavier containers, add gravel ballast, install saucers with rubber pads | $20–$100 |
| This season | Add trellises or cages, anchor large planters with brackets, repot root-bound plants | $50–$200 |
| Long-term project | Install a slatted fence windbreak, screened enclosure, or patio cover | $300–$3,000+ |
You don't have to do all of this at once. Start with the free and cheap moves today, reposition, stake, cluster, and you'll notice an immediate improvement. Then work through the rest as time and budget allow. The patio-level wind solutions at the end of that list do the heaviest lifting long term, because once you've created a genuinely sheltered outdoor space, you stop fighting the wind entirely and start enjoying the patio the way it's meant to be used.
FAQ
How do I know how deep or how large the stake should be to stop tipping?
Use a stake length that reaches deep enough to resist leverage. For most container plants, push the stake until it’s well below the top inch of the potting mix, then tie at about one-third and two-thirds up the stem if it’s tall. If the stake feels loose, don’t tie tighter, instead add ballast or switch to a wider plant stand so the whole setup has grip on the patio.
What type of tie should I use, and how often should I re-check it?
Garden twine can cut into soft stems over time, especially in heat and wind. Prefer fabric ties or soft plant tape, and check every 2 to 4 weeks during the growing season. When you retie, leave slack for growth (you should be able to slide a finger under the tie without the stem lifting).
If a plant already toppled, is there a “best time” to fix it and re-set it?
Do it when the soil surface is lightly moist, not bone-dry. Tipping often loosens fine roots and the pot can rock even if you re-stake, so gently press potting mix back around the root ball and water to settle it, then wait a few hours before reassessing stability. If the pot slides on a slick surface, stop and add non-slip pads under the saucer or use a rougher placement surface.
Will adding gravel to the bottom of a pot actually help, or can it cause drainage problems?
Yes, but avoid burying mulch or stones in a way that blocks drainage holes. A common safe approach is to add a 2 to 3 inch layer of pea gravel or small stones only at the bottom, then fill with potting mix above it. Make sure water drains freely after watering, and never let gravel cover the outlet holes.
My pots blow over, but sometimes they also slide, what’s the difference in what I should fix?
If the pot is top-heavy, moving the plant behind a wall or clustering can help, but sliding is different from tipping. For sliding, use non-slip rubber pads under saucers, choose a heavier base (terra cotta or concrete), and keep the pot footprint flat. For true tipping, focus on ballast, stake/tie, and pot shape (wide, low profile).
When I repot a root-bound plant, should I wait until after windy weather, or is it safe to do right away?
Only repot when the plant can recover quickly, and avoid doing it right before a forecasted wind event. Loosen or redirect circling roots only as needed, then stabilize the plant immediately with a stake or wider base container. After repotting, use a gentle watering routine and recheck ties because newly disturbed roots can temporarily reduce anchorage.
Is it better to use a larger pot to prevent tipping, or can it backfire?
Don’t rely on “bigger” if the plant is smaller. An oversized container can stay wet longer, and weak root anchorage can make tipping worse during wind gusts. Aim for a pot where the root ball takes up about two-thirds of the volume, then use ballast (wide base, heavier outer pot) rather than jumping far past the needed size.
What are good non-drilling options if I rent or can’t anchor planters to the patio?
If you can’t drill into pavers or concrete, try non-drill alternatives like wide-base stands plus a weighted saucer and a cable tie to a nearby fixed structure (rail, fence post, or sturdy furniture). For climbing plants, wall trellises and cage systems often eliminate tipping without anchors in the patio surface.
How do I place a windbreak so it helps plants instead of creating more turbulence?
A porous windbreak is more about reducing wind speed than fully stopping wind. Extend it past the protected area on both ends because winds accelerate around ends, and avoid tight solid corners that create turbulence. If your patio is very exposed, combine a windbreak with moving the most vulnerable pots to the leeward side and clustering by height.
Should I move containers during storms, or can I rely on permanent fixes?
Some plants should be moved during severe gusts even if you do everything else right. Keep a “temporary placement” spot near the house or under a cover, and plan to relocate only the biggest, leafiest containers when forecasts mention high gusts. This is especially useful for plants with flexible stems that can bend repeatedly without breaking, since they can still rock in wind.
What quick diagnostic can I do to figure out why my plant keeps tipping?
Leafy plants with high sail-area (large broad leaves) usually need more aggressive stabilization than smaller-leaved plants. If you notice the foliage swaying while the pot stays planted, tie and add ballast first. If the entire container rocks, switch to a wider base, add non-slip pads, and ensure the root ball is well seated in the potting mix.
In what order should I upgrade fixes if I only have time for a few changes?
Start with the containers that are highest and most exposed. Prioritize: (1) windward side pots closest to open gaps, (2) the tallest plants, and (3) the lightest containers. Then upgrade from free moves (reposition, clustering) to medium effort (wide stands, ballast, non-slip pads) before spending on full bracket-and-anchor systems for the most valuable large planters.
Next Articles
How to Bug Proof Your Patio: DIY Fixes That Work
DIY steps to bug proof a screened patio with gap sealing, screen repairs, door upgrades, netting, and seasonal maintenan

How to Decorate a Long Narrow Patio: Layout Tips
Practical DIY layout and decor tips to widen a long narrow patio using zoning, furniture spacing, lighting, greenery, an

How to Decorate a Rectangular Patio Step by Step
Step-by-step plan to decorate a rectangular patio with smart layout, zones, furniture fit, lighting, plants, and seasona