The fastest way to block rain on a patio depends on where the water is actually coming from. If it's dropping straight down, you need a solid roof, a sloped cover, or a well-tensioned canopy overhead. If rain is blowing in sideways, you need side protection: screens, curtain panels, or solid walls. Most patios deal with both, so the best solution usually combines an overhead cover with at least partial side protection. The good news is there are options at every budget level, and plenty of them are DIY-friendly.
How to Block Rain on Patio: Step-by-Step Fixes and Options

Felix Brennan
29 Jun 2026

Figure out where the rain is getting in first
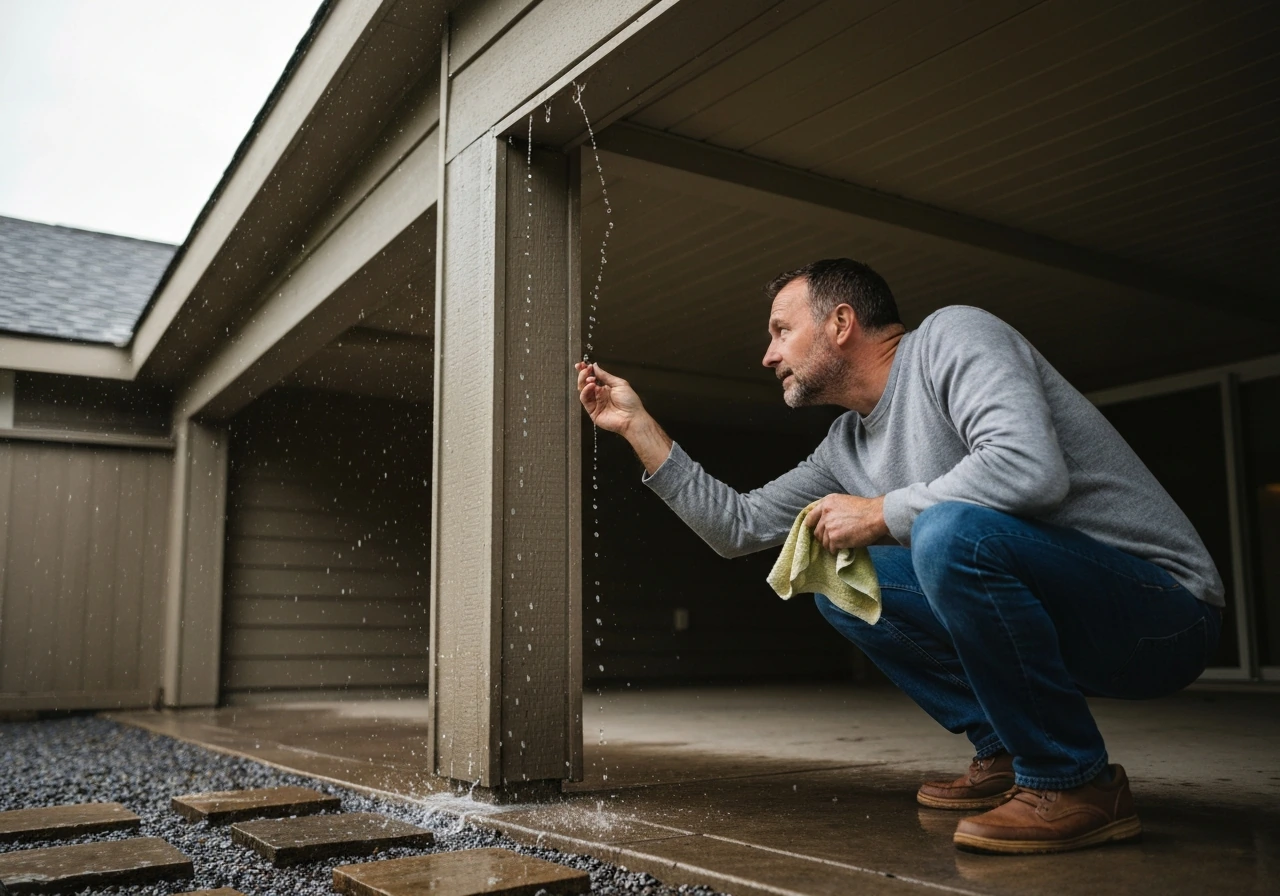
Before you spend a dollar, spend five minutes during the next rainstorm actually watching your patio. Once you know how rain enters, the same weatherproofing steps help you bug-proof your patio by sealing gaps and reducing standing water. Sounds obvious, but it tells you exactly what you're solving for. Is water coming straight down through an open or inadequate overhead? Is it sheeting off the house wall and landing inside the patio footprint? Is it blowing in from the open sides? Each of those problems has a different fix, and misdiagnosing it is the most common reason people buy something that doesn't help.
- Overhead rain (water falling straight down): you need a proper roof, solid cover, or sloped panel system with runoff drainage
- Wind-driven rain from the sides: you need curtain panels, retractable screens, polycarbonate side panels, or solid walls
- Runoff from the house wall or roof above: you need flashing, a kick-out diverter, or improved gutters on the main roof before worrying about the patio cover itself
- Water pooling on the patio floor and splashing up: grading the slab surface or adding a perimeter drain solves this separately from any overhead fix
Also note whether your patio is attached to the house or freestanding. Attached patios are more susceptible to runoff from the main roof edge and need flashing at the house wall junction. Freestanding pergolas or shade structures have simpler rain-blocking needs overhead but usually need more side protection because they're exposed on all four sides.
Best options for blocking overhead rain
Here's a straight comparison of the main overhead options, because this is where most people start and where the biggest decision lives.
| Option | Rain Protection | DIY Difficulty | Approximate Cost Range | Best For |
|---|---|---|---|---|
| Solid patio roof (aluminum, wood, metal panel) | Excellent | Moderate to hard | $3,000–$15,000+ installed | Attached patios, permanent use |
| Polycarbonate panel cover | Very good | Moderate | $500–$4,000 DIY | Pergolas, semi-permanent installs |
| Retractable awning (motorized or manual) | Good in light-moderate rain | Easy to moderate | $500–$3,500 | Flexibility, smaller patios |
| Louvered pergola roof | Very good (when closed) | Hard (usually pro install) | $5,000–$20,000+ | Premium builds, year-round use |
| Shade sail or tarp (temporary) | Fair in light rain | Easy | $30–$300 | Immediate/budget fix |
| Retractable canopy on track | Good | Moderate | $800–$4,000 | Open pergolas, flexibility |
Solid patio roof covers
A solid patio roof, whether it's an aluminum pan cover, corrugated metal panels, or a built framed-and-shingled extension, is the most reliable way to block rain completely. If you're attaching it to the house, you'll need proper flashing at the wall, and the roof needs enough pitch to drain. A minimum slope of about 1/8 inch per foot is the bare minimum for water to move, but 1/4 inch per foot is much safer and gives you a margin if the structure settles slightly. These are generally permitted projects (more on that below), so check with your local building department before you start building.
Polycarbonate panel systems for pergolas
If you already have a pergola or want a lighter-weight solution, polycarbonate panels are a popular middle ground. They're translucent so you keep natural light, they shed rain well when installed at the right slope, and they're a manageable DIY project. The key is slope: panels must be installed at a pitch so water runs to one end and into a gutter or over the edge, not pooling between panels. Sealing the panel ends with compatible end caps and using EPDM rubber gaskets or silicone sealant at the joints prevents leaks at the overlap points. Don't skip the end caps; they're specifically designed differently from mid-panel closures to allow drainage while blocking debris.
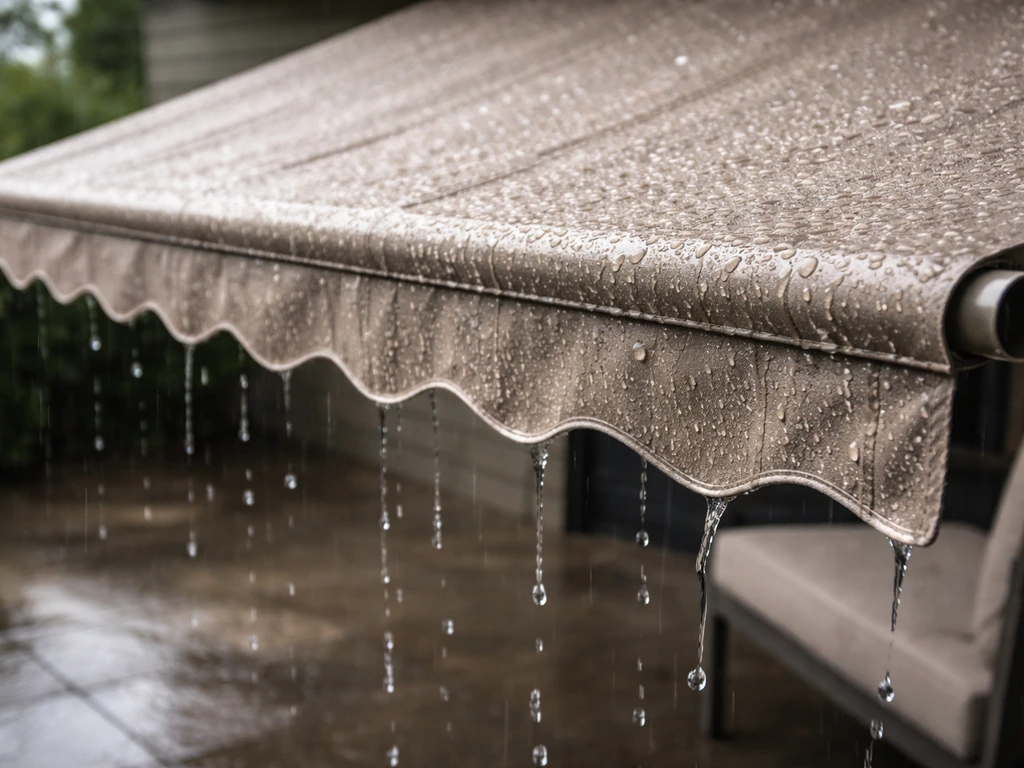
Retractable awnings
Awnings work well for moderate rain and are easier to install than a full roof. The trade-off is that they're not great in heavy rain or wind because water can pond in the fabric if the pitch isn't steep enough, and in high winds you should retract them. Most awnings pitch between 5 and 30 degrees depending on the model. Motorized versions with wind sensors are worth the extra cost if you're not always home. From a code standpoint, awnings in many jurisdictions are designed to handle specific load requirements, including wind loads, so make sure any permanent awning you buy is rated for your local wind zone, especially if you're in a coastal or storm-prone area.
Getting the water management details right
This is the section most guides skip, and it's why a lot of DIY patio covers still leak. Putting a cover over your patio without managing where the water goes just moves the problem. Here's what you actually need to think about.
Slope and pitch
Any cover that sheds water needs consistent pitch with no low spots where water can pool. For gutters attached to the cover, the standard pitch target is 1/4 inch drop per 10 feet of gutter run, though 1/16 inch per foot is often cited as the minimum for water to flow. Start the gutter at the high end (farthest from the downspout) and slope toward the outlet. If you have a long run, consider two downspouts, one at each end, with the gutter highest in the middle.
Flashing where the cover meets the house
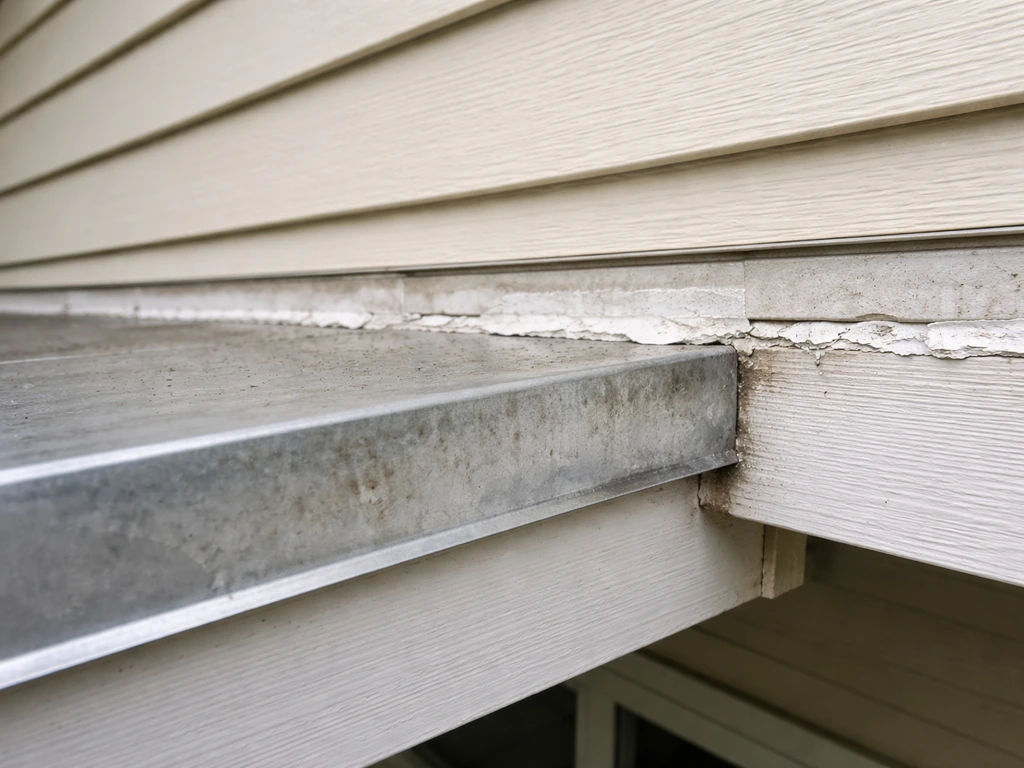
If your patio cover attaches to the house, the junction between the cover's ledger board (or header) and the house wall is where water most commonly infiltrates. You need step flashing or continuous flashing that laps over the top of the cover material and tucks behind the house's siding or exterior cladding. Where the cover meets a wall at a downhill angle, a kick-out diverter flashing diverts runoff away from the wall rather than letting it channel down behind the cover. Skipping flashing at this junction is the most common structural leak point on attached patio covers.
Gutters, downspouts, and sizing
Size your gutter to the roof area it's draining. A standard 5-inch K-style gutter handles most residential patio covers. For larger patio roofs with high rainfall rates, 6-inch gutters give you more margin. Position the gutter lip slightly below the plane of the roof surface so water falls into the gutter rather than overshooting it. For downspouts, route them away from the patio foundation and into a splash block or drain. One downspout for every 30 to 40 linear feet of gutter is a reasonable starting point.
Sealing and weatherstripping
Panel joints, end caps, and the perimeter edge where a cover meets a wall all need weatherproofing. Use silicone sealant rated for exterior use and compatible with your panel material. For metal-to-metal joints, butyl tape or EPDM rubber gaskets hold up better than silicone over thermal expansion and contraction cycles. Check manufacturer specs before choosing a sealant: some polycarbonate manufacturers void warranties if incompatible sealants are used.
DIY vs. hiring a pro: honest guidance on cost, permits, and skill
Let's be direct about where DIY makes sense and where it doesn't. The main factors are structural complexity, permit requirements, and your comfort level with roofing and framing.
When permits are likely required
Patio covers are regulated structures under most building codes in the US. The International Residential Code (IRC Appendix H) and International Building Code (IBC Appendix I) both treat patio covers as structures that must be designed for specific dead loads, live loads of at least 10 psf, snow loads where applicable, and wind loads. That means most permanent patio roof additions, attached or freestanding, will need a permit. Freestanding pergolas sometimes fall under a threshold (common exemptions are for structures under 200 square feet or under a certain height), but this varies by municipality. Call your local building department before you start, because building without a permit can create problems when you sell the house.
What's reasonable as DIY
- Installing a retractable awning on an existing wall bracket (moderate DIY, most systems come with instructions)
- Adding polycarbonate panels to an existing pergola frame (moderate DIY if the frame is already square and structurally sound)
- Installing gutters on an existing cover (easy to moderate DIY)
- Adding retractable screen panels or curtain systems to an existing structure (easy DIY)
- Temporary tarp or canopy setup (easy, immediate)
When to call a pro
- Building a new attached patio roof that requires a ledger connection to the house (flashing and structural attachment need to be done correctly for both weather and safety)
- Any project in a high-wind zone where load calculations matter
- Projects that require permits and inspections where your municipality requires licensed contractors
- Louvered pergola systems, which typically need factory installation for the mechanical parts to work correctly
On cost: a DIY polycarbonate pergola cover might run $500 to $2,000 in materials. The same project with a contractor typically doubles or triples that. A fully permitted attached patio roof addition with gutters and flashing runs $5,000 to $15,000 professionally installed, depending on size, materials, and region. Budget accordingly and be realistic about the time a DIY job takes, especially if you haven't done roofing work before.
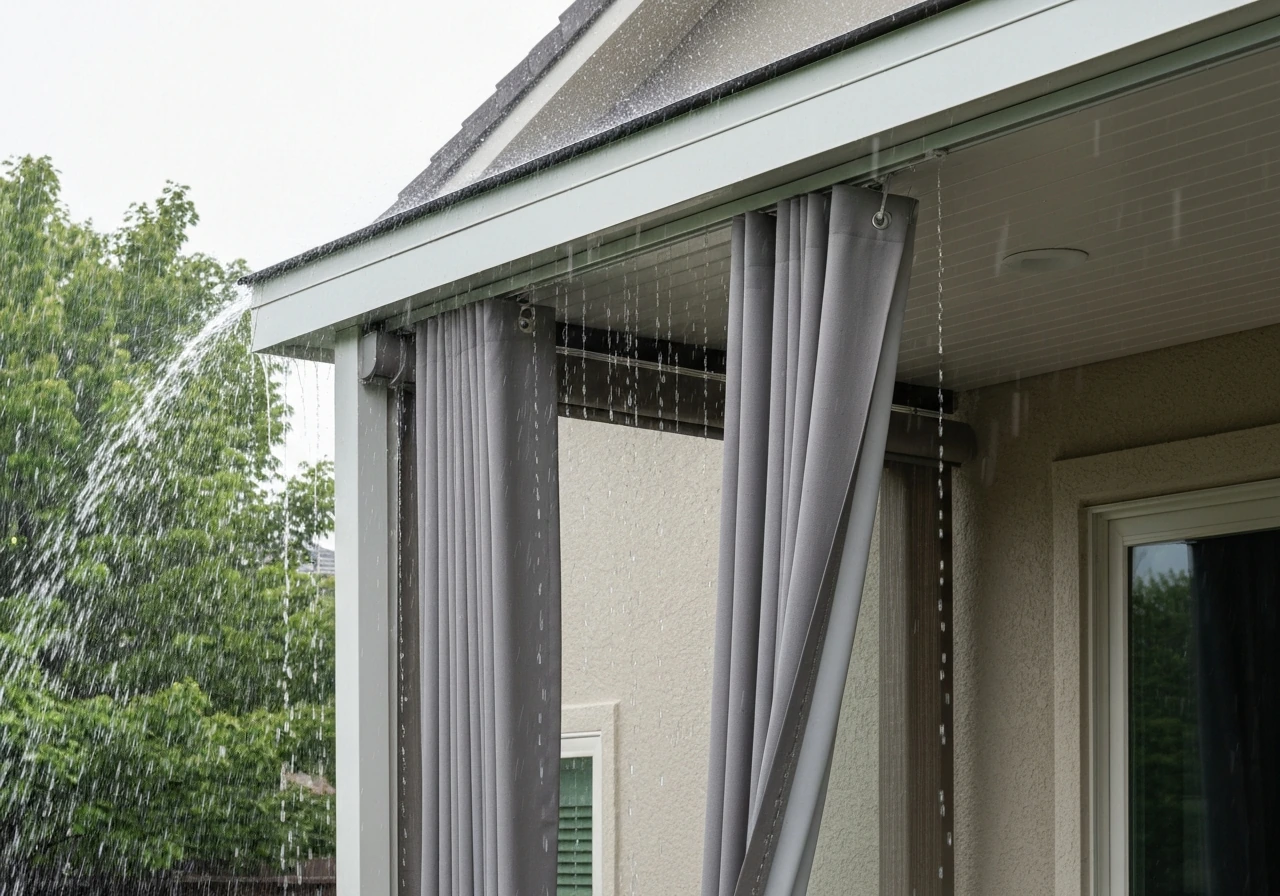
Add-ons that handle wind-driven rain and side entry
Once your overhead is handled, wind-driven rain coming in from the sides is the next problem. To protect your patio from a fire pit, keep the heat and sparks away from any overhead cover, screens, and side panels by using noncombustible materials and maintaining safe clearance. This is especially relevant for open pergolas or patios with large open sides facing the prevailing weather direction. The good news is that side protection options range from cheap and temporary to elegant and near-permanent.
Retractable vinyl and screen panels
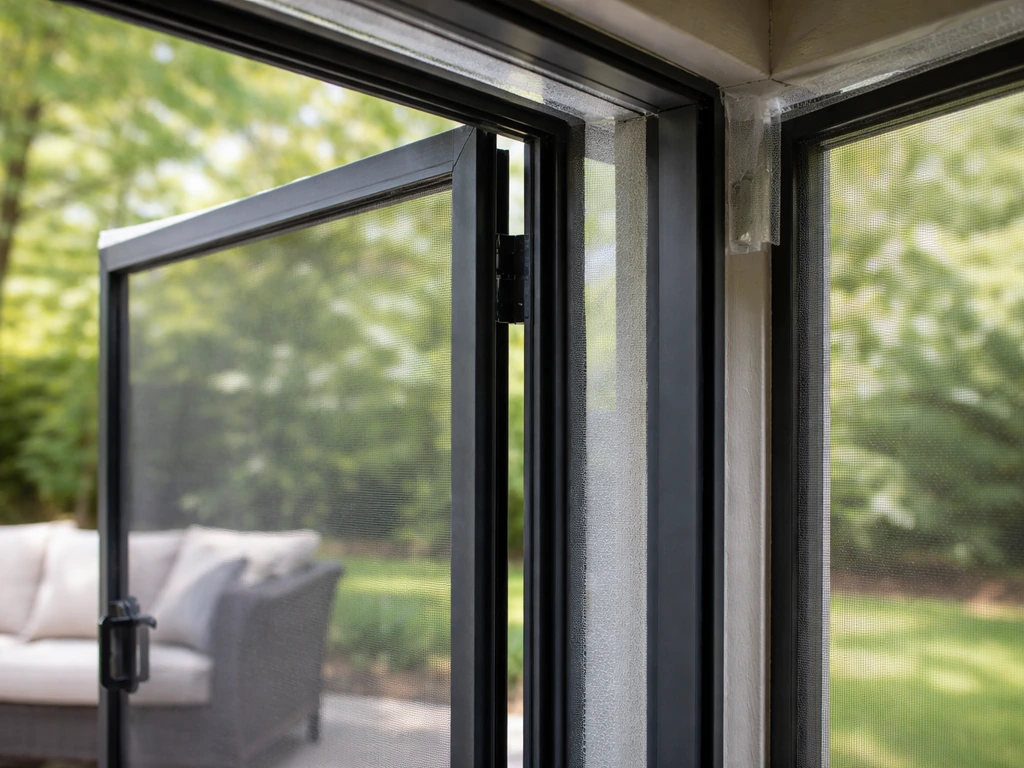
Motorized retractable screen systems designed for outdoor use are one of the best investments for a covered patio that faces a lot of wind-driven rain. Systems using a track-retention design (sometimes called V-track or zip-track systems) hold the screen panel edge in a side channel so the screen stays taut and doesn't billow in wind. Clear vinyl panels provide visibility while blocking rain and cold air effectively. Solar screen or mesh fabric versions block UV and insects but let more wind-driven moisture through, so for rain specifically, clear or coated vinyl is the better choice.
Outdoor curtains and zip-track shade systems
For a lower-cost side solution, heavy outdoor curtains on stainless or powder-coated rods can reduce wind-driven rain significantly. They're not completely watertight but they knock down the wind enough to matter. Zipper-retention roll-down shade systems go a step further: a zipper runs along both side rails so the panel is sealed on the edges, dramatically improving rain and wind blocking versus a free-hanging curtain. These are semi-permanent installs that typically mount to the overhead structure and can be rolled up when not needed.
Polycarbonate or acrylic side panels
For the most robust side protection short of a full wall, rigid polycarbonate or tempered glass side panels create a near-indoor environment. These are heavier installations that usually require a proper frame, but they completely stop both overhead and wind-driven rain while keeping visibility. If you're going this far on side protection, you're essentially building a screened or glazed patio enclosure, which is a bigger project with its own permit considerations.
Tarps and temporary canopies as an immediate fix
If you need protection today while you plan a longer-term solution, a heavy-duty polyethylene tarp or a pop-up canopy can work in a pinch. A tarp rigged with bungee cords and ratchet straps over an existing pergola frame sheds rain reasonably well if you [create a slope so water runs off one side](https://www. homebuilding. co.
uk/advice/waterproofing-a-pergola). FEMA emphasizes safe self-help tarp usage as a temporary covering approach used until permanent repairs are made A tarp rigged with bungee cords and ratchet straps over an existing pergola frame sheds rain reasonably well.
The downsides are wind vulnerability and appearance. Never leave a tarp or pop-up canopy deployed in high winds: in storms, improperly secured temporary canopies are a real safety hazard. Use them as a bridge solution, not a permanent one.
Keeping your rain-blocking solution working over time
Even a well-installed patio cover can fail prematurely without basic maintenance. Here's what to actually do and when.
Gutter and drainage checks
Clean your patio cover gutters at least twice a year, once in early spring and once in late fall after leaves have dropped. Look for debris buildup, sags in the gutter run (meaning the pitch has shifted), and any overflow points. If water is spilling over the front of the gutter during rain, the gutter is clogged, undersized, or has lost its pitch. A five-minute inspection with a hose after cleaning tells you immediately if the drainage is working.
Inspect flashing and seals after major storms
After any significant storm, check the junction between your patio cover and the house wall. Look for water staining on the interior wall, peeling paint at the connection point, or visible gaps in the flashing or sealant. Silicone sealant has a typical service life of 10 to 20 years outdoors but can degrade faster in high-UV climates or if an incompatible product was used. Re-sealing a joint is a 30-minute job. Ignoring a failed seal can lead to rot behind the siding or water intrusion into the house wall, which is a much bigger repair.
Retractable system maintenance
Retractable awnings and screen panels need seasonal attention. Extend them fully a few times a season to check for tears, stuck tracks, or motor issues before you need them during a storm. Clean the fabric with mild soap and water (not bleach, which degrades most awning fabrics). Lubricate tracks and hinges with a silicone-based lubricant rather than oil-based products that attract dirt. In climates with harsh winters, retract and secure or remove fabric panels before freezing temperatures arrive to prevent cracking of vinyl panels.
Seasonal adjustments and winterizing
In snow climates, check that your patio cover can handle snow load. Code minimums call for patio covers to resist at least 10 psf live load, with higher requirements where snow loads exceed that. If you're in a heavy-snow region and your existing cover wasn't designed for it, be cautious about letting snow accumulate. Use a roof rake to clear snow from polycarbonate or fabric covers before buildup gets heavy. For retractable canopy systems, the manufacturer will specify a maximum snow load and usually recommends leaving them retracted in winter. Inspect all structural fasteners, brackets, and anchor points in early spring to catch any corrosion or loosening from winter freeze-thaw cycles before the rainy season starts.
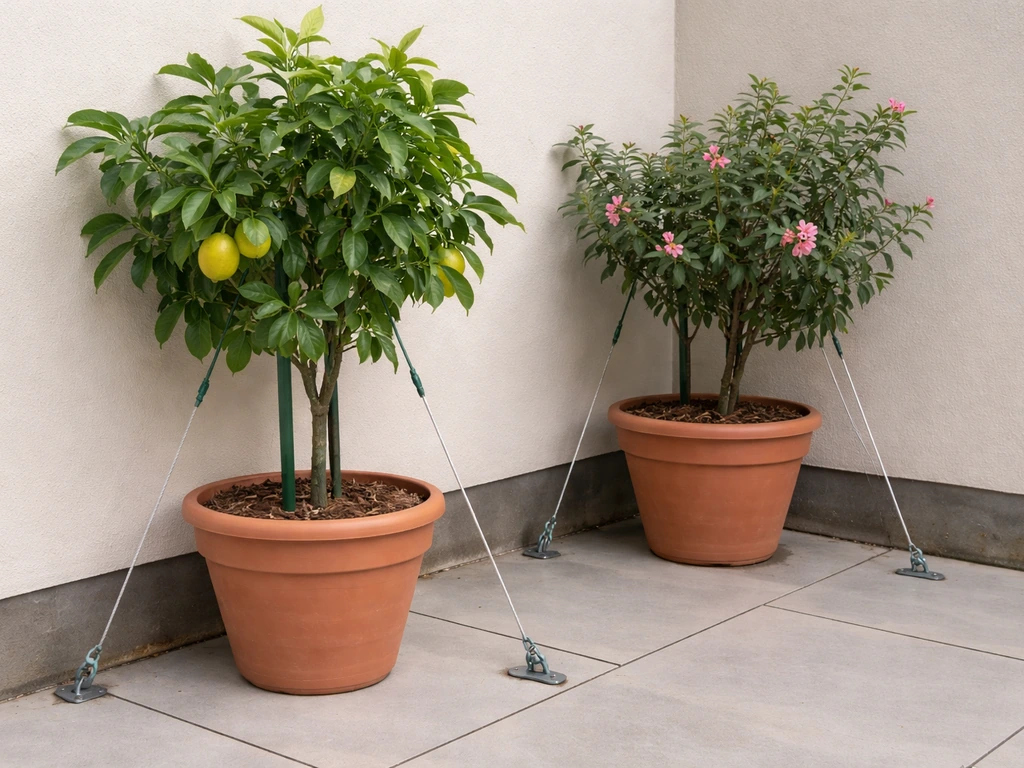
Rain management on a patio is closely connected to a few neighboring problems: wind blowing in is part of the same side-protection challenge you'll face if you're also dealing with pests or plant damage from storms. To prevent patio plants from blowing over, focus on wind management and make sure your cover and side protection reduce gusts reaching the plants. And if you have a fire pit under your covered patio, the cover itself creates a specific set of clearance and ventilation considerations worth thinking through as part of the same project.
FAQ
How can I tell if my patio problem is from the house roof runoff or from the patio cover itself?
During the next rain, watch which surface starts the first flow (house shingles/gutter line versus the patio-cover panels). Then check whether water is dripping right at the house-wall junction (attached cover issue), or pooling beneath low spots on the patio cover (pitch or gutter issue). Water that seems to originate from the gutter/downspout area upstream usually indicates a roof-drain or flashing problem at the wall connection.
What’s the biggest mistake to avoid when adding gutters to a patio cover?
Avoid assuming “whatever slope seems right.” If the gutter has low points or the downspout outlet is too low, water will back up and spill over during heavy rain. Use consistent measured pitch across the full run, and confirm the outlet can drain freely during a hose test, not just dry-season checks.
Can I use spray foam, caulk, or random sealants to stop leaks at panel joints?
Usually not. Many sealants fail early if they are not compatible with the panel material (especially polycarbonate) or if they get pulled apart by thermal movement. Follow the material maker’s recommended products, and prioritize proper mechanical joint design (end caps, gaskets, and flashing) over “filling gaps” with one-off caulk.
Do I need flashing even if my patio cover looks sealed with caulk?
Yes, especially on attached covers at the house-wall junction. Caulk can shrink, crack, or peel over time, but flashing is designed to shed water consistently by layering and directing flow. If water can travel behind siding or cladding, caulk alone is not a reliable long-term barrier.
What size gutters and downspouts should I choose for heavy storms?
Instead of using a single default, size based on the roof area being drained and local rainfall intensity. If you frequently see overflow or streaking during hard rain, the gutter may be undersized or the pitch may be off. As a practical step, consider adding a second downspout for long gutter runs and ensure the gutter lip catches runoff without overshooting.
If my patio cover is freestanding, do I still need to manage water at the base?
Yes. Freestanding structures can still create water channels that run toward the patio floor, foundation, or posts. Make sure runoff drains away from the slab and that post bases are detailed so water does not collect around anchors (standing water accelerates corrosion and staining).
How do I prevent wind-driven rain from entering under the roof edge, not just through the sides?
Look for gaps at the perimeter where wind can force water upward or sideways under the cover. Improve edge containment by adding properly layered drip edges or skirt detailing, and ensure gutters and flashing are continuous. Also confirm the cover slope is correct, because poor pitch increases the chance of edge wetting and blow-in.
Are clear polycarbonate panels always the best choice for blocking rain?
They work well if installed with correct slope and the right end caps and gaskets, but they can leak if panel ends are not treated as purpose-designed drainage points. Also consider that polycarbonate can flex, so fastening and joint sealing must allow for movement without creating micro-gaps.
What should I do about condensation under a covered patio?
Condensation usually happens when warm, humid air meets a colder cover surface. The practical fix is airflow and insulation details, such as adding ventilation paths at the edges, improving drainage so wet surfaces dry out, and avoiding non-vented “fully closed” designs unless the system is designed for moisture management.
How often should I re-check seals and flashing after installation?
Do a quick visual inspection shortly after the first major rain (within the first month), then plan for periodic checks after seasonal temperature swings. Pay special attention to the house-wall junction and downhill seams, because movement from freeze-thaw cycles and settling can open gaps even when the initial installation was solid.
Can I leave a tarp or pop-up canopy up during storms to save time?
Not recommended. Temporary covers are highly vulnerable to gusts, flapping, and detachment, and they can fail suddenly. If you use a tarp as a short-term bridge, keep it tensioned with a real slope and secure it redundantly, and remove it when severe wind is likely.
How do I make sure side panels or curtains don’t trap water and create new leaks?
Edge retention matters. If you hang curtains loosely, water can run down the curtain face and then drip where it meets openings or fasteners. Use side rails, zipper retention systems, or panel skirts designed to keep water from reaching the patio opening lines, and avoid mounting so the curtain blocks natural drainage paths from the cover.
What maintenance checks should I do specifically before the rainy season?
Clean gutters, verify pitch, and hose-test at least once after cleaning. Then inspect all junctions (especially flashing and panel-to-wall transitions), confirm downspouts discharge away from the patio area, and check fasteners and anchors for loosening or corrosion after any cold-weather freeze-thaw period.
Next Articles
How to Keep Patio Plants From Blowing Over: DIY Fixes
Step-by-step DIY fixes to stop patio plants blowing over, from staking and anchors to windbreaks and better plant choice
How to Bug Proof Your Patio: DIY Fixes That Work
DIY steps to bug proof a screened patio with gap sealing, screen repairs, door upgrades, netting, and seasonal maintenan

How to Decorate a Long Narrow Patio: Layout Tips
Practical DIY layout and decor tips to widen a long narrow patio using zoning, furniture spacing, lighting, greenery, an