
You can build a screen room on an existing patio in a single weekend for a small attached structure, or over two to three weekends for a full freestanding room. For step-by-step guidance on how to turn a patio into a screened-in porch, follow our detailed how-to. The basic process is: pour or set footings if needed, frame the walls and roof, attach flashing where the structure meets your house, install roofing, stretch and spline the screen panels, hang the door, and trim everything out. Total material costs run roughly $1,500 to $6,000 for a DIY build on a 10x12 to 16x20 foot patio, depending on roof style, screen type, and how much lumber work is involved. It is genuinely beginner-friendly if you take the planning seriously before you pick up a saw. For a full build walkthrough with photos and real‑world tips, see how i built a diy screened in patio.
How to Build a Screen Room on a Patio: Complete DIY Guide

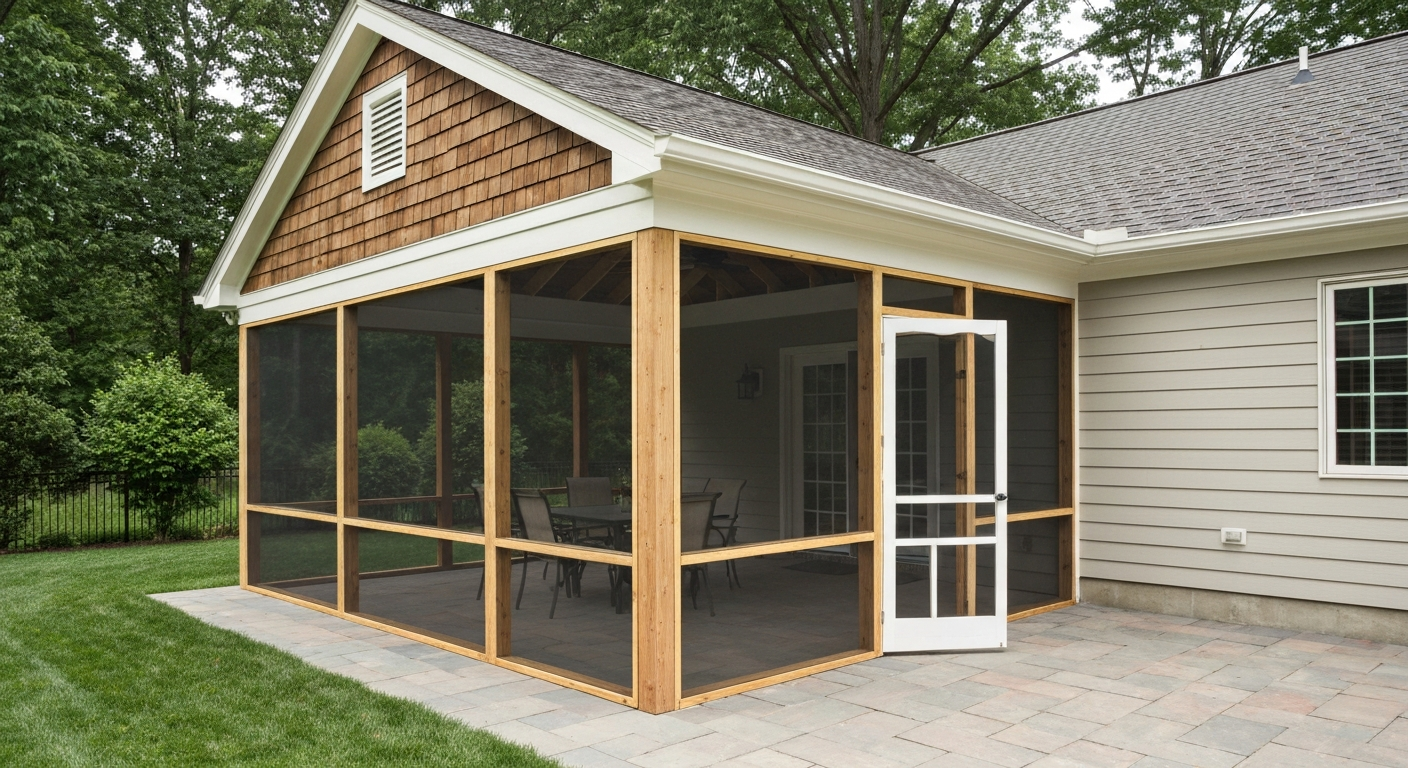
What you are actually building and what to expect
A screen room is a framed structure with screened wall panels and a solid roof that sits on top of or alongside your existing patio slab. It keeps insects out, filters some sun and wind, and turns an underused outdoor space into a room you actually want to sit in from April through October, or year-round in mild climates. The finished product feels like an outdoor room: you have a defined ceiling, walls that let air through, and a door. If you later want to go further and add insulated windows and a mini-split, that is a three-season or four-season room conversion, which builds on everything covered here. The core screen room build is what we are focusing on step by step.
Big planning decisions to make before you buy anything
Attached vs. freestanding
An attached screen room shares one wall (the ledger wall) with your house, which saves framing and makes the structure feel like a natural extension of the home. The downside is that you must flash the connection properly to prevent water intrusion, and you must use tested fastener patterns to satisfy IRC ledger attachment requirements. FastenMaster LedgerLOK and Simpson Strong-Tie connectors both publish technical bulletins with exact fastener spacing for this. One important caution: if your house has brick veneer or continuous exterior insulation, ledger attachment is tricky to verify and most codes require you to use a self-supporting (freestanding) structure in those cases. A freestanding screen room sits entirely on its own footings with no house attachment, which avoids flashing complexity and is easier to permit in some jurisdictions.
Roof types
Your roof choice affects cost, complexity, and how the finished room looks. A shed roof (single slope) is the simplest to frame and works well on attached rooms because water runs away from the house. A gable roof looks more like a permanent room addition and handles snow loads symmetrically. A hip roof is the most structurally stiff but adds significant framing complexity. Polycarbonate or insulated composite panels are popular for DIY screen rooms because they let in light and you can cut them with a circular saw, but they require careful attention to thermal expansion allowances and manufacturer-specified fastener spacing. Asphalt shingles over OSB sheathing are the most weatherproof and familiar option; GAF and most shingle manufacturers require a minimum 2:12 pitch and specify underlayment and ice-and-water shield placement in their installation instructions.
Screening systems
You have two main installation approaches: spline-and-frame (screen is stretched into a channel router cut or built into a wood or aluminum frame and held with a vinyl spline) or screen-bead systems that use factory-extruded aluminum screen frames. For a wood-framed DIY room, spline-and-frame in the stud bays is the most common method. Spline diameter matters: match it to the channel depth (typical DIY spline runs 0. Hardware retailers and manufacturers document common spline diameters and recommend matching spline diameter and roller type for durable installation; typical spline diameters are about 0.115″–0.165″. 115 to 0.165 inches in diameter). Use the wrong diameter and the screen will pull out or wrinkle. For screen material, fiberglass (vinyl-coated) is the standard choice: good visibility, easy to work with, and durable enough for most climates. Aluminum screen is stiffer and more resistant to rust in coastal environments. If you have dogs or cats, Phifer PetScreen is a heavy-duty option that costs roughly double the standard material but resists tearing far better.
Sizing and layout
Start with your existing slab dimensions and subtract at least 3 inches on any side that does not have a house wall, to leave room for the footing or post base. A 12x16 foot room is a comfortable size for a table and chairs; anything under 10x10 starts to feel cramped. Plan your stud layout on 16-inch centers so screen panels work out to reasonable widths without awkward splices. Locate your door away from prevailing wind if possible, and think about where you want electrical outlets before you start framing (it is much easier to rough in conduit during framing than to fish wire through finished walls later).
Permits, building codes, and site safety checks
Almost every jurisdiction requires a building permit for a screen room. Do not skip this. The permit process confirms your design meets IRC structural requirements for roof loads (the 2024 IRC R301 tables cover roof live loads, ground snow loads, and wind loads), framing spans, and footing depth. Most residential screen rooms fall under IRC prescriptive rules rather than requiring a full engineering stamp, but your building department will tell you which applies. While you are at the permit office, ask specifically about setback requirements from property lines, easements, and your HOA (if applicable). Setback violations can require demolition, and that is an expensive lesson.
Before you dig a single footing, call 811 (in the US) to have underground utilities marked. This is free and legally required in most states. Give them at least three business days before your planned dig date. Check for overhead electrical lines as well: OSHA and utility companies require a minimum horizontal clearance from structures, typically 3 feet for services up to 150 volts. If a utility line runs through your planned build area, stop and call your utility company before proceeding. Also confirm whether your patio slab has existing rebar or post-tension cables before cutting into it for footing holes.
Pre-build checklist
- Measure your patio slab and sketch a dimensioned floor plan with door and window locations
- Confirm property setbacks and HOA restrictions with your local building department
- Submit permit application with site plan, framing plan, and footing details; wait for approval before starting
- Call 811 to mark underground utilities at least 3 business days before digging
- Check for overhead electrical lines and confirm required clearances
- Determine local frost depth from your building department or state extension service
- Assess existing slab condition: look for cracks, settlement, and drain locations
- Set your total budget with a 15 percent contingency buffer
- Create a week-by-week build schedule accounting for cure time on concrete footings (minimum 24 to 48 hours before loading)
- Confirm material lead times: pressure-treated lumber, screen, and composite roof panels can have variable availability
- Schedule required inspections: footing inspection before pouring concrete, framing inspection before sheathing, and final inspection after completion
- Arrange for a helper for framing days (wall and roof framing is much safer with two people)
Complete materials list
Foundation and posts
- Concrete tube forms (8 or 10 inch diameter, depth to below local frost line plus 6 inches)
- Bagged concrete mix (60 lb bags; typically 2 to 3 bags per footing for a 10-inch tube form)
- Ground-contact rated pressure-treated 4x4 or 6x6 posts (IRC R317 requires ground-contact rated lumber for any wood embedded in concrete or bearing on exterior footings)
- Post base hardware (Simpson ABA or ABU series adjustable post bases for slabs, or direct-embed design for footing tubes)
- Galvanized or stainless structural screws and bolts sized per post base manufacturer specs
Wall framing
- Pressure-treated 2x4 bottom plates (any plate in contact with concrete must be treated)
- Standard #2 2x4 studs at 16-inch on-center spacing for wall height up to 10 feet
- Double 2x4 or 2x6 top plates
- Structural headers over door openings (doubled 2x8 with 1/2-inch plywood spacer or LVL per span tables)
- Galvanized framing nails (3.5-inch 16d common) or structural screws
- Simpson lateral-load connectors (DTT2Z tension ties or equivalent) if attaching to house ledger
Roof framing
- Ridge board or ridge beam (size per AWC span tables for your species, grade, span, and load)
- Rafters: dimensional 2x6 or 2x8 at 16 or 24-inch spacing (size per AWC span calculator for your span and snow/live load zone)
- Rafter ties or collar ties as required by your framing plan
- Ledger board for house attachment (pressure-treated, minimum same size as rafters)
- LedgerLOK or equivalent code-compliant ledger fasteners at tested spacing per manufacturer bulletin
- Hurricane ties and rafter-to-top-plate connectors (H2.5A or equivalent)
Roofing
- 7/16-inch or 1/2-inch OSB sheathing (for shingle roof)
- Self-adhered ice-and-water shield: full coverage at eaves (first 3 feet minimum) and at all wall intersections
- 15 lb or synthetic felt underlayment for remainder of roof deck
- Step flashing and counter flashing at house wall (galvanized or copper)
- Drip edge (aluminum or galvanized) at eaves and rakes
- Architectural shingles (minimum 30-year, installed per manufacturer instructions including minimum 2:12 pitch requirement)
- Roofing nails (1.75-inch minimum for standard shingles)
- Ridge cap shingles or hip and ridge cap material
- Alternatively: polycarbonate or insulated composite panels with manufacturer-specified fasteners, foam closure strips, and ridge/eave cap extrusions
Screening
- Fiberglass insect screen (18x16 mesh, standard roll widths of 36, 48, or 72 inches; buy 10 percent extra for waste)
- Vinyl screen spline (0.140-inch diameter for most DIY wood-frame applications; verify against channel depth)
- Screen molding or 1x2 trim to cover spline channels on interior
- Pet screen or solar screen as upgrade options for specific bays
Doors
- Pre-hung wood or aluminum screen door (32 or 36-inch width; aluminum is lower maintenance)
- Screen door spring closer and hook-and-eye latch
- Door threshold and sweep
- Stainless or galvanized hinge hardware
Trim and finishes
- 1x4 or 1x6 exterior-grade trim boards for corners, fascia, and frieze
- Paintable exterior caulk
- Exterior primer and paint (or solid-color deck stain for wood components)
- PVC or composite trim as low-maintenance alternative to wood
Tools you will need
| Tool | Use | Buy or Rent |
|---|---|---|
| Circular saw | Cutting lumber and sheathing | Buy if you do not own one |
| Miter saw (sliding) | Accurate angle cuts on rafters and trim | Rent for the framing weekend |
| Drill/driver (18V+ cordless) | Driving screws, boring holes | Buy |
| Framing nailer (pneumatic) | Wall and roof framing | Rent for framing days |
| Finish nailer | Trim and screen molding | Rent or buy if you do multiple projects |
| Level (4-foot) | Plumbing posts and walls | Buy |
| String line and stakes | Layout and squaring footings | Buy (inexpensive) |
| Speed square and framing square | Rafter layout and checking square | Buy |
| Tape measure (25-foot) | Everything | Buy |
| Post-hole digger or rented power auger | Footing holes | Rent power auger for hard soils |
| Tamper | Compacting footing base | Buy (hand tamper is fine) |
| Caulk gun | Sealing gaps and flashing | Buy |
| Spline roller (double-wheel) | Pressing screen spline into channel | Buy (cheap, about $8) |
| Utility knife | Trimming screen | Buy |
| Safety glasses, hearing protection, gloves, hard hat | PPE | Buy |
If you are renting a power auger for footings, reserve it for the same day you plan to pour concrete. Footing holes left open overnight can collapse in sandy or loose soil, which wastes your prep work. For the framing nailer, a rental from Home Depot or Lowe's typically runs $40 to $60 per day, which is far cheaper than buying one for a one-time project.
Realistic cost and time estimates
Material costs for a straightforward 12x16 DIY screen room typically land between $2,500 and $4,500 as of mid-2026, assuming a shed or simple gable roof with asphalt shingles and standard fiberglass screen. A smaller 10x10 attached room on an existing slab can be done for closer to $1,500 to $2,500 if the slab is in good shape and no new footings are needed. A larger 16x20 freestanding room with a gable roof, composite trim, and polycarbonate panels can push to $6,000 or more in materials alone.
| Room Size | Estimated Material Cost | DIY Labor Time (2 people) | Main Cost Drivers |
|---|---|---|---|
| 10x10 attached, shed roof | $1,500 – $2,500 | 2 weekends | Roof material, screen door, ledger hardware |
| 12x16 attached, gable roof | $2,500 – $4,000 | 3 weekends | Framing lumber, shingles, footings |
| 16x20 freestanding, gable roof | $4,000 – $6,500 | 4–5 weekends | Posts, footings, roof area, door count |
| Three-season upgrade (windows, insulation) | Add $1,500 – $4,000 | 1–2 additional weekends | Window units, insulation, HVAC mini-split |
Time estimates assume two people working full weekend days (about 8 hours each day). Solo builds take roughly 50 percent longer. Permit fees range from around $50 to $400 depending on jurisdiction and project value. Concrete curing adds at least one day of waiting before you can load footings. Weather delays are real: do not schedule roofing for days with rain in the forecast, and do not frame in winds above 20 mph.
Step-by-step build sequence
Step 1: Layout and footings
Mark your corner post locations using batter boards and string lines. Check for square by measuring diagonals: they should be equal within 1/4 inch. Dig footing holes to below local frost depth plus 6 inches (IRC R403. See 2024 International Residential Code, Chapter 4: Foundations (ICC) for the IRC prescriptive deck and deck-footing provisions (R507.3/R507.3.1) that set minimum isolated footing diameters and depths based on tributary area and allowable soil-bearing capacity, and for R403.1.4 frost-depth requirements 2024 International Residential Code — Chapter 4: Foundations (ICC). 1.4). In Minneapolis, that might be 48 inches deep; in Atlanta, 12 inches is often sufficient. Set tube forms, pour concrete, and set post bases or direct-embed post anchors before the concrete stiffens. Use a level to verify post bases are plumb and aligned. Let concrete cure 24 to 48 hours minimum before attaching posts.
Step 2: Post installation and beam
Cut 4x4 or 6x6 pressure-treated posts to height. For an attached room, the post height at the house wall is set by your desired roof pitch and the height of the ledger board. Snap a chalk line on the house wall at ledger height and verify it is level. Attach the ledger using LedgerLOK or equivalent fasteners at the spacing specified in the manufacturer's technical bulletin: do not substitute standard lag screws without checking load ratings. Install posts in their bases, plumb them with temporary bracing, and install the beam across the outer posts. Use galvanized post caps and straps for all post-to-beam connections.
Step 3: Wall framing
Frame the screen walls on the ground and tilt them up. Use pressure-treated 2x4 bottom plates anywhere the plate contacts concrete. Frame at 16-inch on-center spacing to give yourself regular bays for screen panels. Double up the top plate. Frame door openings with doubled 2x6 or 2x8 headers (check your span and load against AWC span tables or ask your building department what they want to see). Brace the walls temporarily until the roof framing ties everything together.
Step 4: Roof framing
Lay out rafter locations to match your stud spacing. Cut a test rafter first, verify the birdsmouth cut seats properly on the top plate, and use it as a template for the remaining rafters. Install hurricane ties at every rafter-to-plate connection. For an attached gable or shed roof, the ridge or the ledger carries the upper rafter end: use joist hanger hardware here rather than toenailing. Size your rafters per AWC span tables for your span, species, and local snow/live load. In high-snow areas (more than 20 psf ground snow load), this step may require an engineer's review depending on your jurisdiction.
Step 5: Sheathing and roofing
Install OSB sheathing with the long edge perpendicular to rafters, staggering seams. Install drip edge at eaves first, then apply self-adhered ice-and-water shield: minimum the first 3 feet from the eave edge and at all valleys and wall intersections. Install synthetic underlayment over the rest of the deck, lapping shingles-style from bottom to top. Step-flash the wall intersection: each piece of step flashing overlaps the one below by at least 2 inches and tucks behind the siding above. Install counter flashing over step flashing at the house wall. Now install shingles per the manufacturer's instructions, including the specified nail pattern and exposure. Ridge cap last.
Step 6: Screening
Router or table-saw a spline channel around the perimeter of each screen bay, or use premade aluminum screen frame extrusions. Cut screen material 2 to 3 inches larger than the opening on all sides. Tack one edge with a staple or fold it into the channel, then use the spline roller to press the spline into the channel starting at the top, then the bottom, then the sides. Pull the screen taut but not so tight it distorts the frame. Trim the excess with a utility knife along the outer edge of the spline. A double-wheel spline roller (costs about $8 at any hardware store) makes this much easier than a single-wheel tool.
Step 7: Door installation and trim
Set the pre-hung door frame in the rough opening, shim it level and plumb, and fasten through the hinge side first. Check that the door swings freely and closes without binding before nailing the latch side. Install the door sweep and threshold. Attach screen molding or 1x2 trim over all spline channels on the interior. Install corner trim boards, fascia, and frieze boards on the exterior. Caulk all trim-to-framing joints with paintable exterior caulk, then prime and paint or apply solid-color stain.
Upgrading to a three-season room
Once the basic screen room is complete, converting it to a three-season room means replacing the screen panels with framed window units and adding insulation and a heat source. The 2021 IECC (R402.2.12/R402.2.13) requires sunroom additions to meet minimum wall insulation of R-13 and fenestration U-factor requirements per your climate zone. Use double-pane low-E windows to meet U-factor thresholds in most climates. Add batt insulation in the wall cavities and a mini-split heat pump for heating and cooling: a 9,000 to 12,000 BTU unit handles most screen room sizes efficiently. Insulate the ceiling with R-30 if you are converting a vented attic space above. For step-by-step guidance specific to patio conversions, see our guide on how to build a 3 season room on a patio. Add GFCI-protected outlets per NEC 210.8 for any outdoor or damp-location receptacles. A licensed electrician should handle panel work, but running conduit and placing outlet boxes during the conversion is straightforward DIY work.
Furnishing and decorating ideas
Function first: decide how you will primarily use the room (dining, lounging, reading, or some mix) before you buy furniture. See our guide on how to decorate a screened-in patio for layout, color, and lighting ideas. For a 12x16 room, a 48-inch round dining table with four chairs leaves comfortable circulation space. Add a loveseat or two lounge chairs in a corner for a secondary seating zone. Use outdoor-rated furniture even in a screened room because humidity, pollen, and the occasional rain splash will still find their way in. Ceiling fans rated for damp locations are one of the best investments you can make: a 52-inch fan on a 9-foot ceiling makes the space usable in summer heat without air conditioning. For lighting, a pendant over the dining area and flush-mount damp-location fixtures work well. String lights along the roofline give the space a warm evening atmosphere at minimal cost. Keep the floor simple: an outdoor rug over the existing concrete adds comfort and defines zones without major expense.
Seasonal maintenance
Screen rooms are low maintenance but not no-maintenance. Each spring, inspect every screen panel for tears, popped splines, and sagging. Small tears can be patched with screen repair tape or a patch kit. Larger damage (more than a few inches) is easier to re-screen the whole bay than to patch neatly. Check flashing at the house wall connection every spring and fall: look for lifted counter flashing, cracked caulk, or rust streaks. Reseal any gaps with a good-quality roofing sealant before water intrusion causes rot in the ledger or rim joist. Clean gutters if your screen room roof feeds into the house gutter system. In late fall, check that door sweeps are still sealing and that the spring closer is adjusted so the door latches cleanly. In high-snow regions, clear heavy snow loads from polycarbonate panel roofs promptly; the panels are rated for load, but excessive snow adds risk and can stress fasteners.
Troubleshooting common problems
- Screen sagging or pulling out of spline: spline diameter was too small for the channel; remove and replace with the correct diameter, and re-stretch the screen slightly tighter
- Water dripping inside at the house wall: step flashing was not installed correctly or counter flashing has lifted; reseal and re-bed the counter flashing, check that siding overlaps flashing properly
- Door not latching: frame has racked slightly; add diagonal blocking to the door rough opening or adjust the hinge shims; a self-closing spring closer that is too strong can also cause this
- Condensation on polycarbonate panels dripping inside: foam closure strips at eave and ridge are missing or collapsed; replace them to seal the flute ends
- Insects getting in despite new screens: check the door bottom sweep, the threshold gap, and the junction between screen frames and framing members; even a 1/16-inch gap is enough for mosquitoes
- Roof leaking at ridge: ridge cap shingles not overlapping enough or nails placed outside the coverage zone per manufacturer spec; re-nail and seal with roofing cement
When to call a pro
Most of this project is within reach of a careful DIYer, but a few situations genuinely call for a licensed professional. If your jurisdiction requires a stamped engineering drawing for the roof framing (common in high-wind or high-snow zones), hire a structural engineer. Any electrical panel work, circuit additions, or service entrance work requires a licensed electrician in virtually every jurisdiction. If you find that your existing slab has post-tension cables (look for PT slab markings at the edge), do not cut into it without a structural engineer's assessment. And if the project involves modifying any load-bearing wall of the house to open a passage to the screen room, that is a structural alteration that needs engineering review. The permit process will usually flag these situations, which is another reason pulling that permit is worth the fee.
Safety notes and PPE
Wear safety glasses every time you operate a saw or drive fasteners, hearing protection whenever you use a pneumatic nailer or circular saw for extended periods, and work gloves when handling pressure-treated lumber (the preservative treatment is a skin and eye irritant). Cut pressure-treated lumber outdoors and do not burn the offcuts. Wash hands before eating or touching your face after handling treated wood.
Ladder safety is where DIY injuries most commonly happen on this type of project. Use a fiberglass ladder rather than aluminum near any power lines. Set the ladder at a 4:1 angle (1 foot out for every 4 feet up). Never stand on the top two rungs. For roof work above 6 feet, use a roof bracket and plank system: these are inexpensive to rent and dramatically reduce fall risk on even low-slope roofs. Tie off with a personal fall arrest system if you are working above 10 feet. Have your helper on the ground during all roof work: they stabilize the ladder base and can call for help in an emergency. Keep your tools on the roof bracket plank, not loose on the sheathing where they can roll off.
For tool safety: keep blade guards in place on circular saws, do not reach across a running blade, and disconnect pneumatic nailers from the air hose when clearing jams. GFCI-protected extension cords are required for all outdoor power tool use: do not use an indoor extension cord on a construction site. If you are cutting framing near existing electrical service, turn off the circuit at the panel before you start.
FAQ
What are the first planning steps before building a screened room on an existing patio?
Survey the site and existing patio (size, slab condition, slope, drainage, overhead obstructions). Decide attached vs. freestanding (attached saves materials but requires secure ledger/flashings; freestanding avoids house-attachment issues). Check local zoning and building-permit requirements and adopted codes (IRC/IBC/IECC/NEC) and confirm frost depth and allowable soil-bearing pressure for footings. Inventory existing utilities (electrical, gas) and consider ventilation, HVAC, and access. Create a schematic plan with dimensions, desired door/window locations, roof type, and screen style. See pre-build checklist and permit section (link: /screened-patio/pre-build-checklist and /screened-patio/permits).
How do I decide between attaching the screened room to the house or building it freestanding?
Attached: pros — lower materials cost, integrated access, simpler roof tie-in; cons — requires ledger attachment to structural rim joist or studs, careful flashing/ice-and-water shield to prevent moisture intrusion, and consideration of lateral loads per IRC/IBC. Freestanding: pros — no house penetration concerns, easier code compliance when attachment is prohibited (e.g., over certain veneers or continuous insulation); cons — larger footings and possibly more framing/materials. Choose attached if you can confirm a suitable attachment point and flashing detail; choose freestanding if house wall conditions prevent safe ledger attachment. Refer to ledger fastening guides and manufacturer bulletins (link: /screened-patio/attach-vs-freestanding).
What code and structural checks are essential for the roof and framing?
Verify applicable live and snow loads and wind/seismic requirements using IRC/IBC and ASCE tables for your jurisdiction. Use American Wood Council span tables or engineered-member tables to size rafters, headers, and beams. Ensure footings meet local frost-depth requirements (IRC R403.1.4) and footing diameters follow deck footing tables (R507.3). If attaching to the house, follow tested ledger-attachment details and lateral-load connectors per Simpson/fastener manufacturers. For conditioned or insulated three-season roofs, follow IECC thermal requirements for walls/fenestration. When in doubt, get a structural engineer to stamp plans.
What permits are commonly required and what inspections should I expect?
Most jurisdictions require a building permit for constructing an attached or sizable screened room. Electrical work (outlets, lighting) typically needs an electrical permit; adding HVAC requires mechanical permits. Submit plans showing foundation/footing details, framing, roof tie-in, and electrical layout. Inspections commonly include footing/underground, rough framing/roof, electrical rough and final, insulation (for three-season conversions), and final building/occupancy. Check local code adoption (IRC/IBC/IECC/NEC editions) and any HOA rules before starting. Link: /screened-patio/permits-inspections.
What materials and tools will I need (basic list)?
Materials: pressure-treated, ground-contact posts or concrete piers; footings/fast-setting concrete; pressure-treated or preservative-treated framing lumber or engineered members (LVL/glulam where required); exterior-rated ledger fasteners or through-bolts; joist hangers, hurricane ties, lateral connectors; roof sheathing, underlayment, ice-and-water shield, shingles or polycarbonate/metal panels; screening frames (2x or 1x trim), screen mesh (fiberglass/aluminum/pet/solar), spline and spline rollers; exterior doors or screen doors, trim, flashing, gutters. Electrical: exterior-rated wiring, GFCI-protected receptacles per NEC, lighting fixtures. Tools: circular saw, miter saw, drill/impact driver, framing nailer, level, plumb-bob, tape measure, hammer, post-hole digger/borer, concrete mixer or wheelbarrow, screening roller, utility knife, caulk gun. See complete materials and tool checklist (link: /screened-patio/materials-tools).
What are realistic cost and time estimates for a typical DIY screened room?
Cost range depends on size and finish: basic screened room (10'×12') using a roof tie-in and asphalt shingles: $3,000–$8,000 in materials for experienced DIY; mid-range with better roofing, doors and trim: $8,000–$15,000; three-season insulated conversion with windows/HVAC: $15,000–$30,000+. Labor time: a competent DIYer can complete a basic attached screened room in 1–2 weekends for prep plus 2–4 weekends for framing, roofing and screening (total 40–120 person-hours depending on complexity). Factor permit wait times, curing times for concrete, and weather. Get multiple material quotes and add contingency of 10–20%.
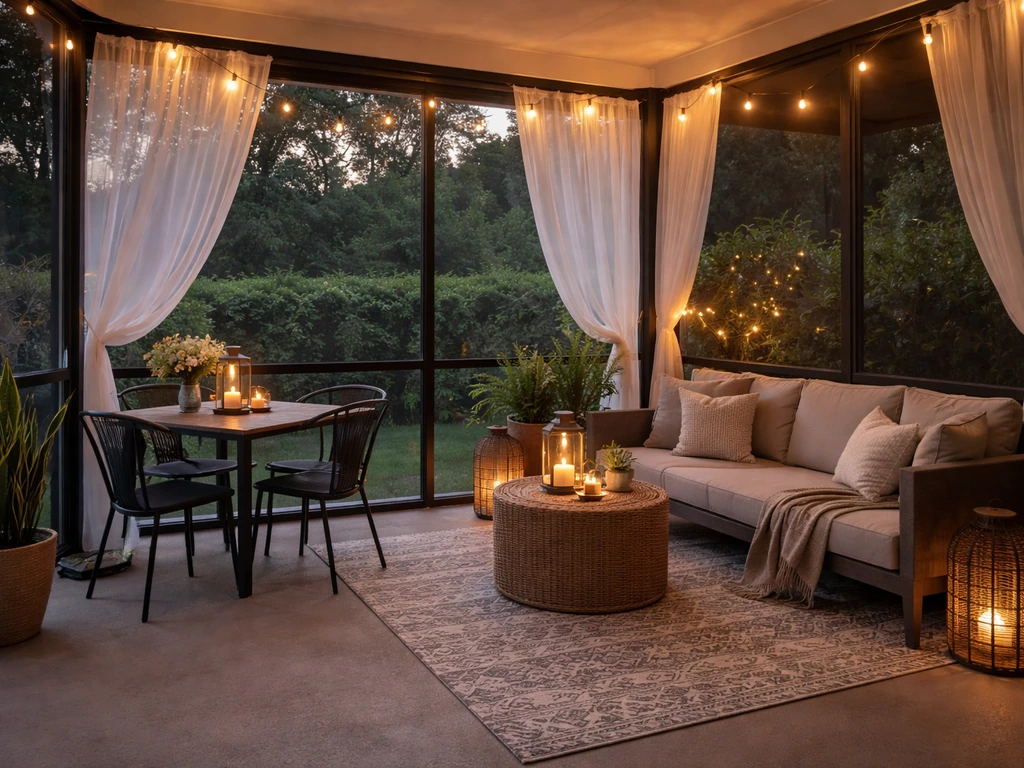
Step-by-step tips to decorate a screened patio with lighting, comfy airflow, bug control, zones, safe fabrics, and weath
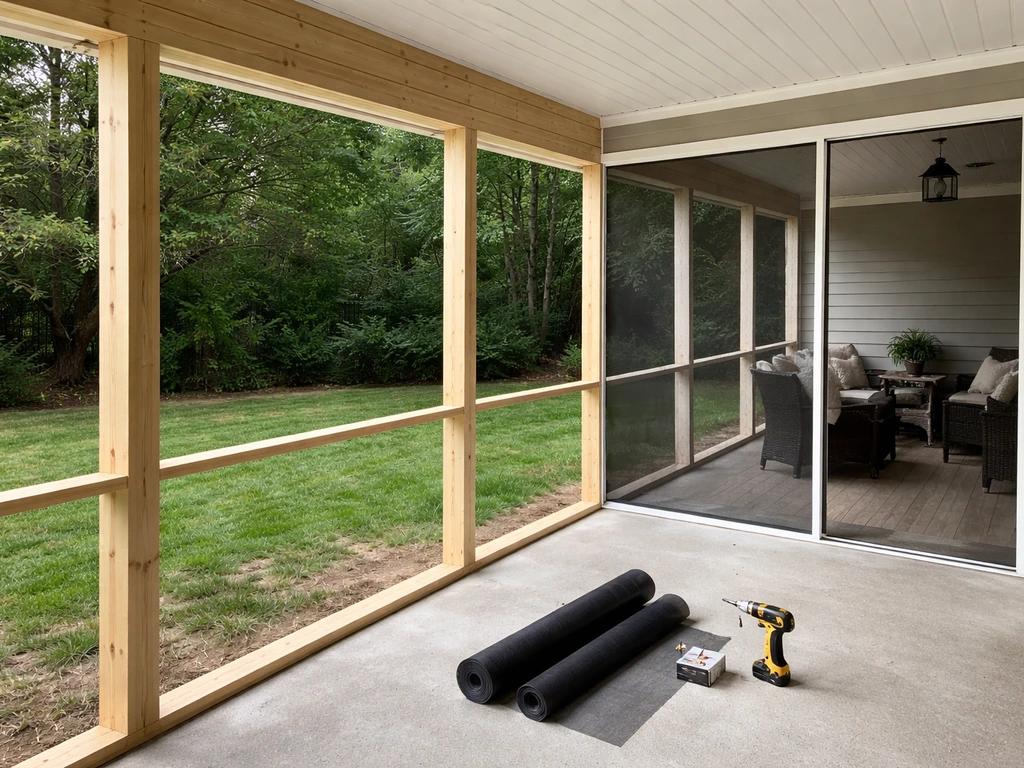
Step-by-step DIY on how to turn a patio into a screened-in porch, from planning and framing to screens, utilities, and p
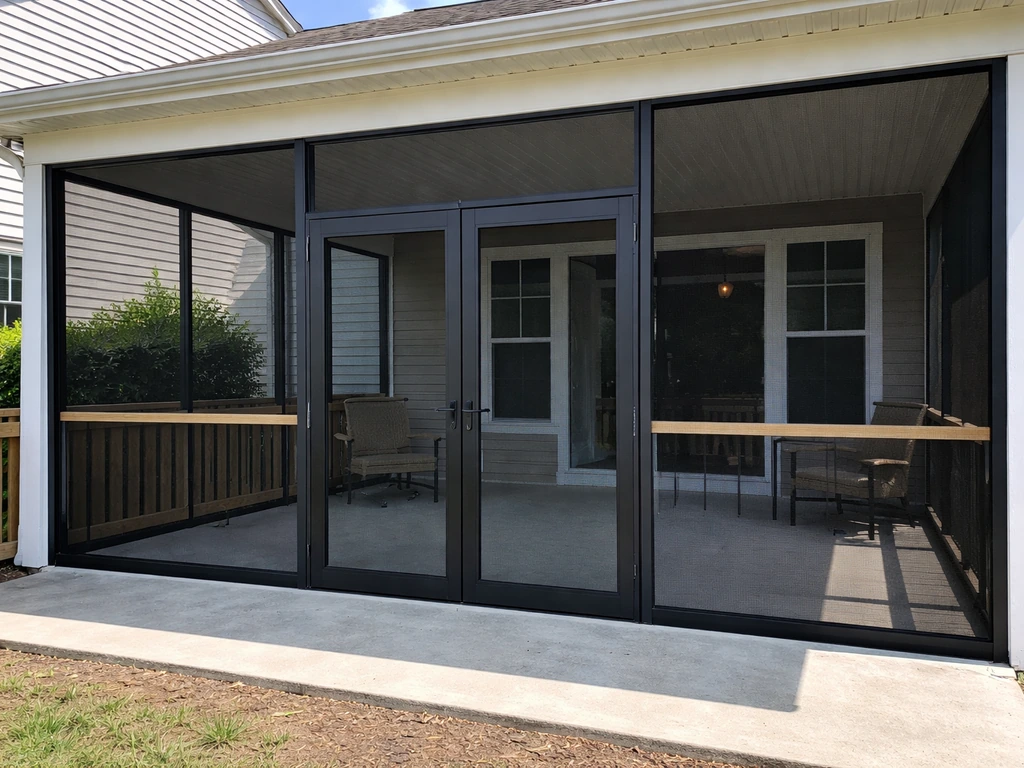
Step-by-step DIY screened patio build: planning, framing, posts, screen panels, doors, sealing gaps, and fixes.