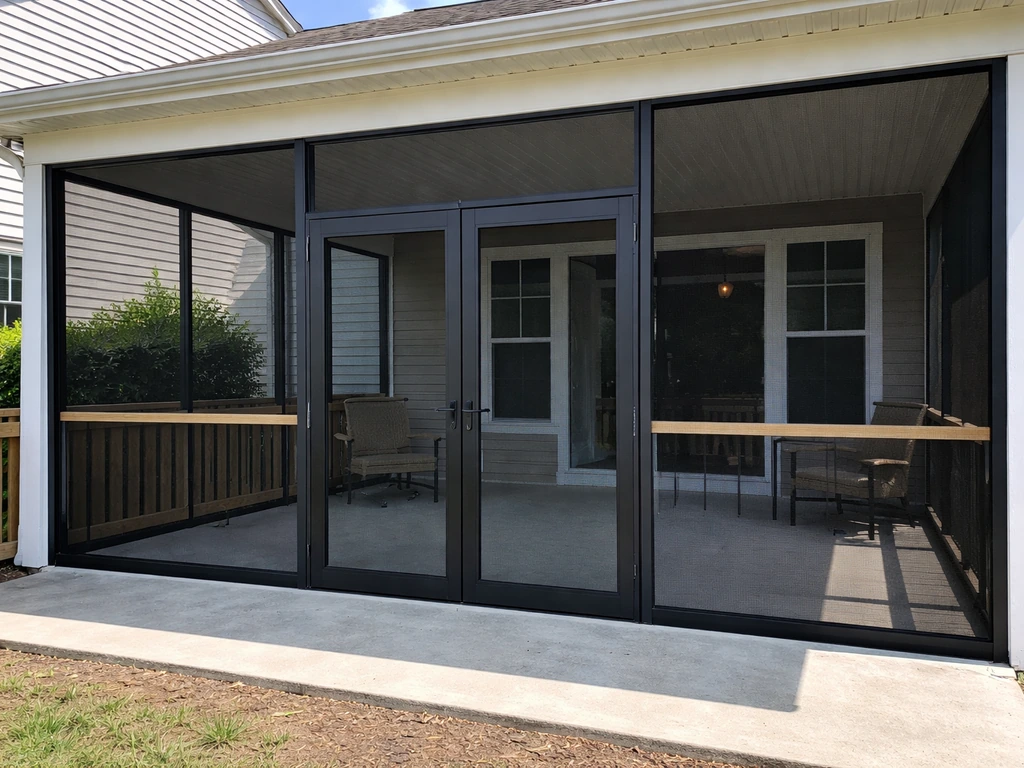
You can turn an existing patio into a screened-in porch by building a simple frame around the perimeter, attaching it to your house and any existing roof structure, and installing screen panels in the openings. Most DIYers complete this project over a long weekend to a few weeks depending on size, and costs typically run from $1,500 on the low end for a small DIY build up to $10,000 or more if you're adding a roof or hiring out specialty work. The key decisions are whether your patio already has a roof (that changes everything), what frame material you use, and whether you need a permit. Let's walk through all of it.
How to Turn a Patio Into a Screened-In Porch

Felix Brennan
5 Jul 2026
Is your patio actually a good candidate?
Before you buy a single board, do an honest assessment of your patio. The easiest conversions start with a patio that already has a solid roof or pergola overhead, a concrete slab or existing decking underfoot, and at least two sides that border your house or a wall. If you have all three, you're in great shape. If you're starting with just a concrete pad and open sky, you'll need to plan a roof or overhead structure before screens make sense, since screens can't support weather load on their own.
Here's what to check before you commit to the project:
- Roof or overhead cover: A solid roof, covered pergola, or awning is practically a requirement. Screens alone aren't rated as a weather barrier, and IRC Appendix H classifies screen enclosures specifically as non-habitable spaces with insect-screen or lightweight material roofs. If you don't have overhead cover, adding a simple shed roof is doable but adds cost and complexity.
- Slab or deck condition: Check for cracks, heaving, or drainage problems. A concrete slab with a slight slope away from the house (even 1/8 inch per foot) is ideal. A wood deck works too, but inspect the joists and ledger for rot before enclosing it.
- House wall attachment point: Your frame needs to anchor somewhere solid. Look for a band joist, rim board, or solid blocking in the wall where you'll attach the ledger or top plate.
- Ground clearance and drainage: Low spots that pool water after rain will become a soggy problem once you enclose the space. Address drainage issues now, not after the screens are up.
- HOA and local zoning: Some neighborhoods restrict enclosures or require specific materials. Check before you design anything.
If your patio checks most of these boxes, you're ready to plan. If it needs a roof added, that's a separate (but manageable) sub-project. We cover full room additions in the guide on how to build a screen room on a patio, which goes deeper on structural roof builds if that's your situation.
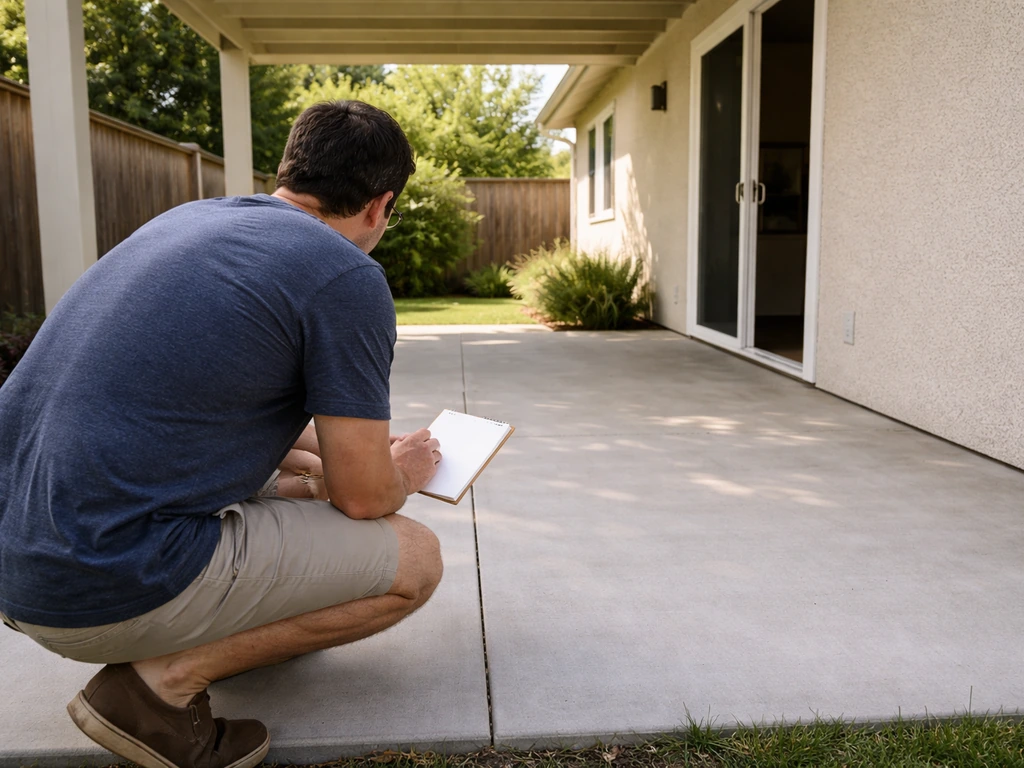
Plan the layout and get accurate measurements
Measure your patio perimeter carefully before ordering anything. Write down the height from floor to roof deck or soffit (this becomes your wall height), the width of each open side, and the depth from the house wall to the outer edge. These three dimensions drive every other decision. Be precise: measure each wall separately because patios are rarely perfectly square.
For screen panel sizing, the practical range for individual frame bays is 3 to 8 feet wide. Panels wider than 8 feet become difficult to handle and tend to sag. Plan your framing layout so your posts divide the openings into manageable bays within that range. Sketch this out on graph paper or a simple app before buying lumber or screen frame components.
A few planning tips that save headaches later:
- Mark where the door will go first, then work the bay spacing outward from there. A standard screen door is 32 to 36 inches wide.
- Account for post width in your spacing. A 4x4 post takes up 3.5 inches of your opening.
- Measure the height at multiple points along the roof line. Sagging soffits or uneven overhangs are common and you'll need to shim or scribe your top plate to match.
- If any part of the patio is exposed to a lot of afternoon sun or prevailing wind, note which walls face which direction. This matters for screen material selection and where you position shade upgrades.
- Take photos of the house wall, existing roofline, and slab edges. You'll reference these constantly during the build.
Choose your screening system: frames, screen type, doors, and hardware
This is where most people get stuck, so let's break it down clearly. You're making three decisions: frame material, screen mesh type, and door style.
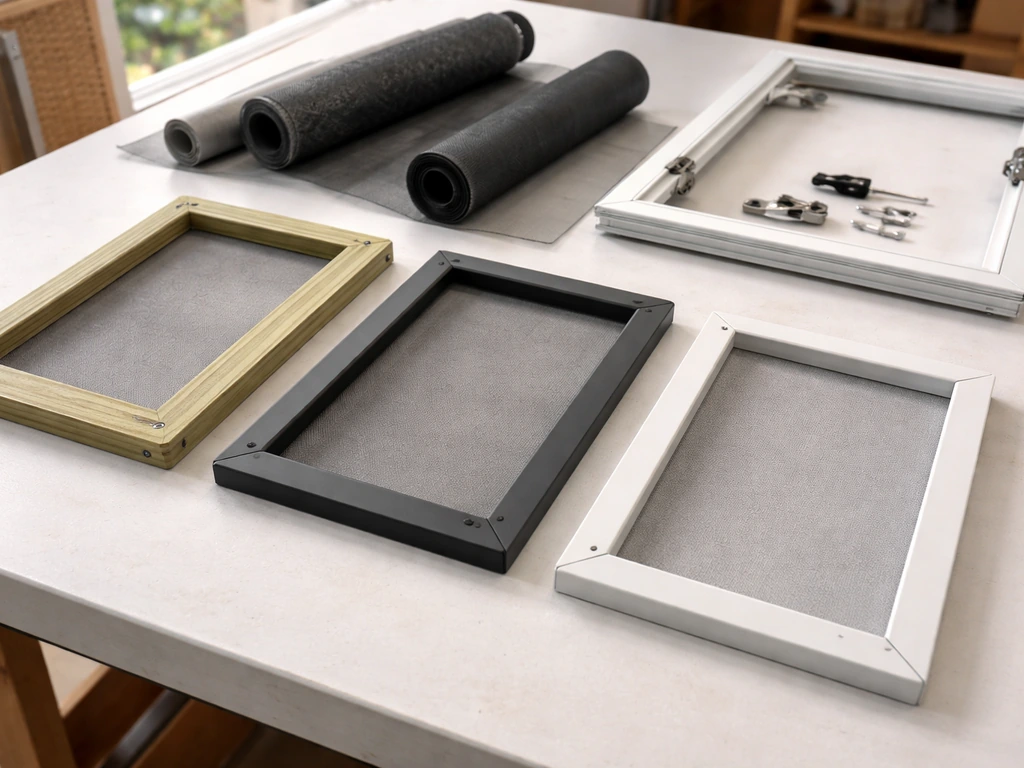
Frame material
| Material | Pros | Cons | Best for |
|---|---|---|---|
| Pressure-treated wood (2x4 or 4x4) | Affordable, easy to cut and fasten, widely available | Needs painting or sealing, can swell when wet, requires periodic maintenance | Budget builds, traditional look, DIY beginners |
| Aluminum screen frame extrusions | Lightweight, rust-proof, low maintenance, snaps together | Less structural on its own (needs a wood skeleton for posts), specialized connectors needed | Screen panel infill within a wood-framed structure |
| Vinyl or composite lumber | Rot-proof, no painting needed, looks clean | More expensive than PT wood, harder to fasten, less structural strength per size | Low-maintenance builds in humid climates |
| Steel or powder-coated aluminum posts | Very strong, long-lasting, slim profile | Expensive, requires welding or specialized connectors, overkill for most DIY projects | Large enclosures or permanent structures |
For most DIYers, pressure-treated 4x4 posts and 2x4 framing members are the sweet spot. They're strong, forgiving, and easy to source. Use at minimum ground-contact rated (UC4B) PT wood for any posts that touch the slab or go near soil. The USFS and most building guides confirm that pressure treatment significantly reduces decay and insect damage under outdoor moisture conditions, but it's not zero-maintenance. Plan to seal or paint it within the first year.
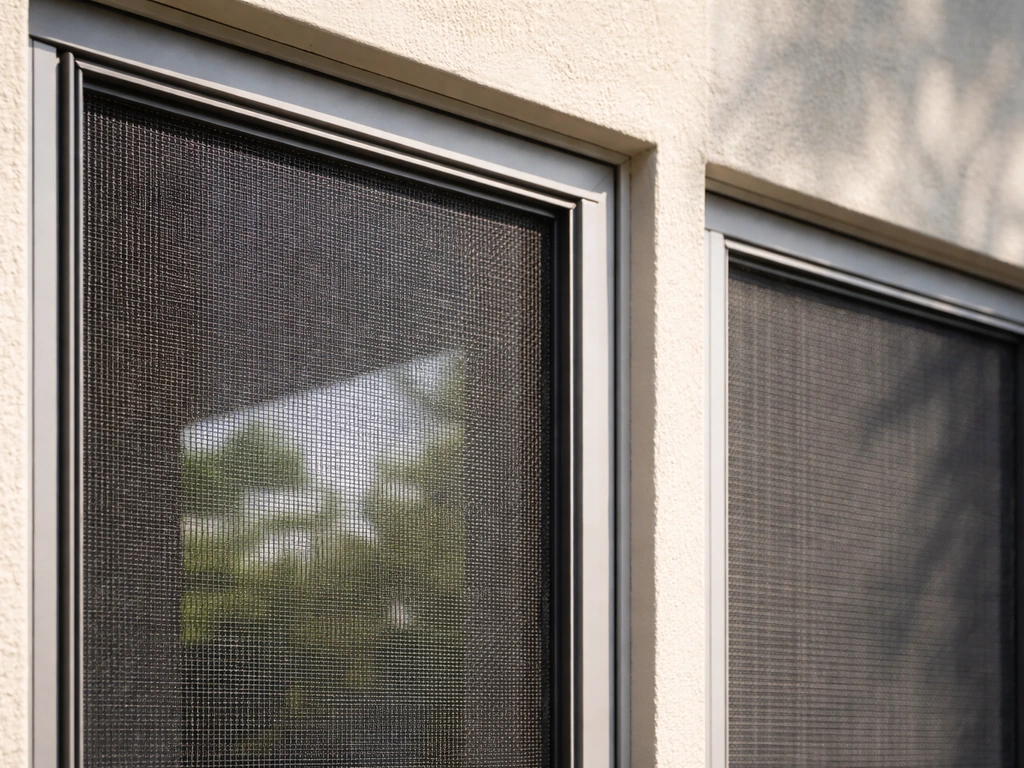
Screen mesh type
Fiberglass mesh is the most common choice: it's flexible, easy to install, resists rust, and costs less than aluminum. Aluminum mesh is more durable and harder to tear but less forgiving when installing. If you're in a region with intense afternoon sun, consider solar screen mesh (also called sun screen or privacy screen), which is a tighter weave that reduces heat and glare noticeably while still letting air through. It costs more but makes a real difference on west-facing walls. Standard insect screen works fine for the remaining sides.
Doors and hardware
For a single entry, a self-closing aluminum screen door (32 or 36 inches) is the standard choice and costs $80 to $200. If you want a wider opening for furniture moving or a more polished look, a double-door unit works well. Make sure the door header framing is solid enough to support the door frame without flexing. Use stainless steel or hot-dipped galvanized hardware throughout (hinges, screws, tension adjusters) since plain steel corrodes fast in an outdoor screened environment.
The build sequence: from slab to finished screens
Step 1: Site prep
Clear everything off the patio and do a final check of the slab. Fill any cracks over 1/4 inch with hydraulic cement or concrete patching compound and let it cure. If the slab has zero slope away from the house, you can't fix that easily now, but make sure the outer edge has a clear drainage path and nothing is blocking it. Snap chalk lines on the slab where your posts will land so you know exactly where you're working before anything goes up.
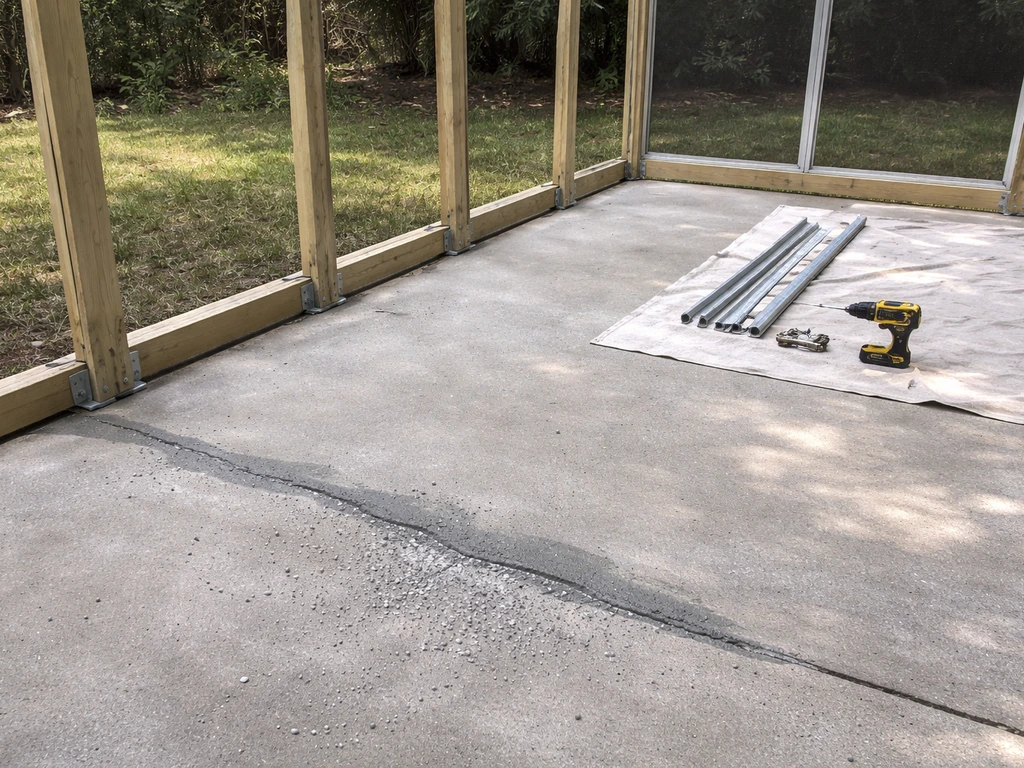
Step 2: Set the posts and bottom plate
If you're building on a concrete slab, anchor your posts with adjustable post bases (Simpson Strong-Tie makes reliable ones). Drill into the slab with a hammer drill and set the bases with wedge anchors, then bolt the posts into the bases. This keeps the wood off the concrete and dramatically reduces rot risk. Space posts according to your bay plan, keeping them plumb in both directions. Run a pressure-treated bottom plate along the outer edge between posts, anchored into the slab, to tie everything together and give you a nailing surface for screen frames.
Step 3: Attach the top plate to the house
The top of your frame needs to attach to the house wall. Use a ledger board (typically a 2x6 or 2x8) lagged into the rim joist or wall framing with structural lag screws. This is the most critical connection in the whole project. Space lag screws every 16 inches and stagger them slightly from the board edge.
Before you lag in, check for any existing flashing at the wall. If you're attaching near or at the roofline, IRC R905. 2. 8.
3 requires base flashing at roof-wall intersections to be continuous or step flashing with a minimum 4-inch height and 4-inch width. If the existing flashing is missing or damaged, remove the siding at that junction and repair it before closing everything up. Water intrusion at this joint is one of the most common and expensive mistakes in porch enclosure projects.
Step 4: Roof and ceiling tie-in
If your patio has an existing attached roof that extends from the house, you're anchoring into that structure. Your outer posts need to support the roof overhang at the perimeter, so make sure your post placement aligns with the existing beam or fascia above. If you're tying into an existing soffit, cut a ledger notch or use joist hangers to transfer the load properly. Never just screw screen frame to a fascia board and call it done.
If you're adding a new shed roof to an uncovered patio, that's its own sub-project requiring rafter sizing, proper slope (minimum 1/4 inch per foot for water runoff), and full flashing integration at the house wall. When in doubt on structural roof tie-ins, pull a permit and get an inspector to sign off. The cost of a permit is far less than a collapsed roof or a failed home sale inspection.
Step 5: Frame the screen bays
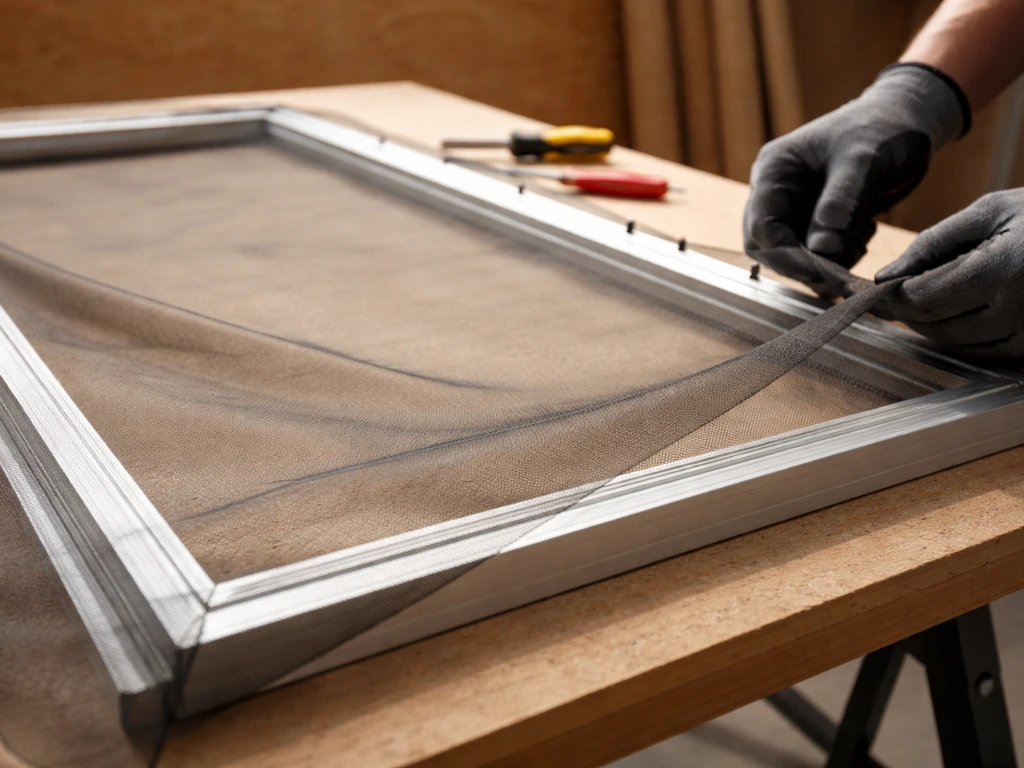
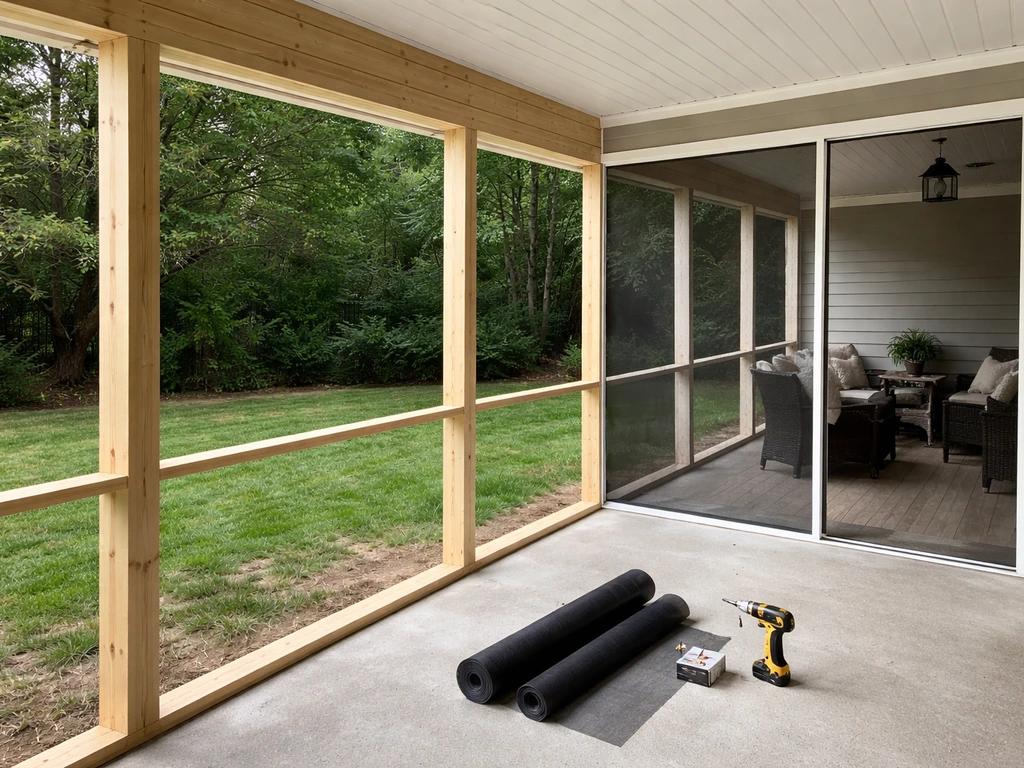
Once your posts and plates are solid, frame each screen bay with horizontal rails. A typical bay has a top rail, bottom rail, and two vertical sides formed by adjacent posts. Within each bay, you can use aluminum screen frame extrusions (available at home improvement stores in standard lengths) for the screen panels themselves. These extrusions have a routed groove running their length that accepts a vinyl or rubber spline, which pinches the screen mesh in place. Cut your aluminum frame pieces to fit each bay, assemble them with corner connectors, then cut the screen mesh slightly larger than the frame opening.
Step 6: Install the screen mesh
Lay the assembled frame on a flat surface (a large piece of plywood on sawhorses works great). Cut mesh about 2 inches larger than the frame on all sides. Starting on one long side, [press the mesh into the spline groove using a spline roller tool, then push the spline in on top](https://www. finehomebuilding.
com/1998/07/01/putting-the-screening-in-a-porch-screen). Work the opposite long side next, pulling the mesh taut before rolling in the spline. Then do the two short ends. The mesh should be taut with no visible sag or wrinkles.
Trim excess mesh with a utility knife after all four sides are splined. For a clean cut, score along the outer edge of the spline groove. Once panels are complete, set them into your wood frame bays and fasten with screen clips, screws, or a bead of screen bead molding to lock them in place.
Comfort upgrades: lighting, fans, flooring, and controlling sun and wind
A screened porch is only as comfortable as you make it. Here's how to plan each upgrade so they're integrated into the build rather than bolted on afterward.
Lighting and electrical
IRC E3901.7 requires at least one receptacle outlet accessible from porches and balconies that are accessible from inside the home. So you'll need at least one outdoor-rated outlet, and it must be GFCI protected. Run electrical before you close up any walls or ceiling. For lighting, a flush-mount outdoor fixture or recessed wet-rated cans give the cleanest look. Plan the wiring route before framing is complete, especially if you need to run conduit through a wall. If you're not comfortable with electrical rough-in, this is one place to hire a licensed electrician for a few hours rather than risk a code failure.
Ceiling fans
A ceiling fan makes a screened porch genuinely usable in summer heat. Use only a fan rated for damp or wet locations (look for UL listed damp or wet rating on the label). Mount it to a fan-rated ceiling box, not a standard light box. If your porch ceiling is an exposed roof deck or open rafters, you may need to add a blocking board between rafters to give a solid mount point. Keep the fan on a GFCI circuit per code expectations for outdoor electrical.
Flooring
If you have a concrete slab, you have several solid options. Leaving bare concrete is fine but cold and hard. Painting or coating it with an anti-slip porch and patio coating (products like BEHR's Porch and Patio Anti-Slip line) gives a cleaner look and better traction when wet. Pressure-treated tongue-and-groove porch boards laid over sleepers give a warmer feel and run roughly $2.
40 to $4. 20 per square foot installed for a basic option. Composite decking is more expensive but eliminates the maintenance cycle entirely. Whatever you choose, make sure the finished floor surface doesn't trap or hold water, especially near the walls where wind-driven rain can occasionally push through the screen.
Slight floor slope toward the outer edge (1/8 inch per foot away from the house) handles this well.
Sun and wind control
Standard insect screen lets through nearly all wind and about 70 to 80 percent of sunlight. For west- or south-facing walls that get hammered by afternoon sun, solar screen mesh with a 90 percent or higher blockage rating cuts heat significantly without blocking the breeze.
For wind-driven rain, which can be a real problem on exposed sides, consider adding a lower knee wall (12 to 18 inches of solid framing at the base of each screen bay) and sealing the top of each screen panel to the frame with screen bead molding. Reddit homeowners dealing with wind-driven rain intrusion often find the culprit is at the floor edge and the base of screen panels, not the screens themselves. Seal those transitions carefully.
If you want to extend your season into fall or shoulder months, the guide on how to build a 3 season room on a patio covers the next level of enclosure with operable windows and more insulation, which is a natural upgrade path from a basic screen porch.
Permits, budget, and when to hire help
Do you need a permit?
In most jurisdictions, yes. Screen enclosures are classified as patio covers under IRC Appendix H, and even though they're not habitable spaces, they typically require a permit if they're attached to the house or exceed a certain square footage (often 200 square feet, but this varies widely by municipality).
Permits are especially important if you're adding a new roof structure, tying into the house electrical system, or significantly modifying the existing structure. Call your local building department before you start and ask two questions: do I need a permit for a screened-in porch enclosure, and do I need engineered drawings? Many jurisdictions have a simple permit process for screen rooms that costs $50 to $200 and requires only a basic site plan.
Getting caught without a permit can mean fines, required demolition, and problems when you sell the house.
What does this project actually cost?
Here's a realistic breakdown based on a 12x16 foot patio conversion as a reference:
| Item | DIY Cost Estimate | Notes |
|---|---|---|
| Lumber (PT 4x4 posts, 2x4 framing) | $300–$600 | Depends on post count and regional pricing |
| Screen mesh (fiberglass, 100 sq ft roll) | $30–$80 | Solar screen adds $30–$60 per roll |
| Aluminum screen frame extrusions + connectors | $150–$350 | Based on perimeter and bay count |
| Screen door (single, aluminum) | $80–$200 | Double door runs $250–$500 |
| Post bases and hardware (anchors, screws, hangers) | $100–$250 | Don't skimp on stainless or galvanized |
| Permit fee | $50–$300 | Varies heavily by municipality |
| Electrical (one outlet + fan circuit, DIY) | $100–$200 | Hire out: $400–$800 for electrician |
| Flooring (paint/coating or PT boards) | $200–$800 | Composite decking: $1,500–$3,000+ |
| Ceiling fan (damp/wet rated) | $80–$250 | |
| Total DIY estimate | $1,000–$2,800 | Add $3,000–$7,000+ if roofing work needed |
When to hire a pro vs. do it yourself
Most of the framing and screen installation is genuinely DIY-friendly if you're comfortable using a drill, a miter saw, and reading a tape measure. The tasks worth hiring out are: any structural roof work or new roof addition (especially if it requires engineered drawings or ties into your home's main roof system), electrical rough-in and panel work, and any situation where your permit requires stamped drawings or inspector sign-off at rough framing. For the framing and screening itself, if you've ever built a fence or a basic deck, this project is very similar in difficulty. A step-by-step DIY screened patio build is very achievable in a single weekend for a motivated homeowner with one helper.
The smartest approach: pull the permit first, handle the framing and screen installation yourself, and subcontract just the electrical to a licensed electrician. You'll save $2,000 to $4,000 compared to a full contractor build while keeping everything up to code. If you want to see how one homeowner tackled the full build from scratch, the article on how I built a DIY screened-in patio walks through a real project with practical lessons learned along the way. If you want to see how one homeowner tackled the full build from scratch, check out how I built a DIY screened-in patio.
FAQ
Can I turn a patio into a screened porch if it has no existing roof or pergola overhead?
Yes, but you must plan the roof or overhead structure first, screens alone cannot carry weather loads. Before you frame anything, verify you have space for posts plus a slope for runoff (commonly at least 1/4 inch per foot if you are adding a shed-style roof), and confirm how you will flash the roof where it meets the house.
What if my patio is already sloped toward the house, won’t that cause water problems?
It can. The goal is for water to shed away from the house and not pool along the inside edge of the screen. If the slab slopes toward the home, you may need patching and re-leveling during the floor prep phase, otherwise you risk recurring wet floors and leaks at the wall connection.
How do I choose between fiberglass screen, aluminum mesh, and solar screen?
Match it to your biggest issue. Fiberglass is easiest for DIY installs, aluminum lasts longer in rougher use, and solar screen is best on west or south sides where heat and glare are the primary problem. If you expect strong wind-driven rain, prioritize a solid lower seal plan (knee wall or careful floor edge sealing) more than switching mesh types.
Do screen panels need to be sealed or adjusted after installation to prevent drafts and rain intrusion?
Often, yes. Even with tight spline fit, check and seal the transitions where screen bead meets the floor line and where the frame meets corner posts. A common leak path is at the base of panels and the floor edge, so use consistent bead molding and pay special attention to any gaps from uneven slab contact.
Should I use pressure-treated wood for everything, including the rails and trim?
Use pressure-treated for any member that touches the slab, sits near soil, or stays consistently exposed to outdoor moisture. For convenience, many DIYers use PT posts plus PT bottom plates, then choose appropriately rated wood for the rest based on your local climate and how sheltered the porch will be. Regardless, seal or paint the treated wood within the first year to slow surface weathering.
How wide should my screen bays be, and what if my patio opening is wider than 8 feet?
Keep most bays in a manageable range (3 to 8 feet) to reduce sag and make panels easier to handle. If you have a larger opening, split it with an extra post so each panel frame stays within that range, rather than trying to make one oversized screen span.
What’s the best way to prevent rot at the post and bottom plate connections?
Use adjustable post bases to keep wood off bare concrete, then bolt posts into the bases so the wood is not sitting directly on moisture. Also anchor the bottom plate to the slab so the framing is tied together, and make sure the base flashing and wall ledger connection are watertight before closing anything in.
Do I need a GFCI outlet and what does that affect during the build?
Yes, at least one outdoor-rated receptacle accessible from the screened porch must be GFCI protected, and it must be wired before walls and ceiling finishes go up. Plan your conduit or wire route early, because retrofitting after framing and mesh panel installation is usually much harder and can compromise your wall sealing.
Can I install a ceiling fan on a screened porch ceiling, or does it have to be a regular light fixture?
A ceiling fan is a great comfort upgrade, but it must be rated for damp or wet locations and mounted to a fan-rated ceiling box. If your ceiling is open rafters or an exposed deck, you may need added blocking to give the fan box a solid mounting surface that meets the fan manufacturer’s requirements.
What floor choices work best on a screened porch built over a slab?
Bare concrete is durable but feels cold and slippery when wet. Options include anti-slip coatings or paint designed for porches, or adding pressure-treated tongue-and-groove decking over sleepers for a warmer surface. Whatever you choose, confirm the floor doesn’t trap water, and keep a slight slope toward the outside to help manage wind-driven rain that occasionally sneaks in.
When does it make sense to add a knee wall for wind-driven rain control?
If you have at-risk sides (often exposed west or south) where wind pushes water in at the base, a 12 to 18 inch knee wall plus sealing at the top of the screen panels can significantly reduce intrusion. It also helps keep airflow reasonable while improving the comfort level during storms.
If I’m planning to extend the porch into a 3-season room later, should I change my framing now?
Plan ahead so you can upgrade without rebuilding everything. Consider leaving room for future operable window tracks, making sure wall framing is aligned and sturdy enough to accept window hardware, and wiring in advance for additional outlets or HVAC needs, since later openings often require modifications to existing screen framing.
How do permits and inspections usually affect the timeline?
Pull the permit before ordering materials when possible, because some jurisdictions require engineered drawings, especially if you are adding a roof, connecting electrical, or altering structural members. Even when the permit cost is modest, waiting for inspection appointments can stretch the schedule, so build in time for at least a rough inspection and a final sign-off if required.
What should I hire out first to avoid the most expensive mistakes?
Hire out structural roof tie-ins if you are adding or modifying a roof, and hire a licensed electrician for rough-in and any panel work. These areas have the highest risk for code problems and water intrusion issues. Everything else, like framing the screen bays and installing panels, is typically similar to fence or basic deck work if you can follow measurements carefully.
Next Articles
How I Built a DIY Screened-in Patio Step by Step
Step-by-step DIY screened patio build: planning, framing, posts, screen panels, doors, sealing gaps, and fixes.

How to Decorate a Long Narrow Patio: Layout Tips
Practical DIY layout and decor tips to widen a long narrow patio using zoning, furniture spacing, lighting, greenery, an

How to Decorate a Rectangular Patio Step by Step
Step-by-step plan to decorate a rectangular patio with smart layout, zones, furniture fit, lighting, plants, and seasona