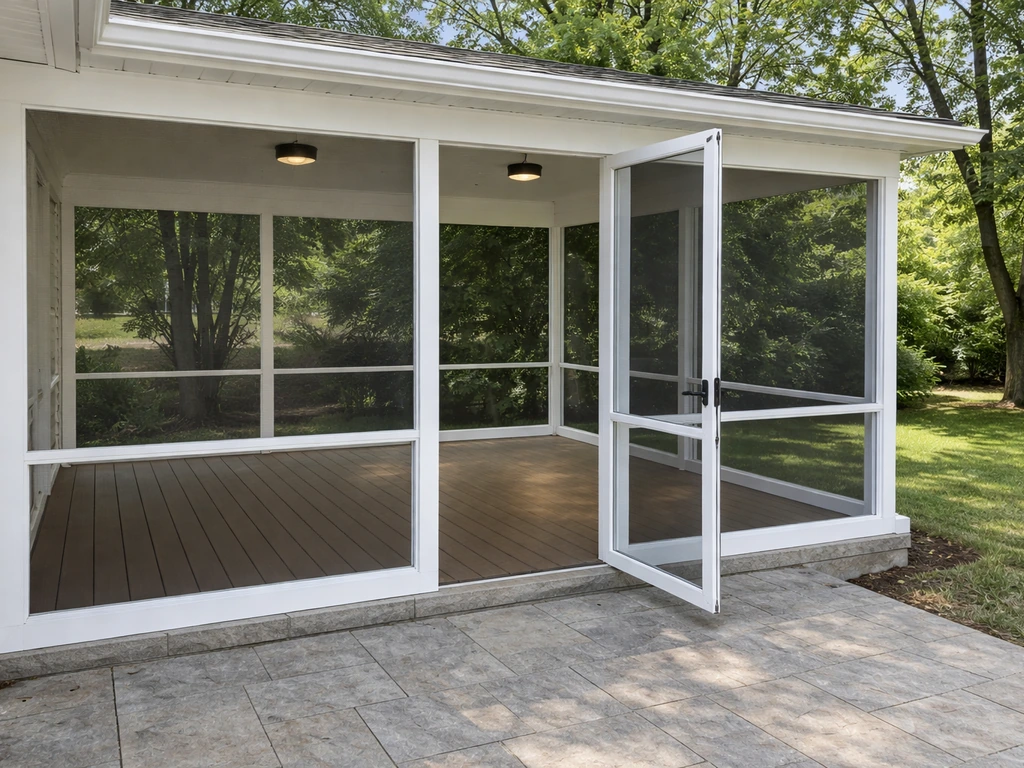
You can absolutely build a screened-in porch on an existing patio, and in most cases your concrete slab or paver base is already doing most of the hard work. If you are wondering how to build a screened patio specifically, this is exactly the approach to follow on an existing patio slab or paver base. If you are aiming for a do it yourself screened in patio, your biggest win is checking the slab condition and drainage first, then framing and sealing carefully before you hang screens. The basic process is: assess the slab condition and drainage, frame a perimeter wall system with pressure-treated or aluminum members anchored into the existing surface, stretch screen panels into those frames, tie a roof structure to your house or build a simple shed roof, seal every gap where bugs can sneak in, and pull a permit before you start swinging a hammer. A typical DIY build on a 12x16-foot patio takes one to two weekends for an experienced homeowner and a helper, costs roughly $1,500 to $4,500 in materials depending on your screen and framing choice, and adds real daily-use value to the space.
How to Build a Screened-In Porch on an Existing Patio

Assessing Your Existing Patio Before You Build

Walk the patio with a critical eye before you buy a single board. You are looking for four things: structural integrity, drainage slope, enough space for the enclosure footprint you want, and anything that could complicate anchoring posts or framing.
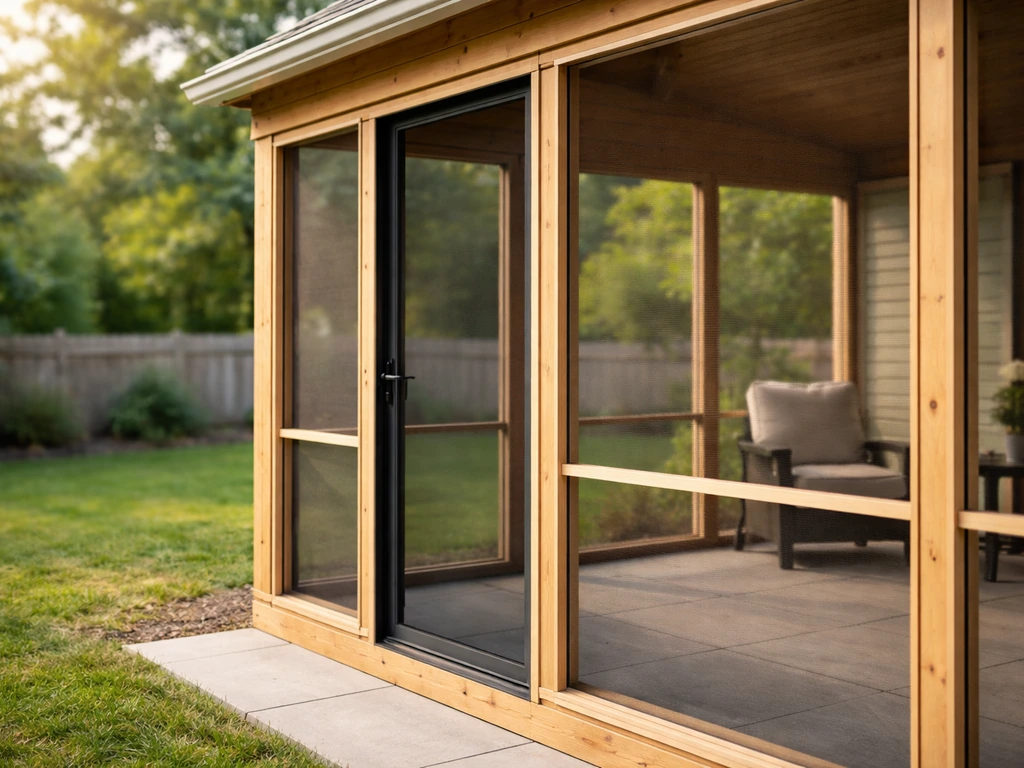
Start with the surface. A concrete slab should be in good shape with no major cracking or heaving. Small cosmetic cracks are fine; cracks wider than a quarter inch that shift up or down suggest settling issues worth addressing first. Paver patios work too, but you will need to set posts on concrete footings beside the paver field rather than anchoring directly into loose pavers. Check your slope: patios are typically poured with a 1/8-inch-per-foot pitch away from the house for drainage, and you want to keep that. A screened enclosure does not change rain direction, so water still needs somewhere to go.
Measure the clear height from your patio surface to the underside of any existing overhang or soffit. Most screen wall systems need at least 7 feet of clearance for the frame plus screen to look right and let a ceiling fan run. If you have an existing roof overhang you plan to tie into, check that the ledger area (the band of framing against the house) is solid and not rotted. You will be fastening into it. While you are up there, note whether there is an existing electrical outlet on the back of the house. That will matter later.
Finally, measure your setbacks. Most municipalities require a screened structure to sit a set distance from property lines, usually 5 to 10 feet, though this varies widely. Look this up before you finalize your footprint. If your patio is already close to the property line, that might dictate how much of it you can enclose.
Design Choices: Layout, Screen Type, and Roof
Get the design clear in your head before you start shopping for materials. These three decisions drive everything else: how much of the patio you are enclosing, what screen system you are using, and how you are handling the roof.
Enclosure Layout and Door Placement
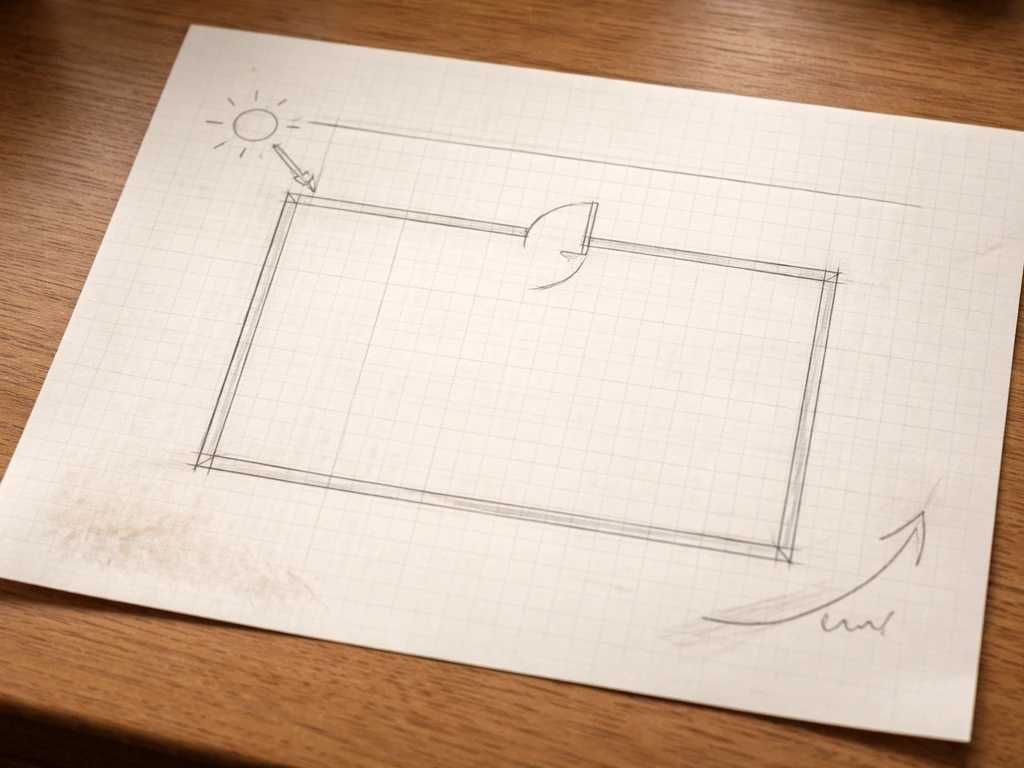
Sketch your patio to scale on graph paper. Mark where the house wall is, where the existing door or sliding glass door opens, and which direction you face for sun and wind. The screened door into the enclosure should be opposite the house entry so you have a clear traffic flow. A 36-inch door is the minimum comfortable width; 48 inches is better if you plan to move furniture through it. If you want two entry points, plan for that now because each door opening requires additional framing.
Screen System Options
Fiberglass screen is the most common choice for DIY builds. It is flexible, easy to work with, less expensive than aluminum or polyester, and readily available at big-box stores. The downside is it can sag over time in large panels and is not as pet-resistant. Aluminum screen is stiffer and more durable but harder to handle on a first build. For the frame that holds the screen, you have three realistic options:
- Traditional wood framing with spline-and-groove screen installation: lowest material cost, most familiar to DIYers, requires more finish work and paint or stain
- Aluminum extrusion systems like the Snapp screen system: pre-engineered channels where screen installs under tension, minimal visible hardware, works well for clean modern looks
- Systems like SCREENEZE: uses an aluminum base piece pre-drilled for fastening and a vinyl cap that snaps over to stretch and lock the screen without spline tools, making installation very forgiving for beginners
For a first-time build, a capped system like SCREENEZE or a similar no-spline product makes the screening step much less frustrating. The sequence for those systems is always the same: attach the base to the frame, install screen from the bottom up (bottom first, then top, then sides), and snap the cap to tension everything tight.
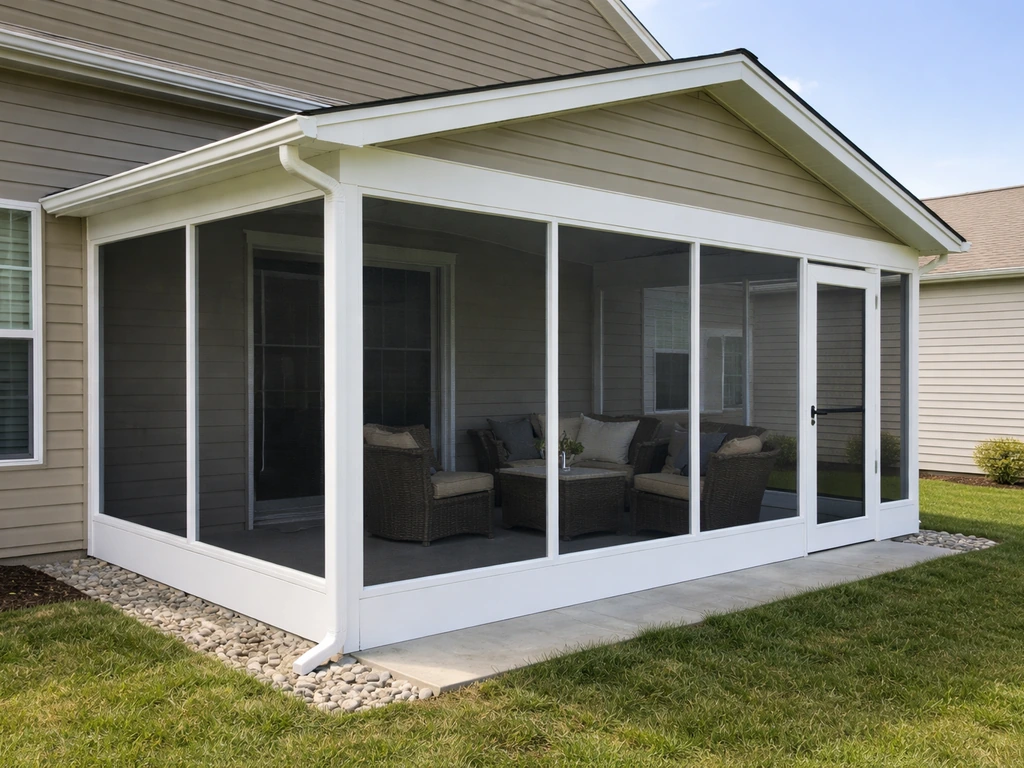
Roof and Ceiling Options
If your patio already has a solid roof overhang extending from the house, you are in the best possible situation. You attach the top plate of your screen walls to that existing structure and skip the roof framing entirely. If the overhang is partial, you can extend it with a simple shed-style roof addition that ties into the house ledger on one side and sits on your new corner posts on the other. A shed roof is the easiest new-roof option: one slope, no valleys, and straightforward rafter sizing. Whatever you add overhead, the roof structure must be anchored for wind uplift at every connection point, which is a code requirement under IRC R301 for any covered porch structure. This is not a place to skip hardware.
Materials and Tools You Will Need
Here is a practical list for a standard wood-framed enclosure on a 12x16-foot concrete slab with an existing overhang. Scale quantities up or down for your footprint.
Materials
- Pressure-treated 4x4 posts (one per corner, one each side of door opening, and at any span over 8 feet)
- Pressure-treated 2x4 or 2x6 lumber for top and bottom plates and any knee walls
- Post base hardware (adjustable post bases for anchoring to concrete slab, sized for 4x4)
- Wedge anchors or epoxy anchors for fastening post bases to concrete (follow manufacturer diameter and embedment depth specs)
- Structural screws and joist hanger hardware rated for pressure-treated lumber
- Screen material (fiberglass or aluminum mesh, sized to your panel dimensions with 6 inches extra per panel for tensioning)
- Screen frame system of your choice (SCREENEZE base and cap, aluminum extrusion channels, or wood stop trim and spline)
- Screen door with a spring closer and extender sweep at the bottom to seal the threshold gap
- Concrete screws or sleeve anchors for ledger attachment to the house (if tying into a concrete or masonry wall)
- Flashing tape and metal drip edge for any new roof-to-wall connections
- Exterior-grade caulk and weatherstripping for sealing perimeter gaps
- Bug-seal vinyl or foam tape for the base of screen panels where they meet the slab
Tools
- Rotary hammer drill with masonry bit (essential for anchoring into concrete)
- Circular saw and miter saw
- Level (4-foot level minimum), speed square, and tape measure
- Chalk line and marking pencil
- Drill/driver with bit set
- Spline roller (if using traditional spline-and-groove screen method)
- Screen tension tool or simply a helper for capped systems
- Caulk gun
- Ladder
Step-by-Step Build Process
Work through these steps in order. Skipping ahead usually means pulling things apart later.
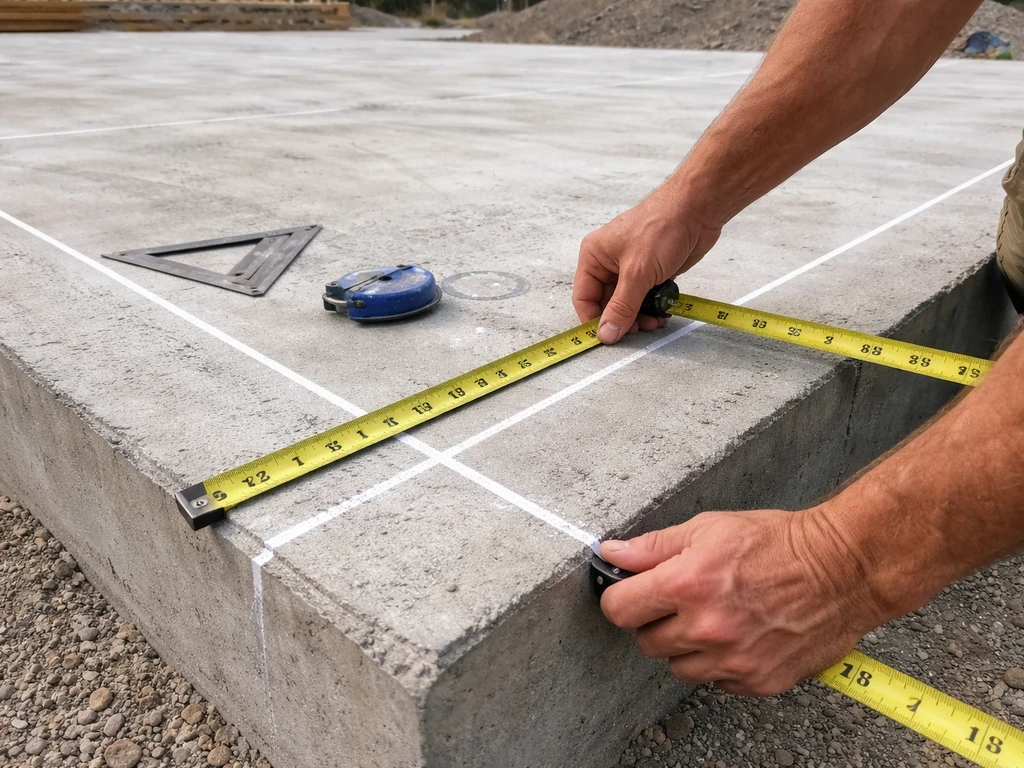
- Mark your layout. Snap chalk lines on the slab for the outer edge of each wall. Use the 3-4-5 triangle method to confirm corners are square before you anchor anything.
- Install post bases. Position adjustable post bases at each corner and door jamb location along your chalk lines. Use a rotary hammer to drill holes for wedge anchors at the manufacturer-specified diameter and embedment depth. For a 1/2-inch wedge anchor, that is typically a minimum 2-1/4 inch embedment into solid concrete. Set the bases, drop in the anchors, and torque them according to the anchor spec. Do not skip depth requirements — too shallow and the base pulls out under lateral load.
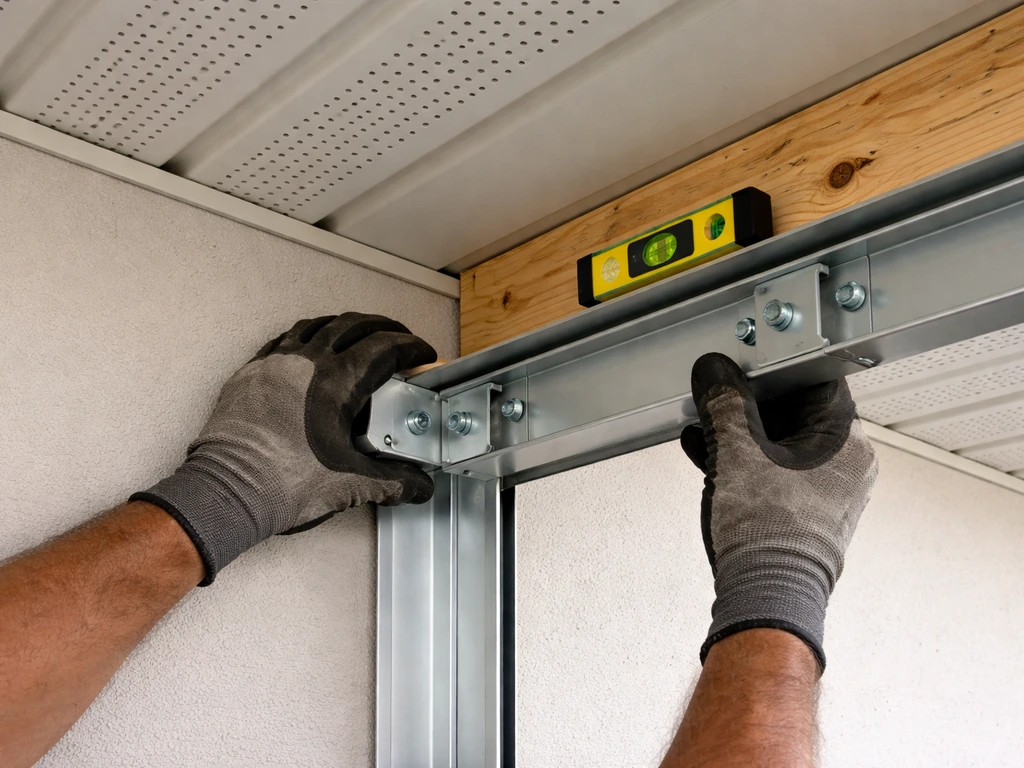
- Set and plumb your posts. Cut pressure-treated 4x4s to the height needed to meet the underside of your existing overhang or the top plate height for a new roof. Drop them into the post bases, check plumb in both directions with a level, and brace them temporarily with 2x4 diagonals screwed to stakes in the ground until the framing ties them together.
- Install the top plate. Run a pressure-treated 2x4 or 2x6 top plate across the tops of your posts and fasten with structural screws. Where this plate meets the house, attach it to the existing framing or ledger. For a concrete or masonry wall, use sleeve anchors or concrete screws rated for the load. This connection point carries the roof load and wind uplift, so use the hardware called for in your permit drawings.
- Install the bottom plate or sill. Run a treated 2x4 flat on the slab at the base of each screen wall. Anchor it with concrete screws every 24 inches. This gives your screen frame a base to fasten to and helps seal the gap between the frame system and the slab.
- Frame the door opening. Set a pressure-treated header across the door opening (typically a doubled 2x6 for a 36-to-48-inch span). Plumb the king studs and jack studs on each side. Install blocking as needed for the screen door track or hinge side.
- Install mid-rails if needed. For screen panels taller than about 48 inches, add a horizontal mid-rail to break the panel into two shorter sections. This prevents screen sag and makes installation easier. Position it at roughly the midpoint of your wall height.
- Attach screen frame bases. Follow your chosen system: for SCREENEZE, screw the aluminum base along the top and bottom of each panel opening. For wood-stop systems, nail the first half of the stop to the inside face of the framing.
- Install the screen. Cut screen fabric with 4 to 6 inches of overhang on all sides. For capped systems, start at the bottom: lay the screen over the base, pull it taut, and snap the cap to lock it. Move to the top, pulling screen tight before snapping. Then do the sides. For spline systems, roll screen into the groove with the spline roller, starting at one corner and working around. Trim excess with a utility knife.
- Hang the screen door. Follow the door manufacturer's installation sequence for hinges and the closer. Adjust the extender sweep at the bottom so it makes full contact with the threshold without dragging. A gap here is the number one way bugs get in.
- Seal all perimeter gaps. Run a bead of exterior caulk where the top plate meets the house siding or soffit. Seal around each post base. Use bug-seal foam or vinyl tape along the slab-to-bottom-plate joint. Check every corner where two screen panels meet and add weatherstrip or trim to close any gaps.
Flooring, Posts, Leveling, Drainage, and Sealing
Most existing patios are ready to use as-is for the floor of a screened enclosure. The surface you already have, whether concrete, pavers, or a composite deck over a slab, can stay. But there are a few things to address to keep the space comfortable and bug-free.
Drainage is critical. If your slab already pitches away from the house, great. If not, or if it pitches toward the house, you have a water management problem that will get worse once you enclose the space. Standing water inside a screen porch invites mosquitoes and accelerates mold. Options: have a concrete contractor cut a drainage channel and fill it with gravel, or use a floor drain if you are adding one as part of the project. At minimum, confirm that rain blowing in through the screen will drain out, not pool.
If you are adding posts on or next to a paver patio, dig footings to the frost line for your region rather than anchoring to loose pavers. The 2021 IRC requires footings to extend below the frost line to prevent freeze-thaw heaving. In cold climates like the upper Midwest or New England, that can mean 42 to 48 inches deep. Check your local requirement. In mild climates, shallow footings may be permitted, but confirm this in your permit application.
For the slab-to-frame transition, the critical zone is the base of each screen panel where it meets the floor. Even a 1/4-inch gap is enough for ants and small flies to enter in volume. Use a combination of the bottom plate fastened flat on the slab and a foam or vinyl bug seal compressed between the bottom screen frame and the plate. Some screen door manufacturers include a vinyl bug seal with their systems that can be trimmed to fit and may need adjustment after installation. Check that seal after the first rain to confirm it is not letting water wick under.
If you plan to add flooring on top of the existing slab, such as outdoor tile, rubber pavers, or a wood deck surface, install it before the screen walls go up so you can run material edge to edge. Account for the added thickness in your post height calculations.
Electrical, Lighting, Fans, and Ventilation
A ceiling fan is one of the best upgrades you can make to a screened porch, and it does double duty: it moves air to keep you cool and discourages mosquitoes from landing. Size it to your space, a 52-inch fan works well for a 12x16 space. Use a fan rated for damp or wet locations since even a screened porch gets moisture from rain blowing in.
For electrical outlets, plan on at least one weatherproof GFCI receptacle inside the enclosure. Local codes in many jurisdictions specify that receptacles in screened porches must be GFCI-protected and installed no more than 6 feet 6 inches above the walking surface. The NEC requires that receptacles in damp or wet outdoor locations use weatherproof covers: in wet locations, covers must protect even when a plug is inserted, which means an extra-duty in-use cover. Do not install a standard indoor outlet and call it done.
If you are comfortable with basic electrical work and your jurisdiction allows homeowner electrical work, you can extend an existing outdoor circuit to add the porch outlet and fan. In some jurisdictions, like New York City, all electrical wiring in permitted porch projects must be performed by a licensed electrical contractor. Check what is required in your area before doing any wiring yourself.
For lighting beyond the ceiling fan, surface-mounted exterior fixtures at the entry and a string of LED outdoor lights are easy additions that do not require new circuits if you have enough capacity. Run conduit along the ceiling framing to protect any wiring you add, and use weatherproof boxes and covers at every device location.
Ventilation beyond the ceiling fan comes naturally through the screen itself, which is a big advantage of a screened enclosure over a solid sunroom conversion. If you decide you want year-round comfort instead of just bug protection, the next move is converting a patio to a sunroom. If you want to control airflow seasonally, look at panels that can be swapped between screen and solid acrylic inserts. That is a step toward a true enclosure, and it connects naturally to projects like converting a patio to a sunroom if you want to go further down that road later.
Permits, Safety, and Fixing Common Problems
Get the Permit First
A screened-in porch is a permanent structure and requires a building permit in virtually every jurisdiction. Do not skip this. Pulling a permit means a plan reviewer checks your design against local code requirements for structural connections, wind uplift, and egress, and an inspector verifies the work before it is closed in. That review protects you if you ever sell the house or file an insurance claim. Submit a simple site plan showing the porch dimensions and setbacks, a framing plan, and a description of materials. Many building departments have a standard checklist for screen rooms; ask for it. Some jurisdictions like Wheaton, IL have specific requirements like the GFCI receptacle height rule mentioned above, and those only show up when you engage the permit process.
Wind and structural safety requirements under IRC R301 include provisions for uplift connections at the roof-to-wall and wall-to-foundation interfaces. In coastal or high-wind areas, your plan reviewer may require hurricane straps or tension ties at those connections. Budget for that hardware and do not treat it as optional. The connections are there to keep the roof on the structure if a storm hits.
Troubleshooting Common Problems
| Problem | Likely Cause | Fix |
|---|---|---|
| Bugs getting in despite screens installed | Gap at door sweep, slab-to-frame joint not sealed, or screen panel corners not trimmed tight | Adjust door sweep for full threshold contact, apply foam bug seal at slab joint, add trim or weatherstrip at panel corners |
| Screen panels sagging or bubbling | Screen over-spanned without a mid-rail, or screen not tensioned properly during install | Add a horizontal mid-rail to break panels into sections under 48 inches; re-tension or reinstall screen using proper sequence (bottom first, then top, then sides) |
| Water pooling inside the enclosure | Slab drainage pitch is wrong, or roof drains toward the enclosure interior | Add a floor drain or drainage channel; redirect roof runoff with proper gutter and downspout away from the slab |
| Posts shifting or rocking | Anchor bolts not set to required embedment depth in the concrete, or anchors installed in deteriorated slab | Remove and re-drill to correct depth; use epoxy anchors in problem concrete where wedge anchors cannot achieve adequate hold |
| Frame misaligned with uneven slab surface | Slab has high or low spots making the bottom plate rock | Shim the bottom plate level before fastening; use a self-leveling sill gasket product to fill voids between plate and slab before anchoring |
| Ledger pulling away from house | Fasteners into rim joist or framing were too small, spaced too far apart, or the rim joist is rotted | Replace rotted wood first; use code-approved concrete screws or sleeve anchors for masonry walls, and structural lag screws for wood framing at specified spacing |
Safety Basics During the Build
- Call 811 before drilling or digging for any new footings to locate underground utilities
- Wear eye protection when using the rotary hammer — concrete dust is harsh
- Brace posts securely before walking away; an unbraced 10-foot post in wind can fall and injure someone
- Confirm anchor torque specs from the manufacturer rather than guessing — over-torquing wedge anchors can crack the concrete around the hole
- Turn off the circuit breaker before tapping into any existing outdoor outlet for the new wiring
How This Compares to Other Patio Enclosure Projects
Building a screened porch on an existing patio is the middle ground in a range of patio enclosure projects. It is more involved than a basic DIY screened patio with a simple kit and no roof changes, but far simpler and less expensive than converting the space to a sunroom with insulated walls and HVAC. This is a good middle step if you are wondering how to enclose a screened patio, instead of jumping straight to a full sunroom conversion with insulated walls and HVAC. If your goal is comfortable outdoor living with bug protection at a reasonable cost, this approach hits the sweet spot. If you want to use the space year-round through cold winters, a full enclosure or sunroom conversion is worth exploring as a next step once the screened structure is in place.
Your practical next steps: measure your patio and sketch the footprint today, call your local building department to confirm setback requirements and the permit application process, and price out the post base hardware and screen system that fits your framing approach. Once you have the permit in hand and materials on site, most of the actual construction happens in a focused weekend. The prep and planning stages are where the real time goes, and doing them right is what keeps the project from turning into an expensive redo.
FAQ
When building a screened-in porch on an existing patio, do I need to remove or replace the patio surface first?
Not always. If your patio slab is sound and already pitched correctly away from the house, you can often use it as the floor without adding a new base. If you see pooling after rain, staining along the foundation, or the patio slopes toward the house, you typically need a drainage fix before building the screen walls, because enclosing can trap moisture and increase mosquito breeding.
How can I tell if my existing patio drainage is good enough for a screened porch?
You want to check for water movement after rain using observation, not just dry-day inspection. Look for any areas where runoff concentrates, measure the slope direction, and confirm there is a clear path for water to leave the patio perimeter. If the patio drains toward the house, plan for a drainage channel or a floor drain option before framing, because you cannot rely on the screens to keep the space dry.
Can I anchor the screened porch frame directly into pavers or do I need footings?
For concrete slab patios, it is usually best to attach the bottom track to the slab with appropriate anchors and ensure a tight, continuous bug seal under the frame. For paver patios, do not count on anchoring to loose pavers; you typically need concrete footings alongside the paver field so the structure is supported below the frost line (or to local required depth).
What if my existing roof overhang looks questionable, can I still attach the porch walls to it?
If the existing overhang has rot, soft spots, or visible water damage, you should not treat it as a reliable ledger connection. Before you plan on tying into it, inspect the ledger band thoroughly, use a probe to check for internal softness if you can, and repair or replace failed wood before fastening the screen top plate.
Where should I place the screened porch door, and what are common layout mistakes?
Yes, and it helps you avoid expensive rework. The common mistake is building the screen frame first, then realizing the door opening does not line up with the interior traffic path or furniture layout. Plan the door location relative to the house entry, consider minimum clear width (often 36 inches for basic flow, wider for furniture movement), and decide early if you want one or two doors.
What is the correct way to add electricity for outlets and a ceiling fan in a screened porch?
You generally need weatherproof electrical protection, not just a standard exterior outlet. Plan for at least one interior GFCI receptacle, use weatherproof in-use covers in damp or wet conditions, and follow the local mounting-height rule your jurisdiction uses. Also consider whether you need conduit along the ceiling framing for any added fixtures.
What type of ceiling fan should I install, and do I need to size it to my porch?
A typical ceiling fan is not just comfort, it is also pest control. Choose a fan rated for damp or wet locations, because rain blowing in through screens still creates moisture exposure. Also size the fan to your porch dimensions (a larger fan for a 12x16 space is common), and verify you have enough clearance for blades under the screen ceiling line.
If I build a shed roof or extend an existing overhang, what roof-to-structure safety details should I plan for?
Budgeting too little for roof connections is a common failure point. Covered screen rooms require secure anchoring for wind uplift at the roof-to-wall and wall-to-foundation interfaces, and in higher-wind regions you may need additional hardware like hurricane straps or tension ties. If you are extending only part of an existing overhang with a shed roof, make sure every new connection is tied in and fastened to spec.
How do I keep bugs out at the bottom of the screened porch walls?
It often happens. Even with good framing, small gaps at the base of screen walls can allow ants and tiny flies in. Use a bottom track plus a compressed bug seal at the slab or sill interface, and then re-check after the first rain to confirm the seal stayed snug and did not wick water underneath.
Can I make the screened porch usable year-round without rebuilding the whole structure?
Yes, depending on climate and how you plan to use the space. For seasonal comfort only, screens and ventilation may be enough. If you want year-round use, the next step is typically converting part or all of the screen area to solid panels or moving to a sunroom-style enclosure with insulation and HVAC planning.
What setback rules could force me to change my patio-to-porch footprint?
Check setback requirements and code rules before finalizing your footprint, because the permit reviewer will measure from property lines. If your patio is already close to the line, you might have to reduce the enclosure area or reconfigure the layout to meet required distances and egress considerations.
Do I really need a permit for a screened-in porch on an existing patio, and what will the inspector expect?
Many jurisdictions require permits because screened porches are treated as permanent structures, and reviewers look at structural connections, uplift resistance, and sometimes egress. If you want less guesswork, ask your building department if there is a standard checklist for screen rooms and what drawings they want (often dimensions, setbacks, and a framing plan).
DIY step-by-step on building a screened patio, framing, mesh, doors, and weatherproofing for comfort.
DIY screened-in patio build guide with materials, tool lists, step-by-step framing, screen install, door, sealing, and u

Practical DIY layout and decor tips to widen a long narrow patio using zoning, furniture spacing, lighting, greenery, an