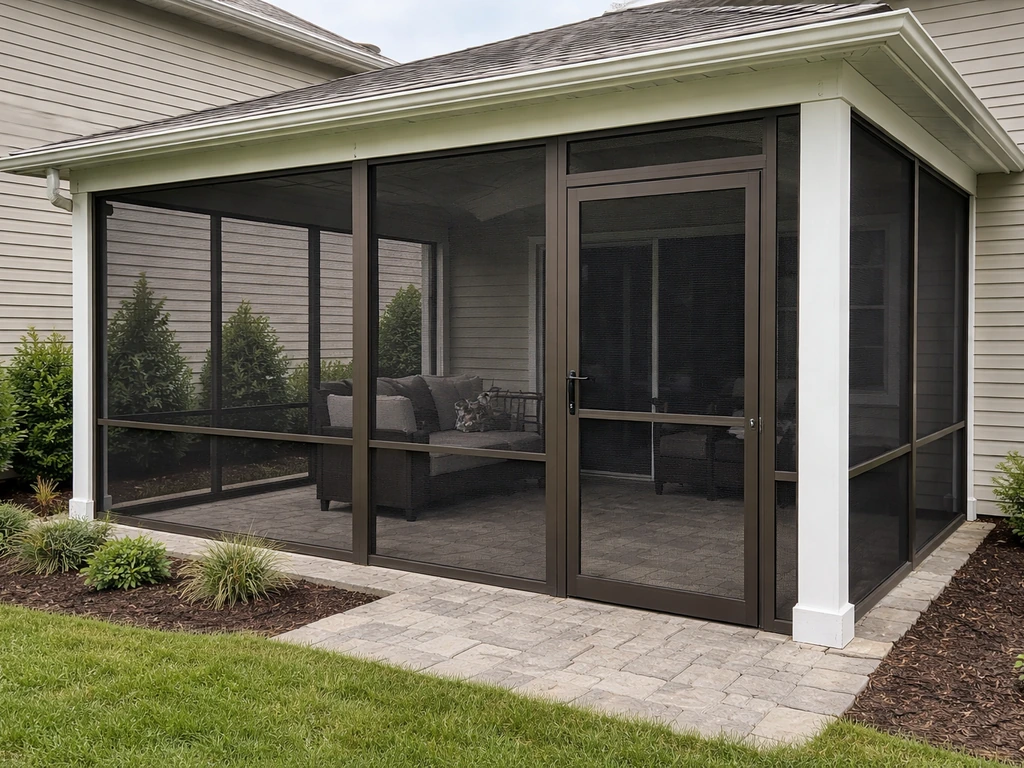
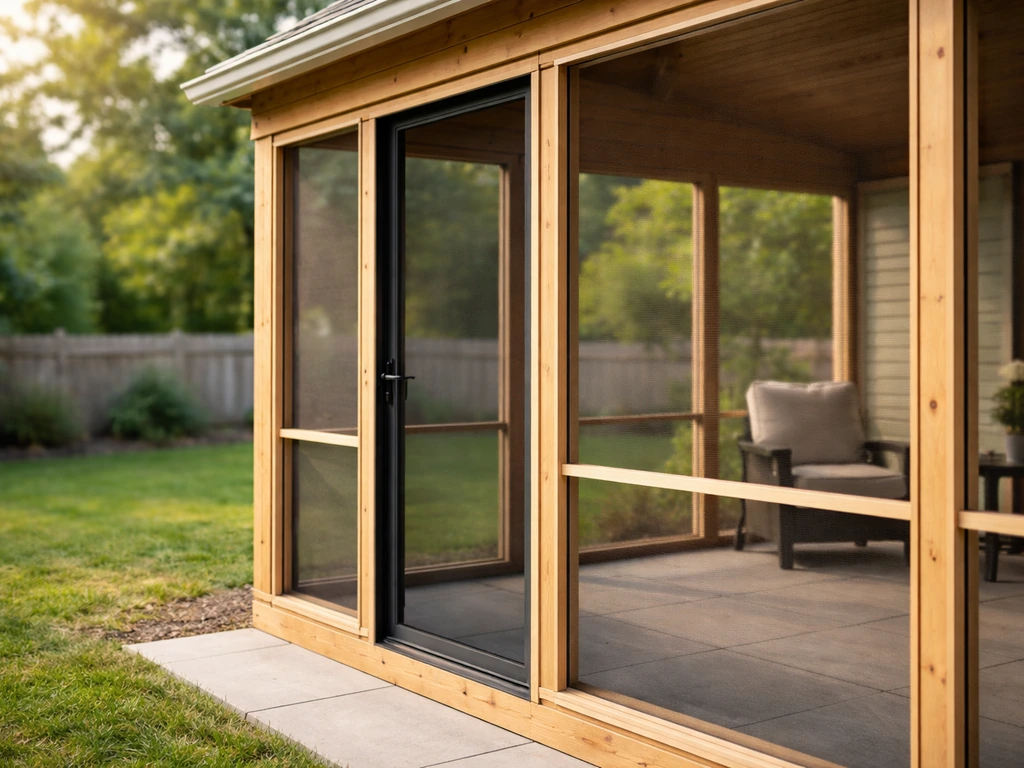
To enclose a screened patio, you frame the open sides with posts or attach directly to existing structure, stretch insect screen material across panels, secure it with spline or staples, and seal the edges and any door openings so bugs and wind can't sneak through. Most homeowners can complete a basic single-side enclosure in a weekend. A full perimeter enclosure on a larger patio is typically a two- to three-weekend project, depending on how much framing you need to build from scratch. Before you grab a staple gun, though, you need to nail down your enclosure style, pull a permit if required, and get your measurements tight, those three things determine everything else.
How to Enclose a Screened Patio Step by Step Guide

Felix Brennan
15 May 2026
Check permits before you touch anything
This is the step most DIYers skip, and it's the one that causes the biggest headaches later. Many jurisdictions treat screened enclosures as regulated structures, even when they're attached to an existing covered patio. [Some cities require a building permit to construct a screened enclosure on an existing deck or patio. ](https://www.
cityoflawrence. org/sites/default/files/document-group/SUNROOMS%20AND%20SCREENED%20ENCLOSURES_0. pdf) Others tie setback requirements to whether your enclosure has a roof that's impervious to weather. Temple Terrace’s land development code treats screened enclosures as regulated accessory structures and ties applicable setback requirements to the enclosure height and roof imperviousness to weather [setback requirements to whether your enclosure has a roof that's impervious to weather.
](https://templeterrace. elaws. us/code/coorch12artixdiv2sec12-508). If your existing patio roof is solid, the rules may be different than if it's a pergola or lattice cover.
Check with your local building department before you start framing. Bring a rough sketch of your patio footprint and describe what you're adding. Most permit offices can tell you in five minutes whether you need a permit, and getting caught without one can mean tearing the whole thing down.
Decide on the enclosure style first
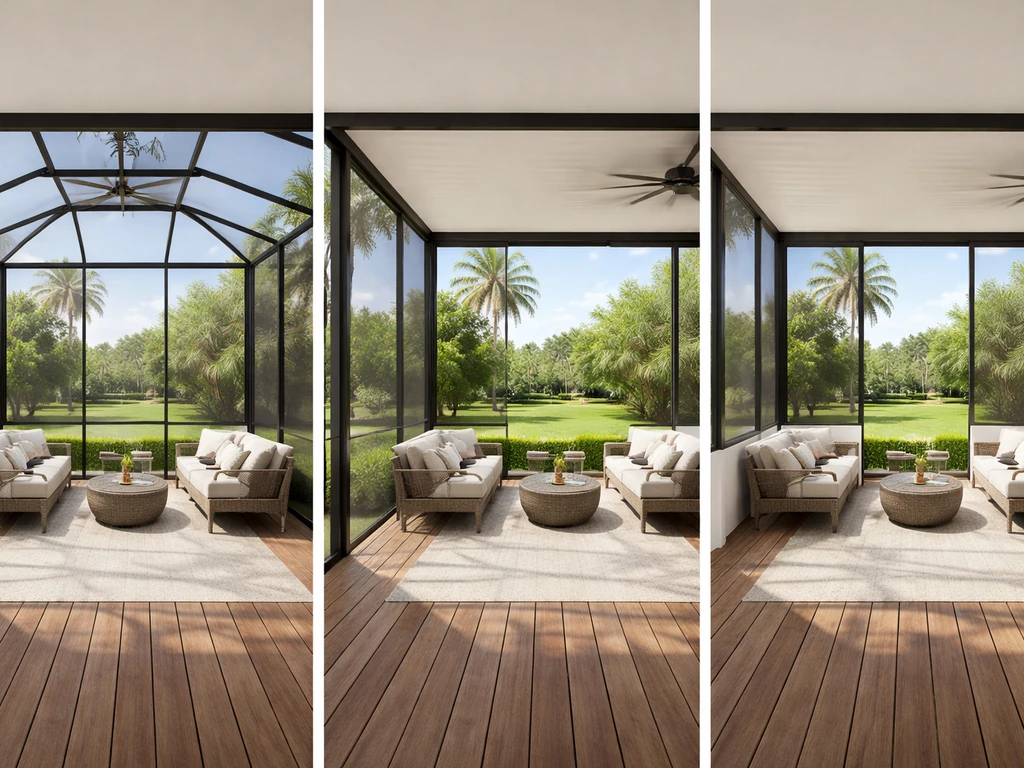
Not every screened patio needs to be a fully enclosed room, and choosing the right style upfront saves you time, money, and a lot of rework. There are three main approaches, and the best one depends on your climate, how you use the space, and how much work you want to take on.
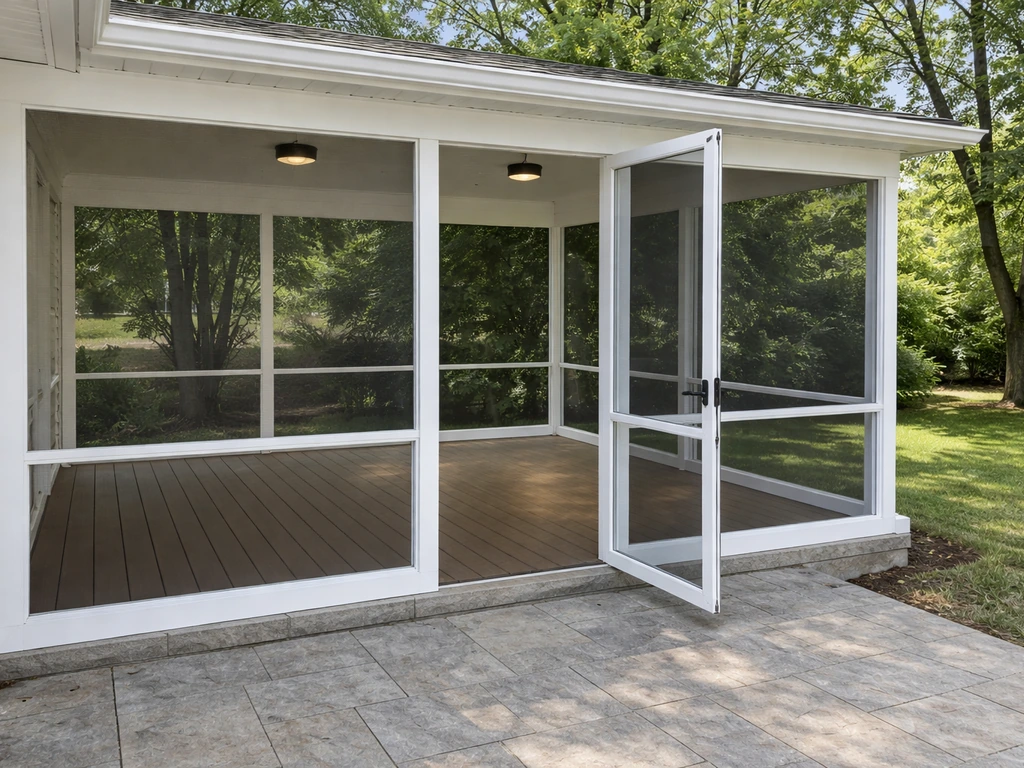
Full perimeter enclosure
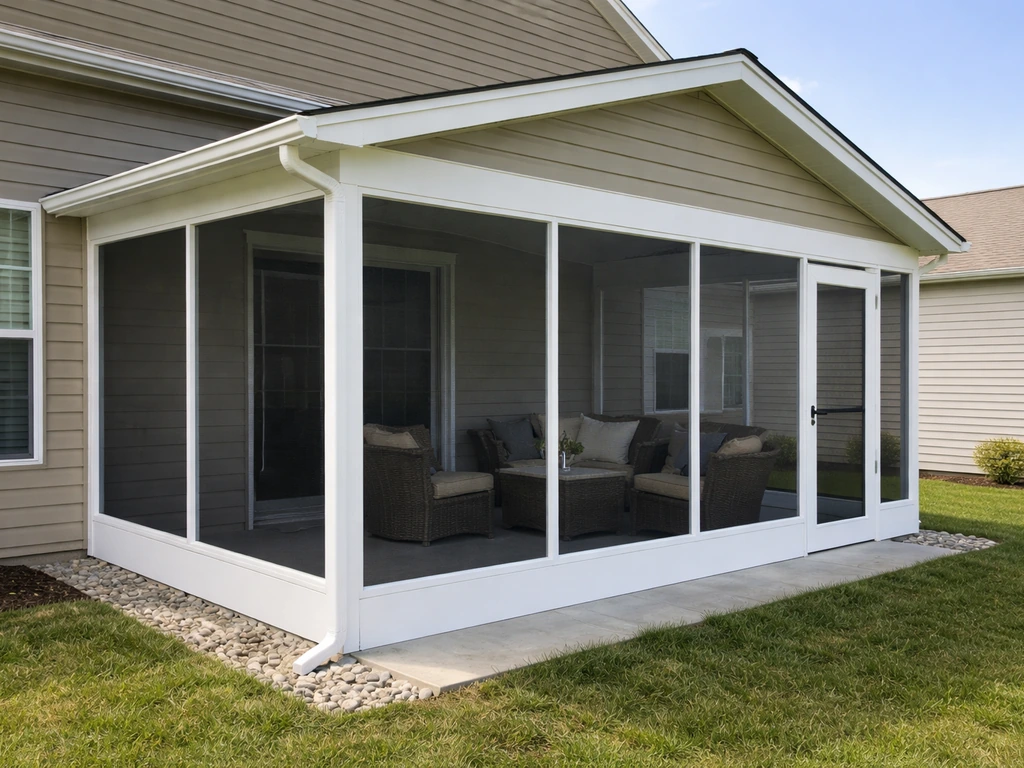
This is the classic screened-in porch setup: every open side gets framed and screened from floor (or knee wall) to ceiling. It gives you maximum bug protection and the most weather shielding from wind-driven rain. If you're in a mosquito-heavy region or you want to use the space during cooler months, this is the right call. It's also the most work, and the most likely to require a permit.
Partial or single-side enclosure
Sometimes you only need to screen one or two sides, maybe to block a neighbor's sightline, cut prevailing wind, or keep bugs out of the direction they come from. This is a lighter project and often skips permit requirements entirely, but check locally. A privacy screen approach is another variation of this idea, focusing more on sightlines than bug control.
Hybrid screen-and-panel enclosure
A hybrid uses insect screen for most of the enclosure but incorporates solid panels (wood, composite, or PVC) for the lower knee-wall section, typically 18 to 36 inches up from the floor. This protects screen from foot traffic, pets, and lawnmower debris while still keeping the airy feel up top. It's a smart upgrade if you have dogs or kids. If you're thinking about eventually converting the space into a true sunroom with glazed panels, starting with a solid frame and screen now makes that future upgrade far easier.
Plan your measurements and layout
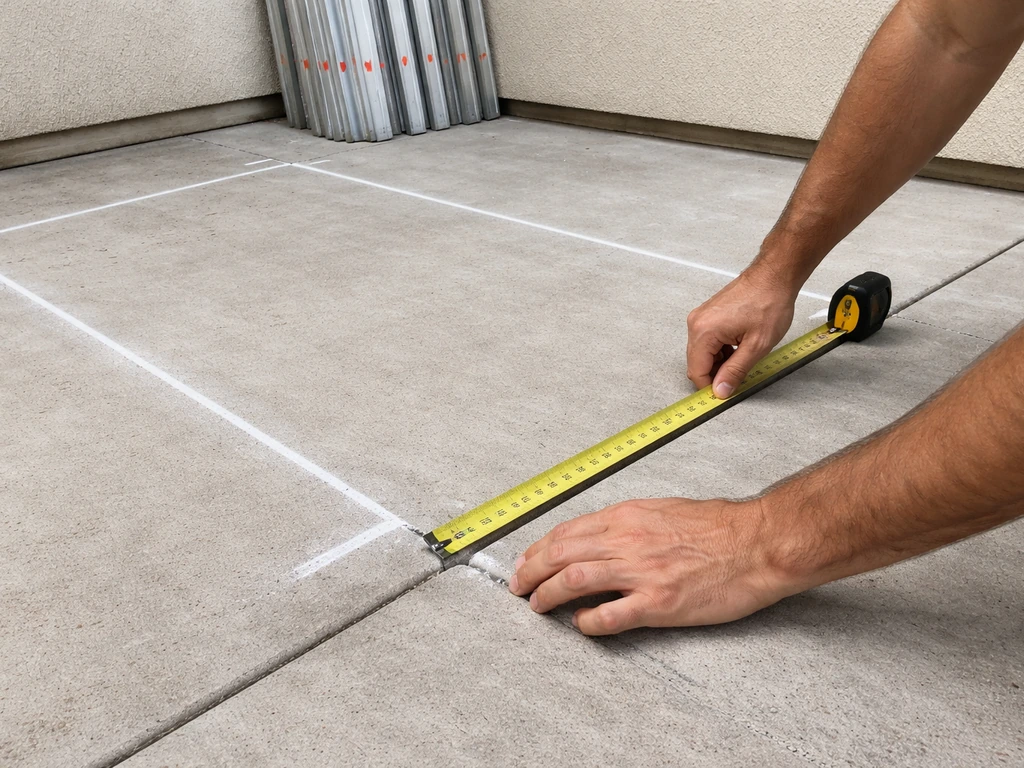
Good measurements are the foundation of a screened enclosure that actually looks right and seals properly. Sloppy layout leads to gaps at corners, screen panels that don't span evenly, and doors that won't close flush. Take your time here.
- Measure the total perimeter of the open sides you plan to enclose. Write down each wall section individually, not just the total.
- Measure floor to ceiling (or floor to the underside of the beam/soffit) at multiple points on each wall. Older patios often aren't perfectly level, and a 1/2-inch difference matters when you're fitting screen panels.
- Identify your attachment points: existing posts, beams, slab edges, or house walls. These are where your new frame members will anchor.
- Plan post spacing at 6 to 8 feet on center for standard screen panels. Wider spacing increases screen sag and wind vulnerability.
- Mark where your door opening will go. Standard screen doors are 32 or 36 inches wide, so pick a bay that accommodates that without heavy custom cutting.
- Check that your slab or deck has a slight slope (1/8 inch per foot is typical) for water drainage. If water pools at the perimeter, it will rot wood framing fast.
Sketch the whole layout on paper with measurements before buying anything. Include the post locations, panel widths, and door position. This sketch also comes in handy if you do need to pull a permit, since most building departments want a simple plot plan showing the enclosure relative to property lines.
Choose the right materials and hardware
The materials you pick will determine how the enclosure holds up over years, not just how it looks on day one. Here's how to think through each category.
Screen material
Most building codes that regulate screened enclosures specify insect screening with a maximum mesh opening of 0.5 mm, which is standard 18x14 or 18x16 mesh fiberglass screen. Fiberglass is the go-to for most DIYers: it's flexible, easy to work with, doesn't corrode, and costs about $0.15 to $0.25 per square foot in bulk rolls. Aluminum screen is stiffer and more durable against pets and snags but harder to handle and prone to oxidation in coastal climates. For high-UV areas or if you want some solar heat reduction, solar or super screen (a heavier 80-gram weave) costs more but cuts glare and is noticeably tougher.
| Screen Type | Best For | Durability | Approx. Cost/Sq Ft | DIY Ease |
|---|---|---|---|---|
| Fiberglass (18x14 mesh) | General use, most climates | Good | $0.15–$0.25 | Easy |
| Aluminum | High-traffic panels, pet households | Very good | $0.20–$0.35 | Moderate |
| Solar/Super screen | High UV, heat reduction, coastal | Excellent | $0.40–$0.70 | Moderate |
| No-see-um screen (20x20 mesh) | Florida, Gulf Coast, mosquito-heavy zones | Moderate | $0.30–$0.50 | Easy |
Frame system
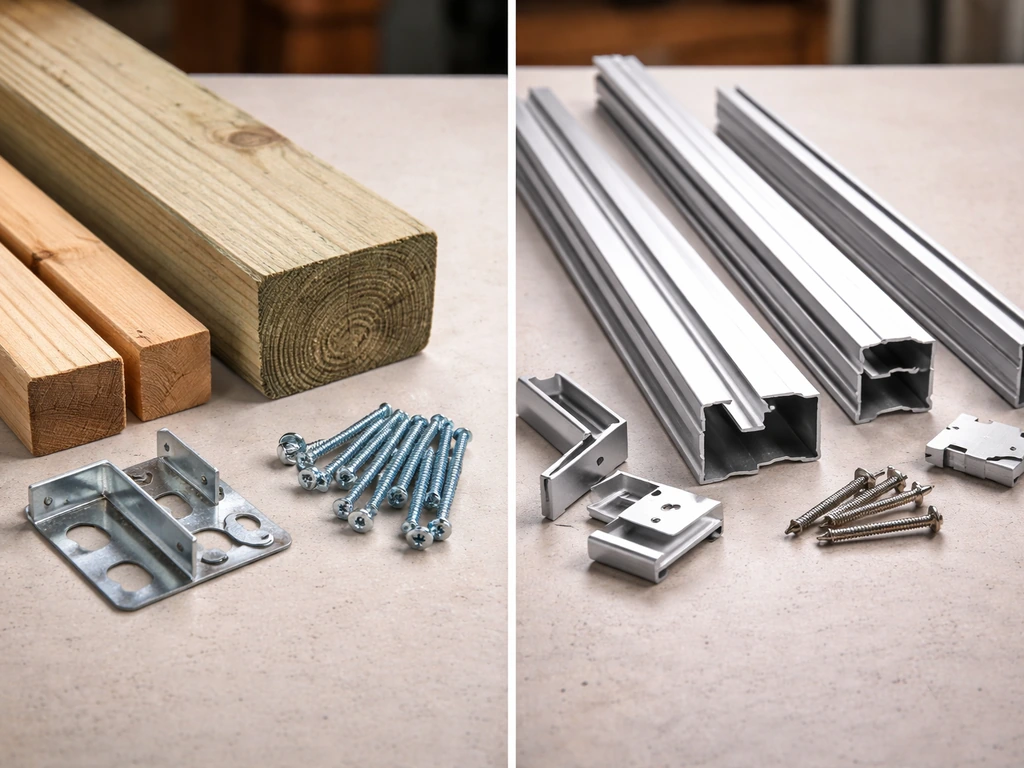
You have two main options: wood framing or aluminum screen track systems. Wood framing (pressure-treated 2x4 for posts, 1x3 or 1x4 for screen frame members) is familiar to most DIYers, more forgiving to work with, and easy to modify. Use pressure-treated lumber for any member that contacts the slab or is within 6 inches of ground level. Aluminum track systems, often sold as EZ Screen Room or similar kits, use pre-engineered aluminum channels and spline to hold screen in place.
They go up faster, look cleaner, and are better for humid climates where wood warps. Kits typically run $1,500 to $4,000 for a 200-square-foot enclosure, depending on height and configuration. For most first-time builders, wood framing is easier to troubleshoot and correct on the fly.
Fasteners and connectors
Use hot-dipped galvanized or stainless steel fasteners throughout. Standard zinc-plated screws corrode quickly in an outdoor enclosure, especially where screen and wood hold moisture. For attaching posts to an existing concrete slab, use 1/2-inch wedge anchors or Tapcon concrete screws, with a post base connector rated for exterior use. At the top, toe-screw or use hurricane tie connectors to connect posts to the overhead beam or ledger. Stainless steel screws cost a bit more but are worth it if you're near the coast or in a high-humidity climate.
Install posts, frames, and screening step by step
Now you're ready to build. Work through this sequence, and don't jump ahead: getting each stage right before moving on prevents you from screening over a frame that's out of plumb or has a loose post.
Step 1: Set your posts
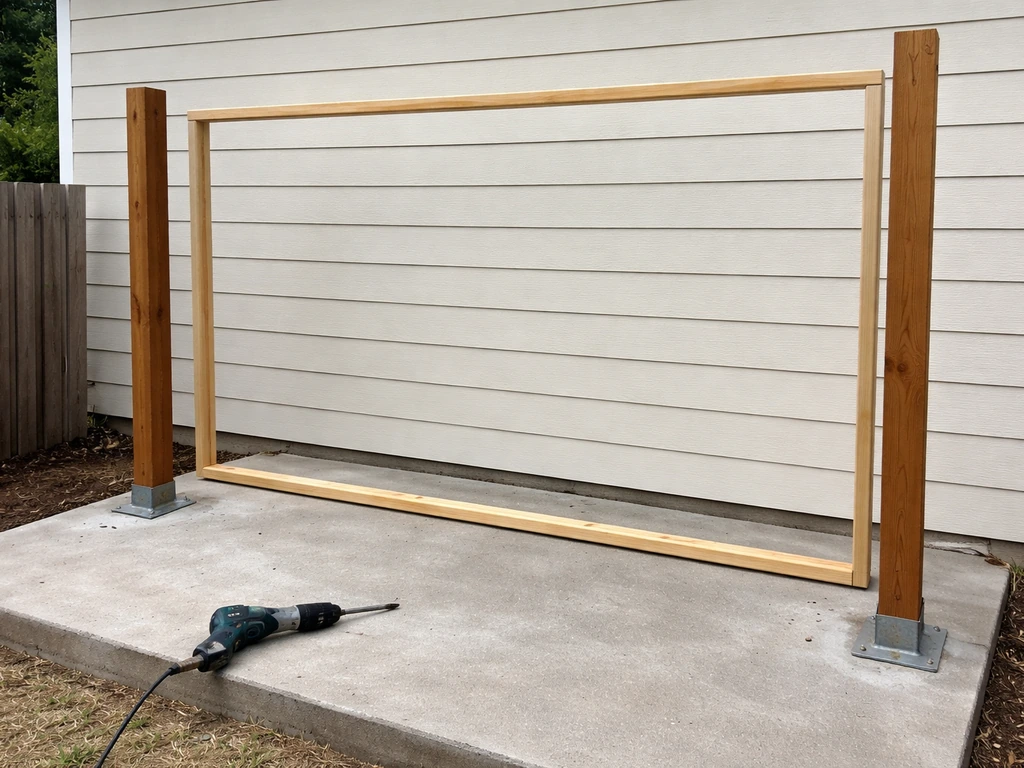
Mark post locations on the slab with a chalk line snapped from corner to corner. Drill anchor holes with a hammer drill and a 1/2-inch masonry bit, set your post bases, and bolt them down. Stand each post plumb (check with a level on two adjacent faces), then fasten the top to the overhead structure. If you're attaching to an existing house wall, install a pressure-treated ledger board anchored into the framing with structural screws, not just into siding. Span a top plate (2x4 or 2x6 depending on span) between posts to give you a continuous nailing surface for screen frames.
Step 2: Build screen frame panels
For a wood system, build rectangular frames from 1x3 or 1x4 pressure-treated or cedar stock. Cut them to fit snugly between posts, floor to top plate (or to the top of a knee wall if you're doing a hybrid). Square each frame by measuring diagonally corner to corner before fastening. Screw frames together with 2-inch galvanized screws and add a center horizontal rail at mid-height on panels taller than 4 feet. This horizontal member keeps the screen tight and prevents bowing. For aluminum track systems, snap the channels into place per the kit instructions and dry-fit before stretching any screen.
Step 3: Stretch and fasten the screen
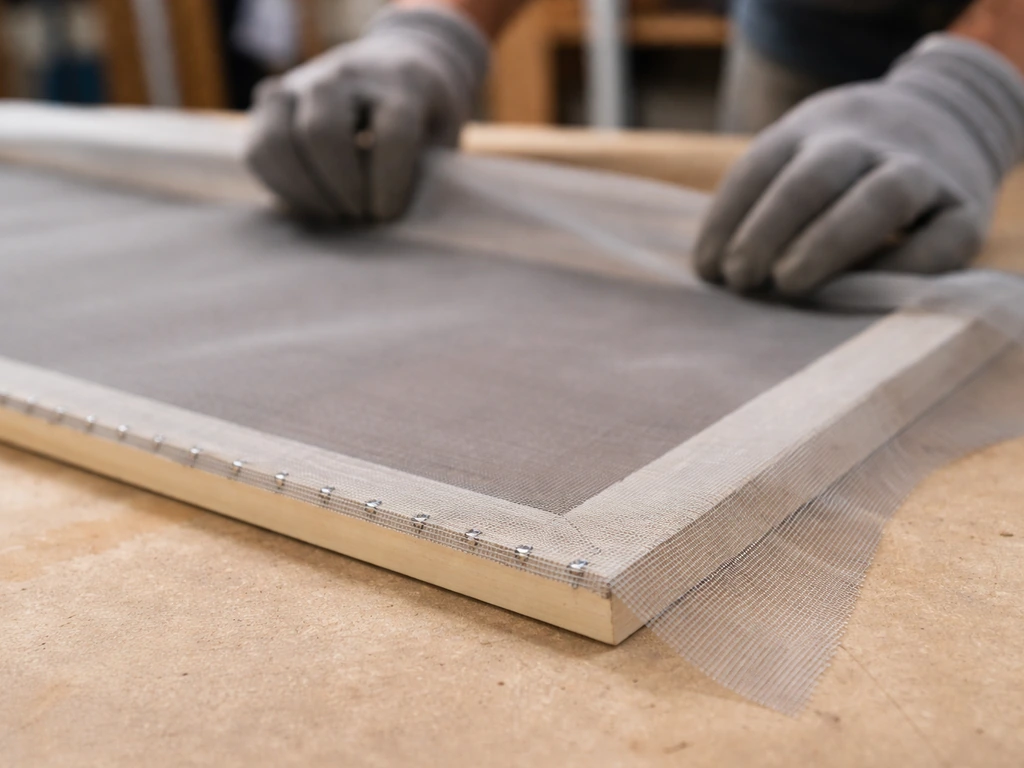
Roll out screen material across the panel frame, leaving 2 to 3 inches of overhang on all sides. Staple one long edge first, starting from the center and working outward. Then pull the screen taut across to the opposite long edge and staple it, again from center outward. Do the same for the short edges.
The goal is even tension without distortion of the mesh pattern. Staple every 3 to 4 inches along all edges using a heavy-duty staple gun with 9/16-inch stainless or galvanized staples. Once stapled, press a vinyl screen spline into a routed groove if you're using a channel system, which gives a cleaner finish and holds the screen more firmly than staples alone.
Trim excess screen with a utility knife held at a slight inward angle so the cut edge tucks behind the spline or trim board.
Step 4: Install screen trim and backer boards
Cover the stapled edges with 1x2 or 1x3 trim boards (cedar or PVC) nailed or screwed over the staples. This protects the screen edge, holds it more securely, and gives the enclosure a finished look. Use a finish nailer with galvanized nails, or pre-drill and countersink screws. At corners, miter the trim at 45 degrees for a clean joint, or butt-join them and fill with exterior caulk.
Set up the door, seal edges, and upgrade bug protection
The door is the weakest point of any screened enclosure for bug infiltration and wear. Take extra care here.
Door framing and installation
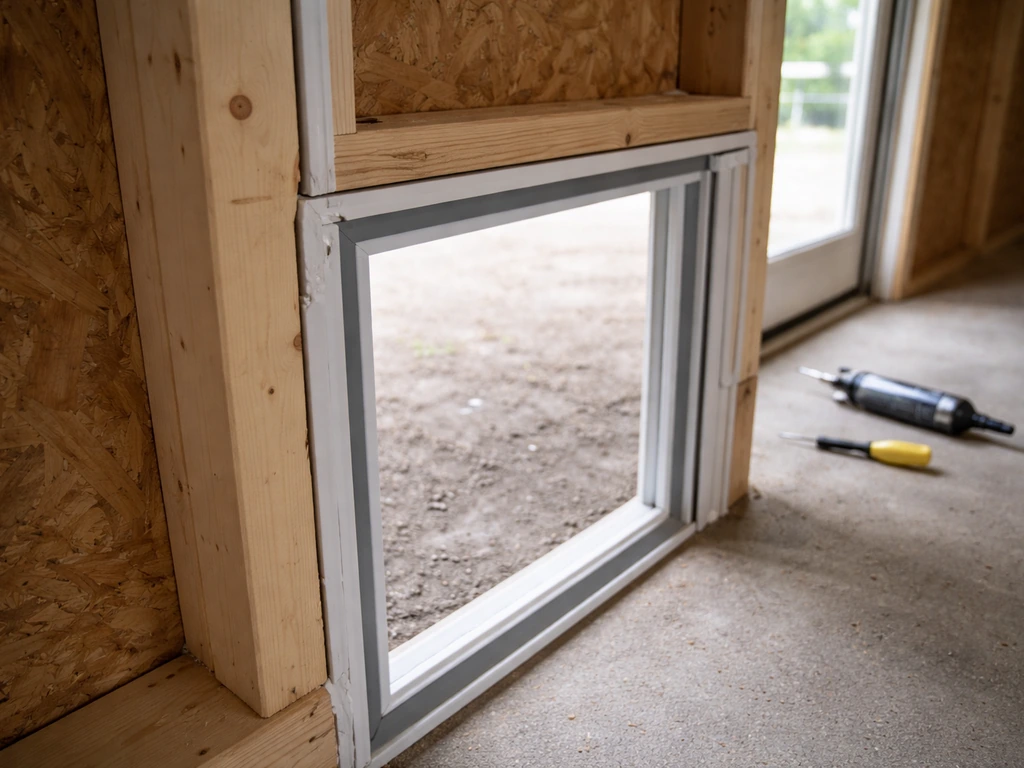
Frame the door rough opening 2 inches wider and 1 inch taller than the door unit. For a 36-inch pre-hung screen door, that's a 38-inch-wide opening. Install a double header above the opening if spanning more than 32 inches. Standard wood-framed screen doors from a home center work fine, but aluminum-framed screen doors hold up better in high-humidity climates and don't warp.
Hang the door with at least two heavy-duty exterior hinges, and set it so it swings outward (easier to use and sheds rain better). Add a door sweep at the bottom and foam or vinyl weatherstrip on the stop on the top and latch side. Self-closing spring hinges (or a dedicated screen door closer) keep the door from being left open by accident.
Perimeter sealing
Bugs get in through gaps you didn't think were gaps. Run a bead of paintable exterior caulk along every joint where the screen frame meets a post, a beam, the house wall, or the slab. At the floor line, where the bottom plate meets the concrete, use a foam backer rod first (for gaps over 1/4 inch), then caulk over it. At the top where the frame meets the soffit or overhead beam, use caulk and press a strip of weatherstripping foam if there's any irregular gap. Pay special attention to where the enclosure meets the house wall: this joint needs to be fully sealed to prevent both bugs and water infiltration.
Wind and weather upgrades
If you're in a region with strong seasonal winds or you want to use the enclosure in cooler weather, consider adding clear vinyl curtain panels that attach to the inside of the screen frame with snaps or hook-and-loop fasteners. These drop behind the screen to block wind-driven rain without permanently enclosing the space. In hurricane-prone areas, removable polycarbonate panels or roll-down shutters are worth the investment. If you're seriously considering making the space season-round, that path leads toward a full sunroom conversion, which is a bigger project but starts with the same framing you've already built.
Finishing touches and keeping it in good shape year-round
A screened enclosure built right will last 10 to 20 years with basic maintenance. Here's how to wrap up the project and keep it going strong.
Weatherproofing the wood frame
If you used untreated or cedar wood for the screen frames and trim, apply a penetrating exterior wood sealer or solid stain within a week of finishing construction. This is especially important on any end grain. Pressure-treated posts don't need sealing for rot protection, but painting or staining them to match keeps them from graying and checking over time. Repaint or reseal every two to three years, or whenever the finish starts to look chalky or cracked.
Seasonal maintenance checklist
- Spring: Inspect all screen panels for holes, tears, and sagging. Even a pinhole lets in mosquitoes, so patch small holes immediately with a screen patch kit (self-adhesive patches cost about $5 and work fine for holes under 1 inch).
- Spring: Check all caulked joints and reseal any cracks. Winter freeze-thaw cycles open gaps fast.
- Summer: After any major storm, check the door alignment and hinges. Wind stress can loosen hardware over a single season.
- Fall: Clear debris from the base of the frame and anywhere leaves collect against the screen. Wet leaves accelerate wood rot and can stain or clog aluminum frames.
- Fall/Winter: If using vinyl wind panels, install them before the first cold spell. Store them rolled (not folded) to prevent cracking.
- Annually: Tighten all post anchor bolts and check that posts haven't shifted or cracked at the base.
Repairing or replacing screen panels
Small holes under 1 inch get a patch. Tears or holes larger than that, or screen that has gone baggy and won't re-tension, means re-screening the whole panel. Remove the trim boards, pull the staples or spline, and rescreen exactly as you did during installation. It takes about 20 minutes per panel once you have the material and tools ready. Keep a spare roll of screen material (the same type you used originally) somewhere dry so you can do repairs without a hardware store run. Fiberglass screen rolls last for years in storage if kept out of UV light.
Your next steps
Start by calling or visiting your local building department to find out if your project needs a permit. Then sketch your patio layout, measure each open side, and decide whether you're doing a full enclosure, partial enclosure, or hybrid. From there, you can calculate material quantities and put together a budget. A 200-square-foot full enclosure with wood framing typically runs $800 to $2,000 in materials depending on screen type and trim choices, and takes two to three weekends to complete.
If you're starting from scratch without an existing covered patio, you'll want to build the overhead structure first before tackling the screen walls. This is especially useful when you're learning how to build a screened-in porch on existing patio because you can build outward from what is already there build the overhead structure first.
And if you want to go further than just screening and eventually close in the space for three-season or year-round use, the framing you build now is the foundation you'll build on.
FAQ
How do I measure for a screened patio enclosure if my patio isn’t perfectly square?
Use diagonal measurements to confirm squareness, then plan the framing so panels reference the larger dimension, not the widest wall. If you have more than about a 1/2-inch difference corner to corner, consider shaving one panel width and keeping the rest consistent so the screen tension stays even across the run.
Can I enclose an existing screened patio without building full-height walls?
Yes, if your goal is pest control along specific areas. A knee-wall hybrid (solid at 18 to 36 inches, screen above) reduces rework and material, but you still need to seal the bottom and side joints where bugs typically enter, especially at the corners.
What’s the correct way to seal the bottom edge if the patio slab has small cracks or unevenness?
Use foam backer rod where gaps are larger than 1/4 inch, then caulk over it. For low spots where caulk alone won’t bridge the void, add a thin shim under trim so the gap doesn’t keep reopening when the materials expand and contract.
Do I need to waterproof the enclosure, or is insect sealing enough?
In many climates you should treat it as both bug control and water management. Seal the top and house-wall joint thoroughly, and make sure any door sill and bottom trim are detailed to shed or redirect water, otherwise water will track behind the screen over time.
How do I prevent screen panels from bowing or loosening after installation?
Install a mid-height horizontal rail for taller panels (over about 4 feet), and confirm each frame is square by measuring diagonals before fastening. Also check screen tension while attaching, you want even pull from center outward so the mesh pattern doesn’t “walk” when stapled.
What type of door setup works best to limit bug entry?
A pre-hung screen door with a tight weatherseal on the top and latch side performs better than DIY adjustments alone. Use a door sweep at the bottom, and add weatherstripping on both the top and hinge/stop edges so the door can’t leave a tiny gap when it sways slightly.
Can I reuse existing screen and framing materials if I’m expanding later?
Sometimes, but only if the material is still taut and undamaged, and the framing is still plumb. If you plan to expand, leave the ends of existing frames “square for attachment” (cap and brace them), so the next section can tie in without creating persistent gaps.
What causes premature corrosion in screened patio enclosures, and how do I avoid it?
Most failures come from using regular zinc-plated hardware outdoors, or from trapped moisture where fasteners contact both wood and screen materials. Use hot-dipped galvanized or stainless fasteners, and avoid sealing over wet areas that can’t dry, particularly near the slab and at post bases.
If I choose aluminum screen versus fiberglass screen, how should I expect the install to differ?
Aluminum is tougher and less forgiving to stretch, so dry-fit frames and clips first. Plan on careful handling around corners and track components because small installation misalignments can show up as uneven tension or binding when spline is inserted.
How often should I recheck and maintain the caulk and screen edges?
Do a quick seasonal inspection, then touch up caulk when you see cracking, pulling away at joints, or any evidence of water paths. For screen repairs, keep the same mesh type so re-tensioning matches the original look and mesh size.
Next Articles
How to Build a Screened-In Porch on an Existing Patio
Step-by-step DIY guide to build a screened-in porch on an existing patio, with framing, flooring, sealing, and permits.
How to Build a Screened Patio: DIY Step-by-Step Guide
DIY step-by-step on building a screened patio, framing, mesh, doors, and weatherproofing for comfort.
Do It Yourself Screened-In Patio: Step-by-Step Build Guide
DIY screened-in patio build guide with materials, tool lists, step-by-step framing, screen install, door, sealing, and u