Closing in a patio comes down to three basic approaches: screen it in to keep bugs out while staying breezy, add polycarbonate or vinyl panels for real weather protection without full construction, or frame proper walls with windows and doors for a true enclosed room. Which one fits your situation depends on how much weather you're trying to block, your budget, and how much of the year you want to use the space. All three are DIY-friendly if you plan carefully, measure twice, and handle the permits before you start swinging a hammer.
How to Close in a Patio: DIY Steps, Options, Costs

Felix Brennan
29 Apr 2026

Decide what 'closing in' actually means for your patio
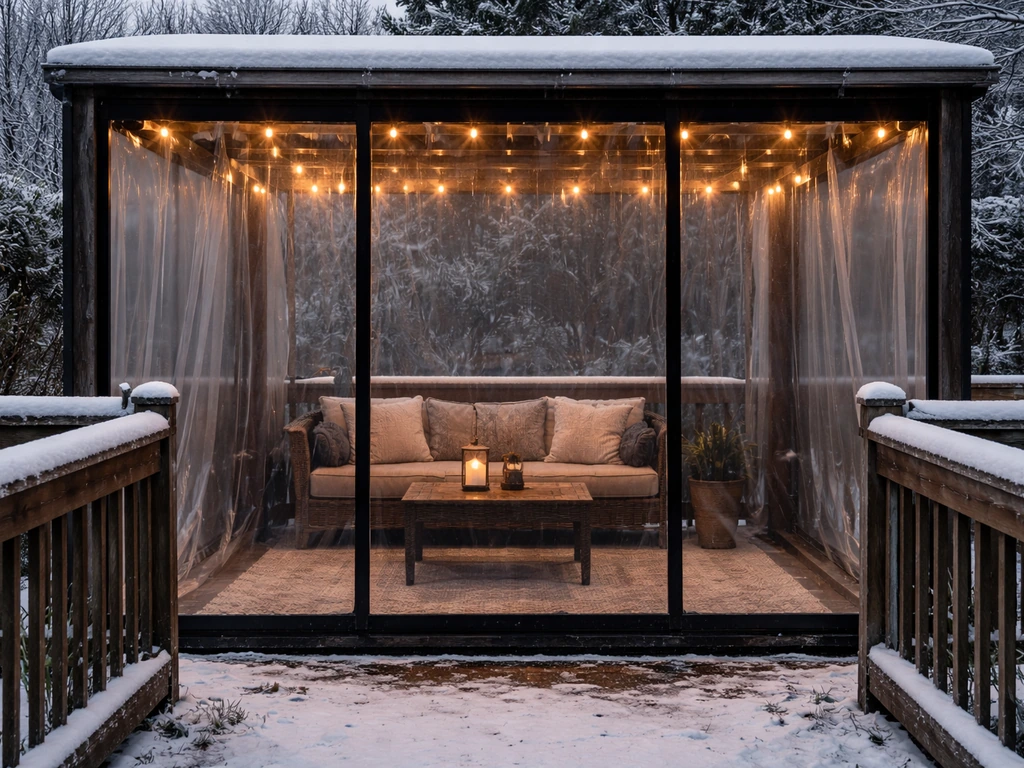
This sounds obvious, but it's worth being specific before you buy a single board. A screened enclosure gives you a bug-free, shaded outdoor room that stays airy and open. Wind passes through pretty freely, which feels great in summer but limits how useful the space is on cold or rainy days. A step up from that is a screen room with a solid roof and heavier framing, which adds more weather protection while keeping good airflow. Then there's the three-season room approach, where you add windows and glazed panels to block rain and wind but still don't insulate or connect to your home's heating and cooling system. At the top end, a four-season sunroom has full insulation, real windows, and HVAC tie-ins, but that's more of a room addition than a patio closure.
For most people reading this, the sweet spot is somewhere between a screened enclosure and a three-season room. You want to be out there more months of the year, stay dry when it rains, and have some privacy from neighbors, but you're not trying to build a full addition. That middle ground is exactly what this guide covers.
| Enclosure Type | Weather Protection | Airflow | Privacy | DIY Difficulty | Relative Cost |
|---|---|---|---|---|---|
| Screen enclosure | Bugs only, no rain/wind block | High | Low | Easy | $ |
| Screen room (framed) | Partial wind/rain under roof | Medium | Medium | Moderate | $$ |
| Three-season room | Rain, wind, some cold | Low (windows open/close) | High | Moderate–Hard | $$$ |
| Four-season sunroom | Full weather and cold | Controlled via HVAC | High | Hard / pro recommended | $$$$ |
Quick site assessment before anything else
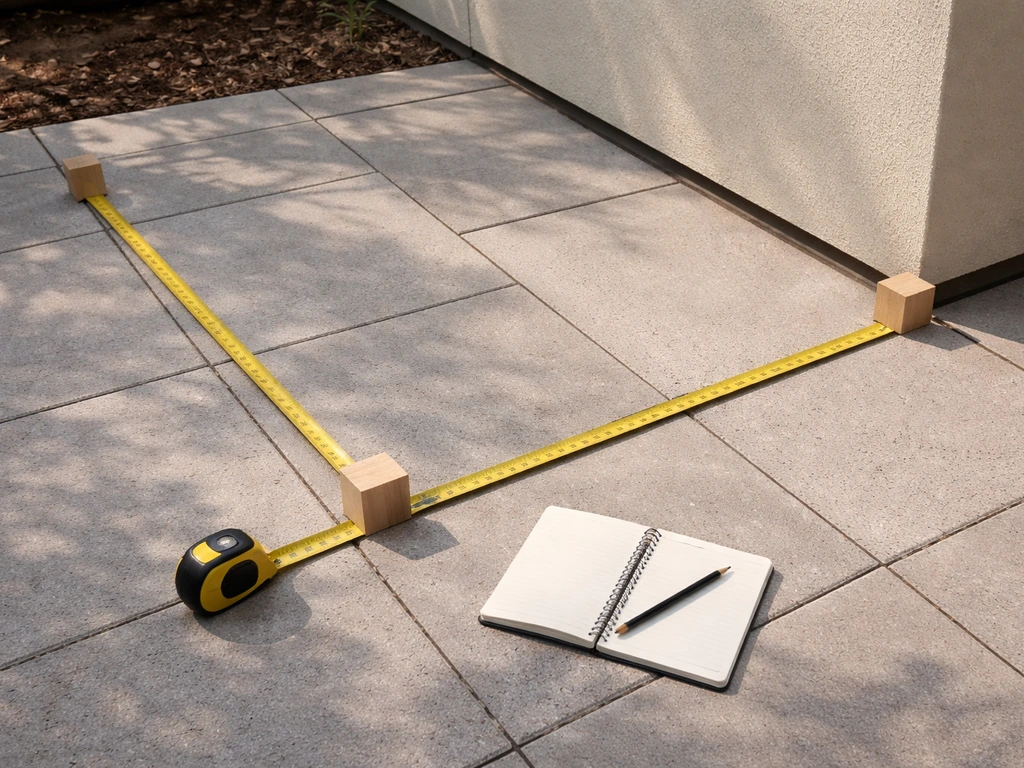
Grab a tape measure and spend 20 minutes on your patio before you do anything else. You need to know the exact footprint: width, depth, and the height from the floor to any existing roof or overhang. If your patio already has a roof or pergola, measure the post spacing and note whether they're anchored into concrete footings. Those details will determine whether you're building a completely new frame or just filling in the open sides of an existing structure.
While you're out there, check which direction the patio faces and where the sun and prevailing wind hit it. A west-facing patio gets brutal afternoon sun; you'll want solid panels or UV-filtering glazing on that wall. A patio open to the north in a cold climate needs better insulation in the panels. Also look at where rain comes from during storms. If water blows in hard from one side, that wall needs a tighter enclosure solution than a simple screen.
Note what's already there: concrete slab or wood deck, any existing posts or beams, how the patio connects to the house wall, and whether there's a ledger board or a header you can tie into. Check the condition of the slab edges, because you'll be anchoring a bottom plate or track to the floor, and cracked or crumbling concrete at the perimeter needs to be patched first. If you have a wood deck, confirm the frame underneath is solid and the joists aren't rotted before you plan on anchoring anything structural to it.
Choosing your enclosure materials and system
The material you choose does the most to determine how hard the build is, how long it lasts, and what the finished space feels like. Here's a practical breakdown of the main options.
Aluminum or vinyl framing systems
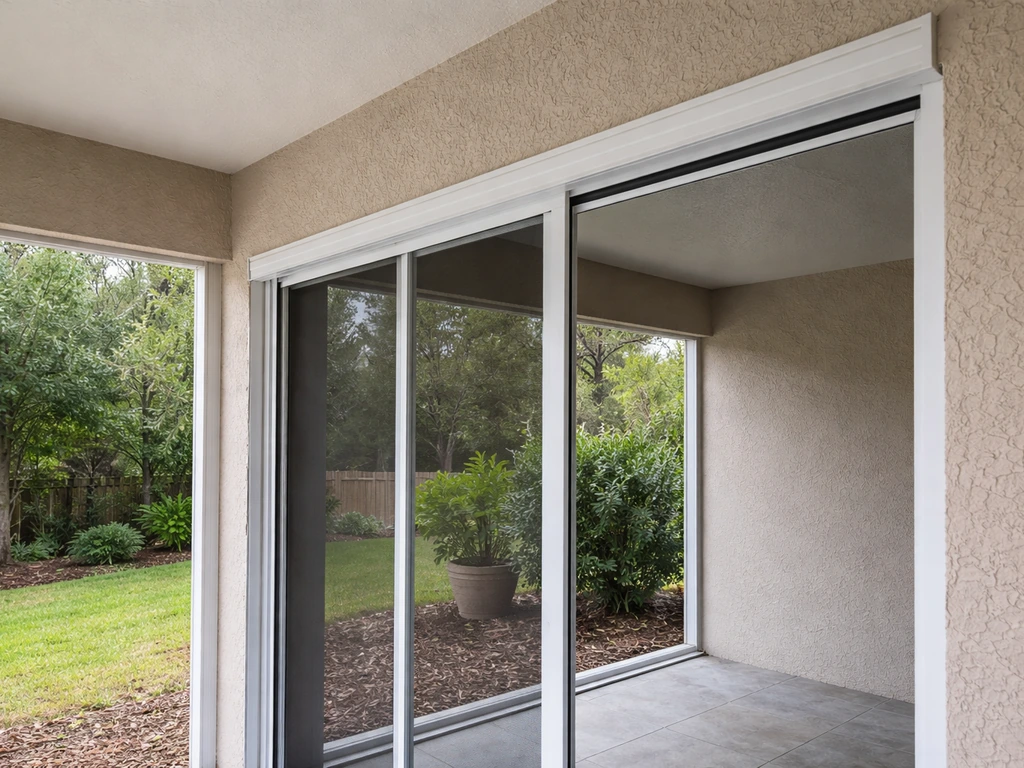
Pre-engineered aluminum or vinyl screen and enclosure systems are the most approachable DIY option. Companies like SNAPP and similar track-based systems let you mount a continuous track to the existing framing, then insert screen or glazing panels. Aluminum framing is more rigid and holds up better in wind; vinyl is lighter and easier to cut. Both are sold in kit form with manufacturer instructions. If you want a clean, finished look without building a full wood frame, this is the approach to start with.
Polycarbonate panels
Multiwall polycarbonate is the budget-friendly upgrade from screens. It blocks rain and wind, transmits light, and is lightweight enough to work with basic tools. It comes in clear, bronze, and opal tints. The material expands and contracts with temperature, so you have to pre-drill oversize holes and use the correct closure profiles and U-channels. One detail that trips people up: you need to drill weep holes in the bottom U-channel profile every 12 inches to let condensation drain out instead of pooling inside the panel channels. Skipping this step causes water to seep out at the bottom seams and looks like a leak.
Vinyl glazing and screen mesh panels
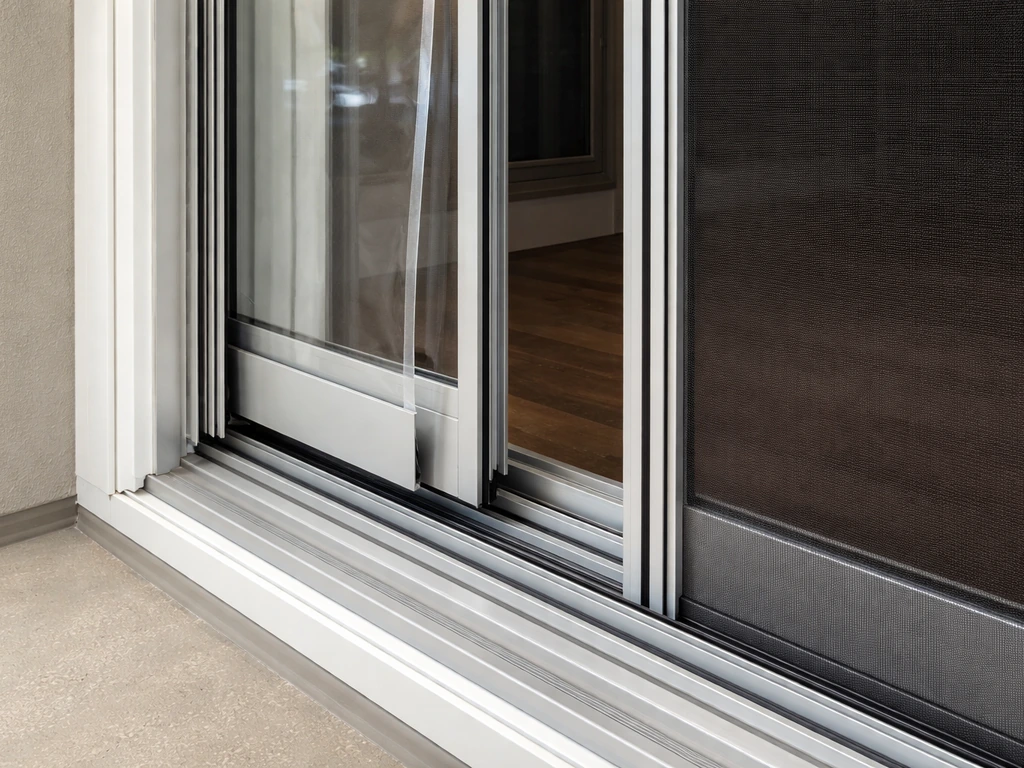
Vinyl glazing panels (the kind used in three-season room systems sold by companies like PorchPros) slide in and out of a track system. In warm months you pop in screen mesh; in cooler months you replace it with clear vinyl glazing panels. This convertible approach gives you the most flexibility across seasons and is fully DIY-replaceable when panels wear out. The downside is that vinyl glazing isn't as rigid or insulating as glass or polycarbonate, and it can yellow or crack over years of UV exposure.
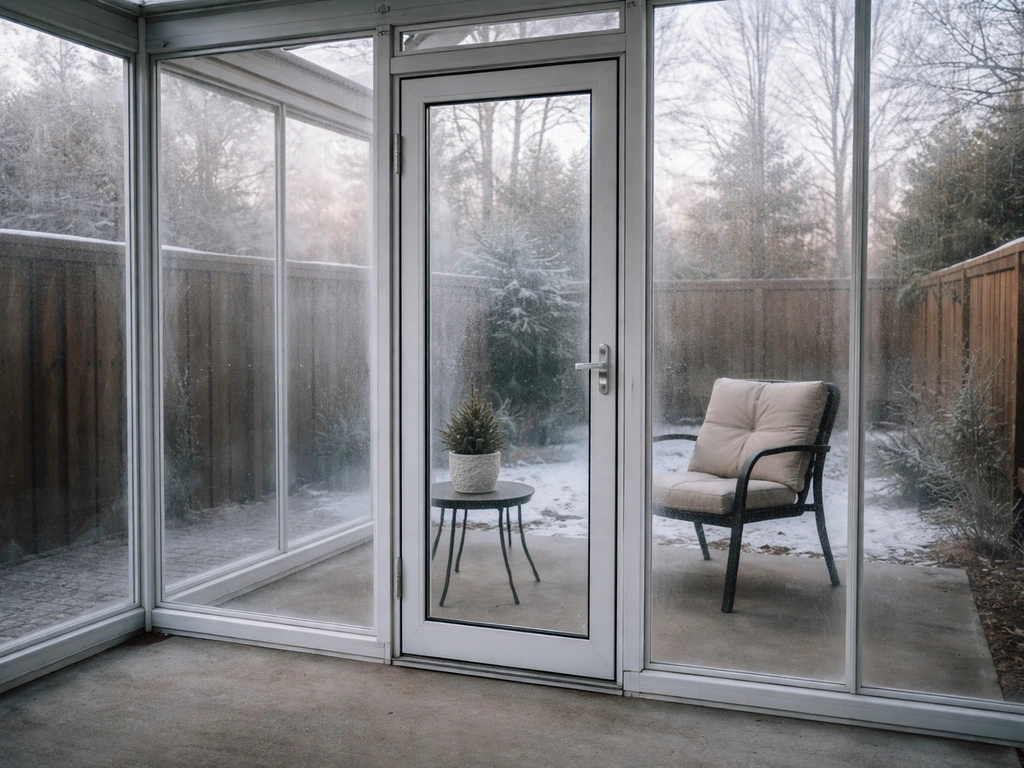
Glass windows and framed walls
If you're building a proper three-season room with wood or metal stud walls and real windows, you're in full light construction territory. This gives you the best result but requires framing, proper rough openings, flashing, and a building permit in almost every jurisdiction. It's doable as a skilled DIY project, but it takes a weekend or more per wall and is less forgiving of measurement errors.
Permits, HOA, and safety requirements you need to check first
Do not skip this step. Many homeowners start building and get a stop-work order that costs them far more than the permit would have. Whether you need a permit depends on your municipality and the scope of work. A simple screen enclosure on an existing roofed patio often doesn't require a permit, but adding any electrical (even a single outlet or light fixture), adding a roof, or framing walls almost always does. The ICC 2021 International Residential Code (Chapter 3) allows certain penetrations and openings for electrical outlets and similar devices, which is why jurisdictions often tie permit and inspection requirements to electrical work and related building changes blank" rel="noopener noreferrer">electrical (even a single outlet or light fixture). Permit requirements typically include a plot plan showing your property with the enclosure location, minimum setback distances from property lines and neighboring structures, and details about the structure itself. Maplewood, MN also notes that building permit requirements for a three-season porch can vary by included work, and blank" rel="noopener noreferrer">separate permits may be required if plumbing, mechanical, or electrical work is part of the project. Some cities require that electrical fixtures be weatherproof rated in outdoor enclosures, which affects what you can install even on a simple project.
Check your HOA rules before the permit office, because some HOAs have restrictions tighter than local code. They may require a specific material, color, or even pre-approval before construction. Getting HOA approval first avoids the scenario where you pass city inspection but still have to tear it down because the HOA wasn't notified.
For the safety side: make sure any footings or anchors you're adding don't hit underground utilities. Call 811 (in the US) before you dig or drill into a slab that might have conduit beneath it. If you're tying the new structure to the house, make sure the connection is properly flashed and water-tight, not just screwed to the siding.
Plan the layout: walls, corners, roof tie-ins, and door locations
Sketch the plan on paper first. Mark which walls are being closed in, where the door will go, and how the new framing will connect to the existing house wall and to any existing roof or pergola. Corners are the trickiest part of any enclosure because you need a continuous vertical post or corner trim piece that both walls can tie into. Plan for a post at every corner and at any opening wider than about 6 feet.
Door placement matters more than people think. Put the door where it gets the most traffic, but avoid placing it on the windward wall if you can. A door on the side that takes direct wind and rain will leak and wear out faster. If you have only one wall to close in, centering the door is usually the cleanest layout. If you're closing three walls, put the door in the wall most sheltered from weather or closest to your indoor kitchen/living room for convenience.
Where the new walls meet the house, you need a proper connection point. If there's existing siding, you'll need to cut a channel, install flashing, and then cover the joint with trim. If the house wall has a ledger or beam you're tying into, great. If not, you'll be lag-screwing a header or top plate into the house framing, which means locating studs or blocking first. Measure the rough opening for any door carefully: measure the width and height of the opening from structural framing to structural framing, not from existing trim to trim. For a standard door, maintain at least a 1/4-inch gap all around between the door unit and the framing to allow for shimming and leveling.
Step-by-step build and installation process
The sequence below works for most DIY patio enclosures, from a basic screen system to a framed three-season room. Adapt the steps to your chosen system, but don't skip the order. Getting ahead of yourself (for example, installing panels before the frame is fully squared and anchored) is the source of most alignment and gap problems.
- Prep the slab or deck perimeter. Patch any cracks in concrete, confirm deck framing is solid, and sweep clean. Mark the layout lines where your bottom plates or tracks will be anchored.
- Install bottom plates or base tracks. For a framed wall, use pressure-treated lumber for the bottom plate since it contacts or is close to the slab. Anchor it with concrete screws (Tapcon or equivalent) at 16-inch intervals. For aluminum track systems, follow the manufacturer spacing requirements and use the correct fasteners for your floor type.
- Set and plumb corner posts. This is your most critical alignment step. Use a level on two faces and brace each post temporarily until the top connection is made. If the posts aren't plumb, nothing else will line up.
- Install the top plate or header. Connect the top of the wall framing to the house header or existing roof beam. If you're tying into the house wall, locate structural framing first. The top plate carries the load of the roof edge if your enclosure roof is part of the assembly.
- Frame intermediate studs or rail supports. For framed walls, space studs at 16 inches on center. For panel systems, space intermediate vertical supports per the panel width of your chosen product, typically every 24 to 48 inches depending on the system.
- Measure and cut rough openings for windows and doors. Remove any temporary framing from the opening areas. Measure the rough opening by recording the distance from framing member to framing member, width and height separately. Allow at least 1/4 inch on all sides between the window or door unit and the rough framing for shimming.
- Install door and window units. Set the unit in the rough opening, shim level and plumb, and fasten through the jamb into the framing. Check operation before final fastening. For screen track systems, mount the track first, then test the screen installation geometry and clearances before securing permanently.
- Install panels, glazing, or screen mesh. Work from the bottom up. For polycarbonate, place the closed end of the sheet at the top (or use top closure profiles) and the open channels facing down into the bottom U-profile where weep holes will drain condensation. For screen systems, stretch the mesh taut and secure per the track system instructions, leaving at least one inch on all sides as clearance per manufacturer guidance.
- Secure all framing and trim connections. Install corner trim, window and door casing, and any vertical or horizontal trim that covers raw framing or panel edges. These aren't just cosmetic: they seal the gaps between panels and framing that would otherwise let in water and bugs.
Weatherproofing, ventilation, and drainage done right

This section is where DIY enclosures most often fall short. Getting the structure up is the easy part. Keeping it dry over years of weather is where details matter. If you’re trying to reduce outside noise, you can take some of the same enclosure steps and choose sound-blocking materials and gaps to improve how quiet your patio feels soundproof a patio.
Flashing at the house wall
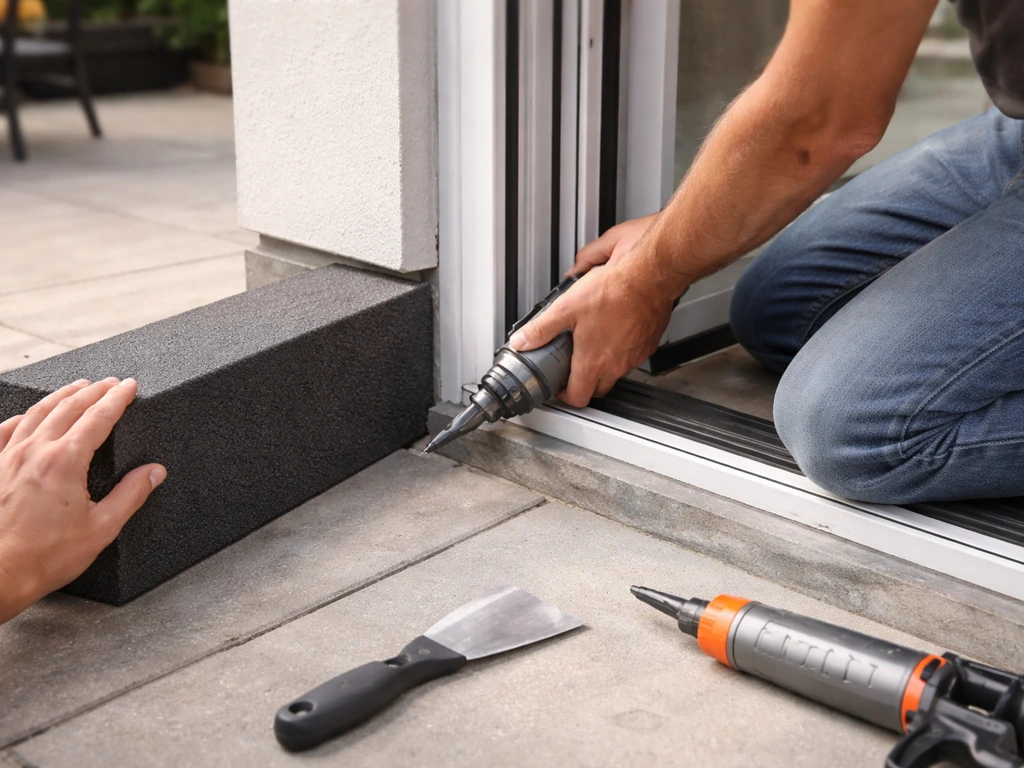
Where your new enclosure meets the existing house wall is the highest-risk point for water intrusion. You need to flash this joint using a shingle-style layering approach: the sill pan flashing goes in first, then side jamb flashing overlaps the sill pan at the bottom corners, and head flashing goes on last so it laps over the side flashing. Every layer directs water down and outward. If you reverse this sequence anywhere, water will run behind the flashing instead of down it. Use self-adhesive flashing tape rated for exterior use, and lap each piece at least 3 inches over the one below it.
Weep holes and condensation drainage
Any track or channel at the bottom of your enclosure needs weep holes so trapped moisture can escape to the outside. For polycarbonate bottom U-channels, drill small weep holes every 12 inches. For aluminum frame systems, check whether the extrusions have pre-made weep slots. If not, drill them. Never caulk over or otherwise block the weep holes during installation or painting. Blocked weep holes are one of the leading causes of water damage in otherwise well-built enclosures because moisture collects inside the track and eventually seeps through the bottom seam.
Ventilation
Even a closed-in patio needs airflow to prevent mildew and condensation buildup. If you're installing operable windows, place them on opposite walls so you get cross-ventilation when they're open. If the roof is part of the enclosure, consider a ridge vent or a vented soffit on at least one wall. For a basic screen enclosure, ventilation takes care of itself, but once you add glazing panels and close the space up, passive airflow needs to be planned in.
Floor and slab drainage
Check that your slab or deck surface drains away from the house. A closed-in patio that collects rainwater blown in under the door or through a gap will pool against the foundation. The slab should slope at a minimum of 1/8 inch per foot away from the house wall. If it doesn't, address that before enclosing, because you won't be able to fix it easily afterward.
Finishing touches, seasonal maintenance, and fixing leaks
Once the structure is up and weatherproofed, the finishing work is what makes it feel like a real room. Paint or stain any exposed wood framing with an exterior-rated product. Install weatherstripping around the door on all four sides. Add door sweeps at the bottom threshold. Caulk the joint between panel edges and framing trim using a paintable exterior caulk, but leave the weep holes open.
For seasonal maintenance, do a walk-around inspection every spring and fall. Check the flashing at the house wall for any gaps or lifting. Look at the panel edges and caulk lines for cracks. Clear any debris from weep holes and bottom tracks so drainage stays unobstructed. If you have vinyl glazing panels, inspect them for yellowing or cracking and replace individual panels as needed since most track systems are designed for panel-by-panel replacement. Screen mesh can be re-splined in the same tracks when it tears.
If you notice a leak after the first rain, don't just caulk over the wet spot. Trace the water back to its entry point, which is almost always either a flashing gap at the house wall, a blocked weep hole causing overflow, or a panel-to-trim gap where caulk has cracked. Fix the source, not the symptom. If your enclosure is getting heavy condensation on the inside in cold weather, that's a ventilation problem, not a leak. Add an operable vent or crack a window to let moist air escape.
If you're planning to use this space through winter, the next logical step beyond closing it in is insulating the walls and floor. Similarly, prepping the enclosure specifically for cold-season use involves a few additional weatherization steps. If you want a complete walkthrough, see our guide on how to winterize a patio prepping the enclosure specifically for cold-season use. For more detailed guidance on how to close in patio for winter, follow the next steps in the cold-season section here. If you want a true insulated patio for colder weather, you will need to add insulation to the walls and floor and seal the joints so warm air stays in. These topics go deeper than what a basic enclosure covers, but they build directly on the foundation you've set up here.
FAQ
Do I need a permit to close in my patio, even if it’s DIY and “only” a screen?
Yes, but only for certain scopes. In many areas, adding walls or any roof changes the structure category and typically triggers permits, while a basic screen install on an existing roofed patio may be treated like an accessory. When in doubt, ask the permit office whether your plan counts as a “structure,” “enclosure,” or “accessory building,” and tell them if you’re adding even low-voltage wiring, ceiling fans, or outdoor lighting.
Can I seal or caulk over the bottom track to stop water leaks?
Don’t rely on just caulk or sealant at the bottom. If you block weep holes, trapped moisture builds inside tracks and can later escape through panel seams, staining the interior trim and causing hidden corrosion. Instead of caulking the track bottom, keep weep openings clear, use flashing where the track meets any wall, and inspect after heavy rain for any sign water is pooling inside the channel.
What should I do if my slab doesn’t slope away from the house?
Most enclosures should be planned for drainage, not flat surfaces. Aim for a patio/slab slope away from the house (a common target is at least 1/8 inch per foot). If you currently have standing water after storms, fix grading or add a drain plan before enclosing, because once walls go up you often cannot correct the water behavior without major demolition.
How can I reduce outside noise when I close in the patio?
Use more than one method. For noise, gaps and air leaks matter as much as the material, so tighten panel-to-frame joints and install proper weatherstripping at the door. For glazing, choose thicker multiwall options where available, and seal corners carefully because sound can leak through small discontinuities at post intersections and at the house connection.
How do I prevent condensation and mildew in a glazed patio enclosure?
Plan for airflow by mixing intake and exhaust points. A common approach is to place operable windows on opposite walls for cross-ventilation, and if you have a roofed section, add a vented high point such as a ridge vent or a vented soffit. If you mainly use sliding panels and rarely open them, you will likely need vents designed for passive airflow, otherwise condensation can increase even when the structure isn’t “leaking.”
Will a patio enclosure hold up in high winds, and does material choice matter?
Not always, especially in wind. Screens reduce airflow, but panels can catch wind loads and stress frames, so if you’re in a high-wind region you may need stiffer framing, closer post spacing, or an aluminum system rather than lightweight vinyl. Before buying, check the manufacturer’s wind rating for your system and compare it to local design wind speeds, and ensure your anchors are into the right substrate (not just surface-level fasteners).
How do I measure and install the patio door correctly?
Measure the rough opening from structural framing to structural framing, not from existing trim lines. Also confirm the door unit’s required clearance for shimming and leveling, and plan the door sill so water sheds outward. If you’re installing into an area with uneven siding or an imperfect header, the cleanest fix is to build a proper rough frame first, then install the door into a square opening.
Where should I put the door if I’m closing in two or three sides?
Yes, but the pattern changes. When you close in multiple walls, you usually choose the door location based on shelter from wind and how you move between indoors and outdoors. If one side is the primary wind and rain exposure, avoid putting the door there, and instead place the door on the most protected wall or the wall closest to your kitchen or living room flow.
If a polycarbonate or vinyl panel cracks, can I replace only that section?
Not usually. Many panel systems are designed for panel-by-panel replacement, which is exactly why small failures do not require scrapping the whole enclosure. Keep extra matching panels, note the panel model and track profile you used, and plan access to replace them from the inside. If your system is mixed, confirm compatibility first, because different profiles do not always seat or seal the same way.
What’s the best way to troubleshoot a leak after the first storm?
If you find water after rain, treat it like a detective problem. Start at the highest-risk zone, the house-wall connection and flashing layers, then check bottom weep holes and overflow inside channels, next examine panel edge-to-trim seams for cracked or failed caulk. If the inside surface is “wet with fog” or heavy condensation without a drip trail, you may have a ventilation issue rather than a true leak.
Can I just close it in and use it through winter without further work?
It depends on your use in colder months. If you want to use the patio through winter, you’ll generally need more than panels, you’ll need weatherization measures like additional sealing and controlled ventilation so warm moist air does not condense inside. Plan this before you close up everything permanently, because improving insulation and sealing later can mean removing panels, reworking trim, or correcting trapped gaps.
What finishing details matter most after the enclosure frame is built?
Don’t assume paint and caulk are one-and-done. Wood framing needs exterior-rated paint or stain for the whole surface, not just the visible faces, and the exterior caulk should be compatible with the materials you’re sealing. For door performance, prioritize weatherstripping on all four sides and a proper door sweep at the threshold, then confirm the bottom seal doesn’t block drainage weep paths.
Next Articles
How to Enclose a Patio for Winter: DIY Step-by-Step
Step-by-step DIY guide to enclose your patio for winter with panels, doors, sealing, condensation control, and a build c
How to Close in a Patio for Winter: DIY Guide
Step-by-step DIY options to close a patio for winter, from quick wind curtains to full screened enclosures and sealing t
How to Soundproof a Patio: DIY Steps That Actually Work
DIY guide for how to soundproof a patio: find leaks, seal gaps, add barriers, enclosure upgrades, and weatherproof mater