Closing off an apartment patio is absolutely doable as a DIY project, but your first move is checking with your landlord or HOA before you buy a single screw. Once you have that green light, the most practical options range from no-drill curtain and shade systems to track-mounted screen panels and semi-permanent polycarbonate infill walls, depending on how much protection you want and what your lease or association rules allow. Most apartment renters land somewhere in the middle: a fabric or screen system that blocks wind, bugs, and nosy neighbors without putting holes in walls or altering the railing structure.
How to Close Off an Apartment Patio: DIY Options

Felix Brennan
29 Apr 2026
Start here: know your constraints before you plan anything
This step sounds boring but it saves you real money and headaches. HOA and association management rules commonly require written approval before any exterior modification, including screens, awnings, patio enclosures, and even exterior wiring. In many cases you have to submit drawings or sketches to the board, and in some jurisdictions those drawings also go to the city. If you skip this and install something without permission, you risk being forced to remove it at your own expense.
Beyond the HOA, actual building permits may be required depending on what you build. Baltimore County requires a permit for weatherproofing an existing porch or deck. Raleigh processes screened porch and balcony work through a formal permit application. Tampa has a full residential screen enclosure permit process with defined stages. If you are a renter rather than an owner, you also need written landlord permission on top of any permit requirements. Get everything in writing, keep a copy, and do not start work until you have approvals in hand.
There are also structural safety rules you cannot ignore. If your patio surface is more than 30 inches above grade, a guard rail is required, and you cannot modify or remove it without engineering review. Residential guard heights are 36 inches minimum (42 inches in commercial settings). Any enclosure wall you build must also preserve required egress openings, meaning a window or door in a sleeping room must remain functional for emergency escape. Do not close off a wall in a way that blocks the one window someone could escape through in a fire.
Measure your patio and check the existing structure

Accurate measurements are the foundation of any enclosure project. Measure inside edge to edge for each opening, working left to right. Write down the width and height of every gap you want to close: the open side faces, the distance between posts or columns, and the height from the floor to the underside of the roof or soffit. If there is no overhead structure, measure to where you plan to terminate the top of any panel or screen system. Round down to the nearest quarter inch so panels fit without forcing.
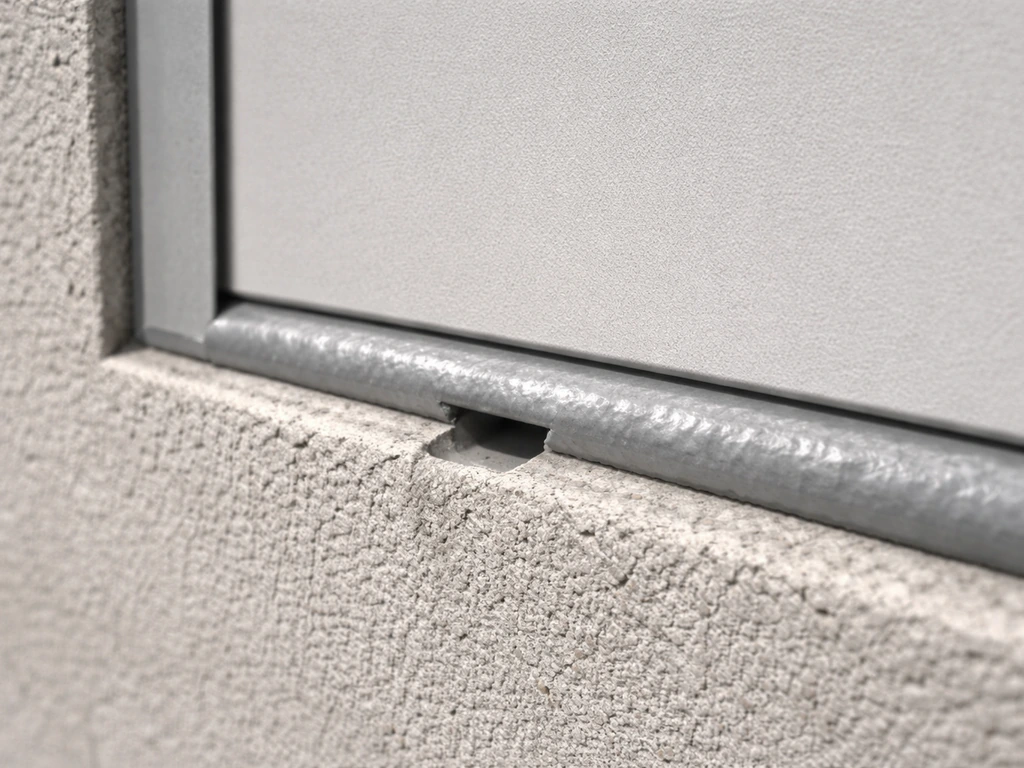
Then inspect what you are attaching to. Check whether the existing posts, walls, or railing are wood, metal, masonry, or composite. Wood and metal framing can usually accept fasteners directly. Masonry requires masonry anchors. Look for any soft, rotted, or corroded spots that would not hold fasteners safely. Check the railing for wobble, and if it moves, fix that before you attach anything to it. Also note whether there is an existing roof overhang above the patio and how far it extends, because that affects your drainage and weatherproofing plan.
Choose the right type of closure for your actual goal
People use the phrase 'close off a patio' to mean very different things, so it helps to decide which problem you are actually solving before you shop for materials. Here is a practical breakdown of the main closure types and what each one does well.
| Closure Type | Best For | Apartment-Friendly? | Approximate Cost Range |
|---|---|---|---|
| Outdoor curtains or shade sails | Privacy, sun, light wind | Yes, no-drill options exist | $30–$200 |
| Roll-down screen or fabric shades | Bugs, wind, sun, privacy | Yes, most are no-drill or tension-mount | $80–$400 per panel |
| Track-mounted screen panels | Bug control, partial wind, airflow | Often yes with landlord approval | $200–$800 installed |
| Polycarbonate or acrylic infill panels | Wind, rain, cold-weather use, some privacy | Requires approval, usually semi-permanent | $300–$1,200+ |
| Clear vinyl or PVC panel systems | Wind and rain with visibility | Rental-friendly track versions available | $150–$600 |
| Fabric wrap or zippered enclosure kits | Full seasonal enclosure, easy removal | Yes, most systems are removable | $200–$700 |
| Framed door or window additions | Full enclosure, weather control | Requires permit and landlord approval | $1,000–$5,000+ |
If your main goal is bug control with good airflow, a screen system is the right call. For wind and rain blocking while keeping visibility, clear vinyl or polycarbonate panels work best. For maximum privacy with easy removal when you move out, heavy outdoor curtains or a zippered fabric enclosure kit is the most practical apartment-renter choice. Full window-and-door framed enclosures are typically owner projects because they require permits and alter the building structure permanently.
Non-permanent vs permanent: what's actually realistic in an apartment
Most apartment renters need to think in terms of reversible. A non-permanent system is one you can remove without leaving damage, or without leaving anything your landlord would call a structural change. That rules out cutting new framing into walls, anchoring large posts into the slab with core-drilled holes, and installing anything that alters the railing height or structure. What it leaves open is a surprisingly wide range of options.
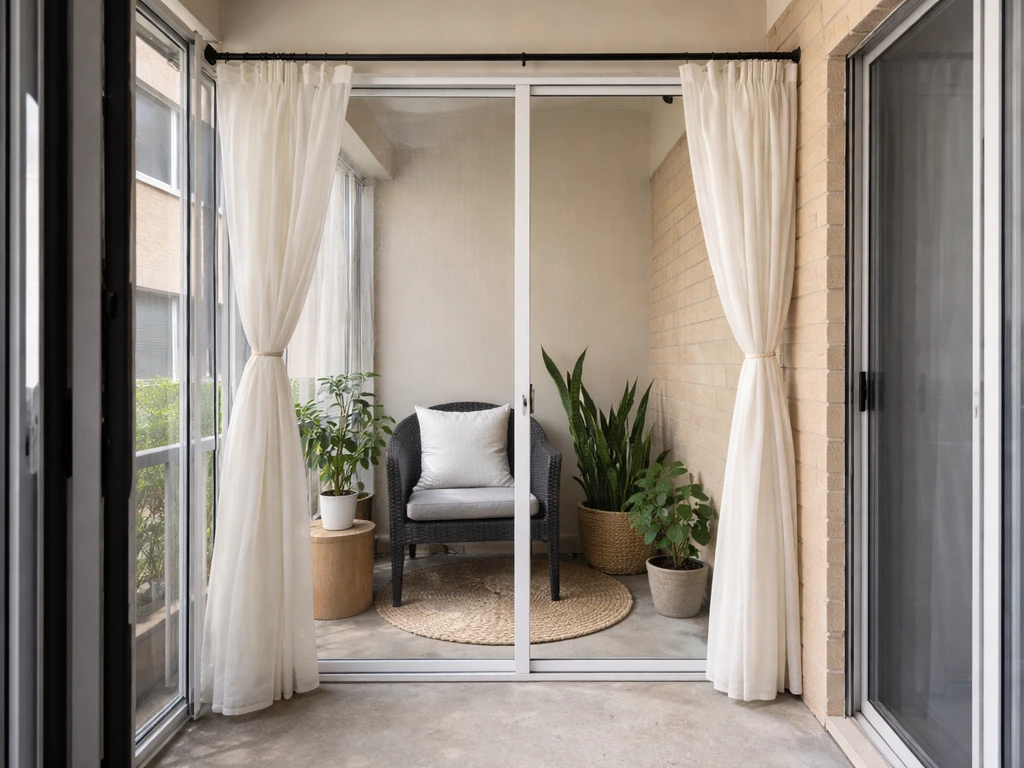
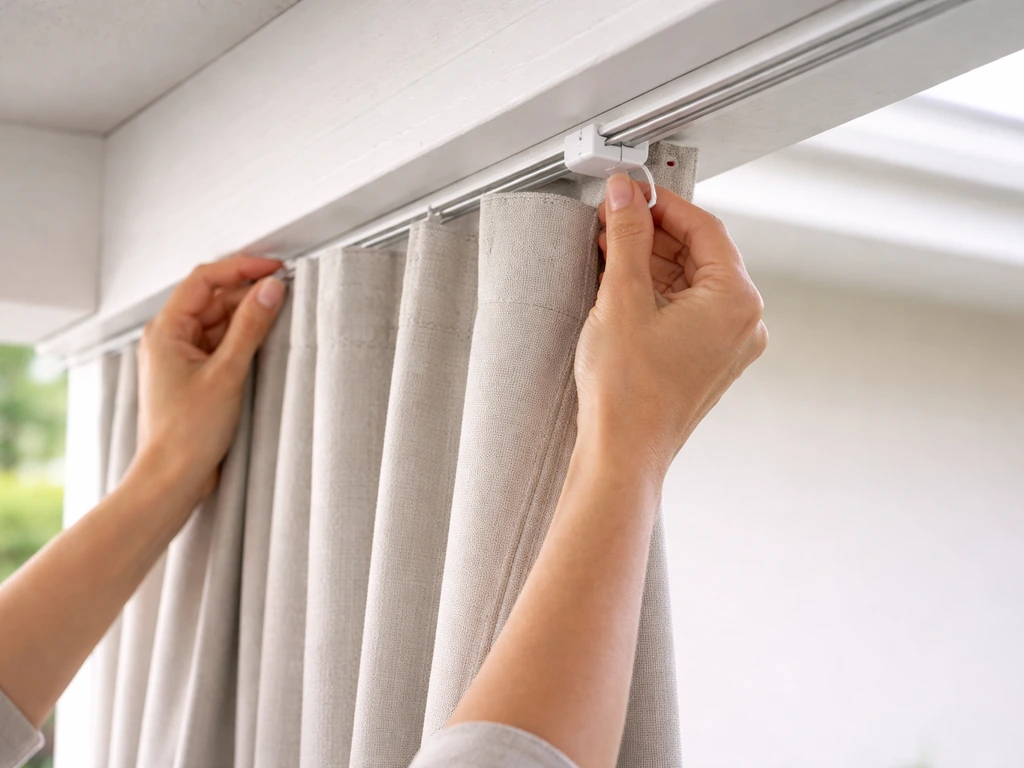
No-drill options include tension-mounted curtain rods that clamp between ceiling and floor, magnetic or adhesive shade mounts on metal surfaces, freestanding privacy screens, and weighted curtain panels hung from overhead beams with zip ties or hooks. These take under an hour to install and you can take them with you when you move.
Semi-permanent options require some fasteners but use minimal holes and are designed for removal. Track-mounted screen systems attach to existing framing or railing with screws and can be unscrewed and patched later. Tension wire systems for outdoor curtains anchor at two points and can be filled with matching caulk on move-out. These are often acceptable to landlords if you ask first and document the condition before installation.
Permanent options, like framed polycarbonate walls anchored to the slab or a full screened room with a new roof, are homeowner-only territory. If you own your condo unit, you still need HOA approval and almost certainly a building permit. The building code requires enclosure walls to maintain a minimum of 65 percent open or glazed area on the longer wall and one additional wall below 6 feet 8 inches from the floor if you want the space classified as a patio cover rather than a habitable room. Crossing that line triggers additional requirements. Related topics like how to fully enclose an apartment patio or how to build a privacy wall go deeper on these permanent approaches. If you want a more complete, permanent-style setup, see the guide on how to fully enclose an apartment patio and what to expect for permits and structure changes.
Materials, tools, and fastening basics
Materials worth knowing about
- Fiberglass or aluminum screen mesh: fiberglass is cheaper and easier to work with; aluminum is more durable and holds its shape better in high-traffic areas
- Polycarbonate panels: choose UV-stabilized versions rated for outdoor use to avoid yellowing and clouding over time; twin-wall polycarbonate adds insulation value
- Clear PVC or vinyl roll panels: flexible, lightweight, and removable; look for 20–30 mil thickness for wind resistance without excessive weight
- Weatherproof outdoor fabric: solution-dyed acrylic (like Sunbrella) holds color and resists mold far better than polyester for curtains and shade panels
- Aluminum track systems: extruded aluminum channel allows screen or panel inserts to slide in and out without fasteners on the panels themselves
- Flashing tape and butyl sealant: used to seal any gap where a panel meets a wall or roof edge to prevent water infiltration
- Pan flashing: installed below any opening where a panel meets a horizontal surface to redirect water to the exterior rather than into the wall
- Marine-grade 316 stainless steel fasteners: the right choice for any outdoor fastening where corrosion resistance matters, especially in coastal areas
Tools you will likely need

- Tape measure and pencil
- Level (a 4-foot level makes panel alignment much easier)
- Drill with appropriate bit set (wood, metal, or masonry depending on substrate)
- Utility knife or screen spline roller and screen-cutting tool for screen systems
- Miter saw or circular saw for cutting aluminum track or framing lumber
- Caulk gun with silicone or polyurethane outdoor sealant
- Pop rivet gun if attaching aluminum track to metal framing
- Safety glasses, work gloves, and a stable step ladder
For fastening into masonry (concrete columns or block walls), use a hammer drill and concrete sleeve anchors sized for your load. For wood framing, 2.5-inch exterior-grade screws work for most panel brackets. For metal railings, use stainless U-bolts or railing clamps rated for the railing diameter rather than drilling through the railing itself, which can weaken it.
How to install the most common apartment patio enclosure styles
Installing outdoor curtains or shade panels (no-drill)
- Measure the height from the ceiling track or overhead beam to the floor, then subtract 1 inch so panels hang freely without bunching.
- If there is no overhead beam, install a tension curtain rod between two walls or columns, or use a ceiling-mounted curtain track with adhesive mounting plates rated for outdoor use.
- Hang weatherproof fabric panels using rust-proof rings or clips. Overlap adjacent panels by 6 inches so wind does not create gaps.
- At the bottom, use curtain weights sewn into hem pockets, or add a bottom tension rod threaded through a rod pocket, to keep panels from blowing up in wind.
- For privacy walls on open railing sides, use freestanding outdoor privacy screens placed inside the railing line and anchored with sandbag bases or furniture feet to prevent tipping.
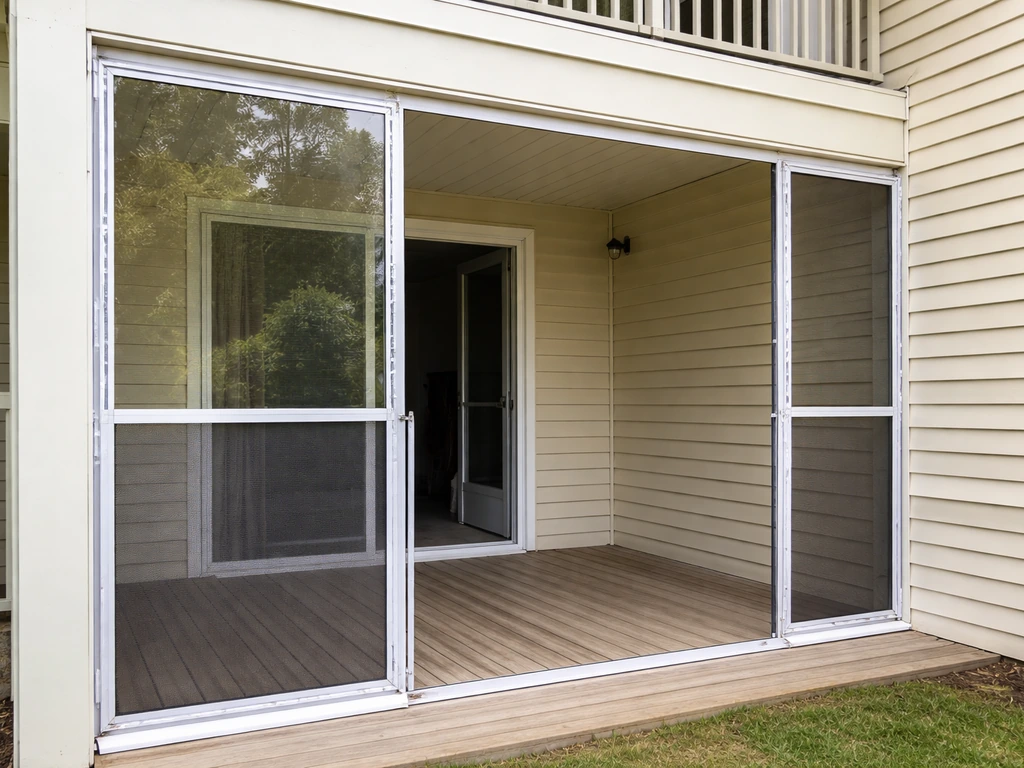
Installing a track-mounted screen panel system
- Measure each opening width and height exactly. Order or cut aluminum screen track to fit, planning for a top channel, bottom channel, and two side channels per opening.
- Mount the top channel first, using a level to keep it straight. Fasten to wood with 1.5-inch stainless screws or to metal with self-tapping screws. For masonry, use plastic anchors and stainless screws.
- Install the bottom channel parallel to the top, then snap in the two side channels. Check for square by measuring diagonally: both diagonal measurements should be equal.
- Cut screen mesh to fit the opening plus 2 inches on each side. Lay the mesh over the track frame.
- Use a screen spline roller to press the rubber or foam spline into the channel groove, starting at one corner and working around the perimeter. Trim excess mesh with a utility knife held at an angle along the outer edge of the channel.
- Test each panel for tension and check all four corners for gaps. If a corner gaps, remove and re-roll that section of spline.
- For sliding or removable panels, install a locking clip or turn-button at the top channel so panels can be removed in winter or for cleaning.
Installing clear vinyl or polycarbonate panel infill
- Measure each opening and cut panels to fit with a circular saw using a fine-tooth blade. Polycarbonate cuts cleanly; clear vinyl can be scored and snapped for straight cuts.
- Install a pressure-treated wood nailer or aluminum angle iron around the opening perimeter to create a lip for the panel to seat against. Fasten the nailer to existing framing or railing posts.
- Set the panel into the opening and clamp it temporarily while you drill pilot holes through the panel and into the nailer. Use oversized pilot holes in the panel itself (about 1/8 inch larger than the fastener diameter) to allow for thermal expansion.
- Fasten with stainless screws and neoprene washers to cushion the panel and prevent cracking at fastener points.
- Seal the perimeter gap between the panel edge and the nailer with a flexible silicone caulk rated for outdoor use. Do not use rigid caulk, as expansion and contraction will crack it.
- Apply pan flashing tape at the bottom edge where the panel meets any horizontal surface to direct water outward rather than inward.
- Check for any gap at the top where the panel meets an overhead soffit or beam and seal with butyl flashing tape integrated with the wall surface.
Installing a zippered fabric enclosure kit
- Choose a kit sized to your patio dimensions, or buy modular panels and a zip-together system designed for patios or pergolas.
- Attach the top Velcro or hook-and-loop mounting strip to the underside of the overhead beam or fascia using adhesive-backed hook tape rated for outdoor use, or with staples into wood.
- Hang the fabric panels from the top strip and connect adjacent panels with the zipper or snap system along vertical edges.
- At the bottom, use the included ground stakes (for patios with soil borders) or loop the weighted hem over a bottom rail or railing top cap.
- Unzip one or more panels for access and ventilation on mild days. The system fully removes for storage in off-season if your climate requires it.
Weatherproofing, drainage, ventilation, and privacy finishing
Water and drainage
Water management is where most amateur enclosures fail. Any horizontal joint where a panel or frame meets a wall or overhead structure is a potential leak point. The rule is simple: lap upper materials over lower materials so water always sheds outward, and never let water pool against a seam. Install pan flashing at the base of any wall opening to catch incidental water and direct it to the exterior. Weep holes (small openings at the bottom of a track or frame channel) allow moisture that gets inside a cavity to escape rather than rot the structure from inside. Keep weep holes clear of debris every season.
Ventilation and condensation control
A fully enclosed patio with no airflow will sweat. Condensation forms when warm moist air hits a cool panel surface, and it can cause mold on furniture, staining on floors, and corrosion on metal frames. The fix is cross ventilation: place openings on opposite sides of the enclosure so air moves through rather than stagnating. For screen enclosures this happens naturally. For panel enclosures, plan for at least one operable vent panel or a louvered opening near the top of one wall and an openable panel or door on the opposite side. Opening a corner panel an inch also helps significantly.
Wind resistance
Wind loads matter more than most people expect. A flat panel exposed to a 40 mph wind is under real stress, and a panel that is lightly anchored will rattle, flex, and eventually fail at the fastener points. Any semi-permanent panel system should be attached at no more than 24-inch intervals along its perimeter. For high-wind areas, consult local code for required wind load ratings, because roof additions including patio covers must be engineered or tested to meet applicable wind speeds and uplift pressures. For apartment renters using removable systems, simply take down fabric panels when a storm is incoming rather than trying to engineer them for extreme wind.
Privacy finishing
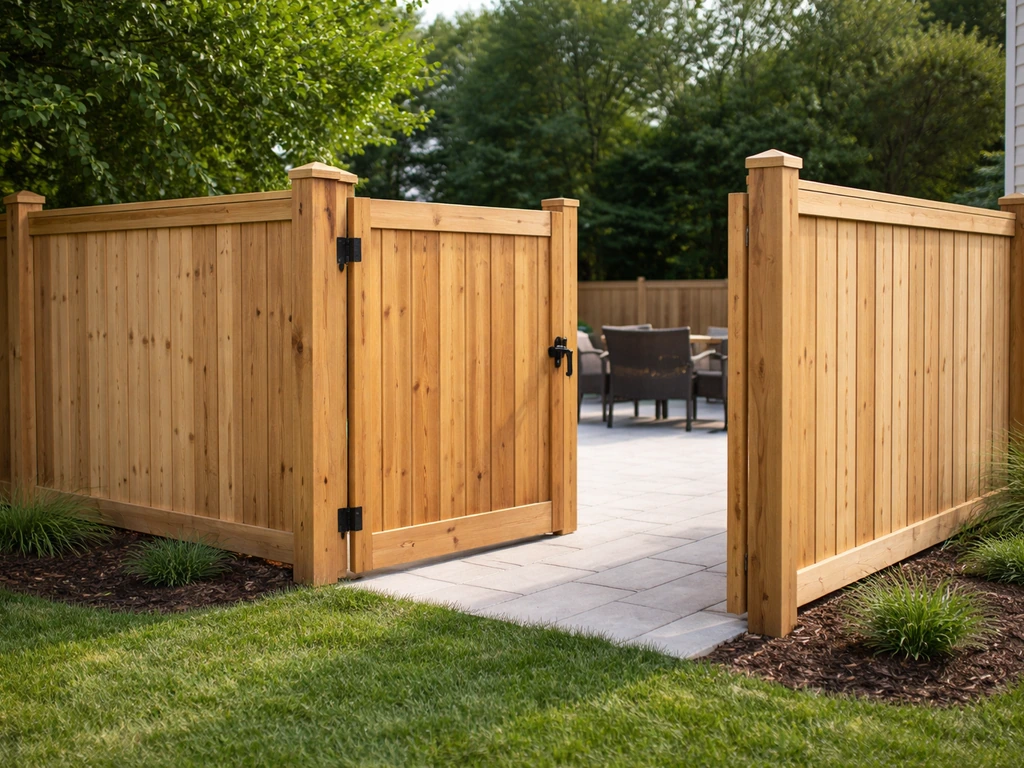
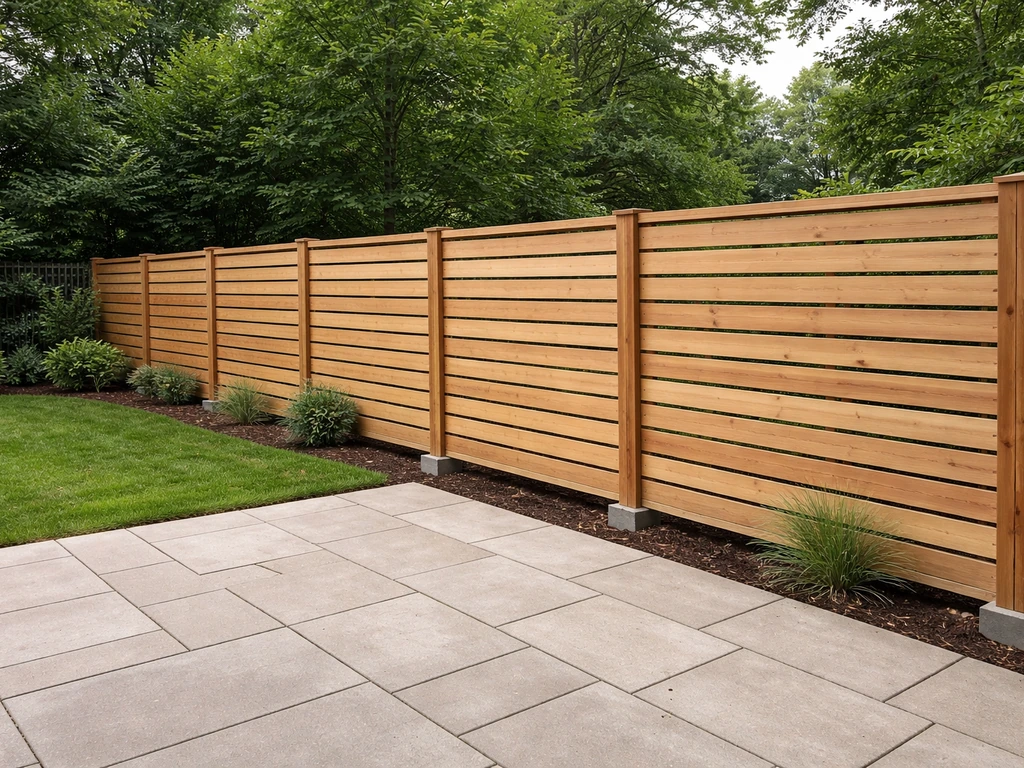
If privacy is your main goal alongside weather protection, layering works better than a single solution. A screen or polycarbonate panel blocks bugs and wind but does not prevent someone from seeing in. Adding an interior curtain layer, frosted window film on clear panels, or a tighter-weave privacy screen mesh (70-percent shade cloth or higher) solves that without adding structural complexity. For partial privacy at railing height, lattice panels or bamboo roll shades attached to the railing face are both affordable and landlord-friendly because they are easily removed. Fencing off a patio or building a dedicated privacy wall are deeper dives if you want to go further in that direction. If you are trying to fence in an apartment patio specifically for privacy and weather protection, you will want to compare enclosure styles that stay reversible and HOA compliant Fencing off a patio. If you are aiming for more than privacy, this guide on how to fully enclose an apartment patio covers the options and expectations for permits and structure changes privacy wall.
Maintenance, seasonal care, and your next-step checklist
Routine and seasonal maintenance
Screen enclosures need the least maintenance but the most inspection. At the start of each season, rinse the screens with a garden hose to clear dust, pollen, and spider webs, then walk the perimeter checking for loose spline, torn mesh, or panels that have shifted in their tracks. Tighten any loose screws and re-roll spline where it has started to pull away from the channel. Polycarbonate and vinyl panels should be cleaned with mild soap and water only (no abrasive cleaners that scratch the surface) and inspected for any cracks at fastener holes, which signal that thermal expansion is stressing the panel. Replace cracked panels before they fail completely in wind.
Fabric systems should be removed and stored if you have freezing winters, as ice and snow load can destroy stitching and break frame components. Before storage, spray with a fabric protector appropriate for the material and let dry completely to prevent mildew in storage. When you reinstall in spring, check all mounting hardware for rust and replace any corroded fasteners with new stainless ones.
Pre-start checklist: approvals, permits, and materials
- Get written landlord or HOA approval before purchasing any materials, including a description of what you plan to install and how it will be attached
- Check with your local building department whether a permit is required for your specific closure type (screened porches, weatherproof enclosures, and structural additions commonly require permits)
- If a permit is required, prepare basic drawings showing existing patio dimensions, proposed enclosure dimensions, height above grade, and railing information
- Verify that your planned enclosure will not block any required egress opening (emergency escape window or door) in an adjacent room
- Confirm your railing height meets local code (minimum 36 inches residential) and that you are not planning any modification that lowers or removes the guard
- Measure all openings inside edge to edge and record dimensions before ordering materials
- Choose a fastening method appropriate for your substrate (wood, metal, masonry) and confirm fasteners are stainless steel or otherwise corrosion-rated for outdoor use
- Have your sealant, flashing tape, and weep-hole plan figured out before you start installing panels
- Plan your ventilation: identify where cross-ventilation openings will be before you close off the last wall
Quick path recommendation based on your main goal
| Your Main Goal | Recommended First Step | Best System |
|---|---|---|
| Bug control with good airflow | Get landlord/HOA approval | Track-mounted fiberglass screen panels |
| Privacy from neighbors | Check if freestanding screens are allowed | Freestanding screens or heavy outdoor curtains |
| Wind and rain blocking | Check permit requirements | Clear vinyl roll panels or zippered fabric enclosure kit |
| Year-round temperature comfort | Consult HOA and building department | UV-stabilized polycarbonate infill with operable vent panel |
| Full seasonal enclosure (owner) | Submit permit application with drawings | Framed screen or panel system with permit and engineering |
The most common mistake is skipping the approval step and installing something that works beautifully for one summer before you get a removal notice. Do the paperwork first, keep your receipts and approval emails, document the patio condition before you start, and you will have a space that is usable, legal, and yours to enjoy for as long as you live there. Do the paperwork first, keep your receipts and approval emails, document the patio condition before you start, and you will have a space that is usable, legal, and yours to enjoy for as long as you live there, and if you also need to disable any connected gas line, see how to disconnect patio gas as the related safety step.
FAQ
Do I need HOA approval for removable curtain or screen systems that do not drill into the building?
Often yes. Even if the hardware clamps or uses adhesive, many HOAs consider anything attached to exterior surfaces or visible from common areas an exterior modification. Ask what qualifies as “removable” versus “installed,” and request written approval that specifies the exact kit, mounting method, and where it will be placed.
What should I do if my landlord says yes verbally but not in writing?
Do not start work. Request a written addendum to your lease or an email approval that includes the enclosure type, where it will be mounted, and whether you must remove it at move-out. Save screenshots and receipts, because enforcement notices are typically tied to written permission.
Can I attach to the patio railing if it feels sturdy but wobbles slightly?
A small wobble can turn into a fastening failure under wind load. Tighten or repair the railing first, confirm it is secure to the structure, then only attach to the repaired components. If the railing is loose at its base, the enclosure should not be mounted until it is corrected.
How much spacing do I need between panels and the roof soffit to prevent leaks and rubbing?
Leave a small clearance for expansion and for water shedding. Avoid forcing panels tight against wood or trim where they can trap water or bind when temperatures change. When in doubt, follow the kit’s stated gap and keep seams so water can run outward rather than into a corner.
What’s the difference between “close off” for privacy and “close off” for weather protection?
Privacy solutions usually require narrower airflow but still manageable ventilation, like layered curtains, shade film, or mesh. Weather protection often needs more continuous barrier coverage and careful water management, like overlapping panels and flashing at bases. Mixing approaches without planning can increase condensation or create leak points at seams.
Will a partially enclosed patio cause condensation, and how can I prevent mold?
Yes, especially if you block airflow on all sides. Plan at least one vent path from intake to exhaust, such as a higher operable vent on one side and an openable panel or door on the opposite side. If you can only do one opening, place it higher to encourage stack ventilation.
Are weep holes and pan flashing really necessary for semi-permanent systems?
They matter even for renter-friendly setups. If your system creates a bottom track where water can collect, use pan flashing or a drip strategy at the base so incidental water drains outward. Keep weep openings clear so trapped moisture can escape instead of rotting fastener holes or channels.
How do I choose between screen panels and polycarbonate if I also want some privacy?
Screens provide bug blocking with airflow, but they have line-of-sight. If you need more privacy, add a secondary layer like frosted film on clear panels, a tighter-weave mesh panel at railing height, or a curtain inside the enclosure. This keeps airflow while improving visibility control.
Can I install the enclosure over an existing patio surface that is uneven or slopes?
Yes, but you must account for leveling at attachment points. Uneven surfaces can create gaps where water pools and can misalign panels in tracks. Measure multiple points along the run, plan for shimming where appropriate, and ensure the bottom edge slopes so water drains away from seams.
What should I check for electrical or safety hazards before mounting anything near the patio?
Look for outdoor outlets, low-voltage wiring, doorbell transformers, and any gas-related shutoff hardware in the patio area. If your enclosure requires moving around those components, stop and get guidance, because alterations can violate lease rules and create safety risks. If you suspect a connected line is affected, address the gas issue separately before building.
Do wind events require different installation spacing than the rest of the year?
For semi-permanent panel systems, do not reduce attachment spacing to “lightly anchored.” Use the recommended perimeter spacing (the article notes 24-inch intervals for semi-permanent panels) and make sure panels can be secured or removed before storms. If you cannot remove them quickly, consider using a system designed for higher wind exposure.
What’s the safest way to make an apartment patio enclosure removable for move-out?
Use a reversible mounting method that does not require cutting framing or drilling into critical structural elements. Prefer track systems that can be unscrewed and patched, clamp systems that avoid fastener holes, and curtains designed to detach cleanly. Document the condition after installation so you can restore it to the original state if required.
How do I measure correctly if my patio has angled corners or non-rectangular openings?
Measure each opening individually, including corner angles. The cleanest approach is to map each gap from inside edge to inside edge, then subtract any overlap your kit requires. Rounding down to a small fraction helps prevent forcing panels, but do not round so much that you create wide daylight gaps.
What maintenance schedule should I follow so screens and panels stay safe and secure?
At the start of each season, inspect fasteners, track alignment, and any spline or seals. Rinse screens to remove pollen and debris, tighten loose screws, and replace torn mesh. For polycarbonate and vinyl, use mild soap and water to avoid surface damage, then check for cracks near fasteners from thermal stress.
Next Articles
How to Enclose an Apartment Patio: DIY Step-by-Step
Step-by-step DIY plan to enclose a first-floor apartment patio with screen or glass panels, doors, sealing, and permits.
How to Fence Off a Patio: DIY Steps, Materials, and Tips
Step-by-step DIY plan to fence off a patio: layout, posts, gate, materials, obstacles, and upkeep for privacy and safety
How to Build a Privacy Wall for Patio: Step-by-Step DIY
Step-by-step DIY plan to build a patio privacy wall, choosing materials, permits, footings, framing, finishes, and maint