You can enclose a first-floor apartment patio yourself, but the sequence matters: get written permission from your landlord or HOA before you buy a single screw, then measure carefully, choose a removable or semi-permanent enclosure system (screen, clear panel, or hybrid), frame it using attachment methods that don't damage the building, seal every gap for bugs and weather, and plan for a simple twice-yearly maintenance routine. Done in that order, you get a genuinely usable outdoor room without risking your lease or security deposit.
How to Enclose an Apartment Patio: DIY Step-by-Step

Felix Brennan
29 Apr 2026
Can you even do this? Permissions, leases, and HOAs first
This is the step most people skip, and it's the one that can cost you thousands. Standard lease language typically forbids any alteration to the premises without prior written landlord consent, and most clauses require you to submit your request at least 30 days before you start work. The landlord usually has the right to deny anything that affects the building's exterior appearance or structural systems, and many leases require you to restore the patio to its original condition when you move out. That restoration clause alone should shape every material decision you make.
HOAs and condo associations layer on their own approval requirements. They routinely require advance committee review for any exterior modification, including enclosing a patio or porch. Some HOAs restrict screen mesh color, specify whether you can extend a roof line or must keep a screen-only enclosure, and require you to sign an affidavit of HOA awareness as part of the municipal permit package. Check your CC&Rs (the HOA's governing documents) before your landlord conversation so you know exactly what restrictions apply.
Permits are the third leg of this stool. Cities like Tampa have dedicated residential screen enclosure permit applications separate from general building permits. Coral Springs requires two signed and sealed plan sets from a licensed architect or engineer. Jacksonville ties permit classification to whether your walls are open-screened versus translucent glass, and whether existing doors or windows must stay in place. Miami-Dade publishes a permit exemptions list that sometimes covers lightweight non-wind-resistant structures, so it's worth checking your local exemptions before assuming you need a full permit or before assuming you don't need one at all. The Florida Building Code's R4403 section, for example, requires vinyl or acrylic glazed panels to be removable and governs wind loads on screen surfaces based on solid-to-gross area ratio. Your municipality will have equivalent rules.
Here's your practical first-day checklist before you do anything else:
- Pull your lease and read the alterations clause word for word. Note the required notice period and any restoration language.
- Write a brief written request to your landlord describing what you plan to build, the materials, and whether the installation is reversible. Keep a copy.
- Download your HOA's CC&Rs and look for sections on exterior modifications, screen enclosures, and patio improvements.
- Contact your city's building department and ask specifically about screen enclosure or patio enclosure permits for a residential rental unit. Ask whether your enclosure type needs signed/sealed engineer plans.
- Check your city's permit exemptions list for lightweight structures.
- Do not purchase materials until you have written landlord approval and know your permit path.
Measure, inspect, and map your patio layout

Once you have the green light, go outside with a tape measure, a notepad, and your phone camera. Accurate dimensions are the difference between a clean enclosure that fits and a frustrating rebuild. Measure every dimension twice and photograph the patio from all four corners before you start planning anything on paper.
Start with the overall footprint: width and depth from wall to railing or slab edge. Then measure the height from the patio slab to the underside of the overhead structure (soffit, roof overhang, or open sky). Note every obstruction: hose bibs, electrical outlets, light fixtures, gas shutoffs, drain locations, and existing railing posts. Be sure you know how to shut off and disconnect any patio gas line safely before you start work disconnect patio gas. These are your constraints and your anchor points.
Inspect the existing surfaces carefully. Check the slab for cracks or unlevel sections that will affect how framing sits. Look at the overhead structure: is there a solid soffit you can attach to, or is it open framing? Is the building wall behind you concrete block, wood frame, stucco, or brick? This matters for fastener selection. Probe any wood components for softness or rot before planning to attach anything structural to them.
- Overall width (wall to outer edge) and depth (front to back)
- Clear height at the building wall and at the outer edge (these often differ)
- Location of every existing penetration: electrical, gas, water, drain
- Railing height and post spacing if a railing exists
- Overhead structure type and material (concrete soffit, wood fascia, open rafter tails)
- Building wall material at the attachment line
- Prevailing wind direction and sun angle (note which walls get morning vs. afternoon exposure)
Sketch a simple top-down plan to scale, even if it's just graph paper. Mark where you want the door, which walls will be screened or paneled, and where your main entry into the apartment is. A scaled sketch catches conflicts before they cost you money.
Choose your enclosure type and materials
There are three main directions to go: screen enclosure, clear/glazed panel enclosure, or a hybrid of the two. Each has a different cost, feel, reversibility level, and permit complexity. Here's an honest comparison to help you decide.
| Type | Best For | Visibility | Weather Protection | Cost Range | Reversibility |
|---|---|---|---|---|---|
| Screen enclosure | Bug control, airflow, warm climates | Excellent | Wind/rain partial | $ Low-Mid | High (removable frames) |
| Clear polycarbonate panels | Year-round use, cold or rainy climates | Good (slight tint) | Strong | $$ Mid | Moderate |
| Tempered glass panels | Maximum clarity, premium look | Excellent | Excellent | $$$ High | Low (heavier, permanent feel) |
| Vinyl/PVC curtain panels | Budget, seasonal use, renters | Good | Moderate | $ Low | Very high (fully removable) |
| Hybrid (screen + clear inserts) | Flexibility across seasons | Good to excellent | Good | $$ Mid | High (inserts swap out) |
For most apartment renters, a screen enclosure with removable clear vinyl or polycarbonate inserts for winter is the sweet spot. It's the least likely to trigger a permit requirement, the easiest to reverse at move-out, and it handles the two biggest complaints about open patios: bugs and wind. Some HOAs limit screen mesh to specific colors (charcoal or black are common), and some jurisdictions cap screen mesh density at 20x20 mesh, so check before ordering.
If you're leaning toward a full glazed or glass enclosure, understand that this starts to look like a sunroom to building departments, and Jacksonville-style sunroom categories require stricter egress compliance and may prohibit removing existing windows or doors from the host structure. That's a meaningful permit and design constraint for an apartment renter.
Material recommendations for renters specifically
- Aluminum extrusion screen framing: lightweight, corrosion-resistant, available in DIY kits, easy to disassemble
- Fiberglass screen mesh in charcoal 18x16 or 20x20 (check local rules): won't rust, holds shape better than aluminum mesh
- Clear vinyl panels (8-12 mil thickness): inexpensive, removable, adequate for wind and light rain
- Twin-wall polycarbonate panels: more rigid than vinyl, better insulation, still cuttable with basic tools
- Self-tapping screws and anchors rated for the base material (masonry anchors for concrete walls, structural screws for wood)
Design details: doors, panels, airflow, and sealing
A good enclosure design answers four questions before framing starts: Where does the door go? How does air move through the space? How do you get in and out in an emergency? And where are the gaps that bugs and water will find first?
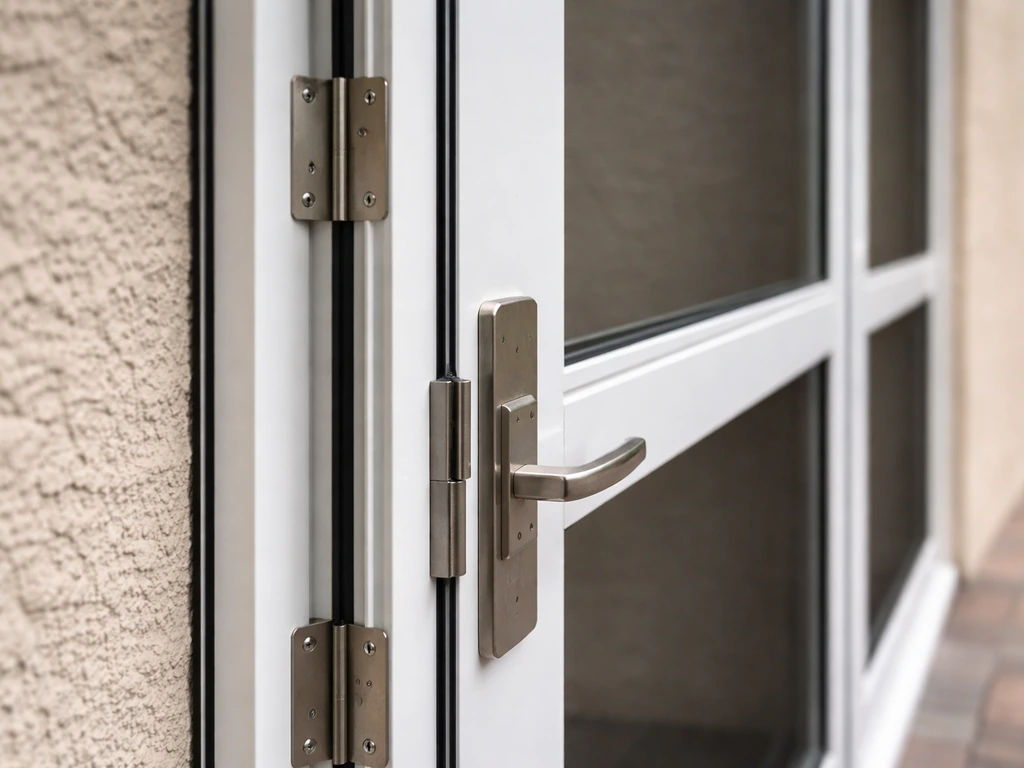
Doors and entry points
Place your main door where it aligns naturally with how you use the patio, typically opposite the apartment sliding door. A single hinged screen door (32-36 inches wide) works for most apartment-scale patios. If your landlord's approval includes a clear panel or vinyl curtain enclosure, consider a zippered panel as the entry instead of a framed door, since it requires no hinges attached to the structure. Port St. Lucie's permit forms require an opening schedule that lists swing, overhead, and sliding doors separately, which tells you that the door type is a design decision your permit package will need to address explicitly.
Airflow and ventilation
This is where enclosures fail livability. A fully sealed patio with no airflow becomes a hot box in summer and a condensation trap in winter. Plan for at least 20-25% of your wall area to remain as openable screen panels or operable vents. If you're using solid panels, include at least one operable section per wall. Condensation on panels means too much interior moisture and not enough air movement. The fix is increasing ventilation, reducing moisture sources like wet towels or planters, and using a small fan to keep air circulating. This is a design decision, not a material fix.
Pest and weather sealing
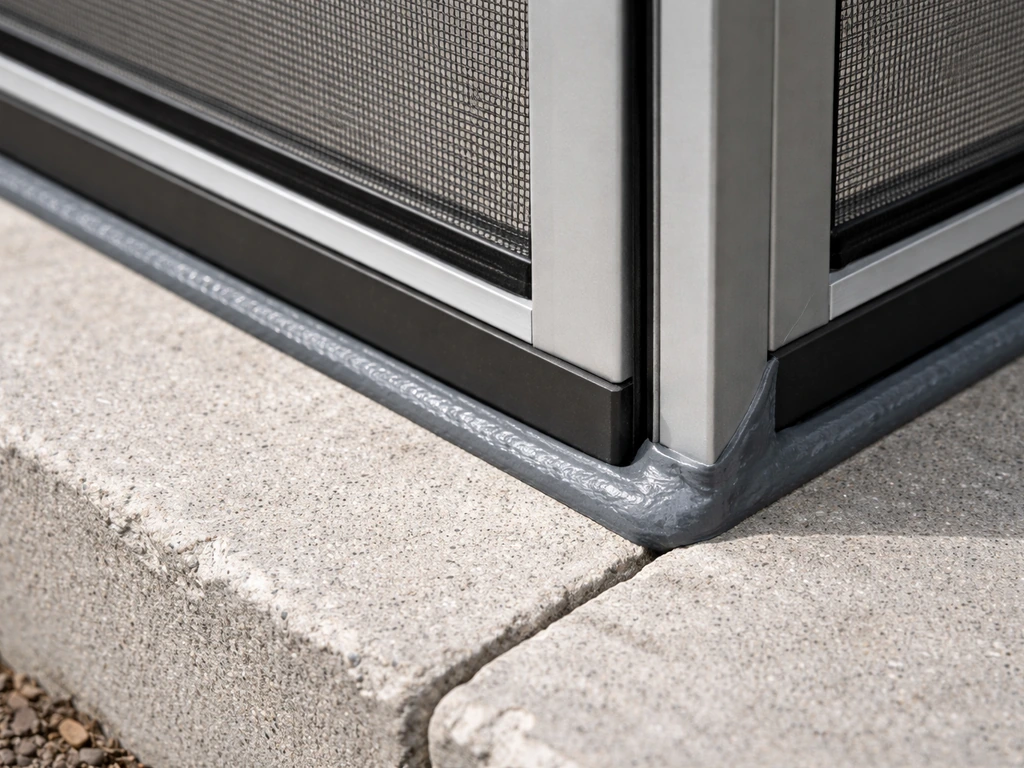
Gaps at the base of screen frames where the frame meets the slab, and at the corners where panels meet, are the main entry points for insects and water. Seal the base of screen framing to the slab with a flexible exterior caulk or foam backer rod plus caulk. At panel-to-panel corners, use aluminum corner molding with a sealant bead behind it. For the top edge where the enclosure meets the overhead structure, seal with low-expansion foam first (to avoid distorting the frame), then a weatherproof caulk layer. Magnetic screen door closures need to stay aligned or they'll gap open over time, so check alignment monthly during high-use seasons.
Framing and attachment methods for apartment patios
The trickiest part of an apartment enclosure is attaching framing without causing damage your landlord can deduct from your deposit. You have three realistic options, and the right one depends on your building wall material and your landlord's approval terms.
Option 1: Freestanding post-and-beam frame
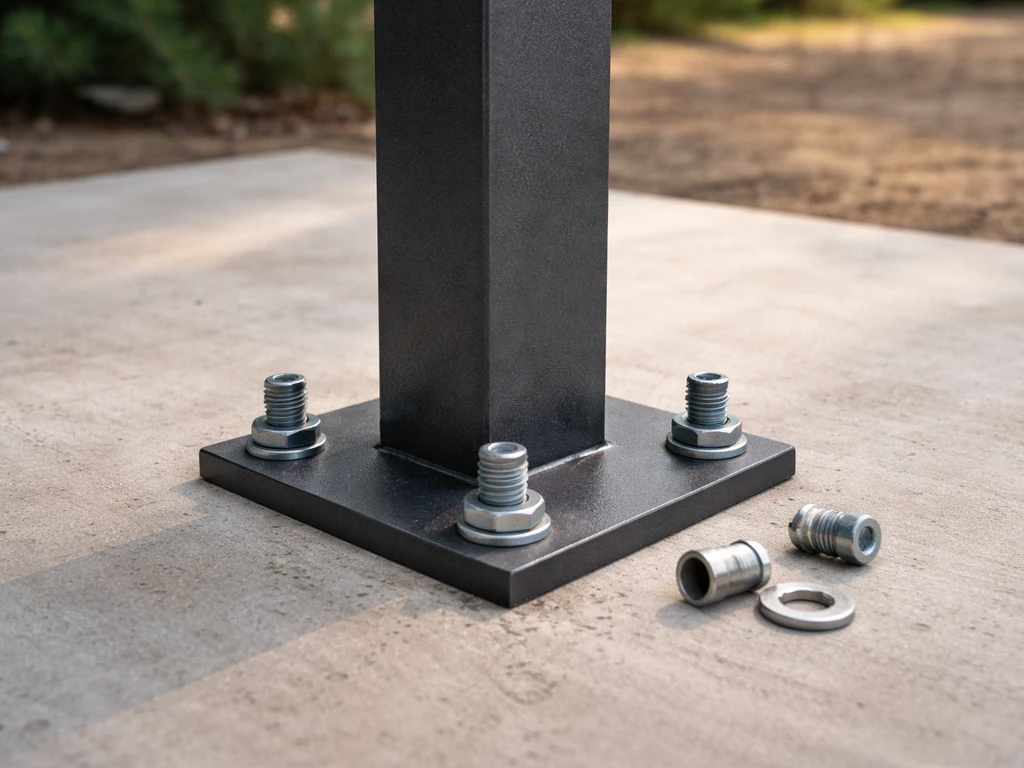
A freestanding aluminum or steel frame uses posts anchored to the slab with removable base plate hardware (surface-mount post bases with concrete anchors) rather than attaching to the building wall. The overhead beam leans against or rests under the soffit without being fastened to it. This is the most landlord-friendly approach because removal leaves only small anchor holes in the slab, which are much easier to patch than holes in a building wall. It works well for patios that are three sides open and one side building wall.
Option 2: Direct attachment to the building wall
If your landlord allows direct attachment (get this explicitly in writing), use masonry anchors for concrete block or brick walls and structural lag screws into studs for wood-frame walls. A ledger board or aluminum channel screwed to the wall provides the horizontal attachment point for the top of your screen or panel frames. Always locate studs with a stud finder before drilling into stucco or siding. Never attach to stucco alone without hitting the framing behind it. This method is more secure in wind but harder to remove cleanly.
Option 3: Tension or pressure-fit systems
For the most reversible setup, tension-fit screen systems use spring-loaded or pressure-fit posts that wedge between the slab and the overhead structure without any fasteners at all. They're less wind-resistant and not code-compliant for permitted work in most jurisdictions, but for a simple bug screen on a sheltered patio with landlord approval and no permit requirement, they're excellent. Some systems also use railing-top mounts if you have an existing railing, clamping to the railing cap rail without drilling.
Regardless of attachment method, make sure every metal component that contacts the building is separated from dissimilar metals with a gasket or non-conductive washer to prevent galvanic corrosion, and use corrosion-resistant stainless or coated hardware throughout. In coastal or humid climates, standard zinc-plated screws will rust within a season.
Roof and overhead options, and managing water
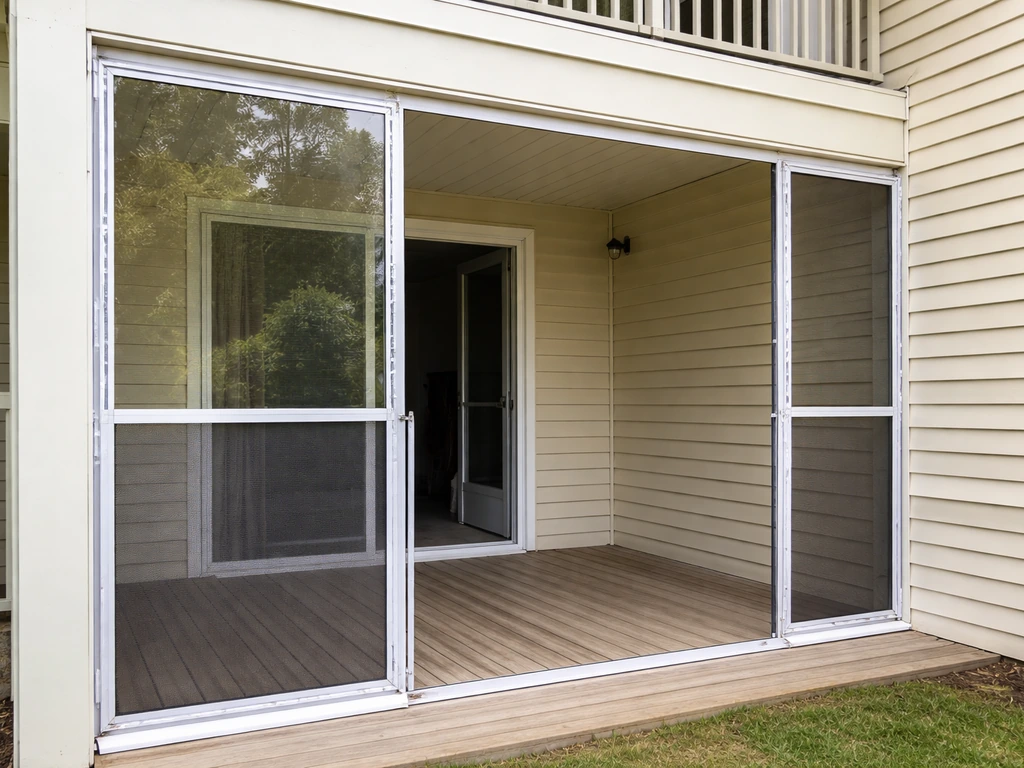
Most first-floor apartment patios already have an overhead structure: a concrete soffit above a second-floor unit, or a roof overhang. That's an asset. It means you only need to close the sides, and your drainage path (the slab drain or the edge of the patio) is already established. Your job is to make sure your enclosure doesn't redirect water into the building wall or trap it inside the enclosure.
Where the top of your screen or panel frame meets the underside of the overhead structure, the joint needs to be watertight on the exterior face but must not trap water behind the frame. The best approach is a continuous sill or head flashing channel installed so that any water that gets past the outer seal drains outward, not inward. Sill flashing with end dams at corners collects and directs incidental moisture back to the exterior. Avoid relying on sealant alone without a physical drainage path, because sealant cracks over time and a failed sealant-only joint has nowhere to send the water except into your wall assembly.
If your patio has no existing overhead structure (rare for ground-floor apartment units but possible), you'll need to add one before enclosing the sides, since building an enclosure with an open roof creates a water management problem that's hard to solve at the sides alone. Lightweight polycarbonate roof panels on a simple aluminum purlin system are the most renter-friendly overhead option: they're removable, don't require heavy structural attachment, and diffuse light rather than blocking it entirely.
Check the slab drain (if one exists) before you seal the perimeter. The drain needs to remain accessible and unobstructed after the enclosure is built. Run a hose for a few minutes after you've framed the space but before you install panels, and watch where the water goes. Any pooling area inside the enclosure needs to be addressed with a floor slope check and possibly a secondary drain or drain channel.
DIY installation workflow, step by step
Here's the order of operations that avoids the most common mistakes. Skipping steps or reordering them is where most DIY enclosures go wrong.
- Confirm permits are approved and landlord consent is in writing. Don't start until both are done.
- Set up your framing layout on the slab using chalk lines or tape to mark post locations. Verify they're square using the 3-4-5 triangle method.
- Install base hardware: surface-mount post bases or concrete anchors. Let anchor adhesive cure fully before loading posts (follow product cure time, usually 24 hours).
- Erect vertical posts and temporarily brace them plumb. Check plumb with a level on two adjacent faces of each post.
- Install the top horizontal channel or header across the posts. This is your attachment point to the overhead structure if you're using it.
- Install flashing at the top joint where the frame meets the overhead structure before installing any panels. Get the flashing right before it's covered.
- Run any electrical or lighting now, before panels close in the space. Use exterior-rated conduit and GFCI outlets if adding lighting.
- Install screen or panel frames into the framing system, starting from the corners and working toward the door opening.
- Install the door frame and hang the door. Adjust hinges and check that the door closes and latches squarely.
- Seal all perimeter gaps: base of posts to slab with caulk, top of frame to soffit with low-expansion foam then caulk, corner joints with caulk behind aluminum corner trim.
- Run a water test with a hose at every joint for 5 minutes before calling the installation done. Mark any drips and fix them while you have access.
- Call for required inspections if your permit requires them (staged inspections are common for screen enclosures in Florida municipalities).
Common pitfalls and how to avoid them
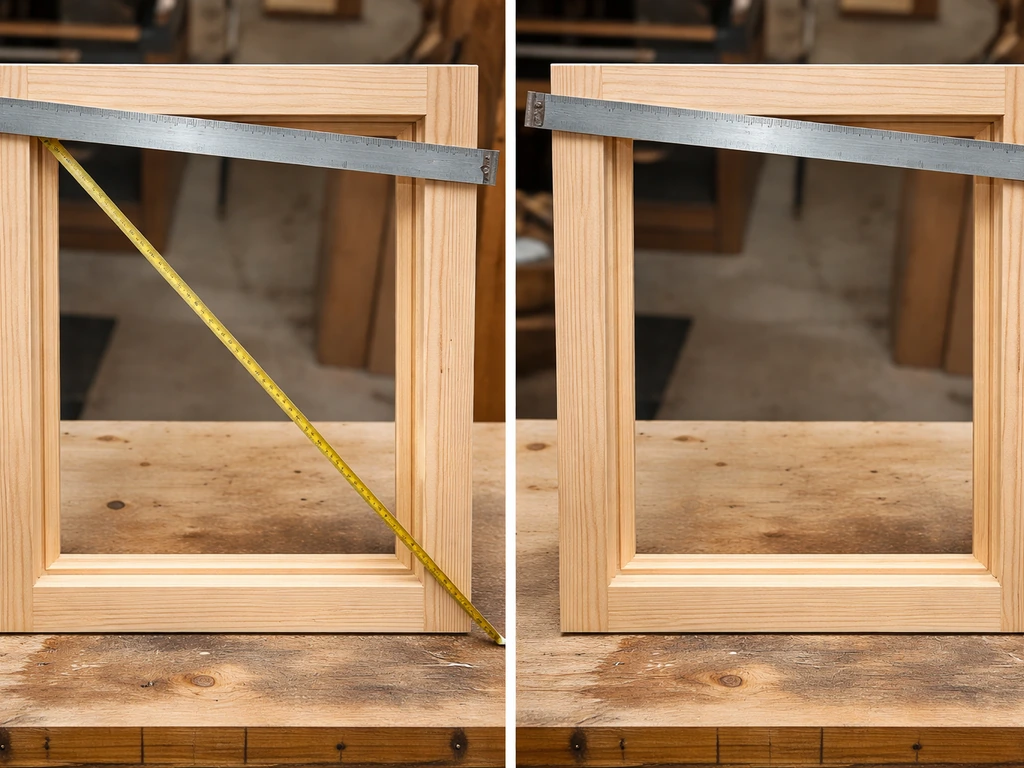
- Framing out of square: always check diagonal measurements across the full opening. Equal diagonals mean square. An out-of-square frame makes every panel fit badly.
- Skipping the water test: sealant that looks fine dry often gaps under actual water pressure. Test before you're done, not after a rainstorm reveals the problem.
- Attaching to soft or rotted wood: probe any overhead wood framing before assuming it can hold a fastener load. Soft spots mean the wood is failing and can't carry the frame.
- Using undersized anchors in concrete: masonry anchors have rated pull-out strengths. Use anchors rated for at least twice your expected load and follow the manufacturer's minimum embedment depth.
- Blocking the slab drain: check that all panel bases and post hardware clear the drain path before you anchor anything permanently.
- Not planning for the door swing: a door that swings into the enclosure needs clearance from furniture. A door that swings outward can hit people on the patio. Decide early and build accordingly.
Maintenance, seasonal care, and troubleshooting
The most common enclosure problems are sagging or torn screens, condensation on clear panels, and hardware that loosens over time and lets the frame rack slightly. All three are predictable, and a twice-yearly inspection catches all of them before they become expensive.
Your twice-yearly inspection checklist
- Check every screw and bolt for rust or loosening. Replace any fastener showing corrosion with stainless or coated equivalents. Loose hardware is the first cause of screen sag and frame racking.
- Inspect screen mesh for tears, holes, or visible sagging. Small tears (under 2 inches) are patchable with screen repair tape or patch kits. Larger tears, widespread sagging, or mesh that's pulling out of the spline mean it's time to re-screen that panel.
- Check caulk and sealant at every joint. Sealant that's cracked, peeling, or discolored has failed its water seal. Scrape out old caulk and replace it; don't layer new caulk over old failing caulk.
- Test the door latch, hinges, and closure system. Tighten loose hinge screws. Realign magnetic closures if they're gapping.
- Clear any debris from the slab drain and the base of the screen frames. Debris dams cause water to pond, which accelerates frame corrosion.
- Inspect the top flashing joint for gaps or lifted edges, especially after high-wind seasons.
Seasonal adjustments
If you're using a hybrid screen-plus-clear-panel system, swap in your clear vinyl or polycarbonate inserts before the cold season and remove them in spring. Panels left in during high summer heat on a south-facing wall can warp or distort. For motorized or drop-shade enclosure systems, wind loading is a real operational issue: retract motorized screens before storm-level winds arrive, not during them. Screen fabric under heavy wind load can tear at the roller or hem bar before the mechanism trips its safety stop.
Troubleshooting the most common problems
| Problem | Likely Cause | Fix |
|---|---|---|
| Screen sagging in panels | Loose spline, loose hardware, or UV-degraded mesh | Re-tension spline with a spline roller, tighten frame fasteners, or replace mesh if brittle |
| Water dripping inside at the top joint | Failed caulk at soffit-to-frame joint or missing flashing | Remove old caulk, install sill flashing channel if not present, recaulk with exterior silicone |
| Condensation on clear panels (interior) | High interior humidity + low ventilation | Open a panel or add a vent, run a fan, remove moisture sources (wet plants, damp towels) |
| Frame racking or posts leaning | Loose base anchors or missing diagonal bracing | Retighten anchors (check cure if recent), add corner braces at post-to-header joints |
| Bug gaps at screen base or corners | Caulk shrinkage or base foam compression | Reapply flexible caulk at base; add foam weatherstrip behind base trim if needed |
| Door not closing or latching | Frame racked slightly out of square, or hinge screws loose | Tighten hinge screws, adjust strike plate, re-square frame if needed |
If you notice sagging screens, visible tears, or rusty hardware across multiple panels at once, you're past routine maintenance and into repair territory. At that point, it's usually more cost-effective to replace entire panel sections than to patch individual spots, especially if the mesh is more than 5-7 years old and showing UV brittleness. Catching it at first inspection rather than after a season of neglect keeps the job manageable.
One last note: if you're also thinking about adding a privacy wall, putting up a perimeter fence, or fully closing off the patio from the outside for additional separation from neighbors, those are related projects that follow a similar permissions-first workflow and can often be designed alongside the enclosure so the framing serves double duty. If your goal is to fully close off an apartment patio, make sure your enclosure plan and your permissions from the landlord and HOA line up before you install anything how to close off an apartment patio. If you want more separation for your outdoor space, follow the same permissions-first approach when you plan how to fence off a patio. If you want more privacy beyond the enclosure, see how to fence off a patio before you finalize your layout. When you're also planning a privacy wall for the patio, treat it as part of the same enclosure plan so you can coordinate permits, fastening, and sealing from the start. Plan them together from the start if that's the direction you want to go.
FAQ
Do I need to remove my enclosure if I move out, even if it’s “just screens”?
Often yes. Many leases require restoring the patio to its original condition at move-out, even for non-rigid screen systems. Ask your landlord in writing whether the enclosure can remain, and if restoration is required, get a list of which attachment points they expect you to repair (for example, anchor holes in the slab versus caulk-only sealing).
What’s the difference between a removable screen enclosure and something that counts as a “structural alteration”?
The deciding factors are how it’s attached and whether it changes exterior appearance or wind behavior. A screen system that is fully non-penetrating and uses clamped or tension-fit mounts is more likely to be treated as temporary, while anything that fastens to walls, adds a roof extension, or creates a glazed “room-like” volume usually triggers stricter review. Confirm the classification with your landlord and ask which items you’re allowed to install without a permit.
Can I enclose only part of the patio, like two sides, to reduce permits and cost?
Sometimes, but partial enclosures still need approval because they can alter wind loads and drainage patterns, and they change the building’s exterior. If your plan leaves one side open, you still need to document measurements, door/egress choices, and how water will exit. Ask the HOA and permit office whether partial screening has the same requirements as a full enclosure in your area.
How do I avoid trapping water behind the enclosure when rain blows sideways?
Plan for a drainage path, not just seals. Use a sill or head flashing approach at the top joint, with continuous flashing that directs any incidental water back to the exterior. Also check that side seams and base sealing do not create a “bathtub” effect that forces water inward during heavy rain.
If my patio has a slab drain, can I just leave it exposed or cover it later with panels?
You should keep it accessible and unobstructed for maintenance and emergencies. Before installing panels, test the water flow with a hose after framing to see where pooling occurs, then design a panel or grill section that can be removed to reach the drain. Covering it permanently can create interior pooling and can be a recurring maintenance issue.
What’s the best way to handle a gas line on a patio enclosure?
Treat gas shutoff as a safety and compliance step, not a DIY afterthought. Your design should keep the shutoff valve and any approved access points reachable, and you should coordinate with the proper utility or qualified professional if disconnect or rerouting is needed. If your enclosures require moving or shielding components, ask your landlord what documentation they expect for safety.
Why do clear panel enclosures get condensation, and what should I change first?
Condensation usually means the enclosure is reducing airflow while adding indoor or sheltered moisture. The first changes are increasing venting (operable vents or openable panel sections), reducing moisture sources near the door area, and improving air circulation with a small fan. If panels are constantly dripping, the design may need more operable area than you originally planned.
Can I use magnetic screen doors, and what causes them to fail after a few months?
They can gap over time if the frame racks, if alignment shifts with temperature cycling, or if the base seal compresses unevenly. Check alignment monthly during high-use seasons, and design the frame so it stays square under wind. If you see widening gaps, fix the alignment or the door closure mechanism early to prevent bug entry.
What attachment method is easiest to remove without losing most of the security deposit?
Freestanding frames that anchor to the slab with removable base plate hardware are typically easier to restore than fastening to building walls. Still, removal often requires patching and touch-up, so photograph your existing condition and ask for deposit expectations in writing. Also confirm whether the landlord allows any wall attachments even if you intend to remove them later.
How should I choose between screen mesh and clear inserts for year-round use?
A common strategy is screen for spring through fall and clear removable inserts for cooler or windy seasons, especially on south-facing walls. Inserts left in during peak summer heat can warp or distort, so plan for a seasonal swap and ensure your enclosure hardware supports the changeover without loosening.
Are there common design mistakes that lead to sagging screens or racking frames?
Yes, undersized bracing, incorrect fastener placement for your wall type, and poor sealing that increases water weight or wind pressure at joints. If you see sagging across multiple panels or rusty hardware appearing in the same locations, it often indicates a structural alignment problem rather than a single bad screen. Address bracing and frame squareness during your twice-yearly inspections.
If my HOA restricts mesh color or screen density, what should I do before ordering materials?
Get those requirements in writing, then confirm compatibility with the system you’re buying. Screen color and mesh density limits can affect visibility, airflow, and sometimes wind performance, which can influence whether the enclosure meets the expected behavior under storms. Coordinate your final order after you have HOA approval and confirmed your local rule details.
Next Articles
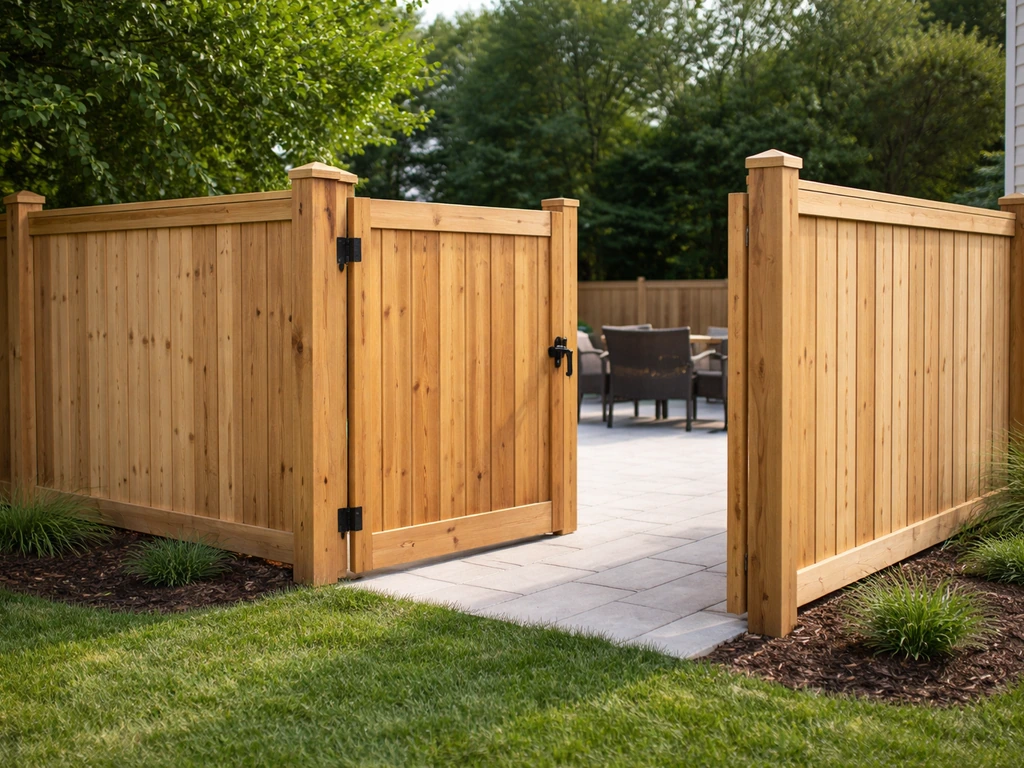
How to Fence Off a Patio: DIY Steps, Materials, and Tips
Step-by-step DIY plan to fence off a patio: layout, posts, gate, materials, obstacles, and upkeep for privacy and safety
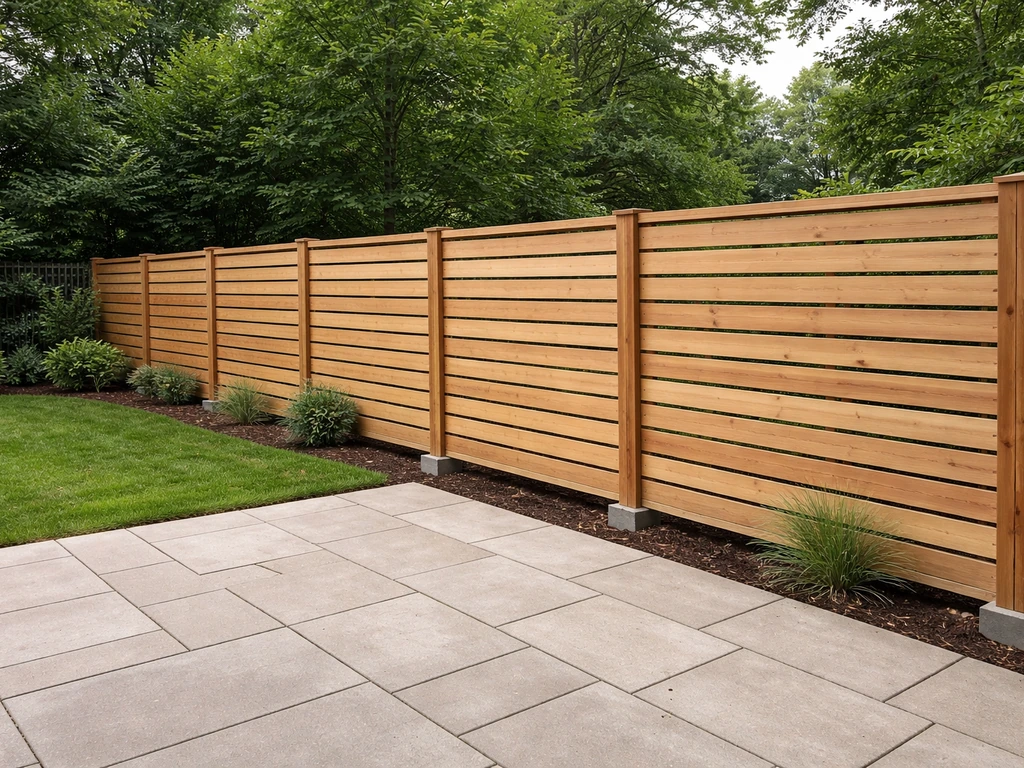
How to Build a Privacy Wall for Patio: Step-by-Step DIY
Step-by-step DIY plan to build a patio privacy wall, choosing materials, permits, footings, framing, finishes, and maint

How to Disconnect Patio Gas Safely Step by Step
Step-by-step guide to disconnect patio gas safely, tools, valve shutdown, hose/regulator removal, leak checks, and troub