
Covering a small patio comes down to three things: figuring out what problem you're actually solving (shade, rain, or full weather protection), picking a structure that fits without overwhelming the space, and making sure water runs away from the house instead of into it. Do those three things right, and even a 100-square-foot patio can become a genuinely usable outdoor room.
How to Cover a Small Patio: DIY Options, Steps, Costs

Felix Brennan
9 Jul 2026
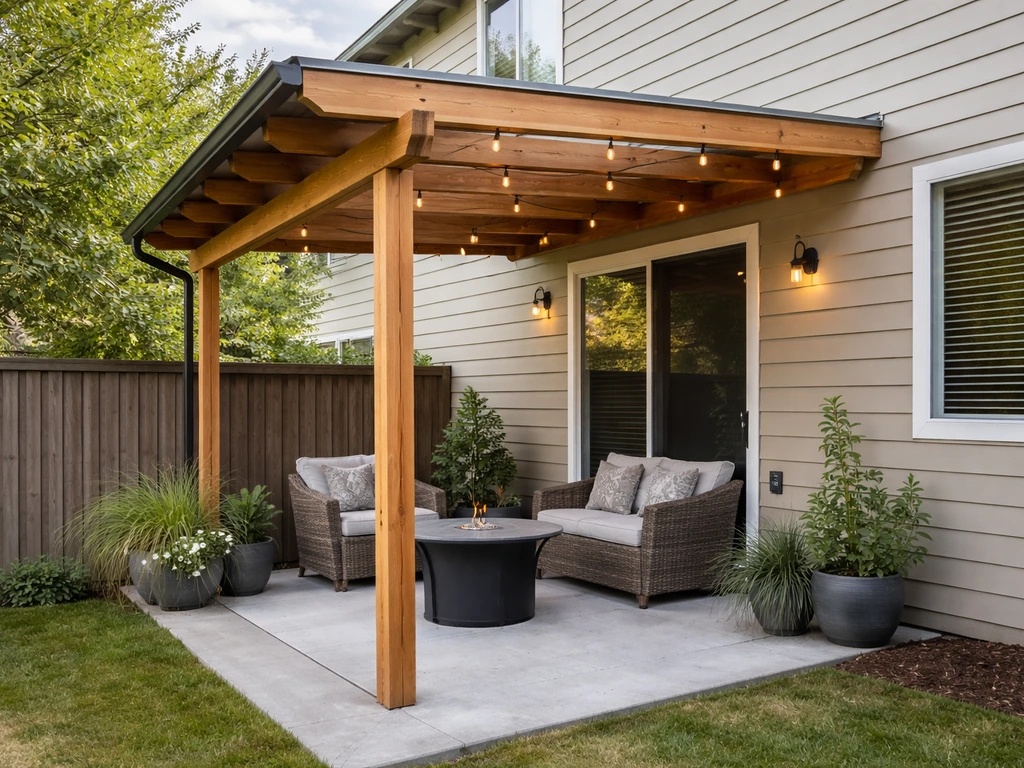
Decide what kind of cover you actually need
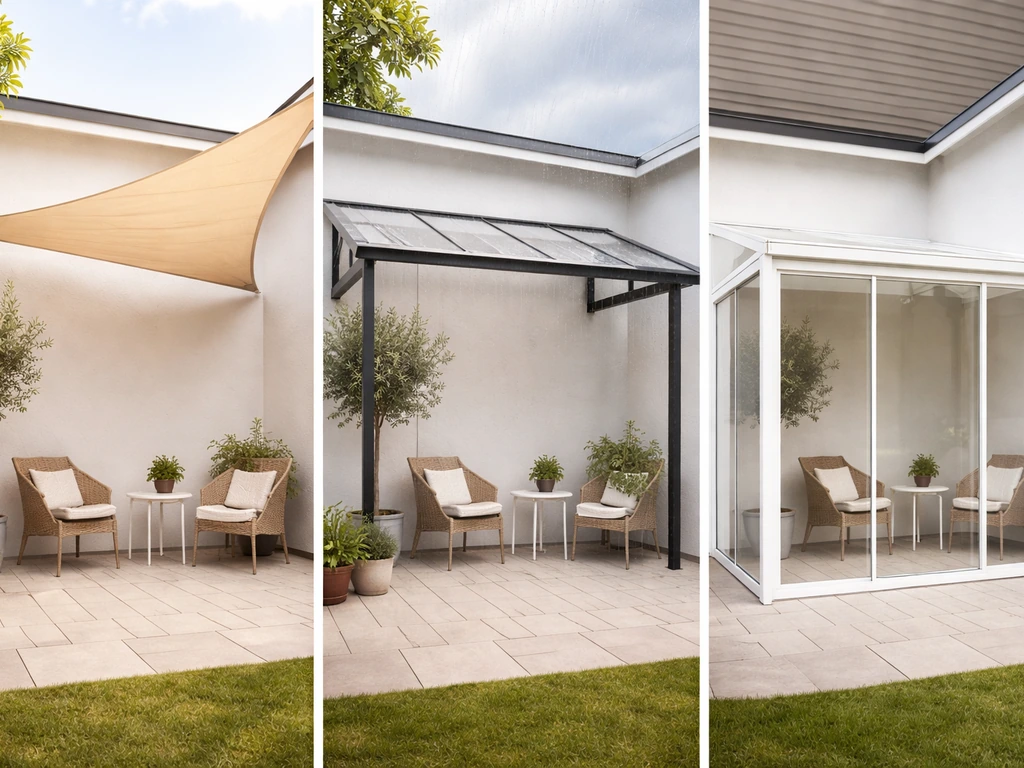
Before you pick a product, be honest about what's bothering you. Shade, rain, and full enclosure are three different problems and they each have different solutions. Choosing what to cover patio with comes down to the kind of shade and weather protection you actually need, not just the look of the cover. Getting this wrong is the most common reason people spend money on a cover and still don't use their patio.
- Shade only: You want afternoon sun off your back but don't care about rain. A sail shade, pergola, or retractable awning handles this cheaply and without any structural complexity.
- Rain protection: You want to sit outside during light rain or keep furniture dry. You need a solid or near-solid roof, like polycarbonate panels, metal roofing, or a fixed fabric canopy. A pergola with open slats won't cut it here, even though the marketing photos look great.
- Full protection and partial enclosure: You want a real outdoor room, protected from sun, rain, and wind. This usually means a solid roof plus screens, curtains, or panels on one or more sides. This is the most involved option but turns a small patio into usable space for most of the year.
One real-world note: a solid roof with no ventilation on a hot afternoon can feel stuffier than an open patio. A homeowner on a roofing forum mentioned exactly this after installing corrugated plastic roofing that blocked direct sun but trapped warm air on still days. If you're in a hot climate, plan for airflow from the start, either through a vented ridge, screen sides, or a partial open-beam section. If you're looking to add side protection later, that's a natural next step once the roof is sorted.
Measure and plan the layout before you buy anything
Small patios are unforgiving. A cover that's even 12 inches too wide in one direction can block a door, crowd a walkway, or create drainage problems against the house. Spend 30 minutes measuring carefully before you look at products.
Key measurements to take
- Overall patio dimensions: Measure the full usable area (length x width). Most small patios run 8x10 ft to 12x14 ft.
- Clearance height: Measure from the patio surface to any overhead obstruction, including eaves, gutters, and soffit. You need at least 7 ft of headroom under a finished cover, and most codes require 7 ft minimum for patio enclosures.
- House wall attachment zone: If you're attaching to the house, identify stud or block locations in the wall. Find the ledger point and note whether there's an existing overhang, gutter, or eave that will affect your connection height.
- Roof slope and drainage direction: Decide which direction water will run off. On a small patio attached to the house, the slope always runs away from the wall, ideally dropping about 1/4 inch per foot of run.
- Post locations: Mark where posts would land, keeping them out of traffic paths. For a small patio, two front posts are usually enough for an attached cover.
Permits and code: check before you build
Most jurisdictions require a permit for a permanent patio cover, and the threshold often hinges on the projected roof area. For example, San Diego's residential patio cover guidance uses projected roof area as the key trigger for permitting. blank" rel="noopener noreferrer">The 2024 International Building Code requires patio covers to handle all dead loads plus a minimum vertical live load of 10 lb per square foot, plus local wind and seismic loads. City of San Diego’s residential patio cover permitting guidance also ties permit minimum requirements to projected roof area and references a 10 psf roof live load blank" rel="noopener noreferrer">minimum vertical live load of 10 lb per square foot. In practice, this means your framing needs to be sized properly for your region, not just whatever looks sturdy. Check with your local building department before pouring footings or attaching a ledger board. Many simple DIY covers under a certain size qualify for a simplified or exempted permit process, but you need to verify this locally, not assume it.
Choose the best cover type for a small space
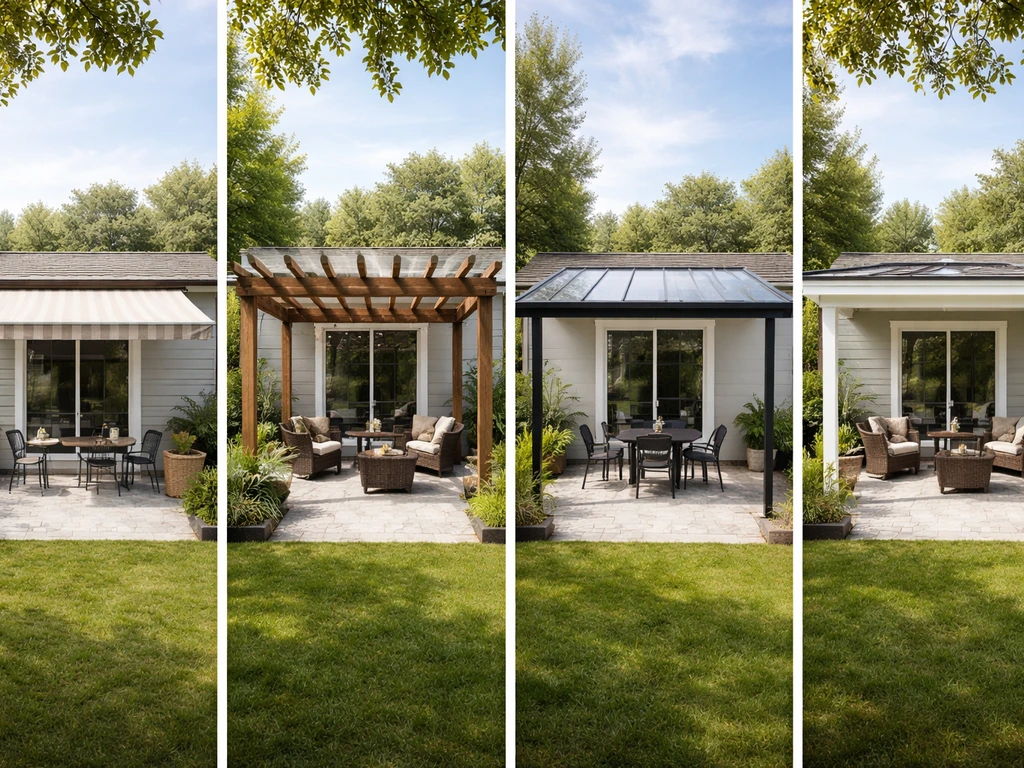
Small patios benefit from covers that feel proportional and don't eat into headroom or walkway space. To cover a back patio effectively, match the cover type to the shade, rain, and drainage needs of your exact layout. Here's a straight comparison of the most practical options.
| Cover Type | Weather Protection | DIY Difficulty | Typical Cost (materials) | Best For |
|---|---|---|---|---|
| Retractable awning | Sun + light rain | Easy | $300–$900 | Renters, minimal commitment, quick install |
| Sail shade | Sun only | Very easy | $50–$250 | Budget shade, seasonal use, flexible positioning |
| Pergola (open slats) | Sun (partial) | Moderate | $500–$2,000 | Aesthetics, climbing plants, adding fabric later |
| Polycarbonate roof panels | Sun + rain | Moderate | $400–$1,500 | Covered patio on a budget, DIY-friendly framing |
| Metal roofing (corrugated/standing seam) | Full rain + snow | Moderate–Hard | $600–$2,500 | Durable permanent cover, cold/wet climates |
| Fixed fabric canopy | Sun + light rain | Easy–Moderate | $200–$800 | Renters, softer aesthetic, limited attachment |
| Full patio enclosure kit | Sun, rain, wind, bugs | Hard | $1,500–$6,000+ | Year-round use, screened outdoor room |
For most small patios where the goal is practical everyday use, polycarbonate panels on a simple aluminum or wood frame hit the sweet spot. They block rain, let in diffused light (avoiding that dark cave feeling), and are genuinely manageable for a DIYer with basic tools. To cover an apartment patio effectively, start by matching the cover type to your available space, drainage needs, and local rules how to cover an apartment patio. Metal roofing is tougher but lasts longer and handles snow load better if that matters in your climate. Retractable awnings are the right call if you rent, don't want to deal with permits, or just want something you can roll back on nice days.
Materials and tools checklist
This list covers what you need for the most common DIY setup: a simple attached patio cover with two front posts, a ledger board at the house, and polycarbonate or metal roof panels. Adjust based on your chosen cover type.
Structural materials
- Ledger board: 2x6 or 2x8 pressure-treated lumber, length matching your patio width
- Beam: 2x8 or doubled 2x6 pressure-treated, spanning front posts
- Rafters: 2x6 pressure-treated, spaced 16–24 inches on center
- Posts: 4x4 or 4x6 pressure-treated, height to match your desired clearance
- Post bases: Adjustable post bases with 1/2-inch anchor bolts for concrete, or direct-bury post hardware
- Joist hangers and rafter ties: Simpson or equivalent, sized for your lumber dimensions
- Roofing panels: Polycarbonate corrugated or flat panels, or metal roofing, cut to your rafter span
- Flashing: Z-flashing or step flashing for the wall attachment, minimum 4-inch width
Hardware and fasteners
- Lag screws (3/8 x 3-inch or 3/8 x 4-inch) for ledger attachment into wall studs or masonry anchors for block/brick
- Structural screws or through-bolts for beam-to-post connections
- Roofing screws with neoprene washers for panel attachment
- Silicone caulk and butyl tape for sealing panel overlaps and flashing joints
- Concrete for post footings if not using surface-mount hardware
Tools you'll need
- Drill/driver and hammer drill (for masonry walls)
- Circular saw or miter saw for cutting lumber and panels
- Level (4-foot minimum) and a string line for setting post heights
- Tape measure and square
- Post hole digger or rented auger (if setting footings)
- Safety glasses and gloves
- Chalk line for marking rafter layout
- Caulking gun
DIY installation steps for an attached or freestanding cover
The steps below cover both the attached-to-house approach and the freestanding approach. Read through both sections even if you already know which you're doing, because several common mistakes happen at the planning stage. If you are trying to learn how to make a covered patio in The Sims 4, planning what the room layout and roof pieces look like is the key first step planning stage.
Attached cover (ledger to house wall)
- Mark the ledger height on the house wall. Set it high enough to give 7 ft minimum headroom at the lowest point of the roof slope. If your patio is 10 ft deep and you want a 1/4-inch-per-foot slope, your outer edge will be 2.5 inches lower than the ledger, so account for that.
- Locate studs or blocking in the wall with a stud finder. Lag screws must hit solid wood or masonry anchors—no exceptions. Space lags every 16 inches.
- Install flashing above the ledger before you lag it in place. Slide Z-flashing up under the siding so water that runs down the wall goes over, not behind, the ledger. This is the number one leak point on attached covers, and it's far easier to do before the ledger is up.
- Attach the ledger with 3/8 x 3-inch lag screws through the flashing and ledger into each stud. Pre-drill to avoid splitting.
- Set post locations using a string line and level from the ledger. Mark footing locations with spray paint. Footings should be below the frost line in cold climates; check your local frost depth requirement.
- Install post bases or dig and pour footings. Let concrete cure 24–48 hours before setting posts.
- Set posts, check plumb on two axes, and brace temporarily.
- Install the front beam by connecting it to the post tops with hardware (post caps work well here). Verify the beam is level across its length.
- Cut and install rafters from the ledger to the beam, using joist hangers at the ledger end and rafter ties at the beam end. Space at 16–24 inches on center depending on your panel span rating.
- Install roofing panels starting from one end, overlapping corrugations by one rib. Use roofing screws with neoprene washers every 12–18 inches at each rafter. Don't overtighten; polycarbonate needs a little give.
- Seal the top edge where panels meet the wall with butyl tape under the flashing, then caulk the top flashing edge to the wall with silicone.
Freestanding cover
A freestanding cover uses four posts instead of two, with beams on both the house side and the outer side. You don't need to attach to the house wall at all, which is great for renters, for patios on the side of the house with no good attachment point, or if you just want to avoid any possibility of leaks at the wall. The framing is the same except you replace the ledger with a second beam, set on two additional posts. The roof still needs to slope in one direction for drainage, so the house-side posts should be set slightly taller than the outer posts, or vice versa depending on where you want runoff to go. Make sure the slope still drains away from the house.
Water management and sealing: don't skip this part
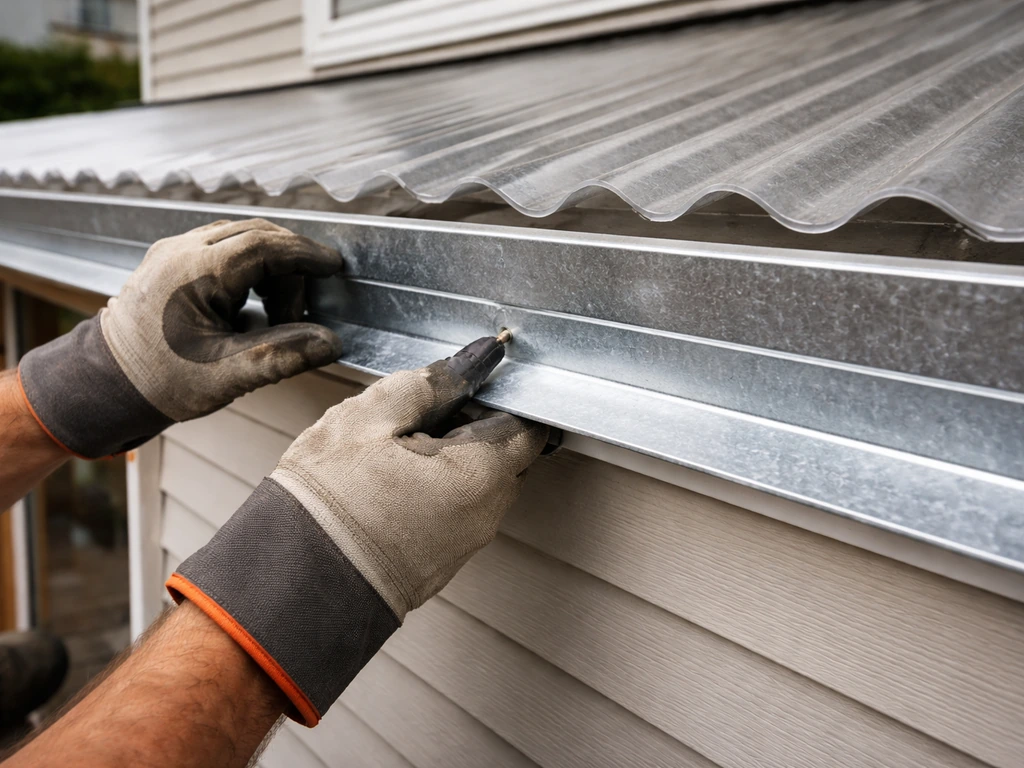
Water problems are the most common complaint with DIY patio covers, and almost all of them come from two mistakes: not enough slope and bad flashing at the wall. The IRC's Chapter 9 roof assembly provisions exist for a reason, and the core principles apply even to a small patio cover.
Slope and drainage
Minimum slope for polycarbonate or corrugated metal is about 1/4 inch of drop per foot of run. On a 10-foot-deep patio, that's 2.5 inches of total drop from ledger to outer edge. It doesn't sound like much but it's enough to keep water moving. If you're using flat polycarbonate sheets (not corrugated), bump that up to at least 1/2 inch per foot to prevent pooling, which causes leaks at seams over time.
Flashing at the house wall
Install Z-flashing or continuous step flashing along the top of the ledger before the roofing goes on. The flashing should extend at least 4 inches up the wall under the siding or stucco, and lap over the top of the first roofing panel by at least 2 inches. Seal the top edge of the flashing to the wall with silicone caulk (not just caulk alone on the ledger, which fails within a few years). Any penetrations through the wall, like lag bolt holes, should be sealed with silicone before the ledger goes up.
Gutters and runoff
On a small patio, the runoff from the roof drops right onto or next to your patio surface. If you're attaching to the house and the water runs off the outer edge, that's usually fine as long as it's not dumping onto a neighbor's property or pooling against a foundation. If the slope runs back toward the house (don't do this, but if it happens), you'll need a gutter at the house wall. For most setups, a simple aluminum gutter along the outer beam edge, draining to a downspout at one corner, keeps runoff tidy and prevents the waterfall effect during heavy rain. Gutters also extend panel life by keeping standing water off the panels.
Budget, timeline, and when to call a pro
Here's an honest look at what covering a small patio actually costs and takes. These numbers are for a roughly 10x12 ft attached cover with two posts, pressure-treated lumber framing, and polycarbonate panels, built in the summer of 2026.
| Item | DIY Cost (materials only) | Contractor Installed |
|---|---|---|
| Retractable awning (fabric) | $400–$900 | $900–$2,500 |
| Pergola kit (wood or aluminum) | $600–$2,000 | $1,500–$4,500 |
| Polycarbonate panel cover (attached, 10x12) | $700–$1,500 | $2,500–$5,000 |
| Metal roofing cover (attached, 10x12) | $900–$2,500 | $3,000–$6,000 |
| Full enclosure with screens | $1,500–$4,000 | $5,000–$12,000+ |
For a simple polycarbonate cover on a small patio, plan on a weekend for the actual build if you have basic skills. Day one is usually footings, ledger, and posts. Day two is rafters and roofing. Permits add 1–4 weeks of lead time depending on your municipality, so factor that in if you want to be using the patio by a specific date. If you're handy and comfortable with a drill, a ledger install, and basic framing, this is a genuine DIY project. Where it makes sense to hire out: if your attachment wall is masonry or stucco over foam (common in newer homes), if you have any structural concerns about the existing wall, or if your project exceeds 200 square feet and requires engineered drawings. For covers above a certain size or in high-wind or high-snow zones, a structural engineer review is worth the few hundred dollars it costs.
Maintenance and seasonal care after installation
A well-built cover on a small patio needs surprisingly little maintenance, but a few simple habits will double its lifespan.
Twice-a-year checks (spring and fall)
- Inspect the flashing at the wall connection. Look for gaps, lifted edges, or cracked caulk. Re-seal with silicone if needed. This takes 10 minutes and prevents the majority of leaks.
- Check roofing screw tightness. Polycarbonate panels expand and contract seasonally, and screws can work loose. A loose screw lets water wick under the panel.
- Clear any debris from gutters and the roof surface. Leaves and pine needles hold moisture and degrade panels faster.
- Look for UV yellowing or hazing on polycarbonate panels. Yellowing means the UV coating is degrading. Replace panels showing significant yellowing to maintain weatherproofing.
- Check post bases for rust or wood rot at ground level. Pressure-treated lumber is resistant but not immune, especially at the post base where water collects.
Fabric awnings and canopies
If your cover includes fabric (retractable awning, fixed canopy, or pergola shade cloth), retract or remove it during high winds and extended periods of heavy snow. Fabric covers aren't designed for snow load and even moderate accumulation can damage the frame. Clean fabric covers once a season with mild soap and water, and never store them wet. Mildew sets in fast and once it's embedded in the weave it's nearly impossible to fully remove. Most quality awning fabrics are treated for UV and mildew resistance, but that treatment wears down after 5–8 years and the fabric will eventually need replacement.
Metal and polycarbonate roofing
Rinse polycarbonate panels with a hose annually to clear dirt and oxidation. Use a soft cloth if scrubbing is needed; abrasives scratch the surface and accelerate UV degradation. For metal roofing, inspect the cut edges and any pre-drilled holes for rust annually. Touch up with a rust-inhibiting primer if you see surface rust forming. Both materials can last 15–25 years with basic care, but neglected panels can fail in 5–7 years through delamination, corrosion, or UV breakdown.
Your action checklist before starting
- Measure your patio and sketch a simple plan with post locations, ledger height, and slope direction.
- Contact your local building department to ask whether a permit is required for your planned size and attachment method.
- Decide: attached to house or freestanding? Shade only, rain protection, or enclosure?
- Pull your materials list from the framing and hardware sections above, priced at your local lumber yard or home center.
- Order roofing panels early if you're using polycarbonate or specialty metal roofing. Lead times can run 1–2 weeks.
- Set aside a full weekend (or two half-days) for the build, with one extra day buffer for any footing cure time.
- Before the first board goes up: install flashing first, seal all ledger penetrations, and double-check your slope calculation.
FAQ
How do I choose the right cover type for my small patio if I only need some relief, not full weather protection?
If you mostly need daytime shade, prioritize light blocking and ventilation over full enclosure, like polycarbonate panels with a pitched roof line or an awning you can retract. For light rain only, avoid fully sealed designs that trap heat, and keep sides partially open so wind can move air through. If you truly need full rain protection, plan for proper slope and flashing before you choose aesthetics, because leakage usually comes from the attachment and roof edge details, not the panel brand.
What’s the simplest way to prevent leaks where the roof meets the house?
Use a continuous flashing system, not spot sealant. Install Z-flashing or step flashing along the top of the ledger before the roof goes on, extend it several inches up behind siding or into the stucco system, lap it correctly over the first roof panel, then seal the top edge to the wall. Silicone at that top seam is critical because most failures happen when water gets behind the flashing during wind-driven rain.
Can I build a DIY patio cover if I’m not sure which direction water should drain?
Yes, but confirm early by mapping your roof edge runoff path before you mount anything. The roof needs a consistent slope so water doesn’t pool near seams, and runoff should end away from the house. If you find you cannot slope away from the foundation without dumping onto a neighbor or into a walk path, redesign the post heights or consider a gutter downspout plan from the start rather than retrofitting later.
How much slope is enough if I’m using corrugated metal or polycarbonate panels?
For corrugated metal and corrugated polycarbonate, plan for about 1/4 inch drop per foot of run. For flat polycarbonate sheets, use a steeper slope, at least 1/2 inch per foot, because flat sheets pool water and that pooled water stresses panel joints over time. If you’re close to the minimum, add drainage margin by keeping panel overlap and eave coverage generous.
Do I need a gutter on a small patio cover?
Not always, especially if the roof drains onto ground that won’t erode and won’t pool near foundations. You likely do need gutters if runoff would hit a walkway, stain siding, discharge onto a neighbor’s property, or if your slope ends up directing water back toward the house. A simple aluminum gutter along the outer edge with a single downspout at a corner usually solves the common “waterfall” problem during heavy rain.
What measurements should I double-check before ordering panels?
Verify clear headroom, door and gate swing clearance, and the actual distance between house-side mounting and the outer edge after accounting for beam thickness. Measure the run length twice and confirm square by checking corner-to-corner diagonals, because small patio frames that are slightly out of square create edge gaps that are hard to waterproof. Also plan for panel overlap, so “coverage area” on paper matches the actual laid area.
Can I attach a patio cover to stucco or masonry on a new home?
Often yes, but the attachment method matters. Stucco over foam and some masonry conditions can complicate sealing and holding strength, so you may need to use correct anchors and ensure the ledger attachment and flashing integrate with the wall system. If you cannot identify where the solid backup lies behind stucco, it’s safer to pause and get guidance from your building department or a qualified installer.
Is ventilation required, and what happens if I skip it in a hot climate?
Ventilation is not just comfort, it affects performance and material life. A solid roof with no airflow can feel hotter and can trap moisture, increasing condensation risk under the cover. In hot areas, plan airflow using vented ridge details where appropriate, vented side openings, or screened side panels, so heat and humidity can escape instead of stagnating under the roof.
What’s the best way to maintain polycarbonate panels so they don’t cloud or crack early?
Rinse annually and avoid abrasive scrubbers that scratch the surface, because scratches accelerate UV degradation. If you must scrub, use a soft cloth and mild soap, and check for edge dirt or debris at seams so water can flow freely. After storms, inspect fasteners and overlaps to ensure nothing loosened, since small gaps can worsen leaks and seam wear.
How do I handle snow or heavy wind if I installed a DIY cover sized only for “normal” conditions?
If you live in a high-snow or high-wind zone, do not rely on “looks sturdy” sizing. Your framing and fasteners need to be sized for local dead load, live load, and wind/seismic forces, and in some cases you should bring in an engineer review. Also, if your setup includes any fabric component, plan to retract or remove it during high winds and do not let snow accumulate beyond what your specific structure is designed to handle.
What’s the easiest mistake to avoid that causes early failure?
Bad wall flashing and insufficient roof slope are the top two. If water can reach behind the ledger or pool on top, leaks and panel failure can start quickly, even if the cover looks solid. Before you build, confirm your flashing laps, slope math, and runoff direction, then do one final “water test” using a hose before closing up edges and trimming.
Next Articles
How to Make a Covered Patio in Sims 4 Step by Step
Step-by-step guide to build a covered patio in Sims 4, align roofs and supports, then fix common snapping and clipping i
How to Design a Covered Patio: Step-by-Step Guide
Step-by-step DIY guide to design a covered patio, choosing roof, structure, drainage, screens, permits, and maintenance.

How to Decorate a Long Narrow Patio: Layout Tips
Practical DIY layout and decor tips to widen a long narrow patio using zoning, furniture spacing, lighting, greenery, an