
Covering the sides of a patio means adding panels, screens, curtains, or other barriers to the open vertical edges of your outdoor space, not the roof. Done right, it blocks wind, cuts glare, keeps insects out, adds privacy from neighbors, and can make your patio genuinely comfortable through more months of the year. You have options ranging from a $30 set of outdoor curtains you can hang this weekend to permanent framed screen panels or polycarbonate glazing that takes a full day and a trip to the lumber yard. This guide walks you through every practical option, how to choose the right one for your situation, and how to install the most common solutions yourself.
How to Cover Patio Sides: DIY Plans, Materials & Steps Guide

Felix Brennan
13 Jul 2026
What Covering Patio Sides Actually Does (and Who This Guide Is For)
Whether you have a concrete slab in the backyard, a raised wood deck, a covered pergola, or a small apartment balcony, the open sides are usually the reason you stop using the space. Wind makes it uncomfortable in spring and fall. Mosquitoes drive you inside at dusk. The afternoon sun turns a west-facing patio into an oven. Neighbors can see directly onto your seating area. Any one of those problems is worth fixing, and most of them can be addressed with a single well-chosen side cover.
This guide is written for DIY homeowners and renters who want to solve those problems without hiring a contractor. We cover everything from purely temporary, non-penetrating solutions (good for renters or anyone who wants flexibility) to permanent framed enclosures. We also briefly acknowledge that digital design tools like Sims 4 have their own 'covered patio' mechanics, but those are a separate topic with their own resources, not what we are focused on here. If you want step-by-step instructions for how to make a covered patio in Sims 4, consult a dedicated guide on how to make a covered patio in sims 4 that covers the game's build tools and mechanics.
Plan Before You Build: The Checklist That Saves You Headaches
Skipping the planning step is how people end up with panels that violate HOA rules, hardware that pulls out of rental walls, or a framed screen room that needs a building permit they never pulled. Spend 30 to 60 minutes on this checklist before you buy a single thing.
- Identify your patio type and structure. Is it a freestanding pergola, a roof-attached covered patio, an open deck, a concrete slab, or an apartment balcony? The structure you have determines what you can attach to and how permanent you can go.
- Measure every open side you want to cover. Note the height from floor (or deck surface) to the roof or beam overhead, and the width of each opening. Write down exact measurements, not approximations — framing and panel cuts depend on accuracy.
- Determine your orientation and dominant weather. A south- or west-facing open side usually needs solar shading. A north or east opening is more about wind and privacy. Knowing this steers your material choice.
- Check local building codes and permit requirements. Permanent enclosures with framing or glazing often need a permit in most U.S. jurisdictions under the International Residential Code (IRC). A screened porch or a glazed panel wall is a structural addition, not just a decoration. Call your local building department or check their website before framing anything.
- Review your HOA rules. Many HOAs limit visible materials, colors, and structural additions. Get written approval before purchasing materials if there is any doubt.
- If you rent, read your lease. Drilling into masonry, wood framing, or railings may be prohibited. Plan for non-penetrating or removable solutions and get written landlord approval for anything more involved.
- Locate utilities. Before drilling or driving anchors into walls or a slab, know where electrical, plumbing, and gas lines run. Use a stud finder and a cable detector.
- Set your permanence and budget. Decide upfront whether you want a permanent installation (requires more planning, possibly a permit, but adds value), a semi-permanent setup you take down seasonally, or a fully temporary/removable solution. Budget ranges vary enormously — from under $100 for curtains to $2,000 or more for a framed glazed enclosure.
Tools and Materials You Will Likely Need
The exact toolkit depends on what you are building, but most patio side-cover projects draw from the same basic set of tools. Here is what to have on hand before you start.
- Tape measure and pencil (buy a 25 ft. tape minimum)
- Level (a 4 ft. level for framing; a torpedo level for hardware)
- Drill and a full set of drill bits including masonry bits if attaching to concrete or brick
- Circular saw or miter saw for cutting lumber and panel materials
- Utility knife and straightedge for trimming screen and polycarbonate
- Spline roller (for screen installations)
- Rubber mallet
- Socket set and screwdriver set
- Stud finder and cable/wire detector
- Safety glasses and gloves
- Ladder appropriate for your working height
- Caulk gun and weatherproof sealant
- Paint brushes or roller if you are finishing wood
Common hardware and fasteners include pressure-treated 2x4 lumber (for framing in ground contact or wet areas), galvanized or stainless steel screws and joist hangers (stainless if within 5 miles of saltwater), concrete anchors or tapcon screws for slab or masonry attachment, screen spline and aluminum screen frame channels, polycarbonate H-channel and end caps, and curtain rod brackets with appropriate wall anchors. Buy 10 to 15 percent more material than your measurements suggest, cuts waste material and minor errors are a given on a first build.
Your Best Options for Covering Patio Sides
Below is a prioritized list from the most accessible and affordable to the most involved. Read through all of them before deciding, the best solution depends on your patio type, climate, budget, and how permanent you want to go.
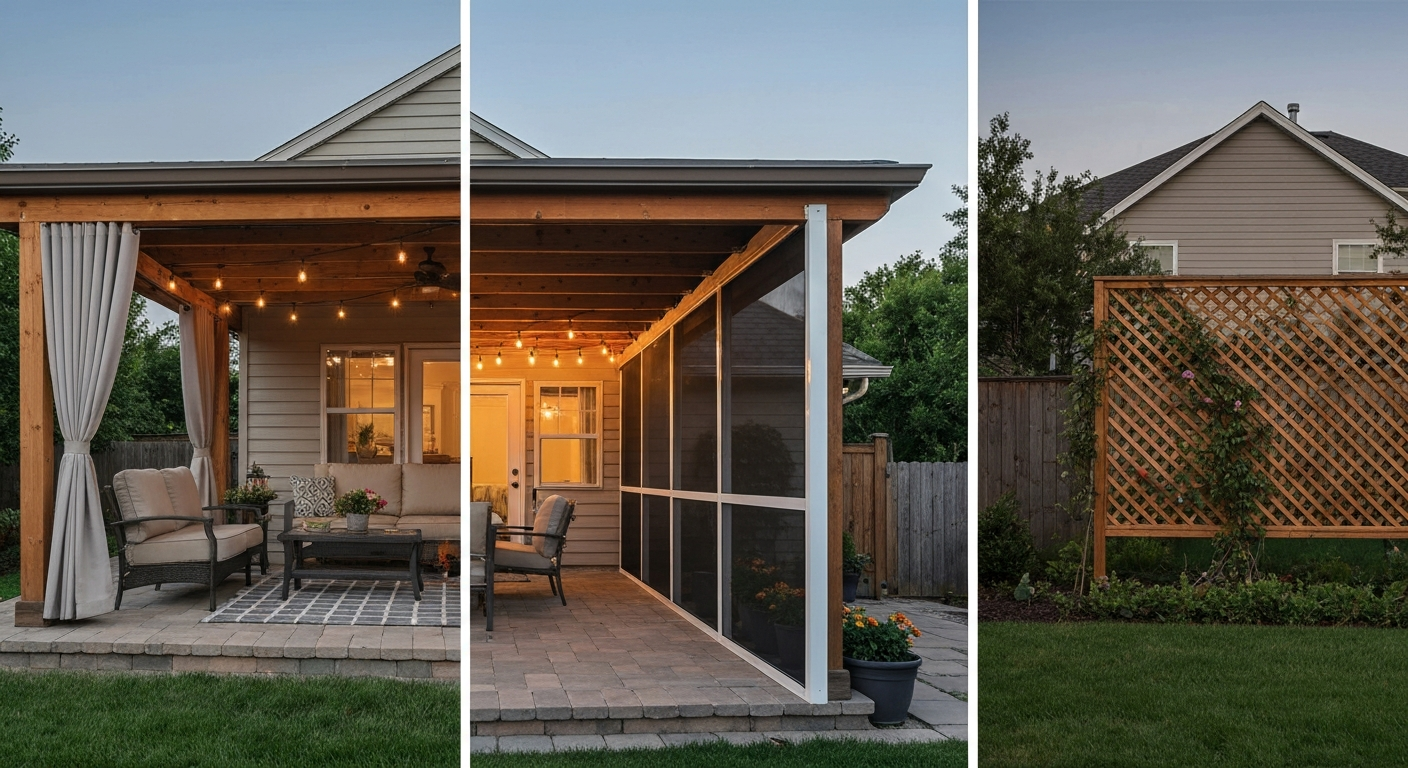
- Outdoor curtains: Best for renters, small patios, and anyone who wants a fast, affordable, and attractive solution with minimal installation. They add privacy and block some wind and sun. Not effective for insects or severe weather.
- Roll-up and retractable screens: Best for homeowners who want insect protection and wind blocking on demand with the option to open the sides fully. More expensive than curtains but highly flexible. Solar-shade mesh versions (with 3–10% openness) can block 80–95% of solar heat gain while maintaining a view.
- Fixed mesh screen panels: Best for anyone whose primary goal is insect exclusion and who wants a clean, permanent or semi-permanent setup. Works well on pergolas and covered patios. Standard 18x14 or 18x16 fiberglass mesh handles most insects; upgrade to 20x20 mesh if small biting midges are a local problem.
- Lattice and slatted wood panels: Best for homeowners who want privacy, a natural look, and moderate wind protection. Not airtight, so insects can still get through, but excellent for creating a visual barrier and support for climbing plants.
- Polycarbonate or acrylic panels: Best for homeowners who want a glazed, weather-tight side that still admits light. Polycarbonate is impact-resistant and handles hail and wind better than acrylic. Good for extending the season into cool weather. Requires more careful installation.
- Storm and hurricane panels: Best for homeowners in coastal or high-wind regions (Florida, Gulf Coast, Atlantic coast). Rigid aluminum, steel, or impact-rated polycarbonate panels that meet ASTM E1886/E1996 and TAS 201/202/203 standards. In High Velocity Hurricane Zones (HVHZ) like Miami-Dade County, products must carry a Notice of Acceptance (NOA). These are not casual DIY projects in HVHZ areas — consult a licensed contractor for anchorage requirements.
- Sliding glass or frameless glass panels: Best for homeowners who want a clean, modern, nearly transparent enclosure that transforms a patio into a three-season room. Glazing must comply with IRC safety-glazing requirements and 16 CFR Part 1201 (federal impact-safety standard for architectural glazing). Permits almost always required.
- Living green walls and trellises: Best for homeowners who want a natural privacy screen that improves over time. Takes a full growing season to establish meaningful coverage. Lightweight, no permits, and adds visual interest. Combine with a freestanding trellis frame for renters.
- Freestanding partitions and pergola side panels: Best for renters, apartment patios, or anyone who cannot attach to walls or posts. No fasteners into structure required. Can be moved or stored seasonally. Options include freestanding bamboo screens, modular panel systems, and outdoor privacy screens.
How the Materials Stack Up: A Side-by-Side Comparison
| Material | Pros | Cons | Typical Cost (DIY installed) | Durability | Insect Protection | DIY Difficulty |
|---|---|---|---|---|---|---|
| Outdoor curtains | Fast install, inexpensive, attractive, removable | No insect protection, moves in wind, fades over time | $30–$150 for one side | 2–4 years in full sun | None | Very easy |
| Roll-up / retractable screens | Flexible open/close, good insect protection, solar-shade options available | Higher cost, hardware can fail, needs clean track | $150–$600 per panel | 7–12 years | Good (matches mesh rating) | Moderate |
| Fixed fiberglass screen panels | Excellent insect control, light airflow, clean look, long-lasting | Does not block wind well, needs framing | $2–$4 per sq. ft. material | 10–15 years with UV-stabilized mesh | Excellent (18x14 or finer) | Moderate |
| Lattice / slatted wood panels | Privacy, natural look, supports plants, paintable/stainable | No insect protection, requires finishing and maintenance | $4–$10 per sq. ft. material | 10–20 years (pressure-treated or cedar) | None | Moderate |
| Polycarbonate panels (twin-wall) | Weather-tight, high impact resistance, good light transmission, UV grades available | Thermal expansion requires careful installation, can yellow over time without UV-stabilized grade | $3–$8 per sq. ft. material | 10–15 years (UV-stabilized grade) | Good (sealed installation) | Moderate |
| Acrylic / PMMA panels | Higher optical clarity (~92% light transmission), clean look | Lower impact resistance than polycarbonate, more brittle, cracks under impact | $5–$12 per sq. ft. material | 10–15 years | Good (sealed) | Moderate |
| Storm / hurricane panels | Certified impact protection, meets ASTM E1886/E1996, code-compliant in hurricane zones | Heavy, expensive, may need engineer review for anchorage | $15–$40 per sq. ft. installed | 20+ years (aluminum) | Good (sealed) | Difficult (professional often needed in HVHZ) |
| Sliding glass / frameless panels | Clean modern look, nearly transparent, transforms patio into 3-season room | Requires permit, safety glazing required (16 CFR 1201), higher cost, complex installation | $40–$120 per sq. ft. installed | 20+ years | Excellent (sealed) | Difficult |
| Living green wall / trellis | Natural, no permit, improves over time, inexpensive | Slow to establish, seasonal, requires watering/maintenance | $50–$300 for trellis structure plus plants | Structure 10+ years; plants vary | None | Easy |
| Freestanding partitions | No fasteners needed, renter-friendly, movable | Can tip in wind, less durable, limited coverage | $50–$400 per panel | 3–8 years depending on material | None to minimal | Very easy |
Step-by-Step: Installing Mesh Screen Panels
This is one of the most rewarding patio side projects you can do yourself. A framed screen panel on a covered patio or pergola keeps insects out while letting air flow through freely. Plan for about half a day per side panel, longer if you are building the frame from scratch.
What You Need for Screen Installation
- Fiberglass screen mesh, 18x14 or 18x16 mesh (Phifer and similar brands sell 36-in. x 100-ft. rolls at big-box stores)
- Aluminum screen frame channel (or build a wood frame from 2x2 or 2x4 lumber)
- Screen spline and spline roller
- Corner keys if using aluminum channel
- Utility knife and straightedge
- Tape measure and pencil
- Drill and screws or staple gun (for wood frames)
- Level
Installation Steps
- Measure the opening precisely. Measure width and height at both ends of each opening — openings are often not perfectly square. Use the smallest measurement in each direction so the panel fits without forcing.
- Build or size your frame. If attaching screen directly to existing posts and beams, you can use the structure itself as the frame and add nailer boards to give the spline a surface to seat into. For a freestanding panel, build a rectangular frame from 2x2 lumber, glued and screwed at corners, sized to fit snugly in the opening.
- Cut the screen mesh about 2 inches larger than the frame opening on all sides. Lay it flat over the frame.
- Start the spline at one corner. Use the spline roller to press the spline and screen together into the channel groove. Work one side completely before moving to the adjacent side. Keep the mesh taut but not distorted — pull gently with one hand while rolling with the other.
- Work opposite sides next (top then bottom, or left then right) to keep tension even. Avoid pulling at sharp angles or the mesh will distort.
- Trim the excess screen flush with the outer edge of the spline channel using a utility knife. Run the blade along the channel edge in one smooth pass.
- Fasten the completed panel into the opening. For wood framing, use screws with finish washers or trim strips to hold the panel in place. For aluminum channel frames, the frame can be screwed directly to the structure or held by clips.
- Inspect the finished installation. Look for gaps at corners, loose spline, or areas where the screen is not fully seated. Press any lifted spline back down with the roller.
For maximum insect protection, seal the perimeter where the frame meets the structure with weatherstrip foam tape. If you are in an area with small biting midges (no-see-ums), switch to a 20x20 mesh instead of the standard 18x14, the finer openings are needed to exclude the smallest insects, blank" rel="noopener noreferrer">as the CDC has noted in vector control guidance.
Step-by-Step: Hanging Outdoor Curtains and Mounting the Rod
Outdoor curtains are the fastest and most renter-friendly way to add privacy and a visual windbreak to a patio side. The hardware choice matters more than the curtain itself. Here is how to do it right.
Choosing Your Hardware
You have two main hardware approaches. Drilled mounts use standard outdoor curtain rod brackets screwed into wood beams, posts, or masonry (with the right anchor). Non-penetrating mounts use tension rods (for narrow openings up to about 48 inches), rope or cable strung between two fixed points with cable clamps, or weighted clamps that grip over a beam or railing without drilling. For renters, the tension rod or cable approach is the right call. For permanent installs, drilled brackets in a structural member are far more reliable and will not shift in wind.
- Measure the full width of the opening and add 12 inches on each side if attaching to posts, so the curtain can stack open neatly without blocking the opening.
- Mark bracket positions on your structure. Use a level to confirm both brackets will be at the same height. For drilled mounts, locate a stud or post — do not anchor into drywall or thin sheathing alone.
- Pre-drill pilot holes slightly smaller than your screw diameter. For masonry, use a hammer drill and a masonry bit, then insert a concrete anchor before driving the screw.
- Install the rod or cable. For a rod, slide on the curtain panels before mounting the second bracket. For a cable system, attach one end with a cable clamp, pull the cable taut, and secure the other end. A turnbuckle in the cable line lets you tension it after installation.
- Choose your fabric. Outdoor curtains need to be made from solution-dyed acrylic (like Sunbrella) or polyester with UV stabilizers. These resist fading, mildew, and moisture. Avoid standard indoor curtain fabric outdoors, which will deteriorate within one season in direct sun.
- Windproof the installation. Use curtain tiebacks when the curtains are open, and add small clip weights to the bottom hem to prevent the curtain from billowing. Bungee cord loops looped through the bottom grommets and around a post work well in windy locations.
- For a pergola without a solid roof, run the rod or cable across the top of each post at the desired height and add a second rod at the bottom to hold the curtain flat. Bottom-weighted panel systems stay more stable in wind than top-hung-only curtains.
Step-by-Step: Building and Installing Lattice or Framed Wood Panels
A framed wood panel gives you privacy and a solid structure that can support climbing plants, string lights, or a coat of paint or stain to match your house. This is a half-day to full-day project per panel, depending on your carpentry experience. Budget for pressure-treated lumber if any part of the frame will contact the ground or deck surface.
- Measure the opening and decide on panel dimensions. For openings wider than 4 feet, plan for two or more panels with a shared intermediate post rather than one large unsupported panel — wide single panels rack and bow over time.
- Cut your frame lumber. Use 2x4 pressure-treated or cedar for the outer frame. Cut two vertical stiles and two horizontal rails to form a rectangle sized about 1/4 inch smaller than the opening on each side — this gives you clearance for installation without forcing.
- Assemble the frame on a flat surface. Pre-drill and use 3-inch exterior wood screws or galvanized joist-hanger hardware at the corners for a rigid connection. Check for square by measuring diagonals — they should be equal. Clamp until the screws are set.
- Cut lattice or slats to fit within the frame. Standard pressure-treated diagonal lattice sheets come in 4x8 ft. panels and can be cut with a circular saw. For horizontal slat panels (a cleaner, more modern look), rip 1x4 cedar or redwood boards to your desired width and fasten them to the frame with 2-inch exterior screws, spacing them evenly (typically 1.5 to 2-inch gaps for partial privacy; tighter for more coverage).
- Fasten lattice to the frame using 1x2 trim strips sandwiching the lattice edge, screwed through into the frame. This holds the lattice securely and gives a finished appearance.
- Anchor the panel into the opening. For a patio post structure, use L-brackets or Z-clips screwed to the post and frame. For a freestanding panel on a concrete slab, use metal post bases anchored with Tapcon masonry screws, then slip the panel's vertical stiles into the post bases.
- Finish the panel before or immediately after installation. Apply a wood preservative, exterior stain, or paint. Pressure-treated wood should be allowed to dry for several weeks before painting. Cedar and redwood can be finished immediately with oil-based stain or left to weather naturally.
If you are anchoring a framed panel to a deck rather than a slab, use through-bolts rather than screws wherever possible. Screws can pull out laterally in wind; through-bolts with washers resist that load much better, which matters more as panel size increases.
Step-by-Step: Installing Polycarbonate or Acrylic Panels
Clear or tinted polycarbonate panels let light through while blocking wind, rain, and some UV, making them a popular choice for extending a patio into the shoulder seasons. Twin-wall polycarbonate panels (the corrugated or hollow-channel type sold at Home Depot and Lowe's in widths of 2 to 8 feet and lengths of 4 to 12 feet) run roughly $3 to $8 per square foot for material. Always buy a UV-stabilized grade, non-UV grades yellow and become brittle within a few years outdoors. Acrylic has superior optical clarity (around 92% light transmission) but is more brittle and will crack under impact, making polycarbonate the better default for side panels that might take an errant object.
- Build or confirm your frame. Polycarbonate panels need a supporting frame with a contact point at least every 24 inches horizontally for twin-wall panels. Use aluminum H-channel extrusions to connect panel edges to each other and to the frame, and U-channel at the top and bottom edges.
- Cut panels with a fine-tooth saw blade (carbide-tipped circular saw blade or jigsaw with a fine blade). Clamp the panel firmly to prevent vibration and cut slowly. Wear eye protection — polycarbonate produces fine shards and dust.
- Seal the top edge of twin-wall polycarbonate panels with aluminum tape or a solid end cap before installation. The hollow channels must be sealed to prevent water ingress, algae growth, and insect nesting inside the panel.
- Leave the bottom edge open or use a vented end cap to allow condensation to drain. Orient twin-wall panels so the channels run vertically, allowing drainage.
- Drill clearance holes (slightly oversized) through the panel at fastener points. Polycarbonate expands and contracts significantly with temperature changes, so tight fastener holes will cause the panel to buckle or crack. A 1/4-inch oversized hole at each screw location is typical — use a neoprene-backed washer to seal without pinching.
- Fasten panels to the frame with hex-head screws and neoprene washers, driving them snug but not tight. The panel needs room to move.
- Seal all perimeter gaps with a silicone weatherstrip or foam tape. Do not use oil-based caulk directly on polycarbonate — some caulks contain solvents that craze or cloud the panel surface. Use a neutral-cure silicone.
- Check the finished installation in bright sunlight. Look for any cloudy areas at fastener points (sign of over-tightening) or gaps in the edge channels.
Rental-Friendly and Small-Space Solutions
If you rent your space or are working with a small balcony, the framed-panel approaches above may not be appropriate. The goal here is meaningful coverage without leaving a trace. Covering a small patio or an apartment patio calls for a different toolkit than a permanent backyard enclosure.
- Tension curtain rods in narrow openings (up to about 48 inches) require zero drilling and can be removed in minutes.
- Freestanding bamboo or reed privacy screens in frames stand on their own and can be weighted with sandbags in the base for wind stability.
- Modular outdoor privacy screen panels (available at most home improvement stores) interlock at angles and need no wall attachment.
- Cable and turnbuckle systems anchored to existing railing posts (not walls) using clamp attachments — compatible with draping outdoor fabric or attaching shade sail panels.
- Shade sails attached to existing railing posts or freestanding poles at the patio corners can cover one or two sides at an angle, adding shade and partial wind protection with no wall penetration.
- Zip ties and grommeted shade fabric stretched between railings work for a truly temporary setup and cost very little.
- Roll-up bamboo blinds hung from an existing overhead beam or pergola rail use the structure's existing fasteners and can be raised and stored when not needed.
Design and Performance Considerations
Choosing a side cover material involves more than just cost and installation difficulty. Think through these practical performance factors before you finalize your choice.
Ventilation
Screen mesh and lattice allow free airflow, which keeps a covered patio cooler in summer and reduces the risk of mold and mildew on furniture. Fully sealed panels (polycarbonate, glass) trap heat and require planned ventilation gaps or operable sections. If you enclose three or four sides with non-breathable panels, consider leaving the top edges open or installing an operable vent panel on the least-used side.
Light and Solar Control
Clear polycarbonate and glass pass most visible light but can increase heat gain significantly on a west or south side. Solar-shade mesh products are rated by 'openness factor', a 3% openness mesh blocks roughly 95% of solar heat gain while still maintaining an outward view. Tinted polycarbonate panels (bronze or gray tint) reduce both glare and heat gain while keeping the space bright. Outdoor curtains in a lighter color reflect more heat than dark fabrics but also provide less privacy.
Drainage and Water Management
Side panels that extend to the floor can trap water against the bottom rail or post base. Always leave at least a 1-inch gap between the bottom of any panel or frame and the deck or slab surface. Use pressure-treated lumber for any ground-contact members and seal end grain with preservative. For polycarbonate, orient the hollow channels vertically and seal the top edge to prevent trapped moisture inside the panel.
Matching Your Existing Structure
Side panels look best when they reference the existing materials and colors of your patio structure. If your pergola is stained cedar, a natural wood lattice panel in the same stain color reads as intentional. If your patio is painted white with aluminum framing, aluminum-framed screen panels match much better than raw lumber. Take a photo of your existing structure to the lumber yard or home improvement store and use it to check finish compatibility before you buy.
Maintenance, Seasonal Use, and Troubleshooting
Even the most durable installation needs occasional attention. Here is what to expect from each type and how to handle the most common problems.
Cleaning
- Screen mesh: Brush loose debris with a soft brush, then rinse with a garden hose. Stubborn dirt can be cleaned with a mild dish soap solution applied with a soft brush. Avoid pressure washing at close range — it can distort the mesh.
- Polycarbonate panels: Rinse first to remove grit, then wash with a mild soap and a soft cloth. Never use abrasive pads or solvents like acetone — they will permanently scratch or craze the surface.
- Wood lattice and frames: Wash with a deck cleaner or a diluted bleach solution (1 cup bleach per gallon of water) if mildew is present. Rinse thoroughly and allow to dry before reapplying stain or sealant.
- Outdoor curtains: Most solution-dyed acrylic fabrics can be hand-washed or machine-washed on gentle cycle. Check manufacturer tags. Hang to dry, do not machine dry.
Winterizing and Seasonal Storage
In climates with hard freezes, remove outdoor curtains and roll-up screens at the end of the season and store them flat or loosely rolled indoors. Polycarbonate and properly framed wood panels can usually stay in place through winter, but inspect fasteners and seals in the spring for frost-related movement. Screen mesh is durable through cold temperatures but benefits from a visual inspection each spring for small tears caused by debris or ice.
Common Problems and Fixes
- Sagging screen mesh: Caused by loose spline or a frame that has racked. Re-roll the spline section by section, pulling the screen taut as you go. For a racked frame, add a diagonal brace from corner to corner on the back side of the frame.
- Curtain rod slipping or drooping: The bracket screws may be in a weak substrate. Remove the bracket, install a toggle bolt or a longer screw into a solid member, and reinstall.
- Polycarbonate panel buckling at fasteners: The clearance holes are too small or fasteners are too tight. Loosen all screws slightly and re-drill slightly oversized holes if buckling is significant.
- Wood frame rotting at base: The frame is sitting directly on a wet surface. Raise it on metal post bases or add rubber feet to lift it off the slab or deck boards.
- Screen mesh torn or punctured: Small tears (under 2 inches) can be repaired with a mesh patch kit available at hardware stores. Larger tears require replacing the screen in that panel — cut out the old spline with a utility knife, remove the old screen, and re-screen.
- Curtains billowing and tangling: Add bottom weights or bungee ties, and switch to a heavier fabric weight (at least 8 oz per square yard for a windy site).
A Note on Hurricane and High-Wind Zones
If you live in a coastal area subject to hurricanes or severe windstorms, covering your patio sides means something more specific and more critical than in other climates. Permanent enclosures and protective panels in these areas must be engineered to handle wind loads per ASCE 7 standards, and any glazing must meet 16 CFR Part 1201 federal safety-glazing requirements at minimum. The 2021 International Residential Code (IRC), Chapter 3, Building Planning includes specific safety-glazing and enclosure planning requirements commonly adopted by states 2021 International Residential Code (IRC) — Chapter 3, Building Planning. In Florida's High Velocity Hurricane Zone (HVHZ, which includes Miami-Dade and Broward counties), panels used for openings must carry a Miami-Dade Notice of Acceptance (NOA) and pass TAS 201, 202, and 203 impact and cyclic pressure tests. ASTM E1886 and E1996 are the widely referenced U.S. standards for hurricane impact resistance used by code bodies across the country. FEMA P-804 (Wind Retrofit Guide for Residential Buildings) is a useful free reference that covers protective system choices and anchorage considerations. The practical takeaway: in hurricane zones, verify product approvals before purchasing, pull the required permit, and do not improvise anchorage details, get an engineer or licensed contractor to review your installation plan.
Where to Go From Here
Covering your patio sides is often just the starting point for a bigger transformation. Once the sides are handled, you might find yourself thinking about the roof structure, the floor, lighting, or how to make the space work year-round. If you are working on a small space, the approach is a bit different, with more emphasis on compact, non-permanent solutions. For step-by-step tips tailored to compact yards and balconies, see our guide on how to cover a small patio. If you are covering a back patio specifically, the orientation and privacy considerations change the calculus. For step-by-step instructions specifically on how to cover a back patio, see our dedicated guide on how to cover back patio. And if you are starting from scratch with a brand-new covered patio design, laying out the structure around both roof and side coverage from the beginning saves a lot of retrofitting later. For step-by-step guidance on layout, roof integration, and material choices, see our how to design a covered patio guide. There are also design-only variants of this question, if someone in your household has been asking about building a covered patio in Sims 4, that is a fun exercise in virtual design that shares some vocabulary with real construction but operates on completely different rules, and there are dedicated gaming resources for it. For real-world projects of any scale or patio type, the planning checklist and material comparisons in this guide give you everything you need to make a confident, informed decision. For specific material recommendations and pros and cons, see our detailed guide on what to cover a patio with. For quick material ideas and pros and cons, see what can I cover my patio with.
FAQ
What key planning steps should a DIY homeowner take before covering the sides of a patio?
Start with a short planning checklist: 1) Assess patio type (open, attached porch, balcony, freestanding pergola), exact measurements (height, width, clearances), and orientation (sun/wind direction). 2) Check building/rental rules: local building code and permit triggers (see IRC/IBC and local adoption), HOA rules, and landlord approval for rentals. 3) Identify performance goals: shade, privacy, wind resistance, insect control, year‑round use, or storm protection. 4) Note structural attachment points and material compatibility (masonry, wood, aluminum). 5) Determine exposure: wind zone (use ASCE 7 guidance), hurricane/windborne‑debris region requirements (Florida/Miami‑Dade if applicable). 6) Budget and DIY skill level. 7) Choose permanent vs removable solutions for rentals. Authoritative sources to consult during planning include IRC Chapter 3 for residential enclosure rules, ASCE 7 for design loads, and local code enforcement or building department for permit specifics.
What are the prioritized side‑cover solutions and who each is best for?
Prioritized list with best uses: 1) Screen panels / full screened enclosures — best for insect control and airflow; homeowners wanting a low‑cost, DIY insect barrier. 2) Roll‑up or retractable screens (manual/zip systems) — best for flexible shade/privacy with minimal permanent changes; renters and homeowners wanting adjustable openings. 3) Outdoor curtains — best for low‑cost privacy and style; renters or seasonal users wanting easy removal. 4) Lattice or slatted wood panels — best for aesthetic privacy and climbing plants; DIY carpenters wanting a semi‑permanent look. 5) Polycarbonate or acrylic panels — best for robust weather protection and light transmission (polycarbonate for impact resistance). 6) Storm/hurricane panels or shutters — best for high‑wind/burst protection in hurricane zones (requires certified products/NOA in Florida/Miami‑Dade). 7) Sliding glass or frameless panels — best for all‑weather, year‑round enclosed patios; typically higher cost and may require permits/structural checks. 8) Living green walls and trellises — best for natural privacy, cooling and aesthetics. 9) Freestanding partitions and pergola side panels — best for non‑penetrating, temporary, or renter‑friendly solutions. Choice depends on goals: insect control → screens; wind/impact protection → polycarbonate or certified shutters; privacy/style → curtains, lattice, plants; flexible/removable → roll‑ups, freestanding panels.
What material‑by‑material pros, cons, typical costs, durability and DIY difficulty should I consider?
High‑level comparison: 1) Fiberglass/metal insect mesh: Pros — low cost (~$0.50–$2/sq ft retail screen material), excellent airflow, easy DIY; Cons — little wind/impact protection, can tear; Durability — moderate (UV‑stabilized meshes last years); DIY difficulty — low. 2) Zip/solar shade fabric: Pros — blocks sun, variable openness, neat look; Cons — higher cost than basic mesh, hardware needed; Durability — good for sun/heat if UV‑rated; DIY difficulty — low‑medium. 3) Outdoor curtain fabric (solution‑dyed acrylic/polyester): Pros — affordable, decorative, removable; Cons — limited wind resistance unless tie‑backed; Durability — good with UV/mildew fabrics; Cost — ~$20–$80 per panel; Difficulty — low. 4) Wood lattice/slatted panels: Pros — attractive, customizable, supports plants; Cons — susceptible to rot unless pressure‑treated or cedar; Durability — medium (needs finish); Cost — $50–$300 per panel depending on size/material; Difficulty — medium. 5) Polycarbonate (multiwall/solid): Pros — very high impact resistance, good light control, affordable (~$3–$10/sq ft retail); Cons — can scratch, thermal expansion, requires correct fastening/spacing; Durability — high with UV grade; Difficulty — medium. 6) Acrylic (PMMA): Pros — clear, high optical clarity; Cons — less impact resistant than polycarbonate, brittle in large panels; Cost — higher than multiwall polycarbonate; Difficulty — medium. 7) Glass/sliding panels: Pros — premium appearance, full enclosure and insulation potential; Cons — high cost, heavier framing, code/tempered glazing requirements (16 CFR/IRC/IBC), permits; Durability — high if laminated/tempered; Difficulty — high/professional often required. 8) Storm/hurricane panels: Pros — certified protection in high‑wind zones; Cons — must be certified (Miami‑Dade/Florida NOA in HVHZ), cost varies widely; Difficulty — medium‑high to install per manufacturer anchors. 9) Freestanding partitions (metal/wood/composite): Pros — no penetration, renter‑friendly; Cons — need stable base/weighting, limited wind resistance; Cost — variable; Difficulty — low‑medium.
Which authoritative codes and standards should influence material and fastening choices?
Consult these authoritative sources: - IRC (International Residential Code) Chapter 3 for residential building/enclosure planning and when permits are needed. - IBC Chapter 24 and 16 for glazing, support, and structural requirements when using large glazed panels. - 16 CFR Part 1201 (CPSC) for safety glazing requirements (tempered/laminated) in hazardous locations or in sliding systems. - ASCE 7 for minimum design loads (wind/snow) to size framing/anchors. - ASTM/ICC‑ES testing standards for impact resistance: ASTM E1886/E1996 and TAS 201/202/203 for windborne‑debris/hurricane products. - FEMA P‑804 for wind protection guidance. In high‑wind/hurricane regions use manufacturer NOAs and TAS/ASTM test references (Miami‑Dade/Florida Product Approval) and follow manufacturer anchor/installation details.
What are clear, step‑by‑step DIY outlines for the most common installations?
Concise installation outlines: 1) Mesh screen installation (framed panel): a) Measure and build a rectangular frame (2x2 or aluminum) sized to opening. b) Apply spline into a screen groove or staple screen to the frame, trimming excess. c) Install hangers or through‑fasten frame to structure with appropriate screws/anchors and flashing as needed. d) Add door or zipper closure if desired. 2) Outdoor curtain and rod mounting: a) Select a rated outdoor rod or wire and heavy‑duty anchors. b) Mark and install mounting supports into studs or masonry anchors; for rentals use non‑penetrating tension rods or free‑standing header posts. c) Hang panels with grommets or rings; add tie‑backs or bottom weights for wind. 3) Building a lattice or framed wood panel: a) Build a structural frame (pressure‑treated or cedar) sized to opening. b) Attach lattice/slats with screws; add cross bracing for wind. c) Finish with paint/sealant and attach with through or ledger anchors sized to substrate; consider removable bracket mounts for rentals. 4) Installing polycarbonate/acrylic panels: a) Choose correct thickness and UV grade; plan for thermal expansion (manufacturer spacing/fastener guidance). b) Cut panels to size with fine‑tooth blade; pre‑drill oversized holes for fasteners. c) Use neoprene washers and recommended fasteners; seal edges where water intrusion is a concern with compatible tape/sealant. d) Anchor to routed grooves or structural members per manufacturer's spacing tables and ASCE load guidance. 5) Temporary/rental‑friendly solutions: a) Freestanding framed screens or planters with trellis positioned to block sightlines. b) Tension‑rod curtains, magnetic/adhesive screen frames, or removable zip‑screen posts that clamp without penetrating structure. For each method consult manufacturer instructions and use hardware rated for outdoor use. Include tools: tape measure, level, drill/driver, screws/anchors, saw (circular/jigsaw), spline roller (for screens), rivet gun/fasteners, sealant, safety gear.
What design and performance tradeoffs should I consider (ventilation, light, drainage, insect protection, appearance)?
Key tradeoffs: - Ventilation vs insect/privacy: Tight meshes or solid panels improve privacy and block insects but reduce airflow; choose mesh openness or operable panels (retractable/slider) to balance. - Light vs shade: Clear glazing/polycarbonate maximizes light; tinted/multicell polycarbonate or shade fabrics reduce heat and glare. - Drainage and water management: Solid panels change runoff—provide drip edges, flashing, and maintain gaps at the bottom for drainage or install threshold details to avoid trapping water. - Wind resistance vs ease of operation: Heavier, rigid panels resist wind but are permanent and costly; roll‑ups and curtains are easier to operate but need secure tie‑backs in wind. - Appearance and matching structure: Match material color/finish to existing trim; use comparable mounting details to visually integrate panels with roof/structure. - Thermal/condensation behavior: Polycarbonate and acrylic expand with temperature—follow manufacturer spacing to avoid buckling. Consider mosquito/insect mesh counts to target pests (standard 16–18 mesh for mosquitoes; 20×20 for very small midges). Use manufacturer openness and solar block specs when choosing shade fabrics.
Next Articles
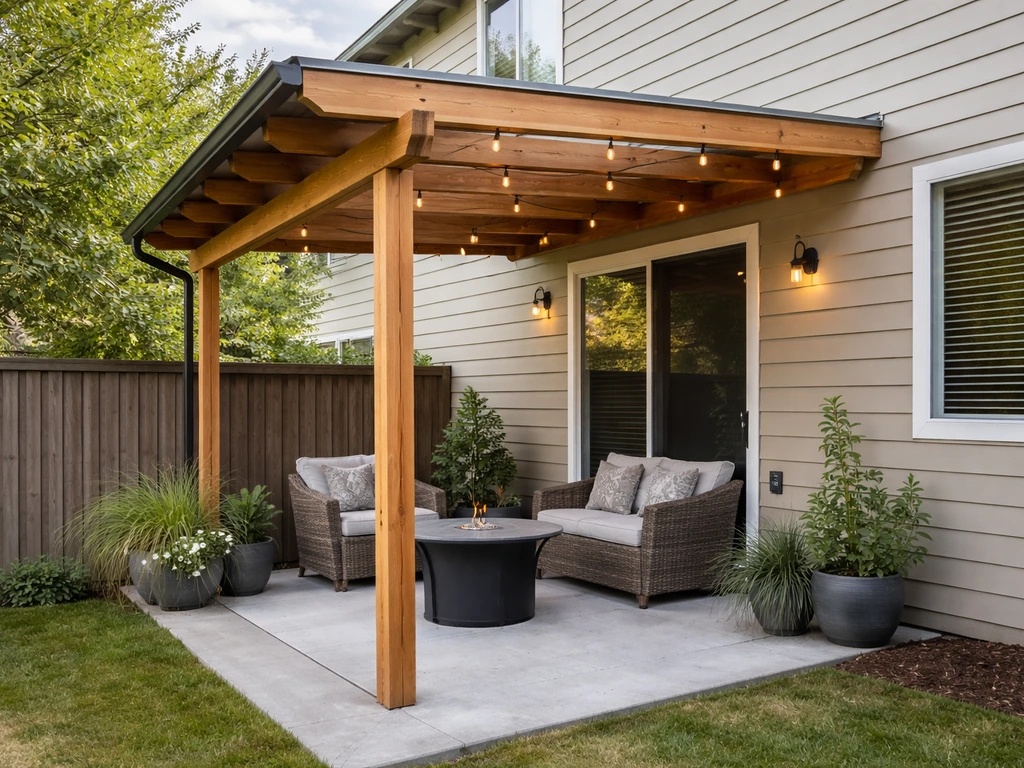
How to Cover a Small Patio: DIY Options, Steps, Costs
Step-by-step DIY guide to cover a small patio with shade or weather protection, including materials, sizing, drainage, c
How to Make a Covered Patio in Sims 4 Step by Step
Step-by-step guide to build a covered patio in Sims 4, align roofs and supports, then fix common snapping and clipping i
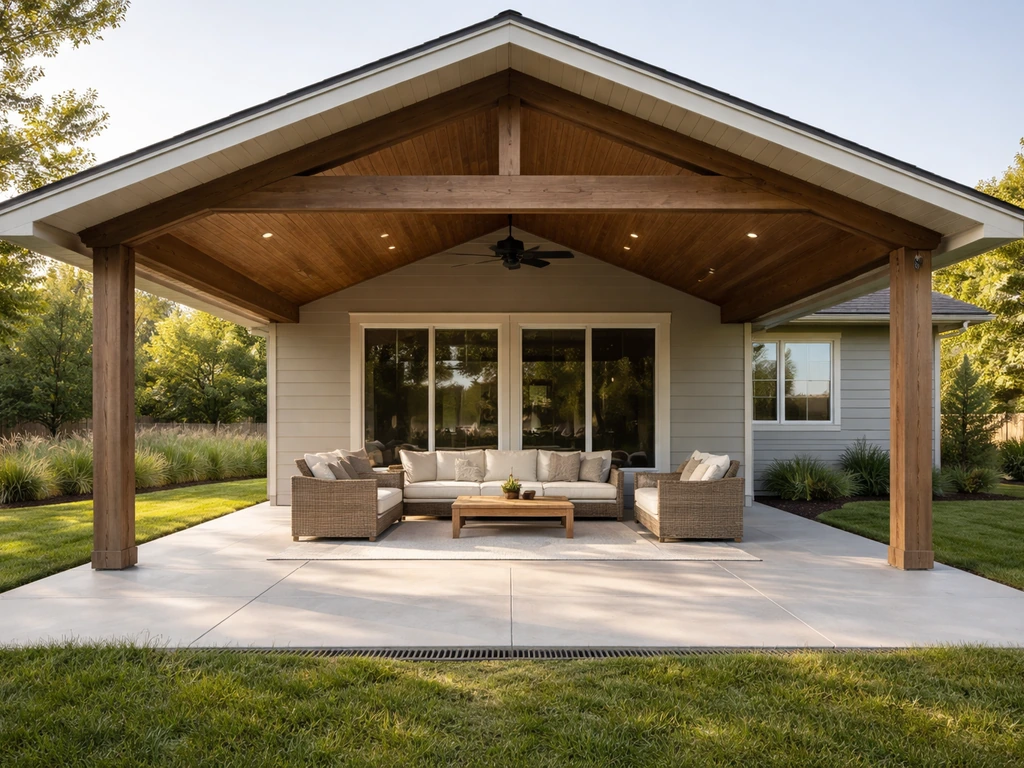
How to Design a Covered Patio: Step-by-Step Guide
Step-by-step DIY guide to design a covered patio, choosing roof, structure, drainage, screens, permits, and maintenance.