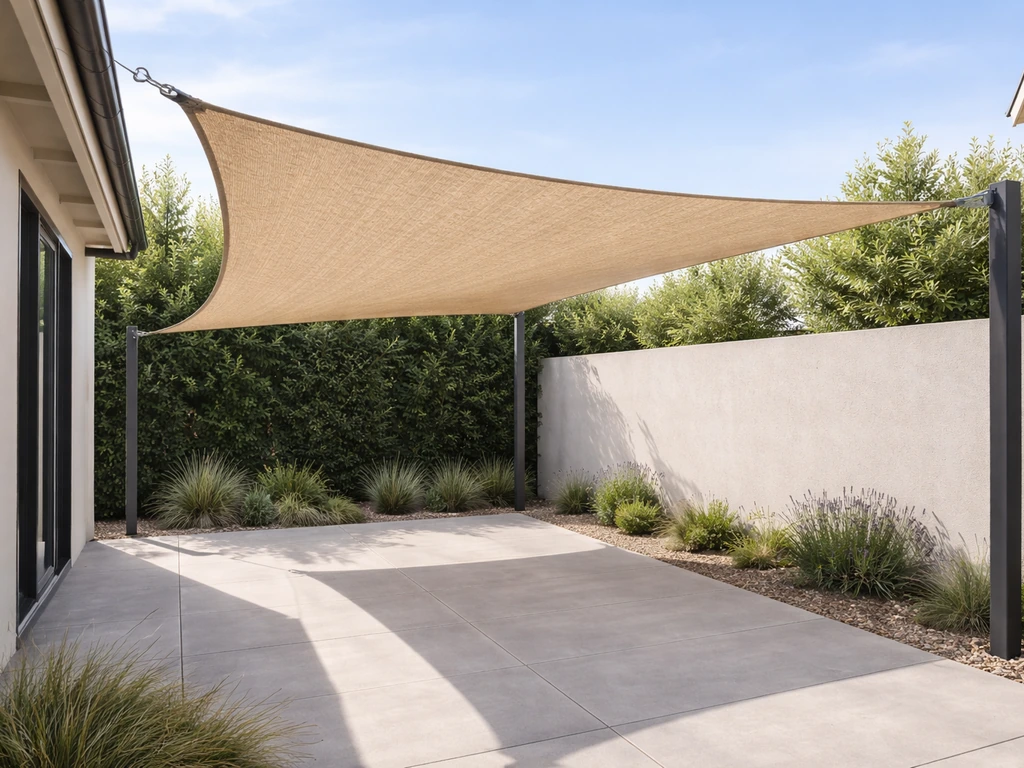
You can make a DIY patio sun shade in a weekend using shade sail fabric, a few heavy-duty anchor points, and a tensioning system built around turnbuckles and shackles. The most practical approach for most homeowners is a shade sail rigged between two or three fixed anchor points, posts, wall brackets, or beam hooks, with enough tension to hold the fabric taut through wind and rain. It takes some measuring upfront, a handful of specific hardware pieces, and one careful installation session. Here's exactly how to do it. If you want a step-by-step guide specifically for building a shaded patio, use this same shade sail approach as your foundation and follow the measuring, mounting, and tensioning steps in order.
How to Make Sun Shades for Patio: DIY Step-by-Step

Felix Brennan
25 Jun 2026
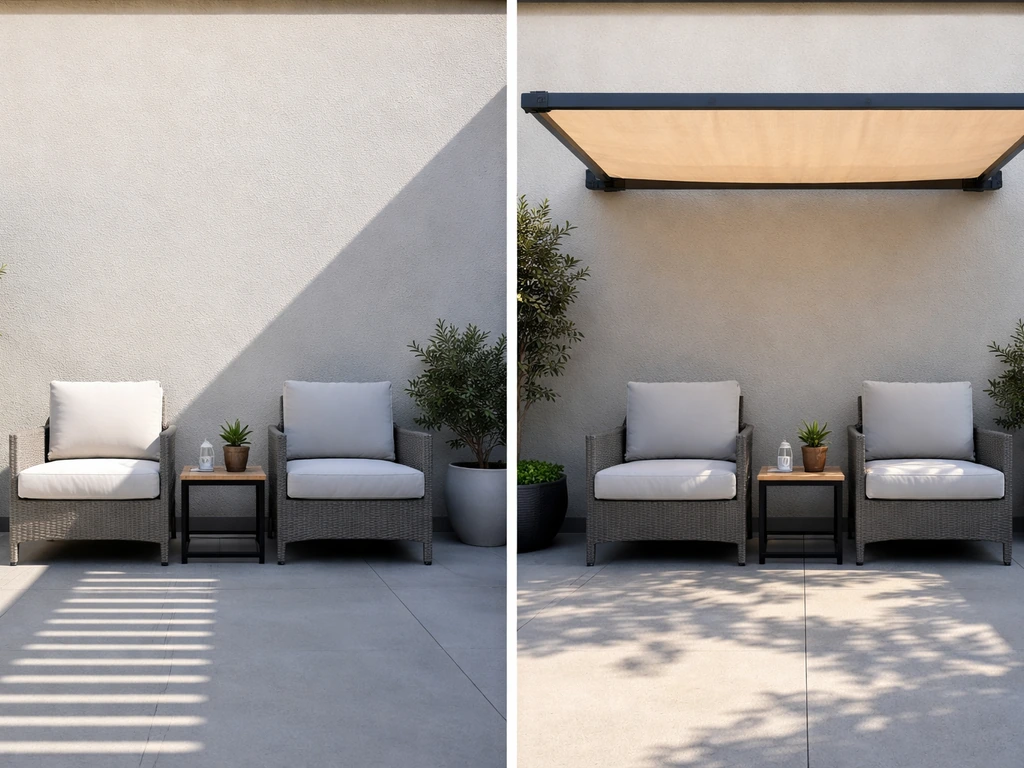
Choosing the right sun shade style for your patio
Before you buy a single piece of hardware, decide which shade style actually fits your patio layout, budget, and how much sun control you need. How to shade a sunny patio: learn how to choose the right shade style and placement for maximum sun control. The three most common DIY options are shade sails, shade cloth panel systems, and pergola-mounted fabric panels. Each has a different installation approach and a different tolerance for wind.
| Style | Best For | Wind Tolerance | DIY Difficulty | Rough Cost |
|---|---|---|---|---|
| Shade sail (triangle or rectangle) | Open patios, corner-to-corner coverage | Moderate — needs tensioning, must re-tension seasonally | Beginner–Intermediate | $80–$300 including hardware |
| Shade cloth panel (attached to frame/pergola) | Patios with existing overhead structure | Good — fabric lies flatter | Beginner | $50–$200 |
| Retractable awning/canopy | Patios needing sun and full-open options | Lower — retract in high wind | Intermediate | $300–$1,500+ |
For most DIYers, a shade sail is the sweet spot. It's affordable, genuinely effective at blocking UV, and doesn't require building a full pergola structure. If you already have a pergola or covered frame, attaching shade cloth panels directly to the rafters is even simpler and handles wind better. Retractable awnings work well but are overkill for a first DIY project and have published wind limits, many need to be retracted in anything above 25–30 mph gusts, which defeats the point if you live somewhere windy. Retractable awnings have published wind-rating categories, and their wind tolerance is a key reason they may need retraction or avoidance during higher gusts compared with fixed shade solutions published wind limits.
One honest note: shade sails don't block 100% of the sun. Most high-quality HDPE shade cloth blocks 90–97% of UV rays while still allowing some airflow, which is actually what makes them comfortable on a hot patio. If your main goal is to block the sun on your patio, focus on high-quality UV-blocking shade cloth and proper pitch so it covers the seating during peak sun hours block the sun on my patio. If you want full shade and rain coverage in one solution, you're looking at a solid-fabric awning or a covered patio build instead, both of which are different projects.
Measuring, layout, and deciding where it mounts
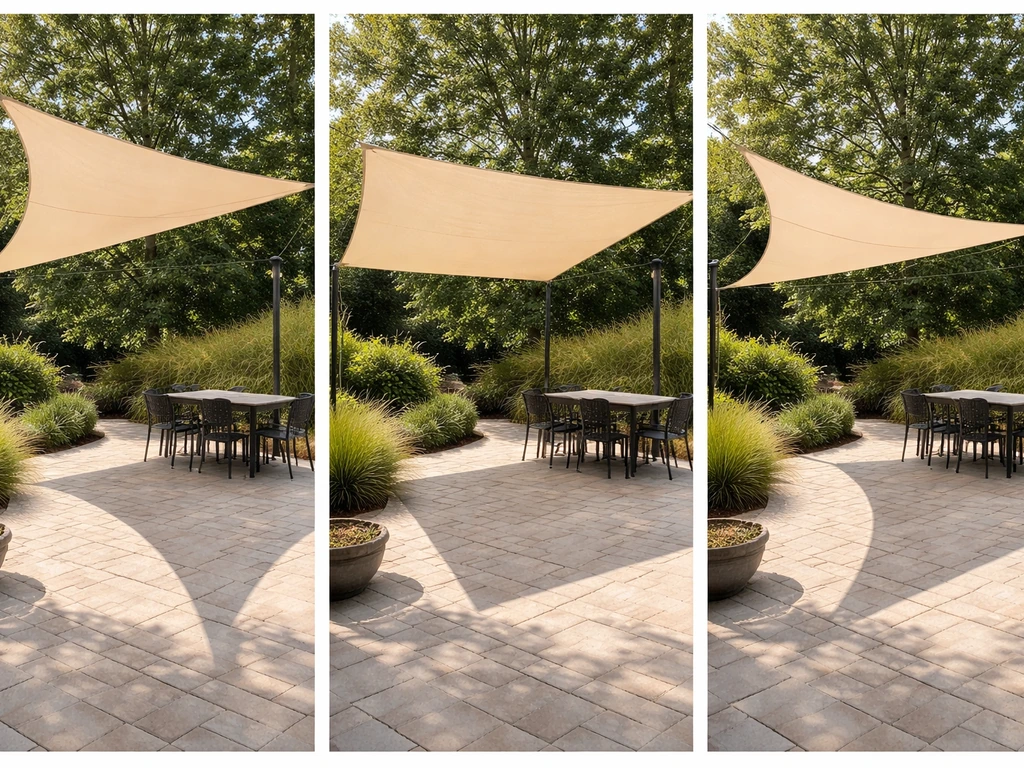
Measure your patio first, then plan the shade footprint. The shade sail doesn't have to cover the entire patio, it needs to cover the seating or use zone during peak sun hours, which is typically mid-morning through mid-afternoon. Stand on your patio around 11am–2pm and note exactly where the sun hits hardest. That's your target coverage area.
How to measure for a shade sail
- Measure the coverage zone you want shaded — length and width in feet.
- Add 1.5–2 feet to each dimension. The sail will be slightly smaller than the span between anchor points because of the catenary curve (the natural inward bow of a tensioned sail edge). A 12×12 ft area needs anchor points roughly 14×14 ft apart.
- Identify your three (triangle) or four (rectangle/square) anchor points. These should be at the corners of your planned coverage zone, mounted as high as comfortably possible — ideally 8–12 feet high. More height means better pitch for rain runoff.
- Mark each anchor point with tape or chalk and double-check they're within range of the fabric you're buying.
- Check for obstacles: overhanging branches, light fixtures, or HVAC units that would interfere with a taut line across the coverage zone.
Anchor point height matters more than most people realize. A flat horizontal shade sail sheds rain poorly and bags in the middle under water weight. Aim for at least a 20–30 degree pitch by making one or two anchor points noticeably higher than the others. Think of it like a tent, you want a peak and a low edge, not a flat ceiling. This pitch also makes tensioning easier and reduces the pooling problem that frustrates so many first-time shade sail installers.
Anchor point options
- Existing house wall or beam: Use a lag-bolt eye bolt or wall plate bracket rated for at least 400 lbs. Hit a stud or use a structural anchor rated for the load.
- Existing fence post or pergola column: Wrap-around post brackets work well here. Make sure the post is set in concrete, not just driven in.
- New freestanding post: This is the most work but gives you full control over placement. A 4x4 or 4x6 pressure-treated post set 24–30 inches deep in concrete is solid enough for most sails.
- Deck railing: Generally not strong enough on its own — only use if the railing is bolted to structural posts and the sail is small and lightly tensioned.
Materials and hardware checklist
This is the section most DIY guides gloss over, and it's where projects go sideways. Skimping on hardware is how you end up with a sagging sail or a torn corner. Here's everything you need for a standard triangle or rectangle shade sail installation.
Fabric
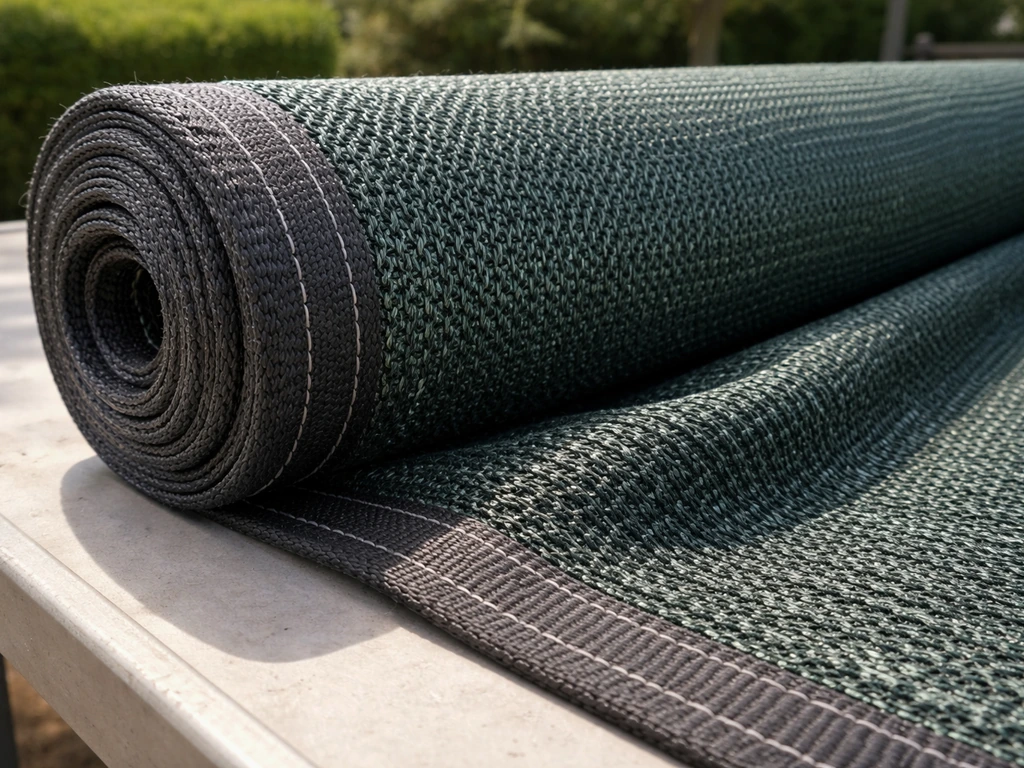
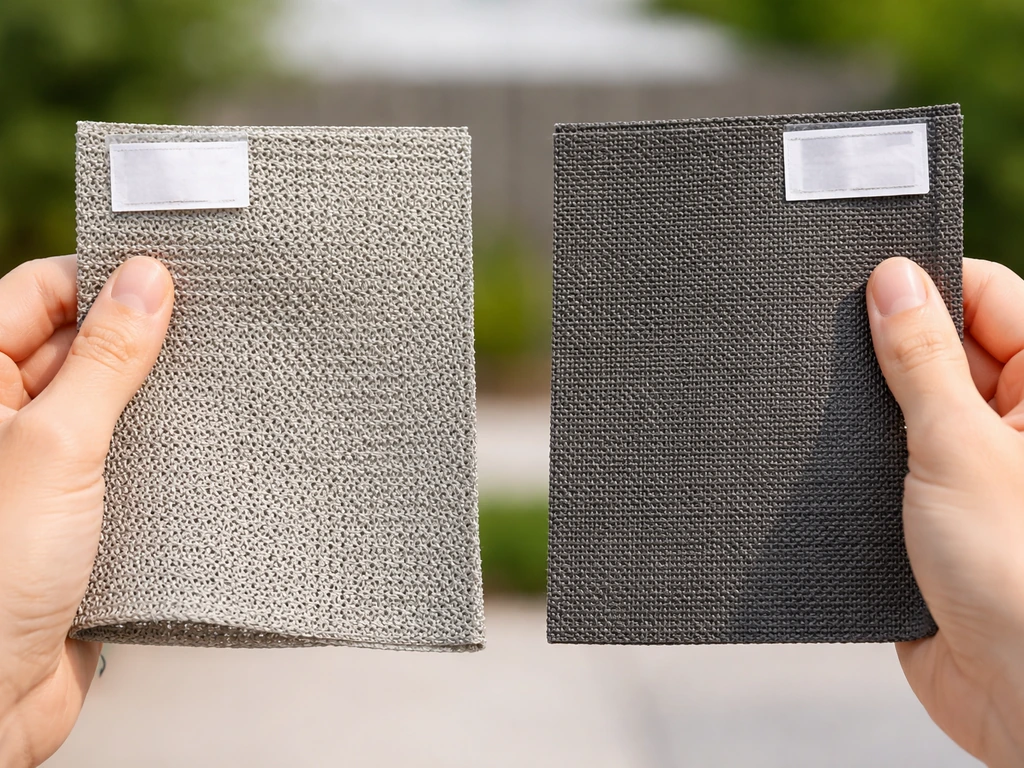
- HDPE (high-density polyethylene) knitted shade cloth: The best all-around choice. Breathable, UV-stabilized, and won't rot. Look for 180–200 gsm weight for residential use.
- PVC-coated polyester: Heavier, blocks more light, and sheds rain more reliably, but traps more heat underneath. Good if rain coverage is a priority.
- Pre-made shade sails with reinforced corner rings: Saves time over cutting and hemming raw fabric. Brands like Coolaroo, Shade&Beyond, and ShelterLogic offer good mid-range options around $60–$150 for a 16×16 ft or similar size.
- Raw HDPE cloth by the yard: More economical for large or odd-shaped coverage. You'll need to sew or use a grommet press to create corner attachment points.
Hardware (per anchor point)
- Heavy-duty eye bolt or pad eye (stainless steel, rated 400+ lbs): The fixed anchor point that goes into your post, beam, or wall.
- D-ring or shackle (stainless steel, 3/8" or larger): Connects the eye bolt to the tensioning system.
- Turnbuckle (stainless steel, jaw-to-jaw or eye-to-eye, 3/8" minimum): This is your tensioning device. Buy one per corner — don't skip these.
- Snap hook or additional shackle: Connects the turnbuckle to the sail's corner ring for easy removal.
- Lag screws or structural bolts for wall mounts: 5/16" or 3/8" diameter, at least 3 inches long to reach a stud.
- Post base hardware (if installing new posts): Concrete, post-base bracket or direct embed depending on your post plan.
- Rope or stainless cable (optional): Some installs use a short section of 3/16" stainless wire rope between the eye bolt and turnbuckle for a cleaner look and extra strength.
Tools
- Drill with masonry or wood bits (matching your anchor bolt diameter)
- Socket wrench or adjustable wrench (for tightening turnbuckles and shackles)
- Level and tape measure
- Ladder tall enough to reach anchor points comfortably
- Post hole digger or clamshell auger (if setting new posts)
- Stud finder (for wall mounts)
- Marker and chalk line
Building a DIY support and mount plan
Your anchor plan depends entirely on what your patio already has. Most installs use a hybrid approach: one or two anchor points on the house structure and one or two on new posts you set yourself. Here's how to handle both.
Attaching to an existing house wall or beam
Use a stud finder to locate a structural stud or beam. Mark your anchor height, then drill a pilot hole slightly smaller than your lag bolt diameter. Drive a 3/8" x 3" (minimum) stainless steel lag-eye bolt or install a through-bolt with a washer and nut on the inside if you have access. The eye needs to be rated for the load, don't use a regular screw hook from the hardware store. On masonry walls, use a concrete anchor sleeve rated for tension loads rather than shear loads.
Setting new posts for shade sail corners
- Mark your post location based on your layout plan.
- Dig a hole 10–12 inches in diameter and 24–30 inches deep (deeper in frost-prone climates — below the frost line).
- Set the post with a slight outward lean — about 5–10 degrees away from the direction the sail will pull. This is important: when you tension the sail, the pull will bring the post back toward true vertical. If you set it perfectly plumb before tensioning, the tension will tip it inward over time.
- Pour fast-setting concrete (like Quikrete Fast-Setting) around the post. Keep it 2–3 inches below grade so water doesn't pool at the base.
- Brace the post and let concrete cure at least 24 hours before attaching hardware.
- Install your eye bolt or pad eye at the top of the post, angled slightly toward the sail's pull direction.
Post size matters here. For a shade sail up to about 16 ft on a side, a 4x4 pressure-treated post set 30 inches deep in concrete is adequate. Go up to a 4x6 if you're in a high-wind area or the sail is large. The post height above ground should put your eye bolt at 9–12 feet, high enough to give the sail good pitch and keep it well above head height.
Attaching to an existing pergola or patio cover
If you have a pergola, lucky you, the hard part is already done. Attach eye bolts directly into the structural rafters or beams, not the decorative lattice. Wrap-around post straps with an integrated eye are great for attaching to pergola columns without drilling. For shade cloth panels rather than a sail, you can staple or zip-tie raw shade fabric directly to the rafters and hem the edges for a clean look, no tensioning system needed.
Installing and tensioning the shade fabric safely
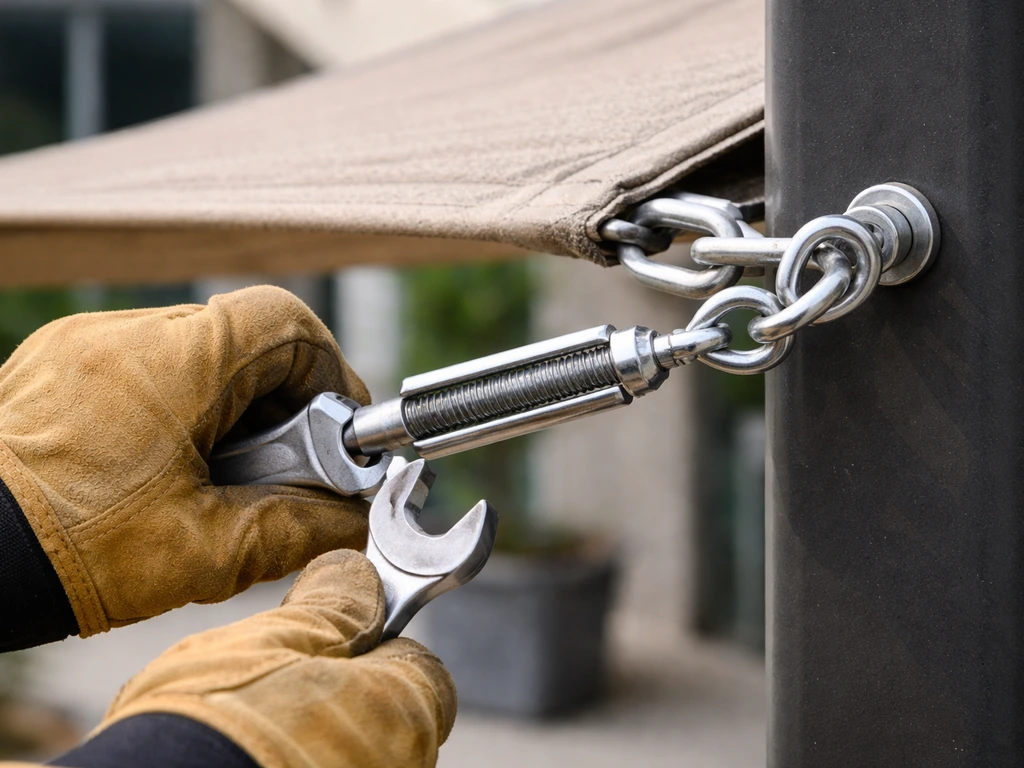
Once all anchor points are set and hardware is in place, installation goes quickly. The sequence at each corner is always: fixed anchor (eye bolt) → D-ring or shackle → turnbuckle → snap hook or shackle → sail corner ring. Never skip the turnbuckle, it's the only way to dial in even tension across all corners.
- With all turnbuckles wound fully open (maximum length), clip the snap hooks to each corner ring of the sail.
- Lift the sail and clip each corner to its corresponding turnbuckle. Have a helper hold the sail up while you work — trying to do this solo on a ladder is frustrating and unsafe.
- Once all four (or three) corners are clipped in, the sail will be visibly loose and drooping. That's correct at this stage.
- Begin tightening turnbuckles in a star pattern — a little on each corner in rotation rather than fully tightening one at a time. This keeps tension even.
- Tighten until the fabric is taut but not drum-tight. You're aiming for a clean catenary curve on each edge — a slight natural inward bow — not a perfectly straight edge. Perfectly straight edges under high tension can tear corner rings.
- Step back and check that the sail has a visible pitch (one corner higher than the others) for rain runoff. If it looks flat, raise one anchor point or add a short chain extension at the high corner.
- Leave the sail slightly looser than you think you need to for the first 2–3 weeks. HDPE fabric stretches as it settles under tension and UV exposure. Plan to come back and re-tighten the turnbuckles after this break-in period.
- Once re-tensioned after settling, apply a drop of thread-locking compound (like Loctite Blue) to each turnbuckle thread to prevent vibration from loosening it over time.
A well-tensioned shade sail has a slight 10–15% curvature on its edges, this is by design, not a flaw. That curve is what gives the sail its structural integrity under wind load. Trying to pull the edges dead-straight puts enormous stress on the corner hardware and will eventually fail a grommet or tear the reinforced corner pocket.
Weatherproofing, wind-proofing, and maintenance tips
A shade sail that's properly tensioned and pitched handles normal rain and moderate wind without drama. But there are a few things you can do during installation and afterward to make sure it holds up season after season.
Wind
The biggest risk with shade sails in wind isn't the fabric tearing, it's the anchor points pulling out or the posts failing. The lateral load on each anchor point in a 30–40 mph gust can exceed 200 lbs on a mid-sized sail. This is why post depth, concrete footing, and properly rated hardware matter so much. If you're in a hurricane-prone area or regularly see sustained winds above 35 mph, plan to remove the sail during storm season or install a quick-release clip system at one corner so you can drop it in minutes. Knitted HDPE shade cloth is permeable (air flows through), which makes it much more wind-tolerant than solid tarps or fabric, that's another reason to choose it over PVC for most residential installs.
Rain
Knitted HDPE is not fully waterproof, it's water-resistant at best and lets light rain pass through slowly. For genuine rain coverage, you need a PVC-coated solid fabric or a proper awning. If you are planning how to cover patio from sun, choose a UV-blocking fabric first, then match the material to your rain coverage needs. If you're using standard shade cloth and want to improve rain runoff, increase the pitch of your sail as much as possible. A 30-degree-plus pitch on the high corner will shed most rainfall before it pools. Never leave a horizontal or near-flat sail up during heavy rain, pooled water can easily exceed 100 lbs of force on the center fabric and fail the installation.
Ongoing maintenance
- Check turnbuckle tension and all D-ring connections every 4–6 weeks during peak use season. Re-tighten as needed.
- Inspect corner rings and stitching at each corner pocket every spring. Early fraying or ring deformation is a warning sign to replace the sail before it fails.
- Hose off the fabric with clean water a few times per season to clear dirt and debris. Most HDPE shade cloth is mildew-resistant but not mildew-proof — keeping it clean extends its life significantly.
- At the end of the season (or before major storms), remove the sail and store it dry. Fold loosely rather than tightly creasing it. This alone will double the lifespan of a quality sail.
- Check post bases annually for any movement, soil erosion, or concrete cracking, especially after hard winters or very wet seasons.
- Touch up any raw cut edges on shade cloth with a flame or edge sealer to prevent unraveling.
Troubleshooting common issues
The sail is sagging in the middle
This usually means one of three things: the turnbuckles need more tightening, the fabric has stretched and needs re-tensioning after its break-in period, or the pitch is too flat and water weight is pulling the center down. Check all four corners and tighten the turnbuckles evenly. If it's still saggy after tensioning, raise the high anchor point by 6–12 inches using a chain extension on that corner, that increased pitch does more for the center sag than crank-tight turnbuckles will.
The edges are flapping and curling inward
Edge flutter is a sign of undertension, not a design flaw. The sail edges should bow inward gently (the catenary curve) but hold that curve firmly under wind. If the edges are flapping loose, work through each turnbuckle and add tension in small increments. If you've maxed out the turnbuckle range, add a short length of chain or a shackle to shift the connection point and give the turnbuckle more adjustment range. Also check that your anchor points haven't shifted, a wall eye bolt that's pulled slightly out of position will immediately reduce tension on that side.
The tension is uneven, one corner looks tighter than the others
Uneven tension usually comes from not tightening in a star pattern during installation. The fix is to loosen all turnbuckles about two full turns, then re-tighten in rotation, a little at a time, until the sail looks balanced. If one corner anchor is lower or farther away than planned, you may need to reposition that anchor point or use a longer chain/cable run to bring it into balance with the others.
A post is leaning inward under tension
If a post was set plumb before tensioning and is now tilting toward the sail, the concrete footing may not be deep or wide enough, or the post wasn't set with the outward lean built in. For a minor lean, you may be able to reduce tension at that corner temporarily, brace the post back to plumb, and then re-tension. For a significant lean, you'll need to reset the post with a deeper footing. This is the most annoying repair in shade sail installation and the best argument for getting the post depth right the first time.
Once you're past installation day and the sail is tensioned, re-tensioned after settling, and checked seasonally, a well-built DIY shade sail genuinely holds up for 5–10 years with minimal effort. Shade sail setups also stretch over the first few weeks, so you should leave initial slack and re-tension after the material settles Shade Sail Installation. The upfront planning, getting anchor points right, using rated hardware, pitching for rain runoff, is what separates a shade sail that lasts from one that's a frustration from the first windy afternoon.
FAQ
How do I choose the best size and shape (triangle vs rectangle) for my patio seating area?
Start by marking the exact “peak sun” zone you checked between about 11am and 2pm, then size the shade so the center covers that area, not just the perimeter. Triangles are great when you have two solid anchor points close together and a third point available, rectangles are easier to match a couch or dining layout, but they need careful corner balancing because long sides show sag first.
What angle should I aim for to reduce water pooling, and how can I verify the pitch after installation?
Aim for at least a 20 to 30 degree pitch by making one corner or one side higher. After it’s tensioned, look for the high edge to shed water away from the seating and confirm the low edge is the only place that collects water during a hose test. If water sits in the middle, you likely need the high corner raised with a chain extension, not just tighter turnbuckles.
How do I run the hose test or light-rain test without damaging the fabric or stressing the system?
Do a gentle test first, use a low-pressure hose stream and keep the water moving across the sail rather than blasting one spot. Watch for pooling at the center and listen for creaking at the anchor hardware. If you see pooling, stop and adjust pitch (raise a high corner) before you try to “fix it” with more tension.
Can I mount shade sails to stucco, brick, or siding instead of structural framing?
You can, but only if you anchor into load-rated masonry anchors for tension loads (or into real framing through the finish when possible). Avoid typical decorative screw hooks or anchors meant for shear only, because wind lateral forces can pull them out even when they feel secure by hand.
What’s the safest way to remove the shade during storms or high wind seasons?
Use a quick-release approach at one corner so you can take the sail down quickly. If you do not want to fully dismount everything, keep one corner connection designed for fast separation, then store the sail dry and folded to prevent mildew. Also check that your turnbuckles have enough adjustment range so you can slack the sail without binding.
My sail edges are flapping. Should I keep tightening the turnbuckles until it stops?
Tighten in small increments and work through each corner, but don’t chase flapping forever. If you’ve reached the turnbuckle limit, add connection hardware adjustment (like a short chain or shackle) to regain range, and re-check that the anchor points have not shifted slightly under wind load.
How can I tell if a sagging sail is due to flat pitch, stretched fabric, or incorrect installation order?
Flat pitch shows as center sag even when all corners are evenly tensioned, stretched fabric usually appears after a break-in period and improves after re-tensioning. If the sail was tensioned before all anchor points were set and aligned, corners can end up uneven, so re-tighten using a balanced “star” pattern before you assume the material has stretched.
What maintenance should I do each season to keep the shade sail working for years?
At the start and end of the sunny season, inspect corners and reinforced pockets for wear, check that turnbuckles still move freely, and confirm anchor hardware has not loosened. Re-tension after settling if you see extra curvature loss, then do a quick hose test to verify runoff and pooling behavior.
Is knitted HDPE really more wind-tolerant than tarp-like materials, and does it help with airflow?
Yes, because it’s permeable, air can pass through, reducing wind suction on the sail compared with solid-looking materials. That also helps the patio feel cooler since it allows airflow, but remember it’s still not fully waterproof, so you should not treat it like a roof replacement for heavy rain.
What should I do if one of my posts leans after tensioning?
First, confirm whether it was plumb at installation and then reduce tension on that corner temporarily. A minor lean may be correctable by bracing and re-tensioning, but a significant lean usually means the footing depth or the post setup needs to be redone with deeper, wider concrete support and proper outward lean if required for your layout.
Next Articles
How to Shade a Sunny Patio: DIY Step-by-Step Guide
DIY step-by-step ways to shade a sunny patio fast, from awnings and pergolas to shade sails, plants, and safe mounting.

How to Decorate a Long Narrow Patio: Layout Tips
Practical DIY layout and decor tips to widen a long narrow patio using zoning, furniture spacing, lighting, greenery, an

How to Decorate a Rectangular Patio Step by Step
Step-by-step plan to decorate a rectangular patio with smart layout, zones, furniture fit, lighting, plants, and seasona