
To protect your patio, you need to address four main threats: water (rain, runoff, and drainage), plant pots and planters (staining, scratching, and concentrated weight), sun and wind exposure, and storm damage if you have a screened or enclosed structure. Most of the work comes down to sealing surfaces, improving drainage slopes, distributing weight from heavy pots, adding overhead cover, and for screened patios, reinforcing framing and having a storm-panel plan ready. This guide walks through every layer of protection, from cheap same-day fixes to weekend upgrades that will last decades.
How to Protect Patio: DIY Guide for Weather, Pots & Storms

Felix Brennan
4 Aug 2026
Who this guide is for and what it covers
Whether you have a bare concrete slab, a paver courtyard, a wood or composite deck, or a fully screened room, the same categories of damage apply: water getting in where it should not, heavy pots grinding into the surface, UV breaking down finishes, wind stress on structures, and extreme weather threatening enclosures. I wrote this for homeowners who want to handle most of this themselves, without an engineering degree or a contractor on speed dial. You will find cost ranges, realistic time estimates, and honest difficulty ratings alongside every major task. We will also flag where a permit or professional sign-off is worth the extra step.
Quick assessment before you start spending money
Spend 30 minutes doing a proper walkthrough before you buy anything. Bring a 4-foot level, a garden hose, a flashlight, and a notepad. You are looking for water pooling after rain (or after you run the hose), cracks or spalling in concrete, loose or sunken pavers, rust stains from pot drainage, screen tears or bent frame sections, missing or clogged downspouts, and any overhead cover that is pulling away from the wall. Take photos and rank what you find by urgency: active water intrusion near the house foundation is priority one, cosmetic staining is priority last.
- Check the slope: lay a 4-ft level on the patio surface and measure the gap at the low end. You want at least 1/8 inch of drop per foot (roughly 1%) away from the house, with 1/4 inch per foot (2%) ideal for smooth concrete or tile.
- Run a hose for 5 minutes and watch where water travels. Any puddle that sits for more than a few minutes is a drainage problem.
- Inspect every joint, crack, and grout line for gaps or crumbling material that lets water underneath.
- Check screen frames for bent or loose sections, missing fasteners, and any area where the screen has separated from the spline.
- Look at overhead gutters and downspouts: clear debris, confirm downspout extensions move water at least 6 feet away from the slab.
- Note where heavy pots or planters sit and check underneath them for staining, soft wood, or cracked tile.
- If you have an awning or pergola, tug on the wall anchors and check the mounting hardware for rust or pull-through.
Permits and local code: when you need them
Most surface-level patio work (sealing, patching, adding furniture pads, installing pot trays) requires no permit. Structural work is different. Adding a permanent roof, attaching a pergola to the house, installing a retractable awning with wall anchors into a load-bearing wall, or making significant drainage changes that redirect runoff to adjacent properties will often trigger a permit requirement in most U.S. jurisdictions. Storm-panel systems on screened patios in Florida and other hurricane-zone states sometimes require product approval documentation (look for Miami-Dade NOA or Florida Product Approval numbers). Call your local building department before you frame anything structural or close in a screened patio. A $50–$150 permit beats a stop-work order or a problem at resale.
Protecting your patio from planters and plant pots
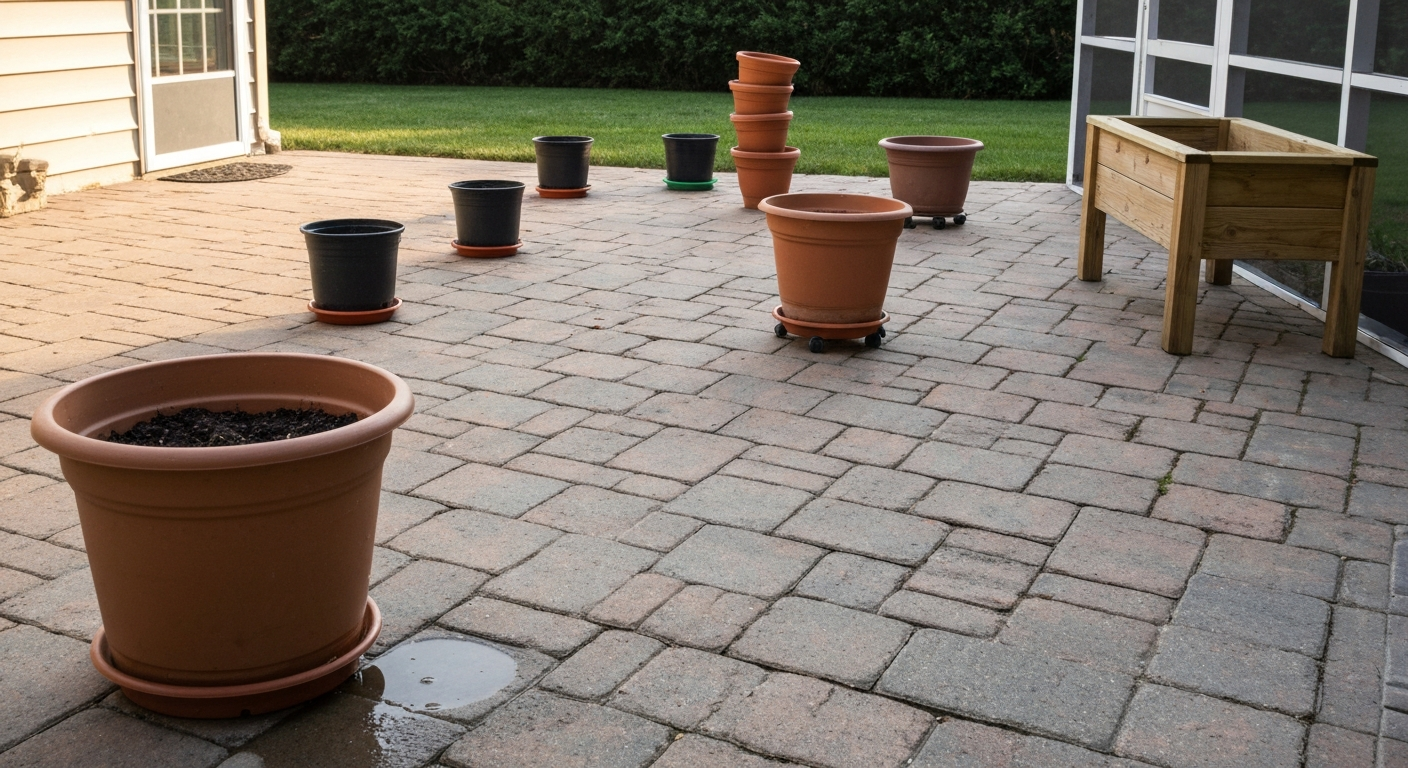
Pots and planters cause more patio surface damage than most people realize: rust rings from unglazed terra cotta, calcium and mineral stains from drainage water, physical scratches from rough bases, and on wood decks, prolonged moisture contact that leads to rot and mold. The fix is simple once you understand the problem, and it costs almost nothing to do right. For detailed, step-by-step instructions on how to protect patio from plant pots, consult the dedicated guide for practical tips and product recommendations (destination ID 72b99e85-62c8-48ef-962e-1a86dbf9909f). For step-by-step tips on how to protect patio from planters, see our dedicated guide on protecting patios from planters.
Coasters, risers, and protective pads
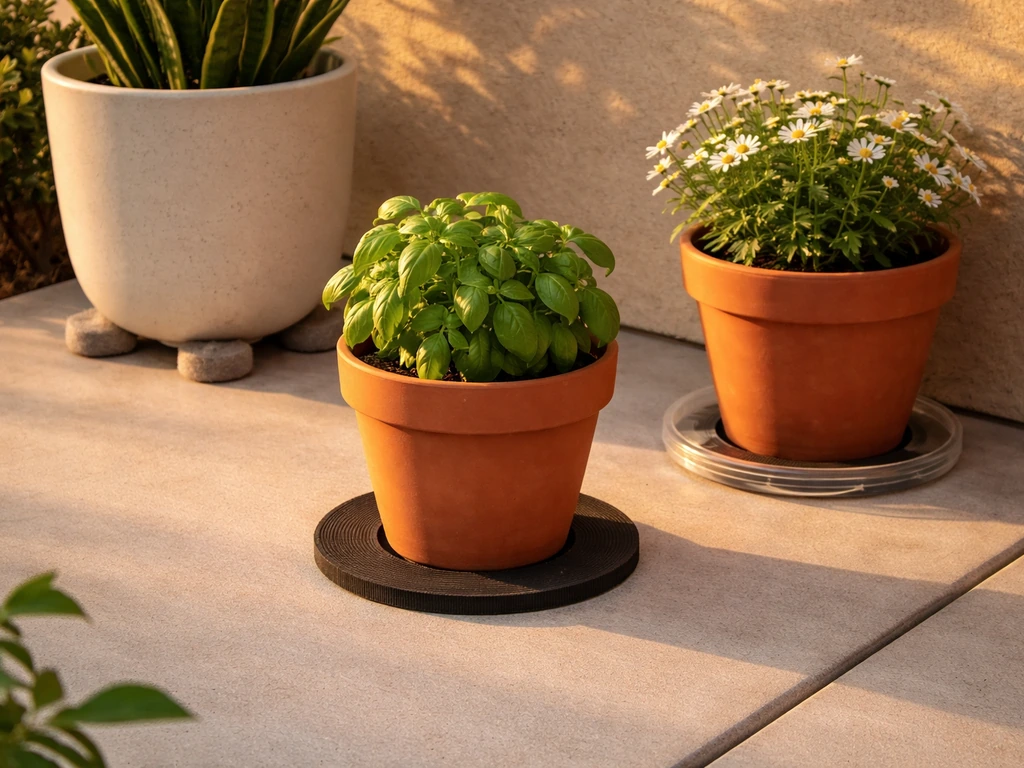
Pot risers (also called pot feet or pot coasters) lift the container off the surface, breaking direct contact and allowing air circulation underneath. For concrete or paver patios, rubber or neoprene pads under each foot stop scratching and prevent staining from metal or unglazed ceramic. On wood and composite decks, risers are non-negotiable: you need that airflow to prevent moisture sitting in one spot and starting rot. Look for risers rated for the pot weight, and use at least three per pot to distribute load evenly. For very large pots (over 50 lbs when filled), use a load-spreading plywood panel (3/4-inch exterior-grade) cut slightly larger than the pot base and placed under the pads. This distributes concentrated weight across more of the deck surface, which matters on elevated wood decks designed to a 40 psf live load under the IRC.
Choosing pot materials that are kind to patio surfaces
Unglazed terra cotta, raw iron, and low-quality concrete planters are the worst offenders for staining. Glazed ceramic, fiberglass, high-density polyethylene (HDPE), and powder-coated metal are much friendlier to patio surfaces because they resist leaching minerals and rust. If you love the look of terra cotta, seal the base with a penetrating silicone sealer before placing it, or use a fiberglass replica that looks identical from 10 feet away.
| Pot Material | Staining Risk | Scratch Risk | Weight | Best Surface Pairing |
|---|---|---|---|---|
| Unglazed terra cotta | High (mineral leach, rust ring) | Low | Moderate | Use with saucer + rubber pads on all surfaces |
| Glazed ceramic | Low | Moderate (chips edges) | Heavy | Rubber pads on tile/pavers; plywood spreader on decks |
| Fiberglass | Very low | Low | Light | Works on all surfaces; ideal for elevated decks |
| HDPE plastic | Very low | Low | Very light | All surfaces; excellent for screened patios |
| Powder-coated metal | Low (if coating intact) | Low | Light–moderate | Rubber feet recommended on any surface |
| Raw/cast iron | High (rust runs) | High | Very heavy | Avoid on wood decks; use rubber pads + saucer on concrete |
Managing pot drainage and plant water runoff
Even if your pots look fine on top, the water draining out of them is quietly doing damage below. The mineral-rich runoff stains concrete and pavers, and the sustained moisture on wood or composite deck boards invites mold and decay. The solution is to intercept that water before it hits the surface.
Saucers, catch trays, and reservoir inserts
Use a saucer or drip tray sized to fully catch the drainage from one watering session, not just a few drops. As a rule of thumb, pick a saucer at least 2–3 inches wider in diameter than the pot base. Empty saucers after every rain or watering so standing water does not breed mosquitoes or create prolonged wetting underneath. On wood decks, even a saucer is not enough on its own: put the saucer on rubber risers so there is a gap between the saucer bottom and the deck board. For large planters where dragging a saucer out to empty it is impractical, use a reservoir insert (an internal tray that sits inside the pot above the drainage holes) combined with a simple hand pump or turkey baster to extract pooled water.
Directing runoff away from the slab
If you have a garden bed adjacent to the patio, position planters along that edge so natural overflow migrates toward the bed rather than pooling on the slab. On fully paved patios with no adjacent bed, route excess water toward a floor drain or a channel drain at the perimeter. You can build a simple drip path using a narrow gravel-filled channel (4–6 inches wide, 3–4 inches deep) along the planter zone, connecting to the patio's existing drainage slope. This takes an afternoon and a bag of pea gravel.
Protecting flooring and finishes from heavy pots and foot traffic
Heavy pots, patio furniture dragged across tile, and high foot traffic all degrade surface finishes faster than weather alone. A little preventive protection here saves hundreds of dollars in refinishing or replacement work later.
Pads, mats, and anti-scratch solutions
Self-adhesive felt or neoprene furniture pads (the same ones used under chair legs indoors) work well on patio furniture feet and pot bases. Replace them once a year because outdoor grit embeds into the pad and turns it into sandpaper. For larger areas of heavy traffic, an outdoor-rated rubber mat or woven polypropylene area rug protects the surface and adds comfort underfoot. Look for mats with an open-weave backing so water drains through rather than pooling underneath. For tile patios, these mats also prevent the surface from becoming a slip hazard when wet.
Protective coatings for concrete and paver surfaces
Penetrating sealers are the best long-term surface protection for concrete and pavers. Silane/siloxane water repellents reduce water absorption and staining significantly, with coverage rates typically ranging from 1,500 to 5,000 sq ft per gallon depending on surface porosity (apply to a dry, clean surface in two coats, following the manufacturer's product data sheet for your specific substrate). Lithium silicate densifiers chemically harden concrete surfaces and work well on high-traffic areas, with coverage around 300–1,000 sq ft per gallon. These two products are not interchangeable: densifiers harden, repellents repel water. For maximum protection, apply a densifier first, let it cure fully, then apply a silane/siloxane repellent as a topcoat. Reapply the repellent every 2–5 years depending on traffic and climate.
Temporary protection during projects
If you are doing a project that involves tools, concrete mixing, paint, or heavy equipment on the patio, lay down rosin paper (a.k.a. builders paper) taped at the seams. It is cheap (a 167 sq ft roll costs around $15), non-slip, and it catches debris and spills that would otherwise grind into tile or concrete. Ram board is a heavier option for situations with wheeled loads. This is one of those 10-minute steps that saves hours of cleaning or repair afterward.
Rainproofing and waterproofing the patio surface
Surface-level waterproofing starts with getting the water off the slab quickly and keeping it from seeping through cracks and joints. For step-by-step tips on how to protect patio from rain, see our focused guide for practical waterproofing strategies and quick fixes. Two things control this: slope and surface integrity. If you do not have both, sealer alone will not save you.
Fixing slope and grading problems
The industry standard minimum slope for an outdoor patio is 1/8 inch of drop per foot of run, with 1/4 inch per foot recommended for smooth surfaces like concrete or tile to prevent ponding and joint erosion. If your patio slopes toward the house or is essentially flat, you have a problem that sealers cannot fix. For paver patios, the fix involves lifting the sunken or flat sections, pulling the pavers, adding or removing base material to re-establish the correct slope, and relaying the pavers. For concrete, grinding high spots or applying a polymer-modified self-leveling underlayment to low spots can correct minor issues (up to about 1/2 inch). Significant slope failures in poured concrete usually require either cutting and reporing sections, or covering with a new topping slab. A slope correction on a 200 sq ft paver patio typically takes one weekend and costs $200–$500 in materials if you do it yourself.
Installing or improving drainage
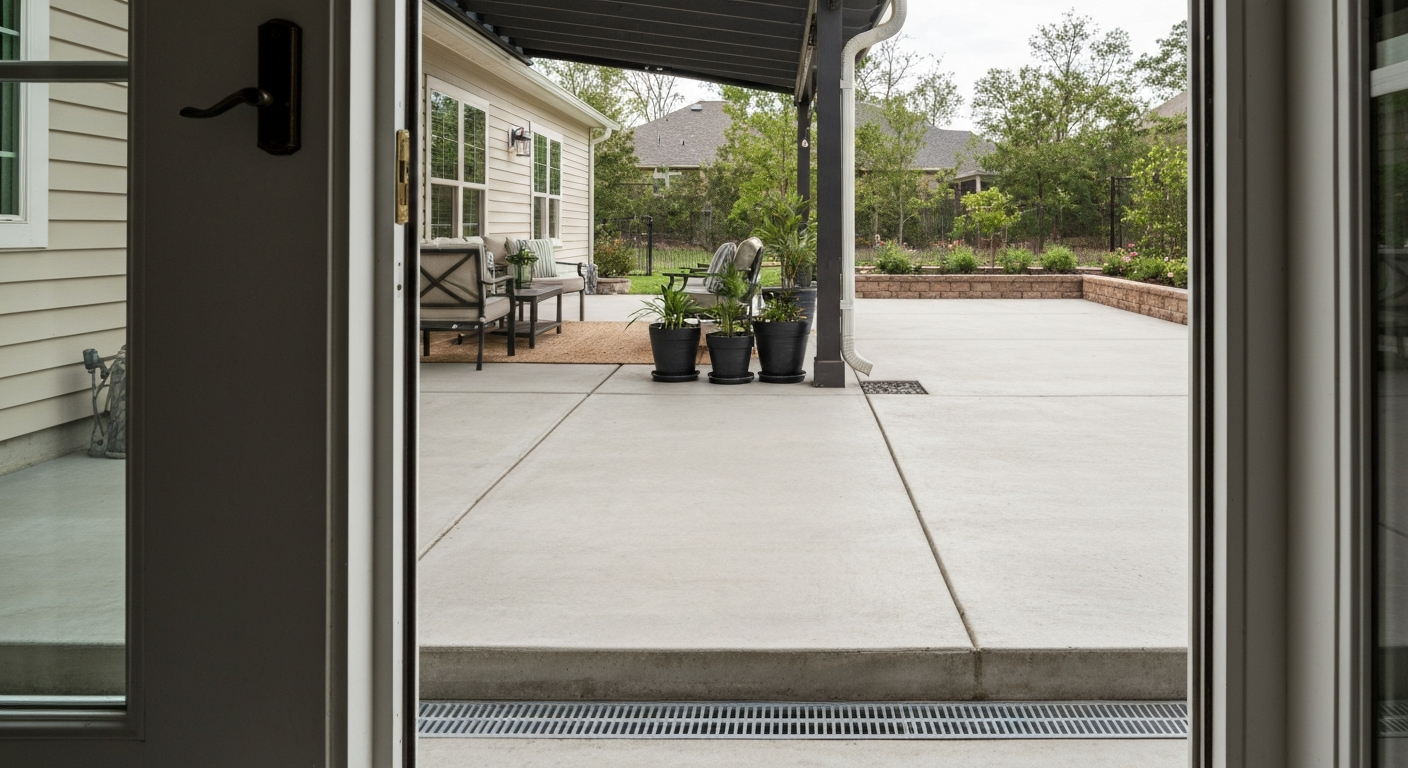
For patios that collect water despite reasonable slope, a channel (trench) drain or linear slot drain at the low edge is the most effective fix. Channel drain kits for residential patios are a 1–2 day DIY install: you cut a trench at the low side of the slab, set the drain body in a concrete bed at the correct elevation, and connect it to a 4-inch PVC pipe routed to daylight, a dry well, or a municipal storm drain (check local codes for connection requirements). For step-by-step guidance on trench drains, pipe connections, and typical DIY timeframes, see How to Install Interlocking Pavers, Hardscape how‑to (installation & drainage notes) How to Install Interlocking Pavers — Hardscape how‑to (installation & drainage notes). For paver patios, a French drain (perforated pipe wrapped in filter fabric, bedded in gravel, routed to daylight) running along the low edge is a clean, less disruptive option. Permeable pavers are worth considering if you are replacing a patio anyway: they eliminate surface runoff almost entirely by letting water pass through the joints into a gravel reservoir bed below.
Sealants, waterproof coatings, and joint repairs
Once slope and drainage are correct, apply protection in the right order. Start by repairing cracks and joints: fill concrete cracks wider than a hairline with a polyurethane or epoxy crack filler, and re-point paver or tile joints with a joint stabilizing sealer or appropriate grout. For tiled patios, epoxy grout and penetrating silicone/polyurethane joint sealants are the best exterior choices; standard sanded grout without sealer will erode in outdoor freeze-thaw cycles. For tile installations on concrete slabs, a liquid-applied waterproofing membrane (such as cementitious or polymer membrane systems) under the tile is the gold standard, with products like HYDRO BAN XP covering approximately 50 sq ft per gallon. Always check the manufacturer's TDS for substrate requirements and the required time before tiling over the membrane. After joint repairs and any membrane work, apply your penetrating sealer as a final layer.
| Surface Type | Recommended Sealer/Coating | Coverage | Reapplication Interval | DIY Difficulty |
|---|---|---|---|---|
| Concrete (unpainted) | Silane/siloxane penetrating repellent | 1,500–5,000 sq ft/gal | 2–5 years | Easy |
| Concrete (heavy traffic) | Lithium silicate densifier + silane/siloxane topcoat | 300–1,000 sq ft/gal (densifier) | Densifier once; repellent 2–5 yrs | Easy–Moderate |
| Pavers | Penetrating paver sealer (silane/siloxane) | 1,500–3,000 sq ft/gal | 2–4 years | Easy |
| Tile (grout lines) | Penetrating silicone or polyurethane joint sealant | Varies by joint width | 1–3 years | Easy |
| Tile on concrete slab | Waterproofing membrane under tile + epoxy grout | ~50 sq ft/gal (HYDRO BAN XP) | Membrane: indefinite; grout: inspect annually | Moderate |
| Composite/wood deck boards | Manufacturer-approved composite cleaner + deck brightener; no film-forming sealer | Per manufacturer | Annual cleaning; seal per mfr | Easy |
Gutters, downspouts, and perimeter drainage
A properly sealed patio surface can still get overwhelmed if the gutters above it are dumping concentrated roof runoff onto it. This is one of the most overlooked sources of patio damage, and fixing it is usually straightforward work.
Sizing and placing gutters correctly
Gutter size needs to match your roof drainage area and your local rainfall intensity. The general practical rule is one downspout per 30–40 feet of gutter run for typical U. Gutter and downspout sizing should be based on roof drainage area and local rainfall intensity; see Gutter Calculator (Free), Downspouts, Hangers & Sizing | RemodelCalculators for practical capacities and recommendations Gutter Calculator (Free) — Downspouts, Hangers & Sizing | RemodelCalculators. S. rainfall, but high-intensity areas (southeast, Gulf Coast, Pacific Northwest) may need a downspout every 20 feet or oversized 6-inch gutters instead of the standard 5-inch. If your patio sits under or adjacent to a roof section with no gutter, that is a priority fix: a single roof valley can dump hundreds of gallons per hour onto a patio during a heavy storm. The International Plumbing Code provides the formal sizing method (rainfall intensity in inches per hour multiplied by drainage area to get required flow capacity in GPM), but for residential work, an online gutter calculator and a call to your local gutter supplier will get you close enough.
Downspout extensions, splash blocks, and dry wells
Every downspout should terminate at least 6 feet from the patio edge and the house foundation. Flexible downspout extensions (accordion-style plastic, around $10–$15 each) are the fastest fix. If you want a cleaner look, a buried rigid PVC extension pipe (4-inch schedule 40) running from the downspout elbow to a pop-up emitter in the lawn is a one-afternoon project for about $50–$80 per downspout in materials. Splash blocks are acceptable for low-volume situations but tend to move over time and can focus erosion. Dry wells (a buried perforated container surrounded by gravel, connected to the downspout by a pipe) work well in areas with permeable soil and no high water table: a 50-gallon dry well kit costs around $80–$120 and handles typical residential downspout flow in most regions.
Perimeter drainage to protect the slab edge
If water pools along the edge of the patio where it meets a lawn or garden bed, a simple perimeter French drain solves it. Dig a trench 6–8 inches wide by 12 inches deep along the problem edge, line it with filter fabric, fill halfway with 3/4-inch clean gravel, lay a 4-inch perforated pipe (perforations down), add more gravel to within 2 inches of the surface, fold the filter fabric over, and backfill with soil or gravel. Route the pipe to daylight at a low point in the yard. Material cost for a 20-foot run is roughly $60–$100 and the labor is one afternoon with a flat spade and a wheelbarrow.
Covers, awnings, pergolas, and permanent roofs
Overhead protection is the single biggest upgrade you can make to a patio's livability and weather resistance. It reduces direct rain impact on the surface, cuts UV degradation of finishes and furniture, and opens up the space for use in weather that would otherwise drive you inside. The right choice depends on your budget, how permanent you want to go, and whether you need to pull a permit.
Retractable awnings
A retractable awning is the most flexible option. You extend it when you need shade or light rain protection, and retract it when a storm is coming (protecting the fabric) or when you want open sky. Most residential retractable awnings are rated for moderate wind speeds, but check the manufacturer's wind rating before buying: many are rated for 20–25 mph winds, and extending them in a 40 mph gust will destroy the mechanism. Installation requires a solid wall anchor or a structural header beam; fasteners must hit framing or a properly backed substrate, not just sheathing. DIY installation time is typically 2–8 hours depending on access and whether you need to install blocking first. Material costs for a quality motorized retractable awning for a 12x10-ft patio run $800–$2,500 installed. A manual crank version of the same size runs $400–$1,200.
Fixed canopies and shade sails
Fixed aluminum or polycarbonate canopies offer full-time protection without the fabric maintenance of awnings. Corrugated polycarbonate panels transmit diffused light while blocking rain, UV, and heat. They attach to a wall-mounted ledger and freestanding posts, and a 12x12-ft kit runs $500–$1,500 in materials with a 1–2 day install. Shade sails are a budget alternative ($50–$300) for sun control, but they are not waterproof (water pools in the fabric), and the tension anchors need to be in structural members to handle wind load. They work well for UV shade in calm climates but are not a rain solution.
Pergolas with weatherproof roofing
A freestanding pergola keeps you off the house structure and often out of permit territory (check your local setback and size thresholds; many jurisdictions allow structures under 200 sq ft without a permit). Adding a waterproof layer to a pergola converts it from a shade structure to real rain protection: options include corrugated metal roofing panels, polycarbonate panels, a peel-and-stick TPO membrane over plywood sheathing, or a louvered-roof insert (motorized louvers open for breeze, close for rain). Louvered pergola kits run $3,000–$8,000 for a 12x16-ft section. A simple DIY wood pergola with corrugated metal roofing can be built for $800–$2,000 in materials over a long weekend.
| Cover Type | Rain Protection | Sun/UV Protection | Estimated Cost (12x12 ft) | Permit Likely? | DIY Difficulty |
|---|---|---|---|---|---|
| Retractable awning (manual) | Partial (light rain) | Good | $400–$1,200 | Rarely | Easy–Moderate |
| Retractable awning (motorized) | Partial (light rain) | Good | $1,200–$2,500 | Rarely | Moderate |
| Shade sail | None | Good (UV block) | $50–$300 | No | Easy |
| Fixed polycarbonate canopy | Full | Good (diffused light) | $500–$1,500 | Sometimes | Moderate |
| Wood pergola + metal roof | Full | Moderate–Good | $800–$2,000 | Sometimes | Moderate–Hard |
| Louvered pergola (motorized) | Full (when closed) | Excellent | $3,000–$8,000 | Often | Hard (kit install) |
| Solid permanent roof addition | Full | Excellent | $5,000–$20,000+ | Yes | Professional recommended |
Protecting screened patios from hurricanes and major storms
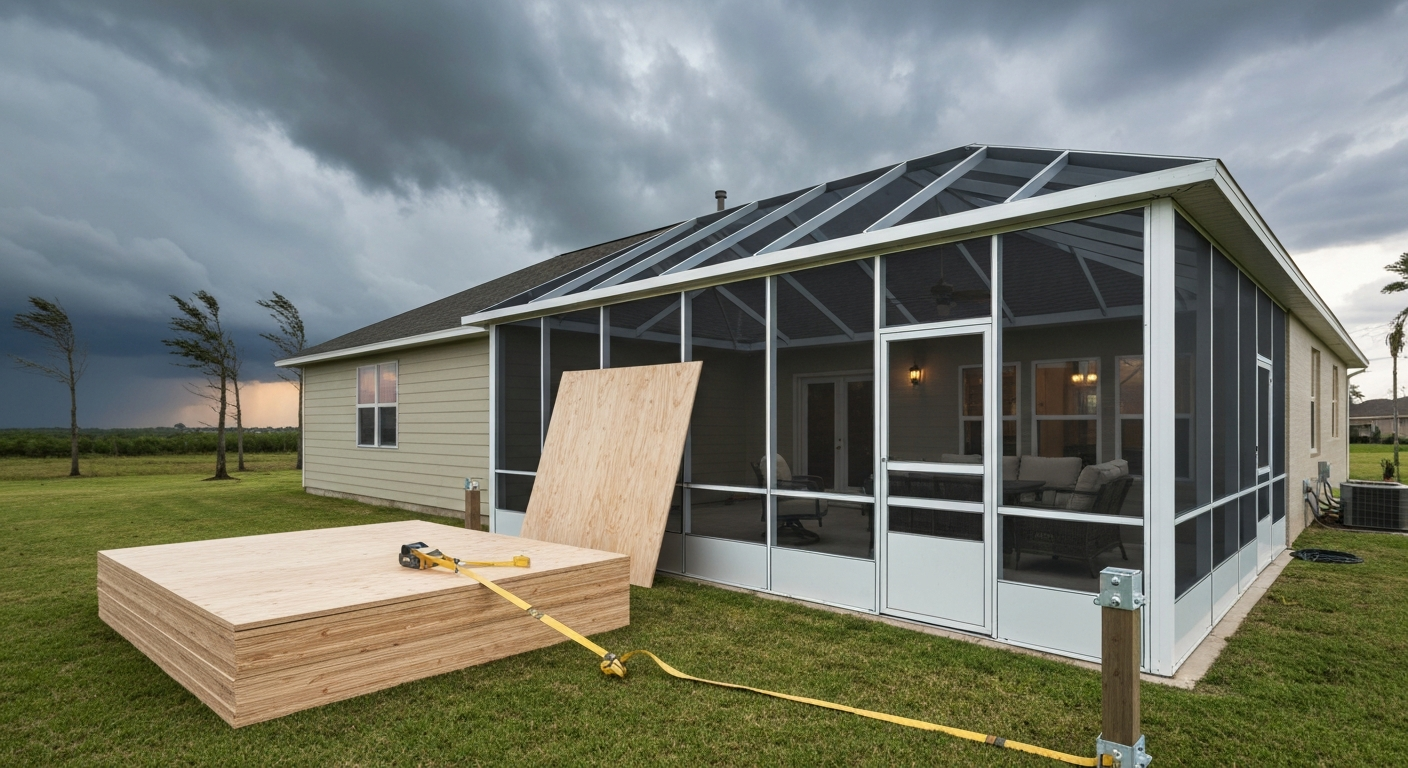
If you have a screened patio (also called a Florida room, lanai, or screen enclosure), storm protection is not optional in hurricane-prone areas. For step-by-step advice on how to protect a screened patio from a hurricane, consult a focused guide on stormproofing screen enclosures. A screened room that fails in a storm can become a projectile hazard and cause serious damage to the house structure it is attached to. This section covers the practical options from temporary to permanent.
Storm panels and impact screens
Removable storm panels (corrugated aluminum, steel, or polycarbonate) are the most common retrofit solution. They mount in tracks installed on the outside of the screen frame, store flat in a garage when not in use, and deploy in a few hours before a storm. Accordion-style shutters permanently mounted on the frame are more convenient: you fold them closed and latch them, and they do not require storage. Fabric storm screens (woven polyester or fiberglass rated to specific impact levels) are a newer option that stays in place year-round and replaces standard screening, while providing significant debris impact resistance. In Florida and other hurricane-code states, any panel or screen system used as storm protection must carry a product approval number (check Florida Product Approval or your state's equivalent). Miami-Dade NOA approval is the highest standard and is required in the High Velocity Hurricane Zone.
Reinforcing the frame and anchoring the structure
A screen enclosure is only as strong as its anchoring system and its frame connections. Have a screen enclosure contractor or structural engineer inspect the anchor bolts at the base of the columns: they should be embedded in the slab, not just surface-mounted. Add hurricane straps or connector plates where the roof frame meets the column tops if they are missing. For a DIY reinforcement, check every fastener in the frame for corrosion and replace corroded screws with stainless steel equivalents. A severely corroded aluminum frame should be assessed by a professional before the next storm season.
Temporary boarding and pre-storm checklist
If you do not have storm panels and a hurricane warning is issued, the best temporary option is to remove all patio furniture, potted plants, and accessories from the enclosure (they become missiles in wind). Secure the screen doors open so the screens do not take full wind load through a sealed enclosure (this reduces pressure differential). Do not attempt to board over standard aluminum screen frames with plywood: the frames are not designed for that load and the plywood attachment points will fail. In an emergency, your energy is better spent moving contents inside and getting out of the storm's path.
Sun, UV, and wind protection
UV exposure degrades patio furniture finishes, fades cushion fabrics, and breaks down wood stains and composite surface coatings faster than almost any other factor. Wind adds physical stress on furniture and overhead structures and makes a patio uncomfortable to use on an otherwise pleasant day. Both problems have layered solutions.
Sun and UV control
For furniture and finishes, apply a UV-protective sealant or topcoat rated for exterior use. For wood furniture, a clear spar urethane or exterior teak oil with UV inhibitors will significantly slow color fading. For cushions and fabric, store them in a UV-resistant storage bin when not in use, or choose fabrics rated for outdoor use (Sunbrella and similar solution-dyed acrylics retain color for 5+ years in direct sun). For structural shade, a retractable awning, pergola, or shade sail rated for UV blocking (look for UPF 50+ on sail fabric) covers the area when you are using it. Outdoor curtains on a pergola add privacy and cut afternoon sun significantly, using a UV-stabilized canvas or polyester fabric on a stainless rod system.
Wind protection strategies
Windbreaks for patios fall into three categories: planted screens (hedges, bamboo), built screens (privacy walls, lattice panels), and fabric barriers (outdoor curtains, roll-down screens). Planted screens take time to establish but are the most natural-looking and effective long-term. A 6-foot-tall arborvitae hedge planted 10–15 feet from the patio edge can reduce wind speed by 50–70% in the protected zone behind it within 3–5 years. Built screens using cedar or composite lattice panels set in concrete footings are a 1–2 day project that delivers immediate results. Roll-down solar screens on a pergola or cover structure serve double duty: they block wind and cut glare while still letting some light through. For screened enclosures, the screen itself provides significant wind reduction; supplementing with a heavier-mesh privacy screen on the windward side increases comfort considerably.
Protecting patio furniture and accessories
Your furniture, grill, and accessories represent a real investment, and leaving them unprotected accelerates wear dramatically. Good covers and anchoring hardware make a big difference with minimal effort.
Use furniture covers made from a solution-dyed polyester with a water-resistant coating (avoid thin vinyl covers that crack in cold and trap condensation underneath, causing the mold they are meant to prevent). Covers should fit snugly, have vents to prevent moisture buildup, and tie down with straps that hook under the furniture to prevent wind from launching them. For umbrella tables and freestanding structures, a 50-lb umbrella base is the minimum for a 9-foot market umbrella; close and strap the umbrella whenever sustained winds exceed 15–20 mph. Anti-tip straps or floor anchors for tall outdoor storage cabinets are cheap insurance in any area that sees thunderstorm wind gusts.
Routine maintenance and seasonal inspection checklist
Protection measures only work if you maintain them. Build a simple annual inspection into your calendar, ideally in early spring before heavy use begins and again in late fall before winter. Here is what to check and when.
| Task | Frequency | Time Required | DIY Difficulty |
|---|---|---|---|
| Clear gutters and downspouts | Spring + Fall | 1–2 hours | Easy |
| Inspect and extend downspout terminations | Annually | 30 min | Easy |
| Check patio slope and look for new low spots | Annually (after winter) | 30 min | Easy |
| Clean and inspect surface cracks and joints; repoint as needed | Annually | 1–4 hours | Easy–Moderate |
| Reapply penetrating sealer (concrete/pavers) | Every 2–5 years | 2–4 hours per 200 sq ft | Easy |
| Inspect pot pads and risers; replace worn felt/neoprene | Annually | 30 min | Easy |
| Empty and clean pot saucers; check for staining underneath pots | Monthly (growing season) | 15 min | Easy |
| Inspect awning fabric, hardware, and wall anchors | Annually | 30–60 min | Easy |
| Check screen frame fasteners; replace corroded screws | Annually (pre-storm season) | 1–2 hours | Easy–Moderate |
| Test storm panel tracks and hardware | Annually (pre-storm season) | 30–60 min | Easy |
| Inspect furniture covers; repair or replace as needed | Annually | 30 min | Easy |
| Treat or refinish wood furniture and wood deck boards | Annually | 2–4 hours | Easy–Moderate |
Putting it all together: a practical action plan
Start with the quick wins: pot pads and saucers, downspout extensions, and a surface inspection. These cost under $100 and an afternoon and they stop active damage immediately. Then work through the medium-term projects in order of urgency from your initial assessment: slope or drainage corrections first, sealing second, overhead cover third. Storm protection for screened patios should be planned before storm season, not during. Budget and time permitting, a covered patio with proper drainage, sealed surfaces, and good pot management will need very little reactive maintenance and will last significantly longer than one that gets attention only after something fails.
- Week 1 (under $100, 2–3 hours): Install pot risers and rubber pads under all planters; add saucers to all pots; extend downspouts to 6+ feet from house; do initial slope and crack inspection.
- Month 1 ($100–$500, one weekend): Repair cracks and re-point joints; correct any obvious drainage issues with a channel drain or perimeter French drain if needed; clean gutters and confirm proper gutter sizing.
- Month 2–3 ($100–$400, two afternoons): Apply penetrating sealer to concrete, paver, or tile surfaces after repairs are cured.
- Season 1 ($500–$3,000+, 1–3 day project): Add overhead cover (awning, canopy, or pergola) appropriate to your budget and usage.
- Before storm season (budget varies): Install, test, or source storm panel system for screened enclosures; inspect frame anchors and fasteners; prep furniture storage and tie-down plan.
FAQ
What are the first quick fixes I can do to protect my patio from damage caused by planters and pots?
Quick fixes (30–90 minutes; low difficulty): 1) Use saucers/trays sized to catch all runoff under each pot; empty after rain to prevent standing water. 2) Add non-staining rubber or PVC coasters or pot feet (1–4 inches height) to lift pots off the surface and allow airflow. 3) Place hard plastic drip trays or metal trays lined with a UV-resistant mat under heavy pots to protect finishes from moisture and staining. 4) Use plywood or 3/4" exterior-grade plywood sheets or dedicated load-spreading pads under very heavy pots on decks to distribute weight. Materials/tools: pot saucers/trays, rubber coasters, scrap plywood, circular saw/drill (if cutting plywood). Cost: $0–$75 depending on number/size of pots. Safety: wear gloves when moving heavy pots; use two people or lifting straps.
How do I manage pot drainage and plant water runoff so it won’t damage tile, concrete, or wood decks?
Action steps: 1) Use saucers sized to fully catch runoff; empty after watering/rain. 2) Add risers (pot feet) so water drains off the saucer instead of soaking the patio surface. 3) For permanent planter beds, install a waterproof liner (EPDM or pond liner) and an overflow/drain connected to a PVC drain line routed to garden or grounded drain. 4) For tiled patios, apply a waterproof membrane at the substrate level (liquid-applied tile-ready membranes such as LATICRETE HYDRO BAN per manufacturer instructions) before installing tile near planters. 5) On wood decks, use breathable mats (polymer grid tiles) under pots to prevent trapped moisture and staining. Tools/materials: saucers, risers, EPDM liner, PVC pipe, waterproof membrane, utility knife, PVC cement. Cost: $2–$50 per pot for trays/risers; $150–$800 for liner + drain for a DIY planter bed. Difficulty: easy for pots, intermediate for liner/drain installation.
What are the basic steps and materials to rainproof an existing patio (slope, drains, sealants, coatings)?
Essential steps: 1) Verify slope: target 1/8" per ft minimum (1/4"/ft better for textured finishes) away from the house to prevent ponding (measure with a level or laser). 2) Add or clear drains: install channel/trench drains or spot drains tied to PVC/ADS drainage to carry water away; channel-drain kits are commonly a 1–2 day DIY install. 3) Seal joints and porous surfaces: apply appropriate sealant to tile joints (exterior-grade polyurethane/silicone) and penetrating concrete water repellents (silane/siloxane) or densifiers per product PDS. 4) Apply a liquid-applied waterproof membrane for tiled or critical threshold areas (follow manufacturer cure/flood-test schedule). 5) Consider permeable pavers or French drains for landscape runoff problems. Tools/materials: level/laser, concrete saw or grinder (if recessing drains), channel-drain kit, PVC pipe, waterproof membrane (LATICRETE HYDRO BAN or similar), sealants, brushes/rollers. Cost estimate: $50–$500 for small drain/seal projects; $500–$3,000+ for larger drain rework or membrane + tile repairs. Difficulty: intermediate to advanced (drain excavation, membrane work). Code note: maintain proper drainage away from foundations per local code; consult building code or a professional if altering grading near structures.
How do I install gutters, downspouts, and awnings to protect a patio from roof runoff and heavy rain?
Installation overview: 1) Size gutters/downspouts using roof drainage area and local rainfall intensity (use online gutter calculators or IPC/IBC tables); common practice: 1 downspout per 30–40 ft gutter run in moderate climates. 2) Install gutters with 1/16"–1/8" slope per foot toward downspouts. 3) Tie downspouts to extensional drains (underground pipe) or splash blocks directing water away from patio foundation. 4) Install awnings/retractable awnings or a fixed roof/cover with positive drainage. Retractable awnings require a solid mounting ledger and appropriate anchors; follow manufacturer wind ratings. Tools/materials: gutters, hangers, downspouts, concrete anchors, silicone sealant, awning kit, drill, ladder. Cost/time: DIY gutter install $200–$800 for a typical house run (1–2 days); retractable awning kits $600–$3,000+ and 2–8 hours for install (may require two people and anchors). Permits/safety: local permit sometimes required for structural additions; ensure mounting into structural backing and adhere to wind-rating limits in product manual.
What are the practical steps and product choices to protect a screened patio from hurricane/storm damage?
Storm protection steps (planning + actions): 1) Assess risk and local code: check local hurricane zone rules and permit requirements — many jurisdictions require approved impact protection or engineered anchors. 2) Install permanent impact-rated screens or laminated/impact glass panels if budget allows (higher cost but best protection). 3) For removable protection: store labeled storm panels (aluminum/steel or clear polycarbonate) sized for each opening; mount pre-installed track systems or use predrilled panels with fasteners. 4) Use roll-down/zipper storm screens or accordion shutters for faster deployment; follow manufacturer anchoring and wind-rating. 5) Brace screen framing: add diagonal bracing, reinforced framing or hurricane tie-downs to posts and header. 6) Temporary measures: board windows/openings with cut-to-fit plywood as last resort (secure with appropriate fasteners and comply with local codes). Tools/materials: impact-rated screens/panels, aluminum channels, anchors (concrete or structural screw anchors), cordless drill, fasteners, storage rack. Cost/time: DIY removable panel system $200–$1,200 per opening (varies widely); professional impact screens/glass $2,000–$10,000+ for full patio. Difficulty: intermediate to advanced (anchoring and structural considerations). Safety/evac plan: always evacuate if local authorities order evacuation; store panels where accessible; follow local permit and code requirements for permanent upgrades.
How do I protect patio flooring and finishes from heavy planters, including load concerns on elevated decks?
Protection and load-distribution steps: 1) Calculate/estimate concentrated loads: residential decks are typically designed for 40 psf live load (IRC). Large planters can create high point loads—spread load across area to reduce psf. 2) Use load-spreading pads: large rubber pads, concrete pavers, or 3/4" exterior plywood bearing platforms that span multiple joists. 3) For tile or pavers, use a paver pedestal or interlocking base that spreads weight and prevents cracking. 4) Add protective matting (non-staining polymer grid) under pots to prevent scratching and staining. 5) For very heavy permanent planters, consult a structural engineer or reinforce joists/footings. Tools/materials: plywood, rubber pads, paver pedestals, carpet knife, drill. Cost: $5–$200 per planter depending on method; engineering assessment $300–$1,200. Difficulty: easy for pads; advanced if structural reinforcement is needed.
Next Articles
How to Protect Screen Patio from Hurricane: DIY Prep & Fixes
How to protect screen patio from hurricane: DIY checklist, reinforcements, temporary panels, costs & safety tips
How to Protect Patio from Planters: DIY Guide & Prep
How to protect patio from planters: DIY steps, drainage, anchoring, materials, costs & seasonal maintenance.
How to Protect Patio From Plant Pots: DIY Fixes
DIY solutions to stop pot water stains, rust, scratches, cracking, soil mess with liners, mats, pads, and drainage fixes