
To protect your patio from planters, use plastic or rubber saucers under every pot, lift containers off the surface with pot feet or risers, seal porous patio surfaces with a penetrating silane/siloxane sealer, and never let standing water sit in trays overnight. For a step-by-step checklist on how to protect patio surfaces from planters, see our detailed guide on how to protect patio. Those four habits alone will prevent the vast majority of stains, moisture rings, and surface damage that planters cause on concrete, pavers, tile, and composite decking. If you have a screened patio, you also need to think about planter placement relative to screen panels and anchor heavier pots before storm season hits. For a step-by-step guide on how to protect a patio from plant pots, see our detailed guide for practical methods and product recommendations.
How to Protect Patio from Planters: DIY Guide & Prep

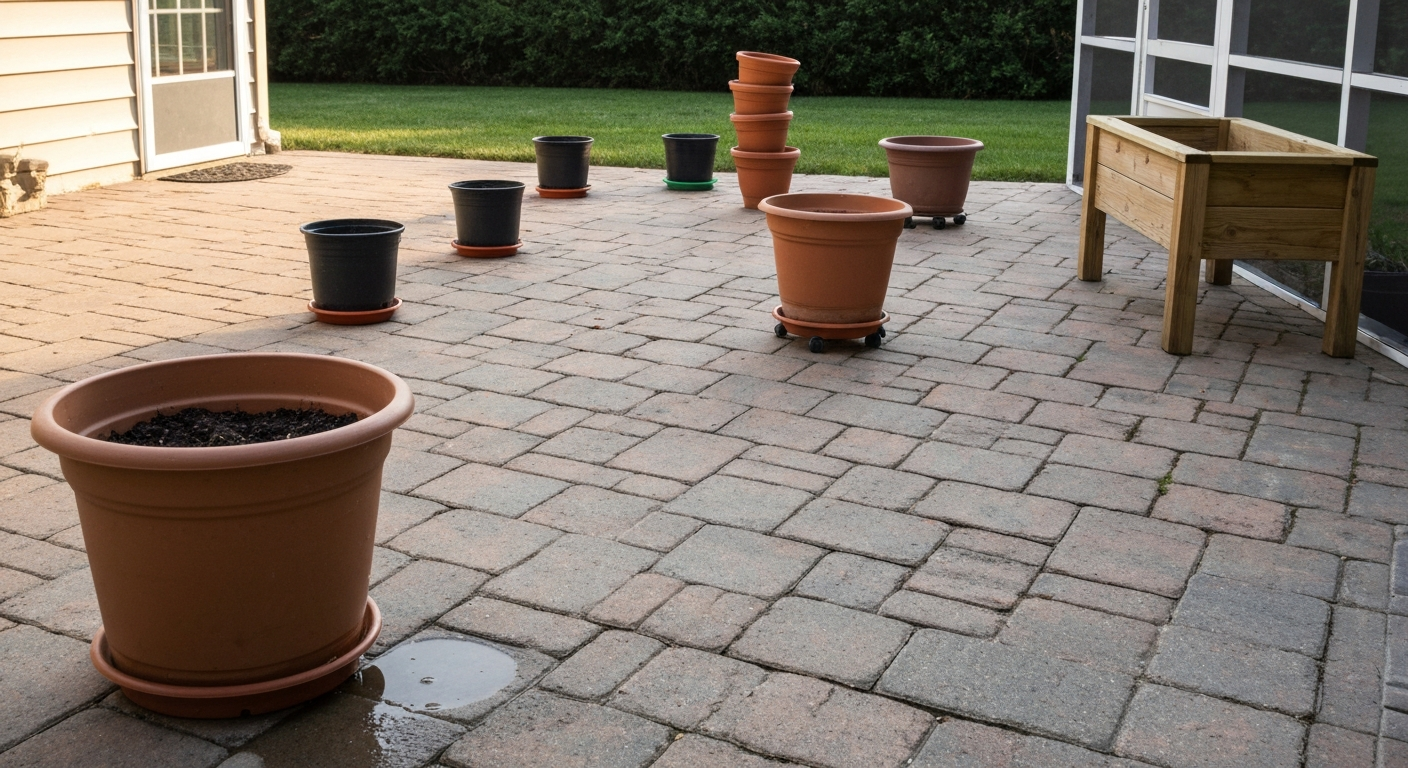
Who this guide is for and what we cover
This guide is written for homeowners who want practical, budget-conscious fixes, not a full patio rebuild. Whether you have a bare concrete slab, an interlocking paver patio, natural stone, tile, or a screened enclosure, the same core risks apply when planters sit directly on the surface. We cover everything from the cheapest five-minute fixes (saucers and pot feet) to longer DIY projects like sealing your slab or building a lined, legged planter box. We also touch on screened-patio-specific concerns like avoiding screen contact and prepping for wind and storms. If you have already read general patio protection advice, this goes one level deeper on planters specifically.
What planters actually do to a patio surface
It is worth being specific here because the type of damage determines the fix. Planters cause several distinct problems, and they tend to compound each other over a single season if you do nothing.
- Moisture rings and tannin stains: Water drains through the pot, picks up organic compounds from soil and clay, and sits trapped between the pot base and the patio surface. On porous concrete, pavers, and natural stone, that dark ring can soak in within days.
- Mineral and fertilizer staining: Dissolved minerals and fertilizer salts in drainage water leave white or rust-colored deposits as the water evaporates, especially on darker pavers.
- Scratching and abrasion: Unglazed ceramic, rough terracotta, and concrete pots act like sandpaper when nudged across tile or composite decking. Even a small shift during watering grinds grit between the pot and the surface.
- Standing water and biological growth: Water pooled under a pot in a tight gap with no airflow promotes algae, mildew, and moss. On pavers, it also traps salts that cause spalling over time.
- Root and soil migration: On raised decks and screened patios with gaps in the decking, fine roots and soil particles work their way into joints and substructure, holding moisture and accelerating rot.
- Tipping and wind hazards: A tall, top-heavy planter on a smooth tile surface can tip in modest wind. On a screened patio, a tipping pot can punch directly through fiberglass or aluminum screen mesh.
- Screen damage on screened patios: Pots pushed against screen panels by wind, a pet, or a careless water-hose moment will bow, tear, or puncture the screen. Replacement is not expensive per panel, but it adds up fast.
Assess your patio and planters before you buy anything
Spend ten minutes doing a quick audit before you spend a dollar. The right solution depends on your surface material, your drainage situation, how heavy your pots are, and whether you are dealing with a screened enclosure.
Surface material
Bare concrete and concrete pavers are porous and stain easily but are relatively forgiving of weight. Natural stone (travertine, slate, flagstone) is porous and often softer, so scratching is a bigger concern. Tile set in thin-bed mortar is rigid and resists staining but is vulnerable to point-load cracking from heavy concentrated weights. Composite decking scratches easily and can trap moisture at the board level if drainage is blocked. Knowing your surface tells you whether sealing, padding, or load-spreading is the priority.
Slope and drainage
Get down at eye level with a long straight edge or use a 4-foot level with a bubble. Industry standard for patios is a slope of 1/8 to 1/4 inch per foot away from the house, with 1/4 inch per foot being the more reliable target for keeping water moving. If your patio is flat or slopes toward the house, water will collect under your pots and the problem will be worse. Note low spots where puddles form after rain, because those are the worst places to put a planter.
Weight limits
For a concrete slab on grade, a single large pot (say, a 24-inch ceramic planter filled with wet soil) can weigh 150 to 300 pounds and concentrates that weight on a small footprint. ACI guidance notes that concentrated point loads are more severe than the same weight spread uniformly, so a slab that handles foot traffic easily can crack under a single heavy pot sitting on a narrow base. ACI 360R‑06, Design of Slabs‑on‑Ground states that concentrated point or wheel loads are more critical than equivalent uniform loads and recommends evaluating them with slab‑on‑ground design procedures blank" rel="noopener noreferrer">ACI 360R‑06 — Design of Slabs‑on‑Ground (concentrated vs uniform load guidance). If you have an elevated wood or composite deck, the IRC requires a minimum design load of 40 pounds per square foot, but heavy planters, especially large water-filled ones, can push that budget quickly. The IRC specifies a minimum uniformly distributed live load of 40 pounds per square foot for decks (see 2015 International Residential Code (IRC), Chapter 3: Building Planning (Deck live-load reference)) blank" rel="noopener noreferrer">2015 International Residential Code (IRC) — Chapter 3: Building Planning (Deck live-load reference). If you are stacking multiple large planters on an elevated deck or suspect your deck is older and under-built, get a structural opinion before adding significant weight. For most standard patios with a few medium pots, this is not a crisis, but it is worth a quick mental check.
Quick screened-patio check
Walk your screen perimeter and note how close existing pots are to the screen panels. A clearance of at least 12 to 18 inches between a planter and the nearest screen is a reasonable minimum. Check whether your screen frame has lower kick-panels or solid base sections, since these are much more impact-resistant than screen mesh. Also note which direction prevailing wind comes from, because that is the side where an unsecured pot is most likely to tip or roll into the screen.
Materials and tools checklist
Here is everything you are likely to need, organized by category. Costs are approximate retail as of mid-2026 in the US. You probably will not need every item, so use the assessment above to narrow the list before you shop.
| Item | What it does | Approx. cost | Effort level |
|---|---|---|---|
| Plastic or rubber plant saucers (10–16 in) | Catches drainage, prevents contact staining | $2–$8 each | 5 min / none |
| Pot feet or ceramic/plastic risers (set of 3–4) | Lifts pot ~0.5–1 in for airflow and evaporation | $5–$15 per set | 5 min |
| Non-marking rubber or felt furniture pads | Prevents scratching on tile and composite | $5–$12 per pack | 5 min |
| Plant caddy / dolly with wheels (12–16 in, 200–380 lb rated) | Raises, mobilizes, distributes load, protects surface | $20–$80 each | 5 min |
| Corrosion-resistant metal or powder-coated stands | Elevates pot, provides airflow, resists rust staining | $25–$80 each | 15 min |
| Penetrating silane/siloxane concrete sealer (1 gal) | Reduces water and stain absorption on concrete/pavers | $30–$60/gal | 2–4 hrs (plus cure time) |
| Liquid-applied elastomeric waterproofing membrane (e.g., RedGard, HYDRO BAN) | Full surface waterproofing for wet areas or severe exposure | $50–$80/gal | Half day (plus 24 hr cure) |
| Self-adhesive waterproofing sheet membrane | Seam and corner detailing with liquid membranes | $20–$40/roll | 1–2 hrs |
| Planter box liner (pond liner or HDPE sheet) | Prevents moisture and root migration through planter walls | $10–$30 per sheet | 30–60 min |
| Rubber furniture or paver shims | Levels pots on uneven surfaces to prevent tipping | $8–$15/pack | 10 min |
| Ratchet straps or bungee anchor cords | Secures pots to railing or wall anchors in wind/storms | $10–$20 per pair | 15 min |
| Wall anchor hooks or eyebolts (stainless or galvanized) | Attachment points for storm straps | $5–$15 each | 30 min |
| 4-foot level | Checks slope and levels risers and stands | $15–$30 (if you don't own one) | N/A |
| Tape measure, pencil, chalk line | Spacing and layout | Under $20 total | N/A |
| Stiff brush and concrete cleaner | Surface prep before sealing | $10–$20 | 30 min |
Everyday protection: saucers, pads, risers, and feet
These are the moves that cost the least and prevent the most damage. Do these first, before anything else.
Saucers and drainage trays
A plastic or heavy-duty rubber saucer under every pot is the single most effective thing you can do. It catches drainage before it contacts your patio surface and keeps soil and minerals contained. The key rule: empty the saucer within 24 hours of watering or rain. Standing water sitting in a saucer that is in contact with your patio will still wick moisture and create staining or a mosquito habitat. Heavy-duty plastic saucers (like the Orbit 12-inch style sold at major home centers) cost a few dollars each and hold up well outdoors for several seasons. Size up: the saucer should be at least as wide as the pot's base, ideally 2 inches wider on each side to catch splash.
Pot feet and risers
Pot feet are small ceramic, rubber, or plastic blocks you place under a pot to lift it roughly half an inch to one inch off the surface. You need at least three per pot, placed evenly around the base. That small gap dramatically improves evaporation under the pot and eliminates the trapped-moisture zone that causes staining. If you are using a saucer, place the pot feet inside the saucer, not under it, so the saucer still catches drainage while the pot sits elevated within it. For larger or heavier pots, a slotted plastic riser disk (a single piece that spans the full diameter) is easier to level and more stable than three individual feet.
Non-marking pads for scratch-prone surfaces
On tile, composite decking, or polished stone, stick self-adhesive rubber or felt furniture pads to the bottom of pot feet, risers, or plant caddies. This eliminates the sandpaper effect when pots are nudged during watering. Check these pads every season, since outdoor exposure degrades adhesive and the pads fall off.
Plant caddies for mobility and load spreading
A wheeled plant caddy does triple duty: it lifts the pot, distributes the weight over a wider footprint, and lets you roll the pot out of the way for cleaning or storm prep without wrestling with dead weight. Most 12 to 16 inch caddies sold at home centers are rated for 200 to 380 pounds, which covers all but the very largest planters. On tile or composite, choose a caddy with rubber-coated or non-marking wheels. On pavers, standard plastic wheels are fine. Budget around $20 to $80 depending on size.
Waterproofing and drainage fixes
If saucers and risers are your first line of defense, sealing and drainage improvements are your backup. They matter most when you have a lot of pots, an older unsealed slab, or a screened patio where drainage is limited by the enclosure roof.
Penetrating sealers for concrete and pavers
A penetrating silane/siloxane sealer (brands like PROSOCO Consolideck are widely available) soaks into the concrete or paver surface and chemically reduces water and oil absorption without changing the surface appearance. For more detailed tips on sealing and drainage, see our guide on how to protect patio from rain. It does not create a film that can peel; it makes the material itself less porous. This is what you want for a patio that gets regular planter traffic. Coverage is typically 200 to 400 square feet per gallon depending on porosity. Application is straightforward: clean the surface thoroughly, let it dry completely (usually 24 hours minimum after rain), apply with a low-pressure sprayer or roller, and let it cure. Follow the manufacturer's dip for reapplication intervals, which is usually every 3 to 5 years for moderate climates.
Elastomeric waterproofing membranes for severe exposure
If you have an elevated deck or a tile patio that gets pooling water, a liquid-applied elastomeric membrane like RedGard by Custom Building Products or LATICRETE HYDRO BAN provides a full waterproof layer over the substrate. These are typically used under tile in wet areas, but they are also appropriate for patios that have persistent drainage problems. Application requires proper surface prep (clean, sound, and primed per the TDS), two coats with drying time between coats, and mesh or fabric tape embedded in corners and at seams. Cure times are typically 24 hours before foot traffic. This is a half-day DIY project if your patio is under 200 square feet. Follow the technical data sheet closely. Skipping the corner detailing is the most common DIY mistake and the most common point of failure.
Fixing slope and adding drainage
If your patio consistently pools water, no amount of sealing fixes it permanently. The target slope is 1/4 inch of drop per foot of horizontal run, aimed away from the house. For a concrete slab, re-sloping means adding a topping layer, which is a moderate DIY job but doable with resurfacing compound. For pavers, you can re-pull low sections, add base material, and relay them to the correct grade. If your screened patio's perimeter has no drain and rainfall runs in under the screen walls, a French drain or channel drain at the perimeter is the right fix. These are bigger projects but still DIY-friendly with the right tools.
Breathable vs. film-forming coatings
One important distinction: penetrating sealers are vapor-permeable, meaning moisture vapor can still escape from below the slab. Film-forming coatings (acrylic or epoxy paints) trap vapor, which can cause bubbling and delamination in climates with ground moisture. For most outdoor patios on grade, stick with penetrating sealers. Film-forming coatings are better suited to above-grade applications like elevated decks where the underside is open to air.
Step-by-step: fitting trays, pads, risers, and stands
This process takes 30 to 60 minutes for a typical patio with 5 to 10 pots. Gather your saucers, pot feet, pads, and caddies before you start so you are not running back to the garage mid-setup.
- Clear the area and clean the surface. Sweep or wash the patio under and around each pot location. Dirt and grit under a riser will scratch the surface just like the pot itself would. Let the surface dry.
- Check and mark your placement. Use chalk or a piece of tape to mark where each pot will sit. Aim to keep pots at least 12 to 18 inches from screen panels and at least 6 inches from walls to allow airflow and easy cleaning access.
- Choose the right riser or caddy for each pot. Match riser diameter to pot base diameter. For pots over 50 pounds, use a caddy rated for the weight. For pots on tile, add non-marking pads to all contact points of the riser or caddy.
- Place and level the riser or caddy. Set it on the marked spot and check with a small level. On slightly uneven pavers, use rubber shims under the low side of the caddy to prevent rocking. A rocking caddy on a smooth surface will walk around and scratch.
- Set the saucer on or inside the riser. If using a caddy, set the saucer on top of the caddy platform. If using individual pot feet, set the saucer first, then place the pot feet inside the saucer, then set the pot on top of the feet.
- Place the pot and check stability. Give the pot a firm push from multiple angles. It should not rock or tip easily. For top-heavy pots (tall, narrow, or with a high center of gravity), consider filling the bottom third with gravel for ballast before adding soil.
- Check spacing for load distribution. If you have multiple large pots close together on an elevated deck, space them out rather than clustering them. Spreading the weight over more deck area reduces concentrated load on any one joist bay.
- Test drainage after the first watering. Water the plant normally and watch where drainage goes. Confirm the saucer is catching it and that water is not escaping under the saucer edge. Empty the saucer within 24 hours.
Building and placing raised planters and lined planter boxes
If you are going beyond individual pots and want a built planter box on the patio, a few construction details make the difference between a planter that protects your surface and one that destroys it within two seasons.
Lining a planter box to stop moisture and root migration
Any wood or composite planter box sitting directly on a patio surface needs a waterproof liner on all interior surfaces, including the bottom. Use a 20-mil HDPE pond liner sheet or a purpose-made planter liner. Cut it to fit, fold the corners cleanly, and staple or nail it to the interior walls 2 to 3 inches below the box's top edge. Leave the liner unattached at the very bottom so water can find the drainage holes. Speaking of drainage: drill 3/4-inch drainage holes every 8 to 12 inches along the bottom of the box, angled slightly so they drain outward. Without these, the liner traps standing water and the roots rot.
Building on legs for airflow beneath the planter
Raise the planter box on legs rather than setting it flat on the patio. Four short legs (4x4 post offcuts or purchased furniture legs rated for outdoor use) at least 3 to 4 inches tall create airflow beneath the box, allow drainage to escape without pooling under the liner, and prevent direct wood-to-patio contact that wicks moisture and accelerates rot. Attach the legs to the corners of the box frame with structural screws and exterior-rated hardware. If the patio surface is pavers or rough concrete, add rubber furniture feet to the bottom of each leg so they do not rock or scratch.
DIY raised planter build: basic steps
- Cut your side boards to length (cedar, redwood, or pressure-treated lumber are good exterior choices). A simple rectangular box with 2x6 or 2x8 boards works well for most patios.
- Assemble the box frame with exterior-grade deck screws. Pre-drill to prevent splitting.
- Attach 4x4 leg blocks to the outside corners using structural screws. Check that all four legs sit level before final tightening. Shim under legs as needed.
- Cut and install the bottom boards with 1/2-inch gaps between them for drainage.
- Install the liner on all interior surfaces, folding and stapling it neatly at corners. Leave liner loose at the bottom to allow drainage through the gaps in the bottom boards.
- Drill 3/4-inch drainage holes through the liner and bottom boards if the gap spacing is insufficient.
- Place the box in position on the patio. Set a rubber furniture pad or leg cap under each leg.
- Add a layer of landscape fabric over the bottom of the box interior before adding soil to slow fine soil particles from flushing out through drainage gaps.
Placement rules for screened patios
On a screened patio, a planter box gets heavy and hard to move once filled. Choose its location carefully before you fill it. Keep all planter boxes at least 18 inches from screen panels. Avoid placing them directly against screen frame posts, which can trap moisture against the frame and cause corrosion or wood rot at the base. Do not place a planter box on or near a screen door, since the door swing will hit the planter. If your screened patio has a solid knee wall (the lower solid section below the screen), a planter box sitting against the knee wall is far safer than one against screen panels, but still leave a 3 to 4 inch gap for airflow and cleaning. For wind prep, a filled planter box is heavy enough that tipping is less of a concern than an individual pot, but secure any lightweight or unfilled boxes with anchor straps before storm season.
Wind, storm, and hurricane preparation
Wind is where planters go from a maintenance nuisance to a genuine hazard. A 20-pound terracotta pot tipping off an elevated deck or punching through a screen panel causes real damage and real cost.
Heavy vs. light planters in storm-prone areas
Heavy planters (cast concrete, large ceramic, stone) stay put better in wind but are harder to move inside when a serious storm approaches. Lightweight planters (thin plastic, resin, fiberglass) are easy to bring indoors but can become airborne in even moderate wind. In hurricane-prone regions, the standard advice is: if a tropical storm watch or warning is issued, move everything you can inside. Do not count on straps to hold lightweight planters against hurricane-force wind. For day-to-day wind protection on a screened patio, ceramic and concrete pots are preferable because their weight keeps them stable.
Anchoring pots for everyday wind
For typical afternoon storms and gusty days, ratchet straps or bungee anchor cords work well for medium to large pots. Install a galvanized or stainless eyebolt into a wall stud or screen frame structural member (never into screen mesh or a thin panel). Loop a strap or cord from the eyebolt around the pot or its caddy. This does not need to be Fort Knox: you are preventing a 30-pound pot from rolling 4 feet into the screen, not withstanding a 120-mph gust.
Pre-storm checklist
- Move all lightweight (under 15 lb) pots and planters inside the house or garage.
- Group heavier pots away from screen panels, toward the interior of the patio.
- Lay down or nest terracotta and ceramic pots on their sides on a padded surface rather than leaving them upright.
- Secure any remaining pots with ratchet straps anchored to structural members.
- Empty all saucers and trays so they do not become water-filled projectiles.
- Remove hanging baskets or mount them inside the enclosure during the storm.
- If a major hurricane is approaching, remove all plants and furniture from the screened patio entirely. Screen enclosures are not rated to hold contents during a direct hit.
If you have a screened enclosure in a hurricane zone, the structure itself needs specific attention before and after a storm. That is a bigger topic covered separately, but the quick rule here is: do not count on a standard screened patio enclosure to protect your belongings during a direct hurricane. For detailed steps on securing screens, anchoring furniture, and pre-storm routines, see our guide on how to protect screen patio from hurricane. Plan to empty it.
Seasonal maintenance checklist
Running through this list twice a year (spring and fall) catches small problems before they become expensive ones.
| Task | Season | Why it matters |
|---|---|---|
| Empty and scrub all saucers | Spring and Fall | Removes mineral deposits and organic buildup that cause staining |
| Lift pots and clean under them | Spring and Fall | Reveals hidden staining, root intrusion, and moisture damage early |
| Inspect sealant condition (bead-up test with water) | Spring | Water should bead; if it absorbs flat, reapply sealer |
| Check pot feet and caddy pads for wear | Spring | Worn or missing pads scratch surfaces when pots are moved |
| Check ratchet straps and anchor hardware for corrosion | Spring | Coastal and humid environments corrode standard steel hardware fast |
| Re-level any risers or caddies on pavers that have shifted | Spring | Frost heave and settling can tilt pots over winter |
| Move pots away from screen panels and clear debris | Fall | Debris trapped between pot and screen holds moisture and causes staining or corrosion |
| Store lightweight and terracotta pots indoors if freezing temps expected | Fall | Terracotta cracks when water in the clay freezes |
| Inspect liner in any planter boxes for tears or pooling | Fall | Tears allow soil and moisture to escape onto the patio surface over winter |
| Flush drainage holes in planter boxes with a hose | Spring | Root growth and soil compaction block drainage holes over time |
Troubleshooting: stains, rot, and mold
Dark organic stains on concrete or pavers
These come from tannins and organic compounds in soil and drainage water. Scrub with a stiff brush and an oxygen bleach solution (not chlorine bleach, which can discolor some pavers and damage nearby plants). For deep-set stains, a phosphoric acid cleaner applied per label directions can lift mineral and tannin staining from concrete. After cleaning, seal the surface to reduce future absorption. This is also a good moment to apply a penetrating sealer if you have not done so.
White mineral deposits
White crusty deposits are typically efflorescence (salts migrating from concrete) or fertilizer mineral deposits. A diluted white vinegar solution (1 part vinegar to 3 parts water) works on light deposits. For heavy buildup, use an efflorescence cleaner from a masonry supplier. The fix is the same as for organic stains: improve drainage, use saucers, elevate pots, and seal the surface.
Mold and green algae
Mold and algae grow wherever moisture and organic material sit together with limited airflow. On a screened patio in a humid climate, this is a common problem under pots. Clean with an outdoor mold and mildew cleaner or a diluted bleach solution (1 cup bleach per gallon of water), scrub, rinse thoroughly, and let dry completely before returning pots. Then fix the root cause: better airflow under pots, emptying saucers more frequently, and improving slope so water does not pool.
Rot under planter boxes
If you find rotted wood on a planter box, assess how far it goes. Surface rot on legs can be scraped back, treated with a penetrating wood hardener, and painted with an exterior primer and paint as a short-term fix. Structural rot (where the wood crumbles when probed with a screwdriver) means the component needs replacement. Going forward, make sure the legs are elevated off the patio surface with rubber feet, and that drainage from the box does not pool at the base of the legs.
When to call a professional
Most of what is covered in this guide is genuinely DIY-friendly. But there are situations where calling a pro is the right call, not just the cautious one.
- Structural load concerns: If you want to place a very large, water-filled planter (think 300 pounds or more) on an elevated wood or composite deck, especially an older one, get a structural engineer to confirm the deck can handle it. The IRC minimum of 40 psf covers typical use, but heavy concentrated loads are a different calculation than uniform foot-traffic load.
- Full waterproofing membrane installation on an elevated or tiled deck: This is DIY-possible, but product warranty and reliable performance depend on correct surface prep, priming, and detailing. If the stakes are high (a deck over living space, an expensive tile installation), a waterproofing contractor with warranty-backed installation is worth the cost.
- Slope correction on an existing concrete slab: Light slope correction with resurfacing compound is a DIY project. If the slab needs significant re-grading or if there is evidence of sub-grade settlement (cracking, sinking sections), a concrete contractor should assess it first.
- Screen repair or enclosure modification after damage: Replacing individual screen panels is a standard DIY job. But if a tipping pot has damaged the screen frame or structural members, have it assessed by a screen enclosure contractor before re-screening. A damaged frame will cause the new screen to fail again quickly.
Quick comparison: protection methods at a glance
| Method | What it prevents | Cost range | Effort | Best for |
|---|---|---|---|---|
| Saucers and drainage trays | Moisture staining, mineral deposits | $2–$8 each | Minimal | All patio types, all pots |
| Pot feet / risers | Moisture rings, trapped water, scratch marks | $5–$15/set | Minimal | All patio types, all pots |
| Non-marking pads | Scratching on smooth surfaces | $5–$12/pack | Minimal | Tile, composite, polished stone |
| Plant caddies with wheels | Scratching, concentrated loads, mobility | $20–$80 each | Minimal | Heavy pots, tile, composite |
| Corrosion-resistant stands | Rust staining, surface contact, airflow | $25–$80 each | Low | Coastal/humid environments |
| Penetrating silane/siloxane sealer | Water and stain absorption into porous surface | $30–$60/gal | Moderate (half day) | Unsealed concrete, pavers, stone |
| Elastomeric waterproofing membrane | Water infiltration through substrate | $50–$80/gal | Moderate–high (half day + cure) | Elevated decks, severe drainage issues |
| Lined, legged planter box | Root migration, soil runoff, standing water | $50–$150 materials | Moderate (a few hours) | Permanent planter installations |
| Anchor straps and eyebolts | Wind tipping, screen damage | $15–$35 per pot | Low–moderate | Screened patios, storm-prone areas |
The best approach for most homeowners is layered: start with saucers, pot feet, and non-marking pads for every pot today, then work through sealing and drainage improvements over the next season. A lined and legged planter box is a weekend project that pays for itself quickly in reduced cleaning and surface repair. And if you are in a storm-prone region, anchor hardware and a clear pre-storm routine are non-negotiable. None of this has to happen at once, and none of it requires specialized skills. Start with what your patio needs most, and build from there.
FAQ
What are the simplest, lowest‑cost ways to prevent planter damage to patios and screened patios?
Use saucers or shallow trays under pots to catch drainage; add risers or pot feet (0.5–1 in high) to keep pots off the surface; use plant dollies/planter caddies to raise and distribute load and prevent scratching; place thin rubber or felt pads under clay/ceramic pots to stop abrasion; and group pots on continuous trays or a single raised platform to reduce point loads and protect finishes. Empty saucers after watering to avoid standing water and mosquitoes. Typical cost: $2–$30 per saucer/riser, $20–$80 per dolly.
How do I prevent staining, mineral rings and organic discoloration from pots?
Allow airflow under pots (use risers or open-grid dollies), always use saucers or trays and empty them after watering, seal porous surfaces with a penetrating sealer (silane/siloxane) for concrete/paver/natural stone, and clean periodic discoloration with mild detergent, oxygen bleach or manufacturer-recommended cleaners. For new staining, scrub while damp; for persistent mineral deposits use diluted muriatic acid only if substrate and local codes permit (test small area and follow safety rules). Sealer cost: ~$30–$150 per gallon; DIY effort: low–medium.
What waterproofing or drainage fixes help protect patios from planter moisture?
Ensure finished patio slope of ~1/8"–1/4" per foot away from structures to avoid standing water. For porous concrete/pavers, apply a penetrating silane/siloxane sealer or densifier to reduce absorption. For tile/finished systems, use a liquid‑applied waterproofing membrane (e.g., RedGard, HYDRO BAN) following the TDS for prep and detailing at joints/drains. Consider raised beds/planters with internal liners to keep soil/irrigation off the patio. Cost/effort: sealers $30–150/gal (DIY moderate), liquid membranes $50–150/gal (DIY advanced; follows cure times and prep).
How can I prevent root or soil migration that stains or disrupts patio joints?
Use planters with intact bottoms or add a heavy-duty liner/pond liner to raised planters, use saucers or trays with a lip to catch soil-laden drainage, and choose pots with internal weed/root barriers. For pavers, maintain joint sand and consider polymeric jointing sand to resist soil washing. Periodically vacuum or sweep joints and reapply joint sand when needed. Cost: liners $10–$50; polymeric sand $20–$60 per 50 lb bag.
How should I distribute heavy pots to avoid concentrated point loads that can crack slabs, tile or pavers?
Spread heavy pots across multiple pavers or a continuous base (e.g., a concrete pad or wide timber platform) instead of placing them on a single small paver. Use plant dollies or wide corrosion‑resistant stands to distribute weight. Avoid placing very heavy, water-filled planters on thin-bed tile or lightweight decking without structural review. If you expect recurring concentrated loads above a few hundred pounds in a single small footprint, consult a structural pro. Effort: simple redistribution low cost; engineered solution requires pro.
What are best practices to prevent tipping and wind hazards, especially in storms or hurricanes?
Use heavy, low‑center‑of‑gravity planters for exposed areas; anchor large planters or stands to the ground or a fixed base when possible; secure lightweight pots by grouping them against a wall or under eaves, and use straps or ratchet tie‑downs for very high winds. For hurricane season, move lightweight pots indoors or to a sheltered spot; empty pots to reduce wind uplift. For screened patios, remove or secure pots away from screens and glass to avoid projectiles. Cost: straps $10–$40; anchors $10–50; moving/storing is low cost but labor‑intensive.
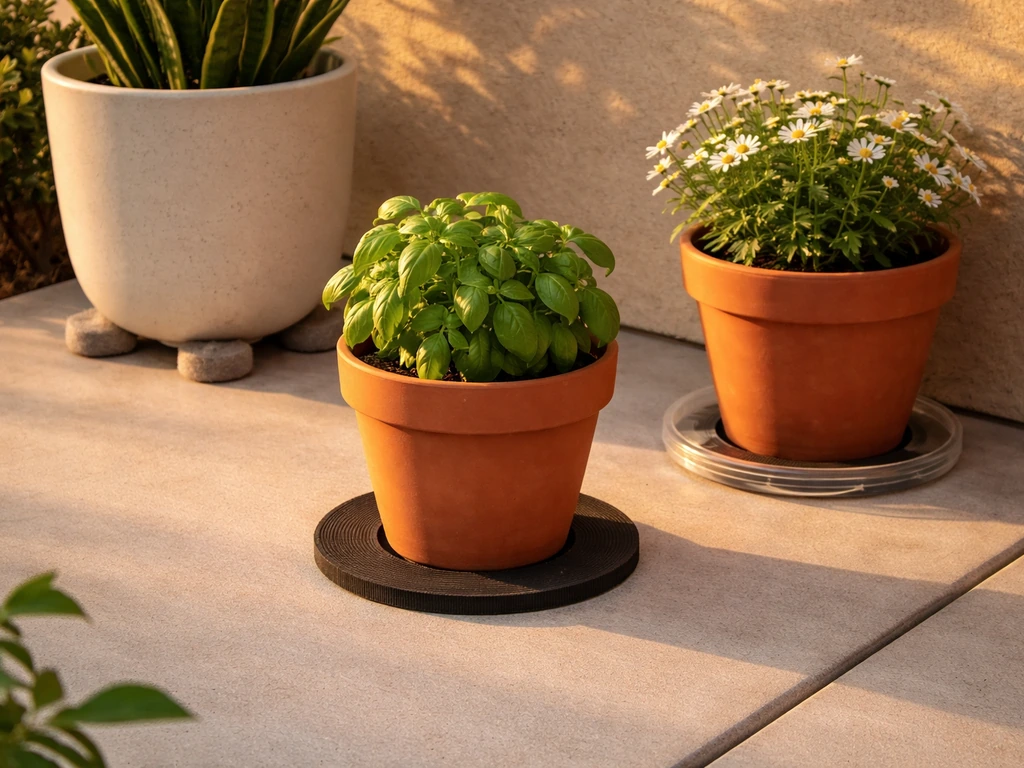
DIY solutions to stop pot water stains, rust, scratches, cracking, soil mess with liners, mats, pads, and drainage fixes
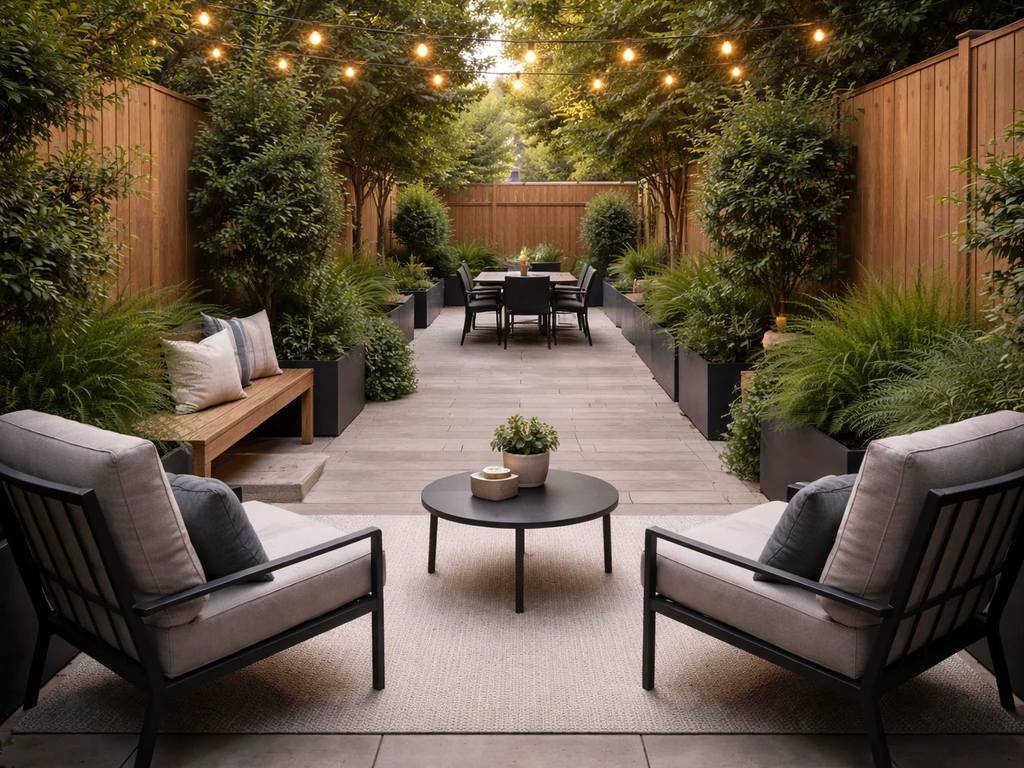
Practical DIY layout and decor tips to widen a long narrow patio using zoning, furniture spacing, lighting, greenery, an
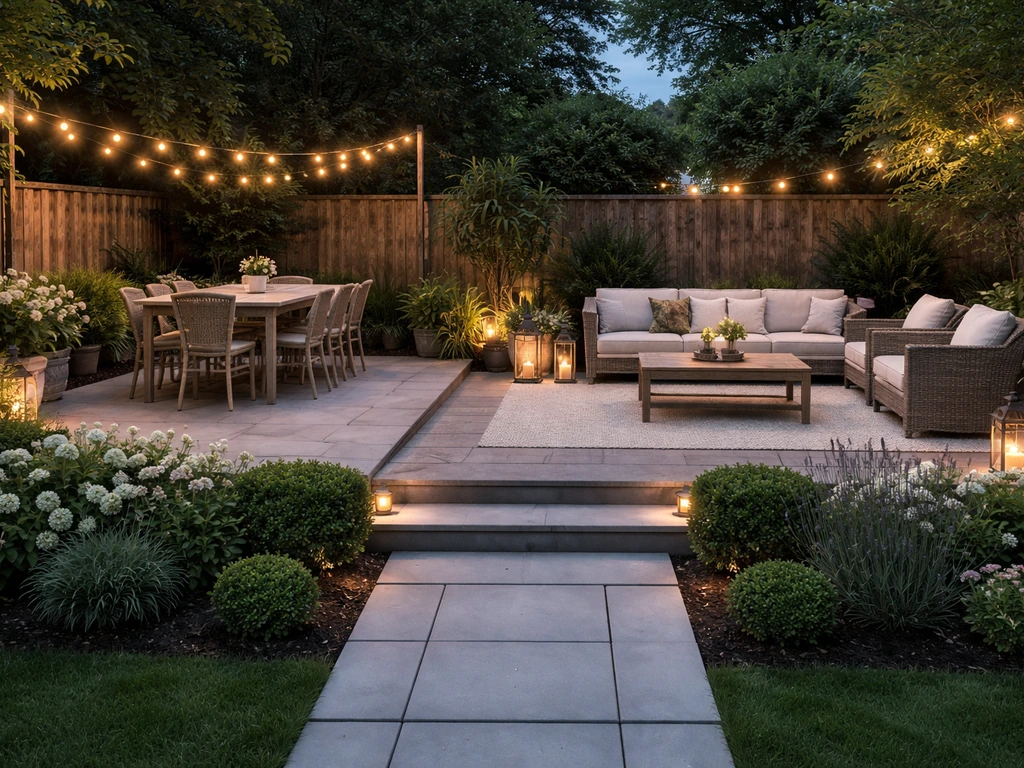
Step-by-step plan to decorate a rectangular patio with smart layout, zones, furniture fit, lighting, plants, and seasona