Trim your lavender patio tree twice a year: once in spring as new growth appears, and again right after the flowers fade in late summer (typically late August for English lavender). Ask Extension recommends pruning lavender in spring and again after flowering, with additional pruning after flowering that can include pinching young tips and cutting stems back by about one-third [pinching young tips and cutting stems back by about one-third after flowering](https://ask. extension. org/kb/faq.
How to Trim a Lavender Patio Tree Step by Step

Felix Brennan
23 Jun 2026
php? id=887394). Each time, cut back the green growth by about one-third, always stopping at least 2 to 3 inches above where the stems turn woody and gray. That single rule will keep the tree-like shape, encourage fresh branching, and protect the plant from the one mistake that actually kills lavender: cutting into old wood.
What a lavender patio tree actually is (and what to expect)
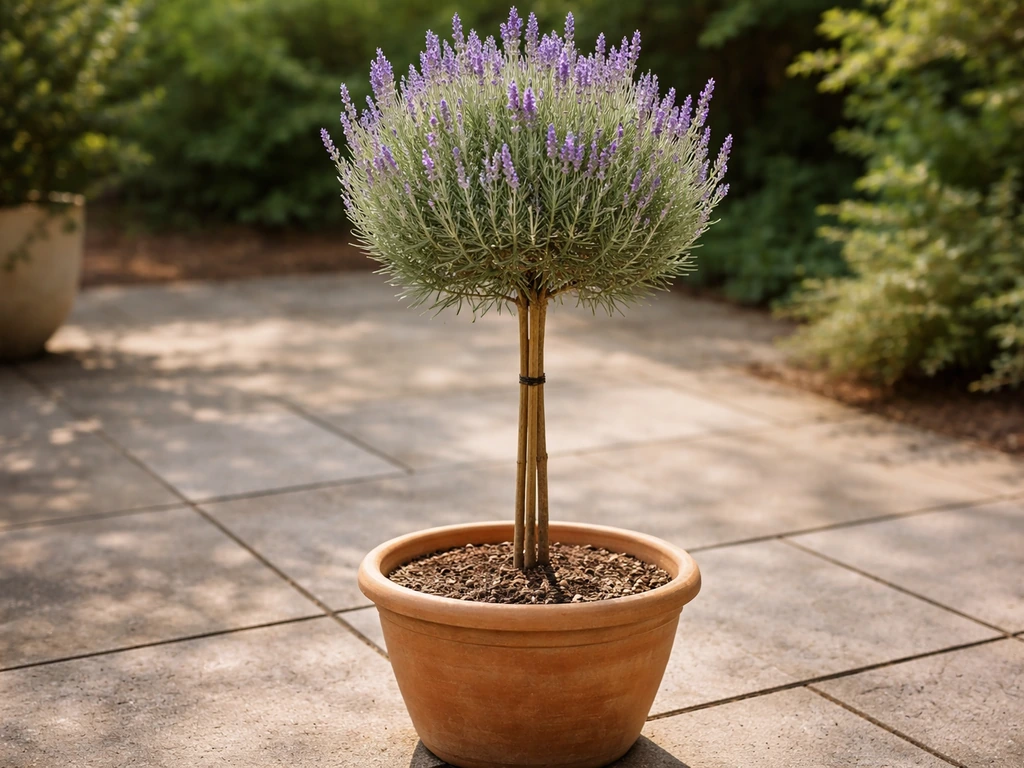
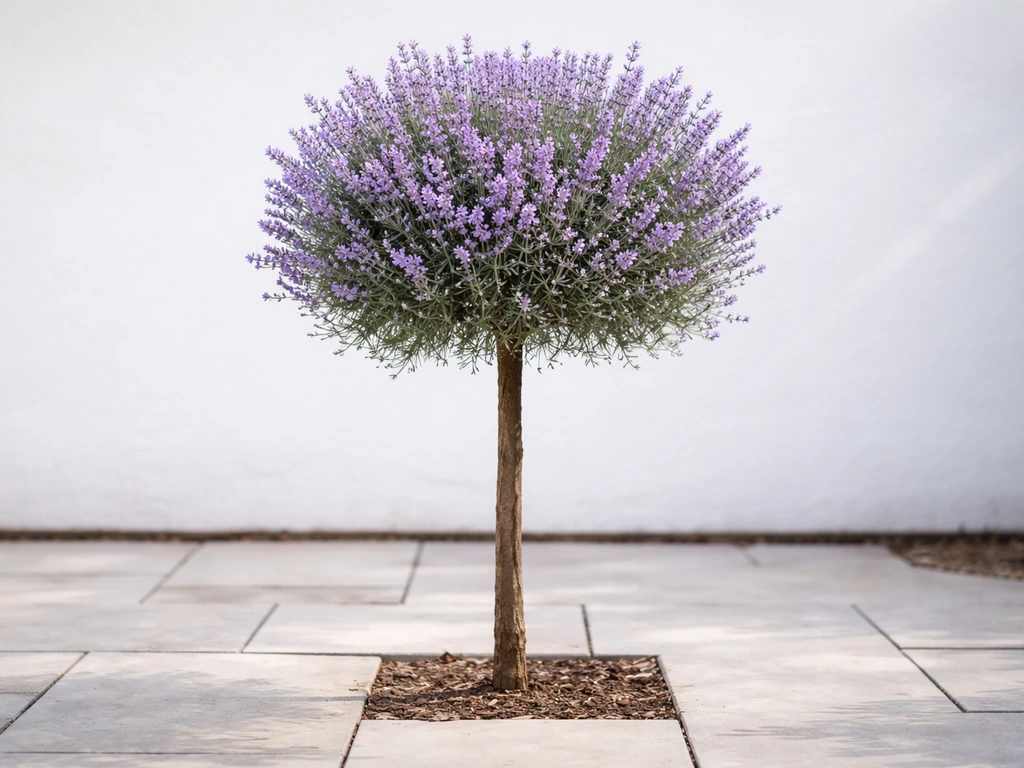
A lavender patio tree is a standard-trained lavender plant: a single woody stem has been staked and grown upright, with a rounded head of foliage and flowers sitting on top, much like a lollipop rose or bay tree. Most are English lavender (Lavandula angustifolia) cultivars such as 'Hidcote', which are naturally semi-woody and respond well to annual shaping. You will find them sold in containers specifically for patio use, and they stay in those containers for years if you maintain them correctly.
Because the plant is container-grown and lives on a patio rather than in open ground, a few things are different compared to regular lavender in a garden bed. The root zone is limited, so the plant is more sensitive to overwatering and drought stress. It also gets more heat reflected off paving, which accelerates flowering but can stress the plant if it dries out. Trimming ties directly into this: a well-shaped, not-too-congested head drains water faster, dries out between rain events, and is far less likely to develop the crown rot that kills patio lavender. Think of trimming as maintenance for the whole plant, not just a cosmetic task.
You should also set realistic expectations about the woody trunk. That main stem will never re-shoot from bare old wood if you cut into it. The lollipop head is the only part you work with. This makes the job simpler than it sounds: you are always shaping the living green canopy, never touching the trunk.
When to trim: timing makes a real difference
There are two main pruning windows and one ongoing task to keep in mind throughout the season.
Spring shaping (the lighter pass)
In early to mid spring, once you see fresh green growth pushing through the base of the canopy, go in with a light trim. You are not cutting hard here. The goal is to tidy any winter dieback, even out the shape of the head, and pinch back the very tips of new shoots to encourage branching. This is also a good moment to assess whether any stems died over winter and need removing. Keep cuts light: no more than the top inch or two of new growth, and always into green stem, never into gray wood.
Post-flowering prune (the main event)
This is the most important cut of the year, and timing matters. For English lavender, that usually means late July through late August, once the flowers have gone over and started to look tatty. Aim to prune before the end of August so the plant has time to harden off before cooler autumn temperatures arrive. At this point you cut back the green growth by one-third to a half, shaping the canopy back into a neat dome. This is when you do the most work, so this is also the step covered in detail in the step-by-step section below.
Deadheading through summer (the ongoing task)
Between those two main prunes, deadhead spent flower stems as they fade throughout summer. Snap or snip them off just above the first set of leaves below the flower. This keeps the canopy looking tidy, encourages a second flush of flowers on some varieties, and prevents the plant from putting energy into seed production. It takes five minutes every couple of weeks and makes a noticeable difference.
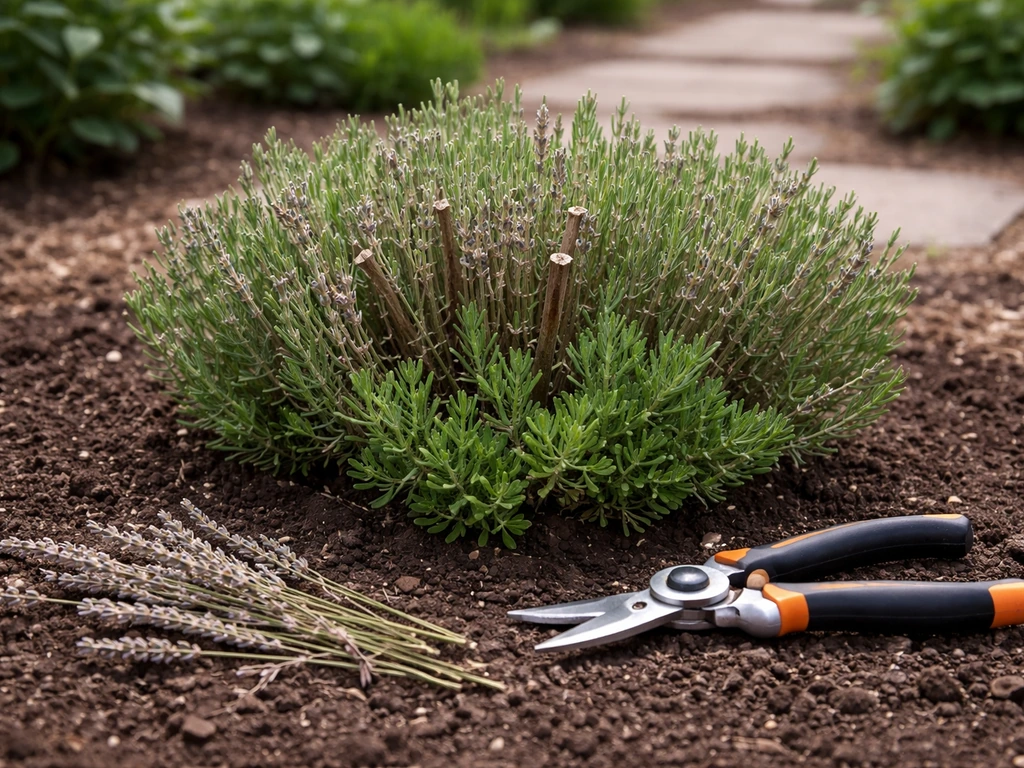
Tools, prep, and safety before you start

You do not need a lot of equipment for this job, but using the right tools matters more than most people realize. Trying to cut thick lavender stems with scissors or dull secateurs tears rather than cuts, which slows healing and opens the plant up to disease. To use a patio knife safely and effectively, keep the blade sharp, use light pressure, and always cut only the green growth.
- Bypass pruning shears (secateurs): your main tool for the canopy. Bypass blades make clean slicing cuts; anvil-style pruners can crush stems. Size them to the job: lavender stems are rarely thicker than a pencil, so a standard pair is fine. Using pruners on stems too thick for the tool damages both the plant and the blades.
- Hedge shears or topiary shears: useful for the final shaping pass on the rounded canopy. Long blades help you see the overall dome shape as you work.
- Gloves: lavender oil is not harmful, but the stems can be scratchy and you will be gripping a lot of them.
- A clean cloth or small spray bottle with 70% isopropyl rubbing alcohol: for disinfecting your blades before you start and between plants. Bleach is not recommended because it corrodes metal over time.
- A small bucket or bag: to collect clippings. Lavender trimmings smell great in the compost or dried indoors.
Before picking up your secateurs, wipe the blades with 70% isopropyl alcohol and let them air-dry for 30 seconds. This is especially important if you have been using the same tools on other plants. Check that the blades open and close smoothly, and that there is no rust or residue on the cutting edge. A sharp, clean blade makes the whole job easier and leaves cuts that callous over quickly.
Take a look at the plant before you cut anything. Rotate the container slowly and note where the shape is uneven, where there is dead growth poking out, and where the boundary between green growth and woody stem sits. On a patio tree the canopy base usually sits right where the staked trunk branches into multiple stems: that junction is the line you never cut below. If the plant is in a container, you can move it into a clear open area where you can walk around it easily, which helps enormously when shaping a round form.
Step-by-step: trimming to maintain the tree-like shape
This sequence covers the post-flowering prune, which is the most involved trim you do. After that, make sure you stake patio tomatoes properly for support as the plants grow taller. Follow this process and the spring touch-up will be straightforward.
- Start with dead and damaged material. Before shaping anything, use your secateurs to remove any dead, brown, or clearly diseased stems from the canopy. Cut them back to where they meet living green wood. Removing debris first gives you a clearer picture of what the live canopy actually looks like.
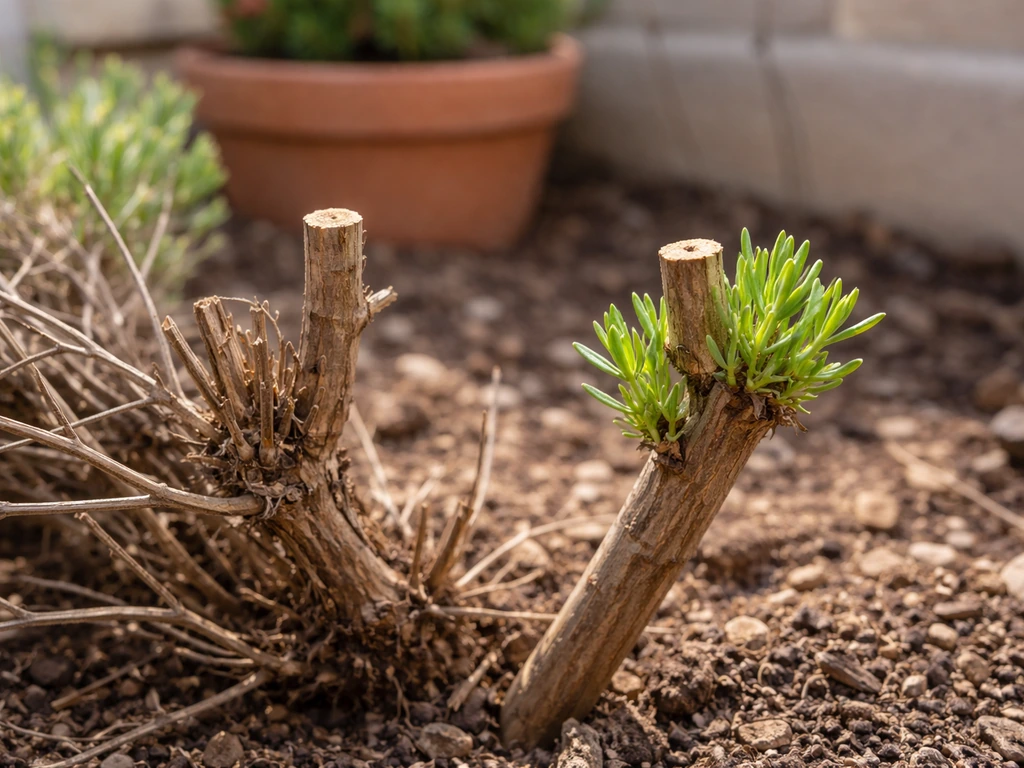
- Find your 'safe zone.' Run your fingers down a stem from the tip toward the trunk until you feel the stem change texture from flexible and green to stiff and gray. That transition point is the top of the woody section. Your cuts must stay at least 2 to 3 inches above this zone on every stem. Mark it mentally before you begin the main cut.
- Cut back one-third of the green growth. Working around the canopy, trim back the current season's growth by about one-third. If the green stems are around 6 inches long, you are cutting off roughly 2 inches. Keep the cuts angled slightly so water sheds off the stem end.
- Shape into a dome. Step back every few cuts and look at the overall silhouette. A lollipop lavender tree looks best with a round to slightly oval head. Use hedge shears for the final pass to smooth out any uneven spots. Cut lightly with the shears: just enough to tidy the outline, not a major reduction on top of the one-third you already took.
- Check the trunk and stake. While you have the plant in front of you, check that the stake is still firmly supporting the trunk and that any ties are not cutting into the bark. Adjust if needed.
- Clear the container surface. Remove fallen clippings from the top of the potting mix. Sitting debris traps moisture against the stem base, which can encourage rot.
Structural pruning: reducing size and renewing growth
Every few years, particularly with established English lavender varieties like 'Hidcote', the canopy can become congested, woody at the base, and less productive. This is when a harder structural prune is worth considering. The goal is to cut back far enough to stimulate strong new growth from lower on the canopy stems, without going so far that you hit old bare wood with no buds on it.
For a patio tree, the same principle applies as for garden lavender: in spring, you can cut the canopy back harder, taking it down to around 8 inches of green stem height from the branching point at the top of the trunk. Missouri Botanical Garden's guidance for Hidcote specifically supports this kind of spring size-control prune every three years or so. The critical check is still the same: there must be visible green shoots or leaves at the point you are cutting to. Never cut to bare wood.
If the canopy has gone very leggy and the woody area has crept up high into the head, a renovation prune may not be fully salvageable. In that case, the most practical option is to replace the plant and start fresh. This is a common reality with lavender that has not been trimmed regularly for several years. The best insurance is the annual one-third cut after flowering, which prevents the canopy from ever getting too far ahead of you.
A useful rule of thumb: if you can still see green growth within 3 to 4 inches of the point where you want to cut, go ahead. If the stems look bare for longer than that, stop there and work only on the green sections higher up.
Aftercare: keeping your patio lavender healthy after trimming
Pruning is a mild stress on any plant, so good aftercare in the first few weeks makes a difference. The good news is that lavender in a container does not need much fussing. Lettuce can also be grown successfully in containers on a patio by choosing the right variety, providing cool conditions, and keeping the soil consistently moist grow lettuce on patio. What it needs is simple and specific.
Watering
Water the container thoroughly immediately after pruning to help the plant settle, then back off. Lavender hates sitting in wet soil, and overwatering is the number one way to lose a patio tree. If you are growing fruit trees on a patio, follow similar aftercare habits so the container soil stays evenly moist and the trees can recover properly after pruning how to care for patio fruit trees.
Let the top inch or two of the potting mix dry out between waterings. On a paved patio in summer the container will dry out faster than you expect, so check it every two to three days in hot weather, but always test the soil before watering rather than watering on a schedule.
Feeding
Lavender does not need rich soil and excessive feeding actually reduces flower production and makes growth soft and floppy. A light feed with a low-nitrogen, balanced fertilizer in spring is enough for a container plant. Do not feed immediately after a hard structural prune in late summer, as you do not want to push soft growth going into autumn.
Sun and placement
After pruning, put the container back in full sun: at least six hours of direct sun per day. Lavender on a shaded patio will produce weak, sparse growth and is far more prone to the fungal issues that pruning is partly designed to prevent. If your patio gets partial shade, prioritize the sunniest spot available. On very hot patios with reflective surfaces, mid-afternoon shade can actually help in peak summer, but morning sun is non-negotiable.
What to watch for in the weeks after
Within two to four weeks of a post-flowering prune, you should see small silver-green shoots emerging from below the cut points. That is exactly what you want. If the plant looks static or you notice any browning or soft, mushy stems at the canopy base, check the drainage holes in the container and make sure the pot is not sitting in a saucer full of water. Good drainage is as important for a patio lavender tree as the pruning itself.
This inspection habit also sets you up for the next maintenance cycle: if growth looks strong and even, your trim was well-timed. If one side of the canopy is sparse, make a note to cut slightly harder on that side in spring.
Common mistakes and how to fix them
| Mistake | What happens | How to fix it |
|---|---|---|
| Cutting into old woody growth | No new shoots emerge from cut points; sections die back | You cannot reverse this cut. Remove the dead section cleanly, reshape around it, and if the damage is extensive consider replacing the plant. |
| Skipping the annual trim for several years | Canopy becomes leggy and congested; woody zone creeps up into the head | Do a careful structural prune back to the lowest visible green shoots. Accept that the shape may be uneven for a season while it recovers. |
| Pruning too late in the season (after September) | New growth is pushed too close to frost or cold weather and does not harden off in time | If you missed the late-August window, do a light tidy only and wait for spring for the main shaping cut. |
| Using blunt or dirty tools | Torn, ragged cuts that are slow to callous and more prone to disease | Sharpen or replace blades before the next prune. Wipe with 70% isopropyl alcohol between uses. |
| Overwatering after pruning | Root rot, yellowing foliage, soft mushy stems at the base | Let the container dry out, improve drainage, and remove the plant from any saucer that is retaining water. |
| Cutting too little each time | Plant gradually becomes dense and woody with reduced flowering | Commit to the full one-third cut after each flowering period. It looks dramatic but lavender needs it. |
One thing worth mentioning: if you also grow other patio plants alongside your lavender tree, such as patio fruit trees or container strawberries, the same tool-disinfection habit applies across all of them. Cross-contamination between container plants on a patio is a real risk, particularly with fungal issues, and a quick wipe-down of your secateurs between plants takes seconds and can save you a lot of trouble.
Lavender patio trees are genuinely low-maintenance once you get the timing and technique right. Two good trim sessions a year, the right tools, and a well-draining container in full sun will keep your plant in good shape for years. If you are instead trying to build a patio greenhouse for year-round growing, the approach to placement, shelter, and drainage is a little different than simple patio container care patio lavender. The one-third rule after flowering and the golden rule of never cutting into old wood cover ninety percent of what you need to know.
FAQ
Can I trim a lavender patio tree if I missed the late-summer pruning window?
Yes, but keep it light. If you missed the post-flowering cut, wait until you see new green growth in spring and do only a light tidy at first, then resume normal deadheading through the summer. Avoid heavy pruning in cool, late-season weather because it encourages tender regrowth that struggles to harden off.
How do I tell the difference between green growth and the woody gray part before I cut?
Green growth looks flexible, pliable, and typically has visible leaf buds or fresh shoots at the tips, while old wood turns gray-brown and feels tougher. If a stem feels stiff and you cannot see buds or any green at or below the cut line, stop and move higher to stay in live green tissue.
What if my lavender patio tree looks leggy and the trunk is starting to branch higher into the canopy?
If the woody area has climbed up too far, a renovation prune may fail because lavender does not reliably reshoot from old bare wood. Use the “green within a few inches” check, if green is not visible near where you want to cut, you will get better results by replacing the plant rather than attempting a drastic cut.
Should I prune right after a rainstorm or should I wait for it to dry?
Wait until the foliage and cut points are dry. Wet plants are more prone to disease spread and harder to shape cleanly, especially in dense patio canopies. A simple rule, if water is dripping or the plant is still damp inside the canopy, pause the trimming.
Is deadheading the same as pruning for a lavender patio tree?
No. Deadheading removes spent flower stems above the next set of leaves, it is a quick, ongoing task. It does not replace the larger post-flowering shaping cut that controls the canopy size and prevents congestion at the base.
How much should I trim off if the plant is smaller than expected or still recovering from a previous cut?
Trim less, not more. If the plant already looks stressed, thin only a small portion of the outer green tips to restore shape and remove obvious dead tips, then let the plant rebuild. The standard one-third to one-half approach assumes the plant is healthy and actively growing.
Can I use hedge trimmers or should I stick to secateurs and knives?
For a lollipop-shaped patio tree, hedge trimmers often shear rather than cleanly cut, which can bruise stems and create ragged edges in the green canopy. Hand tools are safer for precision, use only light pressure and aim for clean cuts on live green portions.
What should I do if I accidentally cut into gray old wood?
Do not try to correct it by cutting further back. Leave the existing cut and focus on shaping only the remaining green canopy in the next window. Monitor for dieback from that point, and adjust future trims so you always stop above the woody gray area.
Why is my lavender patio tree not growing back after pruning?
Most often it is one of these issues: the plant was cut into old wood, the timing was off so it could not harden off, the container stays too wet, or the plant is not getting enough direct sun. Check drainage holes, confirm at least six hours of direct sun, and verify you only cut into green.
How do I prevent cross-contamination if I prune multiple patio plants in the same session?
Disinfect blades between plants and also between severely affected areas and healthy areas on the same plant. Wipe, disinfect, and let tools dry briefly before continuing, and avoid touching cut surfaces with dirty gloves or potting soil.
What kind of fertilizer should I use, and when exactly can I feed after pruning?
Use a low-nitrogen, balanced fertilizer in spring only, and skip fertilizing right after a hard structural prune in late summer. If you do feed, do it after growth has restarted so you support recovery instead of pushing soft growth that is vulnerable to cool weather.
Do I need to stake anything after pruning besides just “putting it back in place”?
Usually no staking is needed right after shaping unless your canopy is top-heavy. However, confirm the trunk remains stable in the container and the stake does not rub the stem, because movement can cause small wounds that increase the chance of rot and fungal problems.
Next Articles

How to Grow Strawberries on a Patio: Container Guide
Step-by-step container guide to grow patio strawberries: varieties, pots, soil, watering, feeding, pests, overwintering,
How to Make a Patio Greenhouse: Step-by-Step DIY Guide
Step-by-step DIY patio greenhouse build: layout, materials, ventilation, sealing, and seasonal climate control tips for

How to Decorate a Long Narrow Patio: Layout Tips
Practical DIY layout and decor tips to widen a long narrow patio using zoning, furniture spacing, lighting, greenery, an