You can make a functional patio greenhouse by enclosing a portion of your patio with a simple frame and glazing panels, adding ventilation, and managing heat and moisture throughout the year. The whole project can cost anywhere from $50 for a basic cold frame to $1,500 or more for a fully enclosed lean-to structure, and most of it is achievable over a weekend or two. The key is matching the greenhouse style to your patio's actual conditions before you buy a single piece of material.
How to Make a Patio Greenhouse: Step-by-Step DIY Guide

Felix Brennan
9 Jun 2026
Pick the right greenhouse type for your patio
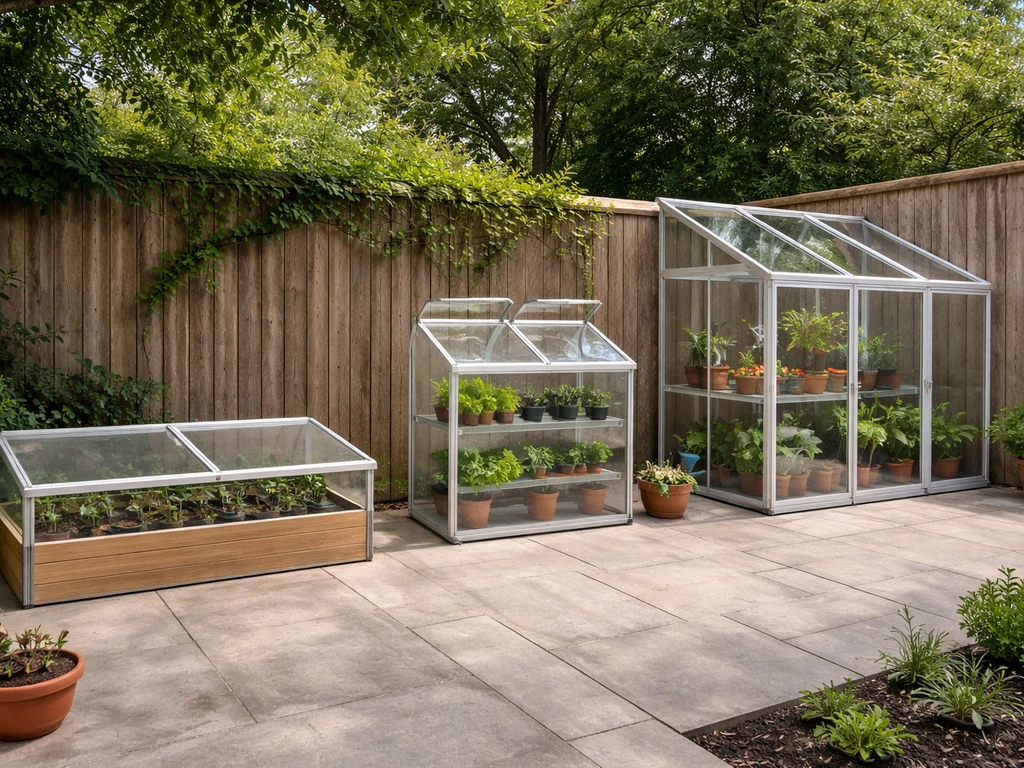
Not every patio needs a full walk-in enclosure. The three practical options for a patio setting are a cold frame, a mini-greenhouse, and a lean-to or enclosed room addition. Each one suits a different space, budget, and growing goal.
Cold frame
A cold frame is a low, box-shaped structure with a transparent or translucent lid, usually sitting directly on the ground or on a patio surface. It is the easiest and cheapest option to build, and it works well for hardening off seedlings, overwintering herbs, or getting a jump on cool-season crops like lettuce. You can regulate the temperature inside just by propping the lid open with a stick or a notched block of wood, which is the original low-tech ventilation method. The main limitation is size: most cold frames only accommodate plants up to about 12 to 18 inches tall.
Mini-greenhouse
Mini-greenhouses are taller freestanding shelving units covered with a clear plastic or polycarbonate zip-up cover. They are popular because they are cheap and portable, but there is a real catch: most mini-greenhouses have very limited built-in ventilation, which the RHS specifically flags as a problem because it causes damaging temperature swings on sunny days. For mini-greenhouses, the RHS cautions that many lack adjustable ventilation, which can lead to damaging temperature fluctuations on sunny days mini-greenhouses often lack ways to adjust ventilation. If you go this route, plan to prop the cover open during the day or cut small vent slits in the fabric cover. They work best in milder climates or as short-term season extenders rather than year-round growing spaces.
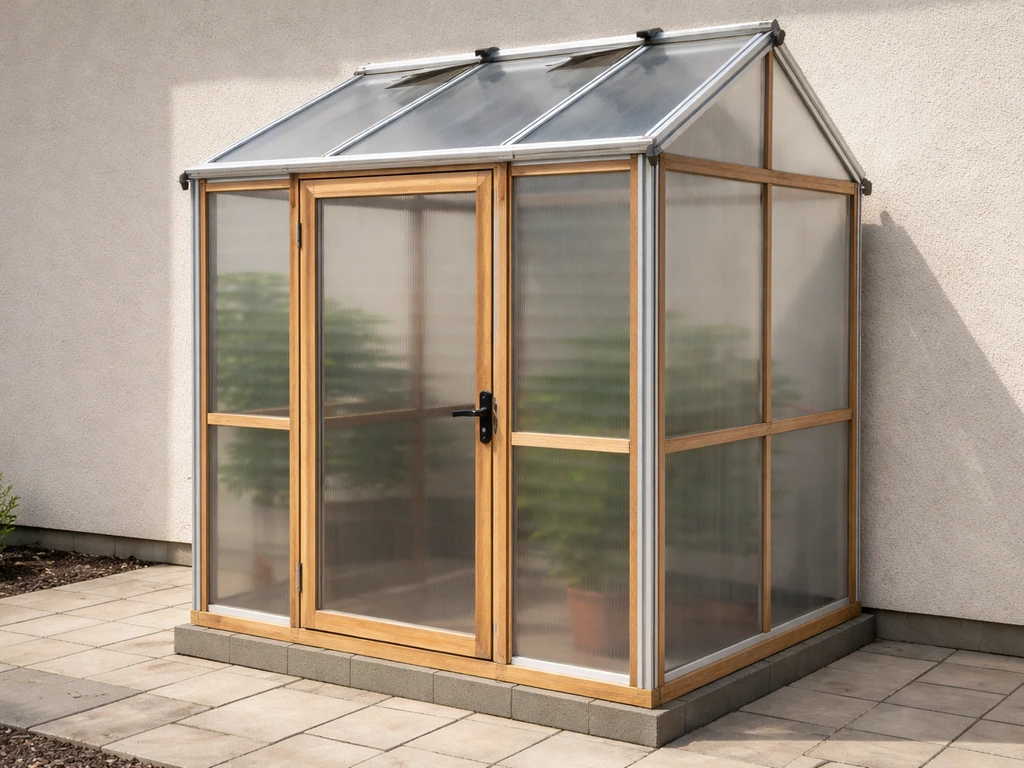
Lean-to or enclosed patio room
A lean-to greenhouse attaches to an existing house or patio wall, using that wall as one side of the structure. This is the most useful option if you want a true growing room: you can stand up in it, run utilities to it, and grow year-round. It does require more planning, a modest foundation or base, and a permit check with your local municipality. That said, a lean-to on an 8x10-foot patio is a realistic weekend build for an experienced DIYer and a two-weekend project for most beginners.
| Type | Approx. Cost | Space Needed | Ventilation Control | Best For |
|---|---|---|---|---|
| Cold frame | $50–$200 | 2–8 sq ft | Manual lid propping | Seedlings, overwinter herbs, cool crops |
| Mini-greenhouse | $60–$300 | 4–16 sq ft | Poor (cover must be modified) | Short-term season extension |
| Lean-to/enclosed room | $400–$1,500+ | 40–120 sq ft | Excellent (vents, fans, doors) | Year-round growing, full plant range |
If you are serious about growing tomatoes, strawberries, or patio fruit trees through shoulder seasons, invest in the lean-to. Lavender patio trees can also benefit from regular trimming to keep their shape, encourage new growth, and prevent overcrowded branches how to trim a lavender patio tree. If you just need to protect seedlings and overwinter a few pots, a well-built cold frame will serve you better than a flimsy mini-greenhouse.
Plan the site and layout before you build anything
Spending 30 minutes on site planning saves hours of problems later. Four things matter most: sun exposure, wind direction, drainage, and access.
Sun exposure
Most food crops need at least 6 hours of direct sun, so place your greenhouse where it catches the most light between 9 a.m. and 3 p.m. In the northern hemisphere, that usually means orienting the longest glazed wall facing south or southeast. If part of your patio is shaded by a roof overhang, check whether that overhang blocks winter sun specifically since winter sun angles are much lower. A shaded spot that works fine in summer may be nearly useless from October through February.
Wind exposure
Wind is the enemy of a patio greenhouse, both because it steals heat and because it can physically damage lightweight frames. Tuck the structure into a corner or against a wall if possible, with the solid back wall facing the prevailing wind direction. In most of the US, prevailing winter winds come from the north or northwest, so a south-facing lean-to against the north wall of your house is close to ideal. The USDA Forest Service specifically recommends that cold frame structures be positioned to resist wind gusts, which applies equally to any patio greenhouse.
Drainage
Standing water under your greenhouse destroys the base and creates root rot conditions. Check that your patio surface drains away from the structure, or plan a gravel base layer (2 to 3 inches of pea gravel works well) before setting down the foundation. If water pools against your house foundation, a lean-to greenhouse will make the problem worse unless you add a perimeter drain.
Access and layout
Leave at least a 24-inch-wide door opening so you can carry in pots, tools, and bags of soil comfortably. Inside, plan a central aisle of at least 18 inches with benches or shelving on one or both sides. If you are building a lean-to, mark the footprint on the patio with chalk or tape first and live with it for a day or two. You will often notice that the corner you picked blocks the sliding door or an outdoor outlet you rely on.
Choosing your materials and design
The three main decisions are what to build the frame from, what glazing to use, and how to handle the door and vents. Each choice affects cost, durability, and how well the structure holds heat.
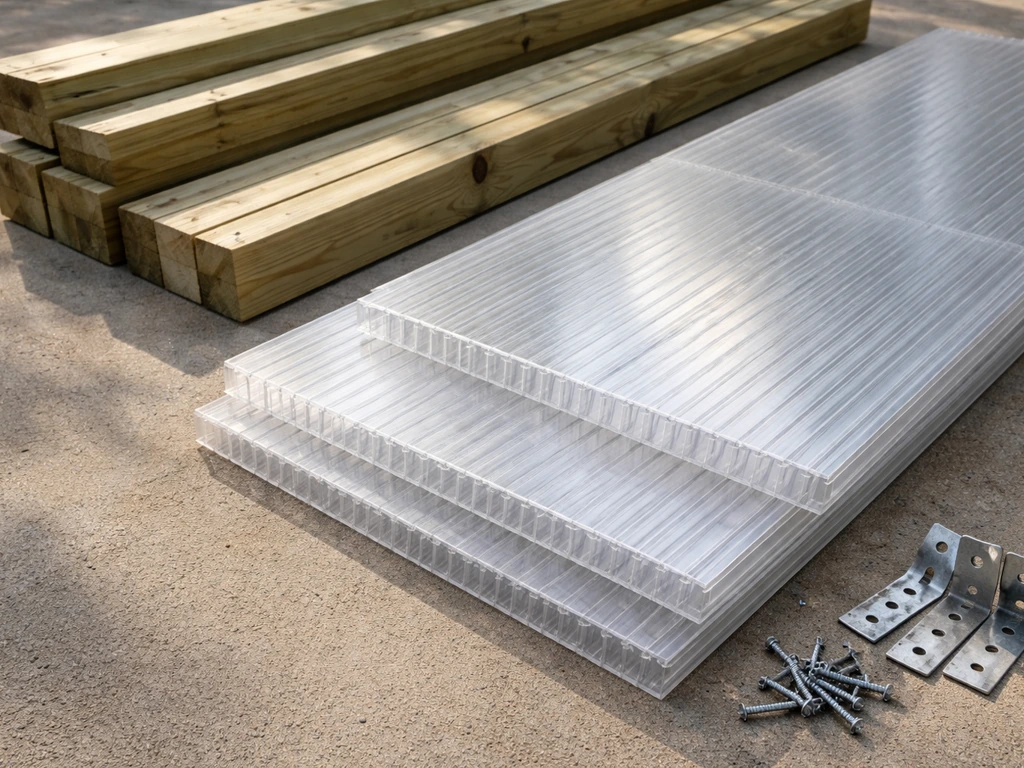
Frame options
- Pressure-treated lumber (2x4s): Affordable, easy to cut, widely available. Use ground-contact rated lumber for any pieces touching the patio surface or soil. Expected lifespan: 15 to 20 years.
- Aluminum extrusion kits: Lightweight, rust-proof, and many DIY greenhouse kits use this system. Easy to assemble with basic tools but more expensive than wood upfront.
- Galvanized steel conduit (EMT): Very strong and inexpensive. Requires a conduit bender and some practice, but creates a sturdy hoop or angle frame. Popular for budget lean-to builds.
- PVC pipe: The cheapest framing option. Works fine for low-load structures like cold frames or temporary mini-greenhouse covers, but degrades in UV light over a few seasons and is not suitable for permanent structures.
Glazing and panel options
- Twin-wall polycarbonate panels (4mm or 6mm): The best all-around choice for a patio greenhouse. Lightweight, impact-resistant, blocks UV, and provides decent insulation (R-value around 1.4–1.7 for 6mm twin-wall). Easy to cut with a utility knife or circular saw.
- Single-pane polycarbonate or acrylic sheets: Cheaper but offer almost no insulation value. Fine for a cold frame lid or a mild-climate mini-greenhouse.
- Tempered glass: Heavy, fragile if hit, and expensive. Not recommended for a DIY patio greenhouse unless you are repurposing salvage windows.
- Clear polyethylene film (6-mil greenhouse plastic): The most budget-friendly option for a temporary or seasonal structure. Replace every 1 to 2 seasons as UV breaks it down.
Doors and vents
For a lean-to, a simple hinged door built from the same framing lumber and polycarbonate panels you are already using costs almost nothing extra. Add a roof or ridge vent on the same side as your door, not opposite it, to create a draw. The RHS recommends that vent area equals at least 20% of your greenhouse floor area, so for a 10x8-foot (80 square foot) patio greenhouse, plan for at least 16 square feet of vent opening combined. That sounds like a lot, but a 2x4-foot roof vent plus two 2x4-foot side vents gets you there.
How to build your patio greenhouse step by step
This build sequence applies to a lean-to or enclosed patio room. If you are building a cold frame or a simpler structure, the same order applies at a smaller scale: prepare the surface, build the frame, attach the glazing, then seal and test.
Step 1: Prepare the site
Clear the area completely. If you are ready to prep and maintain patio tools right alongside your greenhouse build, you can also learn how to use a patio knife for clean cuts and safer handling. If your patio is concrete, sweep and degrease it where your base plates will sit. If you are building on pavers or bare ground, pull them up or level the ground and lay a weed barrier topped with 2 to 3 inches of compacted pea gravel. Check the patio surface for level with a 4-foot level. A slope of more than 1 inch over 8 feet needs shimming before you frame.
Step 2: Set the base or foundation
For a permanent lean-to on a concrete patio, anchor a pressure-treated 2x4 sill plate to the concrete using 3/8-inch concrete anchor bolts spaced every 16 to 24 inches. This sill becomes the bottom of your frame and keeps wood off the wet concrete surface. For a temporary or semi-permanent structure, use adjustable post base hardware set in a concrete pad or attach directly to pavers with masonry anchors. Either way, the base needs to be level and solid before you go vertical.
Step 3: Frame the structure
Start with the back wall (the house or fence wall) and the two end walls, then frame the front wall last. Use 2x4s at 24-inch centers for a standard lean-to. The roof pitch needs to be steep enough to shed rain and snow: aim for at least a 4:12 pitch (4 inches of rise per 12 inches of run). Flatter roofs collect debris and can trap water under the panels. At each corner, use hurricane ties or metal corner brackets to add rigidity. A lean-to greenhouse gets a lot of lateral stress from wind, and screws alone are not enough.
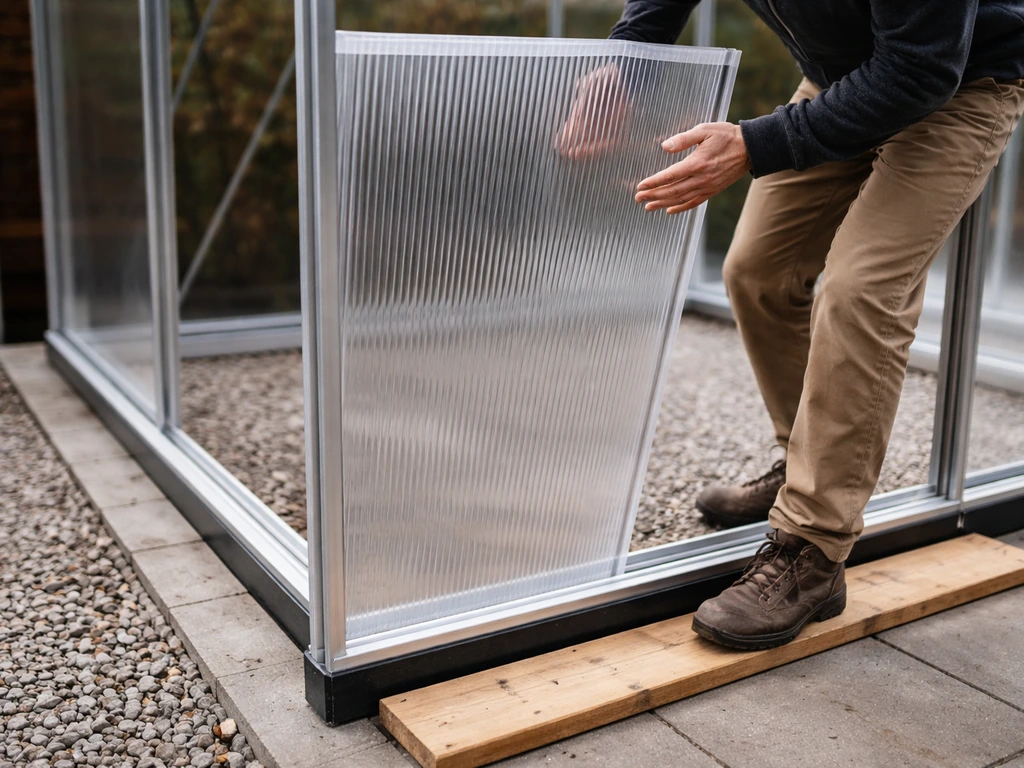
Step 4: Install glazing panels
Cut your polycarbonate panels to fit each framed bay. Run the flutes (the internal channels in twin-wall panels) vertically so condensation can drain out the bottom. Seal the top edge of each panel with aluminum tape to block insects and moisture from entering the channels, and cap the bottom edge with a vented H-profile trim that lets moisture escape. Fasten panels with pre-drilled holes and polycarbonate-compatible screws with neoprene washers. Do not overtighten: polycarbonate needs room to expand and contract with temperature changes, about 1/16 inch per foot of panel length.
Step 5: Install the door and vents
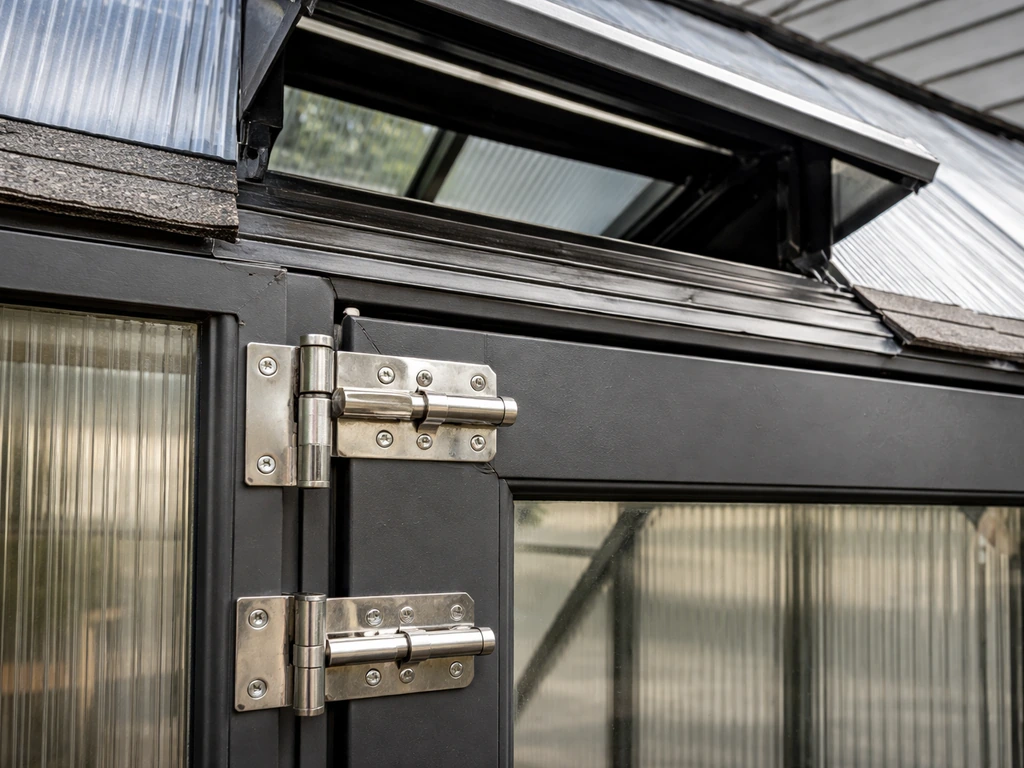
Hang your door on heavy-duty hinges and add a simple barrel bolt latch at top and bottom to keep it secure in wind. Install roof vents using automatic vent openers if your budget allows; these wax-cylinder openers cost around $20 to $40 each and open automatically when the inside temperature hits a set point (usually around 60 to 65°F), with no electricity needed. Install side vents at low-wall level to allow cool air to enter while hot air rises and exits through the roof vent.
Step 6: Seal and weatherproof
Seal every gap between the greenhouse and the house wall using exterior-grade silicone caulk and flashing tape. Where the roof meets the house wall, install a metal flashing (aluminum or galvanized) and caulk both edges. Check the base sill for gaps and fill with expanding foam, then trim flush. Run a bead of caulk where each panel meets its aluminum or wood frame edge. Bad seals are where you lose most of your heat in winter and where pests get in year-round.
Ventilation, insulation, and climate control
This is the part most DIY greenhouse guides gloss over, and it is also the part that makes or breaks the space as an actual growing environment. Overheating kills plants faster than cold does, and inadequate ventilation causes humidity buildup that invites fungal disease.
Passive ventilation
The Massachusetts Farm Energy Program recommends pairing low sidewall inlets with high roof vents to create a stack effect: cool air enters low, warms up, and exits high. For this to work, your inlet openings should be larger than your roof vent opening, not equal to it. A good rule for a small patio greenhouse is to size the combined low-wall vent area at 1.25 to 1.5 times the roof vent area. Open both at the same time during warm weather; close the roof vent alone on cool, breezy nights to hold heat while still allowing minimal airflow.
Mechanical ventilation
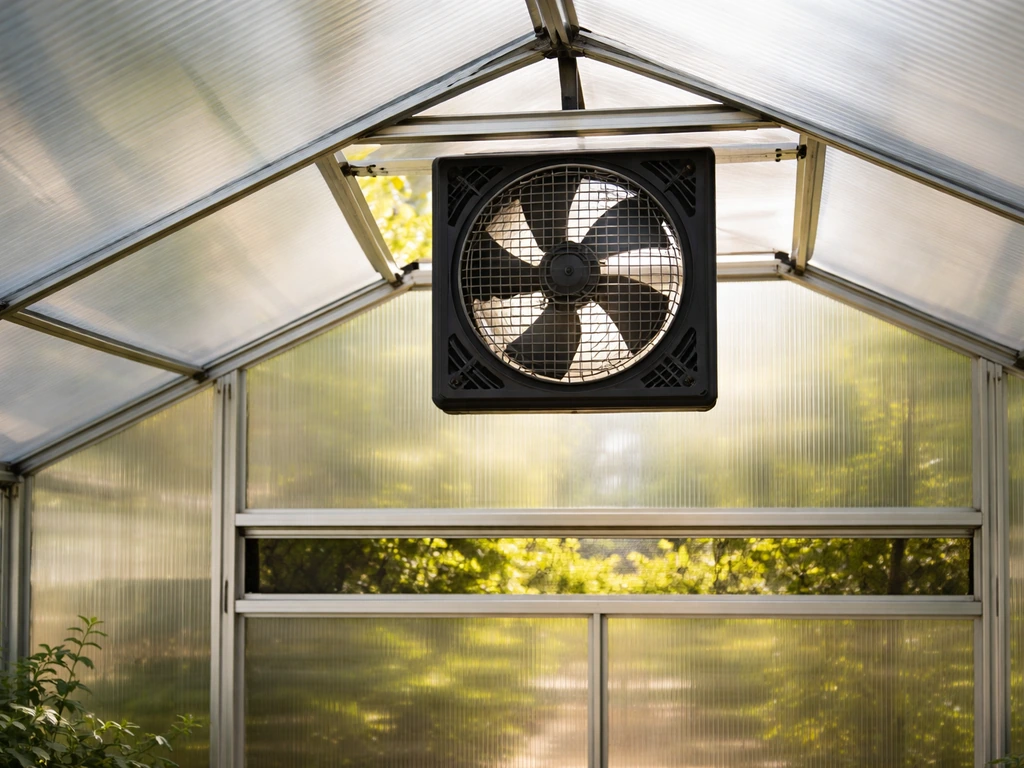
If your patio greenhouse gets full summer sun, passive ventilation alone may not be enough. A small thermostatically controlled exhaust fan solves the problem. [Farm Energy extension guidelines specify a target of one full air volume exchange per minute for summer cooling](https://farm-energy. extension.
org/greenhouse-ventilation/). For a 10x8x8-foot lean-to (640 cubic feet), that means a fan rated at 640 CFM minimum. Greenhouse Management sources suggest 10 to 12 CFM per square foot of floor area as a design maximum, so for that same 80-square-foot space, a fan in the 800 to 960 CFM range covers peak demand. Set the thermostat to kick on at 85°F and pair it with a louvered intake vent on the opposite wall that opens automatically when the fan runs.
Insulation and heat retention
6mm twin-wall polycarbonate gives you a modest thermal buffer, but in cold climates that is not enough on its own. Add a layer of bubble wrap greenhouse insulation (the large-bubble horticultural kind) to the inside of your north and end walls during winter. It cuts heat loss significantly and comes off easily in spring. For the floor, lay rubber matting over bare concrete to reduce radiant cold loss through your feet and pots. If you are growing through hard freezes, a small electric space heater rated 1,500 watts will hold a 10x8 greenhouse above freezing on most nights down to about 20°F outside, depending on your insulation quality.
Watering, lighting, and seasonal setup
Watering
The easiest watering setup for a patio greenhouse is a simple drip system connected to an outdoor hose bib with a battery-powered timer. If you are growing patio tomatoes, you will also want to stake and tie them early so the stems stay upright and airflow stays good stake patio tomatoes. Run 1/2-inch poly tubing along your bench or shelf edge and branch off with 1/4-inch drip emitters to each pot. Set the timer to water early in the morning so foliage dries before temperatures drop at night. This matters more inside a greenhouse than outside because the enclosed space holds humidity, and wet foliage overnight is a fast track to botrytis and mildew.
Lighting
If your patio greenhouse gets 6 or more hours of direct sun, supplemental lighting is optional for most crops. Where it becomes useful is in late fall and winter when day length drops below 10 hours. A single 45-watt LED grow light strip hung 12 to 18 inches above your seedling bench can extend your effective photoperiod by 4 to 6 hours and costs almost nothing to run. Full-spectrum LED panels are a good upgrade if you want to start tomatoes or peppers from seed in February.
Seasonal adjustments
- Spring: Remove bubble wrap insulation from walls, open vents fully during the day, start hardening off seedlings that spent winter indoors.
- Summer: Run exhaust fan on thermostat, shade the south-facing glazing with 30–40% shade cloth if interior temps regularly exceed 95°F, water daily or more.
- Fall: Begin closing vents earlier in the evening, bring in tender plants from the patio, add back the bubble wrap insulation layer to walls.
- Winter: Seal all gaps again (silicone and foam degrade), run a heater on a low thermostat if protecting frost-sensitive plants, reduce watering significantly, and check for condensation pooling at the base of panels.
Finishing touches and keeping it in good shape
A patio greenhouse is low maintenance compared to most outdoor structures, but a few simple habits each season keep it working well for years.
Cleaning
Wash the glazing panels inside and out once a year, ideally in early spring. Algae and mineral deposits build up on polycarbonate and reduce light transmission significantly. Use warm water and a soft cloth or sponge with a mild detergent. Avoid abrasive cleaners or stiff brushes that scratch the panel surface. Inside, scrub shelves and staging with a diluted bleach solution (1 part bleach to 9 parts water) to kill overwintering disease spores and fungus gnats.
Checking seals and structure
Every fall, walk the perimeter and press on every caulked joint and flashing edge. Silicone caulk lasts 7 to 10 years in most climates but cracks faster where it spans a gap between two different materials (like metal flashing and wood). Re-caulk any cracked joints before winter. Check that all vent hinges and door hinges are tight and lubricated with a silicone-based spray, which will not damage polycarbonate panels like petroleum lubricants can.
Repairs and panel replacement
Polycarbonate panels are easy to replace individually if one gets cracked or yellows badly. Keep your panel dimensions written down so you can order a replacement quickly. For small cracks, clear polycarbonate repair tape is a temporary fix that holds through one season. Aluminum frame members that have been dented or bent can usually be straightened with a rubber mallet, but if a main structural member is damaged, replace it rather than work around it.
Your next steps
The practical starting point today is to walk your patio, note where full sun falls between 9 a. m. and 3 p. m.
, check which direction the prevailing wind comes from, and measure the footprint you have available. Those three facts determine which greenhouse type fits your situation and tell you exactly what materials list to build. Once you have decided on a cold frame, mini-greenhouse, or lean-to, the build itself follows a straightforward sequence: level base, solid frame, properly sealed glazing, and adequate ventilation.
If you are already growing things on your patio like tomatoes, strawberries, or patio fruit trees, a greenhouse extends the season on all of them and gives you a proper protected space for overwintering the containers you already have.
FAQ
What’s the best way to choose between a cold frame, mini-greenhouse, and a lean-to for my patio?
Start with your plant height and how long you need protection. If you only need to harden off seedlings or overwinter small pots, a cold frame usually fits better. If you need year-round growing space where you can stand and work, pick a lean-to, and plan for vents plus a sealed foundation area. Mini-greenhouses are most reliable for short-term use, because many lack sufficient ventilation to prevent overheating on sunny days.
Can I build a patio greenhouse on top of existing pavers or do I need to remove them?
You can keep pavers if the surface is level and you can anchor securely, but you should still create a stable base layer. The safer DIY approach is to level the area, install weed barrier, then add 2 to 3 inches of compacted pea gravel, especially if drainage is inconsistent. If the ground shifts or rocks after a rain, your frame will rack and seals will fail.
How do I prevent overheating if my patio gets full sun all summer?
Use ventilation sizing and control, not just “having vents.” Pair low inlets with higher exhaust for stack effect, and if summers are intense add an exhaust fan with a thermostat. Make sure the roof vent is on the side that works with your door and airflow path, because placing it opposite can reduce draw.
Do I need a fan even if I have roof vents?
Not always, but it depends on sun intensity and greenhouse volume. If you routinely get very sunny, hot afternoons, passive vents often cannot keep humidity and temperature in range, even with properly sized openings. A small thermostatically controlled exhaust fan becomes a practical upgrade when you see heat spikes, wilted plants, or frequent condensation during warm periods.
What’s the easiest way to water inside a patio greenhouse without creating disease problems?
Choose drip irrigation on a timer, and schedule watering for early morning so foliage and condensation conditions settle before nighttime. Aim to keep soil evenly moist but avoid wetting leaves overnight, because enclosed humidity makes fungal issues develop faster than in open air.
How can I size vents correctly without doing complicated calculations?
Use a practical ratio approach: plan low-wall vent area bigger than roof vent area. As a starting point for many small lean-to builds, set combined low-wall vent area to about 1.25 to 1.5 times the roof vent area. Then, ensure you can open and close roof and side vents separately, so you can vent on warm days and restrict airflow on cool nights.
Why do my polycarbonate panels get leaks or condensation at the edges?
Most edge issues come from poor sealing where panels meet frames and where the roof meets the wall. Make sure you cap the top edges of twin-wall panels so moisture cannot enter internal channels, and use appropriate flashing plus caulk at the house-wall interface. Also avoid overtightening fasteners, because polycarbonate must expand and contract, and rigid mounting can create micro-gaps.
How do I stop pests from getting into the greenhouse year-round?
Focus on the openings that pests use, gaps, and the panel channels. Seal perimeter gaps with exterior-grade caulk and flashing tape, install proper trim at panel bottoms, and keep vents and door closures tight. If you notice recurring insect problems, check panel seals first because insects often enter through frame-to-panel edge paths, not the main door.
What temperature difference should I expect in a winter patio greenhouse?
A sealed lean-to with insulation can hold above-freezing for many nights, but results depend heavily on insulation quality and ventilation control. If you face hard freezes, adding internal insulation on colder walls and using a modest electric heater can provide reliable protection. If your outdoor lows are near or below your target, plan on supplemental heat rather than assuming glazing alone will be enough.
How often should I clean glazing and sanitize the inside?
Wash glazing once yearly in early spring to restore light transmission, because algae and mineral buildup reduces sunlight significantly. For inside sanitation, do a deeper clean in fall using a diluted bleach solution on shelves and staging. Also scrub benches after any disease season, because spores can persist and reappear next cycle.
Do I need to lubricate hinges, and what lubricant is safe for polycarbonate?
Yes, hinges and vent hinges should be kept working smoothly. Use a silicone-based spray, because petroleum-based lubricants can damage polycarbonate over time. After lubrication, open and close the door and vents a few times to confirm alignment and gasket compression.
Is it okay if the greenhouse base is slightly uneven?
It’s a common mistake that leads to long-term problems. If the base is uneven beyond minor shimming needs, the frame can twist, doors may not close evenly, and seals can gap, letting heat escape and pests in. Before you frame, verify level with a long straightedge or level, and shim anything that has more than about 1 inch of change over an 8-foot span.
Next Articles

How to Decorate a Long Narrow Patio: Layout Tips
Practical DIY layout and decor tips to widen a long narrow patio using zoning, furniture spacing, lighting, greenery, an

How to Decorate a Rectangular Patio Step by Step
Step-by-step plan to decorate a rectangular patio with smart layout, zones, furniture fit, lighting, plants, and seasona
How to Decorate a Patio Wall: DIY Ideas and Mounting Tips
DIY patio wall decor for brick, stucco, wood, concrete, or siding with weatherproof mounting tips and maintenance.