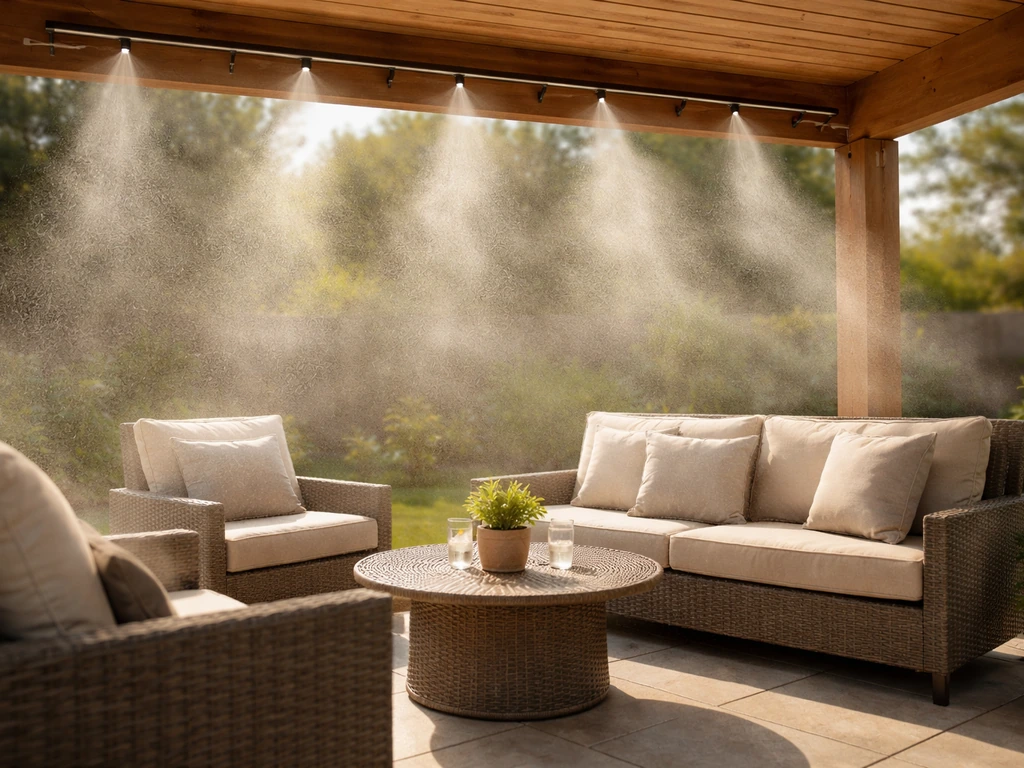
You can build a solid DIY patio mister in an afternoon using a standard garden hose connection, 1/4-inch poly tubing, brass or stainless misting nozzles, and a few push-to-connect fittings. The key to getting a fine, cooling mist (instead of a dripping wet mess) comes down to three things: enough pressure at the nozzles, the right nozzle spacing and aim height, and a filter upstream to keep those tiny orifices from clogging. Get those three right and you will have a comfortable, dry-feeling outdoor space even on a 95-degree afternoon.
How to Build a Patio Mister: DIY Parts and Setup Guide

Felix Brennan
17 Jun 2026
Choose the right patio mister type and water setup
Before you buy a single fitting, you need to pick which kind of misting system fits your patio. The choice mostly comes down to how much pressure you have available and how fine a mist you want. There are three practical options for a DIY homeowner.
Low-pressure (garden hose) systems
These run straight off your outdoor spigot at typical residential water pressure, usually 40 to 80 psi. They are the easiest to build and the cheapest to set up. The trade-off is droplet size: EPA evaluation data confirms that low-pressure nozzles do not produce a true fine fog. You get a heavier mist that can dampen furniture and walls if aimed poorly. That said, for a covered patio where you just want to knock the temperature down a few degrees, a well-aimed low-pressure line works fine and costs a fraction of a pump system.
Mid-pressure pump systems
A dedicated misting pump boosts pressure to roughly 100 to 250 psi, which is enough to produce dramatically smaller droplets that flash-evaporate before they hit you. A pump rated around 1.2 GPM at 100 psi is a reasonable starting point for a typical backyard patio. These systems cost more (usually $150 to $400 for the pump alone) and require a 120V GFCI-protected outdoor outlet, but the cooling effect is noticeably better. If you are building a misting system on a screened or enclosed patio where moisture management really matters, a mid-pressure pump is worth the investment.
High-pressure systems
True high-pressure systems run at 1,000 psi or more and produce droplets in the 3 to 10 micron range, which is essentially fog. These are commercial-grade, expensive, and overkill for most residential patios. Skip this tier unless you have a very large open patio and are comfortable with serious pump installation work.
Which type is right for you?
| System Type | Pressure Range | Droplet Quality | Best For | Approximate DIY Cost |
|---|---|---|---|---|
| Low-pressure (hose) | 40–80 psi | Heavy mist, some drip risk | Open patios, shaded areas, budget builds | $30–$80 |
| Mid-pressure pump | 100–250 psi | Fine mist, near-fog | Covered/screened patios, hot climates | $200–$500 total |
| High-pressure pump | 1,000+ psi | True fog, flash-evaporates | Large commercial/luxury patios | $600+ |
For most readers here, a low-pressure hose-fed system or a mid-pressure pump system is the practical target. If you want a complete walk-through, see how to build a patio misting system for the full parts, layout, and setup steps. The rest of this guide covers both, and we will call out where the steps differ.
Parts list and shopping checklist for a DIY patio mister
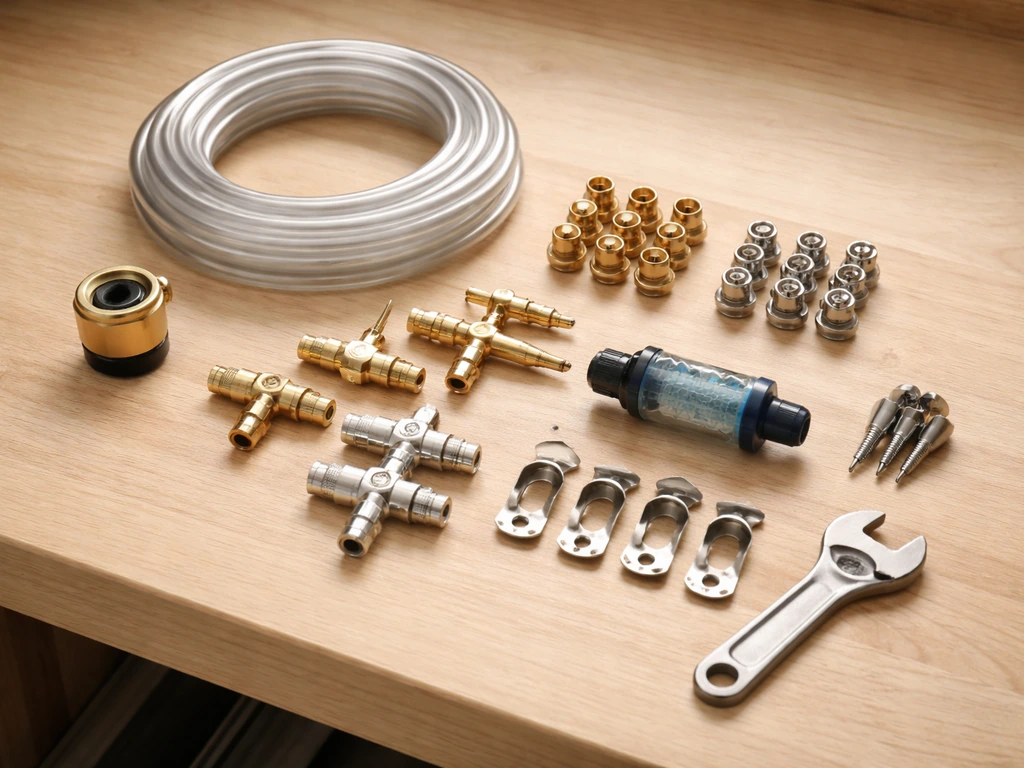
Here is what you need to build a complete, clog-resistant patio misting line. The basic kit covers a hose-fed low-pressure setup. The upgrade notes point you toward the pump-based version. If you want the full walkthrough, see our guide on how to make misters for patio, including the nozzle, tubing, and mounting steps.
- Misting nozzles: brass or stainless steel, 0.007–0.008 inch orifice; buy no-drip or anti-drip nozzles with a built-in check valve to prevent drips at shutoff. Plan for one nozzle every 18 to 24 inches along the line.
- 1/4-inch OD poly tubing (black UV-resistant): enough to run the full perimeter of your patio plus 20 percent extra for routing and mistakes.
- 3/8-inch or 1/2-inch mainline tubing: used to run from the water source to the start of the misting loop, especially for longer runs over 30 feet.
- Push-to-connect tee fittings (1/4-inch barbed or compression): one per nozzle location.
- End cap or figure-8 tubing end: to close off the far end of the line.
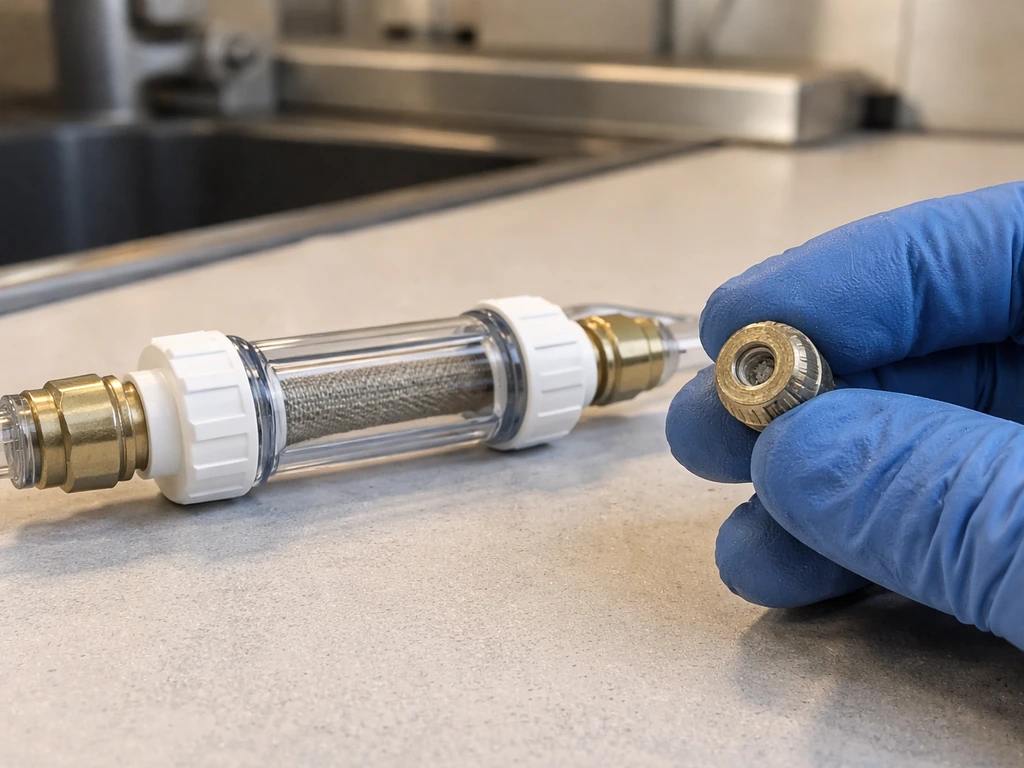
- Inline filter: 100-mesh or finer, installed right at the water source connection. This is the most important clog-prevention component in the system.
- Pressure regulator: set to approximately 80 psi for hose-fed systems. This protects your tubing and nozzles from pressure spikes.
- Backflow preventer (anti-siphon valve): required on any system connected to a potable water supply. Installs between the spigot and the rest of the system.
- Garden hose adapter: to connect from your spigot to the mainline or filter housing.
- Mounting hardware: stainless steel zip ties, tubing clips, or misting line hangers rated for outdoor use.
- Hose thread tape (PTFE): for sealing threaded connections.
- Optional timer/solenoid valve: a simple hose-bib timer ($20–$40) works well for automatic cycling on low-pressure systems. Pump systems use a 24V solenoid and a digital timer.
- For pump systems only: a 110V mid-pressure misting pump (1.2 GPM at 100 psi is a good spec), a dedicated 120V 15A GFCI-protected outdoor circuit, and 1/4-inch or 3/8-inch compression fittings rated for the higher pressure.
Total parts cost for a low-pressure 20-foot hose-fed line runs about $40 to $80 depending on nozzle quality. A pump-based system covering the same run costs $250 to $450 once you factor in the pump and electrical work. You will need a tape measure, a tubing cutter or sharp scissors, and a drill with a small bit if you are mounting to wood framing.
Step-by-step build: plumbing, nozzles, fittings, and mounting
Take your time on this part. A sloppy assembly leads to weeping fittings and clogged nozzles within a week. Follow these steps in order.
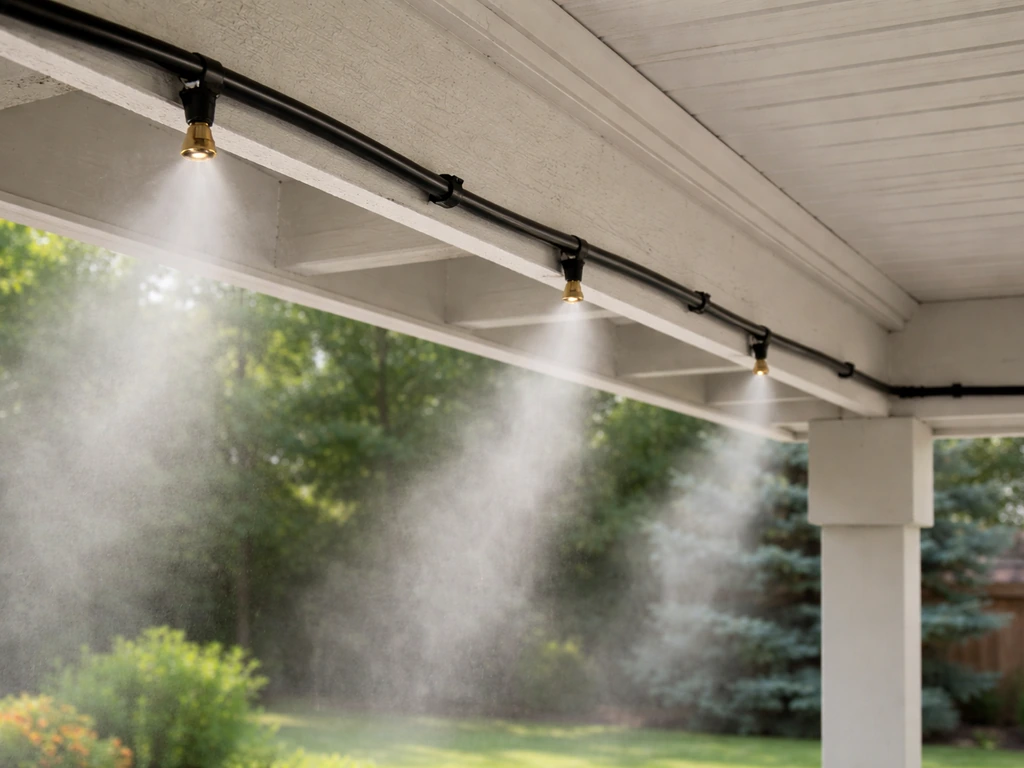
- Plan your line route. Walk the perimeter of your patio and mark where the misting line will run. Aim to mount it on an overhead beam, pergola rafter, or patio cover fascia at a height of 8 to 14 feet, ideally around 10 to 12 feet above the floor. At this height the mist has enough air travel time to evaporate before reaching people and furniture below.
- Measure and cut your mainline. Run your 1/4-inch (or 1/2-inch for longer runs) tubing from the planned water source connection point to the start of your misting loop. Leave a few extra inches at both ends.
- Install the backflow preventer at the spigot. Thread it directly onto the hose bib with PTFE tape. No exceptions here: without this, mist system water can back-siphon into your home's drinking water supply.
- Install the inline filter immediately downstream of the backflow preventer. This goes before the pressure regulator and before the timer if you are using one. The correct order from spigot outward is: backflow preventer, filter, pressure regulator, timer/solenoid, then the misting line. Getting this order wrong (a common mistake) means the filter does not protect your nozzles.
- Install and set the pressure regulator. For a hose-fed system, set it to approximately 80 psi. For a pump system, follow the pump manufacturer's recommendation, usually starting at 100 psi and adjusting from there.
- Lay out and mark nozzle positions on your tubing. Space them 18 to 24 inches apart. If you want wider coverage, 24 to 30 inches is acceptable, but closer spacing gives more even overlap and avoids dry zones.
- Install the tee fittings at each nozzle position. For push-to-connect barbed tees, simply push the tubing firmly into each port. For compression fittings, hand-tighten then snug with pliers (do not overtighten poly fittings).
- Thread each misting nozzle into its tee fitting using PTFE tape on the threads. Snug firmly by hand plus a quarter turn with a wrench. Over-tightening cracks brass fittings.
- Cap the far end of the line with an end cap or figure-8 tubing clamp.
- Mount the tubing line overhead using stainless steel zip ties or misting line clips every 18 to 24 inches. Keep the line as level and straight as possible to prevent sag points where water collects and drips.
- For pump systems: mount the pump in a shaded, protected location. Run the inlet side to your water supply and the outlet side to your misting line. Wire the pump to a dedicated 120V 15A GFCI-protected outdoor circuit only. Never run a misting pump off an extension cord or an unprotected outlet.
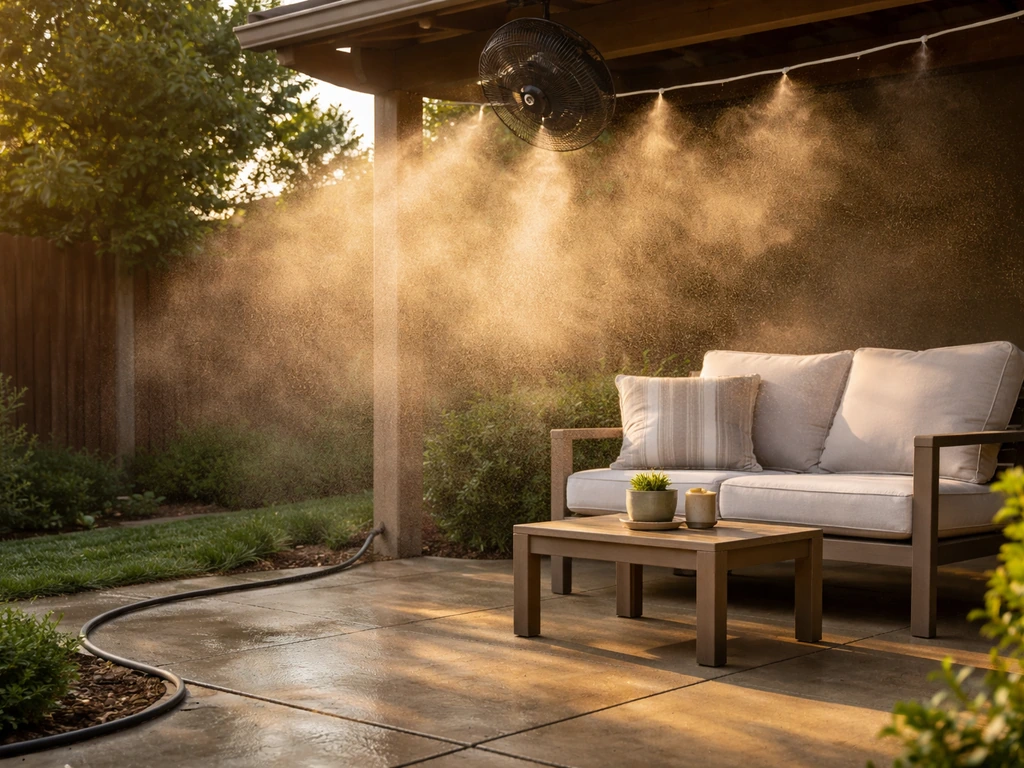
How to set up and aim the mist for even coverage
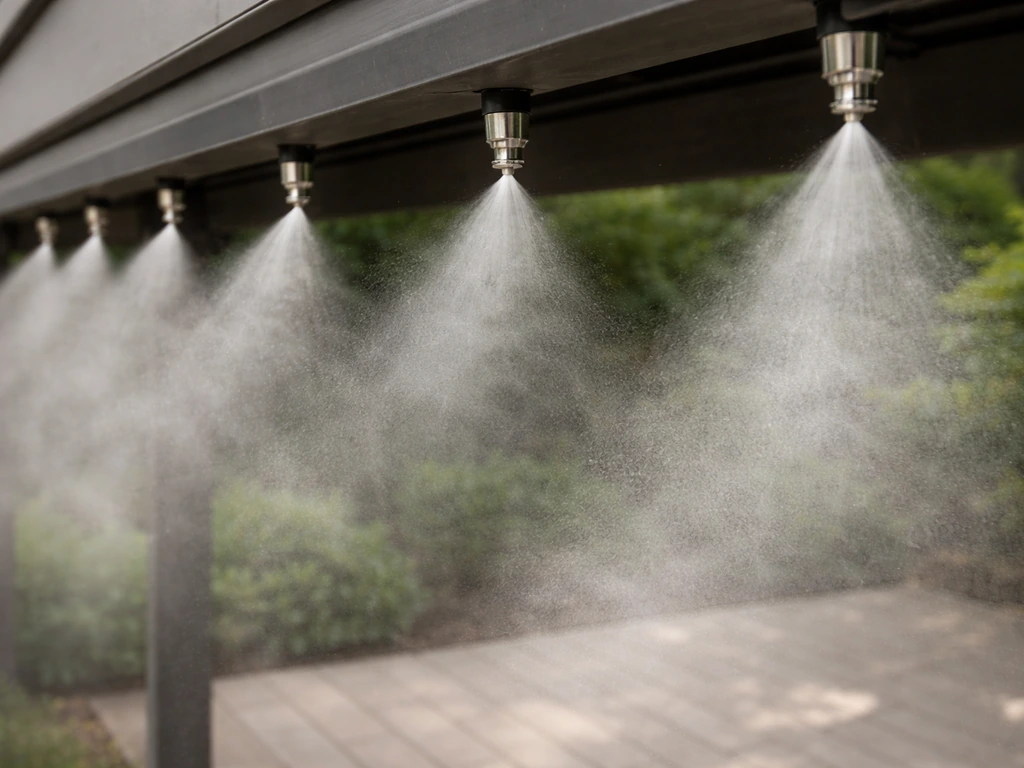
Coverage angle and aim height determine whether your patio feels refreshingly cool or annoyingly wet. The physics are simple: misting nozzles produce a cone-shaped spray pattern, and the width of that cone at any given height depends on the nozzle's spray angle and the distance from nozzle to the space below. NozzlePro’s spray angle guide also uses this coverage-width planning approach, expressing coverage width W as a function of nozzle distance D and spray angle θ blank" rel="noopener noreferrer">cone-shaped spray pattern whose width depends on spray angle and nozzle-to-target distance. A nozzle mounted at 10 feet with a spray angle of around 90 degrees will cover a cone roughly 10 to 12 feet wide at floor level. blank" rel="noopener noreferrer">Overlapping adjacent nozzle cones by about 20 percent eliminates dry stripes between them.
Aim each nozzle slightly downward and inward toward the center of the space, not straight down. Straight-down nozzles create a concentrated wet spot directly below the mounting point and leave the edges dry. Angling inward and slightly toward the area where people sit creates a more even mist cloud across the occupied zone.
Keep nozzles pointed away from walls, screens, and furniture surfaces as much as possible. Any nozzle spraying directly at a wall at close range will wet that wall. On a screened patio, this is especially important: mist aimed into a screen panel will push water right through the screen and onto whatever is behind it. Run the misting line along the inward edge of overhead framing, not along the outer perimeter near the screens.
Once the system is running, do a simple wet-pattern check: lay a few sheets of paper towel on the floor at different spots and run the system for 30 seconds. Even light dampening across all the paper towels means good coverage. If some are dry and some are soaked, adjust nozzle angles and check for any clogged nozzles in the dry zones.
Controls, pressure tuning, and preventing leaks and clogs
Setting up your controls
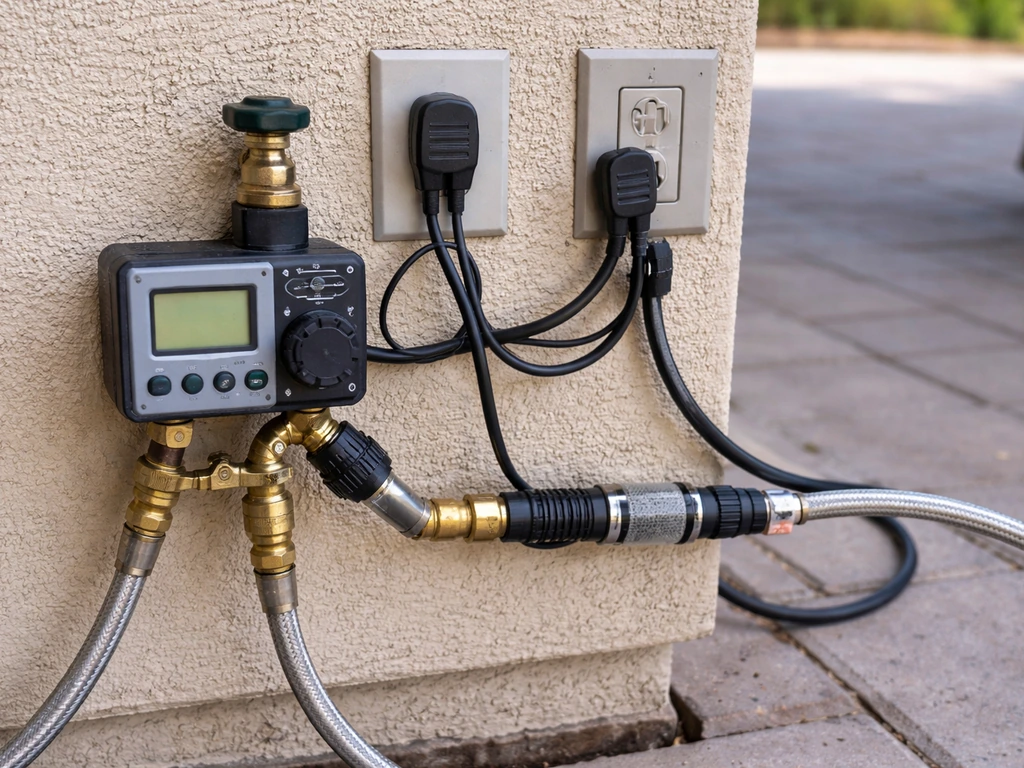
For a hose-fed system, a simple mechanical hose-bib timer is the easiest control you can add. Set it to run in 10 to 15 minute cycles with off periods in between. Running the mister continuously wastes water and, more importantly, will eventually wet down your patio furniture and floor even with perfectly aimed nozzles. Intermittent cycles are almost always better. For pump systems, a 24V digital timer wired to a solenoid valve gives you more precise scheduling and the ability to automate based on time of day.
Tuning pressure for the right mist
If your nozzles are dripping or spitting large droplets instead of producing a fine mist, pressure is either too low or too high. Too low: increase pressure at the regulator (turn clockwise on most regulators). Too high: back it off. The sweet spot for most low-pressure nozzles on a residential system is 60 to 80 psi. For pump systems starting at 100 psi, adjust by turning the pressure-regulating valve counterclockwise in small increments until the dripping stops and a clean mist appears at every nozzle. Run the system briefly after each adjustment and observe all nozzles before finalizing the setting.
Preventing leaks
Most leaks happen at threaded connections that were not taped, at push-to-connect fittings that were not fully seated, or at compression fittings that were over-tightened and cracked the poly tubing. Check every connection on first startup by running your finger around each fitting while the system is pressurized. A weeping fitting needs more PTFE tape or a firmer push-seat. Any cracked fitting needs to be cut out and replaced.
Preventing clogs
Clogged nozzles are the number one maintenance headache with misting systems. Mineral deposits from hard water and debris from the supply line are the usual culprits. Your inline filter (100 mesh or finer) handles debris. For mineral buildup, soak clogged nozzles in white vinegar for 30 minutes, then rinse and reinstall. Many quality nozzles include a built-in internal filter screen that can be removed and cleaned. If a nozzle constantly re-clogs, replace it: a $2 nozzle is not worth fighting. Installing no-drip nozzles with built-in check valves also reduces mineral buildup because water does not sit in the nozzle between cycles.
Operation, troubleshooting, and patio wetting prevention
Normal daily operation
Turn the system on, let it run for about 30 seconds to purge air from the line, then observe the mist pattern. All nozzles should produce a consistent fine spray. A nozzle that is spitting or dripping unevenly while neighbors look fine is either partially clogged or has a loose fitting. Mark it and address it after the session. Bleed air from the line by loosening the end cap slightly on first startup until water (not air bubbles) runs clear, then re-tighten.
Common problems and fixes
| Problem | Likely Cause | Fix |
|---|---|---|
| Nozzles dripping instead of misting | Pressure too low, clogged nozzle, no check valve | Raise pressure, clean or replace nozzle, use no-drip nozzles |
| Uneven mist, some nozzles barely flowing | Clogged filter, dead-leg in tubing, partial nozzle blockage | Clean filter, re-route tubing to eliminate U-traps, clean nozzle |
| Furniture and floor getting wet | Nozzles aimed too low, running too long, pressure too high producing large droplets | Raise line height, reduce cycle time, lower pressure slightly |
| Sputtering or inconsistent spray | Air in the line, loose fitting, insufficient pressure | Bleed air at end cap, check all fittings, verify pressure regulator setting |
| System losing pressure over time | Leak in line, filter clogged, pump wear (pump systems) | Inspect full line for leaks, clean filter, service or replace pump |
| Screens or walls getting wet | Nozzles positioned too close to perimeter, aimed outward | Reposition line inward, re-angle nozzles toward center of space |
Keeping the patio dry underfoot
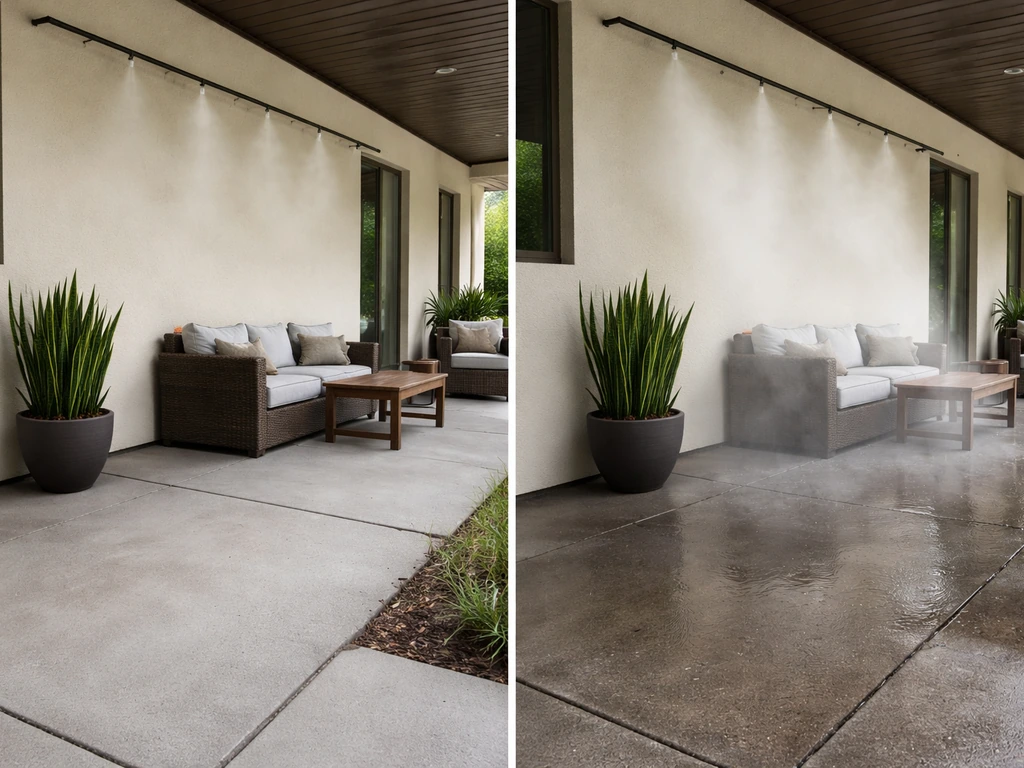
The single biggest complaint about patio misters is that they make everything wet. You can almost entirely avoid this with three habits: mount the line high enough (10 feet minimum), use no-drip nozzles with check valves so water does not drain out of the line between cycles, and run the system on short timed cycles rather than continuously. If your patio floor is still getting wet, the problem is usually nozzle aim (pointing too steeply downward) or a nozzle that is dripping at shutoff due to a missing or failed check valve.
Seasonal maintenance and winterization
If you live somewhere that freezes in winter, winterizing your misting system is not optional. Water left in poly tubing and nozzle fittings will expand when it freezes and crack both. The good news is winterization takes about 20 minutes.
- Shut off the water supply at the spigot or pump inlet.
- Open the lowest nozzle in the system by unscrewing it from its tee. This creates a drain point and lets the line gravity-drain. Leave it off until spring.
- Disconnect the mainline from the water source and let it hang to drain fully. Tilt any horizontal runs slightly if needed to help water move toward the open drain point.
- For pump systems: disconnect the inlet and outlet hoses from the pump housing and let the pump drain completely. Store the pump indoors or in a heated space for the winter. Pump heads crack when frozen just like pipes.
- If your line has any low spots or U-bends that trap water and gravity draining is not enough, blow the line out with a short burst of compressed air at low pressure (30 psi or less). Do not use high-pressure air on poly tubing.
- Remove all nozzles and store them indoors. This prevents mineral deposits from hardening inside the orifices over the off-season.
- In spring, reinstall nozzles, reconnect the line, flush the system for 30 seconds before installing nozzles to clear any debris that collected in the tubing over winter, then reinstall nozzles and restart.
For warm climates where freezing is not a concern, an end-of-season flush once a year is still worth doing. Run clean water through the full line, then soak and clean all nozzles in vinegar to dissolve mineral scale before the system sits unused for months. Replace any nozzle with visible corrosion or a damaged orifice: they are inexpensive enough that fighting with a marginal nozzle is not worth your time.
A well-built patio mister is genuinely one of the more rewarding afternoon DIY projects you can do. The parts are cheap, the installation is forgiving, and the payoff on a hot day is immediate. If you want to go deeper on specific parts of this project, the process of making a custom patio mister from individual components, the full misting system plumbing and pump setup, or detailed installation techniques for different patio styles are all worth exploring as your system grows. If you want to keep it truly hands-on, do it yourself patio misters let you tailor the parts, spacing, and coverage to your exact patio custom patio mister.
FAQ
How do I estimate how many nozzles I need for my patio size?
Start with the nozzle cone coverage at your planned mounting height, then space adjacent nozzles so their cones overlap about 20 percent. Example: if your 90 degree nozzle covers roughly 10 to 12 feet across at floor level when mounted around 10 feet high, aim to place the next nozzle about 8 to 10 feet away so you do not get dry stripes between cones.
My patio is partially covered by a roof or pergola. Should I mount nozzles higher or lower?
If you are mounting under a roof, keep the nozzle line as high as practical while still aiming inward to cover the seating zone. Roof overhang changes where droplets can condense and run, so do the paper-towel wet-pattern test under real conditions, then adjust aim angle rather than lowering the entire line, which often increases wall and furniture wetting.
What should I do if some nozzles mist well but one area stays dry even after I check aim?
Treat it as a flow issue first, not spacing. Check that the line segment is not kinked or pinched, then verify every push-to-connect fitting is fully seated. If the area is dry while others look normal, remove and clean the suspect nozzle (vinegar soak), and inspect the upstream inline filter for clogs.
Can I connect a patio mister to a hose splitter or multiple zones?
You can, but avoid branching that reduces pressure unevenly across branches. If you split into multiple lines, size it so the total demand does not drop nozzle pressure below the nozzle’s operating range, and consider separate timers or solenoid control per zone to prevent one zone from starving another during the same cycle.
How do no-drip check valves affect startup and shutoff?
No-drip check valves help stop the nozzle from draining and dripping between cycles, but you still may see a short adjustment period after power or timer start. Run the system for about 30 seconds on the first startup after assembly, confirm a consistent mist across all nozzles, then fine-tune your pressure or aim if any nozzles spitting persists.
Will a patio mister work on hard water, and how often should I clean the nozzles?
Hard water increases mineral scaling, even with a filter. In practice, you will usually need more frequent nozzle cleaning during hot seasons. Vinegar-soak clogged nozzles for about 30 minutes, and if a nozzle repeatedly clogs after cleaning, replace it because the internal orifice can degrade or continue trapping scale.
What happens if my system pressure is slightly higher than the nozzle rating?
Too much pressure often shows up as spitting, noisy spray, or larger droplets that wet nearby surfaces. Back pressure off in small increments, run the system briefly after each adjustment, and observe every nozzle. Do not assume that “stronger” mist always means better cooling, droplet size is what matters.
How can I prevent leaks when using push-to-connect fittings on poly tubing?
Push-to-connect failures usually come from incomplete seating, damaged tubing ends, or over-tightening nearby threaded parts. Cut tubing with a clean, square cut, ensure the tube end is fully inserted until it bottoms out, and check the connection by running a finger around each fitting while pressurized. If it weeps, reseat or replace the fitting rather than cranking harder.
Do I need to worry about electrical safety with pump-based systems?
Yes. Pump systems require a 120V outdoor GFCI-protected supply, and timers and any wiring should be rated for wet locations. Use an outdoor-rated enclosure or junction box as needed and route cords so they cannot contact moving fans, foot traffic, or splash zones.
How do I handle winterization if my system uses a timer and no-drip nozzles?
Even with no-drip valves, water can remain in the line and fittings. Disconnect and drain the line, and remove or blow out water from nozzle bodies and tubing before freezing temperatures arrive. After the system is dry, store nozzles indoors if you can access them safely.
Can I run the mister continuously during the day to keep things cool longer?
Continuous operation usually leads to patio wetting over time, even with correct aim, because the area and furniture eventually get exposed to repeated droplet deposition. Prefer timed cycles (for example, 10 to 15 minutes on with off periods) and verify the outcome with a paper-towel placement test during typical use hours.
How do I troubleshoot uneven spray between neighboring nozzles?
Mark the nozzle that looks different and troubleshoot in order: check for a partially clogged nozzle (remove and vinegar-soak), verify its push-seat or threaded connection, then look for airflow or trapped air behavior by confirming you bled air during startup. If only one nozzle is affected and cleaning does not fix it, replace that nozzle instead of repeatedly adjusting the whole line.
Next Articles
How to Build a Patio Misting System Step by Step
Step-by-step DIY guide to design and build a patio misting system, including nozzle layout, plumbing, pressure sizing, a

How to Make Misters for Patio: DIY Build and Install Guide
Step-by-step DIY guide to build and install patio water misters, from parts and setup to testing, spacing and troublesho
How to Install Misters on a Patio: Step by Step Guide
Step-by-step DIY guide to install patio misting systems: plan coverage, mount nozzles, connect lines, tune pressure, pre