The easiest reliable way to build a patio privacy screen is to frame 2x4 lumber into panels, fill them with your chosen material (cedar slats, lattice, or outdoor fabric), and anchor the whole thing to the patio with surface-mount post bases secured by expansion bolts (concrete) or lag bolts (wood deck). A well-built 6-foot-tall panel in a sturdy frame, anchored at proper post spacing, will handle everyday wind without wobbling. Most people can finish a single-panel screen in a weekend with basic tools and under $200 in materials.
How to Build a Privacy Screen for a Patio DIY Guide

Felix Brennan
2 Jun 2026
Step 1: Decide your privacy goal and where the screen will mount
Before you buy a single board, get clear on what you actually need the screen to do. Are you blocking a neighbor's direct line of sight from one angle, or do you want to enclose two or three sides of the patio into a more private outdoor room? These are very different projects. A single freestanding panel is a weekend build. A full three-sided enclosure starts to overlap with a screened patio project and involves more planning, posts, and structural thinking.
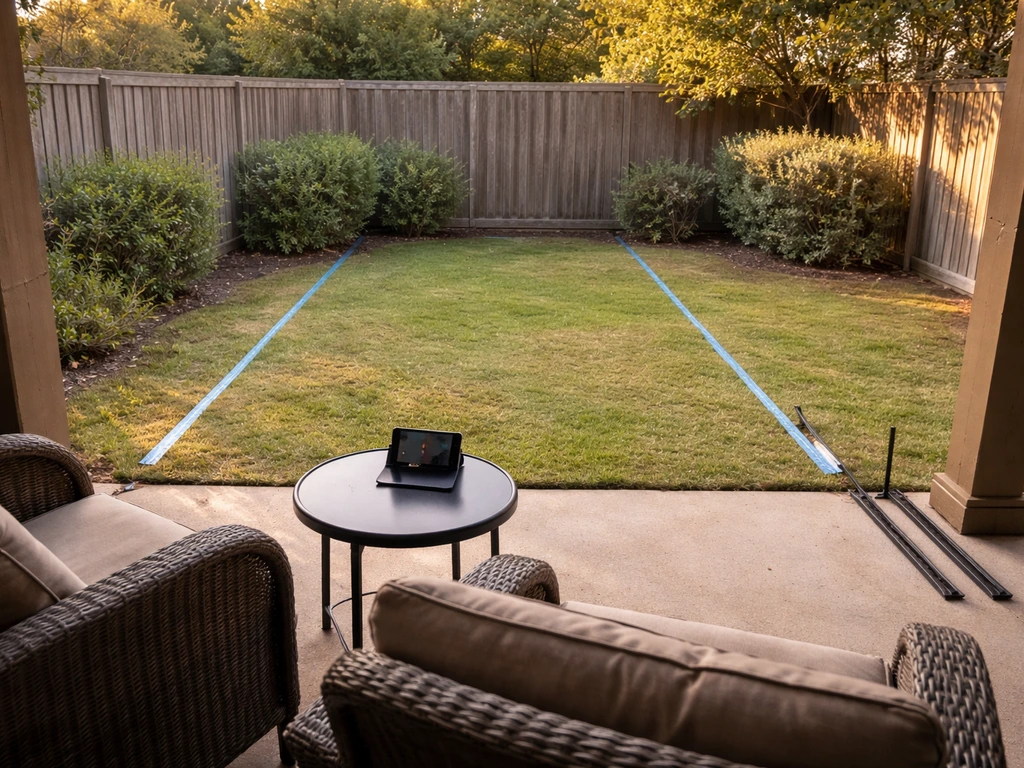
Walk your patio at the time of day you use it most and mark the exact sightlines you want to block. A 6-foot screen solves most standing and seated privacy problems. If you want a do it yourself screened in patio feel, start by planning your panel height and where the posts will anchor to your patio surface. If you only need to block seated views, you can get away with a 4-foot screen, which is also much easier to keep stable in wind. Once you know the height, figure out where the posts will land. Your three main mounting surfaces are concrete slab, wood deck, and an existing railing. Each one requires a slightly different anchoring approach, which we'll cover in step 5.
Also think about wind before you finalize placement. A screen on an exposed corner of the patio will see much more wind load than one tucked against a house wall. Wind loading can actually be the dominant design condition for a privacy screen around 6 feet tall, so placement and post spacing matter more than most people expect. Tighter post spacing (every 6 to 8 feet rather than 10) and solid anchoring will protect you far more than thicker lumber alone.
Step 2: Choose a privacy screen style and outdoor materials
The style you pick determines how much privacy you get, how much airflow you keep, and how long the thing will last. Here are the four most practical options for a DIY patio build.
| Style | Privacy Level | Airflow | DIY Difficulty | Relative Cost |
|---|---|---|---|---|
| Cedar or redwood slats (horizontal or vertical) | High (gaps adjustable) | Moderate | Beginner-Intermediate | $$ |
| Lattice panels (wood or vinyl) | Medium (diamond/square pattern) | Good | Beginner | $ |
| Outdoor fabric or mesh panels | High | Low-Moderate | Beginner | $ |
| Composite or PVC board panels | High | Low | Intermediate | $$$ |
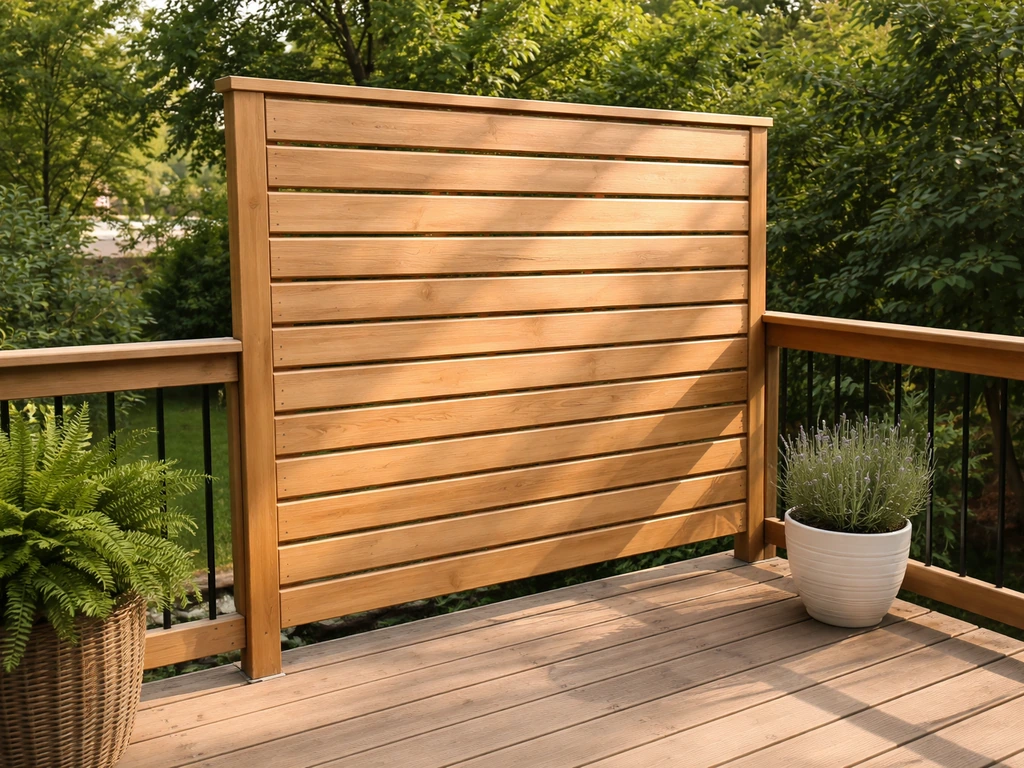
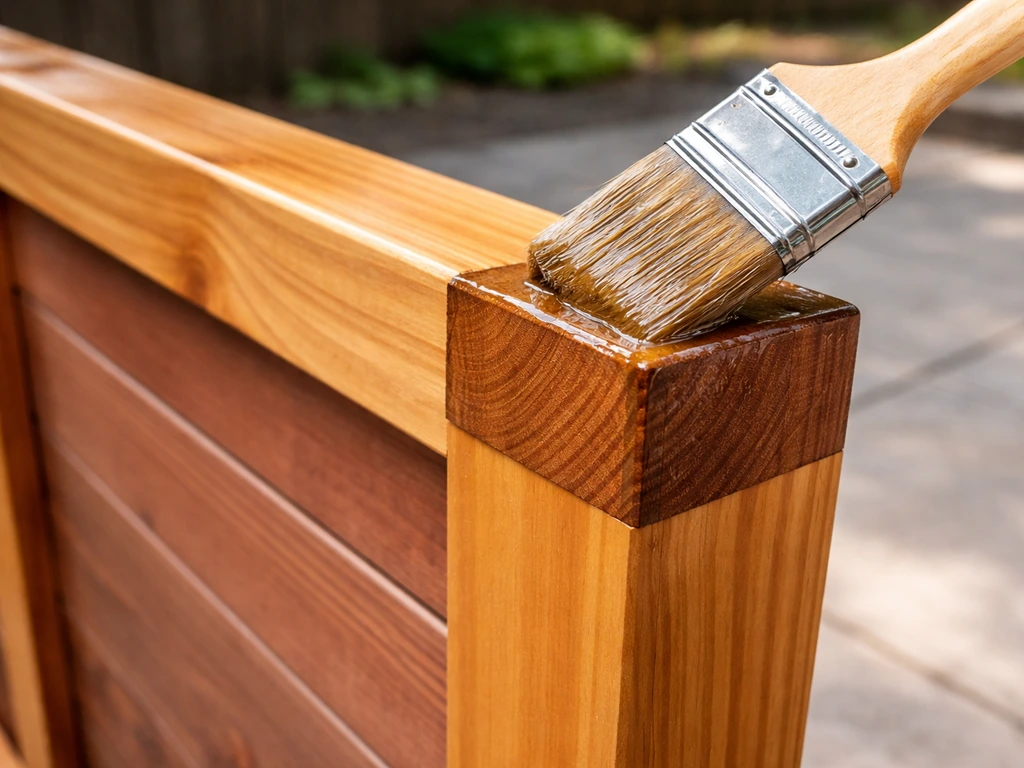
Cedar slats are the most popular choice and for good reason: they look great, resist rot naturally, and you can control privacy by spacing slats closer or farther apart. Leave a half-inch gap between slats for airflow and the screen becomes far more wind-resistant because wind passes through rather than pushing against a solid surface. Pressure-treated pine is a cheaper alternative but needs painting or staining to look finished. Redwood is premium, long-lasting, and worth it if budget allows.
Lattice panels are the fastest beginner build. You can buy 4x8 sheets at any home center and just frame them. Home Depot's installation guidelines recommend hanging lattice from the top every 12 inches and securing the sides, which keeps panels from warping or rattling. Vinyl lattice never rots, but it flexes more than wood and can look cheap. Wood lattice looks better and holds paint well, but needs sealing.
Outdoor fabric or shade cloth panels are the lightest and easiest option, especially for a rental home where you can't make permanent modifications. They stretch across a simple frame or clip to a tension wire system. The downside is longevity: even UV-rated outdoor fabric typically lasts 3 to 5 seasons before it needs replacing.
Whatever material you choose, use hardware rated for exterior use. Hot-dip galvanized or stainless steel fasteners are the standard recommendation for pressure-treated and exterior wood. Do not mix metals: if you're using stainless screws, use stainless connectors; if you're using galvanized hardware, stick with galvanized throughout. Mixing metals accelerates corrosion and will shorten the life of your frame significantly.
Step 3: Measure, plan the layout, and select a simple build design
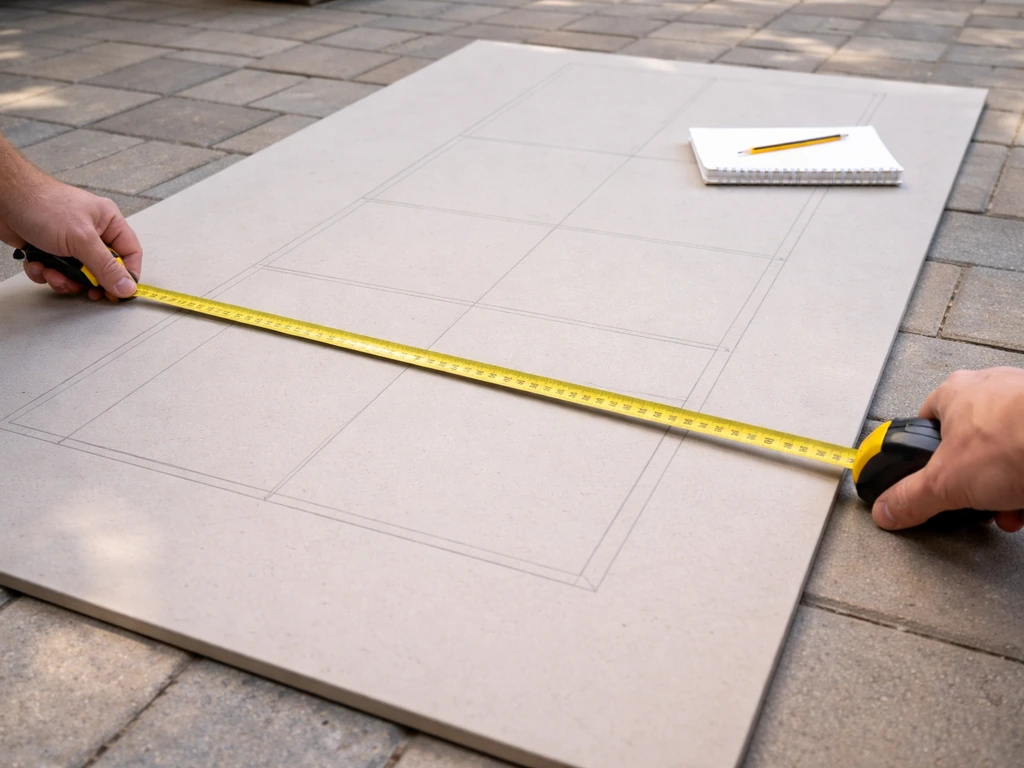
Measure the total length of the run you want to screen. Then divide it into panels no wider than 8 feet each. Panels wider than 8 feet are heavy, harder to handle solo, and more vulnerable to wind racking. Six-foot-wide panels are the sweet spot: they're manageable alone, sized to standard lumber lengths, and give you a strong build without excessive complexity.
For each panel, sketch a simple cut list. A basic framed panel uses: two vertical side rails (your full panel height, typically 72 inches for a 6-foot screen), two horizontal rails (your panel width minus 3 inches to account for the side rail thickness on each end), and one center horizontal rail at mid-height for rigidity. That's five pieces of 2x4 per panel frame before you add the infill material. Keep your cut list simple and grouped by length so you can cut multiples at once.
Plan post locations before you cut anything. Posts should be placed at the junction between panels, plus one at each end. If a panel is 6 feet wide, posts land every 6 feet. Mark these spots on the patio surface with chalk or tape and check for obstructions below (drain lines, conduit) before committing to anchor locations. This is also the moment to confirm you have enough post base clearance from any existing railing or wall edge.
Step 4: Build the frame and assemble the panels
Build each panel flat on the ground before raising it into position. This makes assembly much easier and lets you check for square before anything is attached permanently. Here's the sequence that works best.
- Cut all 2x4 frame pieces to length according to your cut list. Label each piece so you're not guessing on site.
- Lay the two vertical side rails flat, parallel, at your panel width. Place the top and bottom horizontal rails between them and drive two 3-inch exterior screws through each vertical rail into the end of each horizontal rail (pre-drill to avoid splitting).
- Add your center horizontal rail at the midpoint and fasten the same way. Check the frame for square by measuring diagonals: both diagonal measurements should match within 1/8 inch.
- Attach your infill material. For slats, start at the top rail and work down, spacing each slat consistently with a scrap of wood as a spacer. For lattice, set the panel inside the frame so it's recessed about 3/4 inch, then pin it with 1x2 stop molding around the perimeter, nailed every 12 inches per the lattice installation standard.
- For extra wind resistance, add a diagonal 2x4 brace from one corner to the opposite corner on the back face of the frame. This single addition dramatically stiffens the panel against racking in wind.
- Sand any rough edges and apply your finish (paint, stain, or sealer) before installation. It's much easier to coat all sides of each piece on the ground than after the screen is mounted.
If you're building more than two panels, work in batches. Build all the frames first, then do all the infill, then all the finishing. Assembly-line building saves time and keeps your cuts consistent across panels.
Step 5: Attach it securely to patio surfaces
How you anchor the screen depends entirely on what your patio surface is made of. Here are the three most common situations.
Concrete slab
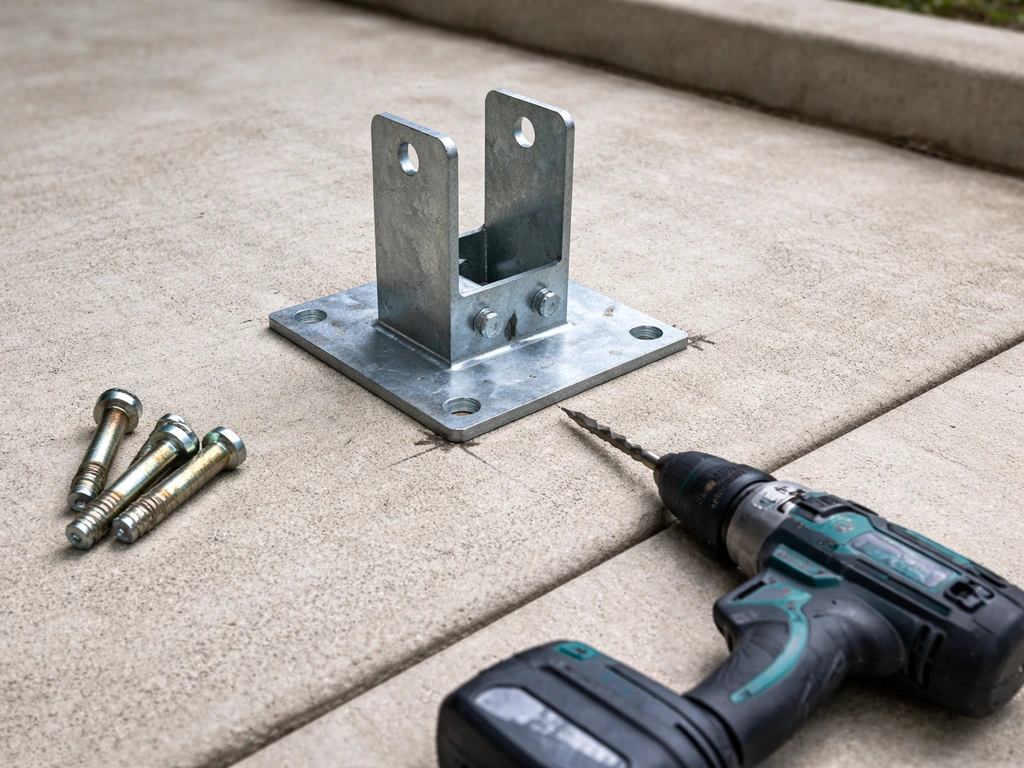
Use a surface-mount post base (Simpson Strong-Tie makes several good options). Mark your post center, drill into the slab with a hammer drill and the bit size specified for your anchor bolts, and set four expansion anchor bolts into the slab. Drop the post base over the anchors, add washers and nuts, and tighten firmly. Then set your 4x4 post into the base and secure it with the lag bolts provided. Most surface-mount bases accept a 4x4 post and are designed to raise it slightly off the concrete, which prevents moisture wicking and extends post life.
Wood deck
The same surface-mount post bases work on wood decks, but use lag bolts instead of expansion anchors. Ideally, locate your post bases over a joist or beam rather than just decking. If you can't hit a joist, add a blocking header between joists below the deck surface. For maximum strength, some builders use a through-bolt pattern: a hollow post base that slides over the post with lag bolts along the side to create a tight post-base connection. This is a strong choice anywhere wind exposure is high.
Existing railing
If your patio already has a railing, you can often mount screen panels directly to the railing posts with carriage bolts or heavy-duty through-bolts. The key is making sure the railing posts are themselves properly bolted to the deck framing. A railing post that wobbles is not a suitable anchor for a wind-exposed screen. Check the posts before relying on them, and add supplemental post bases to the deck if needed.
Once posts are set, attach the panel frames to the posts with structural screws or carriage bolts. Two fasteners per panel edge at the top and bottom of the frame is the minimum. For taller or heavier panels, add a third fastener at the center rail. Plumb each post with a level before final tightening. A post that's even slightly off plumb will make the whole screen look crooked and can cause stress on fasteners over time.
Step 6: Weatherproofing, finishing, and keeping it looking good
A privacy screen is exposed to sun, rain, and temperature swings year-round, so finishing and maintenance aren't optional. Do them right and the screen will last 10 to 15 years. Skip them and you'll be rebuilding in three.
- Seal all cut ends before assembly: end grain absorbs moisture fastest and is where rot starts. A quick brush of exterior wood sealer on every cut end takes five minutes and extends life significantly.
- For cedar or redwood, apply a penetrating exterior oil or solid-color stain rather than standard latex paint. These finishes bond with the wood fibers rather than sitting on top, so they don't peel and need less frequent reapplication.
- For pressure-treated pine, let it dry for at least a few weeks after purchase before painting or staining. Fresh PT lumber is too wet to hold finish properly. If you paint it right away, you'll be repainting within a year.
- Check all fasteners each spring. Exterior screws can back out slightly over a winter season due to wood expansion and contraction. Run a drill over any loose screws and add a second fastener if the original hole has enlarged.
- Inspect post bases annually. Look for rust streaks, standing water pooling around the base, or soft wood at the post bottom. Catch these early and you can treat or sister the post without replacing the whole screen.
- For fabric panels, bring them inside during heavy storm seasons if possible, or at minimum remove them for winter if you live in a cold climate. Even UV-rated fabric degrades faster when it holds ice.
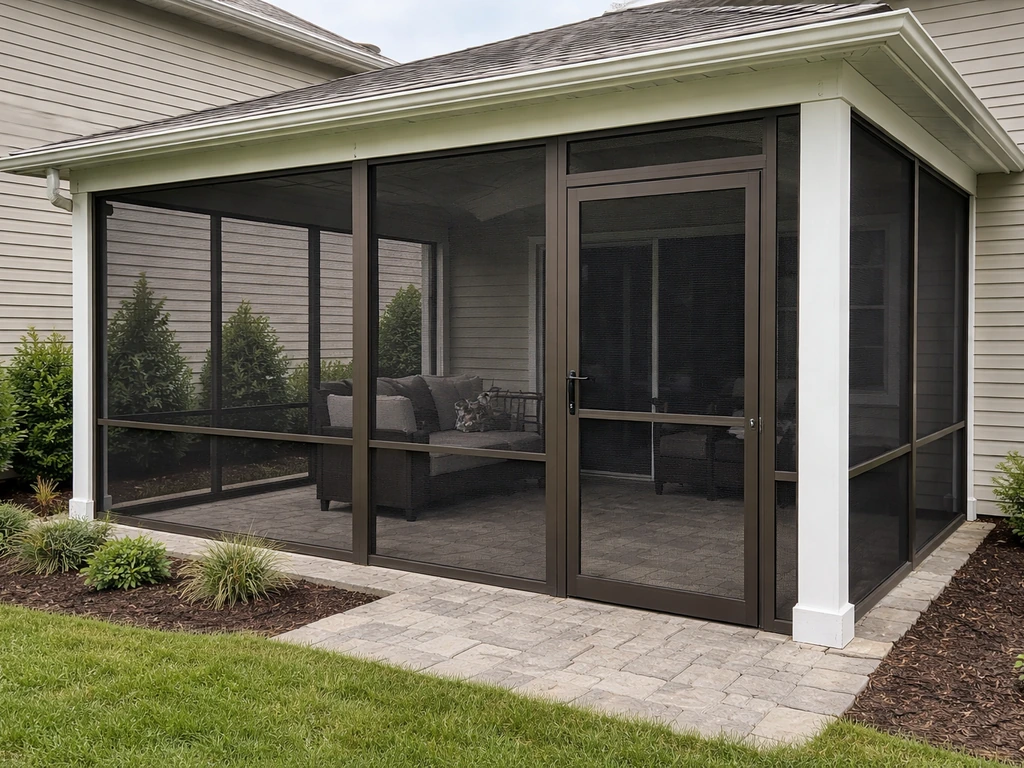
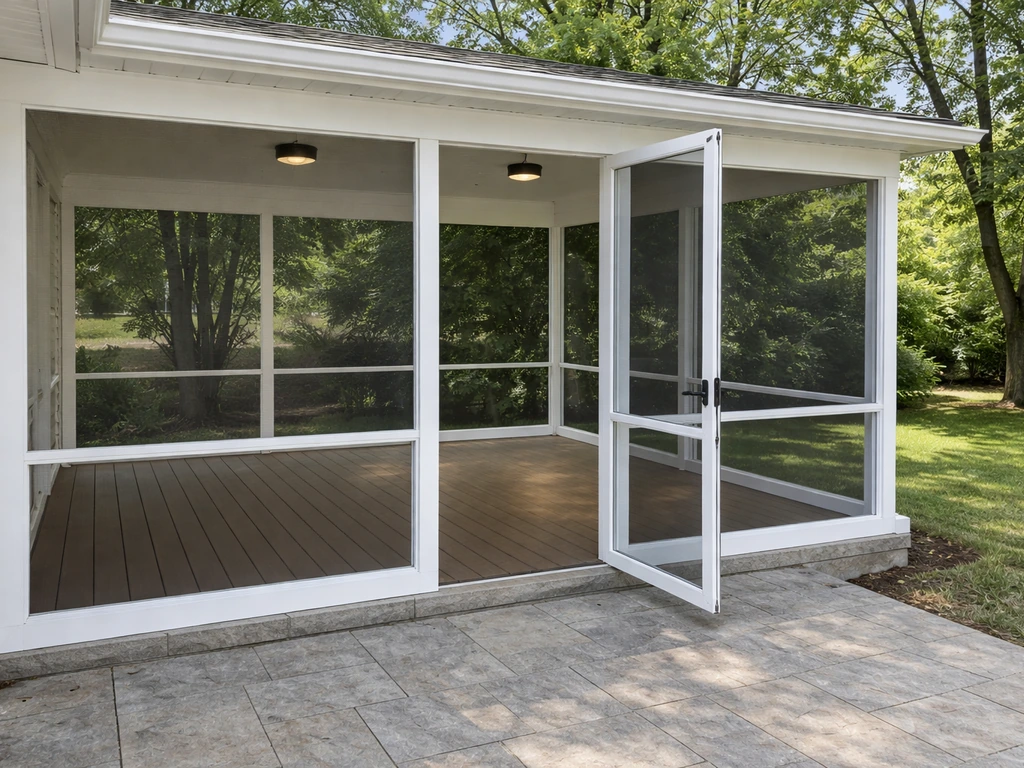
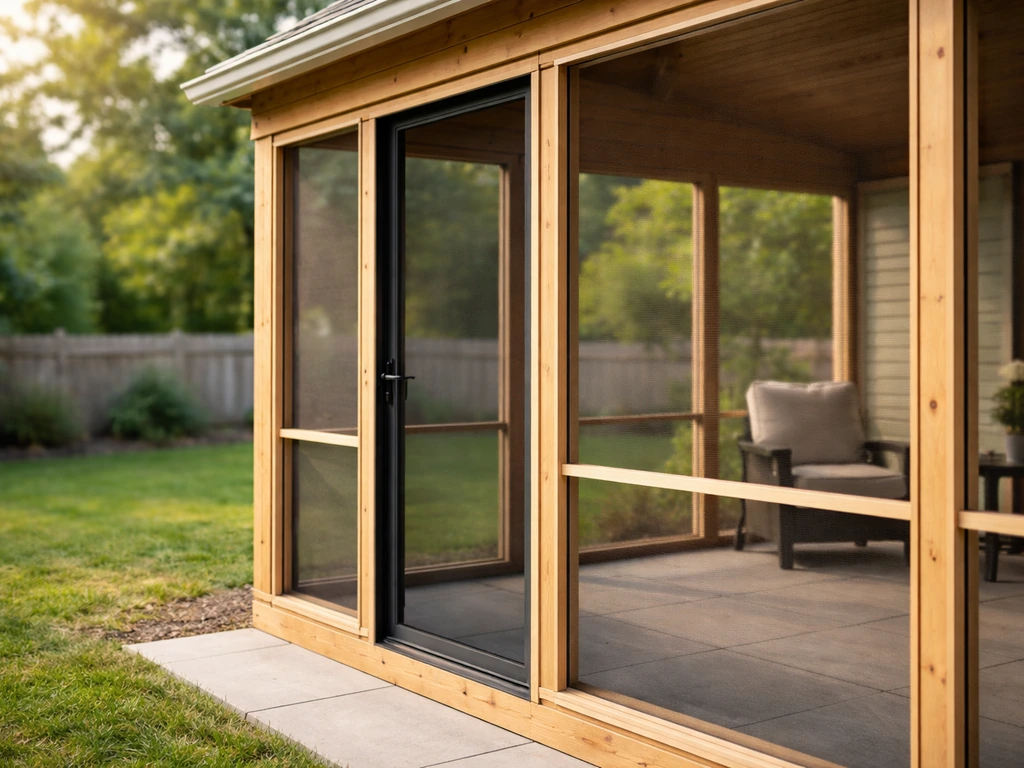
If you're planning something more permanent, like fully enclosing the patio on multiple sides with screening material or converting it to a true outdoor room, the techniques here for framing and anchoring carry directly over. If you're aiming to convert a patio to a sunroom, you'll need to build on the same framing and anchoring logic, plus add roof support, glazing, and door openings how to convert patio to sunroom. A full screened patio or enclosed porch build just adds more panels, a roof connection, and door framing to what is essentially the same post-and-panel logic you're already using here. You can use the same step-by-step framing and anchoring approach to build a screened-in porch on an existing patio screened-in porch on existing patio.
Quick material and cost comparison
| Screen Type | Estimated Cost per 6x6 Panel | Lifespan (maintained) | Best For |
|---|---|---|---|
| Cedar slat frame panel | $80–$130 | 10–15 years | Permanent installs, good looks |
| Wood lattice in frame | $40–$70 | 8–12 years | Budget builds, beginner projects |
| Vinyl lattice in frame | $50–$80 | 15+ years | Low-maintenance preference |
| Outdoor fabric panel | $30–$60 | 3–5 years | Rentals, temporary installs |
| Composite board panel | $150–$250 | 20+ years | Premium, zero-maintenance goals |
For most homeowners doing this for the first time, cedar slats in a 2x4 frame anchored with surface-mount post bases is the best balance of cost, durability, and ease of build. It looks intentional, handles real weather, and you can adjust or expand it later without starting from scratch. Build one panel as a test, get comfortable with the process, and then run the full length of your screen in the same session.
FAQ
Do I need to leave gaps between panels to prevent warping and rubbing?
Yes. Even if your infill material is rigid, wood frames and lattice can swell and shrink. Plan for a small gap (about 1/8 to 1/4 inch) between adjacent panel frames or between a panel edge and a railing, and avoid tightening fasteners so hard that the frame cannot move seasonally.
What’s the best way to choose panel height for privacy if people sit at different levels?
Start by matching the height to the posture you want to block. For seated privacy, measure the top of a typical chair back plus a little clearance (often 18 to 24 inches above the chair seat), then add margin for wind-driven movement. If you are screening around dining, consider 5 to 6 feet instead of relying on a single standard height.
Can I build the screen in one extra-wide panel to reduce the number of posts?
Generally no. Panels wider than about 8 feet become hard to keep square and resist racking under wind. If you want fewer posts, use more posts but shorter panel spans, or add diagonal bracing inside the frame for the larger section, rather than making the panel extremely wide.
How do I prevent cedar slats from shrinking, loosening, or squeaking over time?
Pre-drill slat holes and use exterior-rated screws so you do not split cedar. Leave your airflow gaps, and keep slats from becoming overly tight by not forcing them into a fully solid contact. If you fasten slats to a frame that can move slightly, consider using multiple screws per slat run rather than relying on one edge fastener.
What type of foundation or anchoring should I use on concrete, and how deep is “enough”?
For surface-mount post bases on slab-on-grade, follow the anchor bolt length and embedment specified for the particular expansion anchors. A common mistake is drilling the wrong diameter or failing to clean dust out of the hole, which dramatically reduces holding power. Use a hammer drill at the correct bit size and clear debris before setting anchors.
Can I anchor to pavers or patio blocks instead of pouring or using a slab?
Usually, not directly. Many patio pavers are not designed to resist the lateral wind loads from a tall screen. If your patio is paver-based, you will often need a different anchoring strategy (for example, setting posts into concrete footings or adding a structural base) so the system does not shift or tip.
How can I reduce wind wobble without making the screen heavier?
Use tighter post spacing, keep panels to manageable widths, and ensure the base is solid. Adding a center rail (already recommended in the basic design) helps stiffness. Another practical option is to add diagonal blocking or a diagonal brace hidden behind slats for the sides facing prevailing wind.
Is it okay to mix stainless and galvanized hardware to save money?
No. Mixing metals accelerates corrosion. If your frame uses stainless fasteners, use stainless connectors everywhere, and if you start with galvanized hardware, stay galvanized throughout so the corrosion rate is consistent and predictable.
How do I keep the screen from trapping water and causing faster rot at the post base?
Choose bases that lift the 4x4 slightly off the concrete and do not pack soil, mulch, or landscape fabric against the posts. At the frame level, make sure infill materials do not hold standing water, and seal cut ends and any exposed wood surfaces that are not naturally weather-resistant.
What’s a safe way to build a quick test panel before committing to the full run?
Build one panel with the exact same frame dimensions and infill type, then install it at your intended anchoring points. Check three things: plumb when fastened, how much airflow your slat spacing creates, and whether the panel shows any movement when you push gently at mid-height. Use what you learn to adjust post spacing or slat gaps before building the rest.
If my patio has an existing railing, when is it not strong enough to mount the screen?
Do not use railing posts as anchors if they flex or wobble when someone leans lightly. Even if the railing looks sturdy, the limiting factor is whether the posts are securely bolted to deck framing. If you can access the structure, confirm the attachment, and consider adding supplemental post bases rather than trusting the railing alone.
Next Articles
How to Enclose a Screened Patio Step by Step Guide
Step-by-step DIY guide to enclose a screened patio with secure posts, framing, sealing, doors, and easy maintenance tips
How to Build a Screened-In Porch on an Existing Patio
Step-by-step DIY guide to build a screened-in porch on an existing patio, with framing, flooring, sealing, and permits.
How to Build a Screened Patio: DIY Step-by-Step Guide
DIY step-by-step on building a screened patio, framing, mesh, doors, and weatherproofing for comfort.