Converting a patio into a sunroom is absolutely a DIY-achievable project, but it ranges from a relatively straightforward screen-and-roof enclosure to a full four-season room with insulated walls, double-pane windows, and a dedicated HVAC circuit. The core steps are: assess your existing slab and site, pick your enclosure scope, get permits, build your frame and roof, install windows and doors with proper flashing, seal and insulate, then address climate control. Budget $5,000 to $30,000+ depending on size and finish level, and plan for 2 to 6 weekends of work for a capable DIYer. Here is exactly how to do it.
How to Convert a Patio Into a Sunroom Step by Step

Felix Brennan
4 Jun 2026
First, decide what kind of sunroom you actually want
Before you buy a single board, you need to settle on scope. The phrase 'patio to sunroom' covers a huge range of projects, and the one you choose determines permits, materials, and how much your utility bill changes. There are three main tiers to think about.
| Type | Season Use | Walls/Glazing | Insulation | HVAC Needed | Typical Cost Range |
|---|---|---|---|---|---|
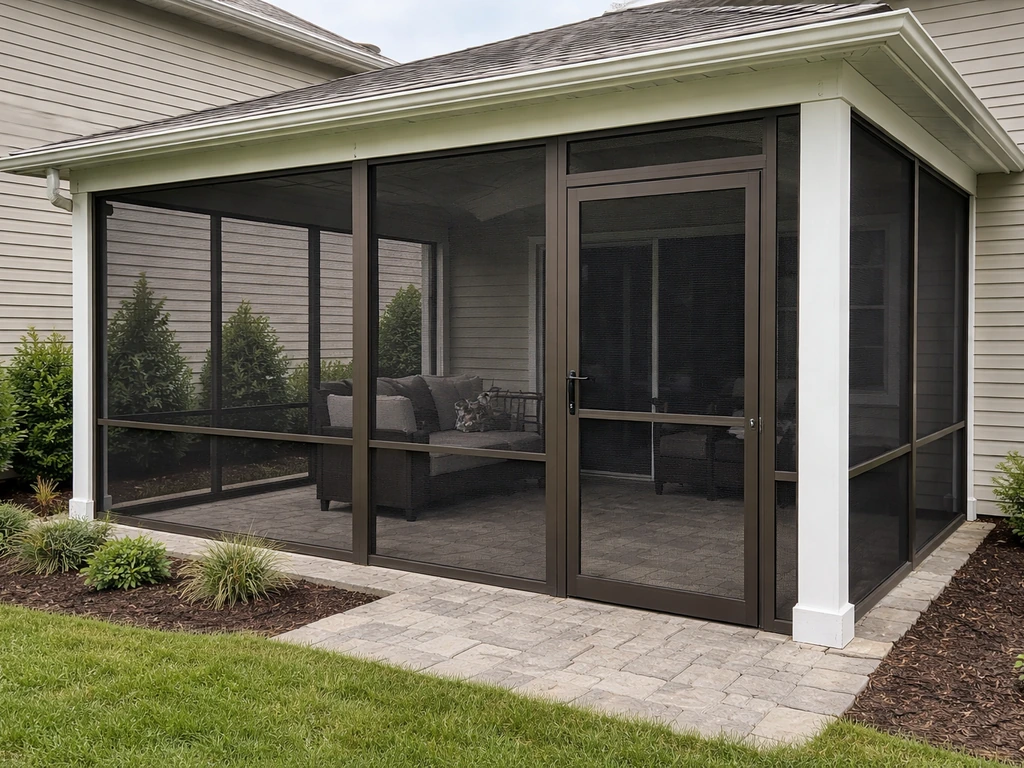
| Screen Room / Patio Enclosure | Spring–Fall | Screen panels, screen doors | None or minimal | No | $2,000–$8,000 |
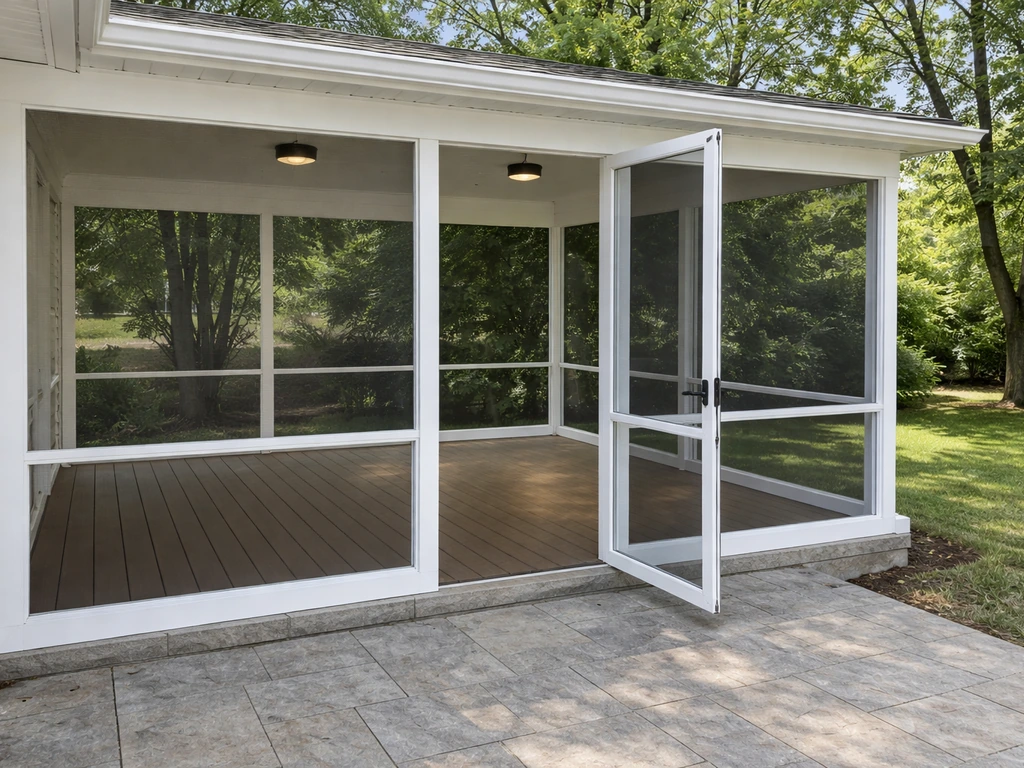
| Three-Season Sunroom | Spring–Fall (mild winters) | Single or double-pane glass/acrylic panels | Light wall insulation | Optional fan or space heater | $8,000–$18,000 |
| Four-Season Sunroom | Year-round | Double or triple-pane low-E glass, insulated walls | Full wall/roof/floor insulation | Yes, full heating and cooling | $18,000–$50,000+ |
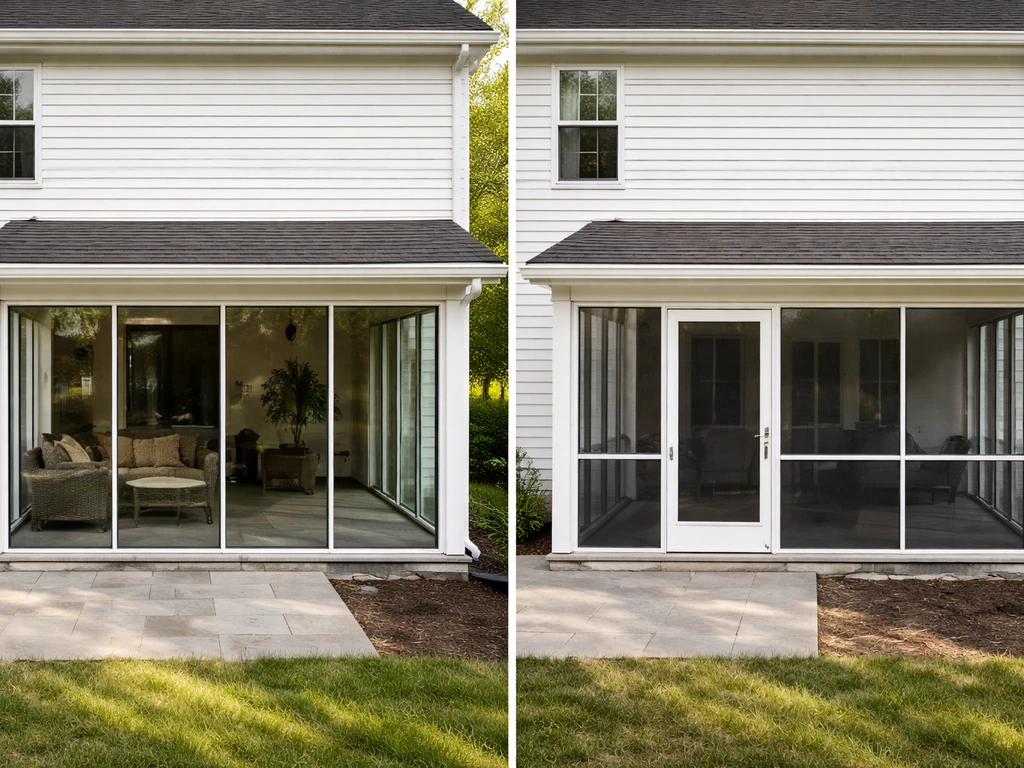
A screen enclosure is the lightest lift and is often the sweet spot for readers on this site who want to go from open patio to bug-free outdoor living space without a massive construction project. If you want to build a screened-in porch on an existing patio, plan your enclosure scope, then follow the same framing, roof, sealing, and permitting steps outlined in this guide screen porch. If you want something closer to a true indoor room that you can use in January, you are building a four-season addition, which means insulation, thermal windows, a foundation check, and an HVAC connection. Be honest with yourself about which one fits your budget and climate before moving forward. A poorly insulated three-season room in Minnesota is just an expensive screen porch that gets uncomfortably cold eight months a year.
Site prep and measurements: what to check before you build anything
Evaluate your existing slab
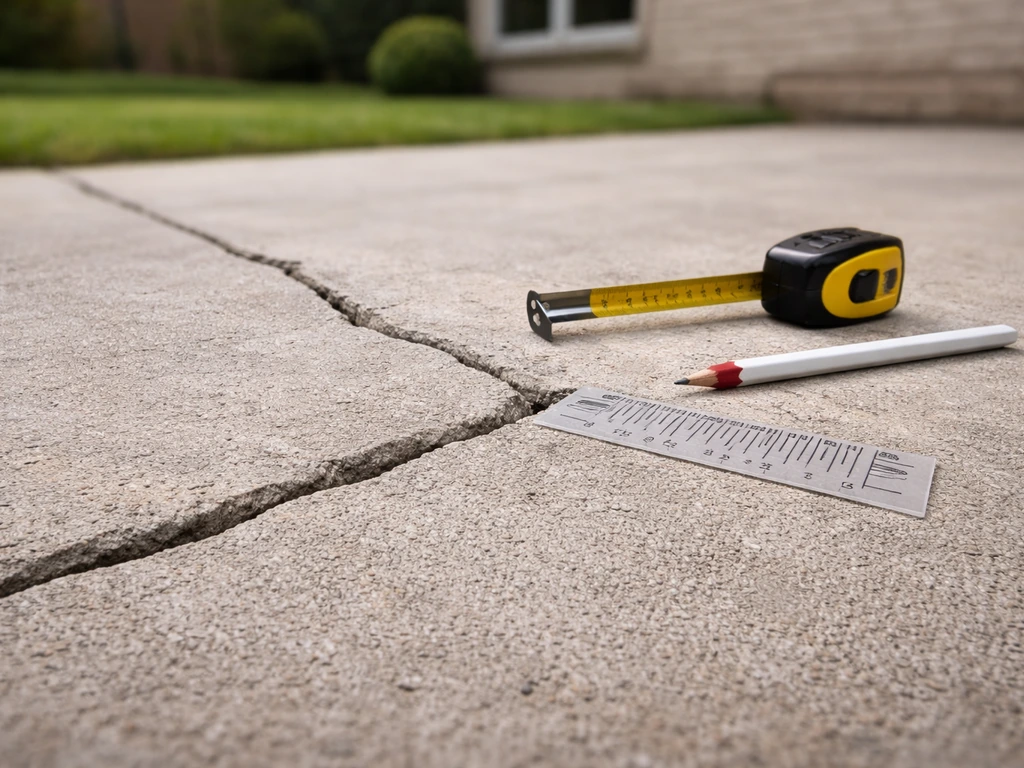
Your concrete patio is the foundation of this whole project, so inspect it carefully. Look for cracks wider than 1/4 inch, significant settling or heaving, or areas that feel hollow underfoot. Minor surface cracks are normal and can be repaired with concrete filler, but a slab that has shifted more than 1/2 inch relative to the house foundation needs a structural assessment before you build walls on top of it. For a four-season room, some jurisdictions require a frost-protected footing that goes below the local frost line rather than relying on an existing patio slab, so check that with your building department early.
Check drainage and slope
Outdoor patio slabs are intentionally sloped away from the house, typically about 1/4 inch per foot (roughly 2%), so rainwater drains off rather than pooling against your foundation. That slope is great outside, but once you enclose the space, standing water under a door threshold or against a wall becomes a leak and mold problem. Confirm the slope direction with a level and a tape measure before framing. If water drains toward the house, you will need to address that with a channel drain or by grinding and resurfacing before the walls go up.
Locate utilities and measure carefully

Call 811 (the national Dig Safe hotline in the US) before any ground work. Even on an existing slab, if you need to cut through it for a drain or anchor bolts, you want to know what is underneath. Also locate exterior electrical outlets, hose bibs, gas lines, and HVAC lines that run through or near the patio walls. These all need to be accounted for in your design. Then measure the full perimeter of the patio, note any irregularities in the shape, and record the height from the slab to the eave or soffit of the house. These three measurements drive every framing and material decision you will make.
Design choices: roof style, walls, windows, and ventilation
Roof options
The roof is the biggest design decision because it affects structural complexity, cost, and how much natural light you get. A lean-to (shed) roof attached to the house fascia is the simplest and most common for DIY builders: one slope, one ridge connection, straightforward framing. A gable roof gives you more headroom and a more finished look but requires more framing skill. Solid insulated roofing panels are best for four-season builds. Polycarbonate multiwall panels are popular for three-season rooms and let in diffused light while blocking UV. Clear tempered glass roof panels look beautiful but can turn the room into an oven in summer without proper shading or ventilation.
Wall and glazing options
For a screen enclosure or three-season room, aluminum-framed screen panels or low-profile vinyl panel systems are the easiest to install. For a four-season room, you want insulated 2x4 or 2x6 stud walls with proper sheathing, just like a house addition, with windows selected based on their NFRC whole-product U-factor and solar heat gain coefficient (SHGC). The U-factor measures insulation ability (lower is better), while the SHGC tells you how much solar heat passes through (lower is better in hot climates, higher can help in cold climates). Always look at the whole-product values on the NFRC label, not just the center-of-glass numbers, which overstate performance. Double-pane low-E windows are the minimum for a four-season room; triple-pane is worth the upgrade in climate zones 5 and above.
Ventilation and airflow
Sunrooms trap heat and moisture, so ventilation is not optional. At minimum, plan for operable windows on at least two walls for cross-ventilation, plus a ceiling fan or roof vent. For a four-season room, you will need either a connection to your home's HVAC system or a dedicated mini-split unit. Under-sizing ventilation is one of the most common mistakes, and it leads to condensation on windows, mold on walls, and a room that is unusable in summer. If you are in a hot-humid climate, plan for active dehumidification in addition to cooling, since moisture accumulation accelerates quickly when interior temperatures drop relative to outside dew point levels.
Materials and build methods
Framing
For a screen or three-season enclosure, aluminum extrusion framing kits are worth considering because they are lightweight, corrosion-resistant, and designed to fit standard screen and panel widths. For a four-season room, standard pressure-treated lumber (PT) at the bottom plate where it contacts or is near the slab, and standard kiln-dried lumber above, is the most accessible framing choice for most DIYers. Steel stud framing is an option for taller walls or fire-rated assemblies but requires different fastening techniques. Anchor the bottom plate to the slab with concrete screws or anchor bolts at 16-inch intervals. Stud spacing of 16 inches on center is standard; go to 12 inches on center if you are in a high-wind or heavy-snow-load area.
Glazing systems
Rough openings for windows should be larger than the nominal window size, typically 1/2 inch wider and taller than the unit dimensions, to allow for shimming, leveling, and flashing clearance. Check the manufacturer's minimum rough opening specification (Andersen and other major brands publish these in their technical guides) before you frame your openings. Do not guess. A rough opening that is too tight will force you to trim framing later, and one that is too loose creates air and water infiltration problems at the edges.
Insulation placement
For a four-season room, insulate the walls, roof/ceiling assembly, and if possible the slab edge. Vapor retarder placement depends on your climate zone: in cold climates, the vapor retarder goes on the warm (interior) side of the insulation; in hot and humid climates, it belongs closer to the exterior. Getting this backwards traps moisture inside the wall assembly and causes mold and rot. If you are unsure of your climate zone, check the DOE climate zone map for your zip code before you frame and insulate.
Permits, codes, and safety: do not skip this part
Almost every jurisdiction blank" rel="noopener noreferrer">requires a building permit for a patio-to-sunroom conversion, even for a basic screen enclosure. blank" rel="noopener noreferrer">Some areas (like Santa Clara, CA) require planning department approval before you even submit building plans. The Pikes Peak Regional Building Department, for example, distinguishes between thermally isolated and non-thermally isolated sunrooms with different code requirements for each. Do not assume your project is exempt because it is attached to an existing patio.
What permits typically trigger for this type of project:
- Building permit (structural review of framing, roof load, and attachment to the house)
- Planning or zoning approval (setback compliance, lot coverage limits, HOA rules)
- Electrical permit if you are adding outlets, lighting, or HVAC circuits
- Mechanical permit if you are extending HVAC ductwork or adding a mini-split
- Smoke and CO detector requirements triggered by converting to a habitable space
Your permit drawings need to address local wind load and snow load requirements for the roof structure. Many jurisdictions also require safety glazing (tempered or laminated glass) in any glazed panel within 18 inches of the floor or in doors, per IRC Chapter 3 safety glazing provisions. Means of egress rules apply too: if your sunroom connects to the house interior, exits must remain clear and unobstructed. Check all of this with your local building department before you finalize your design drawings. The permit fee is almost always worth it because it forces a plan review that catches problems before they are buried in the walls.
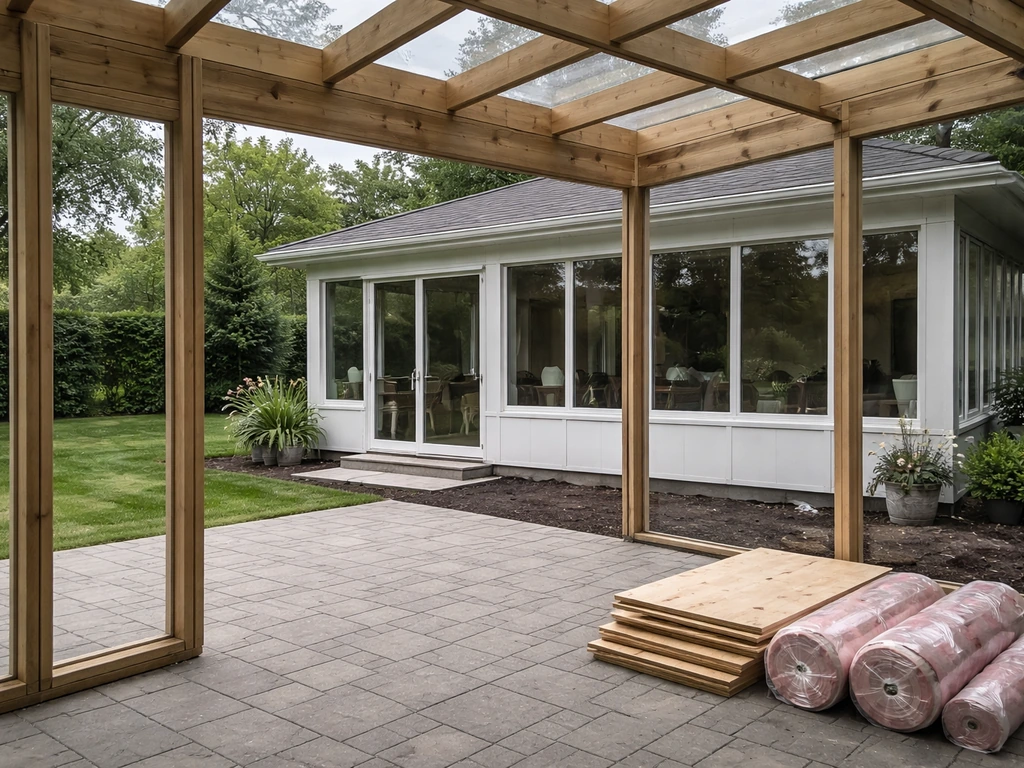
Step-by-step conversion workflow
- Demo and prep: Remove any existing patio cover, awning, screen panels, or pergola structure. Sweep and pressure-wash the slab. Repair cracks with concrete filler and let it cure for at least 48 hours. Mark the layout of your new wall perimeter with chalk lines.
- Anchor the bottom plates: Cut pressure-treated 2x4 or 2x6 bottom plates to length. Pre-drill and secure them to the slab with 1/2-inch concrete anchor bolts or Tapcon screws at 16-inch intervals. Use a sill gasket or foam seal tape under the plate to prevent moisture wicking.
- Frame the walls: Build wall sections flat on the slab and tilt them up, or frame in place. Standard 8-foot ceilings work well for most lean-to designs. Frame rough openings for windows and doors per manufacturer specs, remembering to add header lumber above each opening sized for the span.
- Install the ledger board: Where the sunroom roof meets the house, bolt a pressure-treated ledger board directly into the house rim joist or wall framing using structural lag screws. This is a critical structural and weatherproofing connection. Flash the top of the ledger with step flashing and waterproof membrane tape before the roof goes on.
- Frame and sheathe the roof: For a lean-to design, run rafters from the ledger to the outer wall top plate. Space them 16 or 24 inches on center. Install OSB or plywood sheathing, then a continuous layer of roofing felt or synthetic underlayment. Add your finish roofing material (metal, asphalt shingles, or polycarbonate panels) lapping shingles from the bottom up so each course sheds water onto the one below.
- Sheathe and wrap the walls: Apply OSB or plywood sheathing to the wall framing, then install a continuous water-resistive barrier (WRB) such as house wrap, lapped like shingles so water drains down and out. Tape all seams with compatible tape.
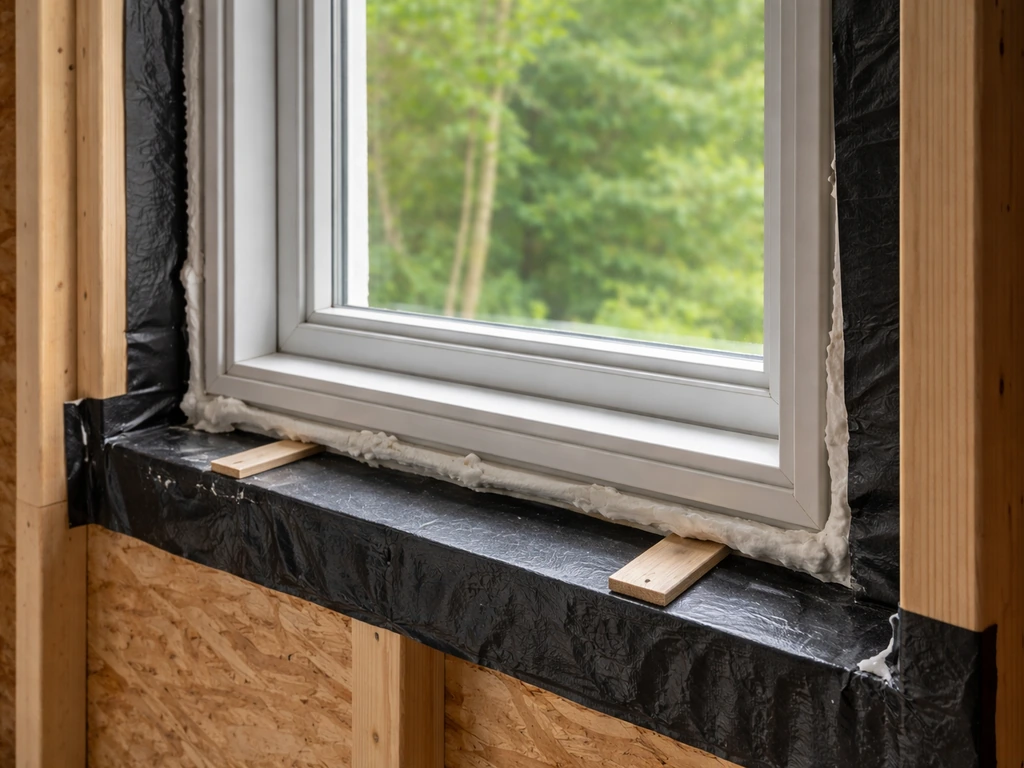
- Flash all openings: Install waterproof flashing tape and/or metal flashing around every window and door rough opening. Sill pan flashing goes in first and should drain to the exterior. Then flash the sides (jambs) and finally the top (head flashing laps over the side flashing). This sequence is non-negotiable for preventing leaks. Seal the jamb and head perimeter to maintain the air barrier, but leave the sill side free to drain out.
- Install windows and doors: Set each unit in its rough opening, shim plumb and level, and fasten per manufacturer instructions. Check that the sill pan is sloped toward the exterior. Seal the interior perimeter with low-expansion foam or backer rod and caulk.
- Insulate: Fill wall cavities with batt insulation or blown-in insulation. Install a vapor retarder on the correct side for your climate. Insulate the roof assembly if using a cold-roof design with a ventilated attic space, or use closed-cell spray foam for an unvented roof assembly.
- Finish interior and exterior: Install drywall or bead-board paneling on interior walls. Tape, mud, prime, and paint. Install baseboard trim and window/door casing. On the exterior, apply siding or stucco to match the house. Caulk all exterior seams and transitions with paintable elastomeric caulk.
- Add electrical, lighting, and HVAC: Run wiring for outlets and lighting before closing walls. Install your chosen climate control system (mini-split, ductless unit, or extension of existing HVAC). Add smoke and CO detectors as required by permit.
Weatherproofing, climate control, and making the space comfortable year-round
Preventing leaks and condensation
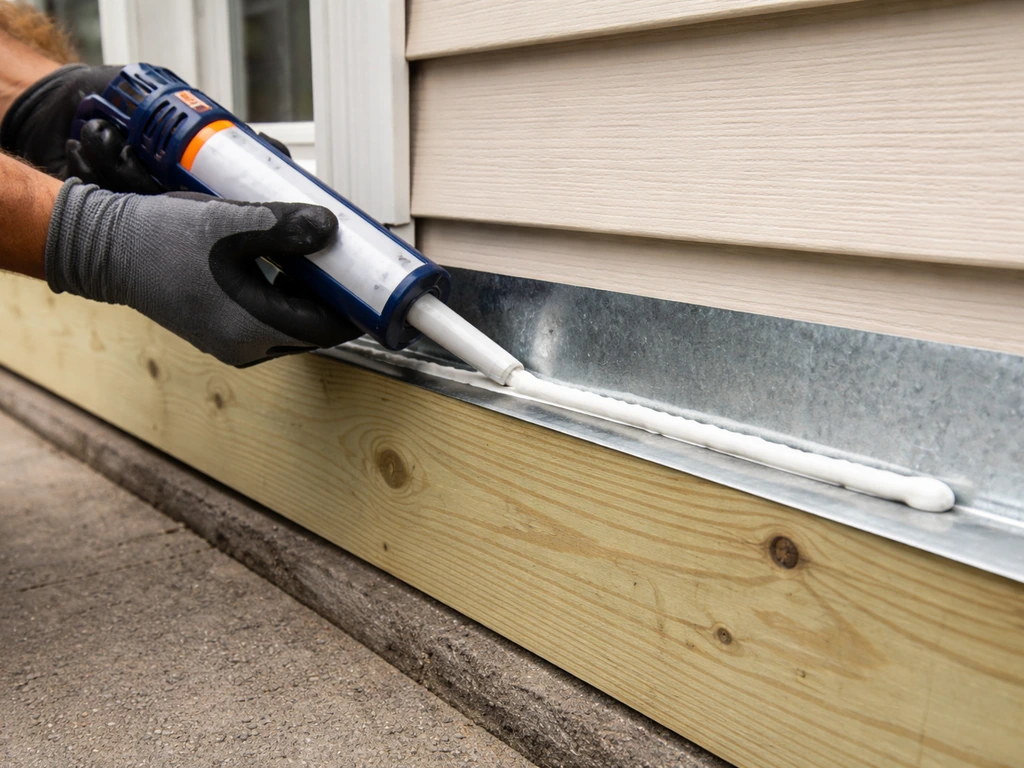
The most common failure points in patio-to-sunroom conversions are the ledger-to-house connection, window and door perimeters, and the junction of the wall bottom plate with the slab. If your goal is a privacy screen for a patio, the same leak prevention and edge sealing principles help keep the space comfortable and dry how to build a privacy screen for patio. All three need belt-and-suspenders waterproofing treatment: flashing plus membrane tape plus caulk. Think of water as always looking for the path of least resistance, and design your drainage plane so that path always leads to the exterior. Every layer should lap over the one below it, just like roof shingles, so gravity moves water out rather than in.
Condensation on windows is almost always a sign of too much indoor humidity relative to the window's surface temperature. Upgrading to double or triple-pane windows with a high condensation resistance (CR) rating (look for CR 50 or above on the NFRC label) helps, but the real fix is controlling indoor humidity with ventilation or a dehumidifier. In hot-humid climates, this is especially important because the air conditioning alone is often not enough to keep relative humidity below 60%, which is where mold growth accelerates.
Solar heat control
Sunrooms face a fundamental tension: you want light, but you do not want a greenhouse. For south- and west-facing rooms, choose windows with a low SHGC (0.25 to 0.40) to limit solar heat gain in summer. External overhangs, retractable awnings, and solar shades are the most effective because they block the sun before it hits the glass. Interior blinds and shades help but less so, since the heat is already inside the glass by the time a blind stops it. Polycarbonate roof panels with UV-blocking coatings are a good middle-ground option that diffuses rather than concentrates sunlight.
Heating and cooling options
For a three-season room, a ceiling fan and one or two portable electric heaters for cool nights is often sufficient. For a four-season room, a ductless mini-split system is the most popular and practical choice for a sunroom addition because it does not require ductwork, provides both heating and cooling, and can be sized precisely for the room's square footage. Most 200 to 300 square foot sunrooms are well served by a 9,000 to 12,000 BTU mini-split unit. If you extend your home's existing HVAC, have an HVAC contractor perform a Manual J load calculation to confirm the existing system can handle the added load without short-cycling, which reduces dehumidification effectiveness and leads to moisture problems.
Draft reduction and air sealing
Air sealing deserves as much attention as insulation. Even a well-insulated sunroom will feel cold and drafty in winter if air is leaking around window frames, door thresholds, and the wall-to-slab joint. After the interior is finished, do a walk-around on a windy day with a stick of incense or a smoke pen and check every perimeter joint, outlet, and penetration. Re-caulk or foam any spot where the smoke wavers. Install door sweeps and compression weatherstripping on all doors. These small fixes often make more difference to comfort than upgrading to thicker insulation.
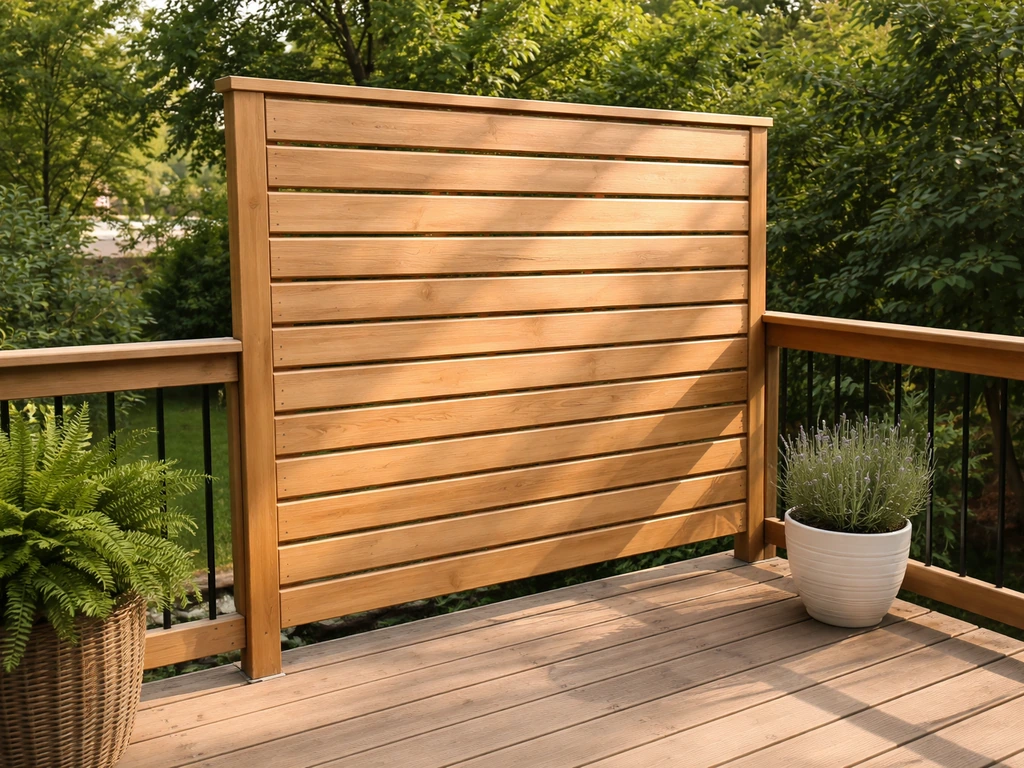
Where this project fits alongside other patio enclosure options
A full sunroom conversion is the most ambitious version of enclosing a patio, but it is not the only route. If you want to stop short of full glass walls and a conditioned room, building a screened-in porch on an existing patio or learning how to build a screened patio gives you most of the bug-free, weather-protected outdoor living benefit at a fraction of the cost and complexity. A screened patio enclosure is also a very natural first phase if you eventually want to upgrade to a full sunroom later: the structural posts and roof framing can often be reused, and you just replace screen panels with glazed ones when you are ready. If you are looking for the first step, a screened patio enclosure is a great way to start bug-free outdoor living before you upgrade to a full sunroom. Whether you go screen enclosure, three-season, or four-season, the site prep, drainage work, and permitting process covered above applies across all of them, so the planning steps here will serve you regardless of which direction you take.
FAQ
Can I build a sunroom without touching the existing patio slab at all?
You can sometimes, especially for screen enclosures, but most three-season or four-season projects still require new framing anchors and a continuous water barrier at the wall base. If you plan to add a deck-style floor over the slab, confirm you are not trapping moisture beneath (use vented assemblies or a capillary break). For full four-season builds, check whether your jurisdiction expects frost-protected footings even if the patio already exists.
What’s the biggest reason patio-to-sunroom projects fail with leaks?
The most common issue is not the roof itself, it is how water crosses transitions (wall-to-roof junctions, door and window perimeters, and the bottom plate to slab). Make sure flashing lapped like shingles is installed at each transition and that membrane tape is used where required, not just caulk. After installation, do a controlled water test (from the top first) before you close up any wall finishes.
Do I need tempered or laminated glass everywhere I add glass?
You usually do not, but many codes require safety glazing in specific locations, such as glazed panels near the floor or certain door areas. Even if you plan for “nice looking” glass, confirm the safety-glazing zones with your building department before ordering windows and glazing so you do not get forced into replacements after the fact.
How do I prevent the sunroom from smelling musty or staying damp after installation?
Treat humidity control as part of the system, not an afterthought. For four-season builds, use either a properly sized HVAC connection or a mini-split, and consider a dehumidifier in hot-humid areas. Also verify you have operable vents or controlled fresh-air supply, because a sealed room with insufficient ventilation can become damp even if it feels warm.
Is a three-season room safe for use in winter if I use space heaters?
It can be uncomfortable and sometimes risky. Space heaters can raise localized surface temperatures and create moisture or condensation problems, and many three-season assemblies are not designed for prolonged freezing conditions. If you need January usability, choose thermal windows and insulation targets appropriate for your climate zone and ensure ventilation and condensation control are designed for cold weather, not improvised.
What should I do if my patio slope drains toward the house?
Stop framing until you correct the drainage plane. Options include installing a perimeter channel drain, re-grading (if feasible), or using a properly detailed water management system at the wall base. Simply sealing the perimeter is often not enough because water can still find a way behind finishes and lead to mold at the wall-to-slab junction.
How close can my sunroom be to the house siding and where should flashing go?
You want a continuous, properly lapped water barrier where the new structure meets the house, usually with integrated flashing into the existing wall system. Avoid relying on caulk alone at the siding-to-frame joint. If you have brick veneer, stucco, or siding, plan the attachment method early because removal and re-flashing details vary by material.
What’s the right way to size a mini-split for a sunroom?
Use a load calculation, not a rule-of-thumb square footage estimate. A Manual J style calculation should account for sun exposure, glazing type and SHGC, insulation levels, air leakage targets, and whether the room is shaded by overhangs. If you guess low, you will run the unit longer and still fail to control humidity.
Should I install a ceiling fan, and does it replace dehumidification?
A fan helps with comfort and can reduce perceived hot or cold spots, but it does not remove moisture from the air. In humid climates, dehumidification is often needed because cooling alone may not maintain relative humidity below levels where mold growth is unlikely. Use a fan as an airflow tool, not as a substitute for humidity control.
How tight does the framing need to be around windows and doors?
Tight enough to prevent air leakage, but sized to the manufacturer’s requirements. Follow the specified rough-opening clearance so you can shim, level, and install flashing tape and sealants correctly. If the rough opening is too tight you will force the unit and compromise performance; if it is too loose you will create larger gap paths that are harder to seal reliably.
What insulation and vapor retarder approach is safest if I’m unsure of my climate zone?
The safe move is to confirm your DOE climate zone (or local equivalent) before you install the vapor retarder. Putting it on the wrong side can drive moisture into the wall where it cannot dry. If you are between zones, ask your building department or an insulation contractor to confirm the assembly and drying strategy rather than “winging it.”
Can I reuse an existing roofline or existing posts from a screened patio when upgrading later?
Sometimes, especially when the structure is already sized for the future loads and the roof framing is sound. However, upgrading usually changes the wall system, window openings, air sealing requirements, and insulation strategy, so you must verify that post spacing, header sizes, and the roof attachment points meet the requirements for the new enclosure type.
Do I need to do an air-sealing test after construction?
A DIY smoke or incense walk-through is a good start, but it is not as precise as a blower-door test. If you want to confirm performance, budget for an air leakage test once the windows, doors, and interior finishes are installed. Tightening leaks often improves heating and cooling effectiveness and helps reduce condensation risk.
Next Articles
How to Build a Privacy Screen for a Patio DIY Guide
Step-by-step DIY guide to build a patio privacy screen with plans, outdoor materials, mounting, and weatherproof finishi
How to Enclose a Screened Patio Step by Step Guide
Step-by-step DIY guide to enclose a screened patio with secure posts, framing, sealing, doors, and easy maintenance tips
How to Build a Screened-In Porch on an Existing Patio
Step-by-step DIY guide to build a screened-in porch on an existing patio, with framing, flooring, sealing, and permits.