
You can cover an apartment patio with a shade sail, retractable awning, freestanding canopy, or portable screened enclosure, no permanent construction required. For more options and detailed comparisons, see our guide on what can I cover my patio with. The right choice depends on whether you rent or own, what your lease or HOA allows, and how much load your balcony railing or wall can safely carry. Most renters can get real overhead coverage and side privacy without drilling a single anchor into structural concrete, and owners have even more options once they check permit and HOA rules.
How to Cover an Apartment Patio: Safe DIY Options

Felix Brennan
19 Jul 2026
Who this guide is for and what we cover
This guide is written for both renters and owners working with a balcony, small ground-floor patio, or back patio attached to an apartment or condo. If you've never installed anything outdoors before, you're in the right place. If you've tackled a few projects but feel unsure about what's allowed in a rental or multi-unit building, we cover that too. We walk through permissions, load limits, material choices, step-by-step installs, side privacy options, cost and time estimates, and maintenance, everything you need to make a confident decision and get the project done safely.
Before you pick anything: the decision framework
Every apartment patio cover project has three gatekeepers: your lease or HOA rules, your building's structural limits, and your local building code. Skip any one of these and you risk a security-deposit deduction, a failed inspection, or worse, a structure that fails in a storm. Here's how to work through them in order.
Step 1: Get written permission
Email your landlord or HOA with a specific description of what you want to install, the product name, dimensions, how it attaches, and whether it's removable. Ask for written approval. A text message or verbal yes is not enough if you later need to prove you had permission. HOA architectural review boards typically meet monthly, so build that lead time into your project schedule. If you have a disability-related need for shade or enclosure, HUD and DOJ guidance under the Fair Housing Act gives tenants the right to request reasonable modifications, though you'll usually pay for the work yourself and may need to restore the space on move-out.
Step 2: Understand load and attachment limits
Apartment balconies are engineered for a specific live load, typically 60 pounds per square foot for residential use, but the railing posts, exterior walls, and ceiling soffits were not designed with awning or sail anchors in mind. The International Building Code requires that any attachment changing the load path be treated as a structural alteration and reviewed against wind and snow load standards (ASCE 7). In plain terms: if you want to bolt a retractable awning bracket into a concrete wall, you need to know the concrete thickness, use the right anchor (expansion or adhesive anchor sized per the manufacturer's ICC-ES data), and confirm the wall can handle the uplift. Hilti and Simpson Strong-Tie both publish allowable-load tables for their concrete anchors, use them, don't guess. For renters, the safer play is to avoid wall anchors entirely and use freestanding or railing-clamp systems instead.
Step 3: Check whether a permit is required
Temporary, removable covers, shade sails hung on hooks, freestanding canopies, portable screened rooms, almost never require a permit. Permanent or semi-permanent structures that attach to the building (polycarbonate roofs, bolted awning systems, framed pergolas) usually do, especially if they enclose the space on multiple sides. Most jurisdictions treat a permanent balcony enclosure as a building alteration requiring a permit, structural review, and sometimes energy-code compliance. Under California Building Code (Chapter 23, Wood) / IBC-referenced structural requirements, permanent balcony enclosures are treated as building alterations and typically require a building permit, structural review, and compliance with applicable code provisions California Building Code (Chapter 23 — Wood) / IBC-referenced structural requirements. Check with your local building department before you start, not after. Some cities also restrict cooking with propane on enclosed balconies under local fire codes, so if you grill on your patio, factor that in.
Renters vs. owners: what you can realistically do
The biggest dividing line isn't skill or budget, it's whether you can make permanent attachments. Renters need damage-free or easily reversible solutions. Owners have more latitude but still face HOA and permit constraints in many buildings.
If you rent
- Use railing-mounted clamp brackets for shade sails, umbrellas, and small canopies — they attach to the railing without drilling.
- Hang outdoor curtain panels from tension rods or railing-mounted curtain rod brackets (no wall holes needed).
- Choose freestanding pop-up canopies and portable screened rooms that sit on the patio floor with weighted legs.
- If you do need a wall anchor (for example, one attachment point for a shade sail), use a removable concrete screw like a Titen HD and fill the hole with color-matched hydraulic cement or filler on move-out.
- Get every permission in writing before you spend money on materials.
- Budget for restoration: keep leftover paint, filler, and your original hardware so the space looks exactly as you found it.
If you own (condo or apartment)
- You likely still have an HOA with architectural guidelines — check those before designing anything.
- Semi-permanent retractable awnings, polycarbonate panel roofs, and pergola kits become realistic if structurally feasible.
- Pull a permit for anything that attaches to the building structure or encloses the space with walls or a fixed roof.
- Hire a structural engineer for a quick consultation ($150–$400) if you're unsure whether your wall or slab can take the anchor loads — it's cheap insurance.
- Even as an owner, avoid making changes to common-area building elements (the exterior facade, shared roof membrane) without HOA and building-management approval.
Matching the cover to your patio type
Not all apartment patios are the same, and the cover that works beautifully on a 12-by-8-foot ground-floor slab may be completely wrong for a 6-by-10-foot fourth-floor balcony. Here's how to think through each scenario.
High-rise or mid-rise balcony
Wind is your biggest challenge here. Above the third floor, gusts are stronger, uplift forces on any overhead cover increase dramatically, and ASCE 7 wind-load requirements become harder to meet with DIY attachments. Stick to compact, low-profile options: a retractable awning bolted into structural backing (with proper anchors), a clamped shade sail spanning only across the railing, or outdoor curtains on tension hardware. Avoid large freestanding canopies on high balconies, they can act as sails and tip over or cause damage.
Small ground-floor or courtyard patio
Ground-floor patios give you the most flexibility. You can use freestanding weighted canopy frames, portable screened rooms, shade sail posts set in weighted bases, or pergola kits assembled on the patio surface. The tradeoff is space: on a small patio (say, under 100 square feet), a large freestanding frame can eat most of your usable area. Shade sails anchored to the building wall and one freestanding post are often the most space-efficient solution for small patios.
Back patio (attached to a ground-floor unit)
A back patio typically offers the most structural attachment opportunities, you usually have a wall or soffit overhead and may be able to tie into existing framing. This makes retractable awnings and even semi-permanent pergola covers feasible. If you own the unit, a polycarbonate panel roof on a lightweight aluminum pergola kit is one of the cleanest permanent solutions. If you rent, a retractable awning mounted to the wall (with written permission and proper anchors) is a good middle ground.
Quick option comparison at a glance
| Cover Type | Best For | Renter-Friendly? | Typical Cost | Install Time | Permanence |
|---|---|---|---|---|---|
| Shade sail | Small/mid patios, sun control | Yes (with clamps or 1 anchor) | $30–$200 | 1–3 hours | Seasonal/removable |
| Retractable awning | Back patios, owners, renters with permission | With permission | $200–$1,200+ | 2–4 hours | Semi-permanent |
| Patio umbrella / cantilever | Any size patio, renters | Yes | $50–$600 | 30 min | Portable |
| Pop-up canopy / pergola kit | Ground-floor, temporary events or semi-perm | Yes (freestanding) | $80–$800 | 1–4 hours | Portable to semi-perm |
| Polycarbonate / metal panel roof | Owners, back patios, permanent cover | Rarely (needs permit) | $400–$3,000+ | Full day or more | Permanent |
| Portable screened enclosure | Ground-floor, any renter | Yes | $100–$400 | 1–2 hours | Temporary |
Materials: what they're made of and why it matters
Material choice affects weight, durability, fire safety, UV performance, and what you're allowed to use under lease or HOA rules. Here's the honest rundown on each material category.
| Material | Weight | UV Resistance | Fire Rating | Durability | Best Use Case |
|---|---|---|---|---|---|
| Solution-dyed polyester / acrylic fabric | Light (1–2 lbs/sq ft) | Excellent (solution-dyed lasts 5–10 yrs) | Look for NFPA 701 compliance | Good; fades less than coated fabrics | Shade sails, awnings, curtains, canopies |
| Polycarbonate panels | Light-medium (0.5–1 lb/sq ft) | Excellent with UV coating (10+ yrs) | Class A when tested | Very good; resists impact and hail | Permanent patio roofs, pergola panels |
| Aluminum / metal | Medium (1–3 lbs/sq ft for frames) | N/A (structural) | Non-combustible | Excellent; won't rot or warp | Pergola frames, awning hardware, canopy frames |
| Wood / timber | Heavy (2–5 lbs/sq ft) | Poor (needs sealing) | Combustible; treat for fire resistance | Moderate; requires annual maintenance | Pergola structures (owners only, check HOA) |
| PVC / vinyl | Light-medium | Moderate (can yellow in UV) | Check product data sheet | Good indoors; degrades faster outdoors | Roll-up blinds, privacy screens, temporary panels |
A note on fire ratings: if your patio is adjacent to an egress corridor or attached to a multi-unit building, your local fire code may require that any fabric or film cover comply with NFPA 701 (the standard U.S. flame-propagation test for textiles and films). Check the product's technical data sheet for NFPA 701 compliance before purchasing, especially for awnings and curtains.
The detailed option guide
Shade sails
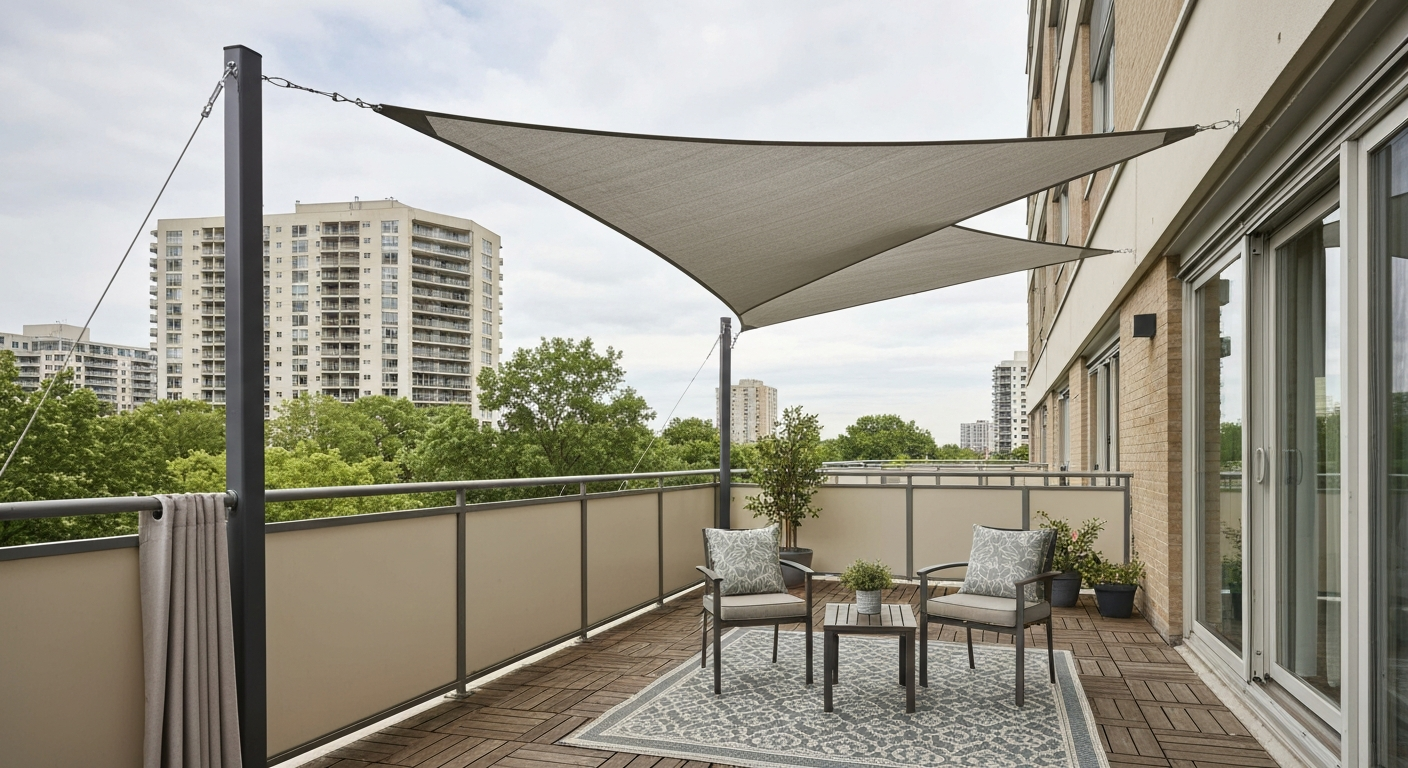
A shade sail is a tensioned triangle or rectangle of fabric stretched between three or four anchor points. They're one of the most cost-effective ways to cover a patio, and they look sharp when installed correctly. The key is getting the tension and slope right. Industry installation guides recommend a slope of 20 to 40 degrees (no flat installs, water will pool) and anchoring each corner into verified structural backing. For a renter, that means at least two corners attached to the railing with heavy-duty stainless clamps and one or two corners on a freestanding weighted post. Tension the sail firmly, a slack sail flaps noisily and transfers more dynamic load to the anchors. Remove or store the sail during high winds or snow; the corners concentrate uplift forces and can pull anchors out if left up in a storm. A quality 12-by-12-foot UV-resistant polyester sail runs $60–$150 and can last 5 to 8 years with seasonal removal and storage.
Retractable awnings
A wall-mounted retractable awning is the gold standard for apartment patio coverage, it rolls up when you don't need it, stores cleanly, and provides solid overhead shade when deployed. Standard residential units range from 8 to 20 feet wide and project 6 to 12 feet out. Installation requires mounting the header bracket into structural backing: concrete, masonry, or wood framing. Do not mount into exterior insulation board, trim, or hollow brick without proper anchors. ALEKO and similar manufacturers explicitly warn in their manuals to check wall load capacity and to mount into structural material only. Use the correct anchor for your wall type: a Hilti or Simpson concrete screw (Titen HD) for concrete or masonry, or lag screws into framing. See Simpson Strong‑Tie Titen HD technical information for allowable loads, embedment recommendations, and installation torque ranges for concrete and masonry. Always retract the awning in winds above 25 mph or in any precipitation, awning failures in wind are almost always caused by leaving it extended in a storm. Budget $250–$600 for a quality manual unit or $500–$1,200+ for motorized, plus 2 to 4 hours of installation time with a helper.
Patio umbrellas and cantilever umbrellas
A good cantilever (offset) umbrella is the easiest renter solution, no drilling, no permissions needed in most cases, and you take it with you when you move. A 10-foot or 11-foot cantilever can shade most of a small patio without a center post getting in the way. The base needs to be heavy (50–100 lbs of ballast is typical for a 10-foot arm) to prevent tipping. Quality aluminum-frame cantilevers with solution-dyed acrylic canopies run $150–$500 and hold up well for 3 to 5 seasons with annual canopy cleaning. Budget tip: a simple center-pole umbrella in a weighted base is $50–$150 and works well for a bistro table setup.
Pop-up canopies and pergola kits
Pop-up canopies (the instant-up folding-frame style) are completely portable and cost $80–$250 for a 10-by-10-foot unit. They're designed for temporary use and manufacturer manuals include serious warnings about high wind, stake them down or weight the legs any time there's wind. They're not a long-term solution for daily use, but they're great for renters who want coverage on demand. Freestanding aluminum pergola kits are a step up: they assemble in 3 to 6 hours, sit on the patio surface with foot pads, and can hold polycarbonate panels or shade fabric on top. Because they're freestanding and not bolted to the building, many fall into the no-permit zone, but confirm with your building manager before assembly.
Polycarbonate and metal panel roofs
A polycarbonate panel roof gives you real, weatherproof overhead coverage, the panels shed rain, block UV, and are virtually unbreakable compared to glass. Palram's SUNTUF and similar corrugated polycarbonate products are a popular DIY choice: they're lightweight (about 0.5 lbs per square foot), cut with a circular saw, and fasten with pre-drilled holes using manufacturer-specified foam-backed screws. Palram's installation guides specify required slope (minimum 5 degrees for drainage), fastener spacing, and expansion gap requirements, follow these exactly, because polycarbonate expands significantly with temperature change. These roofs almost always require attachment to a frame (an aluminum or wood pergola), and if that frame is attached to the building, you're likely in permit territory. Plan for a full weekend of work and a total cost of $600–$3,000 depending on size and frame material.
Mounted canopies
A wall-mounted fixed canopy (sometimes called a door or window canopy) is a compact option for covering a narrow back door patio or balcony opening. These typically span 3 to 6 feet in projection and mount on brackets anchored to the wall. They're lighter and cheaper than full retractable awnings ($80–$300) and simpler to install, but provide less coverage. Use the same anchor logic as for awnings: verify your wall material, use the right anchor, and mount into structural backing.
Portable screened rooms and screened enclosures
A portable screened room (like the Coleman Skylodge-style instant screen house) is a fully freestanding tent-like enclosure that sits on the patio floor and zips shut to keep bugs out. Assembly takes 30 to 90 minutes and no tools. These are manufacturer-rated as temporary shelters, not permanent structures, and include explicit warnings about extreme weather, take them down or secure them before any significant wind event. For renters who want a bug-free outdoor space on a budget, this is one of the best options available. Typical cost is $100–$350 for a unit that covers 100 to 150 square feet. For a more durable semi-permanent option, look at screen-room kits with aluminum frames and removable screen panels, these assemble in a few hours and can stay up for a full season.
Side coverage and privacy solutions
Covering the top of your patio is only half the project. On apartment patios, sides matter too, for privacy from neighbors, wind buffering, and visual separation from common areas. Here are the best options, from simplest to most involved.
Outdoor curtains
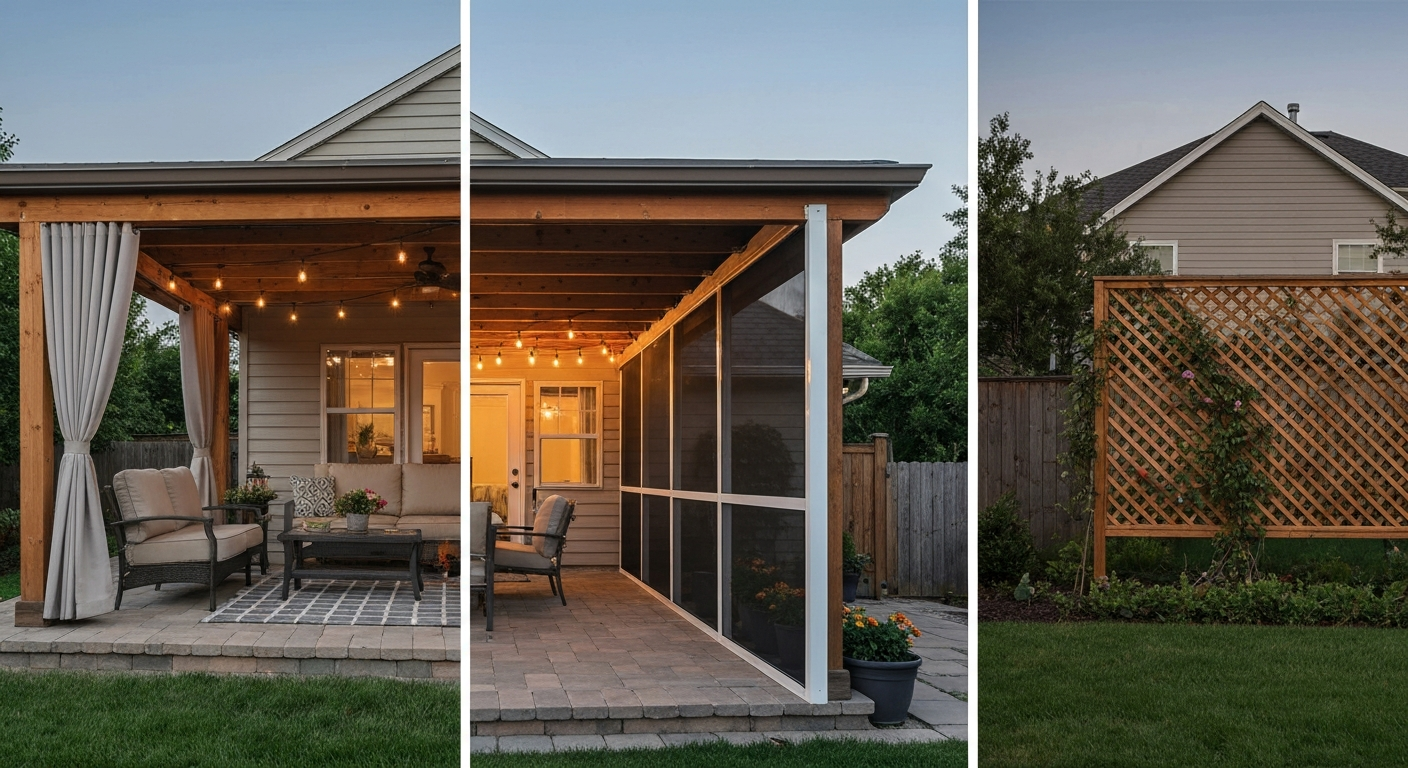
Outdoor curtain panels hung from a tension rod or a railing-mounted curtain rod bracket are the easiest renter-friendly side solution. They can be drawn closed for privacy and pushed aside when you want an open view. Use solution-dyed polyester or acrylic outdoor fabric, it resists mildew and UV far better than regular curtain fabric. For fire safety near building exits, look for panels that list NFPA 701 compliance. A pair of 96-inch drop panels runs $30–$80, and the hardware is $15–$40. Installation with a tension rod takes under 20 minutes.
Roll-up bamboo or vinyl shades
Roll-up shades hang from the roof edge of your awning, canopy, or pergola frame and drop down to form a side wall. Bamboo roll-up shades look natural and provide partial shade and privacy at $20–$60 per panel. Vinyl or outdoor fabric roll-up shades (sometimes called Roman-style patio shades) block more light and provide better wind buffering at $40–$120 per panel. Both types hang on simple screw hooks or zip ties on a canopy frame, making them renter-compatible.
Freestanding privacy screens
A folding or freestanding privacy screen panel sits on the patio floor and requires no attachment to anything. Metal-framed fabric screens and powder-coated aluminum slat screens are weatherproof and provide immediate privacy. They work well in corners or along one edge of a patio. The tradeoff is that they can blow over in wind, use a freestanding screen with wide feet or clip it to the railing for stability.
Lattice panels
For owners (or renters with permission), a lightweight vinyl or cedar lattice panel mounted vertically along a railing or freestanding frame provides semi-transparent privacy and a structure for climbing plants. Vinyl lattice weighs very little, doesn't rot, and can be screwed to a simple 2x4 frame that sits on the patio floor. It won't block wind completely but reduces it meaningfully and looks clean. Cedar lattice is heavier and requires annual sealing but has a more natural appearance.
Tall planters and green walls
A row of large planters with tall ornamental grasses, bamboo, or vertical garden trellises is one of the best renter-friendly privacy solutions available. A bamboo screen in a planter can reach 6 to 8 feet tall within a season or two, provides natural wind buffering, and adds real visual warmth to a small patio. Vertical wall planter systems (pockets or modular panel planters) attach to a railing or hang from a canopy frame and can create a genuine green wall in a small footprint. Weight matters: a large planter fully loaded with soil can weigh 50 to 150 lbs, so place them in corners where patio load capacity is highest, and consider lightweight potting mixes.
Step-by-step installs for the most popular options
Installing a shade sail (renter-safe method)
- Measure your patio and choose a sail size — leave 12–18 inches of clearance from each anchor point to the sail corner (the attachment hardware takes up space).
- Identify attachment points: use two railing posts with heavy-duty stainless U-bolt clamps as one side, and position a freestanding weighted post (or a single wall hook with a concrete screw into structural backing, with permission) on the opposite side.
- Set your freestanding post in a weighted base and ensure it is plumb — use a level.
- Attach stainless D-rings or snap hooks to your anchor points; adjust height to create a 20–30 degree slope toward the lowest point for drainage.
- Connect the sail's corner rings to the hardware using turnbuckles — these let you tension the sail after it's hung.
- Tighten turnbuckles until the sail is taut and wrinkle-free. A slack sail flaps and overstresses anchors.
- Check all attachment points for play or movement. Retighten and re-inspect after the first heavy wind.
- Remove and store the sail at end of season or before any forecast wind event above 25 mph.
Mounting a retractable awning (wall-mounted)
- Confirm your wall material: concrete, masonry block, or wood framing. Do not mount to EIFS (foam insulation board), hollow brick, or vinyl siding without a structural backing behind it.
- Read the manufacturer's installation manual completely before opening the box. ALEKO and similar brands specify exact bracket spacing and required mounting heights.
- Mark bracket locations on the wall per the manual — typically one bracket every 24–36 inches along the header bar.
- For concrete or masonry: drill with a hammer drill to the depth specified by your anchor manufacturer. Use a Hilti or Simpson Titen HD concrete screw at the diameter specified in the awning manual, torqued to the manufacturer's range.
- Mount the header bar with a helper — these units are heavy (40–100 lbs for a 10-foot unit) and require two people to hold in position while fasteners are driven.
- Attach arms and canopy per the manual. Test retract and extend several times.
- Set pitch adjustment to 15–30 degrees for water runoff.
- Always retract before winds exceed 25 mph or before any storm. The awning is not designed to carry wind or snow load when extended.
Setting up a portable screened room
- Clear and sweep the patio surface — the floor footprint should be flat and free of debris.
- Lay out the frame poles per the manufacturer's assembly diagram. Most instant-style screen rooms use pre-connected hub systems that unfold in one motion.
- Stand the frame up and lock all joints or clips per the manual instructions.
- Drape the screen canopy over the frame, aligning corner and side loops with the frame legs and peak.
- Zip the screen panels closed and stake or weight the base legs if any ground anchoring is provided by the kit. For a patio (no ground stakes), use sandbag weights on the feet.
- Check that all zippers and door closures work before placing furniture inside.
- Take the unit down or secure it before any forecast wind event — portable screened rooms are not rated for sustained wind or heavy rain.
Hanging outdoor curtains and roll-up shades
- For curtains on a railing: install a stainless or powder-coated curtain rod bracket that clamps to the railing top rail. No drilling required. Install one bracket every 3–4 feet.
- Thread curtain panels onto an outdoor-rated curtain rod (at least 3/4-inch diameter for rigidity in wind).
- Set the rod in the brackets and adjust panel height so panels clear the patio floor by 1–2 inches (prevents wicking and mold).
- For roll-up shades under an awning or canopy: screw small cup hooks or eye screws into the underside of the canopy frame header every 12–18 inches. Hang the shade using the provided hooks or zip ties through the top hem.
- Test roll-up action and adjust tension cord if provided. Roll and secure shades during high wind.
What you'll need: materials and tools by project
| Project | Key Materials | Key Tools | Est. Cost | Est. Time |
|---|---|---|---|---|
| Shade sail (renter method) | Shade sail, stainless D-rings, turnbuckles, railing U-bolt clamps, weighted post base | Level, measuring tape, pliers, wrench | $80–$250 | 1–3 hrs |
| Retractable awning (wall mount) | Awning unit, concrete anchors (Titen HD or Hilti equivalent), mounting screws | Hammer drill, correct drill bits, level, socket wrench, helper | $300–$1,400 | 2–4 hrs |
| Portable screened room | Screen room kit, sandbag weights | None (hand assembly) | $100–$350 | 30–90 min |
| Outdoor curtains (railing mount) | Curtain panels, outdoor rod, railing clamp brackets | Measuring tape, pliers | $50–$150 | 20–45 min |
| Roll-up shades (canopy mount) | Roll-up shade panels, cup hooks or zip ties | Drill or hand screwdriver | $40–$200 | 30–60 min |
| Polycarbonate pergola roof | Aluminum pergola kit, polycarbonate panels, foam-back screws, flashing, expansion gaskets | Drill, circular saw, level, measuring tape, two helpers | $600–$3,000+ | 6–16 hrs |
Wind, snow, fire, and drainage safety
Safety is not a formality here, cover failures on balconies can injure people below. Work through this checklist before and after install.
- Wind: size anchors using ASCE 7 wind load guidance for your region and exposure category, or follow tested anchor schedules from the cover manufacturer. ANSI/SPRI WD-1 requires that tested wind-uplift capacities meet or exceed calculated ASCE 7 loads — for DIY, this means buying a product that has been tested and following its anchor instructions exactly.
- Snow: in climates with measurable snowfall, any cover that catches and holds snow must be checked for snow load. Retract awnings and remove or drain fabric sails before expected snowfall. Polycarbonate panel roofs installed at proper slope (5 degrees minimum) will shed snow.
- Fire: choose awning and curtain fabrics that list NFPA 701 compliance, especially on multi-unit buildings with shared egress. Check whether local fire codes restrict enclosed balcony cooking — some jurisdictions prohibit propane grilling under any enclosed roof structure.
- Drainage: any sloped cover must direct water away from the building foundation and off the patio. Shade sails need 20–40 degree slope to drain. Polycarbonate roofs need flashing at the wall connection. Pooled water adds load and accelerates material degradation.
- Structural: never attach to non-structural elements (exterior trim, EIFS foam, vinyl cladding) without confirming there is structural backing behind them. Use anchor manufacturer load tables to verify pull-out capacity.
Landlord, HOA, and permit checklist
- Review your lease for any language about alterations, attachments, or modifications to the premises.
- Contact your HOA architectural review committee in writing and request their design guidelines for patio modifications.
- Email your landlord or property manager with a specific description of the project and request written approval.
- Contact your local building department and ask whether your planned cover requires a permit (be specific: freestanding vs. wall-attached, temporary vs. permanent).
- If a permit is required, submit plans and get approval before starting. Factor in typical review timelines (1–6 weeks in most jurisdictions).
- Keep copies of all written approvals, permit documents, and product manuals in a folder — you'll need them if there's ever a dispute or inspection.
- On move-out (for renters), restore all modified surfaces and document the restored condition with photos.
Maintenance and seasonal care
Even the best cover will fail early if you ignore seasonal maintenance. Here's a simple annual routine that takes a few hours and extends the life of your investment significantly.
- Spring: clean fabric panels with mild soap and water; inspect all anchor points, turnbuckles, and brackets for corrosion or looseness; check polycarbonate panels for scratches or yellowing (yellowing indicates UV coating failure — replace before the next season).
- Summer: re-tension shade sails after the first heat cycle (polycarbonate and fabric both relax slightly with heat); clean canopy drainage channels to prevent pooling.
- Fall: treat wood pergola frames with exterior sealer if applicable; remove and clean fabric shades and curtains before storing for winter; retract awnings during any storm.
- Winter (cold climates): remove and store fabric sails and portable screens indoors; leave polycarbonate panel roofs in place if properly sloped and load-rated; do not allow snow buildup on awning canopy fabric.
- Year-round: inspect anchor hardware after every major wind event and retighten or replace any loose or corroded fasteners immediately.
Making a small patio feel bigger: design and furniture tips
A well-chosen cover can actually make a small apartment patio feel more like a room, or it can make it feel claustrophobic if you're not thoughtful about it. A few principles that consistently work on small patios:
- Choose a lighter-colored or translucent cover (white shade sail, clear or opal polycarbonate) to avoid making the space feel dark and enclosed.
- Keep furniture proportional: a small bistro table and two folding chairs take up a fraction of the space of a full outdoor sectional.
- Mount things on the railing or wall when possible (fold-down tables, wall-hung planters, railing-mount umbrella holders) to keep the floor clear.
- Use vertical space for privacy and greenery rather than spreading planters across the floor.
- Outdoor string lights under an awning or sail dramatically extend the usable hours of a small patio without taking up any floor space.
- A consistent color palette (one or two colors for fabric, furniture, and planters) makes a small patio look intentional and larger than it is.
Where to go from here
Once you've covered the top of your patio, you'll likely want to think about the sides, wind protection and privacy make a covered patio genuinely usable rather than just shaded. If you're planning a more involved project, guides on how to cover patio sides, what materials work best for different climates, and how to design a covered patio as a cohesive outdoor room are natural next steps. For a step-by-step walkthrough on layout, materials, and creating an outdoor room, see our guide on how to design a covered patio. For small patios specifically, the design principles and space-saving options for compact outdoor spaces go deeper into furniture layout and cover sizing. If you're working with a back patio and have more structural flexibility, guides on covering a back patio walk through the attachment and framing options available when you have a solid wall to work with. The goal in all of these is the same: turn your apartment patio into a space you actually use, in comfort, all season long. For a step-by-step visual walkthrough and game-based layout ideas, see our guide on how to make a covered patio in sims 4.
FAQ
What are my first steps before covering an apartment patio?
Check lease/HOA rules and local building/fire codes; ask landlord/property manager for written permission if required; verify structural backing and load limits for any attachments; determine wind/snow exposure and drainage paths; decide temporary vs. permanent solution. If in doubt about structural changes (anchoring into walls, adding roof), consult a structural engineer or local building department.
Which patio-covering options are most apartment-friendly for renters?
Portable and non-permanent options: patio umbrellas, freestanding cantilever umbrellas, pop-up screened canopies/rooms, tension-mounted shade sails (using freestanding posts when possible), hanging outdoor curtains on tension rods, freestanding pergolas or planter-wall privacy screens, and roll-up shades attached with removable fasteners. These minimize permanent penetrations and are usually reversible.
Which options are best for owners who can make permanent attachments?
Owners can install retractable awnings (properly mounted to structural backing), fixed polycarbonate or metal awnings, framed or glazed patio roofs, permanent screened enclosures or pergolas with footings, and lattice/wood roofs. Any attachment into the building structure should follow code, engineered load calculations, and manufacturer installation instructions.
How do I choose between shade sails, retractable awnings, umbrellas, canopies, and polycarbonate roofs?
Match use, durability and constraints: shade sails — inexpensive, breathable, good for filtered shade but require strong anchors and removal for high wind/snow; retractable awnings — flexible sun control, neat storage, need structural mounting and periodic maintenance; umbrellas/canopies — low cost, portable, limited coverage; polycarbonate roofs — durable, permanent weather protection, require correct slope, flashing and structural support. Consider wind exposure, permanence allowed, budget, and desired light/weather protection.
What attachment and load issues should I verify before installing anchors or brackets?
Confirm mounting surface type (concrete, masonry, wood studs, metal framing), find and use structural backing (studs, concrete/masonry), check manufacturer anchor tables for embedment and allowable loads, account for wind uplift and snow loads per ASCE 7, and avoid fastening into trim or non-structural cladding. Use rated anchors (mechanical or adhesive) following manufacturer torque and installation guidance; when required, get engineered anchor calculations.
What permits or approvals are commonly required?
Permanent enclosures, new roof structures, or structural attachments often require a building permit and review by the local building department. HOAs may require design approval. Even tenant modifications can require landlord consent and may need restoration at move-out. Check local code and permit office before starting.
Next Articles
How to Cover Patio Sides: DIY Plans, Materials & Steps Guide
Practical DIY ways to cover patio sides for shade, privacy and weather, step‑by‑step plans, costs, tools, rental options.
How to Cover a Small Patio: DIY Options, Steps, Costs
Step-by-step DIY guide to cover a small patio with shade or weather protection, including materials, sizing, drainage, c
How to Make a Covered Patio in Sims 4 Step by Step
Step-by-step guide to build a covered patio in Sims 4, align roofs and supports, then fix common snapping and clipping i