
The fastest way to cover a patio from sun is to hang a shade sail or a freestanding canopy for a weekend solution, or build a pergola or lean-to roof extension if you want something permanent. Which one makes sense depends on your budget, how much structural work you're willing to do, and whether you need rain protection in addition to shade. This guide walks through both routes in full, with site assessment steps, measurements, three complete DIY walkthroughs, and honest cost and performance comparisons so you can choose the right cover and install it confidently. For a focused walkthrough and quick-start options, see our article on how to shade a sunny patio. See our step-by-step guide on how to block the sun on my patio for focused solutions and product recommendations.
How to Cover Patio From Sun: DIY Shading Guide & Plans Tips.

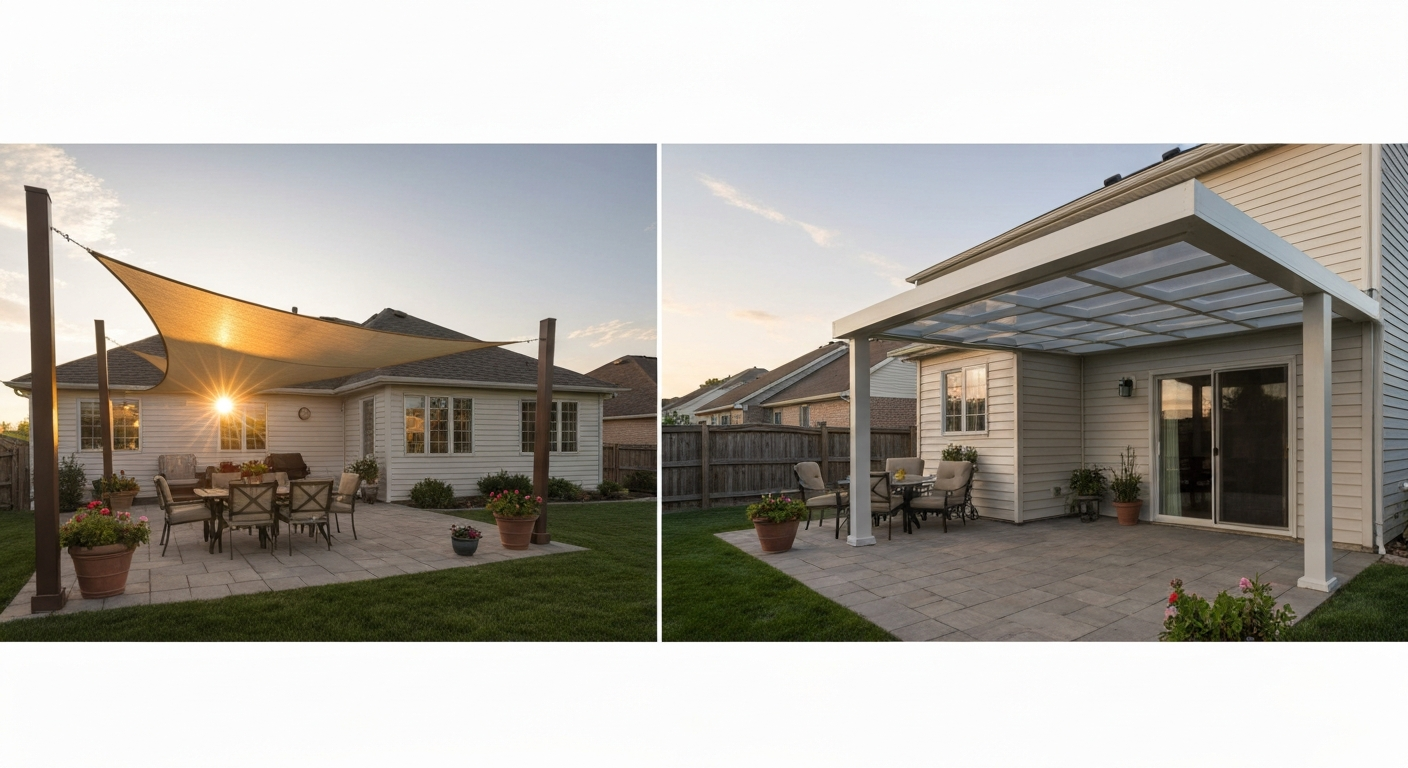
What this guide covers and who it's for
This is written for DIY homeowners, from complete beginners to people who've already tackled a deck or a screened enclosure. If you're comfortable with a drill, a measuring tape, and a level, every project here is within reach. We're covering the full spectrum: quick, removable shade options you can set up in an afternoon, and permanent structures that add real value to your outdoor space. The screened-patio angle runs throughout, so if you're thinking about eventually enclosing your patio fully, the structures and attachment points discussed here are designed to work with that next step.
Temporary vs permanent: pick your path first
Before you buy anything, answer these four questions. Your answers will point you directly at the right category of solution.
- How long do you want it? If you rent, move frequently, or just want to test a shaded layout before committing, go temporary. If you own and plan to stay, a permanent structure pays off in both comfort and home value.
- Do you need rain protection or just UV shade? Shade sails and pergola slats reduce sun but let rain through. Polycarbonate panels, metal patio roofs, and retractable awnings (when extended) give real weather protection.
- What's your budget? Temporary options run $40 to a few hundred dollars for DIY installs. Permanent structures start around $600 for a small kit and climb to $6,000 or more for a full pergola or patio roof.
- Will your HOA or local building department get involved? Permanent structures usually need a permit; temporary fabric shades typically don't. Check before you build anything attached to the house or set in concrete.
| Criterion | Go Temporary | Go Permanent |
|---|---|---|
| Ownership status | Renting or short-term | Own the home |
| Budget | Under $500 | $600 and up |
| Rain protection needed | No (UV shade only) | Yes (waterproof cover) |
| Permit/HOA constraints | Strict HOA, no structures | Permits acceptable, HOA allows |
| Seasonal use only | Yes | Year-round use planned |
| Installation skill | Beginner | Intermediate to experienced |
Reading your site before you spend a dollar
I always tell people to spend one full day observing their patio before buying anything. Walk out at 9 a.m., noon, 3 p.m., and 6 p.m. and note exactly where the sun hits and where the shade falls. A west-facing patio with full afternoon exposure needs very different coverage than a south-facing one that bakes from midday on. A quick sun-path observation tells you the coverage angle and size you actually need, not just what looks good in a product photo.
Sun path and patio orientation
In the Northern Hemisphere, the sun arcs from east to west with a southern bias. South-facing patios get the most prolonged direct sun; east-facing patios catch morning sun; west-facing patios take the harshest afternoon heat. Note your patio's compass orientation and match your shade structure's size and placement to block the worst exposure window. A 10-degree error in sail angle or pergola beam direction can leave a significant gap in coverage during peak hours.
Wind exposure and drainage
Wind is the number-one thing that destroys poorly planned shade structures. Check your prevailing wind direction and think about what happens to a 14-foot shade sail or a pop-up canopy in a 30-mph gust. Shade sails need proper tensioning and removable hardware for storm season. Retractable awnings should be retracted at roughly 20 to 23 mph, and motorized versions can include auto-retract wind sensors to handle that automatically. For hard roofs and pergolas, wind loading is a structural engineering consideration, and in high-wind zones you'll want to verify your footing and fastener sizes against local code or consult a structural engineer.
Drainage matters especially for hard covers. Any solid roof panel needs a minimum slope to shed water without pooling. Polycarbonate and metal panel manufacturers specify this in their installation guides. A good rule of thumb is a minimum 5-degree pitch (roughly 1 inch of rise per foot of run), though some products specify steeper pitches, so always check the manufacturer's documentation.
Attachment points and structural feasibility
If you're attaching anything to your house, you need to locate wall studs, rim joists, or masonry anchors. A ledger board for a pergola or awning bracket must be fastened into solid framing, not just siding. For wood-to-wood connections, use structural lag screws with at least 4 times the lag diameter of embedment into the main member (following NDS guidelines). For masonry, use sleeve or expansion anchors sized per the awning or pergola manufacturer's hardware spec sheet. Probe your eaves and fascia before committing to an attachment location.
Measuring and planning your coverage
Get a tape measure, a notepad, and take these measurements before you look at a single product listing. Buying a shade sail or an awning without measurements in hand is how you end up with something too small or structurally mismatched.
- Coverage area: Measure the length and width of the patio zone you want shaded in feet. Add 1 to 2 feet on each side for overhang where possible.
- Headroom: Measure from the patio surface to the lowest available attachment point (eave, fascia, wall bracket). Most shade sails and awnings need at least 7 feet of clearance below the lowest edge for comfortable use.
- Slope allowance: For shade sails, plan a minimum 20-degree angle from the lowest to highest attachment corner for drainage. For hard panels, calculate rise and run to confirm the minimum pitch.
- Obstructions: Note any gutters, downspouts, light fixtures, or HVAC equipment that fall within or adjacent to the coverage area. These affect where you can mount hardware.
- Post or anchor locations: Sketch a layout showing where posts or wall mounts will go. For freestanding structures, confirm the ground is level or account for grade changes in your post-height calculations.
- Template: Draw a simple overhead sketch to scale (1 inch = 1 foot works fine on graph paper) showing the patio outline, house wall, existing posts or pillars, and your planned shade footprint.
Temporary shading options: what's available and when to use each
Temporary solutions are the fastest, lowest-commitment way to get shade over a patio. They're also the right choice for renters, for seasonal climates where you want to store the shade in winter, or for anyone who hasn't committed to a layout yet. Here's a practical breakdown of what's out there.
Shade sails
Shade sails are triangular or square panels of knitted HDPE (high-density polyethylene) fabric tensioned between anchor points. They're breathable, so air moves through them, but rain also passes through. Most advertise 85 to 95 percent UV block. Retail prices for common household sizes (10 to 16 feet) run about $40 to $200 for the sail itself, with stainless-steel hardware kits running extra. They're one of the best value-to-shade-area options available, and with proper hardware and tensioning they hold up well to normal wind and UV exposure. Remove them before severe weather.
Market and offset patio umbrellas
A freestanding patio umbrella is the simplest, most flexible temporary option. Market umbrellas (center-pole) work well for a dining table. Offset (cantilever) umbrellas let you cover a seating area without a pole in the middle. Quality umbrellas with UPF 50+ fabric and weighted bases can handle light wind, but they need to be closed in any sustained breeze. Expect to spend $80 to $300 for a solid outdoor umbrella with a stable base.
Pop-up canopies and portable frames
Pop-up canopies (the accordion-frame type used at events) can shade a 10x10 or 10x20 foot area quickly. They're not built for permanent use and need to be staked or weighted down to prevent tipping. Most are water-resistant rather than waterproof and will degrade with extended UV exposure, so think of them as a 1 to 3 season solution at most.
Outdoor curtains and shade panels
Outdoor curtains hung from a pergola beam, tension wire, or curtain rod provide side shading and privacy. They don't block overhead sun on their own but work well in combination with a sail or pergola. Look for weather-resistant fabric rated for outdoor use; most residential outdoor curtain fabrics are water-resistant and UV-stabilized. They add a finished, room-like feel to a covered patio and are particularly effective if your sun exposure comes from a low afternoon angle.
Portable pergolas and gazebos
Pre-fabricated portable pergolas and hardtop gazebos are a middle ground. They're freestanding, require no wall attachment, and some models come with polycarbonate or metal roofs that provide real rain protection. Setup takes a few hours and two people. They're not as durable as a built-in structure, but a quality hardtop model can last 5 to 10 years with basic maintenance. Prices range from $300 to $1,500 depending on size and materials.
Permanent shading options: structures that last
Permanent and semi-permanent structures take more planning and investment, but they completely transform how usable a patio is. When you're done, you get a true outdoor room, and if you're planning to eventually add screening or full enclosure, a pergola or lean-to roof is the natural foundation to build on.
Freestanding and attached pergolas
A pergola is an open-beam overhead structure with rafters and optional lattice or slat roof. It creates dappled shade and a defined outdoor space but doesn't block rain. Pergolas can be freestanding or attached to the house with a ledger board. DIY kits for small pergolas start around $600; built-from-scratch projects using 6x6 posts and dimensional lumber vary widely by size. National installed averages run $2,000 to $6,000. For DIY, plan on concrete footings 24 to 36 inches deep (below your local frost line) using 10 to 12 inch diameter sonotubes. Always confirm footing requirements with local code.
Lean-to and patio roof extensions
A lean-to roof attaches to the house on one side and pitches down to posts or a beam at the outer edge. Covered with polycarbonate panels or metal roofing, it provides full weather protection. This is the most functional permanent solution for year-round patio use and it's also the best structural base if you ever want to add screen walls and create a fully enclosed screened patio. It requires a permit in most jurisdictions.
Retractable awnings (manual and motorized)
Retractable awnings mount to the house wall or fascia and extend outward on an arm mechanism. Manual versions use a hand crank; motorized ones retract with a button or automatically via wind sensor. They project 8 to 14 feet from the wall, provide good UV shade and light rain protection when extended, and fully retract to protect the fabric when not in use. Installed costs average about $2,700 (range: $1,000 to $3,500), working out to roughly $15 to $30 per square foot including installation. Angi reports national consumer estimates that typical installed retractable awning projects average about $2,700 (most homeowners $1,000–$3,500), roughly $15–$30 per sq ft including installation, with motorization and full‑cassette housings increasing price materially [How Much Do Retractable Awnings Cost? [2026 Data] — Angi](https://www.angi.com/articles/how-much-do-retractable-awnings-cost.htm). Retract them at wind speeds above 20 to 23 mph to avoid fabric and arm damage.
Polycarbonate and metal patio covers
Polycarbonate multiwall panels are lightweight, UV-stabilized, and transmit diffused light. Most quality products (such as Palram SUNTUF or Lexan Thermoclear) claim more than 99 percent UV absorption on the coated side and carry 10-year limited warranties. Install the UV-coated side facing up (outward), maintain the minimum pitch specified by the manufacturer, and pre-drill with the recommended bit size to allow thermal expansion. Metal patio covers (aluminum or steel) are more opaque and durable; both material types require proper slope (typically at least 5 degrees) for drainage.
Trellis and vine systems
A trellis covered with climbing plants is a long-term, low-cost shading strategy. It takes a growing season or two to reach full coverage, but a mature vine like wisteria, clematis, or a fast-growing annual like morning glory provides substantial overhead shade and significant cooling from transpiration. Trellises work well on south or west-facing pergola sides to block low-angle afternoon sun. The main maintenance consideration is annual pruning and checking that the plant's weight isn't stressing the structure.
How all the options stack up: cost, lifespan, and best use
| Solution | DIY Cost Range | Typical Lifespan | Rain Protection | Permits Usually Needed | Best Use Case |
|---|---|---|---|---|---|
| Shade sail | $40–$200 (+ hardware) | 3–7 years | No (breathable) | No | Quick UV cover, flexible layout |
| Patio umbrella | $80–$300 | 2–5 years | Partial | No | Small dining/seating area |
| Pop-up canopy | $80–$400 | 1–3 seasons | Water-resistant | No | Seasonal, occasional use |
| Portable hardtop gazebo | $300–$1,500 | 5–10 years | Yes (if solid roof) | Usually no | Freestanding, no wall attachment |
| Outdoor curtains | $50–$200 | 2–5 years | No | No | Side shade, privacy, aesthetics |
| Freestanding pergola (kit) | $600–$2,000 DIY | 15–25+ years (wood/aluminum) | No (open slats) | Sometimes | Defined outdoor room, screened-patio base |
| Attached pergola | $800–$3,000 DIY | 15–25+ years | No (open slats) | Yes (most areas) | House-connected patio, enclosure base |
| Lean-to roof extension | $1,500–$5,000 DIY | 20–30+ years | Yes | Yes | Full weather protection, year-round use |
| Retractable awning (manual) | $500–$1,500 DIY install | 10–15 years | Light rain only | Sometimes | Flexible shade, easy retract for winter |
| Retractable awning (motorized) | $1,500–$3,500 installed | 10–15 years | Light rain only | Sometimes | Convenience, auto wind-retract |
| Polycarbonate panel roof | $800–$3,000 DIY | 10–20 years | Yes | Yes | Light transmission + full weather cover |
| Trellis + vines | $100–$500 | Structure 15+ years | Partial (dense vines) | Rarely | Low-cost, natural, long-term shade |
Understanding UPF, UV ratings, and waterproof vs water-resistant
Labels on shade fabrics and panels can be confusing. Here's what the numbers actually mean so you can compare products accurately instead of just trusting marketing copy.
UPF ratings for fabrics
UPF stands for Ultraviolet Protection Factor. It's the textile equivalent of SPF for sunscreen, measured under AATCC Test Method 183 and related standards. A UPF rating tells you the fraction of UV radiation the fabric blocks. UPF 20 blocks about 95 percent of UV; UPF 40 blocks about 97.5 percent; UPF 50 blocks 98 percent or more. For shade sails, look for UPF 50+ if protecting people who spend extended time under them, particularly children. Most quality HDPE knitted shade sails advertise 85 to 95 percent UV block, which corresponds roughly to UPF 20 to 50. When comparing products, ask for the specific UPF test report rather than relying on the percentage on the hang tag.
| UPF Rating | UV Blocked | Protection Category |
|---|---|---|
| UPF 15–24 | 93.3–95.8% | Good |
| UPF 25–39 | 96.0–97.4% | Very Good |
| UPF 40–50+ | 97.5–98%+ | Excellent |
Waterproof vs water-resistant: hydrostatic head explained
Waterproof fabric ratings use a measurement called hydrostatic head, expressed in millimeters (mm). The test (ISO 811 or equivalent ASTM methods) measures how high a column of water a fabric can hold before water penetrates. A rating of 1,500 mm is generally considered the minimum threshold for a fabric to be called waterproof. Ratings of 3,000 to 10,000 mm indicate good to very good performance for sustained moderate rain. Anything above 10,000 mm is intended for heavy, sustained exposure. Most patio canopy and awning fabrics fall in the 1,500 to 5,000 mm range. Water-resistant fabrics (below ~1,500 mm) will shed a light drizzle but let water through under pressure or sustained rain. Always check the hydrostatic head figure in the product datasheet, not just the word 'waterproof' on the label.
What to look for on polycarbonate and rigid panel labels
For polycarbonate panels, the UV protection is built into a co-extruded surface layer, not the fabric UPF system. Look for panels described as 'UV-stabilized' or 'UV co-extruded' with manufacturer documentation. Quality brands like Lexan Thermoclear and Palram SUNTUF publish UV transmission specs and offer 10-year limited warranties on the UV-protective coating. The critical installation point: always install the panel with the UV-protected side facing outward (up). The side is usually marked, and installing it reversed will cause rapid yellowing and degradation.
DIY walkthrough 1: installing a shade sail
This is the most accessible DIY shade project. See our guide on how to make sun shades for patio for step-by-step instructions and material lists. Budget a Saturday morning for a straightforward two-point-to-house installation, or a full day if you're setting new posts. Difficulty: beginner to intermediate.
Materials and tools
- Shade sail (sized for your coverage area, rated UPF 50+ HDPE knit)
- Stainless-steel D-shackles (one per corner)
- Stainless-steel turnbuckles (one per corner for tensioning)
- Stainless-steel pad eye plates or eye bolts (for wall or post mounting)
- 4x4 or 6x6 pressure-treated posts (if no existing anchor points; 6x6 for spans over 12 feet)
- Post-setting concrete (60 lb bags)
- Sonotube forms, 10-inch diameter
- Post-hole digger or power auger
- Drill and masonry or wood bits
- Level, tape measure, string line
- Adjustable wrenches
Step-by-step installation
- Lay out your anchor points using the sketch you made during planning. Aim for a minimum 20-degree angle between the lowest and highest corners for rain drainage.
- For wall-mounted anchors: locate studs or masonry, drill pilot holes, and install pad eye plates using structural lag screws (minimum 3/8-inch diameter, embedded at least 4 times the lag diameter into solid framing) or expansion anchors for masonry.
- For new posts: dig holes at least 24 to 36 inches deep (below your local frost line). Set sonotube forms, pour concrete, and set posts plumb. Allow concrete to cure 24 to 48 hours before loading.
- Mount pad eyes at the top of each post. Position them so the sail edge will sit 7 feet or higher above the patio surface.
- Connect D-shackles to the sail's corner rings. Connect turnbuckles between the D-shackles and the pad eyes, leaving them loose initially.
- Leave 10 to 15 inches of slack per corner when first attaching, as specified in most installation guides. This allows you to tension properly without overstressing the sail or hardware.
- Working from the highest corner to the lowest, use a wrench to tighten turnbuckles gradually and evenly until the sail is taut with no sag. Do not over-tension; the sail should be firm but not drum-tight.
- Check all hardware for tightness and confirm drainage angle. In storm weather or extended high-wind forecasts, detach and store the sail.
Common mistakes and fixes
- Flat installation with no drainage angle: pooled water adds weight and tears the sail. Always set one corner at least 1 foot lower than the others.
- Undersized posts: a 4x4 post can flex and crack under a large sail in wind. Use 6x6 for any sail spanning more than 12 feet.
- Skipping stainless hardware: galvanized hardware will rust and stain in 1 to 2 seasons. Use marine-grade stainless steel throughout.
DIY walkthrough 2: building a simple attached pergola
An attached pergola is the foundation for a proper outdoor room. It can support shade cloth, outdoor curtains, a polycarbonate roof, and eventually screen walls. Plan for a full weekend (two days) with a helper. Difficulty: intermediate. Check permit requirements before starting.
Materials and tools
- 6x6 pressure-treated posts (number depends on span; typical 12x16 ft pergola uses 2 front posts)
- 2x8 or 2x10 ledger board (pressure-treated, length of house attachment span)
- 2x8 or 2x10 beams and rafters (dimensional lumber or LVL for longer spans)
- Post base hardware (Simpson Strong-Tie or equivalent, with through-bolts)
- Ledger board hardware: 1/2-inch lag screws or structural bolts at stud locations
- Concrete and sonotubes (10 to 12 inch diameter, depth per local code)
- Post-hole digger or auger
- Circular saw and miter saw
- Drill, impact driver, bits
- Level, speed square, tape measure, chalk line
- Joist hangers and structural connectors
- Galvanized or stainless framing nails and screws
Step-by-step installation
- Apply for your permit and get it approved before digging. Submit a simple plan drawing showing post locations, ledger attachment, and dimensions.
- Locate the ledger position on the house wall. Remove siding or trim as needed to expose framing. The ledger attaches to the rim joist or wall studs, not to siding alone.
- Install the ledger board using 1/2-inch lag screws or structural bolts into every stud, spaced per the manufacturer spec and local code. Flash the top of the ledger with metal flashing to prevent water intrusion behind it.
- Lay out front post hole locations using batter boards and string lines. Confirm square with the 3-4-5 method: a 3-foot and 4-foot leg of a right triangle should produce a 5-foot hypotenuse.
- Dig post holes to the required depth (24 to 36 inches in most U.S. regions; check local frost line). Set sonotube forms and pour concrete. Set post bases in wet concrete and allow full cure before proceeding.
- Set 6x6 posts in the post bases, plumb them in both directions, and brace temporarily with 2x4 kickers staked to the ground.
- Install the beam across the front posts, secured with post cap hardware. The beam top should be level with or just below the ledger board top.
- Cut and install rafters between the ledger and the front beam, using joist hangers at the ledger end and rafter tie hardware at the beam end. Space rafters 16 or 24 inches on center.
- Add decorative rafter tails or lattice if desired, then inspect all hardware connections before loading the structure.
Troubleshooting tips
- Ledger pulling away from wall: this almost always means the lags missed the framing or the framing was too thin. Probe and re-fasten into solid structure.
- Posts out of plumb after concrete sets: if it's a small deviation, shimming the post base can correct it. More than 1/2 inch off is a problem; reset before the concrete fully cures.
- Rafter crowns inconsistent: always install rafters with the crown (bow) facing up. Gravity and load will flatten them over time.
DIY walkthrough 3: mounting a manual retractable awning
A retractable awning gives you on-demand shade without a permanent structure overhead. Most homeowners with basic DIY skills can mount one in three to five hours with a helper. Difficulty: beginner to intermediate.
Materials and tools
- Retractable awning unit (sized 1 to 2 feet wider than the area you want to cover, to account for projection angle)
- Manufacturer's mounting brackets and hardware
- Stud finder
- Drill and appropriate bits (wood or masonry)
- Level (4-foot recommended)
- Tape measure, pencil
- Adjustable wrenches and socket set
- Ladder (rated for the working height)
- Helper (required for lifting and holding)
Step-by-step installation
- Locate your mounting surface. The awning mounts to the fascia board, a header board, or directly to the house wall. Confirm you're hitting solid framing, not just trim boards or siding.
- Mark bracket positions according to the manufacturer's template, which specifies the exact spacing. Use a level to confirm the bracket line is perfectly horizontal; a tilted awning won't retract smoothly.
- Drill pilot holes and fasten mounting brackets with the hardware provided. For fascia-mounting into wood framing, use the supplied lag screws. For masonry walls, use expansion anchors of the size specified by the manufacturer.
- With your helper, lift the awning cassette and hook it onto the mounting brackets. Most designs use a hook-and-lock or slide-in system. Do not support the full weight yourself during this step.
- Lock the brackets and confirm the unit is level. Adjust pitch using the awning arm adjustment bolts (most arms allow 5 to 35 degrees of pitch adjustment; set to 15 to 25 degrees for best water runoff during light rain).
- Extend the awning fully using the crank. Check that both arms extend evenly and the fabric is taut without bunching or uneven tension. If one arm leads the other, adjust the spring tension per the manufacturer's manual.
- Retract and extend several times to confirm smooth operation. Apply silicone lubricant to the arm pivot points if specified in the manual.
- Set the stop points for full extension and full retraction per the manufacturer's instructions. Always retract the awning at sustained winds above 20 mph to avoid arm and fabric damage.
Common issues and fixes
- Uneven extension (one arm leads): spring tension is out of balance. The manual crank shaft usually has a tension-adjustment access point; make small adjustments and test.
- Fabric bunching at the front bar: the pitch angle is too low. Increase arm pitch to at least 15 degrees.
- Awning vibrating in light wind: the fabric isn't tensioned tightly enough, or pitch is too low. Increasing pitch reduces flutter.
Permits, HOA, and wind safety: don't skip these
Any permanent structure attached to the house or set in concrete footings almost always requires a building permit. This includes pergolas, lean-to roofs, and fixed patio covers. Freestanding temporary structures typically don't require permits, but check with your local building department because rules vary significantly by municipality. HOAs add another layer: even a shade sail can violate rules about visible hardware or color. Get written HOA approval before purchasing materials.
For wind safety, ASCE 7 is the U.S. engineering standard that governs how wind loads are calculated for attached and freestanding canopy structures. DIYers building in high-wind zones (coastal areas, open plains, hurricane-prone regions) should either use pre-engineered kits designed for their wind zone or consult a structural engineer before building. The cost of an engineering review (typically $200 to $500) is far less than the cost of a structure failing in a storm.
Maintenance and seasonal care
Every shade structure needs some seasonal attention to stay safe and perform well. Here's a simple checklist to run through at the start and end of each season.
- Shade sails: inspect turnbuckles and shackles for corrosion; retighten after the first season as fabric stretches; remove and store in cold climates before first frost.
- Pergolas: check all post bases and ledger hardware for rust or loosening; re-tighten any hardware that has shifted; treat wood with UV-protective sealant every 1 to 2 years.
- Retractable awnings: clean fabric with mild soap and water; lubricate arm pivot points; fully retract and lock before any storm; inspect fabric for UV degradation or small tears annually.
- Polycarbonate panels: clean with mild soap (avoid abrasive cleaners that scratch the UV coating); inspect panel fasteners and sealant at the ridge and wall flashing annually; replace any fasteners that have backed out.
- All fabric products: check for mold or mildew at the start of each season; treat with a diluted white vinegar solution or a commercial mildew remover safe for outdoor fabric.
Design and integration with screened patios
If you're thinking beyond just shade, the structures described here are the natural first step toward a fully screened or enclosed patio. An attached pergola or lean-to roof gives you the overhead structure to hang screen panels or install a screen system on. A solid polycarbonate or metal roof extension is essentially the shell of a screened room waiting for its walls. When you're at the design stage, it's worth planning attachment points and post spacing with a future screen enclosure in mind, even if you're not ready to enclose it now. Spacing posts no more than 8 feet apart, for example, makes it much easier to add screen framing later without structural modifications.
For the shading itself, think about layering. A pergola handles the overhead sun; outdoor curtains on the west side handle low afternoon angles; a ground-level screen or privacy fence manages reflected heat from pavement. Combining two or three of these elements at different levels produces a genuinely comfortable outdoor room without needing a full enclosure. That combination approach, shading the patio from multiple angles while keeping it open and breezy, is often more comfortable than a fully enclosed space in hot climates.
If you want to go further with full sun blocking or explore built shading structures in more depth, the site also covers topics like how to build a shaded patio from the ground up, strategies for how to shade a sunny patio with layered approaches, and options for how to make sun shades for a patio using custom fabric panels. Each of those digs deeper into specific aspects of what we've covered here, so if one section of this guide sparked an idea, those are good next reads.
FAQ
What are the main categories of patio sun‑cover options for DIY homeowners?
Two practical categories: temporary (shade sails, market/offset umbrellas, pop‑up/event canopies, outdoor curtains, portable roller/zip screens, vine trellises) and permanent/semi‑permanent (attached/lean‑to or freestanding pergolas, retractable awnings manual or motorized, fixed polycarbonate/metal patio covers, louvered pergolas, screened enclosures). Choose temporary for low cost/flexibility; permanent for long‑term performance, weather protection and higher resale value.
How do I assess my site before choosing a shading solution?
Steps: 1) Observe sun path across multiple times/dates or use a sun‑path app to mark high‑sun hours and seasonal differences. 2) Note patio orientation (N/S/E/W), peak sun hours and where shade is needed. 3) Measure prevailing wind direction and typical wind speeds; check for gusts. 4) Inspect drainage slopes, downspouts and where water will run off a cover. 5) Identify attachment points (house ledger, fascia, existing posts, nearby trees) and locate underground utilities. 6) Check HOA and local permitting requirements and local frost depth/footing rules. Record measurements and constraints before design.
What measurement and planning steps ensure an accurate DIY build?
Measure: 1) Finished usable patio area (length × width) and heights (door thresholds, eaves). 2) Clearance to roof overhangs, gutters, windows and doors. 3) Desired coverage area plus 6–12 in extra for tensioning (sails) or overlap/fasteners (awnings/panels). 4) For attached options measure ledger height and structural backing (sheathing, studs). Plan: sketch to scale, mark post locations, calculate roof pitch/drainage slope (polycarbonate needs minimum slope per manufacturer), and size posts/footings to local frost depth and load. Always confirm with local code if unsure.
What performance ratings should I compare between shading materials?
Key ratings: UPF (textiles) — maps to % UV blocked (e.g., UPF 20 ≈ 95% UV blocked; UPF 50 ≈ ≥98%). Hydrostatic head (mm) — waterproof/resistance for fabrics: ~1,500 mm = minimum water resistance; 3,000–10,000 mm = good to very good. Polycarbonate panels — look for 'UV‑stabilized' coating and manufacturer's UV transmission data (many claim >99% UV block on coated side). Wind rating guidance — manufacturer max operational wind (often ~20–30 mph for awnings; sails and umbrellas have lower safe thresholds). Ask for the test standard (AATCC for UPF; ISO/ASTM for hydrostatic head) on spec sheets.
Which DIY projects will I get full walkthroughs for in this article?
Three full DIY walkthroughs provided: 1) Shade sail installation (small/medium residential sail with new posts). 2) Attached pergola / lean‑to roof (wood pergola kit or custom with ledger attachment). 3) Retractable awning (DIY mounting of a prefabricated manual or motorized unit). Plus a shorter walkthrough for a shade screen/roller installation and troubleshooting tips for each.
What materials, tools and typical costs should I plan for a shade sail DIY?
Materials: knitted HDPE shade sail (85–95% UV block common), stainless steel hardware kit (turnbuckles, D‑shackles, pad eyes), posts (4x4 for small, 6x6 or galvanized steel poles for larger spans), concrete for footings, post anchors/sonotubes. Tools: post hole digger or auger, level, tape, ratchet/wrench set, drill, measuring tape, gloves. Cost range: sails $40–$200; hardware/fasteners $40–$150; posts/poles and concrete $100–$400 depending on size — typical DIY total $200–$800. Anchoring/wind: leave 10–15 in slack allowance per corner for tensioning, angle one corner lower for drainage, remove in extreme weather.
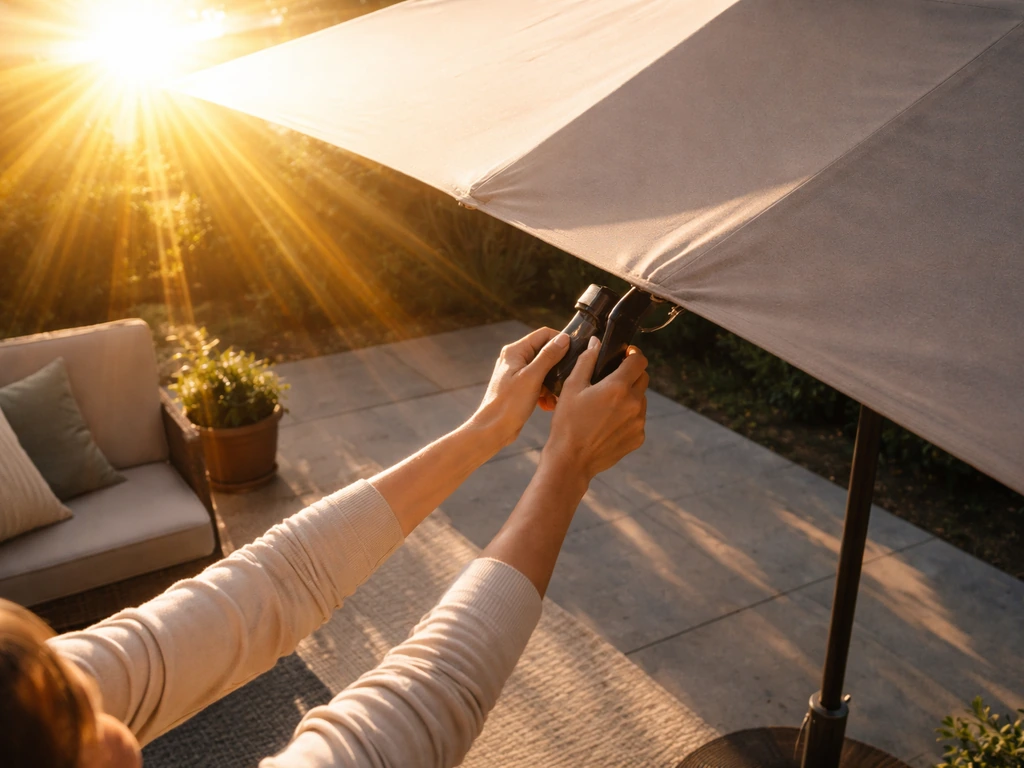
Step-by-step patio shade options to block sun and glare, compare costs and DIY effort, and choose based on sun angles.
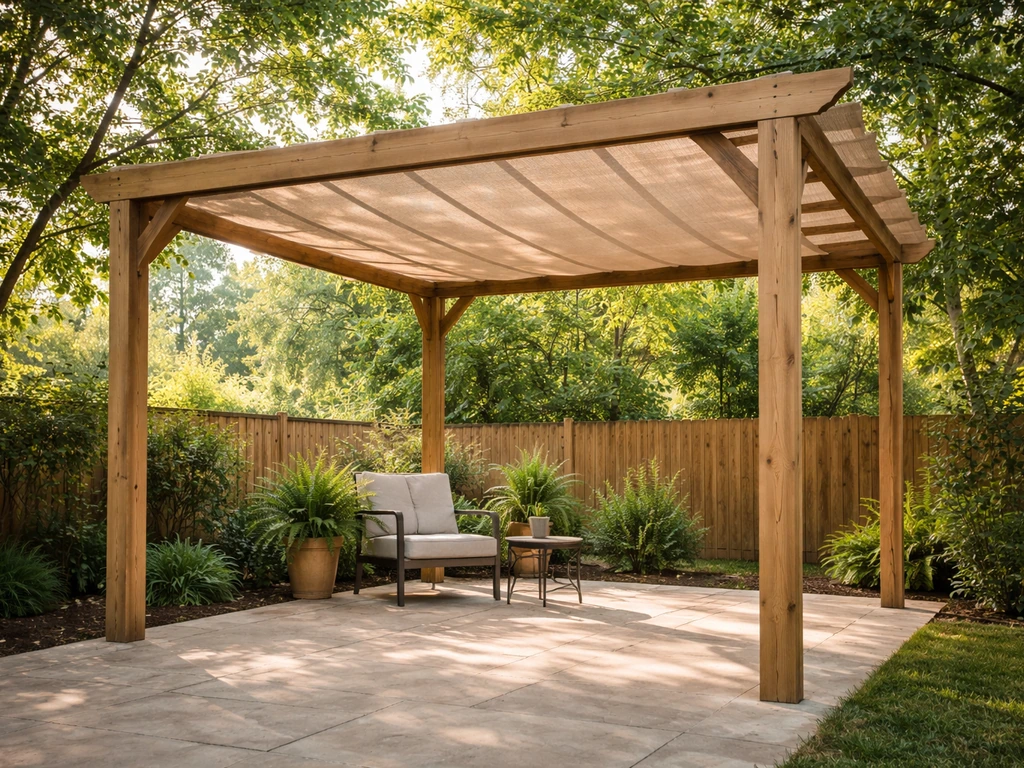
Step-by-step DIY plans to build patio shade, size it right, anchor safely, weatherproof, finish, and maintain year-round
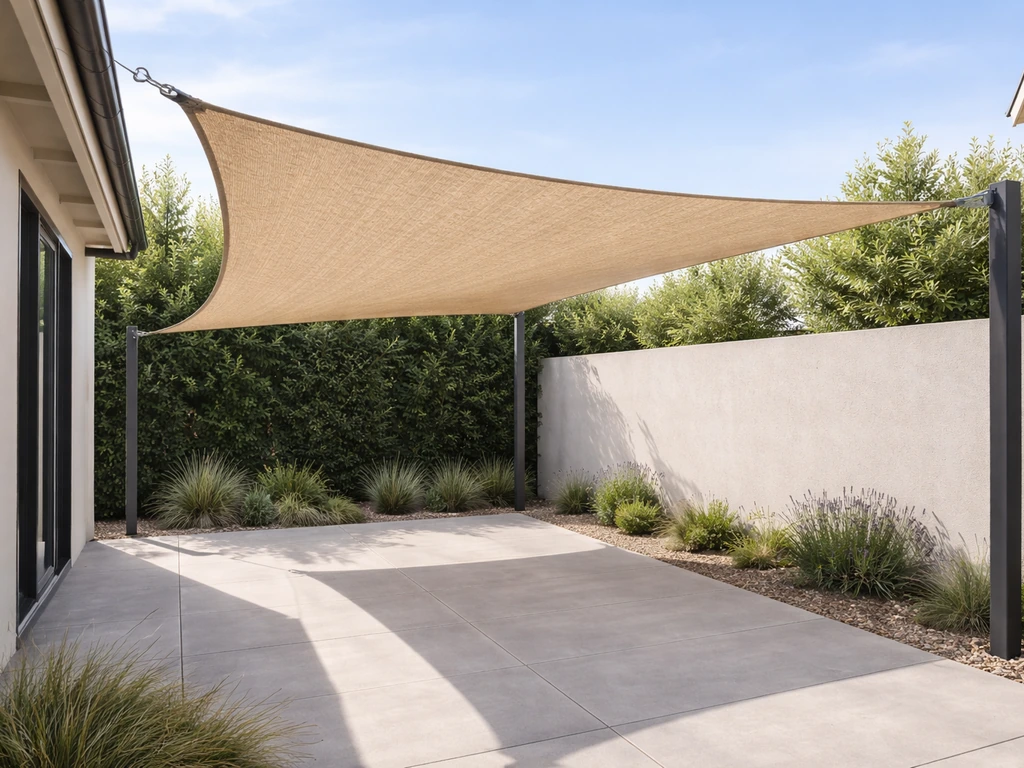
Step-by-step guide to build and mount DIY patio sun shades, with measurements, materials, tensioning, and weatherproofin