
You can hide an air conditioner on your patio with a freestanding screen, a framed lattice panel, a planter and green screen combo, a trellis with climbing plants, or a custom ventilated cabinet. Every one of those options works well as long as you leave the right clearances around the unit, keep the service panel reachable, and never block the airflow direction your manufacturer specifies. Get those three things right and the condenser stays cool, efficient, and under warranty, while your patio looks like you actually planned the layout.
How to Hide Air Conditioner on Patio: DIY Screens, Enclosures

Felix Brennan
13 Jul 2026
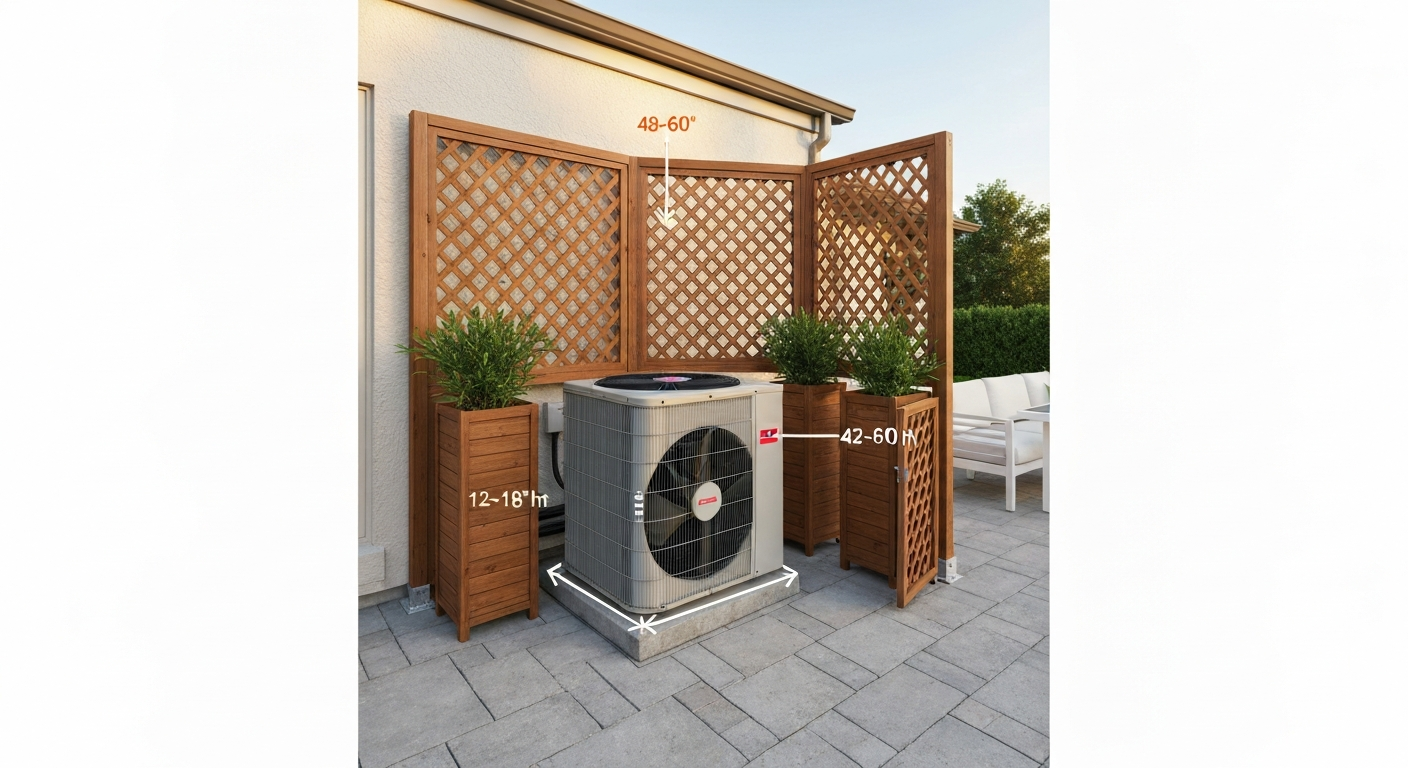
Why bother hiding the condenser at all?
The honest answer is two-part: looks and safety. An exposed condensing unit sitting two feet from your patio chairs is loud, visually cluttered, and a magnet for curious kids or pets who can bend the delicate aluminum fins just by brushing against them. A good enclosure or screen solves all of that. It ties the unit into your patio's design, muffles some of the operational hum, and creates a physical barrier so people and pets stay clear of the fan.
There is also a practical maintenance angle. An enclosure can reduce debris accumulation around the coils, which means less cleaning in fall. On a screened patio, tying your AC concealment into the overall enclosure design makes the whole space feel more intentional, like a proper outdoor room rather than a backyard utility closet. The same thinking applies when you are hiding an outdoor grill or disguising a drain cover nearby: when individual eyesores get addressed together, the patio transforms.
Decisions to make before you pick up a single board
Skipping the planning stage is the number-one mistake I see. Spend 20 minutes here and you will avoid rebuilding the whole thing two months later.
Pull out the installation manual
Every major brand, Trane, Carrier, Lennox, Goodman, Rheem, publishes a model-specific Installation and Operation Manual (IOM). That document has exact clearance numbers, airflow diagrams, pad and anchoring requirements, and explicit warnings about what will void the warranty. If yours is lost, search the model number on the manufacturer's website and download the current IOM. This document is your blueprint. Everything you build needs to respect it.
Measure your existing unit first
Record the height, width, and depth of the unit, plus the location of the service panel (usually a removable cover on one side), the condensate drain line, the refrigerant lines, and the electrical disconnect. Note which direction the fan discharges air, typically straight up through the top grille, though some horizontal-discharge models exist. Knowing the discharge direction is critical because you cannot obstruct it regardless of how attractive the enclosure looks.
Check HOA rules and local permits
Many HOA agreements require pre-approval for any structure visible from the street or neighboring property, and some municipalities treat a permanent enclosure as an accessory structure that needs a building permit. The International Mechanical Code, which most local jurisdictions adopt, also requires that any work touching the disconnect, drain line, or refrigerant connections be permitted and inspected. Consult local AHJ pages, for example, Seattle Services Portal, permit application listings (example AHJ/permit enforcement for HVAC), for project‑specific permit triggers and submittal requirements, since municipal permit offices enforce HVAC/mechanical permit and code requirements Seattle Services Portal — permit application listings (example AHJ/permit enforcement for HVAC). A freestanding removable screen is almost never a permit trigger. A bolted, permanent enclosure sometimes is. Call your local building department before you build anything that attaches to the house or sits on a concrete pad you are pouring for the first time.
Clearance rules and how to measure them without guessing
Airflow restrictions are where DIY AC enclosures go wrong. The condenser pulls outside air through the side coils and exhausts it upward through the fan. Anything that slows down that air exchange forces the compressor to work harder, raises head pressure, reduces efficiency, and can shorten the compressor's life. Here are the minimum clearances that appear across most residential condenser manuals.
| Side / Location | Typical Minimum Clearance | Why It Matters |
|---|---|---|
| Coil inlet sides (air intake) | 12–18 inches | Allows free airflow into the coil; check your specific IOM |
| Back of unit | 6–12 inches (some models allow 6" on bracket-mounted units) | Varies by model; Lennox IOMs sometimes allow 6" when other sides are open |
| Service panel side | 24–36 inches | NEC 440.14 and manufacturer IOMs require readily accessible, unobstructed disconnect and service access |
| Top (discharge) | 48–60 inches of clear vertical space above the fan | Recirculated exhaust air kills efficiency fast; never build a roof over the fan without engineered baffles |
| Around refrigerant/electrical lines | Enough to route and remove without bending | Lines need a clear path; sharp bends crack refrigerant tubing |
The service panel clearance is not just a comfort thing. NEC Article 440.14 requires a disconnecting means within sight of the equipment and readily accessible. NEC (NFPA 70) Article 440 requires a disconnecting means within sight of the equipment and explains when a cord-and-plug may be used as the disconnect (440.13) versus when a permanent hardwired disconnect is required (440.14) NEC (NFPA 70) Article 440 requires a disconnecting means within sight of the equipment and explains when a cord-and-plug may be used as the disconnect (440.13) versus when a permanent hardwired disconnect is required (440.14).. That means your enclosure must allow a technician to reach and operate the disconnect without removing fasteners or moving heavy objects. Design a hinged or removable panel on that side from day one.
The cardboard template method
Before cutting any wood or buying materials, cut cardboard strips to the minimum clearance widths from your IOM and tape them to each side of the unit. Stand back. Those strips show you exactly where your enclosure walls, planters, or screens have to stop. Photograph it. Use that photo when you are shopping for materials or drawing your plan. This takes about 10 minutes and eliminates almost every clearance mistake.
Your five main concealment options at a glance
Here is a quick comparison of all five approaches so you can pick the one that fits your patio, budget, and skill level before diving into the build steps.
| Option | Estimated Cost (materials) | Difficulty | Best For | Airflow Risk |
|---|---|---|---|---|
| Freestanding temporary screens/panels | $40–$150 | Beginner | Renters, quick fixes, testing layouts | Low if panels are open-slat or mesh |
| Framed lattice or slatted screen | $80–$250 | Beginner–Intermediate | Permanent-looking but removable solution | Low; lattice passes airflow well |
| Planter box + green screen | $100–$350 | Beginner | Patios with garden space; slow build-out is fine | Low if planted at proper setback |
| Trellis with climbers | $60–$200 | Beginner | Natural look; fences or walls nearby | Low; open structure allows airflow |
| Custom ventilated cabinet/enclosure | $200–$600+ | Intermediate–Advanced | Clean, integrated look; permanent patio setup | Medium; must be engineered correctly |
Option 1: Freestanding temporary screens and removable panels
This is the fastest, cheapest, most forgiving approach and a great starting point if you have never done any outdoor building. You are essentially making a three-sided screen that wraps around the unit and sits on the patio surface, held upright by its own weight or ground stakes.
What you need
- 3 or 4 pre-made cedar or composite privacy screen panels (typically 4'x4' or 4'x6')
- Panel connector hinges or flat corner brackets (hot-dip galvanized per ASTM A153 or stainless steel)
- Ground stakes or sandbag feet for stability
- Tape measure, pencil, drill, and a level
Build and placement steps
- Use your cardboard template to mark the minimum clearance zone on the patio with chalk or painter's tape.
- Decide on a three-sided or U-shape layout. The open side should face the least visible direction or the service panel side, whichever is more important for your setup.
- Connect panels at corners using hinges or corner brackets so the assembly can fold flat for storage or maintenance.
- Place the assembled screen outside your chalk marks. Double-check that every side clears the IOM minimum.
- Stake or weight the base. On a hard patio surface, rubber-footed sandbag weights work without drilling. On soil or grass, 12-inch ground stakes driven through frame feet hold well.
- Leave the top fully open. Do not lay a board, tarp, or lid across the top of the unit.
Slatted or louvered panels work better here than solid panels. A solid flat fence panel right at the minimum clearance distance will starve the coil of airflow more than an open-slat design at the same distance. If you have to use solid panels, push them a bit further out than the IOM minimum to give yourself a buffer.
Option 2: Framed lattice or slatted screen
A framed lattice screen looks more permanent and polished than a folding panel, and the open diamond or square pattern of the lattice lets air pass through freely. This is probably the most popular DIY approach on screened patios because it matches common patio framing aesthetics.
Measuring and planning the frame
Plan for three sides (front and two sides, leaving the service panel side fully open or fitted with a hinged removable panel). Each screen panel frame should be built from 2x4 pressure-treated lumber for the posts and 1x3 or 1x4 PT lumber for the rails. Cut lattice sheets to fit inside the frame, leaving about a half-inch gap all around so the lattice can expand without buckling in heat.
Framing and fastening
- Cut 4x4 PT posts to your desired height (typically 6–8 inches taller than the unit, never taller than the discharge fan clearance allows).
- Set posts in post anchors bolted to the patio surface, or set them in concrete footings if the installation is permanent. Do not anchor posts through the unit's pad.
- Build a rectangular frame between posts using 2x4 top and bottom rails. Use galvanized structural screws or joist hanger nails (stainless steel 316 grade in coastal climates).
- Cut vinyl or wood lattice panels to fit inside the frame and staple or pin them in with 1x2 stop strips on both faces.
- On the service panel side, build a matching frame but hinge the entire panel to one post so it swings open like a gate. A gate latch keeps it closed during normal use.
- Check that all three sides clear your IOM minimums and that the hinged access panel swings fully open without hitting anything.
For materials: vinyl lattice outlasts wood in humid climates and does not need painting or staining. Cedar lattice looks warmer and weathers gracefully but needs a coat of exterior sealant every two to three years. Composite lattice panels exist but are heavier and can sag in large spans.
Option 3: Planter boxes and a green screen
Tall planters arranged around three sides of the unit look completely natural, especially on a covered or screened patio with other potted plants. For related guidance on electronics in similar outdoor settings, see our piece on whether you can put a regular TV on a covered patio which covers mounting, weatherproofing, and ventilation considerations can you put a regular tv on a covered patio. The plants themselves eventually form the screen. This approach is slow to fill in but requires almost no carpentry.
Pots versus in-ground planting
On a patio, large container planters (24-inch diameter or larger) are almost always the right choice. They sit at the clearance line, can be moved when a technician needs access, and do not produce roots that creep under the unit pad or into the condensate drain. In-ground plantings adjacent to a concrete pad work for yard-mounted units but require root barriers and much more attention to long-term growth to prevent clearance violations in year three or four.
Plant selection
Choose plants that top out at a controlled height and do not spread aggressively. Good options include ornamental grasses like Miscanthus or Pennisetum (3–5 feet tall, clumping habit), columnar evergreen shrubs like 'Sky Pencil' holly or columnar arborvitae, or ornamental bamboo in a root-barrier pot. Avoid plants with large lateral spread, heavy seed production that can clog coils, or root systems known to crack concrete. Your local cooperative extension office is the best free resource for species suited to your climate and growth rate predictions.
Irrigation and root control
Water that drips from overhead irrigation or self-watering containers can wash soil and debris into the condenser's base. Keep drip emitters aimed at the root zone and away from the unit. If your patio already has a condensate drain line running nearby (the IMC requires a minimum 3/4-inch line sloped at least 1/8 inch per foot to an approved receptor), make sure your planter drainage does not dump onto or across that line.
Option 4: Trellis with climbing plants
A trellis-and-climber setup is the most visually striking option, and it is surprisingly simple to build. You are installing a lightweight open-frame structure just outside the clearance zone, then training vines or climbing plants up it to create a living wall.
Building the support
- Set two 4x4 PT posts in post-base anchors, one on each front corner of the clearance zone.
- Span horizontal 1x4 rails between the posts at 12-inch vertical intervals. Use galvanized structural screws.
- Add vertical or diagonal 1x2 slats between the rails to give climbers more contact points.
- Leave the top open so discharge air is completely unobstructed.
- If you want side screening too, build matching lightweight trellis panels on each side, again staying outside your clearance lines.
Planting and training
Plant container-grown climbers at the base of each post. Good choices for heat tolerance near a condenser include Confederate jasmine, climbing roses on a thick cane base, or climbing hydrangea for shade-heavy patios. Avoid very vigorous, self-clinging types like English ivy or Virginia creeper that will eventually grow into the coil fins if left unattended for a season.
Seasonal training and maintenance
Twice a year, in spring and fall, trim any growth that has reached within 12 inches of the unit. Tie back any branches that are heading toward the coil surfaces. In climates with freezing winters, some climbers die back significantly, which is actually a benefit: it gives you easy access to inspect and clean the unit before the cooling season starts.
Option 5: Custom ventilated cabinet or enclosure
This is the most involved build but produces the cleanest, most integrated result. A well-built ventilated enclosure looks like a piece of patio furniture, not a utility box. It takes a weekend to build and requires intermediate carpentry skills, but nothing beyond what you would need to build a raised garden bed or a simple deck.
Framing the enclosure
- Build a rectangular frame from 2x4 pressure-treated lumber. The footprint should place all four walls outside the IOM clearance minimums, which typically means 12–18 inches from the coil faces and 24–36 inches from the service panel.
- Frame the top as a separate open lattice or louvered cap, not a solid lid. The fan discharges upward and that airflow must be completely free.
- Clad the exterior with cedar or composite siding boards, spaced 1/2 to 3/4 inch apart (slatted, not solid). This spacing allows cross-ventilation while blocking sightlines. Calculate the total open area of the slats: it should be at least 25% of each wall's total area as a working minimum.
- For the service panel side, build a full-height hinged door. The door must open at least 90 degrees and provide the clearance required by NEC 440.14 and your IOM.
- Anchor the frame to the patio surface with post-base hardware and concrete anchors, not directly to the unit or its pad.
Venting the enclosure properly
This is the critical part. An enclosure that recirculates the warm discharge air back into the intake coils will hammer your system's efficiency and potentially trigger high-pressure lockouts. The airflow path must move in one direction: fresh air in through the sides, hot air out through the top. To encourage this, keep the top cap as open as possible (a slatted or louvered top with at least 50% open area works well), and make sure the front and side slats are aligned horizontally so air flows inward rather than being deflected down.
Anti-vibration measures
Condensers vibrate at low frequencies during operation. If any part of your enclosure contacts the unit or its pad, that vibration transmits directly into the frame and becomes airborne noise, often louder than the unit itself. Leave a gap of at least 1 inch between the enclosure and the unit. Place rubber isolation pads under any frame members sitting on the same concrete pad as the unit. For the door side, use rubber bumper stops rather than rigid latches if the door could swing into contact with the unit.
Fasteners and material durability
For an outdoor enclosure that will last more than a couple of seasons, use hot-dip galvanized fasteners meeting ASTM A153 for structural connections, or stainless-steel 316-grade screws and bolts if you are in a coastal or high-humidity environment. Do not use standard zinc-plated drywall screws outdoors. They corrode within a single wet season, stain the wood, and structurally fail faster than you expect.
Noise reduction: what actually works
Manufacturers like Carrier and Rheem publish measured sound pressure levels in their product data, typically in the 68–76 dB(A) range for residential split-system condensers. A solid barrier placed between the unit and a listener can reduce perceived sound levels by 5–10 dB(A) depending on height, distance, and material density. That is a noticeable improvement but not silence. The mass-law principle in acoustics says that a heavier, denser barrier reduces more sound. A solid masonry or concrete wall works better than a slatted wooden screen, but a solid wall that violates your clearance minimums is worse than the noise.
The practical takeaway: place your enclosure or screen on the neighbor-facing side of the unit if noise toward a property line is the primary concern. This blocks the direct sound path without necessarily surrounding the unit on all sides. Even a modest barrier at the clearance line can bring the unit's sound exposure toward the EPA's historic recommended outdoor residential target of around 55 dB(A) DNL at typical residential distances.
Coordinating the AC screen with other patio features
On most patios, the condenser is not the only eyesore. For help planning placement of entertainment features alongside the condenser, see our guide on how to watch TV outside on your patio. If you are also dealing with exposed extension cords running to outdoor appliances, a visible drain cover nearby, or a freestanding grill that needs a designated spot, plan all of those together so your solutions do not conflict.
Keep the grill at least 24 inches from any combustible screening or enclosure material you build, following both standard grill manufacturer clearance recommendations and the International Fire Code's requirements for outdoor cooking appliances near combustibles. For tips on anchoring and positioning your grill safely on a patio, see guidance on how to secure a grill to your patio. A lattice or cedar screen can ignite if grease flares up close by, so position your grill zone before you finalize the AC screen layout. Similarly, any extension cords running to outdoor appliances near the unit should be routed in weatherproof cord covers or raceways rather than lying across the patio floor where they become tripping hazards around the enclosure.
Seasonal maintenance and troubleshooting
Spring startup checks
- Remove any enclosure panels or screens and visually inspect the coil fins for damage, debris, or plant matter that may have grown in over winter.
- Check that all clearances still meet the IOM minimums (plants grow, panels shift).
- Inspect the condensate drain for clogs. The IMC requires a minimum 3/4-inch line with at least 1/8-inch per foot slope to an approved receptor. A clogged drain is the most common start-of-season service call.
- Confirm the electrical disconnect is accessible and functioning before turning the system on.
- Look for pest activity inside any cabinet or enclosure. Rodents nest in enclosed spaces over winter and can chew refrigerant line insulation.
Signs your enclosure is hurting performance
- The unit runs continuously without reaching the set temperature on mild days (possible restricted airflow or recirculation).
- You hear the compressor short-cycling or tripping a reset (high-pressure lockout from overheating).
- Energy bills are noticeably higher since you installed the screen.
- The enclosure feels noticeably warm to the touch near the top on operating days (hot air is being trapped).
If you see any of those signs, remove or open up the enclosure temporarily and see if performance improves. If it does, the enclosure needs more open area or more distance from the unit. Do not ignore a performance problem and assume it will resolve itself.
Quick-reference build checklist
- Download the IOM for your exact condenser model and note every clearance dimension.
- Use the cardboard template method to mark clearance zones on the patio before buying materials.
- Check HOA covenants and call your local building department if you plan any permanent, anchored structure.
- Design a removable or hinged panel on the service side to satisfy NEC 440.14 disconnect access requirements.
- Choose slatted, louvered, or lattice surfaces rather than solid panels on any side facing a coil inlet.
- Leave the top completely open or use a louvered cap with at least 50% open area.
- Use ASTM A153 hot-dip galvanized or 316 stainless-steel fasteners throughout.
- Gap the enclosure frame from the unit and its pad by at least 1 inch; use rubber isolation pads to prevent vibration transfer.
- Inspect clearances every spring and after any major plant growth or landscape change.
- Document the installation for your HVAC service records and HOA files.
FAQ
What primary manufacturer documents should I consult to ensure safe, warranty‑compliant concealment of a patio condenser unit?
Manufacturer Installation/Owner Manuals (IOMs) and product data sheets from the specific condenser brand/model (Trane, Carrier, Lennox, Goodman/Amana, Rheem, etc.). These publish model‑specific minimum clearances, service access dimensions, pad/anchoring guidance, allowable reductions (if any), and published sound levels. Use the exact model IOM as the authoritative baseline for clearance, elevation, anchoring, condensate routing, and warranty cautions; quote and document relevant pages when designing a screen or enclosure.
Which electrical and mechanical codes directly affect how I can hide a condenser on a patio?
National Electrical Code (NEC / NFPA 70) — especially Article 440 (440.13/440.14) for disconnecting means and whether a cord/receptacle is permitted. International Mechanical Code (IMC) and International Plumbing Code (IPC) — especially condensate disposal, drain sizing, slope, and secondary drain/overflow device requirements. Local jurisdictions adopt these model codes with amendments, so always verify the locally adopted editions and amendments with your AHJ/permit office.
Why must I contact my local AHJ or permit office before building a screen or enclosure?
Local AHJs enforce adopted mechanical/electrical codes, issue permits for HVAC work or relocations, and may have zoning/HOA rules limiting alterations. They confirm whether a mechanical permit is needed, applicable code editions, required inspections, and whether your planned screening conflicts with setback, fire‑safety, or utility requirements. Early contact prevents code violations that could require removal or costly rework.
What industry technical references explain how screening or barriers affect airflow and performance?
ASHRAE Handbook chapters on unitary air conditioners and heat pumps and ACCA best‑practice guidance. These resources explain the thermodynamic and airflow consequences of recirculating discharge air, reduced inlet area, and the relationship between airflow restriction and capacity/efficiency. Use these to justify clearance decisions and to evaluate tradeoffs when designing partial screens or trellises.
Which sources provide sound data and methods to estimate noise reduction from screens or barriers?
Manufacturer product data sheets publish measured outdoor sound pressure levels (dB(A)) by model. For prediction methods use acoustical engineering references and standards (ISO 12354 family, ASA/Acoustical Society papers) and community guidance (WHO noise guidelines, historical EPA benchmarks). Combine model sound emissions with barrier mass‑law and insertion‑loss estimation methods to predict expected decibel reduction from screens, walls, or plantings.
What standards or guidance should I use to select fasteners and materials for exterior screens near an AC unit?
ASTM standards for corrosion protection (e.g., ASTM A153 for hot‑dip galvanizing) and guidance specifying stainless‑steel grades (316/316L) in coastal or high‑chloride exposures. Manufacturer IOMs may specify anchorage or fastener types for bases/brackets. Use corrosion‑resistant hardware and finishes appropriate for local climate to avoid premature failure and rust staining on the condenser or patio.
Next Articles
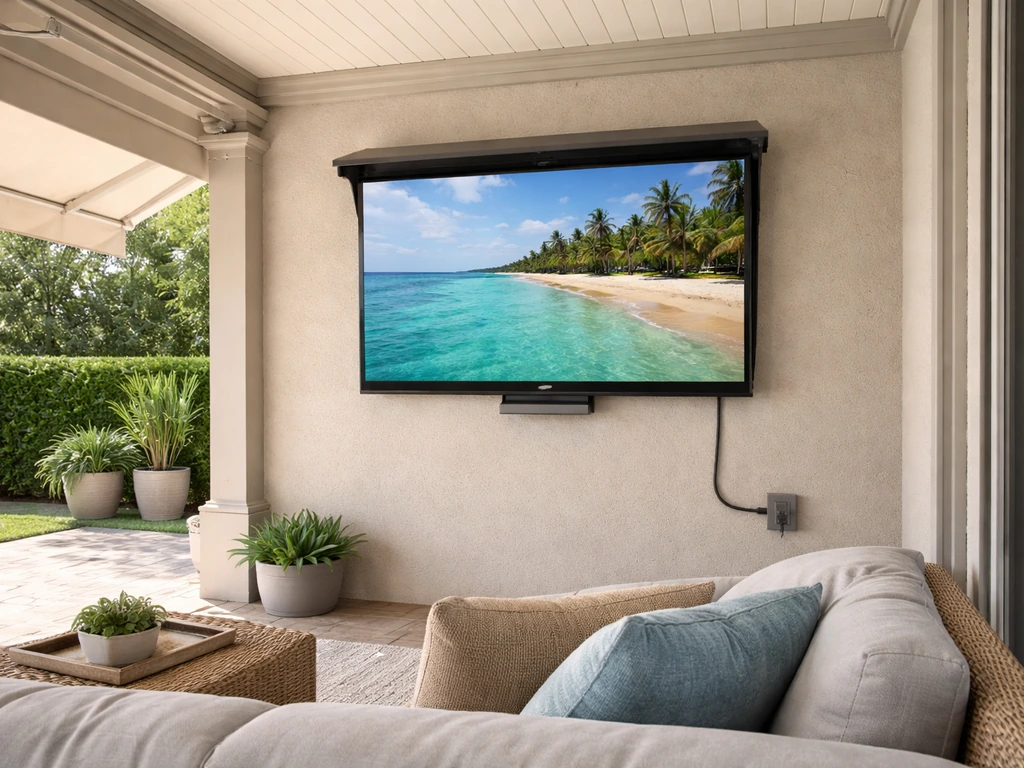
How to Watch TV Outside on a Patio: Setup Guide
Practical patio TV setup for outdoor viewing, covering weatherproofing, mounting, glare control, power, Wi‑Fi, and maint
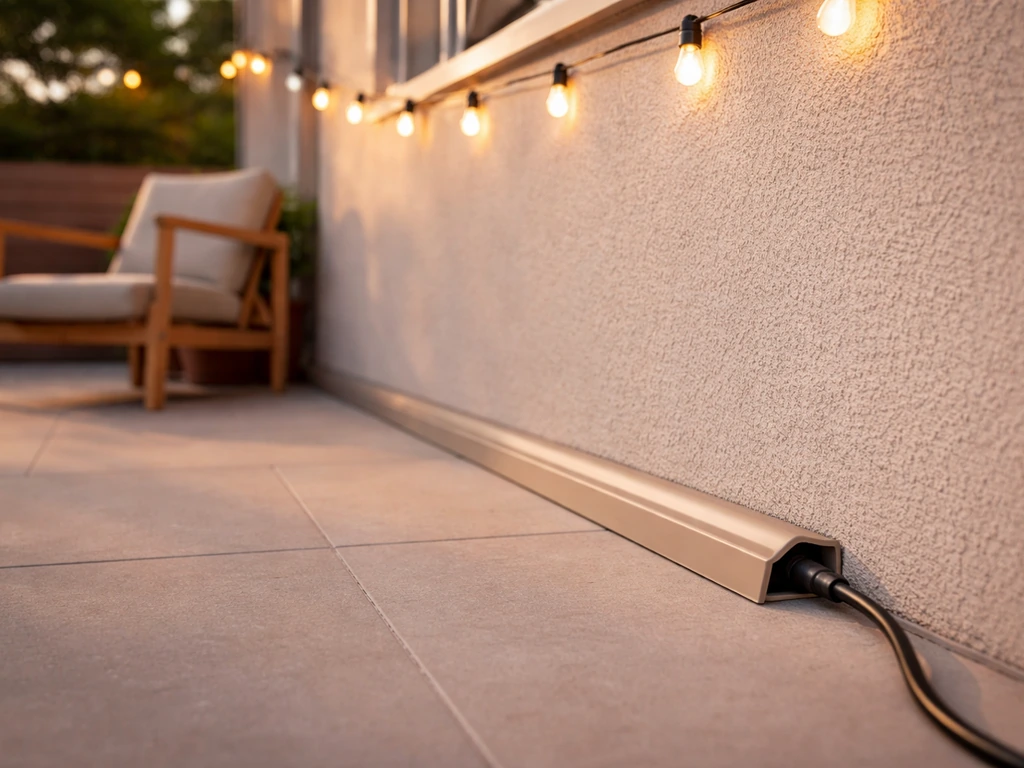
How to Hide Extension Cords on a Patio Safely
DIY guide to hide patio extension cords safely with cord covers, raceways, enclosures, and proper outdoor-rated setup fo
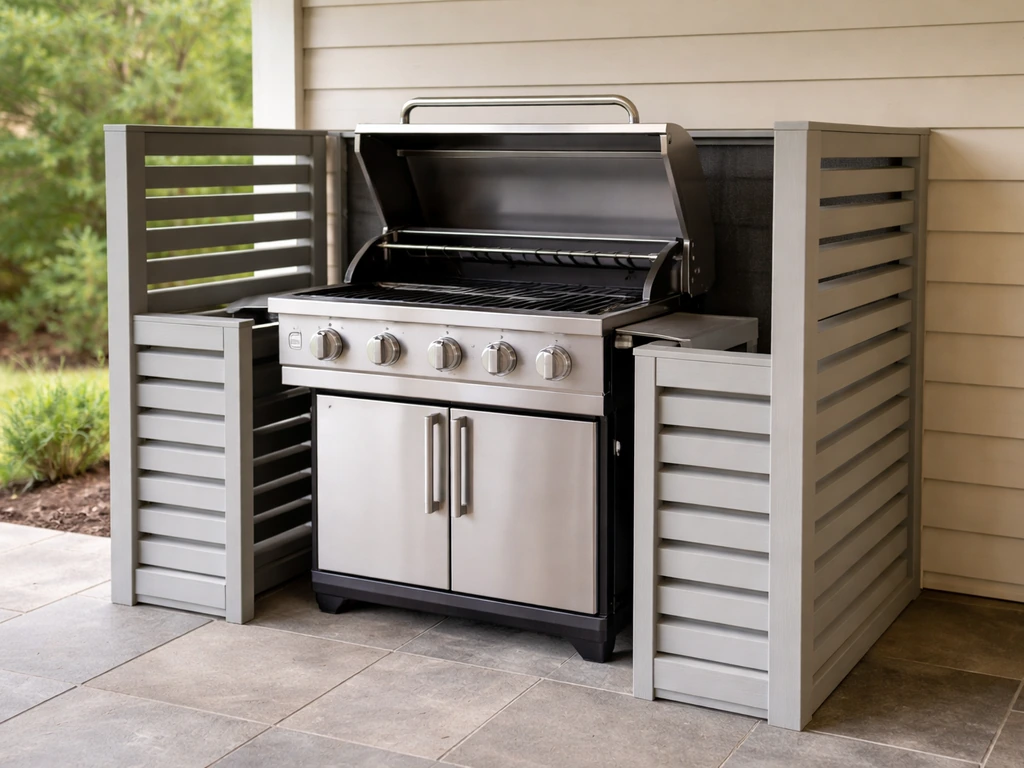
How to Hide a Grill on Patio: Safe DIY Options
Step-by-step DIY options to hide a patio grill safely with enclosures, screens, covers, and grill-zone heat clearance.