You can hide a grill on a patio using anything from a freestanding privacy screen you set up in an afternoon to a fully built grill island with louvered access doors. The right choice depends on whether you rent or own, how permanent you want the solution, and how much clearance you actually have. The one rule that applies to every approach: never seal the grill in a tight box. Grills need airflow, and propane or natural gas builds up fast in enclosed spaces if there's even a small leak. Keep that in mind and the rest is just picking the method that fits your patio.
How to Hide a Grill on Patio: Safe DIY Options

Felix Brennan
29 May 2026
Decide what 'hide' actually means for your setup
Before you buy anything or start cutting lumber, get clear on what problem you're actually solving. Most people searching for how to hide a grill on a patio mean one of three different things, and the solution is completely different for each.
- Visual privacy: You want neighbors or guests to not look directly at the grill, especially when it's not in use. A freestanding screen, a pergola privacy panel, or a fabric curtain solves this without any building at all.
- Aesthetic concealment: The grill looks out of place in your patio design and you want it to blend in. This is where a grill cabinet surround, a grill island with matching finishes, or a built-in bench with a hinged panel works well.
- Full enclosure or integration: You're building or upgrading a screened porch, patio room, or outdoor kitchen zone and want the grill to be a permanent, designed part of it. This requires the most planning and must follow strict ventilation and clearance rules.
There's also a practical fourth option a lot of renters and people with small patios use: just move the grill out of sight when it's not in use and use a quality weatherproof cover when it is. It sounds obvious, but a good cover and a tidy storage spot in a corner or behind a screen does exactly what people want without any construction.
Measure first, build second: clearances, ventilation, and access
This is the step most DIYers skip, and it causes real problems later. Before you design any kind of screen, cabinet, or enclosure around your grill, grab a tape measure and confirm you actually have the room to do it safely.
Horizontal clearances from combustibles
Chubb's safety guidance recommends at least 5 feet of horizontal clearance between a grill and combustible materials like wood fencing, planter boxes, and deck railings. Also, NFPA educational messages emphasize following the blank" rel="noopener noreferrer">gas grill manufacturer’s instructions and maintaining adequate clearance from heat and flames, including propane tank storage cautions. For clearance from the building itself, NFPA guidelines reference a minimum of 24 inches from combustible structures under certain conditions, though many fire departments and manufacturers blank" rel="noopener noreferrer">recommend 10 feet from any combustible wall or overhang when possible. Always check your grill's specific installation manual: Weber's built-in guides, for example, include measured diagrams for minimum distances to adjacent surfaces, and Hestan specifies a minimum 4 inches from the back of the grill to non-combustible construction. When in doubt, more space is always safer.
Vertical clearance
Keep at least 10 feet of vertical clearance between the grill and overhead combustible materials like a wood pergola, fabric awning, or low-hanging tree branches. If your patio cover is non-combustible (metal roofing, concrete, masonry), you still need to plan for smoke and heat ventilation. If you’re thinking about placing a regular TV on a covered patio, you’ll also want to plan for ventilation so the area stays cool and dry for the electronics plan for smoke and heat ventilation. Covered structures with poor cross-ventilation can trap smoke and grease, which creates its own mess and fire risk over time.
Access for service and safety
Whatever you build or install around the grill, you need to be able to: open the lid fully, reach the burner controls, access the grease trap for cleaning, connect or disconnect the propane tank or natural gas line, and read the regulator. Measure the grill's full open-lid height before you frame any overhead structure. For built-in grills, manufacturers specifically call out that units must be removable for service, which means the cutout and cabinet design needs to allow for that without tearing the whole thing apart.
Safety rules you can't skip for any grill hiding method
These aren't suggestions, they're the rules that keep a good-looking patio from becoming a fire claim. Apply them regardless of whether you're hanging a curtain or building a full island.
- Never fully enclose a gas grill. Propane is heavier than air and pools at ground level; natural gas rises. Both need ventilation openings to dissipate safely if a connection leaks. Weber, Hestan, and Aspire all specify that enclosures must have permanent ventilation openings, ideally at ground level, with no overhead cover sealing the top.
- Use non-combustible materials immediately around the grill. Masonry, concrete board, stainless steel, and fiber cement are safe. Untreated wood, wicker, and most vinyl are not safe as the primary surround material within the clearance zone.
- Keep ventilation holes unobstructed. Weber warns directly that blocking ventilation holes in a built-in installation causes the unit to overheat and voids performance. Don't run tile, grout, or caulk over vent openings.
- Plan gas line and propane tank access from the start. Propane enclosures need ventilation at both upper and lower levels or one fully open side. Never store a propane tank in a sealed cabinet.
- Check connections before every use. NFPA and Hull Fire Department guidance both reference propane leak checks as essential, not optional. If you're building a cabinet around the grill, the gas connection point must remain accessible so you can inspect and disconnect it.
Quick, low-cost ways to hide the grill right now
If you need a solution today and don't want to build anything, these options work well. They're also great for renters who can't make permanent changes.
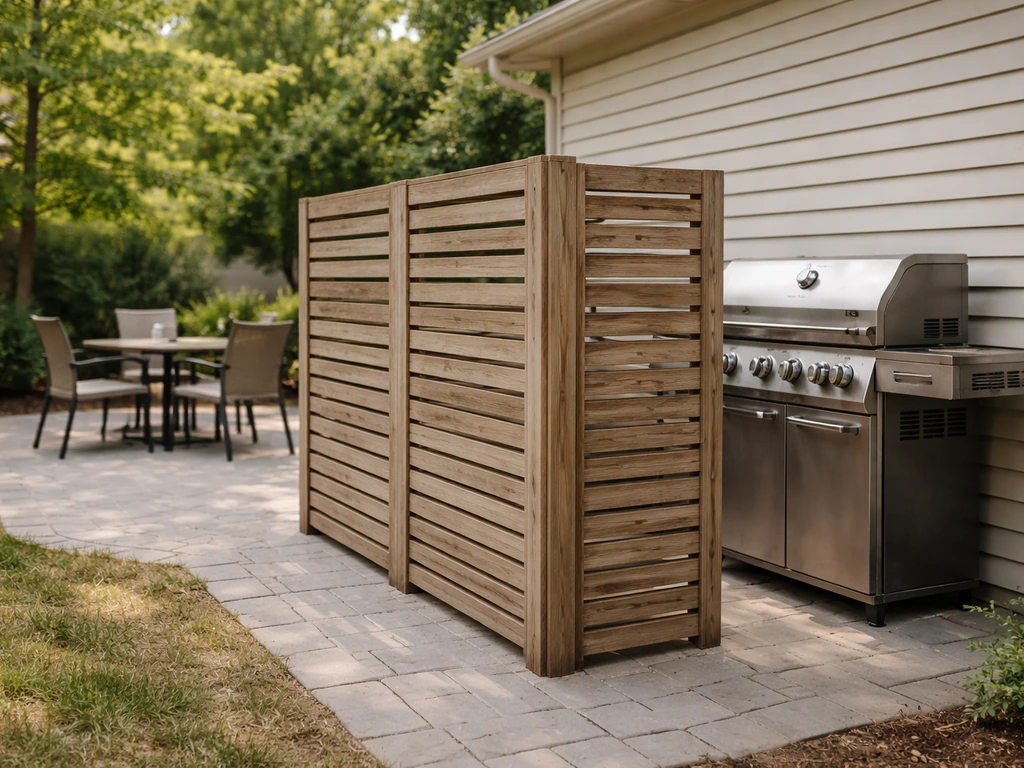
Freestanding privacy screens
A freestanding privacy screen is the fastest fix. Products from brands like Trex Privacy are designed for exactly this: they set up on a deck or patio without permanent mounting and create an instant visual barrier. Look for panels rated for outdoor use with UV-resistant or composite materials. Position the screen at least 5 feet from the grill when it's in use, and make sure it's not blocking airflow around the cooking area. When the grill is off, you can move the screen closer for a cleaner look.
Outdoor curtains and fabric panels
If you have an existing pergola, overhead beam, or curtain rod mounted to your patio wall, outdoor-rated curtains can be pulled closed when the grill isn't in use and opened fully when cooking. Use solution-dyed acrylic fabric (the same material used in marine and awning applications) since it handles UV, moisture, and mildew well. Never leave curtains closed while the grill is running, they need to be fully open and clear of the heat source when you're cooking.
A quality weatherproof grill cover
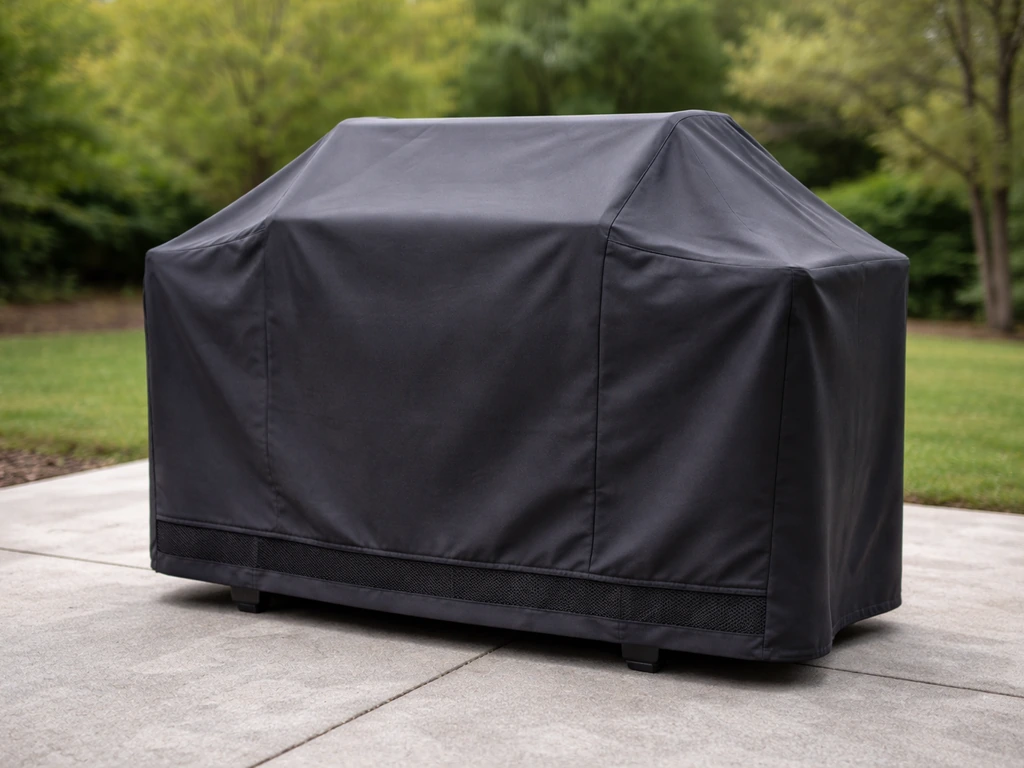
This one gets overlooked because it feels too simple, but a well-fitted, heavy-duty grill cover (look for 600D polyester or vinyl-backed covers with vented hems to prevent moisture trapping) keeps the grill looking neat and protected when it's not in use. Pair it with a corner positioning strategy or a simple screen behind it, and you've handled 90% of the visual problem with zero construction.
Building a permanent solution: benches, cabinets, and grill islands
If you own your home and want something that looks built-in and lasts, these are your options. The complexity and cost range is wide, so pick based on your actual skill level and budget.
Option 1: A simple privacy wall or partial screen
A partial wall, about 5 to 6 feet tall, placed beside or behind the grill is the simplest permanent build. Frame it with pressure-treated 4x4 posts anchored with post bases or set in concrete, then attach composite decking boards, cedar boards, or fiber cement panels horizontally or vertically. Keep the wall at least 5 feet from the side of the grill when it's running. This approach takes a weekend, costs roughly $200 to $500 in materials depending on size, and doesn't require any special permits in most areas, though it's always worth a quick check with your local building department.
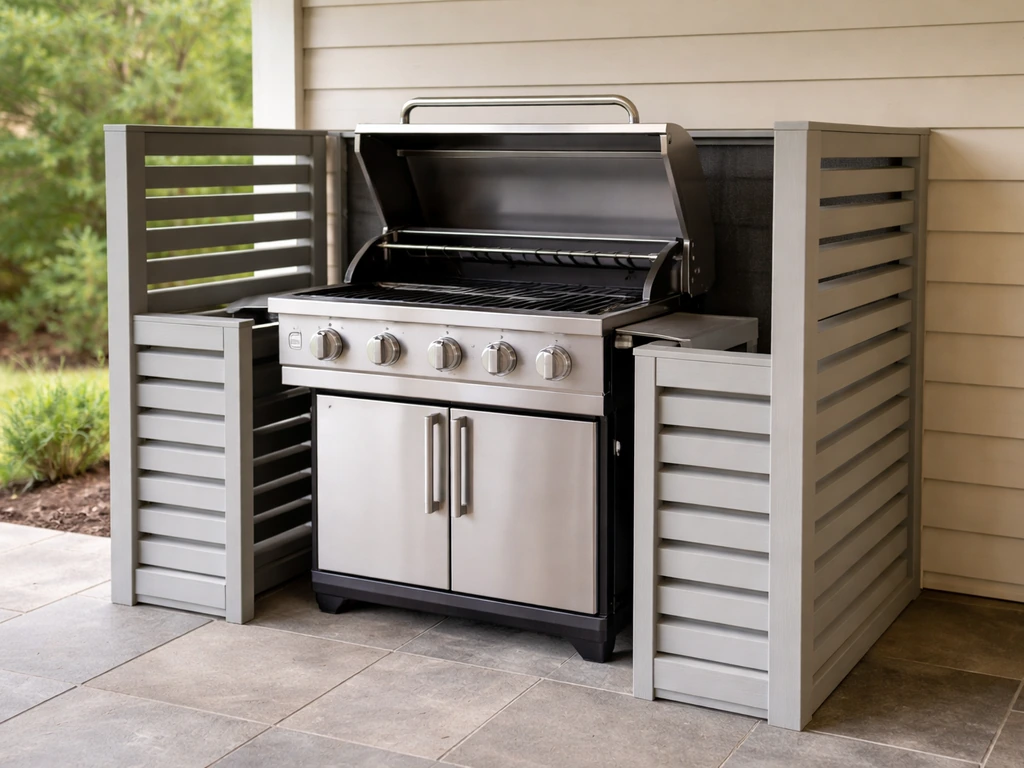
Option 2: A grill cabinet surround with louvered doors

This is the most popular mid-range approach for standalone grills. You're essentially building a three-sided cabinet around the grill that conceals it visually but leaves the front open or covered with louvered doors for ventilation. Frame the structure with steel studs or pressure-treated lumber, then clad it with fiber cement board, concrete board, or composite material rated for outdoor use. Louvered doors (aluminum or composite) on the front give you access while still hiding the grill and allowing airflow. Critical rule: do not use wood as the interior face material within the clearance zone. Use non-combustible board and tile over it. Include at least one low vent opening at ground level for gas vapor dissipation. Budget for this is roughly $400 to $1,200 depending on size and finishes.
Option 3: A full grill island
A grill island integrates the grill into a countertop structure with storage below, side burners, prep space, and access doors. This is the most involved DIY project here, taking a full weekend or more and requiring comfort with basic masonry or framing. The structure must be built entirely from non-combustible materials: concrete masonry units (CMUs), steel framing with concrete board sheathing, or purpose-built aluminum outdoor kitchen frames. Countertops should be granite, concrete, or porcelain tile. Built-in grills are dropped into a cutout sized per the manufacturer's installation guide, and the surrounding cabinet must have ventilation panels in the lower section. Outdoor kitchen cutout guides emphasize that vent panels under the grill are the most commonly missed item on DIY builds. Plan for a gas line run by a licensed plumber or gas fitter. Total cost varies widely, but $1,500 to $4,000 is realistic for a solid DIY island with quality materials.
Integrating your grill into a screened porch or patio room
This is one of the trickier scenarios, and it comes up often for people who already have or are planning a screened enclosure and want the grill to live inside it. The short answer is: you can make it work, but you have to get the ventilation right, and in most jurisdictions a built-in gas appliance inside a screened room will require a permit and inspection.
The core problem with grilling in a screened enclosure is that screen panels slow airflow significantly, which means smoke, heat, and any leaked gas vapor has fewer places to go. BBQGuys specifically notes that covered structures with poor cross-ventilation change ventilation requirements and may require a vent hood above the grill. A powered range hood that exhausts outside the enclosure is the cleanest solution. Size it for at least 600 CFM for a standard residential grill, and make sure the exhaust terminates outside the screen walls, not just into the enclosure.
For the screen panels nearest the grill, use fiberglass or aluminum screen material rated for heat exposure, not standard pet or insect screen. Keep the grill positioned against an exterior wall of the enclosure where you can install a dedicated exhaust pathway. Make sure the grill island or surround materials match the floor and wall finishes of the enclosure for a cohesive look, and plan drainage from the outset so grease runoff and wash water has somewhere to go.
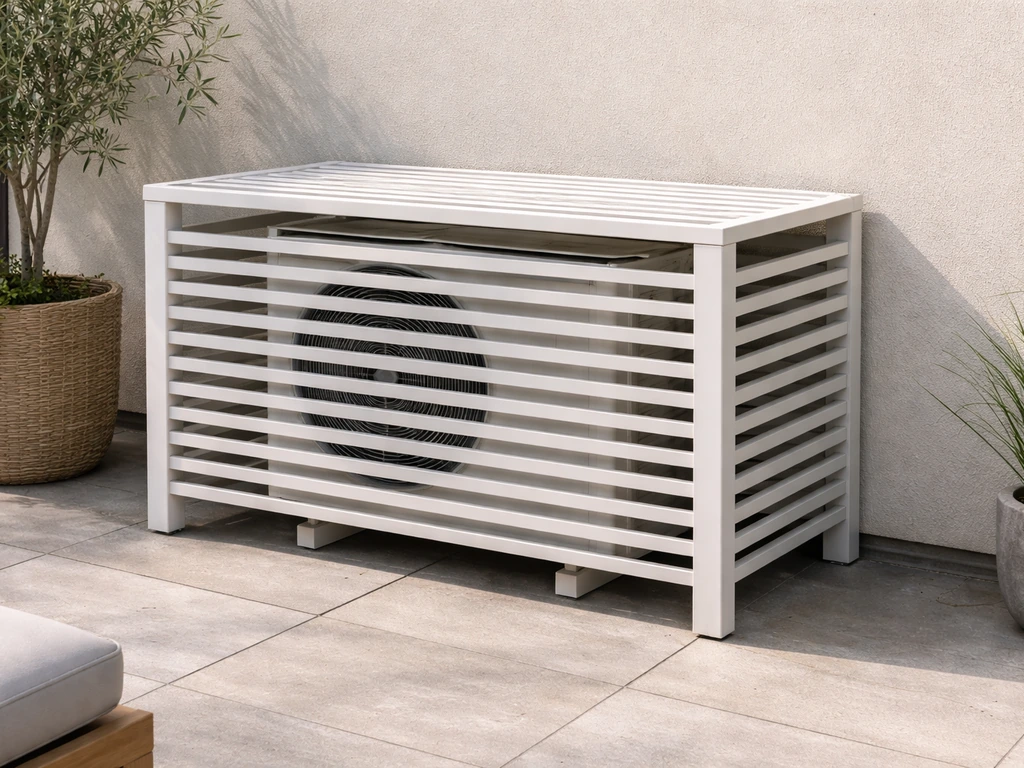
If you're also dealing with hiding an AC unit in the same enclosure space, the airflow planning overlaps, and it's worth thinking through both at the same time so the solutions don't conflict with each other. If you’re also trying to hide an air conditioner on a patio, you’ll want to plan around the unit’s airflow and clearances just like you do for a grill hiding an AC unit. For AC units, plan for airflow and a serviceable access panel so the unit can vent properly hiding an AC unit.
Materials that actually hold up outside
The wrong material choice is what turns a nice-looking grill surround into a warped, moldy mess within two seasons. Here's a quick comparison of the most common options.
| Material | Best Use | Durability | Combustible Near Grill? | Relative Cost |
|---|---|---|---|---|
| Concrete Masonry Units (CMU) | Grill island base structure | Excellent, 20+ years | No (non-combustible) | Low–Medium |
| Steel framing + concrete board | Cabinet framing and sheathing | Excellent with waterproof membrane | No (non-combustible) | Medium |
| Fiber cement board (HardieBacker) | Cladding, tile substrate | Very good, needs sealing at joints | No (non-combustible) | Medium |
| Composite decking/panels (Trex, etc.) | Privacy screens, partial walls | Very good, UV/moisture resistant | Keep 5+ ft from grill when in use | Medium–High |
| Pressure-treated lumber | Screen framing, privacy wall posts | Good with proper sealing | Yes — keep outside clearance zone | Low |
| Cedar or redwood | Decorative cladding, screens | Good with annual sealing | Yes — keep outside clearance zone | Medium |
| Stainless steel (304 grade) | Doors, countertop trim, vent panels | Excellent, marine-grade corrosion resistance | No (non-combustible) | High |
| Porcelain or granite tile | Countertops, island cladding | Excellent, needs sealed grout | No (non-combustible) | Medium–High |
For weatherproofing, seal all wood and fiber cement joints with a paintable exterior caulk before applying any finish. Concrete board seams should be taped with alkali-resistant mesh tape and coated. At the base of any structure sitting on a patio slab, use a continuous bead of waterproof sealant and check it annually. Design any flat horizontal surfaces with a slight slope (about 1/8 inch per foot) to shed water rather than pooling it.
Drainage for grill areas
Grease and wash water need to drain somewhere. If you're building an island, plan a small drain pan or channel under the grill that routes to the edge of the patio. For example, if you’re dealing with patio drainage, you can disguise drain covers so they stay clean and visually blend with the rest of the space drain pan or channel. On an existing slab, check that the patio slopes away from the structure so water doesn't pool under the island base. If you're working on a wood deck, make sure there's no grease trap directly over the decking material without a non-combustible pan underneath.
Keeping it working: maintenance, seasonal prep, and troubleshooting
Whatever hiding solution you build or install, it needs regular attention to stay safe and functional. Here's what to check and when.
Monthly during grilling season
- Check that all vent openings in the cabinet or island are clear and unobstructed. Dirt, leaves, and spider webs accumulate quickly in low vents.
- Inspect the gas connection at the regulator and any flex line runs through the cabinet. Use soapy water to check for bubbles if you suspect a leak.
- Clean the grease trap and wipe down the interior of any cabinet panels closest to the burner area. Grease buildup is the fastest path to a cabinet fire.
- Check that access doors open and close freely. Doors that warp or stick in summer heat indicate a moisture or material problem worth addressing before it gets worse.
End of season / winterizing
- Disconnect and remove the propane tank if temperatures in your area drop below freezing. Propane tanks stored in enclosed cabinets over winter can develop regulator issues.
- Deep-clean the grill interior and cover it with a fitted weatherproof cover, even if it's inside a cabinet or screen.
- Inspect all caulk joints on the cabinet or island structure and re-seal any that have cracked or pulled away. Water intrusion over winter causes more structural damage than anything else.
- For fabric screens and curtain panels, remove them and store them inside or in a weatherproof container. Even marine-grade fabrics degrade faster when left out through freeze-thaw cycles.
- Check the base of any freestanding privacy screens for ground contact rot or corrosion at the foot anchors.
Troubleshooting common problems
- Smoke building up inside the cabinet or screen enclosure: Add or enlarge vent openings. If the grill is in a screened patio room, install a powered vent hood and verify it's exhausting outside the enclosure.
- Cabinet doors warping: Composite or aluminum doors handle heat and humidity better than wood. Replace wood doors with aluminum-framed composite panels.
- Grease on the cabinet interior walls: Add a removable stainless steel liner panel on the walls closest to the burners. It cleans easily and protects the structure behind it.
- Screen panels near the grill yellowing or melting: You're too close to the heat source, or the screen material isn't rated for it. Move the grill or rescreen with aluminum mesh.
- Water pooling at the base of the island after rain: Improve drainage slope on the patio surface, seal the base perimeter, and consider a small gap at the bottom of louvered doors to allow drainage.
Picking the right approach for your patio
If you're a renter or want zero construction: a freestanding composite privacy screen plus a quality weatherproof cover is your answer. If you also need to hide extension cords on the patio, route them along the perimeter and use outdoor-rated cord covers or in-ground options to keep things safe and tidy how to hide extension cords on patio. Set up the screen 5+ feet from the grill when cooking, pull it in when you're done. If you also want to watch TV outside on the patio, pair your grill and screen setup with weather-rated electronics and a covered power plan watch TV outside on patio. Total cost under $300 and completely reversible.
If you own your home and have a small patio: a partial privacy wall with composite or cedar cladding gives you a permanent visual fix without permits in most areas. Frame it, clad it, done. Plan for one weekend and $300 to $600.
If you want the grill to disappear into the patio design: a grill cabinet surround with louvered access doors, built from steel framing and fiber cement with tile cladding, is the sweet spot between effort and results. Budget a full weekend and $600 to $1,500.
If you're building an outdoor kitchen or screened patio room: plan the grill island as part of the overall structure from the start. Use non-combustible materials throughout, install a vented hood that exhausts outside, and get the permit. It's worth doing right because re-doing it is expensive. The grill zone then becomes the anchor of the whole outdoor room rather than an afterthought.
Whichever route you take, the grill should always be serviceable, always have airflow, and always have an accessible shutoff. Everything else is just materials and aesthetics, and there's a good solution at every price point.
FAQ
Can I put a grill inside a cabinet or enclosure if I leave a few small vents?
Leaving vents helps, but it is not the same as meeting required airflow and clearance. You still need to keep enough space around the grill for heat dissipation, allow full lid opening, and ensure any gas vapor can escape. Use non-combustible interior finishes in the clearance zone, and confirm with your grill’s installation manual that the design you’re copying is allowed.
What’s the safest material to use on the inside of a grill surround?
In most designs, use non-combustible materials inside the clearance area (for example, non-combustible board plus tile or other rated surfaces). Avoid using wood as an interior face near the grill, and if you’re tiling over a backing board, use an outdoor-rated mortar and seal the grout properly to prevent water intrusion.
How close can I place a hiding screen or partial wall to the grill while it’s running?
Treat movable screens and fixed partial walls the same way for spacing. Keep at least the same minimum practical clearance you’re using for other nearby combustibles, and also check that your screen or wall does not block airflow toward the burner area or trap smoke. If the screen is adjustable, set it farther back during cooking and closer only when the grill is off.
Do I need a permit to hide a grill on a patio?
Often a simple freestanding screen or a properly placed cover is permit-free, but permanent builds can trigger permits depending on your local rules and whether you add gas lines. If you build a partial wall, a cabinet surround, or any gas-connected island, contact your building department first, and for enclosed spaces or covered gas appliances, expect permits and inspections.
What should I do if my patio cover is over the grill and I want the grill hidden?
You can hide the grill, but don’t rely on a close overhead structure to “shade” the heat safely. Measure the grill’s open-lid height and plan an overhead clearance that accounts for heat and ventilation, not just smoke. If the area is under a non-combustible roof, you still need cross-ventilation, and you may need to adjust the grill position or add a dedicated exhaust approach.
How do I prevent rust and staining on the hidden grill surround?
Water pooling and grease carryover are the usual culprits. Slope any horizontal surfaces about 1/8 inch per foot, seal all joints with exterior caulk (including fiber cement seams), and plan for a grease runoff path (drain pan or channel) so wash water and drippings do not sit under the cabinet base.
If I use a grill cover, should I cover it even when it’s still warm?
Wait until the grill is fully cool before covering. Covering a hot grill traps moisture and heat, which accelerates corrosion and can increase mildew inside the cover. If your cover has a vented design, it still won’t be a substitute for cooling down first.
What’s the easiest way to hide the grill from view without construction, but also keep it safe?
Use a combination approach: store the grill in a consistent corner or behind a movable screen when not cooking, and use a heavy-duty weatherproof cover when it’s off. During cooking, position the screen far enough away to preserve airflow, and do not create any barrier that limits lid opening, burner control access, or grease trap cleaning.
Can I grill inside a screened enclosure if I install an exhaust fan?
It can be workable, but it’s not a simple DIY “add a fan” fix. Screen panels reduce airflow and can change ventilation requirements, so you’ll likely need a properly sized exhaust that vents to the outside, plus materials rated for heat near the grill. Expect jurisdiction-dependent permit and inspection requirements for an outdoor gas appliance inside a screened room.
What service access mistakes cause problems after a grill surround is built?
The two most common are forgetting service clearance (so the grill can’t be removed for repairs) and blocking access to the grease trap, regulator, or shutoff valve. Before you frame, verify you can reach and operate controls, disconnect the fuel safely, and pull the grill out per the manufacturer’s removal instructions.
Next Articles
How to Hide an AC Unit on a Patio Without Blocking Airflow
Step-by-step ways to hide a patio AC condenser with screens or built-in housing while keeping airflow, clearance, and dr

How to Decorate a Long Narrow Patio: Layout Tips
Practical DIY layout and decor tips to widen a long narrow patio using zoning, furniture spacing, lighting, greenery, an

How to Decorate a Rectangular Patio Step by Step
Step-by-step plan to decorate a rectangular patio with smart layout, zones, furniture fit, lighting, plants, and seasona