You can hide an extension cord on a patio safely by routing it along the base of walls, railings, or furniture and securing it with outdoor-rated cable channels, cord covers, or UV-resistant clips every 12 to 18 inches. For tonight, a flat cord cover strip along the edge of the patio does the job in about 20 minutes. If you're setting up outdoor entertainment, you can also plan for how to watch TV outside on a patio while keeping the power and cables safe from weather watching TV outside on a patio.
How to Hide Extension Cords on a Patio Safely

Felix Brennan
6 Jun 2026
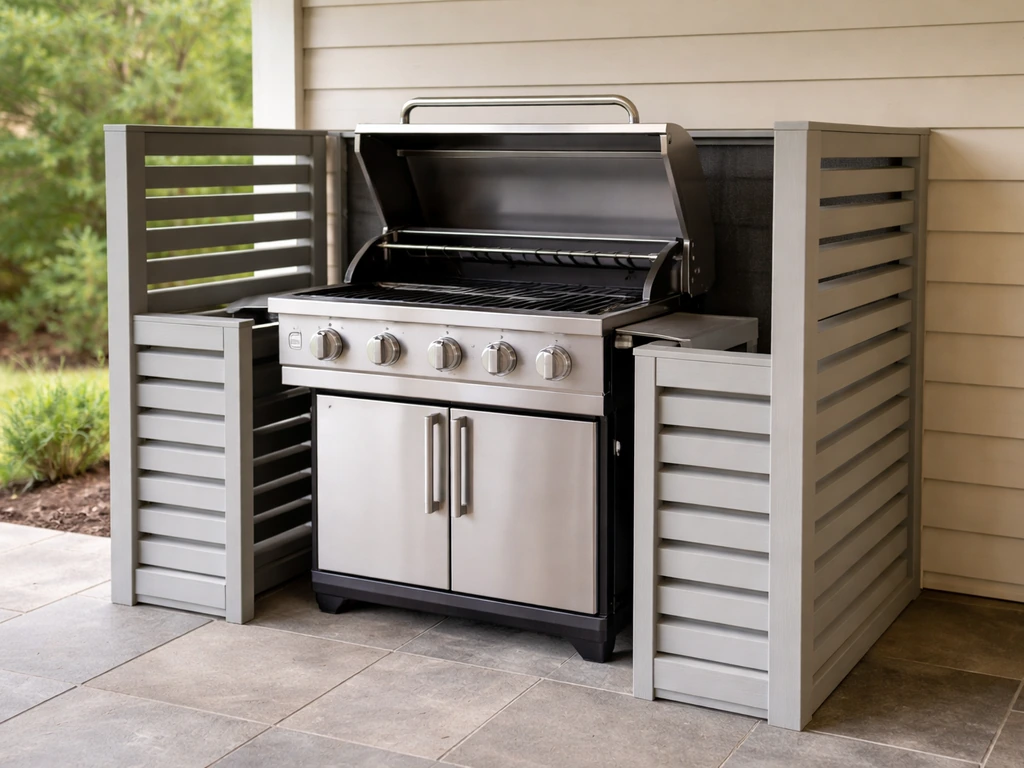
You can apply similar cord-concealment ideas to hide a patio grill setup by routing and protecting the power and keeping the area looking clean hide a grill on patio. For a cleaner, more permanent fix, surface-mounted PVC raceways or cord channels painted to match your trim look intentional and hold up through rain, heat, and cold. Either way, the cord itself must be outdoor-rated, the load must match the gauge, and any connections need to stay dry.
Best ways to route patio extension cords out of sight
The goal is to get the cord from the outlet to the lights without it crossing open floor space, dangling at eye level, or sitting exposed to weather where it can degrade. Before you buy anything, walk the path from your outdoor outlet to where the cord needs to land and look for natural channels: the base of a wall, along a railing post, behind a planter or furniture line, or tucked under a patio edge. The path you find will tell you which hiding method makes the most sense.
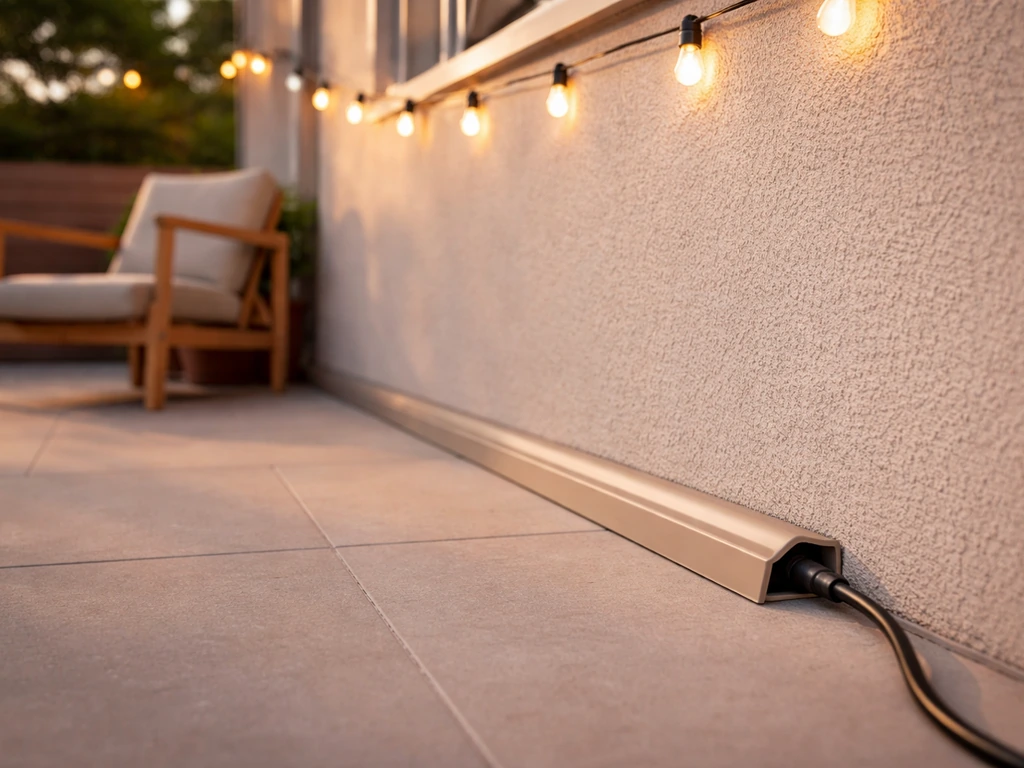
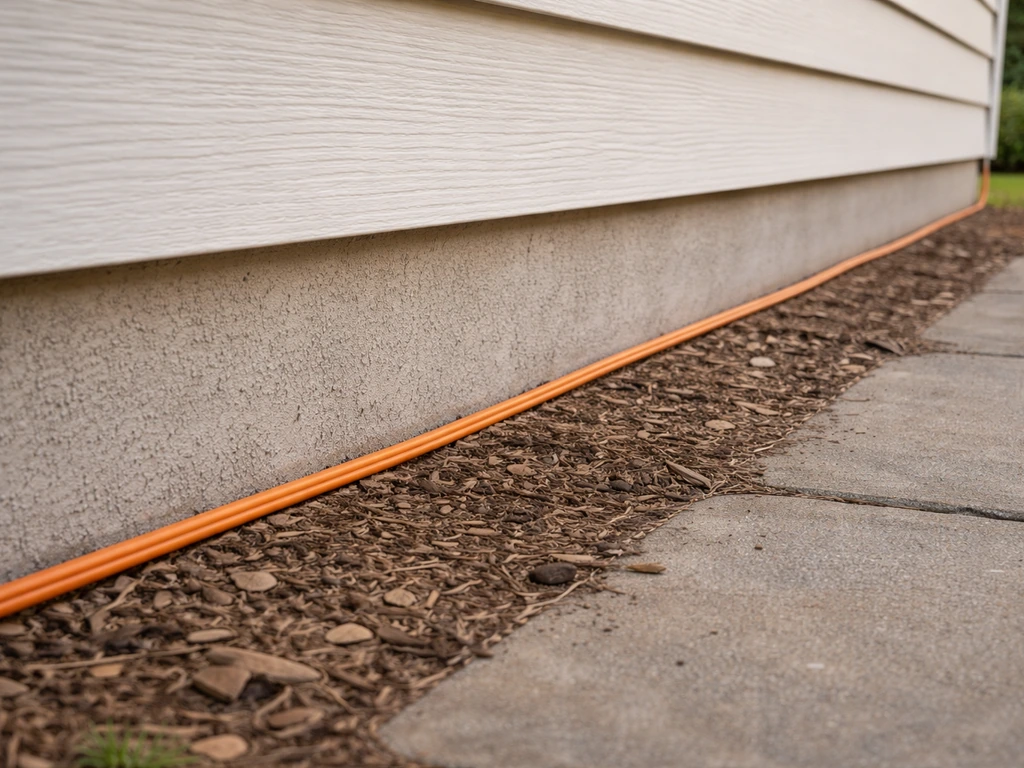
- Along the wall or house perimeter: Run the cord flat against the foundation or siding, secured with cable clips or inside a surface raceway. This is the cleanest route and usually the shortest path from the outlet.
- Along the railing: Zip-tie or clip the cord to the interior face of the railing at 12-inch intervals. Keep it on the inside edge so it stays out of sight from outside the patio.
- Under furniture lines: Route the cord under the path of a sofa, sectional, or outdoor cabinet. This hides it naturally without any hardware but only works if furniture stays in place.
- Along the patio edge: Flat cord covers or threshold-style protectors work well here, especially where the cord crosses from concrete to indoor flooring or transitions between surfaces.
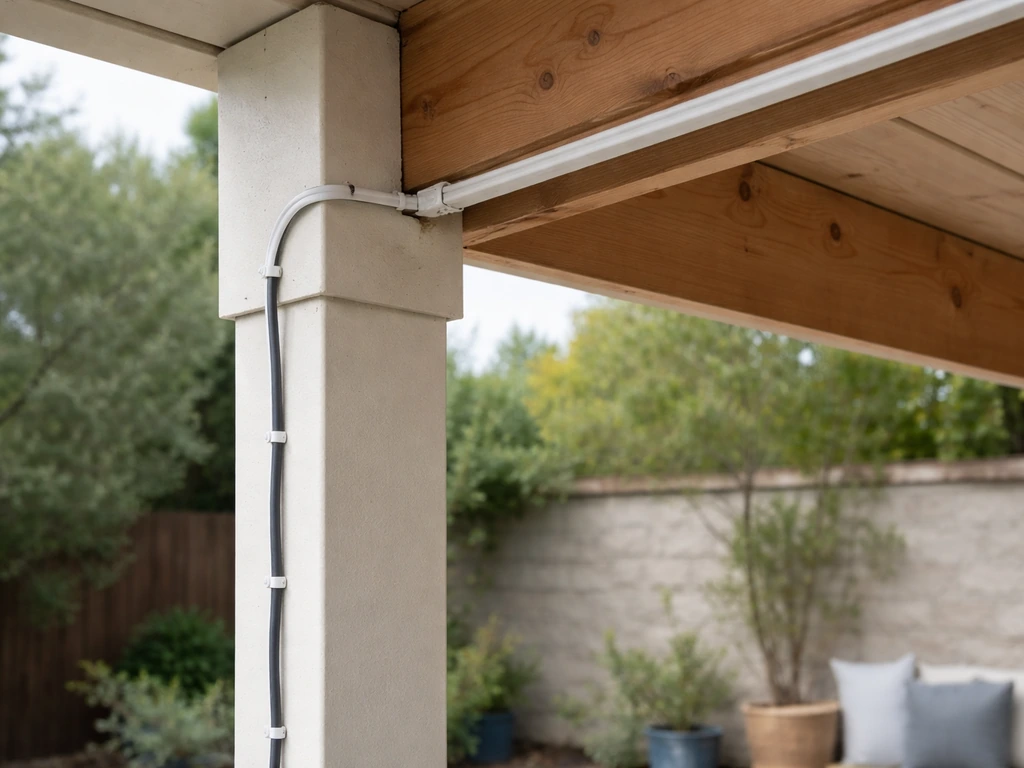
- Up and over: If you have string lights or hanging fixtures, run the cord vertically up a post or wall, across the overhead structure, and down to the light connection. Use cable clips rated for outdoor use and keep the cord tight to the surface.
The biggest mistake people make is letting too much cord coil up behind furniture or in a corner. Coiled cords generate heat, and if they're under load (powering lights for hours), that's a fire risk. Plan the path so the cord runs taut without being stretched, and we'll talk more about how much slack to leave in the layout section below.
Cord-hiding options for patio lights: quick vs permanent
There's a real difference between what you can throw together before guests arrive tonight and what you'd want as a finished patio improvement. Both approaches are valid, and you don't have to commit to the permanent route right away.
Quick fixes (30 minutes or less)
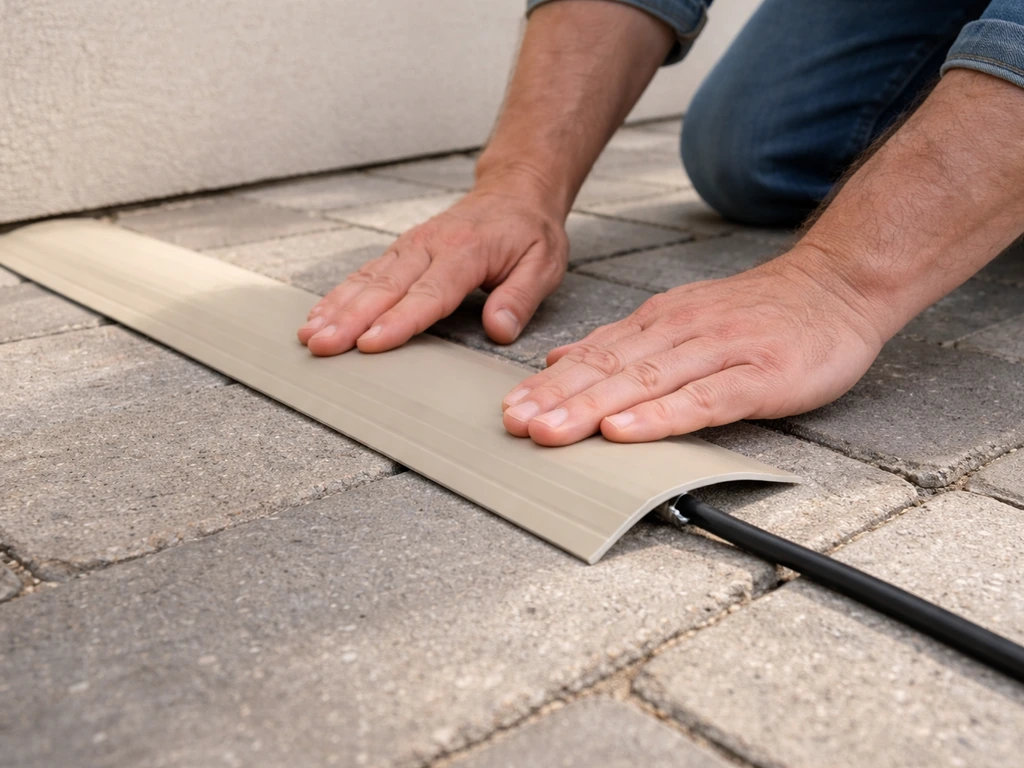
- Flat cord cover strips: Low-profile PVC or rubber strips that pin the cord to the floor and create a smooth ramp over it. Available at hardware stores for $10 to $20 for a 6-foot section. Works on concrete, wood decking, or tile.
- Outdoor cable clips with adhesive backing: Stick these to the wall or railing base and run the cord through. No drilling required. Use UV-resistant clips if you're in a sunny region.
- Rugs and outdoor runners: Hiding a cord under an outdoor rug is genuinely a useful trick for short runs across the patio floor, but only use this if the cord is fully flat, outdoor-rated, and you're not running it where it'll be pinched or repeatedly stepped on.
- Binder clip cord guides on railings: A cheap workaround that holds the cord against the railing for a party setup. Not weatherproof for long-term use, but fine for an evening.
Permanent or semi-permanent setups
- Surface-mounted PVC raceways: These are plastic channels that screw or adhesive-mount to walls, railings, or posts. They snap shut over the cord and can be painted to match your trim. Legrand, Wiremold, and similar brands make outdoor-rated versions. Expect to spend $15 to $35 for a 5-foot section with fittings.
- Weatherproof conduit: For a truly finished look, EMT or PVC conduit run along a wall or overhead structure is the most durable option. This is more of a weekend project but looks completely intentional and handles any weather.
- Cable channel raceways with mounting tape: A step up from quick clips, these are rigid channels with peel-and-stick or screw mounting. Many have snap-in covers so you can access the cord without dismounting the whole channel.
- Integrated patio structure solutions: If you're building or improving a pergola, screen enclosure, or patio cover, routing cords through the framing at build time is the cleanest outcome. Outdoor-rated string lights and patio light kits can be stapled or clipped inside rafters or posts before any finish work goes on.
Outdoor-safe cable management materials and installation tips
Not everything sold in the electrical aisle at a hardware store is rated for outdoor use. Before you buy clips, channels, or covers, check that they're specifically rated for outdoor or wet-location use. UV exposure, rain, and temperature swings will crack cheap plastic in one season.
| Material | Best use | Outdoor rating to look for | Typical cost |
|---|---|---|---|
| PVC surface raceway | Walls, posts, railings | Wet-location listed | $15–$35 per 5 ft |
| Rubber cord cover/floor strip | Ground-level cord crossing | Weatherproof, UV-resistant | $10–$25 per 6 ft |
| UV-resistant cable clips | Securing cord to walls or railings | Outdoor-rated, UV-resistant | $5–$15 per pack |
| Weatherproof conduit (PVC or EMT) | Permanent wall or overhead runs | Schedule 40 PVC or EMT with weatherproof fittings | $10–$30 per 10 ft |
| Outdoor zip ties (UV black) | Temporary railing or post attachment | UV-stabilized black nylon | $5–$10 per pack |
| While-in-use outlet cover (bubble cover) | Protecting the outlet connection point | Extra-duty, wet-location rated | $8–$20 |
Installation tip: when you're mounting a raceway or cable channel to masonry or concrete, use a masonry bit and plastic anchors rather than self-tapping screws alone. On wood posts or railings, stainless steel or coated screws resist rust and won't streak your wood. Space fasteners every 12 to 18 inches to keep the channel tight to the surface and prevent it from bowing away from the wall.
For the cord itself: look for cords marked SJTW, SJTOW, or STW. These jacket types indicate the cord is designed for outdoor, weather-resistant use. The UL marking system also uses labels like 'WET-LOCATIONS CABLE' to indicate suitability for wet environments. If your cord doesn't have an outdoor-specific jacket designation, it shouldn't go outside at all, whether hidden or not.
Using covers, channels, and cord protectors without creating trip or fire hazards

A cord cover that isn't installed properly can actually be more dangerous than the cord alone. Here's what to watch for.
Trip hazard prevention
- Use beveled-edge floor cord covers, not squared-off ones. The ramp profile means feet slide over instead of catching.
- Keep floor-level covers tight to the wall or edge of the patio, not running through the middle of a walkway.
- Secure every section so it can't shift. A cord cover that slides becomes a trip hazard.
- Anchor the end caps so the cover can't be kicked open and expose the cord.
Fire and heat hazard prevention
- Never coil excess cord inside a channel or cover. Coiled cords under electrical load build up heat. Run the cord as close to its needed length as possible, or use the correct length cord to start with.
- Don't bundle multiple cords into a single channel unless it's rated for that load. Stacking cords together traps heat.
- Avoid burying cords under outdoor rugs over large areas. Short passes are fine; long hidden runs under rugs trap heat and wear the jacket from foot traffic.
- If you're running the cord through conduit, make sure the conduit isn't sealed in a way that traps moisture or heat without any ventilation at the ends.
Protecting the connection point
The spot where the cord plugs into your outdoor outlet is one of the most exposure-prone points in the whole setup. The NEC requires that receptacles in wet locations (anywhere rain or splash can reach) use a weatherproof while-in-use cover, sometimes called a bubble cover, that stays closed around the cord even when it's plugged in. A standard flip-lid cover doesn't cut it if the cord is connected and rain is falling. Extra-duty rated covers are required for genuinely wet locations. This isn't optional, and it's one of the most important safety checks before you button everything up.
Designing around your patio layout: where to run and how much slack to leave
Grab a tape measure before you buy anything. Measure the actual route the cord will travel, not just the straight-line distance from outlet to light. Routing along walls, up a post, and across an overhead beam might turn a 15-foot straight distance into a 35-foot run. That number matters for choosing the right cord gauge, which we'll cover in the safety section.
- Map the path: Walk from your outlet to the light and note every turn, vertical section, and obstacle. Sketch it roughly and write down measurements for each segment.
- Add 10% for slack: Don't run a cord so taut that it pulls at connections or strains the outlet. Add roughly 10% extra length to your measured route so the cord has a natural, unforced path.
- Plan for furniture: If you're routing along furniture lines, plan for the furniture to move. Leave enough cord length that a table shifted 6 to 12 inches doesn't yank the line.
- Think about the outlet: Your routing should end cleanly at the outlet without the cord hanging across a walkway. If the outlet is in a hard location, consider whether an outdoor-rated extension with an angled plug makes the connection cleaner.
- Mark where fasteners go: Before drilling or adhering anything, mark every clip and channel mount location. Space them 12 to 18 inches apart on straight runs, and add a fastener within 3 inches of every corner or turn.
- Account for seasonal furniture moves: If you store patio furniture in winter, plan your cord routing so it's either removable or out of the way of furniture movement.
One design tip for string lights specifically: if you're running lights overhead on a pergola or between posts, route the power cord up the most obscure post (usually the one closest to the house) inside a raceway, then let the decorative string portion of the lights do the visible spanning. The cord going up the post is the part that looks messy; hide that section and the rest is fine.
Safety, power limits, and weatherproofing checks before you hide it
This is the step most people skip, and it's the one that actually matters. Once you hide a cord inside a channel or cover, you're less likely to notice if something goes wrong. Get these checks right before installation.
Choose the right cord gauge for your run
Thin cords over long distances mean voltage drop and heat buildup. For most patio string lights totaling under 200 watts, 16 AWG works for runs under 25 feet. If your run is 25 to 50 feet, step up to 14 AWG. For runs of 50 to 100 feet, use 12 AWG. Beyond 100 feet, you're looking at 10 AWG to avoid voltage drop that dims your lights and stresses the cord. If your patio light system exceeds 200 watts total, use 12 AWG as your baseline regardless of distance.
Verify the cord is outdoor-rated
Look for the jacket markings: SJTW (W = weather resistant), SJTOW, or STW. If the cord doesn't have a W in the designation, it's an indoor cord and doesn't belong on a patio regardless of how well it's hidden. The CPSC is clear that outdoor cords need proper jacketing and strain relief features. Covering an indoor cord with a raceway doesn't make it outdoor-safe.
GFCI protection is required outdoors
NEC 210.8 requires GFCI protection for outdoor receptacles. If your patio outlet isn't already on a GFCI circuit, use a GFCI outlet adapter or a GFCI-protected extension cord as your starting point. This is a basic safety requirement, not optional.
Use the right outlet cover
As noted earlier, wet locations need a while-in-use (bubble) cover rated for wet environments. Damp locations (like a covered patio that doesn't get direct rain) may accept a simpler weatherproof flip cover, but if there's any chance of rain or splash reaching the outlet, use the bubble cover. Look for covers marked 'extra-duty' for wet locations.
Don't overload the circuit
A standard 15-amp outdoor outlet handles about 1,800 watts max (80% of 1,500 watts continuous is the practical safe limit). Most patio string lights are low-wattage LED sets, so you'll rarely hit that ceiling with lights alone. But if you're also running a fan, an outdoor speaker, or other devices on the same circuit, add up your total wattage and stay under the limit.
If you're also setting up an outdoor TV or AC unit alongside your lighting, make sure they're on separate circuits. If you’re also planning to run an outdoor TV on that same covered patio, keep it on its own circuit and confirm the outlet and cord routing are rated for wet locations.
If you’re also trying to hide an air conditioner on a patio, the same planning mindset works: choose a safe, ventilated placement and use weather-resistant materials to conceal it without blocking airflow outdoor TV or AC unit. If you plan to set up an outdoor TV, treat it like any other weather-exposed device: confirm power requirements and keep all connections protected.
If you’re also trying to hide an AC unit on a patio, plan airflow-safe screening that blocks sightlines without trapping heat.
Protect all connections from moisture
Any junction or splice in an outdoor cord run needs waterproof protection. Use waterproof wire connector caps or gel-filled connectors at any junction point. A non-waterproof splice connection can corrode, create voltage loss, and eventually short out. If you're connecting multiple light strings, each join needs a proper waterproof connector, not just tape.
Step-by-step DIY plans for the most common concealment setups
Here are the three most common patio cord-hiding scenarios and how to handle each one from start to finish.
Setup 1: Hiding a cord along a patio wall or house foundation
- Measure the route from the outlet to the light. Add 10% for slack.
- Select an outdoor-rated PVC surface raceway in the appropriate size for your cord diameter. Most single extension cords fit in a 3/4-inch or 1-inch channel.
- Mark the mounting holes along the base of the wall at 16-inch intervals using a pencil.
- Drill pilot holes using a masonry bit (for concrete or stucco) or wood bit (for siding). Insert plastic anchors for masonry.
- Screw the raceway base to the wall. Leave the cover off for now.
- Lay the outdoor-rated cord into the open channel. Don't coil any excess inside the channel.
- Snap the raceway cover on from one end to the other.
- Plug in with a GFCI adapter or verify the outlet is GFCI-protected. Install a while-in-use bubble cover on the outlet.
- Test the lights before mounting the channel cover permanently.
Setup 2: Running a cord up a patio post and along an overhead beam for string lights
- Measure the total run: from outlet, up the post height, and across the beam to the first light connection point.
- Choose an outdoor-rated cord in the correct gauge for your total light wattage and run length.
- Mount UV-rated cable clips every 12 inches up the post on the least-visible face.
- At the top of the post, use a corner raceway fitting or a 90-degree cable clip to redirect the cord horizontally along the beam.
- Clip or staple the cord along the underside or inner face of the beam at 12-inch intervals using insulated staples or outdoor cable clips. Avoid stapling through the cord jacket.
- At the first light connection, use a waterproof connector to join the extension cord to the string lights.
- Route any additional cord to subsequent light anchor points, keeping it tight to the structure.
- Plug in at the outlet with a GFCI-protected outlet and a while-in-use cover.
Setup 3: Quick ground-level floor crossing with a cord cover (tonight's fix)
- Buy a beveled, flat cord cover rated for outdoor use. Measure the crossing distance and get a cover long enough to span it, ideally in one piece to avoid gaps.
- Clean the patio surface where the cover will sit. Dirt or grit prevents adhesive from gripping.
- Lay the cord in the channel of the cover before placing it down.
- Position the cover as close to the edge of the patio as possible, not through the center of a walkway.
- Press down firmly if the cover has adhesive backing, or use double-sided outdoor tape for extra grip on smooth surfaces.
- Make sure both ends of the cover are fully seated and not creating a lip that could catch a toe.
- Plug in and verify GFCI protection at the outlet.
If you're setting up a more comprehensive outdoor living space and dealing with other eyesores beyond cords, the same planning approach applies to hiding other outdoor equipment. After you secure the grill in place, use the same kind of weatherproof hardware and moisture protection to keep the connection points reliable secure grill to patio. An organized patio layout, whether you're concealing cords, covering drain grates, or disguising other functional elements, always starts with mapping the space first and working with the natural perimeter before cutting across open areas.
A quick pre-installation checklist
- Cord is outdoor-rated (look for W in the jacket code: SJTW, STW, etc.)
- Cord gauge matches your run length and total wattage
- Outlet is GFCI-protected
- While-in-use bubble cover installed at outlet for wet locations
- No cord coiled inside any channel or cover
- All cord-to-cord junctions use waterproof connectors
- All fasteners and channels are rated for outdoor or wet-location use
- Total load is under 1,500 watts continuous on a 15-amp circuit
- No cord running under a rug for more than a very short crossing
- Cord is not stretched tight or pinched at any fastening point
FAQ
Can I run an extension cord across open patio areas to reach lights faster, or should I only route along edges?
If you need to cross open patio space, avoid running the cord across a walking path or under furniture where it can snag. A safer alternative is to route it along a wall or railing, then use cord clips on the underside of railings or the base of posts so the visible section stays minimal. If you must span a gap, use an outdoor-rated cord cover that creates a raised, protective channel and secure it at both ends so it cannot sag.
What’s the safest way to attach a hidden patio cord, are staples or nails ever okay?
Never staple cords to wood, even if they look hidden. Use outdoor-rated clips or UV-resistant fasteners that clamp the jacket without puncturing it. If you are mounting raceways, drill and anchor correctly (masonry bit and plastic anchors on concrete, coated or stainless screws on wood) so water cannot wick into tiny screw holes.
If I hide the cord in a channel, can I also hide the plug or any connections inside the cover?
Treat every plug end as a critical safety point. Don’t cover an outlet or connection in a way that can trap moisture, and keep junctions inside a weatherproof enclosure if they are not in a factory-designed section. Also confirm the cord connection stays fully seated and that the cord is not under tension once covered.
Can I paint or stain cord covers to match my patio, and will that affect their safety?
Yes, but only if the cable channel and the cord jacket are both rated for outdoor use and the cover is installed so it stays closed and drains or sheds water. For dampness-prone areas, choose covers designed for wet locations and avoid painting over identification labels on the cord or covers that indicate rating.
Which outdoor outlet cover should I use for a patio, a basic weatherproof cover or a bubble cover?
For wet locations, use a while-in-use bubble cover that stays closed around the cord even when plugged in. A simple flip-lid or uncovered receptacle is not sufficient if rain or splash can reach it, and extra-duty wet-location covers are required when the outlet can be directly exposed.
Is it okay to coil extra cord length inside a corner or behind patio furniture if it’s hidden?
You can bundle a cord only if it is not under sustained load and it remains unimpeded, but for patio lighting you generally want the cord laid taut along its route. Coiling behind furniture is risky, and overheating increases with wattage. If you find excess length, store it in a loose, flat loop in a dry location rather than a tight coil in an enclosed corner.
What should I do if my hidden extension cord or lights feel hot during use?
If the cord gets warm to the touch, dimming occurs, or you smell heat, stop using it immediately and recheck wattage, cord gauge, and run length. Confirm the cord is outdoor-rated and the connection points are dry and secure. If the setup exceeds the safe wattage for the outlet or circuit, switch to a lower-load configuration or a dedicated circuit instead of using a thicker extension only after it starts failing.
Can I connect two extension cords together outdoors to reach the far end of the patio?
You generally should not daisy-chain extension cords or plug one extension cord into another outdoors. Instead, choose a single outdoor-rated cord of the correct gauge and total length, or use a properly rated outdoor power strip or in-use cover that is designed for outdoor use. This reduces loose connections that can corrode or create voltage loss.
How temporary is “hidden cord” really, when should I switch to a permanent outlet or wiring?
Outdoor extension cords are not rated like permanent wiring, so use them only as temporary solutions. For a longer-term patio setup, consider installing a fixed outlet or a professionally rated outdoor power solution, and still use channels or conduit for any cord segments that must remain flexible. If you want a permanent “cord-free” look, raceways can hide temporary routing, but they do not replace proper fixed wiring.
Next Articles
How to Hide a Grill on Patio: Safe DIY Options
Step-by-step DIY options to hide a patio grill safely with enclosures, screens, covers, and grill-zone heat clearance.
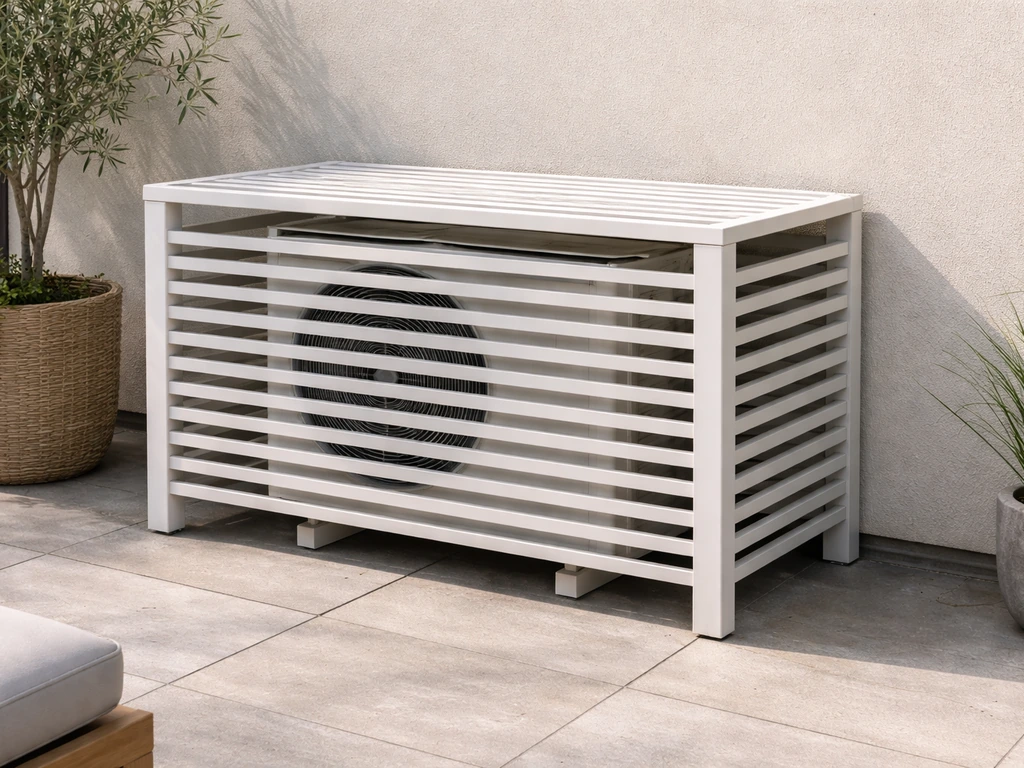
How to Hide an AC Unit on a Patio Without Blocking Airflow
Step-by-step ways to hide a patio AC condenser with screens or built-in housing while keeping airflow, clearance, and dr

How to Decorate a Long Narrow Patio: Layout Tips
Practical DIY layout and decor tips to widen a long narrow patio using zoning, furniture spacing, lighting, greenery, an