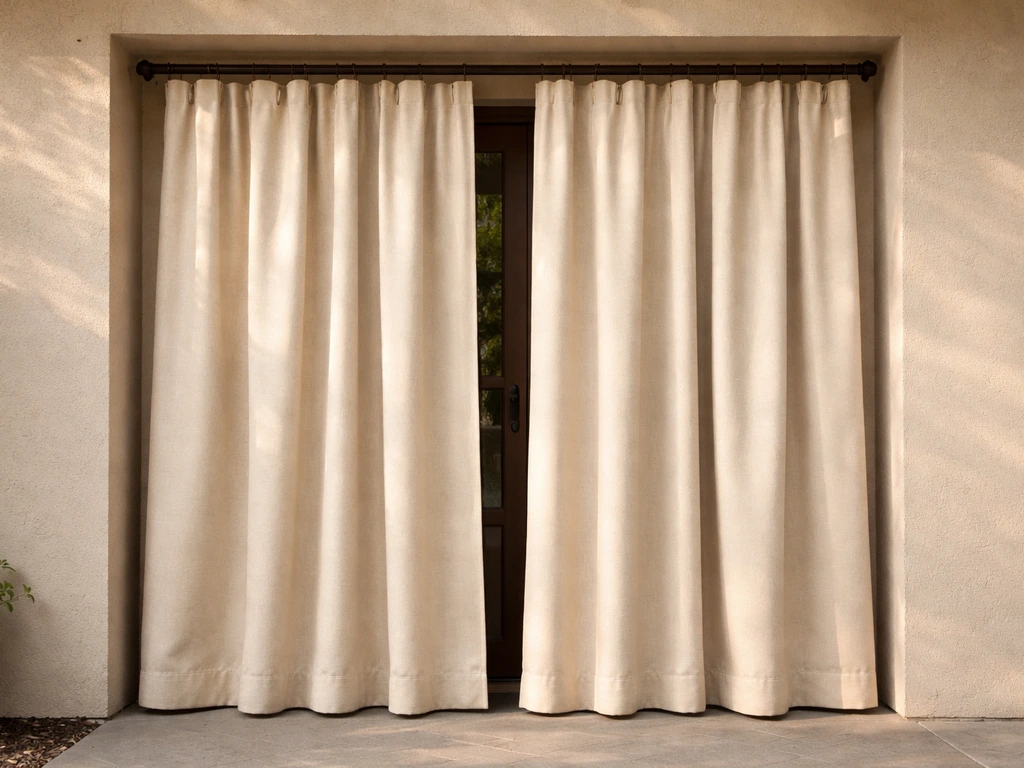
You can make solid, weather-ready patio curtain panels from drop cloths for around $30 to $60 total, and they'll outperform most cheap outdoor curtains you'd find at a big-box store. The basic process is: buy canvas drop cloths in the right size, cut and hem them to your patio opening dimensions, reinforce the stress points, add grommets or a rod-pocket hem, then hang them on a rust-resistant rod or track system. If you're still figuring out the overall approach, this guide on how to make curtains for outdoor patio will help you choose fabric, size, and hanging hardware cut and hem them to your patio opening dimensions. Done right, they block sun, cut wind, add real privacy, and hold up through multiple seasons with minimal maintenance.
How to Make Patio Curtains Out of Drop Cloths

Felix Brennan
3 Jul 2026
Choosing the right drop cloths and measuring your patio opening
Not every drop cloth is created equal, and the type you choose matters a lot for outdoor use. Canvas drop cloths come in cotton duck weights typically described by a numbered system. Cotton duck, also called duck cloth or canvas, is described as a heavy, plain-woven cotton fabric, and it is commonly classified using a numbered system based on fabric weight per area blank" rel="noopener noreferrer">numbered cotton duck weight classification systems. A #10 cotton duck canvas runs about 15 oz per square yard, that's the stuff that holds up to wind and sun without flopping around like a sheet. A #12 cotton duck is lighter at around 11.5 oz per square yard, which is more manageable to work with by hand but slightly less rigid in a stiff breeze. For most patio curtain projects, a #10 or heavy-duty 10 oz to 12 oz canvas is the sweet spot: heavy enough to hang well and resist wind flutter, light enough that you're not wrestling with it on a ladder.
One critical thing to check before you buy: many natural canvas drop cloths are NOT treated for water or mildew resistance. Some brands explicitly state the fabric is untreated, which means moisture will soak straight through and mildew can set in fast in humid climates. Look for drop cloths or canvas tarps that are silicon-treated or have some kind of mildew-resistant finish if you're in a rainy or humid area. Alternatively, you can treat raw canvas yourself with an outdoor fabric waterproofing spray after hemming, more on that in the weatherproofing section below.
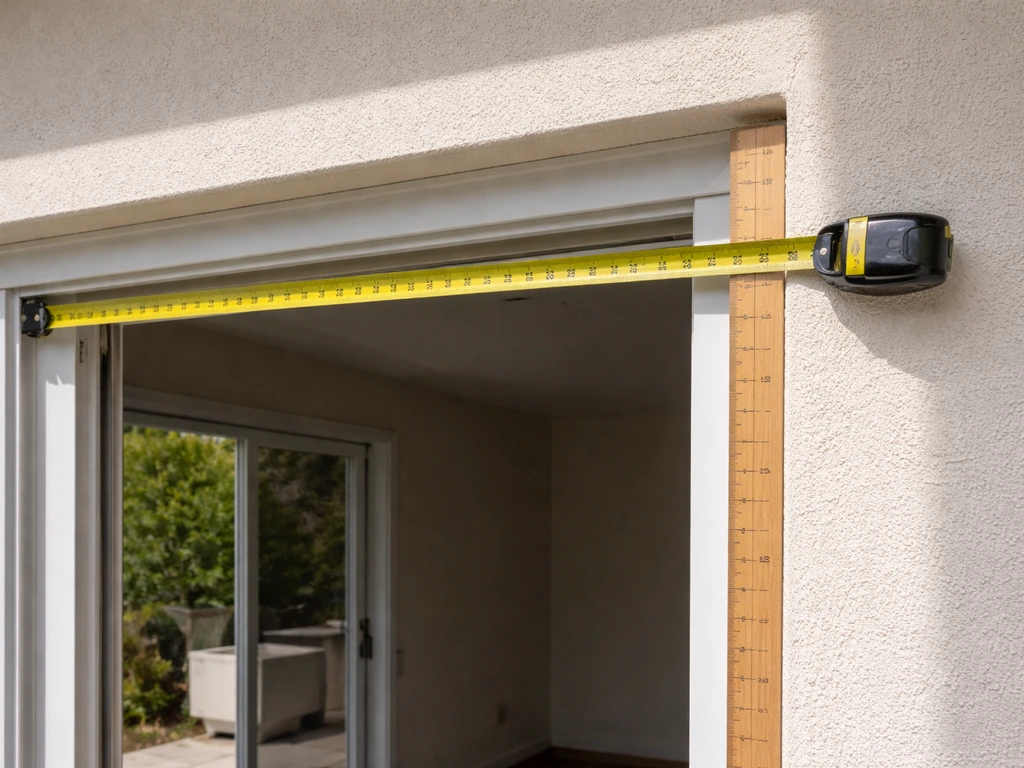
For measuring, always start at your patio opening, not a tape measure guess. Measure the width of each opening you want to cover. For a panel that can actually close and block wind, you want each panel to be 1.5 times the opening width, so a 6-foot gap needs at least 9 feet of panel width total (split across however many panels you're hanging). For height, measure from your curtain rod or track down to where you want the hem to fall. Adding 2 to 3 inches to pool slightly on a deck surface helps block low drafts; for a cleaner look, aim for 1 inch off the ground. Add 6 to 8 inches to your finished height measurement to account for the top hem (rod pocket or grommet header) and the bottom hem.
| Patio Opening Width | Panels Needed | Fabric Width Per Panel (1.5x fullness) | Recommended Drop Cloth Size |
|---|---|---|---|
| 4 feet | 2 | 36 inches each | 4x9 or 5x9 drop cloth |
| 6 feet | 2 | 54 inches each | 6x9 or 4x12 drop cloth |
| 8 feet | 2 or 3 | 48–72 inches each | 6x9 or 9x12 drop cloth |
| 10–12 feet | 3–4 | 45–54 inches each | 9x12 drop cloth (cut down) |
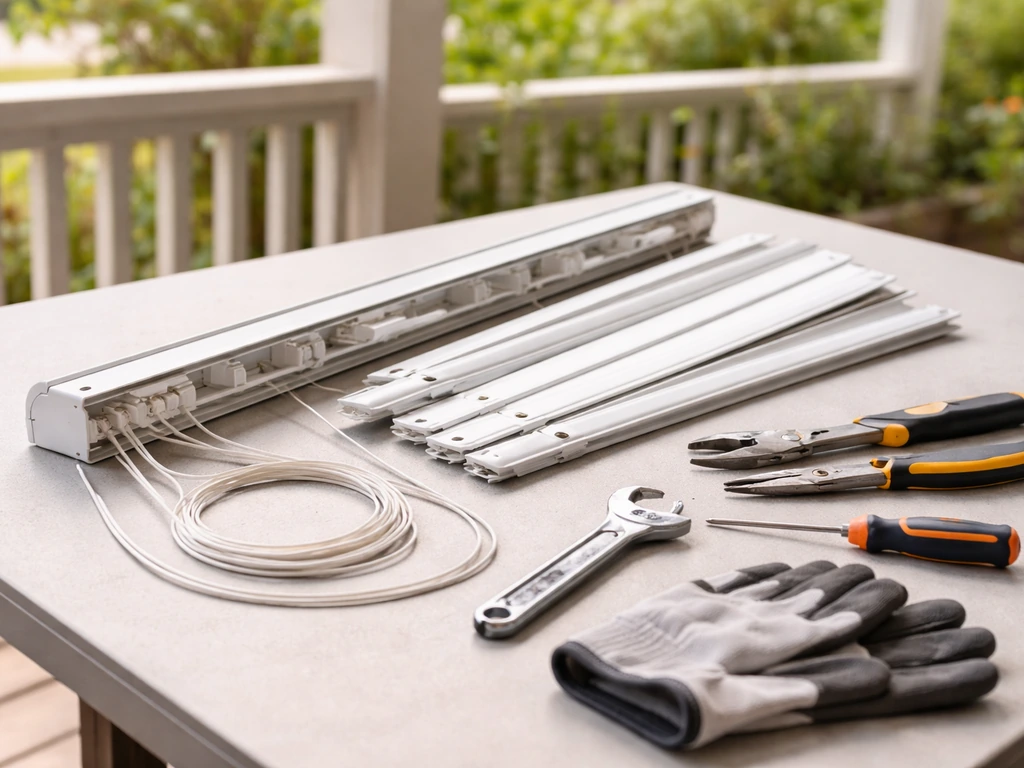
Supplies and tools you'll need
Pull everything together before you start cutting. Running out of grommets halfway through is one of the most frustrating ways to lose a weekend. Here's what the full project requires:
- Canvas drop cloths (cotton duck, #10 or heavy-duty weight, treated for mildew resistance if possible)
- Measuring tape and a long straightedge or carpenter's square
- Fabric chalk or a washable marker for cutting lines
- Sharp fabric scissors or a rotary cutter with a cutting mat
- Sewing machine (a basic machine with a heavy-duty needle, size 16 or 18, handles canvas fine) or iron-on hem tape for a no-sew option
- Grommet kit with grommets sized 1/2 inch to 1 inch (brass or stainless steel for outdoor rust resistance) — or extra fabric for rod-pocket hems
- A hammer and grommet setter punch (usually included in kits)
- Outdoor curtain rod or tension rod rated for the span — look for powder-coated steel or aluminum to prevent rust
- S-hooks or curtain rings with clips if using grommets
- Rod mounting brackets and appropriate screws or lag bolts for your patio posts or wall
- Fabric weights or drapery weights (small lead or steel weights sewn into the bottom hem)
- Curtain tie-backs or outdoor bungee hooks for holding panels open
- Optional: outdoor fabric liner (adds UV blocking and insulation)
- Optional: outdoor fabric waterproofing spray (like Scotchgard Outdoor or similar)
On hardware: don't cut corners on the rod or track system. A thin tension rod rated for indoor use will sag, bow, or pop out of brackets the first time your curtains fill with wind. For spans over 5 feet, use a 1-inch diameter rod with a center support bracket, or go straight to a ceiling-mounted curtain track system (which handles weight and wind far better than a wall-mounted rod in many outdoor setups).
Step-by-step: cutting, hemming, and reinforcing your panels
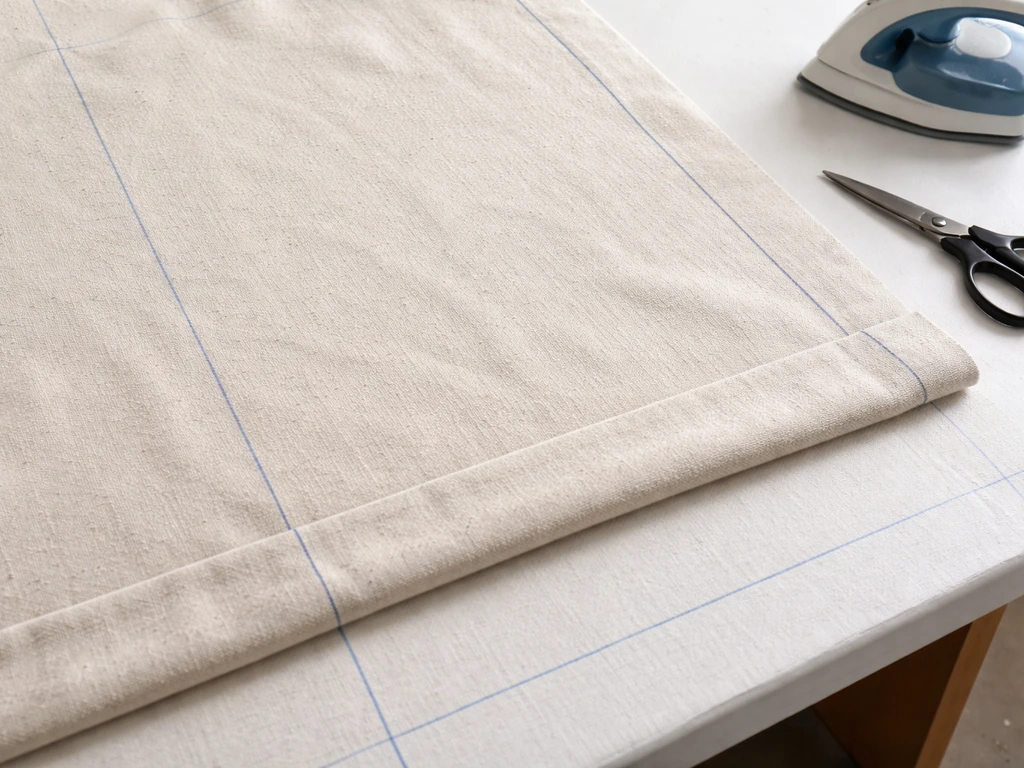
Pre-wash your drop cloths before cutting if you plan to machine wash them later. Canvas shrinks, sometimes 3 to 5 percent, and if you skip this step your nicely hemmed panels will come out of their first wash looking short and bunched. Wash in cold water, dry on low heat, then iron out the worst wrinkles before marking your cut lines.
- Lay the drop cloth flat on a clean floor or large table. Use your tape measure and chalk to mark the finished width and height of each panel, adding 2 inches on each side for side hems and 4 inches at the top and bottom for hem allowances.
- Cut along your chalk lines using sharp fabric scissors or a rotary cutter against a metal straightedge. Canvas frays fast, so cut clean and straight the first time.
- Fold and press the side hems: fold 1 inch inward, then fold again 1 inch and pin or clip in place. Sew a straight stitch close to the inner fold edge. If you're going no-sew, use iron-on hem tape rated for heavy fabric — hold each section with a hot iron for a full 10 seconds for a strong bond.
- For the bottom hem, fold up 2 inches, then fold again 2 inches and sew. Before closing the bottom hem completely, slide drapery weights or small fishing sinker weights evenly spaced every 12 to 18 inches inside the hem channel before stitching it shut. This is what keeps panels from billowing wildly in a breeze.
- For the top hem, decide now whether you're doing a rod pocket or grommets (see the next section for guidance on which to choose). For a rod pocket: fold the top down 1 inch, then fold again to create a channel wide enough for your rod (usually 3 to 4 inches for a 1-inch rod) and sew straight across.
- Reinforce stress points at every corner and anywhere you'll be adding grommets. Cut small squares of extra canvas (about 2x2 inches) and sew or iron-bond them to the back of the fabric at each stress point before installing hardware. This prevents grommets from tearing through under wind load.
If you're installing grommets, space them every 6 to 8 inches across the top header. Mark each center point with chalk, use a hole punch or the grommet setter's cutting die to punch through the canvas cleanly, then set the grommet by placing it through the hole and hammering the back piece down firmly on a hard surface. Test each one with a hard tug before you hang anything, a grommet that wasn't fully seated will pull loose on the first windy day.
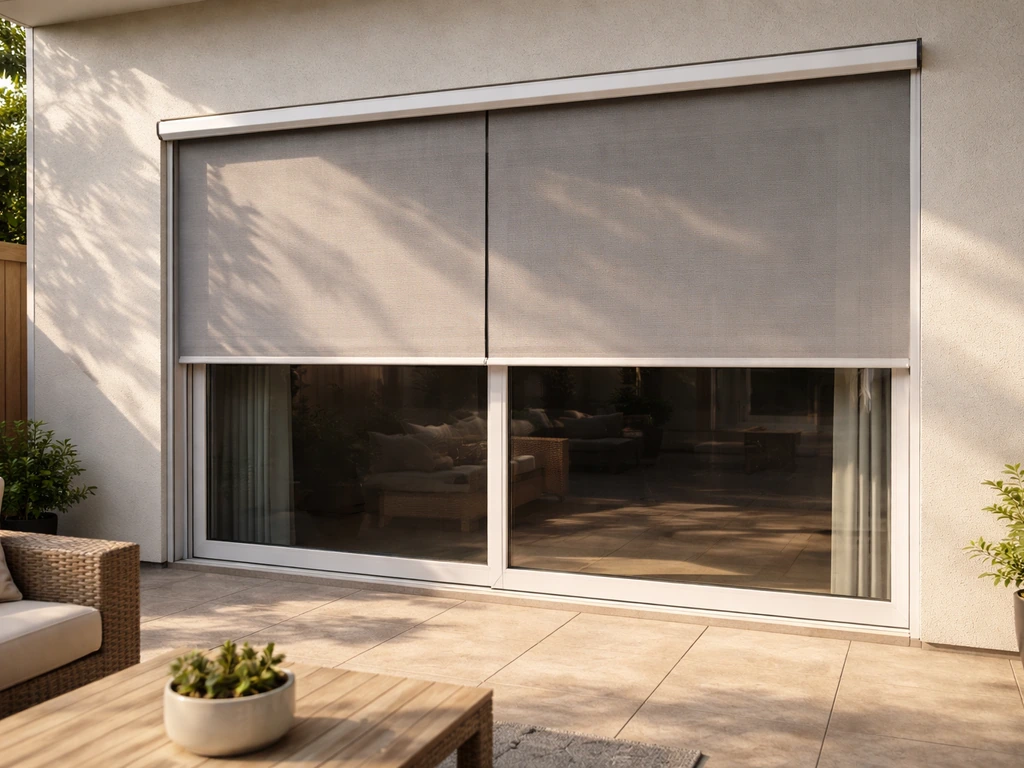
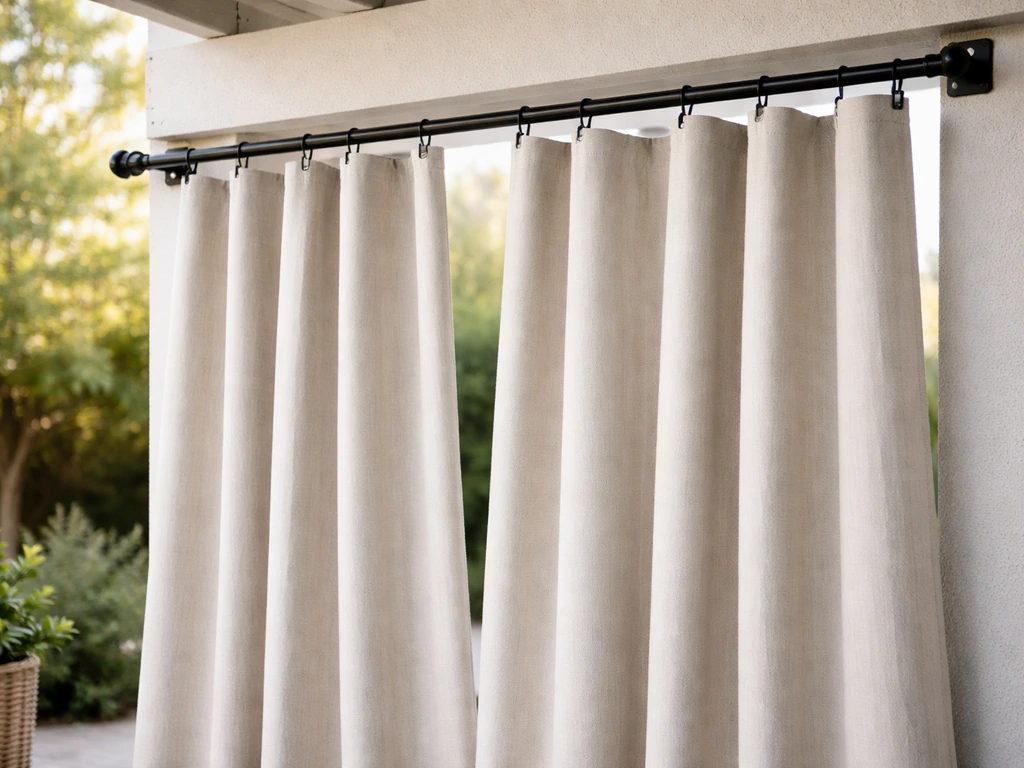
Hanging methods that actually work outdoors
The right hanging method depends on your patio structure, how often you want to open and close the panels, and how much wind you're dealing with. If you want the full walkthrough, follow these same hanging and weatherproofing tips when you learn how to add curtains to your patio how to add curtains to patio. Here's how the three main approaches compare:
| Method | Best For | Pros | Cons |
|---|---|---|---|
| Rod pocket | Covered patios, light wind, fixed panels | Clean look, easy to make, no extra hardware | Hard to slide open/closed, poor for heavy canvas over long spans |
| Grommets with rings/hooks | Most DIY patio setups, moderate wind | Easy to open/close, very adjustable, secure | Requires grommet kit, slight visible hardware |
| Ceiling-mounted curtain track | High-wind areas, large openings, frequent use | Smoothest operation, handles weight well, professional look | Higher cost, requires ceiling/beam mounting |
For most homeowners with a standard covered patio or pergola, grommets with rustproof S-hooks or curtain rings is the best balance of function and ease. Mount your rod using brackets rated for at least twice the weight of your panels, canvas is heavier than you expect when it's wet. Set brackets every 4 feet maximum to prevent rod sag, and use lag bolts into solid wood posts rather than screws into drywall or vinyl if you can.
If you have a flat ceiling or a pergola with beams, a ceiling-mounted curtain track is worth the upgrade. The panels hang from small gliders that roll along the track, which means they open and close smoothly even with heavy canvas. Track systems also keep curtains close to the ceiling edge, which reduces the gap where wind can get underneath and start lifting panels. For large patio openings (10 feet or wider), this is genuinely the most practical option.
Whichever method you use, install the rod or track level using a spirit level before anchoring it permanently. A rod that droops even half an inch in the center will cause all your panels to slide toward the middle, bunch up, and leave the outer edges uncovered.
Getting good coverage: overlap, tie-backs, and wind control
Sun and wind protection only works if the panels actually close and stay closed. A few practical tricks make a big difference here.
Overlap is the most overlooked part of the whole project. When two panels meet in the center of an opening, they should overlap each other by at least 6 to 8 inches. If they just touch or barely meet, wind will push through the gap and light will leak in from every angle. Plan your panel widths to include this overlap from the start, it's much easier to build in at the cutting stage than to try to fix later.
For keeping panels closed in wind, sew a small neodymium magnet into the hem of each overlapping panel edge at the center closure point. Use magnets rated at least 10 lbs of pull force, and sew them inside a small fabric pouch so they don't corrode against bare canvas. Two or three magnet pairs spaced down the overlap edge will hold panels shut through steady breezes far better than tie-backs alone.
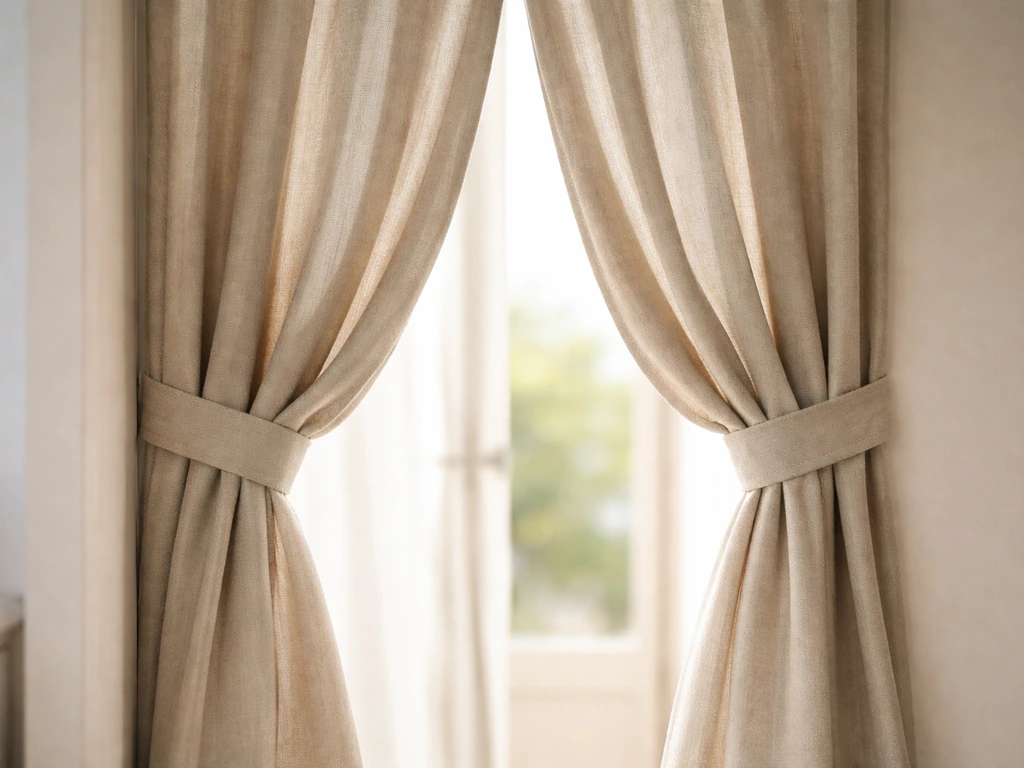
When you want panels open and tied back, use heavy-duty outdoor cleats mounted to the posts at about hip height, or loop-style tie-backs made from the same canvas fabric. Avoid lightweight decorative tie-backs, they'll snap or slip the first time you have a real gust. A simple bungee hook looped around the post is honestly one of the most reliable options for a casual patio setup.
If wind is a persistent problem and your panels are still flapping despite weighted hems, consider adding clip-on panel anchors at the bottom, these are small hooks or clips that attach to the bottom hem and clip onto an eye bolt set into the deck surface or a patio post. This is the same principle as staking a tent, and it works just as well. Keeping curtains from blowing is one of the most common frustrations with outdoor panels, and a combination of weighted hems plus bottom anchor points solves the problem almost completely.
For serious UV and privacy improvement, add a lining to your panels. A basic polyester outdoor lining fabric sewn to the back of each canvas panel adds a second layer of UV blocking, helps the panels hang with more body, and gives a cleaner look from outside. Polysun polyester outdoor fabric lists properties such as dirt- and water-repellent coating, spun-dyed fibers, and color-loss resistance to sunlight under proper use and maintenance basic polyester outdoor lining fabric. If you're in a hot climate, a white or silver-backed lining will reflect more heat than the natural canvas alone.
Weatherproofing, cleaning, and storing your drop cloth curtains
Raw canvas is not waterproof, and even treated canvas will lose its water resistance over time. Once your patio blinds are weatherproofed, you can maintain them with occasional gentle cleaning and proper drying how to make patio blinds. After you finish hemming and before you hang the panels, give each one a thorough coat of outdoor fabric waterproofing spray. Do this outdoors on a dry day, lay the panels flat, spray in overlapping passes, let them dry completely (usually 24 hours), and apply a second coat. Reapply once a season or any time water stops beading on the surface.
Mildew is the biggest long-term threat to canvas curtains. The key is never letting them stay wet for extended periods. If you know a rainy stretch is coming and the curtains will be left up, treat them with a mildew-resistant spray like Concrobium or a diluted borax solution and let them dry fully before closing them up. If mildew does develop, scrub affected areas with a mixture of 1 cup white vinegar or 1/4 cup oxygen bleach in a gallon of water, rinse thoroughly, and dry completely in the sun.
For regular cleaning, canvas is forgiving. Brush off loose dirt with a stiff brush, then hose down with water and a little mild soap. Avoid putting canvas drop cloth curtains through a hot machine wash cycle repeatedly, the heat and agitation will wear the fibers and shrink the material unevenly. Cold wash on gentle, low-heat dry works if you need a thorough clean, but hand washing and air drying extends their life significantly.
At the end of the season, take panels down before the first hard freeze if you're in a cold climate. Canvas that gets wet and freezes will stiffen, crack along hem lines, and lose its shape. Before storing, make sure panels are bone dry, fold them loosely rather than rolling tightly, and store in a breathable cotton bag or a ventilated plastic bin with the lid slightly ajar. Avoid airtight bags, which trap any residual moisture and create exactly the conditions mildew needs to thrive. A small packet of silica gel in the storage bin is cheap insurance.
One final note: if you're planning to add curtains to your patio as part of a larger outdoor enclosure project, think ahead about how the curtains will work with any screens, blinds, or structural elements you might add later. If your patio blinds are sticking or not closing smoothly, the fixes start with checking mounting alignment and cleaning the tracks or slats. Drop cloth curtains are an excellent first layer for privacy and wind protection, but designing them to work alongside other enclosure elements from the start saves a lot of rework down the road.
FAQ
If my drop cloth is untreated, how can I waterproof it so patio curtains stay functional in rain?
Use a water-repellent finish designed for outdoor textiles, not a furniture sealant. If you waterproof after hemming, keep the spray off the grommet holes and hardware contact points, then let the canvas fully cure (often 24 hours) before hanging so it does not rub off on your rod or rings.
Can I use the lighter-weight drop cloth, or do I need a heavy #10 canvas for outdoor curtains?
A lighter canvas (around #12 cotton duck) can work, but it will flutter more in steady wind. If your goal is wind-blocking, choose #10 or heavier canvas (10 oz to 12 oz) and increase stiffness at the header area (thicker rod pocket or a sturdier top hem) to prevent sag.
What’s the best way to prevent my hemmed curtains from shrinking and bunching after the first wash?
Plan for shrinking on both sides of the panels by pre-washing and drying the cloth you will cut, then re-measuring the intended finished width and height. After pre-wash, mark and cut using the shrunk measurements, not your original drop cloth size.
How far from the edges should I place grommets, and should I install them before or after hemming?
Do not place grommets too close to the edge of the hem, leave at least 1 inch of canvas between the grommet and any stitched edge. Also, punch holes after the top hem is finished so the grommets sit in the reinforced band, which reduces tearing when the fabric pulls.
What should I check before mounting a ceiling curtain track so my finished panels do not scrape the patio structure?
If you are using ceiling track, verify the track clearance before cutting panels so the bottom hem does not hit posts, beams, or decorative trim when the curtains move. A quick dry-run is to hang a scrap the same length on the track to confirm clearance across the full open and closed travel.
My curtains still billow in wind, even with tie-backs. What order should I troubleshoot first?
If panels lift when they should stay shut, first confirm overlap is built in, then add or reposition bottom anchors. Magnets help at the overlap seam, but they cannot compensate for gaps at the bottom edge or a rod that is slightly out of level.
What tie-back or cleat style actually keeps panels closed without constantly re-adjusting?
Use outdoor cleats or tie-backs made from the same canvas fabric for similar stretch and weight, and avoid ties that are too short. When tie-backs pull at an angle, they can loosen the overlap edge, so keep your tie points centered and strong enough to hold during gusts.
How do I measure and cut when my patio has an uneven opening or the rod height varies across the span?
Yes, but treat it like sizing for a moving target: leave a slightly larger finished height if your track or rod mounting is adjustable. Measure twice with the curtain hardware in its final position, then account for top and bottom hems so the closure line stays consistent across panels.
Can I clean canvas patio curtains in place, or should I remove them to avoid mildew?
For outdoor canvas, cleaning works better in cool conditions so mildew spores do not spread as the fabric stays damp. Brush, rinse, and then dry completely in sun or airflow before closing or storing, because trapped moisture is what causes mildew to return.
What should I do if rust spots appear around grommets or hardware?
If you are seeing rust on grommets, switch to stainless or brass hardware and keep metal pieces from contacting treated fabric that stays wet. Also, rinse mud or salt residue off quickly, since salts can accelerate corrosion at metal seams.
How should I store drop cloth patio curtains through winter to prevent cracking and mildew?
If you get frost, remove curtains before hard freezes. Wet canvas freezes and then thaws unevenly, which can create permanent stiffness and cracks at hems; bone-dry storage and loose folding reduce stress lines.
Is it worth adding a lining, and does it change how I waterproof and care for the curtains?
Add lining if you want more UV reduction and better privacy from the outside, especially in bright sun. If you add lining, sew it to the back of the canvas panels so it drapes as one layer, then waterproof only the outer canvas surface to avoid trapping moisture inside the lining.
Next Articles
How to Make Patio Blinds: DIY Build, Measure, Install
Step-by-step guide to make patio blinds: choose style, measure for your structure, build, install, weatherproof, and mai
How to Fix Patio Blinds: DIY Repair Guide
Quick DIY steps to fix patio blinds: diagnose issues, repair cords, slats, tracks, tilt, and brackets safely.
How to Make Curtains for Outdoor Patio: DIY Guide
Step-by-step DIY for outdoor patio curtains: measure, choose fabrics, sew or assemble panels, add hardware, weatherproof