You can make outdoor patio curtains in a weekend using solution-dyed acrylic fabric, stainless or powder-coated hardware, and either a rod pocket or grommet top. The basic process is: measure your opening, cut panels to size with hem allowances, sew or seal the edges, add your hanging header, then mount everything so the curtains can handle wind without whipping loose. Budget around $3–8 per yard for decent outdoor fabric, and plan about 4–6 hours of build time for a standard two-panel opening. Once you have your fabric cut and built, follow the same hardware and hanging steps for how to put up patio curtains so they hang straight and handle wind. If you are trying to figure out how to make patio blinds, start by choosing the right outdoor fabric and planning your measurements first.
How to Make Curtains for Outdoor Patio: DIY Guide

Start with purpose: privacy, sun, or wind?
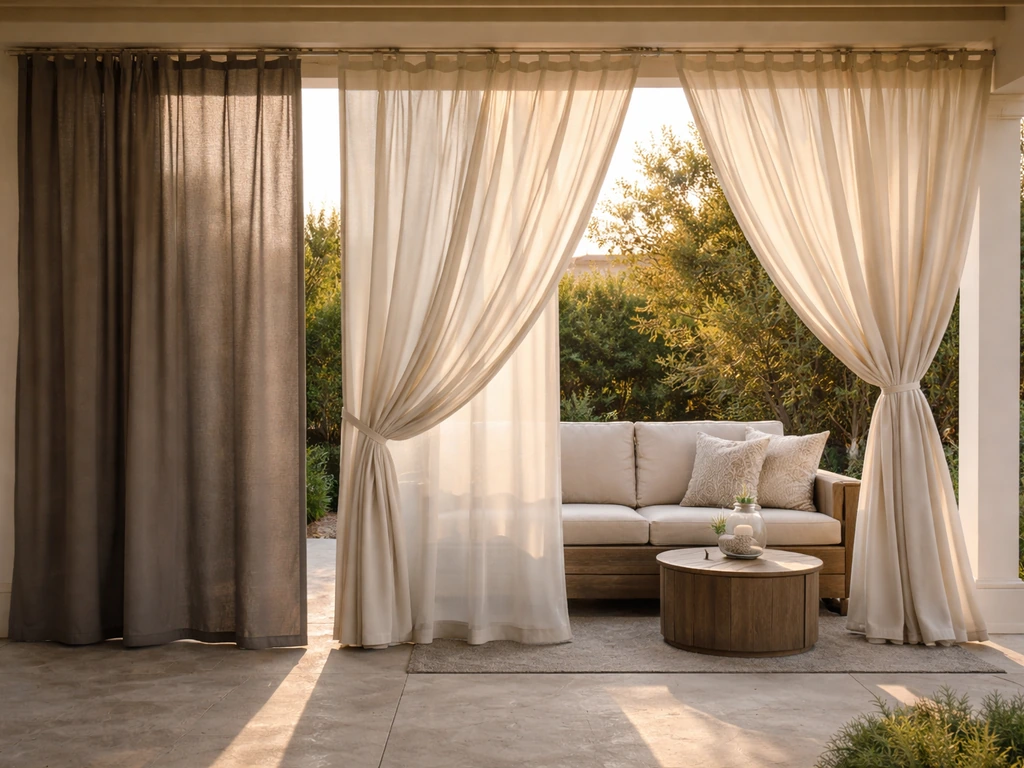
Before you cut anything, decide what job these curtains actually need to do. That single decision drives your fabric weight, how many panels you need, and how you secure them. Privacy curtains on a screened porch or open patio mostly need to block sightlines, so a medium-weight outdoor fabric works fine. Sun-blocking panels need a tighter weave or a solar-screen fabric that filters UV without turning your patio into a cave. Wind curtains are the heaviest job: you need heavier fabric, more secure anchoring at the top and bottom, and hardware rated for load.
Most patio projects need a combination. A side panel that blocks your neighbor's view also catches afternoon wind. Think through each opening separately. A south-facing opening probably needs sun control most; an open west or north side probably needs wind control more. Sketch a quick layout of your patio and label each opening by its primary need. That map will guide every choice below.
Measure your patio openings and plan panel sizes
Measure the width and height of each opening you want to cover. Use a metal tape measure, not a fabric one, and measure at least twice. For width, measure at the top, middle, and bottom and use the largest number. For height, measure from where your rod or cable will sit down to where you want the panel to end.
On height: keep the finished bottom of your panels about half an inch to one inch off the ground. This reduces wind wear on the hem and stops moisture from wicking up into the fabric during rain. If you want a pooled or puddled look, add 4–6 inches, but that style is hard to manage outdoors and collects dirt fast. Practical wins here.
On width, there are two numbers to track. First, the rod or cable should extend 4–12 inches beyond the opening on each side if your structure allows it, so the panels can stack off to the sides without blocking light when you want them open. Second, your total fabric width needs to be 1.5 times the opening width to create proper folds and fullness when the curtains are closed. For a 72-inch opening with two panels, each panel should be about 54 inches wide before hemming. Then add 4–6 inches of overlap at the center where the two panels meet, so wind can't force them apart at the seam. For overlap when panels are closed, add at least 6 to 12 inches on each side according to this custom-curtain measuring guideline add 4–6 inches of overlap at the center where the two panels meet.
| Opening Width | Total Fabric Width Needed (1.5x) | Per Panel (2-panel setup) | Center Overlap per Panel |
|---|---|---|---|
| 48 inches | 72 inches | 36 inches | 4–6 inches |
| 72 inches | 108 inches | 54 inches | 4–6 inches |
| 96 inches | 144 inches | 72 inches | 4–6 inches |
| 120 inches | 180 inches | 90 inches | 4–6 inches |
For your cut dimensions, add hem allowances to both width and height. A standard approach is 2 inches on each side for side hems, 4 inches at the bottom for a weighted hem, and 4–6 inches at the top for your header (rod pocket or grommet band). So a panel that needs to finish at 54 inches wide and 96 inches tall gets cut at roughly 58 inches wide and 106 inches tall.
Choose the right outdoor fabric and hardware
Fabric options compared

Solution-dyed acrylic is the best all-around choice for outdoor curtains. Because the color is infused into the fiber rather than printed on the surface, it resists UV fading far better than polyester or cotton alternatives. Brands like Sunbrella are the benchmark: they are fade-proof, water resistant, mildew resistant, and cleanable with a bleach solution when mold does appear (more on that in the maintenance section). They cost more, typically $15–30 per yard at retail, but they last 5–10 years with basic care.
| Fabric Type | UV/Fade Resistance | Mildew Resistance | Cost per Yard | Best For |
|---|---|---|---|---|
| Solution-dyed acrylic (e.g., Sunbrella) | Excellent | Excellent | $15–30 | Any outdoor use, especially long-term |
| Outdoor polyester (solution-dyed) | Good | Good | $5–12 | Budget builds, covered patios |
| Canvas / drop cloth | Poor–Fair | Poor | $2–5 | Temporary or heavily shaded patios |
| Solar screen mesh | Excellent | Excellent | $8–18 | Sun filtering, heat reduction |
| PVC-coated fabric | Excellent | Excellent | $10–20 | Wind curtains, heavy-duty enclosures |
If budget is a constraint, outdoor-rated polyester gets you most of the way there for covered patios where UV exposure is moderate. Drop cloths are a popular DIY hack and can look great, but they need to be treated with an outdoor fabric protector spray and will not last more than a season or two in direct sun. If you want to explore the drop cloth approach specifically, that deserves its own treatment. For most open patio builds, solution-dyed acrylic is worth the investment.
Hardware to have on hand
- Stainless steel or powder-coated curtain rod (1 inch diameter minimum for outdoor spans over 60 inches)
- Marine-grade stainless wire cable and turnbuckles (for open, high-wind patios)
- Rustproof grommets (size 1 or 1.5 inch inner diameter) and a grommet setting tool
- Curtain rings with clips or snap hooks rated for outdoor use
- Wall anchors or lag screws rated for masonry or wood depending on your structure
- Rod brackets or cable end fittings with at least one intermediate support bracket for spans over 48 inches
- Bottom cable or heavy chain for weighted hem (wind control)
- Fabric weights or sewn-in weight tape for panel bottoms
Cut and build your curtain panels
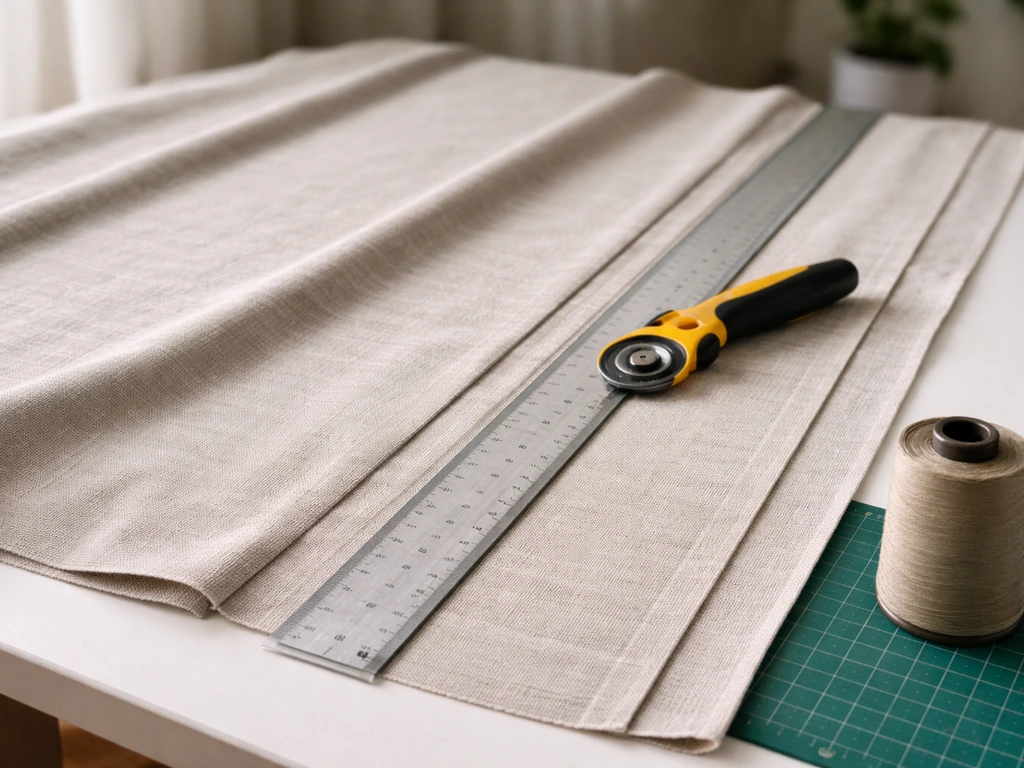
Sewing approach
Lay your fabric on a flat surface and cut panels using sharp fabric scissors or a rotary cutter with a straight edge. Cut on grain (parallel to the selvage edge). For each panel, fold the side edges in 1 inch, press, fold in another 1 inch, and sew a straight stitch close to the inner folded edge. Repeat for the bottom hem with a 2-inch double fold. For the top, fold down 2–3 inches and press flat before adding your header style.
Use a heavy-duty thread rated for outdoor or marine use. Standard thread degrades in UV and moisture faster than the fabric itself, which is a frustrating failure point. Polyester or nylon outdoor thread is worth the small upgrade. If you don't sew, an iron-on hem tape rated for heavy fabric works for side hems and bottoms, but it is not as durable as stitching, especially for panels that will be opened and closed frequently.
No-sew and heat-seal approach
For a no-sew build, use a heat-seal hem tape or a 2-inch perimeter seal made with a heat gun and seam sealer designed for outdoor fabric. This creates a waterproof edge that doesn't fray, and it's a legitimate approach that commercial outdoor curtain manufacturers use on industrial panels. The downside is that it is harder to adjust later if you need to rehem. Grommets still need to be punched and set manually regardless of which construction method you use.
Weighted bottoms for wind control
For any patio that gets regular wind, sew a bottom hem pocket that is wide enough to thread a steel chain or a bottom cable through. A 1-inch pocket along the very bottom of the panel lets you insert a section of ball chain or a thin bead chain, which adds weight to keep the panel from billowing. You can also buy sewn-in drapery weight tape that lies flat inside the hem. Both approaches make a noticeable difference in how the panel behaves in a breeze.
Add your hanging header: grommets, rod pocket, or tabs
Grommet top panels
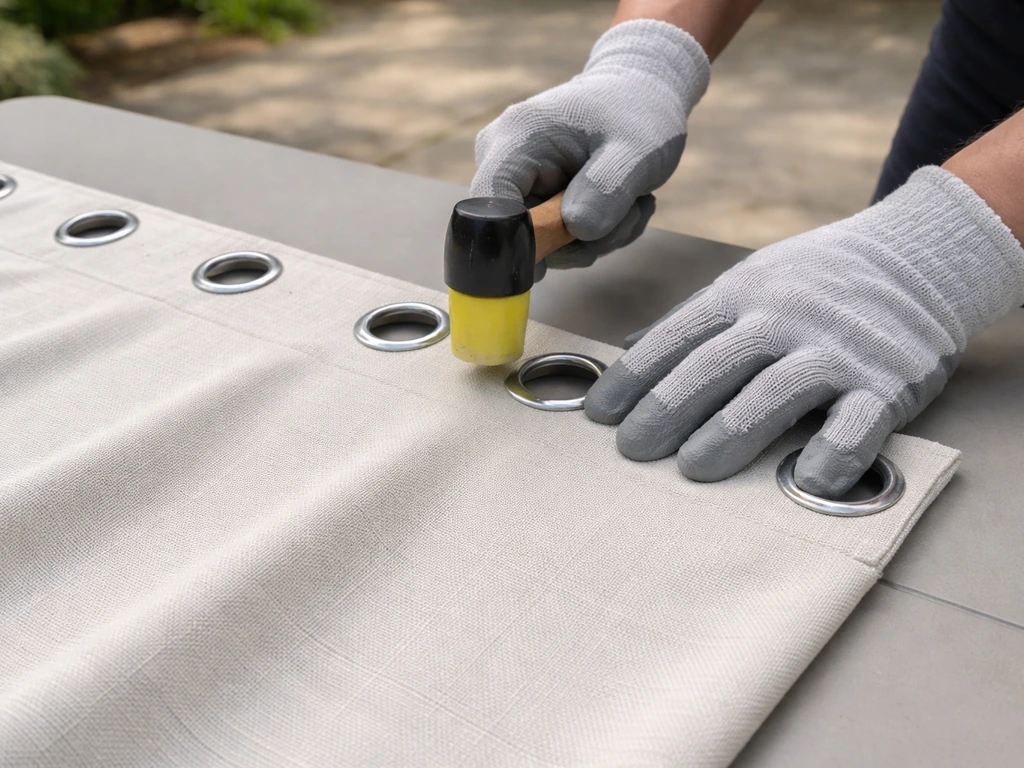
Grommets are the most popular choice for outdoor curtains because they slide smoothly on a rod or cable and look clean. After folding and pressing your top header (fold down 2–3 inches and sew or fuse it flat for a reinforced band), mark your grommet positions. Space them 6–8 inches apart, center-to-center, starting about 1. Some manufacturers standardize grommet placement with a maximum of 8 inches center-to-center spacing maximum 8 inches center-to-center grommet spacing. 5 inches from each side edge. Use a grommet punch or die set to cut the hole, then set the front and back grommet rings together according to the tool instructions. Brass grommets rust outdoors; use stainless, nickel, or zinc-alloy grommets instead.
Rod pocket panels
A rod pocket is simpler to sew but harder to slide open and closed, which makes it better for stationary panels than ones you'll move daily. Fold your top edge down enough to create a pocket that fits your rod diameter plus about half an inch of ease. For a 1-inch rod, fold down about 2.5 inches total, press, and stitch across about 0.5 inches from the fold line and again 2 inches below the fold. The space between the two stitch lines is your rod pocket; the fabric above the upper stitch is a decorative ruffle header. This gives the panel a slightly gathered look when hung.
Tab top and clip-ring options
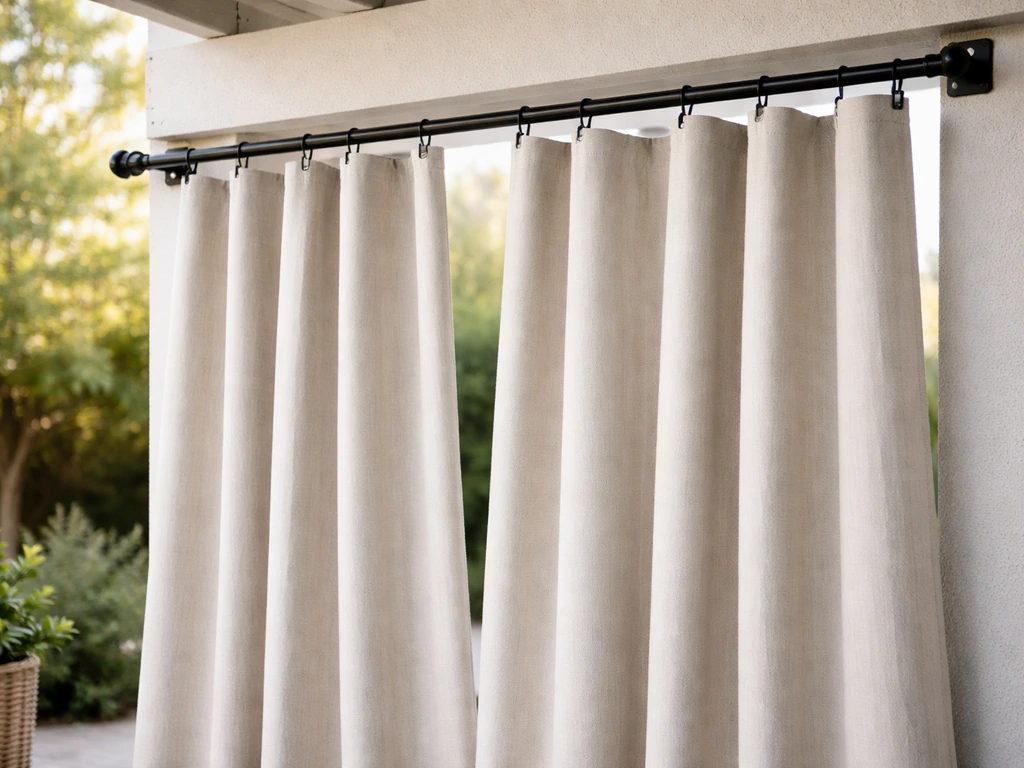
Fabric tabs sewn to the top of the panel loop over a rod and work well for lightweight panels. They are easy to make but even harder to slide than rod pockets and can stretch out over time. Curtain rings with attached clips are the easiest option if you want maximum flexibility: no header sewing required, just clip onto the top hem and hang. Use snap-hook or marine-ring style clips for outdoor use rather than plastic, which becomes brittle in UV.
Install the hardware and hang the curtains
Mount your rod brackets or cable fittings into solid structure, not just drywall or siding. For masonry columns or a concrete patio overhang, use masonry anchors and stainless lag screws. For wood posts or a pergola, use 3-inch structural screws driven into the post, not just the surface facing. Space intermediate support brackets no more than 48 inches apart for a 1-inch rod, or your rod will sag under fabric weight and wind load.
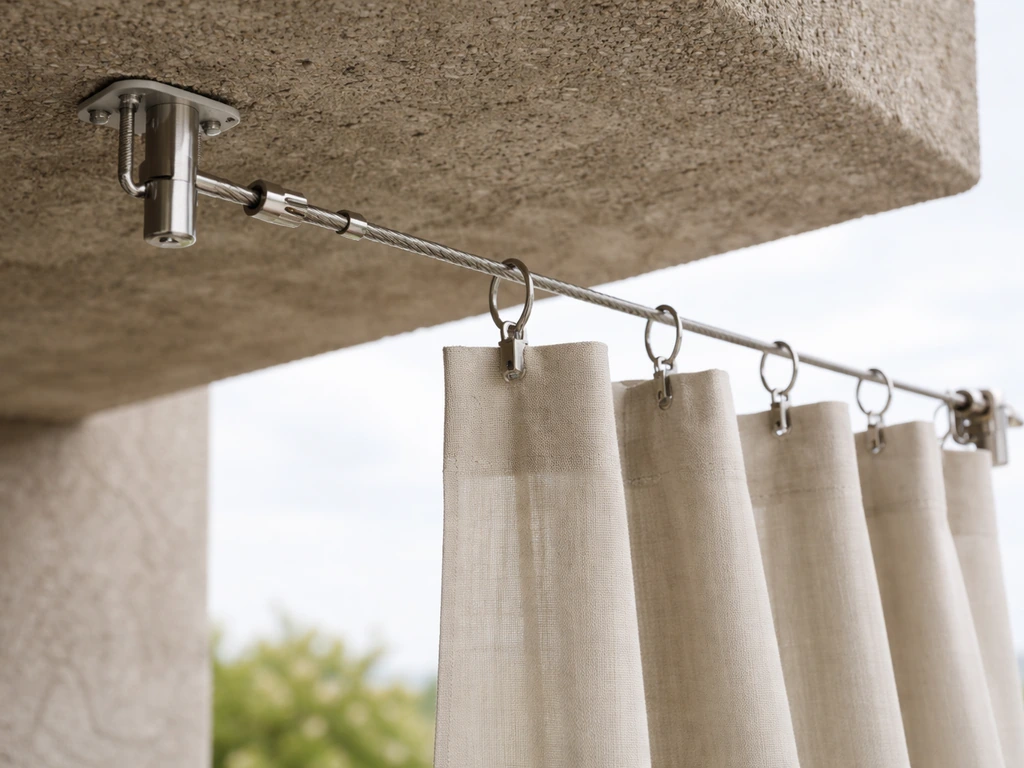
For open patios or high-wind situations, a stainless wire cable system outperforms a standard rod. The cable runs between two end anchors with a turnbuckle on one end to keep it taut. Panels hang from the cable on marine-grade rings or snap hooks through the grommets. You can also run a second cable through the bottom hem pocket of each panel and anchor it to ground hooks or the deck structure below, creating a top-and-bottom tensioned system that stays put in significant wind. This setup is the most effective option when wind control is the primary goal. If your patio blinds are still moving or letting in drafts, apply these wind-control ideas and double-check your hardware tension and anchors how to fix patio blinds.
If you're working with a pergola or a covered patio structure, you may have posts to work with on the sides. In that case, you can add a hook or cleat on each side post at the panel edges, then use a simple tie-back or small carabiner to hold the panel snug against the post when you want it open. This keeps the panel from swinging out and back when a gust hits. Preventing side swing is often just as important as adding bottom weight.
Securing panels against wind
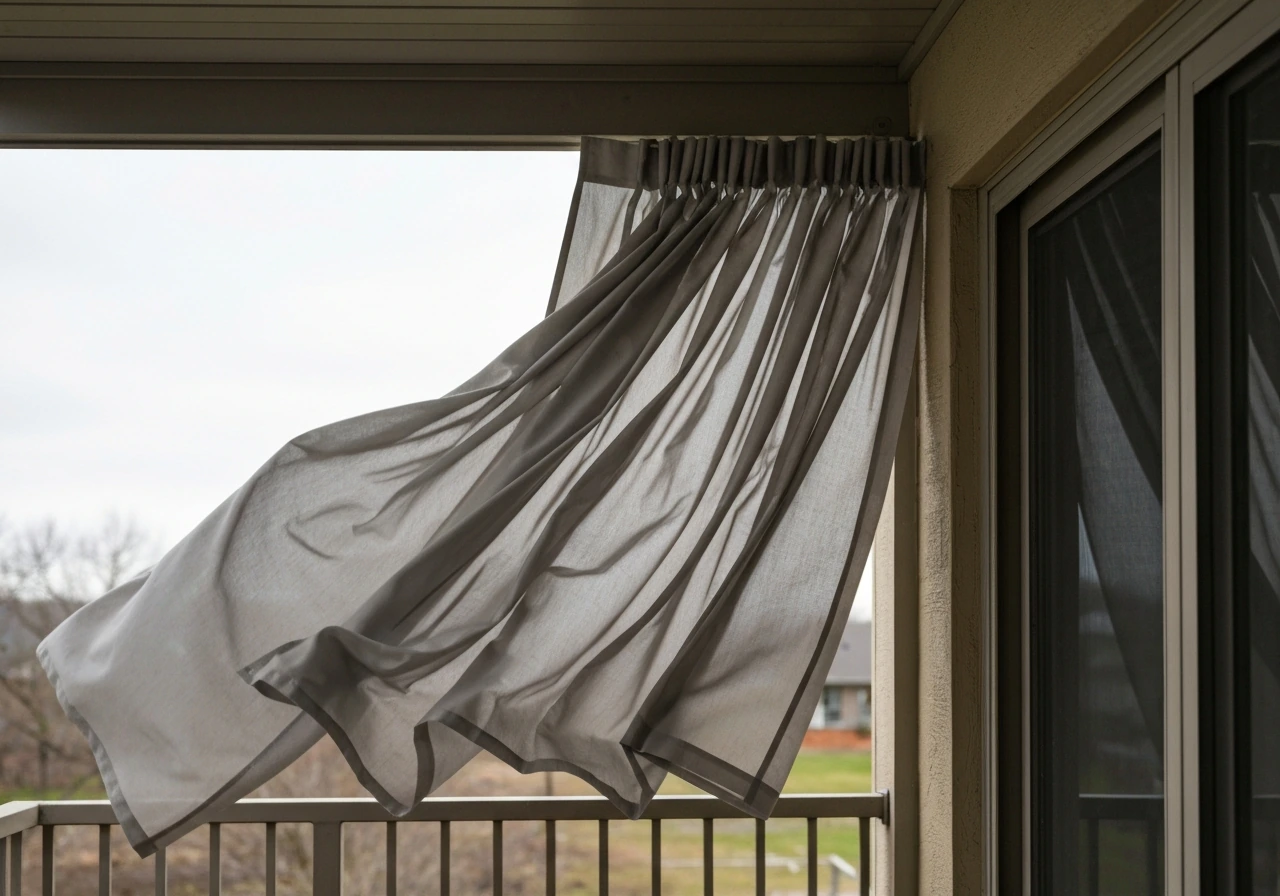
The most effective wind-resistance setup combines three things: a weighted bottom hem, a bottom cable or ground anchor, and a hardware system that keeps panels snug at the top rather than dangling loosely. Adding bottom weight like a chain or cable is one of the most reliable ways to keep patio curtains from blowing in gusts how to keep patio curtains from blowing. If your panels whip and flap constantly, they degrade fast at the grommet holes and hem edges. Spending an extra hour on a proper bottom anchor system saves you a season of wear. If you want to go deeper on wind-proofing strategies, there are several approaches worth knowing for different patio setups.
Weatherproofing, cleaning, and making them last
Solution-dyed acrylic fabrics like Sunbrella don't need a sealer spray when new, but if you use a bleach solution to clean mildew at any point, reapply a fabric water repellent treatment afterward. Bleach can reduce the surface water-resistance even though the color and fiber stay intact. A spray-on fabric protector like 303 Aerospace Protectant or Sunbrella's own fabric guard restores that water beading behavior.
For routine cleaning, brush off loose dirt first, then hand-wash with mild soap and lukewarm water. Rinse thoroughly and let panels air dry completely before folding or rolling. For mildew spots (which grow on dirt deposits on the fabric surface, not in the fiber itself), mix a solution of 1 cup bleach and 1/4 cup dish soap per gallon of water, apply to the affected area, let sit for 15 minutes, scrub lightly, and rinse well. Always air dry after any bleach contact.
On the hardware side, check grommet holes each season for signs of tearing or stretching. If a grommet starts to pull through the fabric, reinforce it with a patch of the same fabric bonded to the back before it fails completely. Inspect rod brackets and cable anchors for rust or loosening, especially after a winter or a particularly rough storm season.
Seasonal storage done right
If you live somewhere with hard winters, taking panels down at the end of the season is the single best thing you can do for their longevity. Clean and fully dry the panels first. Then roll them loosely around a clean cardboard tube (rather than folding, which creates sharp creases that can weaken fibers over time) and store them in a breathable cotton bag or wrap them in old sheeting. Avoid airtight plastic bins or garbage bags, which trap moisture and can encourage mildew even on mildew-resistant fabric. Store in a cool, dry place like a garage shelf or closet, off the ground.
When you bring them back out in spring, rehang them, check the hardware, and give them a light brush-down before the season starts. A 20-minute reinstall beats buying new panels every other year.
Your build checklist at a glance
- Map your patio openings and assign each a primary purpose: privacy, sun, or wind
- Measure width and height of each opening; plan for 1.5x fullness and 4–6 inch center overlap
- Add hem allowances: 2 inches per side, 4 inches bottom, 4–6 inches top for header
- Choose fabric based on exposure: solution-dyed acrylic for full sun and open patios, outdoor polyester for covered spaces
- Cut panels on grain; sew or heat-seal a double-fold hem on all four sides using outdoor-rated thread or seam sealer
- Build your header: punch grommets 6–8 inches apart, sew a rod pocket, or prep for clip rings
- Add a bottom weight: sewn-in weight tape, ball chain in a hem pocket, or a bottom cable system
- Mount hardware into solid structure with rust-proof fasteners; add intermediate brackets for spans over 48 inches
- Hang panels, check overlap at center seam, and add side tie-backs or post hooks for wind control
- Clean at end of season, roll onto a tube, store in a breathable bag in a dry location
FAQ
What’s the best curtain style for a patio that gets sun all day but also has strong wind?
Use sun-filtering or solar-screen fabric for UV, then prioritize a tensioned hanging system. A top cable plus bottom weight (chain or cable in a hem pocket) reduces flutter, and grommets or a reinforced band keeps the top from sagging as gusts hit. If you only add one upgrade, add the bottom cable or ground anchor.
Should I choose grommets or a rod pocket if I plan to open and close the curtains frequently?
For frequent movement, grommets generally work better because they slide on a rod or cable with less friction. Rod pockets can be slower and may snag, especially when fabric is slightly heavy. If you do use a rod pocket, make sure your pocket height includes extra ease for swelling when fabric gets wet.
How do I decide how many panels I need instead of making one wide curtain?
Base the number of panels on opening width and how you want the curtains to stack when open. As a rule, if you’re trying to keep the seam near the center from being forced apart, two panels with a controlled overlap often perform better than one wide panel. If your opening is very wide and you expect heavy wind, splitting into multiple narrower panels also reduces billowing.
Can I make outdoor curtains with cotton or standard polyester and just seal them?
You can, but it usually costs you time and durability. Outdoor use needs UV resistance and moisture tolerance, and standard cotton tends to wick water and mildew even after treatment. If you must use a lower-cost option, plan on replacing sooner and treat it as a covered-patio project rather than an all-weather solution.
What’s the right gap between the bottom of the curtain and the ground for wet or rainy climates?
Leave roughly 1/2 to 1 inch off the ground as a baseline, because it reduces wicking and hem wear. In driving-rain areas, avoid puddling styles (unless you’re ready to clean more often) and consider adding a bottom cable so the hem doesn’t sag closer to the deck during wet spells.
How tight should the bottom cable or anchors be for wind-proof curtains?
Set bottom tension enough that the fabric stays snug when pulled by a gust, without stretching the fabric or overloading anchors. After installation, wait for a breezy moment, then recheck alignment, especially at grommet rows and any ground hooks. Re-tension seasonally since cables can relax slightly over time.
Do I need to re-treat the fabric after cleaning with bleach?
Yes, if you rely on water beading from a fabric protector. Bleach can reduce surface water resistance even when the color stays intact, so after any bleach-based mildew treatment, reapply a water repellent product to restore water beading.
What’s the safest way to reinforce a grommet if it starts pulling through?
Stop using the curtain immediately if you see distortion. Cut the stress area and bond or stitch a patch of the same outdoor fabric to the back first, then reset the grommet through the reinforced area. This prevents the next stress cycle from expanding the tear.
Can I shorten a curtain panel after it’s already hemmed for outdoor use?
It’s possible, but you need to rebuild the hem properly rather than just trimming. If you shorten below the original hem pocket or weighted section, you can lose the balance that keeps the panel from billowing. If you reduce length, decide whether you’ll keep the bottom weight pocket at the new bottom edge.
How should I store outdoor curtain panels to prevent mildew in humid climates?
Clean and fully dry them first, then roll around a clean tube to avoid crease weakness. Store in breathable fabric or wrapped in old sheeting, avoid airtight plastic bins, and keep them off the floor. Adding a dry, low-humidity storage spot like a closet shelf helps more than people expect.
Step-by-step fixes to stop patio curtains blowing fast, using weights, tiebacks, anchoring, and wind-proof hardware.

Practical DIY layout and decor tips to widen a long narrow patio using zoning, furniture spacing, lighting, greenery, an

Step-by-step plan to decorate a rectangular patio with smart layout, zones, furniture fit, lighting, plants, and seasona