
The most effective way to protect a patio from rain is to combine an overhead cover with proper surface drainage and a short pre-storm routine. For a step-by-step checklist and product recommendations on how to protect patio, see the related guide on how to protect patio. A fixed awning or polycarbonate pergola roof handles most rain events on its own, but without a 1/8-to-1/4 inch per foot surface slope draining water away from your house, you will still end up with puddles, stains, and eventually damage to your foundation edge. Getting both pieces right, coverage overhead and drainage underfoot, is what keeps a patio genuinely dry and usable year-round.
how to protect patio from rain: DIY fixes, covers & drainage

Felix Brennan
12 Aug 2026
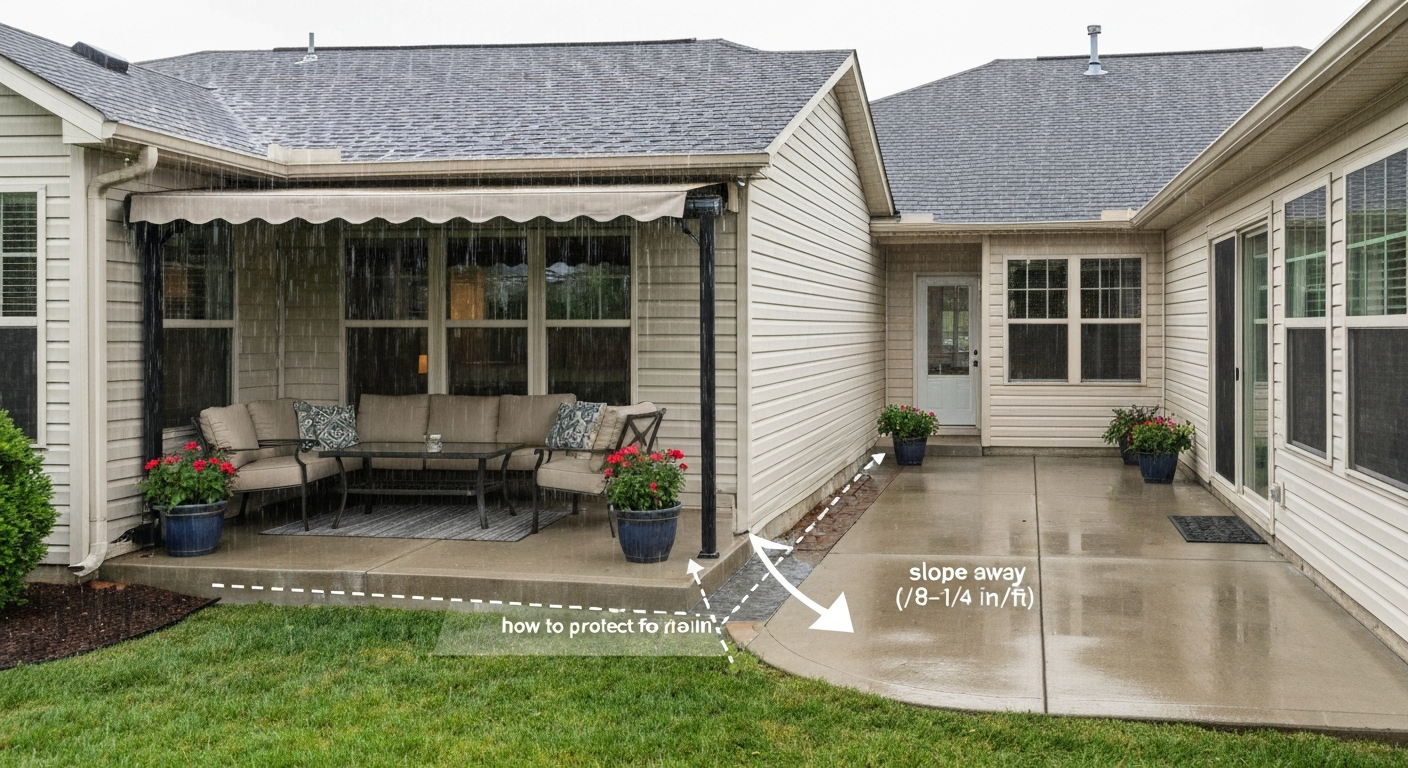
What this guide covers and how to pick the right solution
This guide walks through every practical layer of rain protection, from a ten-minute tarp job before a storm rolls in, to a permitted solid patio roof that adds value to your home. Because patio setups vary so much, the right starting point depends on what you are working with. An uncovered concrete slab needs overhead shelter first. A screened patio already has a roof structure but needs sealing, bracing, and storm prep. A patio packed with planters and pots has its own drainage puzzle to solve (and those planters can actually damage your surface if water is pooling under them).
If you have a screened patio enclosure and you are in a hurricane-prone region, the storm preparation steps covered here are a starting point, but high-wind enclosure work involves engineered anchor details and local product approvals that go beyond standard DIY. We flag those moments clearly. For everything else, these are projects a confident homeowner can tackle with basic tools, a weekend, and a realistic budget.
- Uncovered slab or deck: start with fast temporary fixes, then choose a permanent overhead option
- Screened patio: focus on sealing, drainage, and storm-hardening sections
- Patio with planters and pots: drainage and surface protection sections are especially relevant
- All patio types: drainage and slope fixes apply regardless of what is overhead
Fast temporary fixes before a rainstorm hits
If a storm is a few hours out and you have no permanent cover, here is what to do in order of priority. None of this requires tools beyond a rubber mallet and some bungee cords, and the whole setup should cost you under $100 if you have basic supplies on hand.
- Pull furniture away from open edges. Move chairs, cushions, and side tables toward the house wall or stack them under whatever overhang you have. Wet cushions mildew fast and are expensive to replace.
- Roll or fold rugs and store them indoors. Outdoor rugs trap water against your patio surface and can stain concrete permanently.
- Move planters and pots to a sheltered spot or at minimum elevate them on pot feet so water does not pool under them.
- Unfurl a heavy-duty poly tarp (6 mil or thicker) over furniture you cannot move. Secure corners with bungee cords hooked to fence posts, patio chairs used as anchors, or sandbags on the edges. Leave a slight slope so water sheds off rather than pooling in the center.
- If you have a pop-up canopy, stake all four legs into the ground or weight the legs with sandbag feet rated for at least 40 lbs per leg. Most consumer pop-ups are not wind-rated above 15–20 mph, so take it down if the storm brings sustained winds above that.
| Item | Typical Cost | Time to Set Up | Wind Safe? |
|---|---|---|---|
| Heavy-duty poly tarp (10x12 ft, 6 mil) | $15–$30 | 5–10 min | Low — needs secure anchoring |
| Pop-up canopy (10x10 ft) | $60–$150 | 10–20 min | No — retract in wind above 15–20 mph |
| Canopy sandbag leg weights (set of 4) | $20–$40 | 5 min | Improves stability slightly |
| Bungee cords and tarp clips (pack) | $10–$20 | Included above | Helps secure tarp edges |
Total emergency kit cost: around $50–$80 if you are buying everything new. Keep a tarp and a pack of bungee clips stored in a bin near the patio so you are not scrambling when the weather app turns red.
Temporary overhead shelters: tarps, pop-up canopies, and DIY frame covers
Temporary shelters are a smart middle ground if you are renting, working within an HOA that restricts permanent structures, or saving up for a bigger project. They do have real limits though, and it is worth knowing those before you rely on one for a whole season.
Heavy-duty tarps
A silver or brown poly tarp stretched between two posts or attached to the house fascia with eye bolts creates a cheap, functional rain cover for a single season. Use a minimum 6-mil poly or, better, a woven poly tarp rated at 6 oz per square yard for durability. The key is building in a slope: aim for about 1 inch of drop per foot of run so water flows off the edge rather than pooling. Attach the high side to the house wall or a beam with screw-in eye bolts and use a taught-line hitch or bungee to tension the low corners to fence posts or temporary 4x4 uprights set in bucket planters filled with concrete. Expect a good tarp setup to last one to two seasons before UV degrades it. Cost: $20–$60 for the tarp plus $10–$30 in hardware.
Pop-up canopies
A 10x10 or 10x20 ft steel-frame pop-up canopy is the fastest real shelter you can put up. The better models (brands like E-Z Up, Eurmax) have water-resistant polyester tops rated for light-to-moderate rain. The honest downside: they are not built for sustained wind. Any pop-up canopy should come down when wind exceeds 15–20 mph. Always stake all four legs or use dedicated weight bags. Budget $80–$200 for a decent-quality canopy; the $40 bargain-bin versions shred in one good rainstorm.
DIY pipe or lumber frame covers
A step up from a pop-up is a DIY frame built from 1-1/2 inch EMT conduit or 2x4 lumber, with a tarp or shade sail stretched over it. Four posts, a ridge beam, and two tie-down points to the house gives you a structure that handles moderate rain reliably. It still is not a permanent structure, but it is far more stable than a pop-up. Materials for a 10x12 version run $80–$180 depending on whether you use conduit or lumber. If you go this route, keep the slope consistent (1/4 inch drop per foot minimum) and make sure the tarp edges overhang the frame by at least 6 inches so water clears the posts.
| Option | Cost Range | Durability | Wind Resistance | DIY Difficulty |
|---|---|---|---|---|
| Poly tarp on rope/cord | $20–$60 | 1–2 seasons | Low | Easy |
| Pop-up canopy (consumer grade) | $80–$200 | 2–4 seasons with care | Low–Medium | Easy |
| DIY conduit/lumber frame + tarp | $80–$180 | 2–5 seasons | Medium | Moderate |
| Commercial-grade canopy/tent | $300–$800+ | 5+ seasons | Medium–High | Moderate |
Permanent overhead option: awnings
An awning is usually the fastest path to a permanent rain cover on an existing patio. It mounts directly to your house wall or fascia, requires no footings, and a confident DIYer can install a retractable model in a half-day. Here is what you need to know before you pick one.
Fixed vs. retractable awnings
Fixed awnings are always out, always protecting, and have no moving parts to maintain. They work well in climates with predictable, moderate rain and moderate wind. The trade-off is that they catch wind like a sail, and if yours is not sized and anchored correctly for your local design wind speed, you risk tearing the fabric or pulling the mount off the wall. Retractable awnings solve the wind problem: you roll them in when a storm is coming. Manufacturers including SunSetter explicitly state in their installation manuals that awnings must be retracted in high winds and storms. SunSetter's installation manual specifies mounting to structure, minimum mount heights and recommended fasteners, and explicitly instructs owners to retract or remove awnings in high winds and during storms SunSetter Series Installation Instructions - Owner’s Manual & Installation (SunSetter). That means a retractable awning requires you to be home and paying attention when weather changes quickly.
Fabric vs. metal awnings
Fabric awnings (typically solution-dyed acrylic like Sunbrella, or polyester) shed water well, come in many colors, and are the most common choice for residential patios. They do need periodic cleaning and fabric replacement every 8–12 years. Metal awnings, usually aluminum, are essentially maintenance-free, handle hail, and outlast fabric by decades. They look more industrial and cost more upfront, but if you are in a high-rainfall or high-UV region, the long-term math often favors metal.
DIY install vs. hiring a pro
A standard 10–12 ft retractable awning from a big-box retailer comes with a detailed installation guide and can be mounted to studs or masonry by two people in 3–5 hours. The critical steps are locating studs or using appropriate masonry anchors, maintaining the manufacturer's required mounting height, and getting the pitch right so water runs off the front edge. For awnings wider than 16 ft, or if your wall is stucco over questionable substrate, calling a pro installer is worth the cost to avoid a catastrophic pull-out. Permit requirements for awnings vary widely, many jurisdictions exempt small attached awnings, but some require a permit for anything attached to the structure. Check with your local building department before you start.
| Awning Type | Typical Cost (installed) | Lifespan | Wind Requirement | Permit Likely? |
|---|---|---|---|---|
| DIY retractable fabric (10–12 ft) | $300–$900 DIY | 8–12 years (fabric) | Retract in wind/storm | Often no, verify locally |
| Pro-installed retractable (12–20 ft) | $1,500–$4,000+ | 10–15 years | Retract in wind/storm | Sometimes |
| Fixed aluminum awning | $600–$2,500 installed | 20–40+ years | Must meet local wind load | Often yes for attached |
| Motorized retractable with sensors | $2,000–$6,000+ | 10–15 years | Auto-retracts in wind | Sometimes |
Permanent overhead option: pergolas with translucent roofing
A pergola on its own does almost nothing to keep rain off. Once you add a polycarbonate or corrugated translucent roof panel, it becomes a genuinely weatherproof outdoor room that still feels light and open. This is one of the most popular DIY patio upgrades because the materials are widely available, the skill requirements are moderate, and the results look finished and permanent.
Polycarbonate roofing panels
Twin-wall or multiwall polycarbonate panels (typically 6mm or 8mm thick) are the best choice for a DIY pergola roof. They are lightweight (about 3.5 lbs per square foot for 8mm twin-wall), impact-resistant, and transmit around 80% of light. Install them with a minimum 1/4 inch rise per foot (about 5 degrees) so rain drains cleanly. Fasten panels to purlins using manufacturer-supplied polycarbonate screws with rubber washers, do not over-tighten or the thermal expansion will crack the panels. Seal the ridge and cut ends with aluminum closure strips and appropriate tape to block insects and prevent water infiltration at the channels. UV-coated panels on the top face are worth the small upcharge; they prevent yellowing and maintain light transmission for 10–15 years or more.
Pergola structure basics
Most prefabricated pergola kits from major retailers include step-by-step installation manuals and are designed for attached-to-house or freestanding installation. Attached pergolas require a ledger board bolted into your house rim joist or wall framing, not just the siding. Freestanding pergolas need post footings: typically a 10-inch diameter concrete tube footing set 12 inches below the frost line (or per local code). Frost depth varies enormously by region, from 0 inches in South Florida to 42–48 inches in northern states, so check your local requirement. Do not skip the footings. A pergola with a polycarbonate roof panel now has wind-uplift load on it, and undersized footings are how pergolas end up in your neighbor's yard after a storm.
Pros, cons, and cost
- Pros: lots of natural light, cost-effective, DIY-friendly, adds real value to outdoor space
- Cons: panels can yellow over time without UV coating, not rated for heavy snow loads without engineering, requires careful sealing at ridge and ends
- DIY materials cost (12x16 ft pergola + polycarbonate roof): $800–$2,500 depending on wood vs. aluminum kit
- Contractor-built equivalent: $3,500–$8,000+
- Permit status: attached pergolas with a solid roof usually trigger a permit — verify with your local building department
Permanent overhead option: solid patio roofs and attached additions
A solid patio roof, framed with dimensional lumber and covered with shingles, metal roofing, or another opaque material, is the most protective and most permanent option. It is also the most regulated. Before you build a single post, understand what you are getting into.
Structural considerations
An attached solid patio roof is treated by the International Residential Code as an addition. That means the ledger attachment needs to be engineered or built to code minimums for your region's wind and snow loads. The posts need footings designed for the tributary load they carry. The roof-to-wall connection must resist uplift, which in hurricane regions means hurricane ties or equivalent hardware at every rafter. Skipping any of these is not just a code violation, it is genuinely dangerous during a high-wind event.
When a permit is required
Under IRC Chapter 1 and Appendix AJ (and most local amendments), any attached structure that creates a new habitable or semi-habitable space, involves structural connections to the house, or exceeds a threshold size (commonly 200 square feet, though this varies by jurisdiction) requires a permit and in many cases construction documents. Florida and other hurricane-prone states apply additional requirements through their state building codes, which reference ASCE 7 for design wind speeds and component loads. Do not assume a patio roof is exempt because it is open on the sides. Check with your local building department before buying materials.
Cost estimates
- DIY attached patio roof (framed, shingle-covered, 12x16 ft): $2,000–$5,000 in materials plus permit fees ($150–$500 typically)
- Contractor-built equivalent: $8,000–$20,000+ depending on region, complexity, and finishes
- Permit and inspection fees: $150–$600 in most jurisdictions
- Engineering drawings (if required): $500–$1,500
Retractable covers and motorized systems
Beyond wall-mounted awnings, there is a whole category of overhead retractable systems worth knowing about, especially if you want rain protection that disappears when you do not need it.
Types of retractable systems
- Lateral arm retractable awnings: the most common residential type, wall-mounted, extends 8–14 ft from the house
- Pergola-integrated retractable canopies: a fabric panel slides on tracks between pergola rafters; excellent rain protection with a clean look
- Motorized louvered pergola roofs: aluminum louver blades that rotate open or closed, optionally motorized; premium option with excellent weather control
- Freestanding retractable canopy systems: tension-fabric canopies on free-standing frames; good for detached patios or areas away from the house
Installation and maintenance
Most retractable systems require mounting to solid structure, whether that is wall studs, a structural beam, or a properly engineered pergola. The critical maintenance step for any retractable fabric cover is keeping the fabric clean and dry before storage. Rolling up a wet, dirty awning is how mold and mildew take hold. Brush it off, let it dry fully, then retract. Lubricate pivot arms and guide tracks annually with a silicone spray, and inspect the fabric each spring for small tears that can expand into large ones once the wind catches them.
| System Type | Price Range | DIY Install? | Best For |
|---|---|---|---|
| Manual retractable awning (10–12 ft) | $300–$900 | Yes, 3–5 hrs | Moderate rain, budget-conscious |
| Motorized retractable awning (12–16 ft) | $1,500–$4,500 | Possible, but complex wiring | Convenience, larger patios |
| Pergola retractable canopy | $400–$1,500 (fabric kit) | Yes, if pergola exists | Open-feel coverage |
| Motorized louvered pergola roof | $5,000–$15,000+ | Pro recommended | All-weather outdoor rooms |
| Freestanding retractable canopy | $500–$2,000 | Yes | Detached patios, renters |
Drainage and slope fixes: keeping water moving off your patio
An overhead cover handles what falls from the sky, but water also runs off your roof, off adjacent surfaces, and pools on a flat patio. Getting drainage right is what prevents staining, efflorescence on concrete, wood rot on decking, and water pushing against your foundation. This is the part most DIYers skip, and it is the part that causes the most long-term damage.
The right surface slope
Standard hardscape drainage guidance recommends a surface slope of 1/8 to 1/4 inch per foot (approximately 1–2%) away from your house. For most patios, 1/4 inch per foot is the target: it is noticeable enough to move water but not so steep that furniture feels tilted. A 12-foot-wide patio at 1/4 inch per foot drops 3 inches from the house edge to the outer edge. You can check your existing slope with a 4-ft level and a tape measure. If the slab is essentially flat or sloping toward the house, that needs to be fixed.
Regrading and resurfacing a flat or backward-sloped patio
If your concrete slab slopes toward the house, the least invasive fix is applying a self-leveling concrete resurfacer in a feathered wedge to build up the low points and create the correct outward slope. Clean the slab thoroughly, apply a concrete bonding primer, then trowel the resurfacer in 1/4-inch lifts. For larger corrections (more than 1/2 inch), use a concrete floor leveler rated for exterior use. If the slab has settled badly and the correction would require more than 1 inch of buildup, you are likely better off breaking out the affected section and pouring a correctly sloped replacement, a job that typically justifies renting a concrete breaker and mixer, or hiring a concrete contractor for a few hundred to a few thousand dollars depending on size.
Channel and trench drains
A channel drain installed at the outer edge of the patio (or across the middle of a particularly wide slab) catches surface runoff before it flows into the yard or back toward the house. Pre-sloped modular trench drain systems like NDS Dura Slope are designed for exactly this application. They come with a built-in slope cast into the channel body, which means you do not need your slab to be perfectly level, the drain itself moves water toward the outlet. Installation steps: excavate a trench to the manufacturer's specified depth, pour a concrete bed per the technical data sheet, set the channel sections with the slope direction arrows pointing toward your outlet or catch basin, then connect to a PVC drain pipe leading to daylight or a dry well. The trench walls need adequate concrete encasement, do not just set the channel in dirt.
French drains for perimeter drainage
If water is pooling around the edges of your patio or running along the foundation, a perimeter French drain moves it away. Dig a trench 12 inches wide and 18–24 inches deep alongside the patio, sloping toward a daylight outlet or dry well at 1% grade minimum (1/8 inch per foot). Line with non-woven geotextile fabric, add 4–6 inches of washed gravel, lay a 4-inch perforated drain pipe (perforations down), cover with more gravel to within 3–4 inches of grade, wrap the fabric over the top, and backfill with soil or gravel. For long runs or high-volume situations, the NDS French drain system documentation provides sizing guidance and outlet options worth following before you start.
Handling roof downspouts near the patio
A major source of patio flooding that gets ignored: roof downspouts discharging right at the patio edge or onto the patio itself. The simple fix is extending the downspout with a flexible elbow and corrugated pipe to carry water at least 6–10 feet from the house before it discharges. A cleaner solution is to tie the downspout into a buried 4-inch PVC pipe connected to the French drain system or to a pop-up emitter set in the lawn. This is a Saturday morning project that costs $30–$80 in materials and prevents a large percentage of patio ponding problems.
When to rent equipment or hire a contractor
- Rent a concrete breaker/demo hammer if you need to remove and replace a slab section larger than 4x4 ft
- Rent a plate compactor when re-grading and backfilling soil around the patio perimeter
- Hire a grading contractor if your yard slopes toward the house and the patio drainage problem is actually a yard-wide grading problem
- Hire a plumber or drainage contractor if you need to tie into an existing storm drain or if your local code requires a licensed contractor for drain work
Sealing your patio surface against water damage
Concrete and pavers absorb water. For advice on preventing stains, moisture damage, and standing water caused by plant pots, see our guide on how to protect patio from plant pots. Over time that absorbed moisture causes efflorescence (white mineral deposits), freeze-thaw cracking in cold climates, and biological staining from algae and mildew. A quality concrete sealer or masonry waterproofer is cheap insurance. Products like QUIKRETE Concrete Sealer and DRYLOK Floor and Wall Masonry Waterproofer are tested and documented for this application. DRYLOK masonry & concrete waterproofers are tested to resist wind‑driven rain and hydrostatic pressure; the product data sheet specifies surface preparation, a two‑coat application, coverage rates, and limitations (not a substitute for structural waterproofing where hydrostatic head exists) blank" rel="noopener noreferrer">DRYLOK Floor & Wall Masonry Waterproofer — Product Data Sheet. DRYLOK's technical data sheet specifies that it resists wind-driven rain, though it is not a substitute for structural waterproofing where hydrostatic pressure exists (i.e., below grade).
Application steps: clean the surface thoroughly with a pressure washer and let it dry for at least 24 hours. Fill any cracks with a concrete crack filler and let that cure. Apply the first coat of sealer by roller or brush per the manufacturer's coverage rate (usually 200–400 sq ft per gallon). Let it dry per the TDS (typically 4–8 hours) then apply a second coat. Most sealers need to be reapplied every 2–5 years depending on traffic and weather exposure. This is one of the highest-ROI maintenance tasks you can do on a concrete patio.
Storm prep for screened patios
A screened patio enclosure has unique vulnerabilities in a wind event. The screen panels are the obvious target, but the real concern is whether the frame and its attachment to the house can handle wind loads. In high-wind and hurricane zones, screen enclosures are treated as engineered structural systems by local building codes, particularly in states like Florida where the Florida Building Code references ASCE 7 for design wind speeds. ASCE 7-22 updated the component and cladding wind load rules that affect how enclosure attachments and screen panels are sized and fastened. If you are in a coastal or hurricane-prone area, check with your county's building department for required product approvals before making any modifications or repairs to an existing enclosure. For step-by-step hurricane-hardening steps and approved products, see our guide on how to protect screen patio from hurricane.
For practical storm preparation on an existing screened patio, here is what to do before a major storm:
- Remove all furniture, decor, and loose items from the enclosure — anything that becomes a projectile if the screen fails
- Inspect screen spline and frame for any loose sections and re-spline or tape any open gaps that could turn into a larger tear under wind pressure
- If your enclosure has removable screen panels, remove and store them for storms above Category 1 in your area
- For fixed screen frames, consider adding storm panel protection on the windward side: aluminum hurricane panels available at national retailers can be mounted over screen bays using track systems, following manufacturer installation instructions and any applicable local notice-of-acceptance (NOA) requirements
- Check that all screws anchoring the frame to the house and to the footing posts are tight and corrosion-free; replace any rusted fasteners with stainless steel equivalents
- After the storm, inspect all screen corners, spline channels, and frame joints before putting the space back into use
FEMA's Wind Retrofit Guide for Residential Buildings (FEMA P-804) provides broader guidance on wind-hardening strategies including opening protection and roof-to-wall connections, and is a useful free reference if you are planning more extensive storm hardening. For any screened enclosure work that involves modifying the frame structure or adding new panels in a high-wind zone, get an engineered detail and a permit, this is not an area where improvising saves money in the long run.
Annual maintenance checklist
Rain protection only works if you maintain it. Run through this list every spring and after any major storm.
- Check surface drainage: verify water flows away from the house; look for new low spots or settled sections
- Inspect and clean gutters and downspout extensions near the patio
- Re-examine surface sealer: if water no longer beads on your concrete, it is time to reapply
- Inspect awning or cover fabric for tears, loose stitching, and mold; clean with mild soap and water, let dry fully before retracting
- Lubricate retractable awning arm pivots and tracks with silicone spray
- Check polycarbonate panel fasteners for tightness and inspect ridge seals for gaps or lifted tape
- Inspect screen spline on screened enclosures for sections that have pulled loose from the channel
- Confirm all post footings are solid and no frost heave has shifted pergola or awning posts
- Check all structural fasteners at ledger boards and house attachments for corrosion
- Test any motorized systems and replace remote batteries
DIY vs. hiring a pro: a quick decision guide
| Task | DIY Feasible? | When to Hire a Pro |
|---|---|---|
| Tarp or pop-up canopy setup | Yes, always | Never needed |
| Retractable awning install (under 14 ft) | Yes, with 2 people | If wall substrate is uncertain or span exceeds 16 ft |
| Polycarbonate pergola roof | Yes, moderate skills | If structural changes to house attachment are needed |
| Solid patio roof addition | Experienced DIYers only | Complex framing, permit drawings, any doubt about loads |
| Channel drain install | Yes, if comfortable with concrete work | Large-scale work or tie-in to municipal storm drain |
| French drain (perimeter) | Yes, with a trencher rental | If yard-wide grading or underground utility conflicts exist |
| Concrete resurfacing (thin coat) | Yes | If slab has heaved more than 1 inch or needs major replacement |
| Storm panel install (hurricane zone) | Possible for simple track systems | Any structural enclosure modification in high-wind zone |
| Screen spline replacement | Yes, basic skill | If frame is damaged or structural |
| Surface sealing | Yes, always | Not needed unless product requires spray equipment |
Safety and code reminders before you build anything permanent
A few things worth repeating plainly. The IRC gives building officials broad authority to require permits and construction documents for attached patio structures. Local amendments often lower the threshold for what triggers a permit. Unpermitted structures can cause problems when you sell your home, may not be covered by your homeowner's insurance in the event of damage, and in wind-load jurisdictions can fail in ways that harm you or your neighbors. Always check with your local building department before starting a permanent overhead structure. Many departments have a simple pre-application call or online checklist that takes 15 minutes and saves enormous headaches later.
In hurricane and high-wind regions, the stakes are higher. ASCE 7-22 defines the component and cladding wind loads that your patio cover attachments need to resist. If you are in a windborne debris region (generally within 1 mile of the coast in a hurricane zone, or as mapped by ASCE 7), the design requirements are significantly more demanding than inland areas. This is where spending a few hundred dollars on an engineer's stamp for your drawings pays for itself many times over, because an under-designed attachment can become a dangerous projectile.
FAQ
What quick temporary fixes can I use to keep a patio dry during an unexpected rainstorm?
Use heavy-duty patio tarps or waterproof canvas secured with bungee cords or ratchet straps to cover seating areas and planters; angle the tarp so water runs off to one side. Move cushions, rugs and loose furniture indoors or into a covered garage if possible; store cushions in plastic bins or heavy-duty trash bags. Elevate potted plants off the patio surface onto bricks or plant stands and set catch trays under pots to prevent overflow; wrap porous pots in plastic if they soak through. For minor pooling, use a wet/dry shop vacuum to remove water and a squeegee to push runoff toward an outlet or temporary drain. Cost: $10–$100 (tarps, straps, bins, shop-vac rental low end to midrange). Safety: avoid placing tarps against house siding where water could be trapped; don’t use electrical equipment in standing water unless plugged into a GFCI circuit.
What permanent overhead options keep a patio dry and which are best for DIY vs. professional installation?
Options: 1) Retractable awnings — good DIY for smaller, lighter models; inexpensive to midrange; retract in high winds. 2) Fixed awnings (metal or fabric) — moderate cost, usually require secure attachment to structure; often a pro recommended for correct anchoring. 3) Pergolas with waterproof roofing (polycarbonate panels, roll-on covers, or installed canopy) — patio-style pergolas can be DIY if kit-based and attached per instructions; use pros for large spans or engineered attachments. 4) Fully framed patio roofs/lean-tos (roof tie-in) — permanent, best done by licensed contractors because of flashing, roof tie-in, structural engineering and permitting. 5) Screened enclosures with solid or polycarbonate roofs — mid to high cost and typically pro/permit work in high-wind zones. Cost ranges (very approximate): Retractable awning $400–$4,000; fixed awning $300–$2,500; pergola kit $500–$5,000; built-in patio roof $3,000–$20,000+ depending on size/roof materials. Check manufacturer wind ratings and always follow installation manuals; in many jurisdictions attached roofs and enclosures require permits.
How should I handle drainage, slope and surface sealing to prevent patio water problems?
Ensure patio surface slopes away from the house — target 1/8–1/4 in/ft (≈1–2%) minimum; 1/4 in/ft is better where practical. Install perimeter trench drains or channel drains tied to downspouts and a discharge point or catch basin for concentrated runoff; use pre-sloped modular channel drains from a reputable manufacturer and follow their concrete bed instructions. For heavy subsurface water, install a French drain (perforated pipe in gravel) with outlet to storm system or daylight. Seal porous concrete or pavers with manufacturer-recommended breathable water-repellent coatings (follow surface prep and recoat intervals). Cost ranges: small slope correction/grading $100–$500 (DIY fill and regrade); trench drain kit $150–$800 (materials) plus concrete; French drain $300–$2,000 (depends on length); sealing products $20–$100. For large regrading, sub-base correction, or tie-ins to storm infrastructure, hire a pro/landscape contractor.
What are the best ways to protect furniture, rugs and outdoor textiles from rain and storms?
Use waterproof or water-resistant covers sized to fit furniture and secure with straps or bungee cords. Store cushions and textiles in waterproof storage bins or an outdoor storage bench; rotate ventilation to avoid mildew (leave lids slightly ajar when not raining). Choose quick-drying, water-repellent fabrics (solution-dyed acrylics like Sunbrella) and elevated furniture legs with rust-resistant feet. Outdoor rugs: choose polypropylene or outdoor-rated materials and allow them to dry flat; for heavy storms move them indoors. Clean and re-treat fabrics per manufacturer guidance; replace foam cushions with closed-cell foam for better moisture resistance. Cost: covers $20–$200; storage boxes $50–$600; quality outdoor furniture varies widely. Maintenance: rinse and dry fabrics after storms to avoid mold.
How do I protect planters and plant pots from excess rain without harming the plants?
Use saucers or catch trays sized to each pot to prevent water pooling on the patio; empty trays after storms to prevent root rot and mosquito breeding. Elevate pots on pot feet, bricks or plant stands to improve drainage and airflow under pots. For porous clay pots, line the interior with a heavy-duty plastic liner or use a waterproofing spray to reduce saturation; drill or keep drainage holes open so excess water can escape into trays. Consider raised planter beds with amended soil and drainage, or install an underdrain for heavy clay soils. For frost or extreme storms, move smaller pots indoors or under cover. Cost: pot feet $5–$30 each; liners/ waterproofing spray $10–$50; larger raised beds $200–$1,500+. Maintenance: check saucers after storms, repot if soil stays saturated, monitor for pests/mold.
What specific measures secure a screened patio for hurricanes and severe storms?
Follow manufacturer guidance and local code: install engineered storm panels or roll-down shutters for openings. For removable panels, use F-track or panel-frame systems anchored into structural members with recommended fasteners; label panels and practice installation. Reinforce screen framing and connections with manufacturer-approved bracing or retrofit kits and ensure proper anchor bolts in footings. Remove lightweight screens and store them before storms when instructed by the manufacturer. Tie down or remove loose furniture and décor. For high-velocity hurricane zones (HVHZ), only use products with Miami‑Dade or local product approvals and obtain building permits; many counties require engineered details for screen enclosures. Cost: temporary plywood or aluminum panels $50–$500; bolt-on panel systems and shutters $500–$5,000+ depending on coverage; professional install for full enclosure fortification varies widely. Safety: don’t attempt to retrofit panels without following product approvals and anchorage instructions; improper attachment can fail in storms.
Next Articles
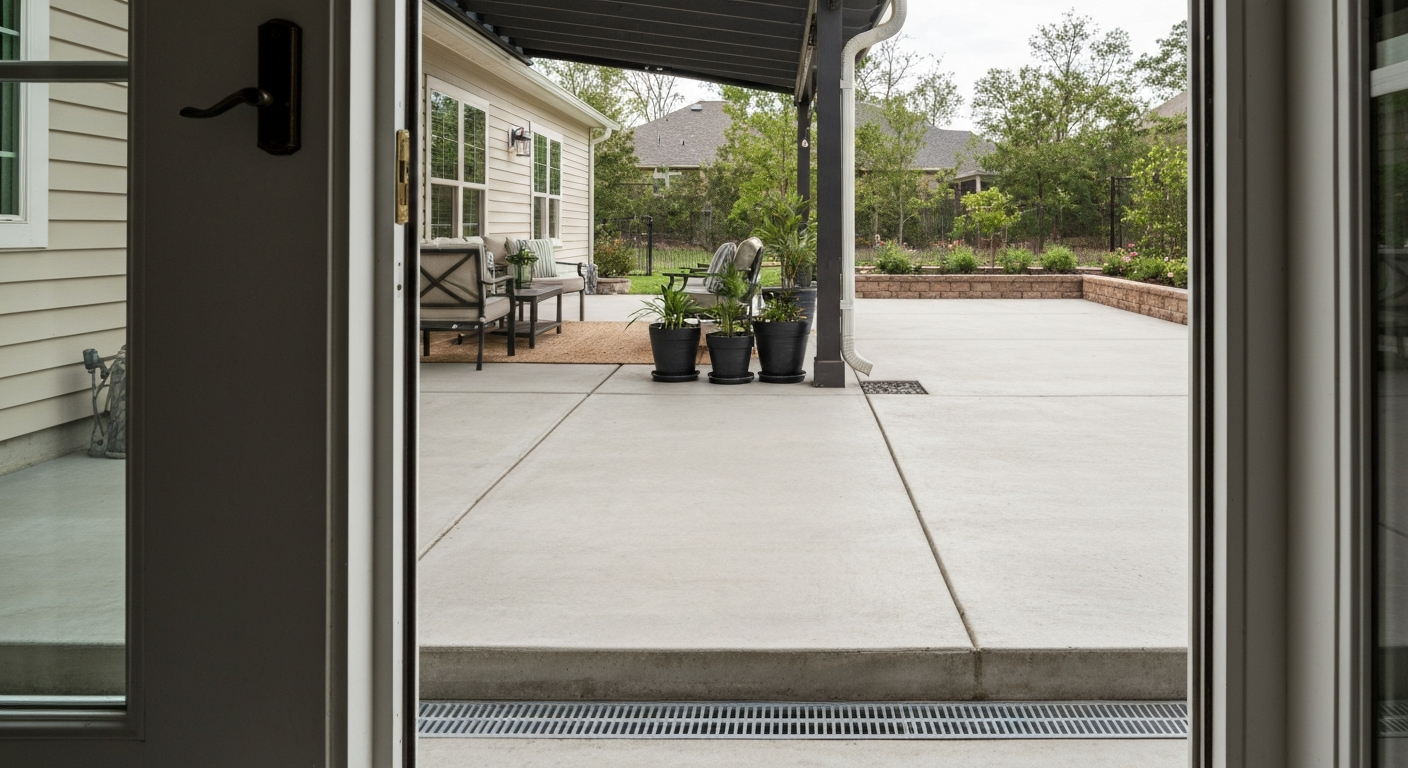
How to Protect Patio: DIY Guide for Weather, Pots & Storms
DIY guide to protect patios from pots, rain, sun and storms, step-by-step fixes, costs, tools, and maintenance.
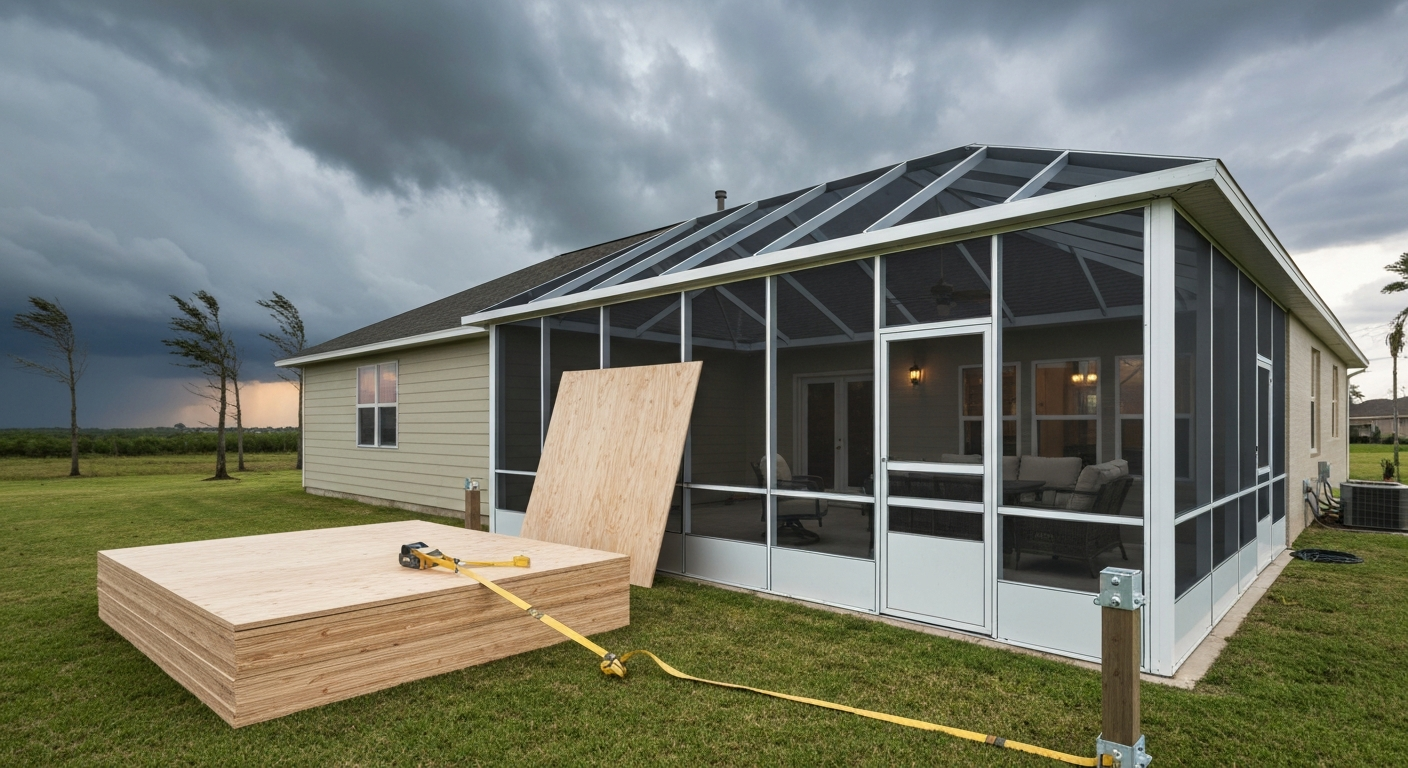
How to Protect Screen Patio from Hurricane: DIY Prep & Fixes
How to protect screen patio from hurricane: DIY checklist, reinforcements, temporary panels, costs & safety tips
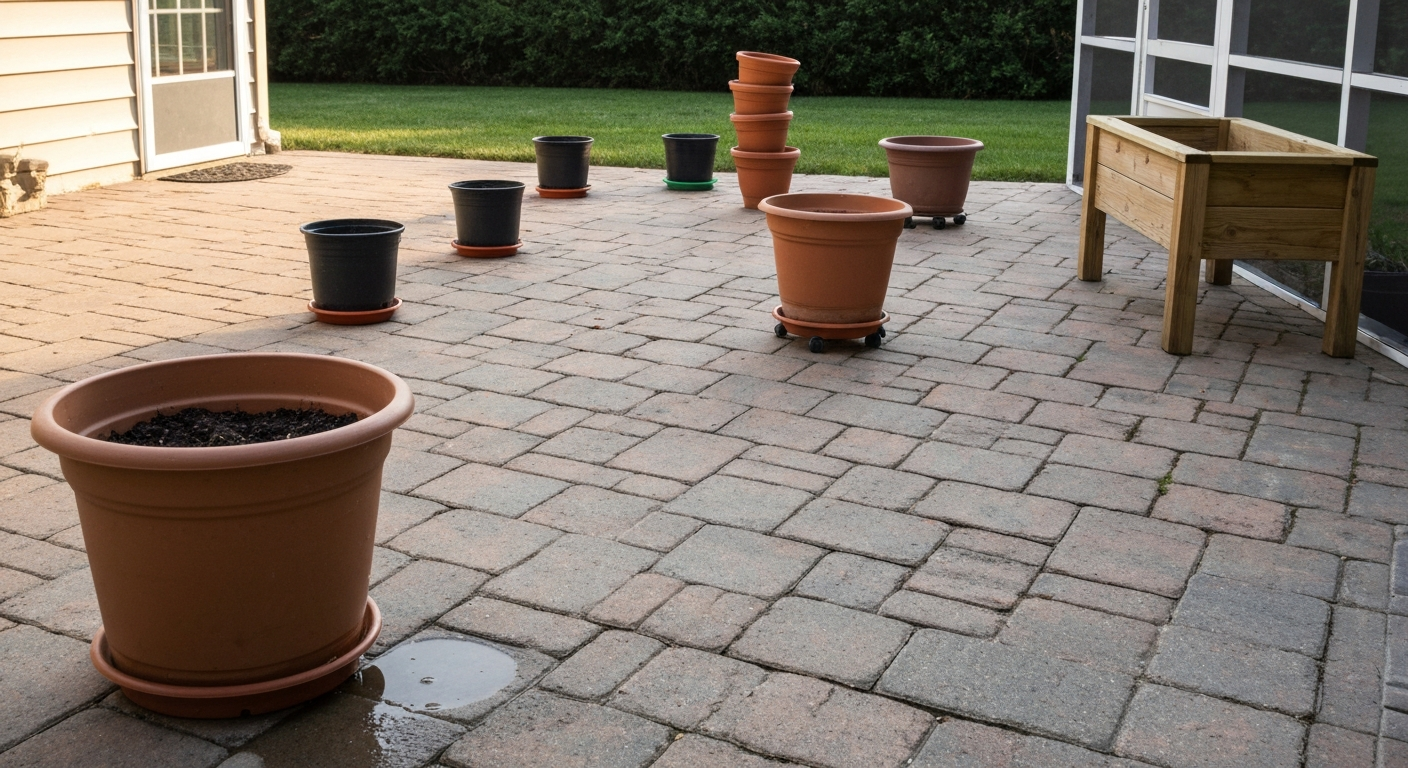
How to Protect Patio from Planters: DIY Guide & Prep
How to protect patio from planters: DIY steps, drainage, anchoring, materials, costs & seasonal maintenance.