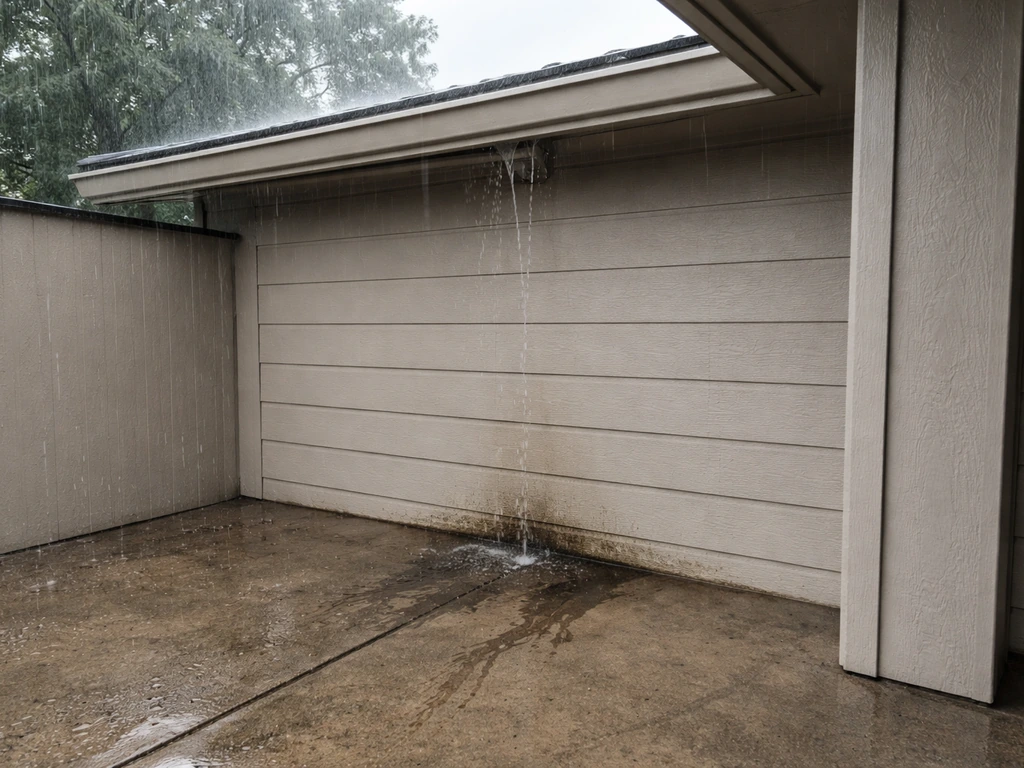
Rain gets onto a patio through a surprisingly small number of entry paths: an uncovered or under-covered roof opening, wind-driven splash from the sides, poor surface drainage that lets water pool and creep back in, or leaks at specific weak points like door thresholds, seams, and gaps in the structure. Once you identify which of those is your problem, the fix is usually straightforward. This guide walks you through diagnosing the real culprit first, then gives you both a quick stop-gap and a proper long-term solution for each scenario.
How to Stop Rain Coming Into Patio: DIY Fixes

Felix Brennan
5 Jul 2026
Find Where the Water Is Coming From (Before You Fix Anything)
Jumping straight to caulk or a new awning without diagnosing the entry point is the most common mistake. Water is sneaky. It rarely drips straight down from the exact spot where it entered. It tracks sideways along joists, collects at low points, and shows up feet away from the real source. Before you spend a dollar on materials, figure out which of these paths applies to your patio.
- Open or undersized overhead covering: If rain is falling directly onto your patio surface, you have insufficient overhead coverage. This is the most obvious path and the most fixable.
- Wind-driven side entry: If your patio has a roof but rain still gets in during storms, look at the open sides. Wind-driven rain can blow horizontally even under a generous overhang.
- Surface water flowing back in: Check whether your patio surface slopes toward the house. Patios should slope away at a minimum 2% grade (about 1/4 inch per foot). If water is pooling near the foundation wall or a door, you have a drainage problem.
- Door threshold or sill leaks: After heavy rain, if water appears just inside a door, the threshold seal, sill pan flashing, or the gap at the base of the door frame is the culprit.
- Seams, joints, and gaps in roof or wall connections: Where your patio roof meets the house wall, or where roofing panels join, water can find its way through cracked caulk, missing flashing, or open seams.
The best diagnostic tool you have is a garden hose. Run a controlled water test by soaking one small section at a time while a second person watches from inside or underneath. Start low (at threshold level) and work upward. Because water tracks laterally before showing up as a drip, wet the suspected area for a few minutes before moving on. Stains on walls or floors are often not directly below the true entry point, so follow the water trail upward and back toward the source.
Quick Fixes for Immediate Relief
If a storm is coming or water is already getting in, you need something that buys time while you plan the proper fix. These are stop-gap measures, not permanent solutions.
- Temporary tarp or poly sheeting over exposed roof sections: Use a properly anchored tarp that guides water runoff off the edge rather than pooling on top. If the sheeting is loose or baggy, it will collect water and make things worse. Secure it tightly and make sure it overhangs the drip edge.
- Foam backer rod and temporary caulk over open seams or gaps: If you can see a visible gap at a joint or around a penetration, a quick bead of exterior caulk over a foam backer rod will hold water out for a season while you plan the right repair. Use an ASTM C920-rated elastomeric sealant for exterior applications.
- Weatherstripping and door sweep on a leaking threshold: For door leaks, a self-adhesive door sweep on the bottom of the door is a same-day fix that can dramatically reduce water intrusion until you address the flashing properly.
- Sandbags or water deflectors at entry points: If surface water is flowing toward a door, a temporary water diverter or even a folded rubber threshold insert can redirect it while you address grading.
- Retract or close existing awnings: If you have a retractable awning, retract it in heavy rain or storms. Retractable awnings are designed for light rain and mild conditions, not sustained wind-driven rain or heavy downpours. Using them in storm conditions risks damage and water intrusion.
One thing to avoid: using expanding foam as a permanent waterproofing fix for large gaps or moving joints. Foam is great for filling and sealing small penetrations around pipes or conduits against air infiltration, but it is rigid and will crack at joints that expand and contract with temperature changes.
Cover Options: Awnings, Pergolas, and Hard Roofs
If your patio has no overhead covering or an insufficient one, this is where the biggest improvement comes from. Not every cover is equal when it comes to rain protection, so here is an honest breakdown.
Retractable Awnings
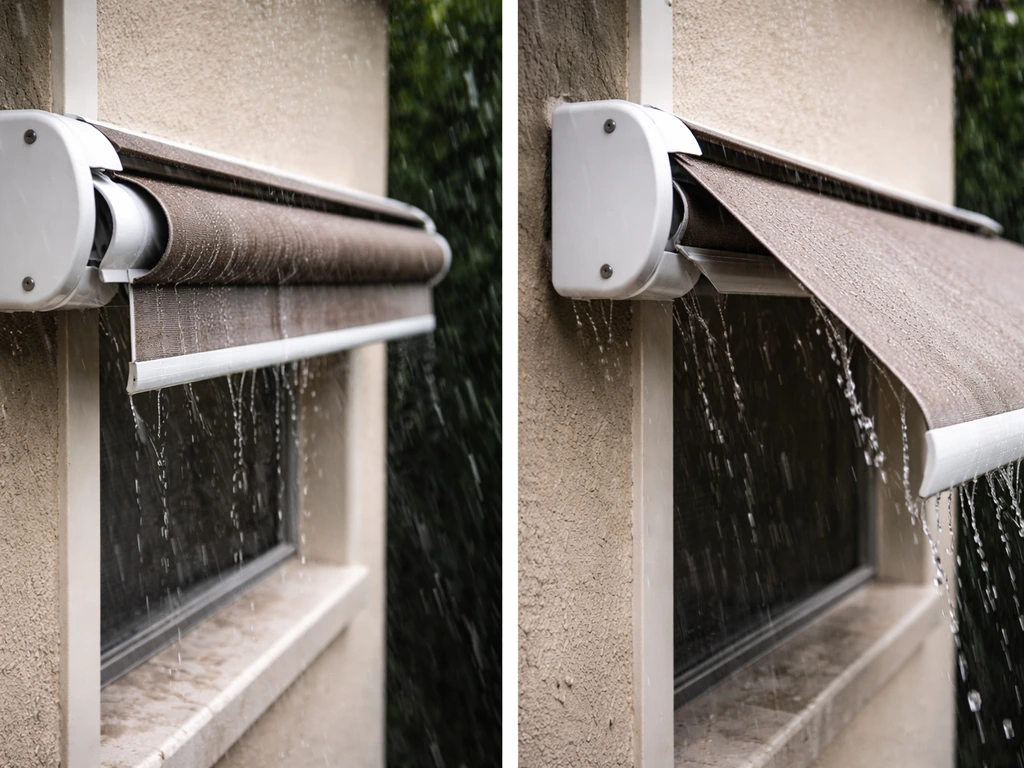
Retractable awnings are the most popular and most misunderstood option. They work well for light rain and sun shade, and they can retract when you need full sky access. The limitation is real: manufacturers explicitly state that retractable awnings are not intended for storm conditions, heavy rain, hail, or high winds. If you live somewhere with frequent summer thunderstorms or wind-driven rain, a retractable awning alone will not solve your problem. That said, models with built-in rain and wind sensors that trigger automatic retraction are a smart upgrade if you want to use the awning without babysitting the weather.
Pergolas: What Actually Keeps Rain Out
A standard open-slat pergola does almost nothing to stop rain. You need a specific roof type to get real weather protection. Three pergola roof systems are genuinely waterproof when properly installed and closed: solid insulated panels (think an aluminum or composite flat roof panel system), polycarbonate panels (clear or tinted panels rated for weather), and motorized louvered roofs. Motorized louvered pergolas like those with blade systems can open for airflow and close for full rain protection, and many integrate internal drainage channels so water exits through the posts rather than dripping off the edges. These are a meaningful investment (typically $10,000 and up for a professionally installed system), but they are the most functional outdoor-room solution for rain control.
Solid Patio Roof Addition
A permanent solid roof attached to the house is the most reliable rain protection you can add. This can be a simple lean-to style aluminum patio cover, a wood-framed structure with shingles, or a full gable roof. When built correctly with proper flashing at the house connection point and adequate pitch (a minimum 1/4 inch per foot slope for drainage), a solid patio roof eliminates vertical rain entirely. This is almost always a permit-required project and typically calls for a contractor for structural work, but a capable DIYer can handle an aluminum patio cover kit with basic tools.
| Cover Type | Rain Protection Level | Wind-Driven Rain | DIY Friendly | Approximate Cost Range |
|---|---|---|---|---|
| Retractable awning | Light rain only | Poor | Yes | $500–$3,000 |
| Polycarbonate pergola panels | Good (vertical rain) | Fair | Yes (kits available) | $1,500–$6,000 |
| Motorized louvered roof | Excellent when closed | Good with side panels | No (pro install) | $10,000–$30,000+ |
| Solid aluminum patio cover kit | Excellent | Good | Yes (basic carpentry) | $1,000–$5,000 |
| Wood-framed shingled roof addition | Excellent | Good | Moderate (permit required) | $5,000–$20,000+ |
Direct Water Away With Gutters, Downspouts, and Grading
A roof over your patio just moves the water problem to the edge unless you have a plan for where that water goes. Missing or poorly placed gutters and downspouts are one of the most overlooked causes of patio water intrusion.
Add Gutters to the Patio Cover
If your patio cover has no gutters, rainwater cascades off the roof edge directly onto the patio perimeter, splashes back under the structure, and can undercut the foundation. Add gutters along the low edge of the roof with a slope of at least 1/16 inch per foot toward the downspout. For a basic 10- to 16-foot patio cover, one downspout is usually sufficient.
Route Downspout Discharge Far Enough Away
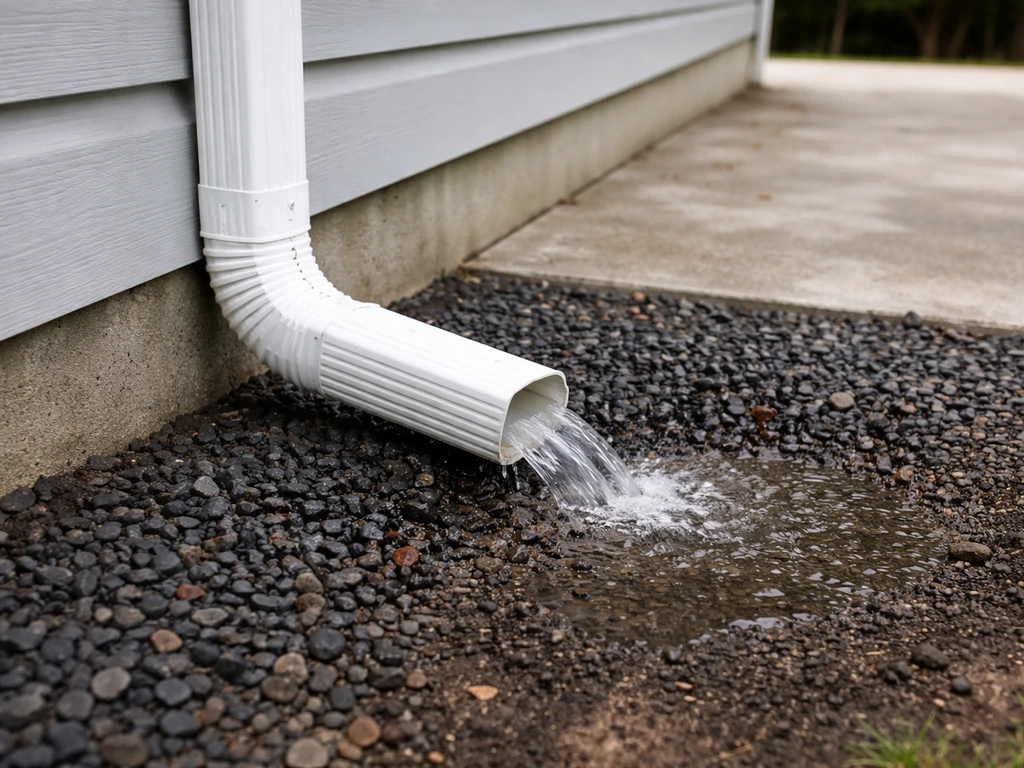
Discharge point matters. Downspout water should exit at least 4 to 6 feet from the foundation, and 10 feet is even better. If your downspout currently empties close to the patio edge or foundation wall, add a downspout extension to move the discharge point further out. Place a concrete or plastic splash block at the base of the downspout to direct water away and reduce erosion. The splash block should sit on ground that slopes away from the house at a minimum 5% grade (about 5/8 inch per foot) for at least the first few feet.
Check and Correct Patio Surface Grading
The ground and paved surfaces immediately around your patio should slope away from the house. Building codes require a minimum 5% slope (1 inch of drop per 20 inches of run, or about 1/2 inch per foot) for the first 10 feet around the foundation. Most paved patio surfaces need at least 2% slope (about 1/4 inch per foot) for water to drain off reliably without pooling. If your patio is flat or slopes toward the house, you have two options: re-grade the surrounding landscape with additional soil to redirect surface water, or install a channel drain or French drain at the low edge of the patio to catch and redirect runoff before it reaches the structure.
Seal and Weatherproof the Weak Points
Even a well-covered patio can leak at specific structural joints. The most common failure points are the connection between the patio roof and the house wall, the door threshold and sill, and any seams between roofing panels or between different materials.
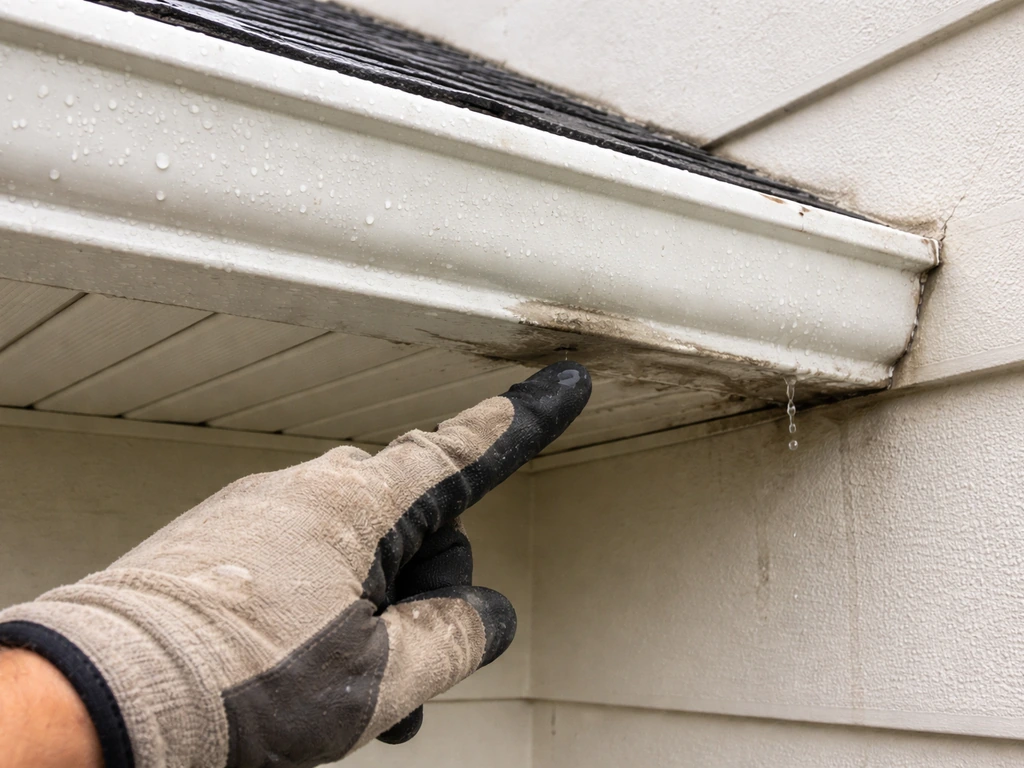
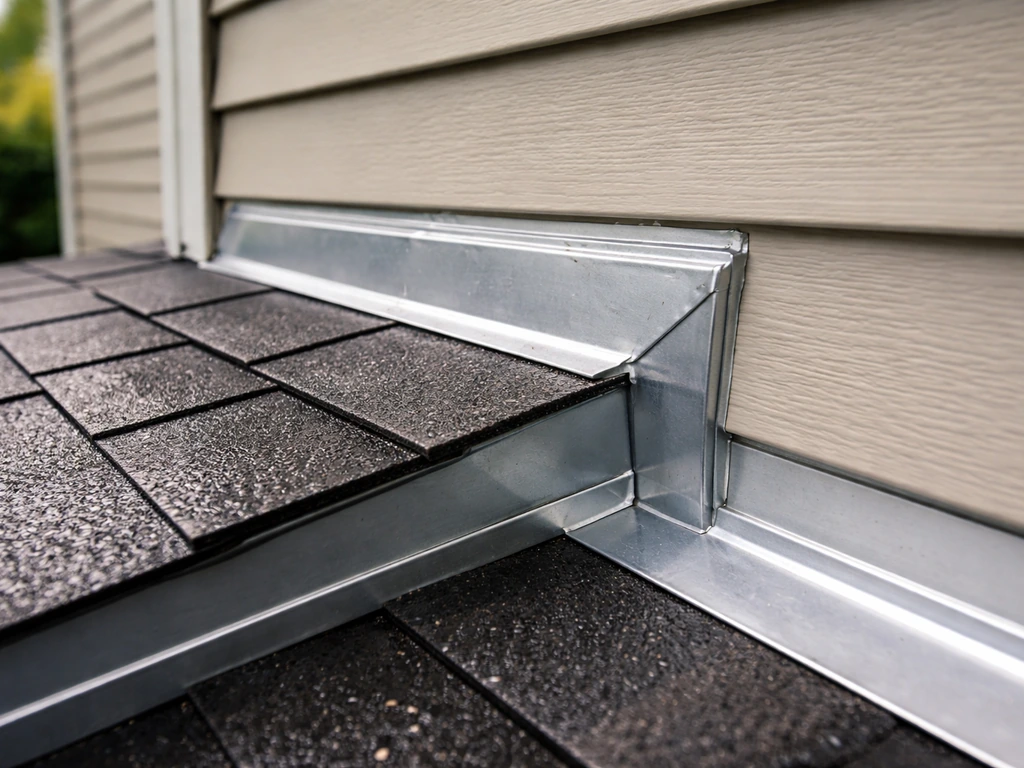
The Roof-to-House Wall Connection
Where a patio roof attaches to the house, there should be a metal flashing (typically step flashing or continuous counter-flashing) that directs water away from the joint rather than into it. If you see a bead of caulk here with no flashing, or old cracked caulk, that is your leak. Caulk alone is not sufficient at this joint because it is a primary barrier location that sees significant thermal movement. The proper fix is to install correct flashing integrated with the wall's water-resistive barrier. This is a job that benefits from professional assessment if you are not comfortable with roofing work, because incorrectly installed flashing can make things worse.
Door Thresholds and Sill Pans
An exterior door that leaks during heavy rain is almost always a flashing or sill pan problem, not just a caulk problem. The threshold area should have a sloped sill pan below the door that directs any water that gets under the threshold outward rather than inward. Self-adhesive flashing tape should seal the sill pan to the wall's moisture barrier at the sides and top. The JLC field guide also stresses using flexible flashing or self-adhered products to integrate waterproofing at exterior door sills, not relying on caulk alone Self-adhesive flashing tape. If your door was installed without a proper sill pan, re-caulking the threshold with exterior-grade elastomeric sealant (ASTM C920 rated) is a partial fix, but the permanent solution is to address the pan and flashing correctly. For a door that leaks only during extreme wind-driven rain, check first whether the door sweep and threshold seal are intact and whether the door closes fully against the weatherstripping all the way across.
Panel Seams, Joints, and Gaps in the Enclosure
If your patio has polycarbonate panels, aluminum sections, or a screening enclosure, the seams between sections are prime leak points. Clean old caulk out completely before applying new sealant. Use a foam backer rod in joints wider than about 1/4 inch so the sealant has the right depth-to-width ratio and can flex through temperature cycles without cracking. Apply an ASTM C920 elastomeric caulk and tool it smooth for a proper bond. Joint prep is as important as the product you use: sealant applied over dirty, wet, or poorly prepared surfaces will fail regardless of brand.
Stopping Wind-Driven Rain From Getting In the Sides
This is the scenario that surprises people. You have a solid roof, the patio is dry in normal rain, but a storm with any wind at all soaks the space. Wind-driven rain travels nearly horizontally and can blow 10 to 15 feet under a roof overhang. The only real fix is side protection.
Understand Your Wind Direction First
Note which side of the patio gets wet first and which direction the prevailing storm wind comes from. In most of the US, summer storms blow from the south or southwest. You likely do not need to enclose all four sides; protecting the one or two sides that face the weather will solve 90% of the problem.
Side Panels and Screening
Mesh screen panels will reduce rain intrusion but will not block it entirely, since water can pass through mesh openings during heavy wind-driven rain. For moderate conditions, screen panels make a noticeable difference and are the easiest DIY installation. For serious rain protection, you need solid or near-solid panels on the windward side. Options include vinyl drop-down curtains (motorized or manual track systems), polycarbonate side panels that attach between posts, or solid wall construction for a permanent enclosure. Keep in mind that a fully enclosed patio with solid side walls is starting to become a room addition, which may require permits depending on your municipality.
Vinyl Drop Curtains and Motorized Screen Systems
Retractable vinyl side panels are one of the most flexible solutions for wind-driven rain control. They can roll up or retract when weather is mild and drop down to create a nearly continuous perimeter barrier during storms. Quality motorized track systems seal better at the edges than simple weighted curtains, reducing gaps where wind can push water through. These are a good middle ground between a full enclosure and an open patio. They also help with insect control and, as a side benefit, can reduce wind load on patio furniture (a problem worth addressing separately if you deal with items blowing over in storms). These same wind conditions can also knock over patio plants, so it helps to add plant supports like stakes or windbreaks in addition to protecting the enclosure items blowing over in storms.
Gutter Splash Guards on the Windward Edge
If wind-driven rain is getting under the gutter and splashing back onto the patio, gutter splash guards installed at the leading edge of the gutter help reduce the impact. Forbes Home explains that gutter splash guards help reduce splashback and the erosion issues that can occur from gutter discharge impacting surfaces reduce the impact. These are simple formed metal or plastic inserts that deflect water into the gutter rather than letting it splash outward and back under the roof. They are an inexpensive addition (often just a few dollars per linear foot) that can meaningfully reduce patio splash intrusion near the gutter line.
DIY vs. Hiring a Pro: How to Decide
Most of the fixes in this guide are within reach of a competent DIYer with basic tools. Most of the fixes in this guide are within reach of a competent DIYer with basic tools, and that same approach helps you with adjacent projects like how to bug proof your patio. Here is a realistic breakdown of what you can handle yourself versus what is worth hiring out.
| Task | DIY or Pro? | Notes |
|---|---|---|
| Recaulking seams and gaps | DIY | Easy if you prep the joint correctly; use ASTM C920 sealant |
| Adding a door sweep or weatherstripping | DIY | Same-day fix, no special tools needed |
| Installing gutter extensions and splash blocks | DIY | Simple; just confirm discharge is 4–6 feet from foundation |
| Adding gutters to a patio cover | DIY (moderate) | Doable with basic carpentry; maintain 1/16-inch slope per foot |
| Installing a polycarbonate pergola panel kit | DIY (moderate) | Kit instructions vary; allow a full weekend |
| Installing vinyl drop curtains or screen panels | DIY (moderate) | Track mounting requires precision; follow manufacturer specs |
| Re-grading ground slope around foundation | DIY (moderate) | Requires a level, soil, and patience; aim for 5% grade over 10 feet |
| Installing flashing at roof-to-wall connection | Pro recommended | Errors here cause serious long-term water damage |
| Sill pan replacement under an exterior door | Pro recommended | Involves removing door casing; easy to get wrong |
| Permitted solid patio roof addition | Pro (structural) | Requires permit, often structural engineering, safe to DIY only if experienced |
When in doubt on flashing and threshold work, get at least one contractor opinion. The cost of a bad flashing job is mold remediation and structural rot, which is far more expensive than the repair itself. Mold can begin developing within 24 to 48 hours of sustained moisture intrusion, so do not let a slow leak linger while you debate the fix.
Maintenance Checklist to Keep Rain Out Year-Round
Once you have made your fixes, a simple seasonal inspection routine will keep things working. Most patio rain problems that homeowners deal with are recurrences of old problems that were never fully sealed or were sealed with the wrong product. Do this check every spring and fall.
- Inspect all exterior caulk and sealant joints at roof-to-wall connections, panel seams, and around doors. Look for cracks, shrinkage gaps, or separation from the substrate. Re-apply with ASTM C920 elastomeric sealant after cleaning out old material.
- Clear gutters and downspout openings of debris. Blocked gutters overflow and dump water directly onto the patio edge and foundation.
- Confirm downspout discharge is still directing water at least 4 to 6 feet away from the foundation. Extensions can shift or detach over winter.
- Check that splash blocks at downspout bases are still sloping away from the house. They can settle and reverse slope over time.
- Walk the patio surface after a rain and look for pooling. Reslope or clear any channel drains that have settled or clogged.
- Test door sweeps and weatherstripping by closing the door and checking for light gaps along the bottom and sides. Replace worn seals before the rainy season.
- If you have a retractable awning, check the fabric for tears and confirm the auto-retract sensor (if equipped) is functioning. Retract manually before any forecasted storm.
- For motorized louvered roofs or vinyl screen systems, test open/close cycles and inspect blade or panel edges for debris buildup that could prevent a full seal.
- Check patio screen or panel framing for loose fasteners, especially on the windward side. Tighten or re-anchor as needed.
Taking an hour twice a year for this inspection will catch 95% of problems before they become soaked furniture and water-stained walls. Most of the materials you need, from sealant tubes to door sweeps to splash blocks, are available at any home center for well under $50 combined. The bigger investments, like a solid cover or motorized side panels, are worth planning carefully since they pay off over many years of comfortable outdoor living in any weather.
FAQ
What kind of caulk should I use to stop rain at patio seams and door thresholds?
Acrylic-latex and generic indoor caulk often fail outdoors because they do not stay flexible or do not bond well to damp surfaces. For joints and exterior door areas, use an exterior-grade elastomeric sealant rated for weather exposure, and always clean out old, loose material first so the new product bonds to sound substrate.
Why does my patio stay dry in normal rain but leaks during storms with wind?
If you see water only during wind-driven storms, you likely have a side entry path rather than a top drip leak. To confirm, re-run the hose test starting on the windward side and watch under the cover for sideways tracking. Then prioritize side protection (near-solid windward panels or a tight curtain system) over adding more roof caulk.
Can I temporarily patch a leak until I can do the proper repair?
Stop-gap measures can work briefly, but do not rely on temporary blocking at structural joints. For example, using plastic sheeting or tape can divert some water, yet if the underlying flashing or sill pan is wrong, moisture can still travel laterally and show up weeks later. Plan the long-term repair before the rainy season escalates.
Will adding a patio cover completely stop rain if I do not add gutters?
Yes, an attic-style “roof deck” cover can still leak if the edge detailing is missing. Check the roof-to-house flashing connection, then confirm the perimeter has gutters or a clearly directed drainage path. If water is falling off the edge without controlled discharge, it can splash back under the cover and re-enter at low points.
How do I find the true source of the leak when the water shows up far from the spot that looks wrong?
Do not assume the wet stain is vertically below the entry point. Water often runs along framing, seams, or below the surface coating. Use the hose test in small sections and look for the first change in wetness direction, then trace upward and back toward the likely source before applying sealant.
What should I check first for an exterior door that leaks only in heavy rain?
If the water comes in at an exterior door during heavy rain, check the door sweep, weatherstripping contact, and whether the door fully closes across the whole opening. If water still appears, treat it as a flashing and sill pan issue, because re-caulking the threshold alone usually cannot handle the “water under the threshold” scenario during storms.
Why do my new patio sealant joints keep cracking or pulling away after a few seasons?
For joint sealing, a common mistake is filling the whole gap with caulk, which can crack from expansion and contraction. Use a foam backer rod when the gap is wide (around the size the article mentions) so the sealant has the correct depth, then tool it smoothly so it forms a continuous bond.
What if my patio surface is flat and still pools water even after I seal seams?
If a patio has flat or near-flat drainage, even a well-sealed roof can still cause leaks through pooled water and seepage into seams. Confirm the surrounding grading slope, then consider a channel drain or French drain at the lowest edge to intercept runoff before it reaches the structure.
Is expanding foam okay to use instead of flashing or exterior sealant for patio leaks?
Do not use expanding foam as the main waterproofing plan for places that move, like door frames, roof-to-house joints, or other structures with thermal movement. Use foam only for small penetrations for air sealing, and choose flexible, weather-rated elastomeric sealing systems for exterior joints that see movement.
Can a side enclosure solve wind-driven rain without making drainage problems worse?
Yes, but you need control of both wind-driven entry and water discharge. Side enclosures often reduce leakage substantially, yet if the roof edge or guttering is poor, the increased sheltered area can still channel splash and runoff to the perimeter. Pair windward side protection with perimeter drainage improvements.
What is the most overlooked part of downspout extensions and splash blocks?
For splash guards and downspout extensions, the key is directing water to a stable area where the ground slopes away and does not erode. If your soil is saturated or the ground near the discharge point is flat, add ground shaping to restore a proper grade before relying on the splash block to protect the foundation.
When should I stop DIYing and get a professional for flashing-related patio leaks?
If you are deciding whether to hire help, treat flashing and sill pan work as the “high-risk” zone. The wrong flashing can force water into wall cavities where it can start mold quickly and be costly to remediate, so get an expert opinion if you are unsure about integration with the wall water-resistive barrier or roof tie-in details.
What should I inspect each season to prevent rain problems from coming back?
A good routine is a quick inspection every spring and fall focused on caulk condition at roof-to-house joints, door threshold gaps, and the underside and edge areas of the patio cover. Look for cracked sealant, lifted flashing, and any recurring wet spots after the first heavy rain, then re-test with a hose before you apply fresh material.
Next Articles
How Do I Protect My Patio From a Fire Pit
Step-by-step tips to protect your patio from fire pit heat and embers with safe clearance, shields, and noncombustible s

How to Block Rain on Patio: Step-by-Step Fixes and Options
Diagnose rain entry and install patio roof, awnings, curtains, or pergola panels with proper pitch, gutters, sealing.
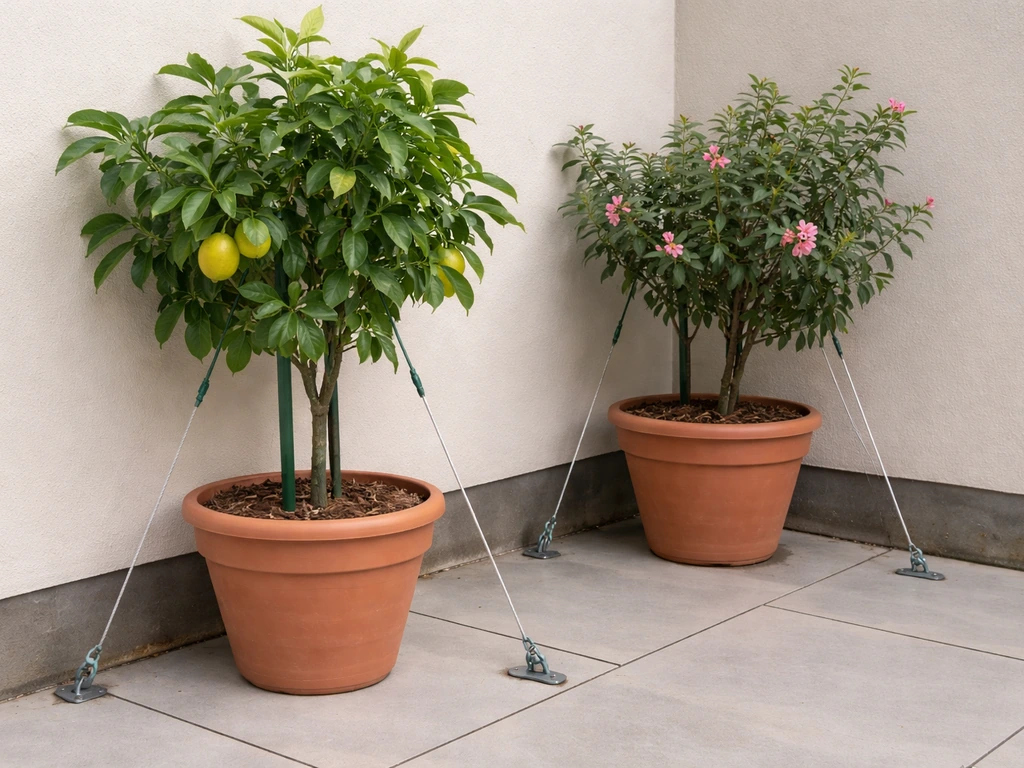
How to Keep Patio Plants From Blowing Over: DIY Fixes
Step-by-step DIY fixes to stop patio plants blowing over, from staking and anchors to windbreaks and better plant choice