
A well-placed windbreak can cut wind speed on your patio by 40 to 70 percent, turning a barely usable outdoor space into a genuinely comfortable room. The most effective DIY options range from a simple freestanding wood panel to a planted trellis, a set of anchored outdoor blinds, or a solid privacy wall, and the right choice depends on your wind direction, budget, and how permanent you want to go. This guide walks through every step: measuring your wind problem, picking the right solution from a clear comparison of all major windbreak types, sizing and placing your barrier for real effectiveness, building or installing it correctly, and keeping it in good shape season after season. For detailed step-by-step instructions on how to protect patio from wind, see our dedicated guide. For step-by-step options and detailed tips on how to block wind on patio, see the dedicated guide.
Windbreaks, How to Block Wind on Patio: DIY Plans & Tips

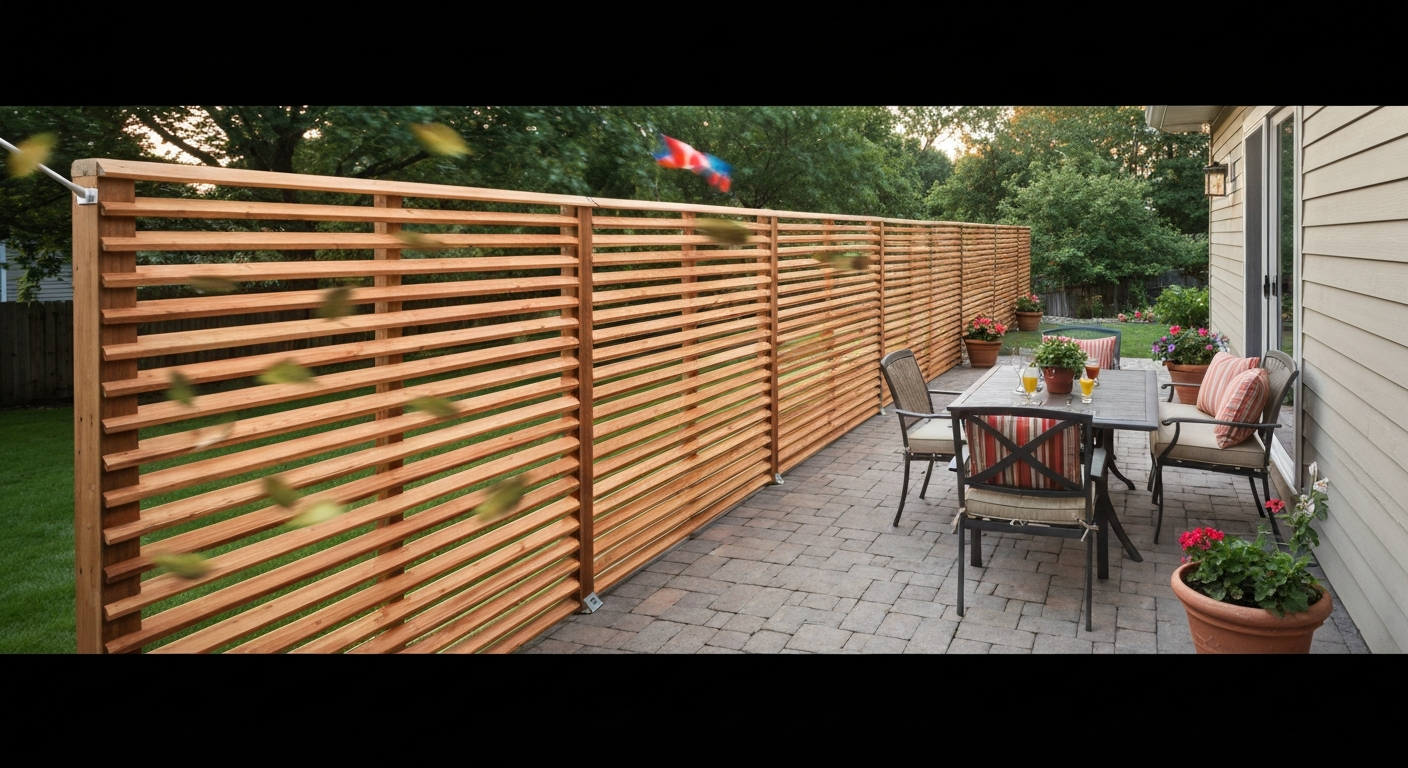
Why your patio windbreak actually matters
Wind is the number one reason people stop using their patios. It knocks over drinks, flips cushions, makes conversation frustrating, and drops the perceived temperature by 10 degrees or more even on a pleasant day. Most homeowners try to solve the problem with a patio umbrella, find it inadequate, and give up. The truth is that a properly sized and placed windbreak does not just knock down some wind near the barrier. Research from USDA and university wind studies shows that a well-designed barrier with around 40 to 60 percent porosity can reduce wind speed by roughly 40 percent across a protected zone that extends 10 to 20 times the barrier height downwind. ShelterMetrics notes that an optimal windbreak porosity of about 40–50% maximizes sheltered distance, typically reducing wind speed by roughly 40% out to about 10–20 times the barrier height Optimal windbreak porosity: 40–50% (ShelterMetrics research explainer). A 6-foot barrier can protect a seating area 60 to 120 feet deep under the right conditions. Understanding that principle changes the whole approach to a patio wind problem.
Assess your patio wind and set your goals first
Before you spend a dollar or swing a hammer, spend a couple of afternoons outside with a simple plan. Wind problems are almost always directional, and blocking the wrong side does nothing. Stand in your seating area at the times of day you actually use the patio and note which direction the wind is coming from. A $10 handheld anemometer gives you real numbers; anything above 10 mph feels uncomfortable for most people during a meal or conversation, and above 15 mph outdoor dining becomes genuinely unpleasant.
If you want to go deeper, NOAA's National Centers for Environmental Information publishes hourly climate normals from the 1991 to 2020 dataset, downloadable by station, which gives you prevailing wind direction and average speed by month for your area. That data tells you whether your summer wind problem is a consistent southwest flow or an afternoon thermal that reverses direction by evening, which changes your layout completely.
Write down your goals before you commit to anything. Ask yourself: Do I need full privacy or just wind reduction? Is this seasonal or year-round? Do I need to preserve a view? Does the solution need to store away in winter? Is a permit likely to be required? Answering these honestly now saves a lot of rework later.
Decision checklist: match the right windbreak to your situation
Run through this checklist before choosing a windbreak type. It only takes five minutes and it genuinely narrows the field.
- Permanence: Do you rent, plan to sell soon, or want flexibility? Go freestanding or fabric-based. Own the home long-term and want a durable solution? Consider a built wall or planted hedge.
- Budget ceiling: Set a hard number now. Fabric and portable solutions start around $50 to $200. Freestanding panels run $300 to $1,500 depending on size and material. Built masonry or concrete walls can reach $3,000 to $10,000 or more with professional help.
- Wind severity: Occasional 15 mph breezes are solved with curtains or a trellis. Consistent 25 mph afternoon gusts need a structural panel or solid wall with proper footings and fasteners.
- Height and permit check: Many municipalities allow fences up to 6 feet in rear yards without a permit. Seattle, for example, permits fences to 8 feet without a building permit if no masonry is involved. Check your local zoning before you build anything taller than 6 feet.
- Aesthetics and neighbors: A solid wood fence solves wind but also kills your view and can impact neighbors. A planted trellis or semi-open panel preserves sightlines and avoids disputes.
- Maintenance tolerance: Treated lumber lasts 15 to 25 years with basic care. Composite materials carry warranties up to 50 years from major manufacturers. Fabric and vinyl need seasonal inspection and occasional replacement.
- Seasonal storage: If you live somewhere with harsh winters, plan for solutions that can be removed, rolled up, or at minimum winterized without special tools.
Every windbreak type compared: pros, cons, and best use cases
There are more options than most people realize, and each one has a genuine sweet spot. Here is a practical rundown of the main types, followed by a comparison table.
Permanent masonry or wood walls
A built wall, concrete block, brick, stucco over CMU, or a solid board-on-board wood fence, gives the strongest wind reduction close to the barrier. It requires footings per IRC R403.1.4 (minimum 12 inches below undisturbed ground, extended below frost line in cold climates), a permit in most jurisdictions above a certain height, and a realistic budget of $1,500 to $8,000 for a typical 20-foot run. The payoff is durability and near-zero maintenance for masonry. The downside is zero flexibility and a significant neighbor and zoning conversation.
Freestanding wood or metal panels
These are the DIY sweet spot for most homeowners. A freestanding 6-foot by 8-foot panel built from pressure-treated 4x4 posts, 2x4 framing, and cedar or composite board infill can be built in a weekend for $200 to $600 and moved or modified later. They can be anchored to a concrete patio with post base hardware and Hilti-type anchor bolts, or set into gravel-filled tube footings in a lawn. The key is ensuring the base is beefy enough to handle wind loads. A 6-foot panel in a 20 mph wind zone sees real lateral force, and a post base alone without concrete embedment or bracing typically will not cut it per Simpson Strong-Tie's own load tables.
Lattice and trellis with climbing plants
A cedar or composite lattice panel planted with fast climbers like clematis, wisteria, or hardy hops gives you the ideal 40 to 60 percent porosity range right out of the box, which USDA windbreak research identifies as the sweet spot for maximum sheltered distance. It looks natural, adds privacy gradually, and doubles as a garden feature. The downside is time: plants take one to three seasons to fill in, and you need to factor in watering and pruning as ongoing tasks.
Outdoor roller blinds and patio curtains
Fabric solutions work well for covered patios or pergolas where there is already an overhead structure to attach to. PVC-coated outdoor roller blinds and weighted curtain panels can drop wind substantially when properly anchored, but the single biggest failure mode is flapping and billowing, which ruins the effectiveness and wears out the fabric fast. Windproof blinds with guide channels, bottom weights, and magnetic snap closures solve this almost entirely. Keeping patio blinds from blowing is a common enough problem that it deserves its own attention in the installation section below.
Polycarbonate and clear vinyl screens
Clear polycarbonate or vinyl panels are excellent when you want wind protection without losing light or a view. Polycarbonate expands significantly with temperature changes (roughly 0.065 mm per meter per degree Celsius), so panels must be installed with expansion gaps, slotted fastener holes, and EPDM washers or rubber edge seals to prevent buckling or cracking. Skip these details and your panels will bow and crack within a season.
Portable wind fences and modular panels
Woven polypropylene wind fence, modular powder-coated aluminum frames with fabric infill, and folding bamboo screens are all genuinely useful for renters, people who want seasonal solutions, or anyone not ready to commit. Costs run $50 to $400 for a typical patio. Effectiveness is decent for mild winds (under 15 mph) but they struggle in serious gusts without substantial ballast or tie-down points.
Patio umbrellas
Cantilever and market umbrellas block overhead sun but are ineffective windbreaks except for the mildest breezes. They also become a safety hazard in sustained winds above 20 mph if not properly weighted or staked. Treat umbrellas as shade tools, not wind tools.
| Type | Wind Reduction | DIY Difficulty | Cost Range | Permit Likely? | Best For |
|---|---|---|---|---|---|
| Masonry / solid wall | High (near field) | Hard | $1,500–$8,000+ | Yes (most areas) | Permanent, high-wind, max privacy |
| Freestanding wood panel | High | Moderate | $200–$800 | Often no (under 6 ft) | Most DIYers, semi-permanent |
| Lattice / trellis + plants | Moderate (grows) | Easy–Moderate | $150–$500 | Rarely | Garden look, natural porosity |
| Outdoor roller blinds | Moderate–High | Easy | $80–$400 | No | Covered patios, rented homes |
| Polycarbonate / clear vinyl | High | Moderate | $200–$700 | Rarely | Preserving views, light |
| Portable / modular panels | Low–Moderate | Easy | $50–$400 | No | Renters, seasonal use |
| Patio umbrella | Very low | Easy | $80–$600 | No | Shade only, very mild wind |
How windbreaks actually work: the physics behind the placement
Understanding a few basic principles helps you avoid the most common mistake, which is placing a windbreak too far from your seating area and losing most of its effectiveness.
Porosity: why a solid wall is not always better
A solid wall creates a strong dead zone immediately behind it but also creates turbulent re-acceleration of wind as airflow curls over the top. Research from USDA and university wind studies consistently finds that barriers with 40 to 60 percent optical porosity (meaning roughly half of the surface is open) produce the longest sheltered zone downwind, with measurable reduction extending 10 to 20 times the barrier height (abbreviated as H). A solid 6-foot wall might protect the 10 feet directly behind it quite well but leave the seating at 15 feet exposed to gusts. A slatted or lattice panel at 50 percent porosity protects that same seating area more evenly across a larger depth.
Height, length, and continuity
Height is the single most important variable. The protected zone scales directly with H. A 4-foot barrier covers a shallower depth than a 6-foot one, even if everything else is identical. Length matters too: a windbreak shorter than the width of the protected area allows wind to sweep around the ends and fill in from the sides. As a rule of thumb, make your windbreak at least as long as the area you want to protect is wide, and ideally 20 to 30 percent longer to account for end-around airflow. Staggered or L-shaped layouts help on corner patios where wind comes from multiple directions.
Sizing and placement: how high, how long, and where to put it
For most residential patios, a barrier height of 6 feet hits the sweet spot: it protects the typical seating zone 10 to 20 feet deep (using the 10H to 20H rule), stays under most municipal fence height limits, and is buildable by one or two people without special equipment. Seattle Department of Construction & Inspections fence rules note the city generally limits residential rear-yard fences to 6 ft and allows up to 8 ft without a building permit in some cases when no masonry or concrete elements are used. Here is how to translate that into a real layout.
- Identify your primary wind direction from your field observations or NOAA data. That side is where your main barrier goes.
- Measure the width of your seating area. Your windbreak should be at least that wide, ideally wider by 20 to 30 percent.
- Place the barrier as close to the upwind edge of the patio as practical. The closer the barrier to the seating, the stronger the immediate protection. A barrier placed 2 feet upwind of your chairs does more than one placed 15 feet away.
- For side winds or swirling patterns, add a shorter return panel at 90 degrees at one or both ends (an L or U shape). This dramatically reduces end-around re-entry.
- If your patio is exposed on three sides, a U-shaped or three-panel layout with a 40 to 60 percent porous infill gives broad protection without the complete enclosure of a screened room.
- Mark post locations on the ground with stakes before digging or drilling. Stand at the seating area and look through the gap between your knees and the planned barrier top — if you can see open sky, wind will come under. Consider going taller or adding a low kick plate.
Corner and staggered layouts
When wind comes from a diagonal or the patio sits on a corner lot, two panels set at an angle or staggered (offset and overlapping by 20 to 30 percent of their length) outperform a single straight run. The staggered arrangement forces air through a longer, more tortuous path, adding effective resistance without completely blocking airflow.
Materials, tools, costs, and time: what each project actually takes
These estimates are based on a single 8-foot-wide by 6-foot-tall freestanding panel as the base unit. Scale up linearly for larger projects. Costs reflect mid-2026 retail pricing at big-box stores and are approximate.
Freestanding wood panel (most common DIY build)
Use pressure-treated 4x4 posts (ACQ or CA treated lumber is standard today) and 2x4 framing with cedar, redwood, or composite board infill. For step-by-step plans and a materials list, see how to build a patio windbreak. Because modern copper-based preservatives like ACQ and CA are more corrosive to metal than legacy CCA, use hot-dip galvanized hardware rated ASTM A153 or G185/ZMAX coated connectors at minimum. Simpson Strong-Tie and the American Wood Council both specifically flag this requirement, and skipping it leads to early hardware failure. For coastal environments, step up to stainless steel fasteners.
| Item | Quantity (per 8x6 panel) | Approx. Cost | Notes |
|---|---|---|---|
| PT 4x4 post (8 ft) | 2 | $18–$28 each | ACQ or CA treated |
| PT 2x4 framing (8 ft) | 6 | $6–$10 each | Top, bottom, mid rails |
| Cedar or composite board (6 ft) | 16–20 | $4–$14 each | Varies by species/product |
| Post base hardware (CBS/PBS) | 2 | $12–$22 each | Needs concrete anchor below |
| Hilti or equivalent anchor bolts | 4–6 | $2–$4 each | For slab-mounted bases |
| Hot-dip galvanized screws (lb) | 2 | $12–$18/lb | ASTM A153 or ZMAX |
| Concrete tube form + mix (if in-ground) | 2 bags | $8–$12/bag | For soil-set posts |
| Total materials (approx.) | — | $200–$450 | Cedar mid-range boards |
Tools needed: circular saw or miter saw, drill/driver, level, measuring tape, string line, post hole digger or rented auger (for in-ground), hammer, safety glasses. Most people can build a single panel in one full day if materials are pre-cut. Two panels with footings is a realistic two-day weekend project.
Step-by-step: building a freestanding wood windbreak panel
- Lay out post locations with stakes and string line. Double-check that your panel line is parallel or perpendicular to the patio edge as intended.
- For slab-mounted posts: drill anchor holes into the concrete with a hammer drill (carbide bit sized to your anchor spec), set Hilti wedge or adhesive anchors per manufacturer torque specs, and bolt down the post base. Do not overtighten anchors in cracked concrete — switch to adhesive anchors if the slab has visible cracks.
- For in-ground posts: dig holes 12 inches below undisturbed grade minimum (deeper if you are in a frost zone — check your local frost depth map). In cold climates, frost-protected footings are required by IRC R403.1.4 unless the structure qualifies as a small exempt accessory. Pour tube-formed concrete, set posts plumb, and brace until cured (24 to 48 hours minimum).
- Cut and attach bottom, middle, and top horizontal rails with galvanized structural screws or joist hanger hardware. Check for square and level at each step.
- Install infill boards vertically (or horizontally for a modern look), leaving a 1/4-inch gap between boards for approximately 25 to 40 percent porosity. Tighter gaps mean more wind blocking but more wind load force on the structure.
- Cap the top rail with a beveled top cap board to shed water and protect the end grain.
- Apply exterior wood finish (stain, sealer, or paint) within two weeks of build. Uncoated cedar and pine check and gray quickly in sun and rain.
Polycarbonate and clear vinyl screen panels
Clear panels let you block wind without blocking light or your view, which is a popular choice for garden patios. Twin-wall polycarbonate (8 mm thickness is a good starting point) is strong, light, and fairly affordable at $30 to $60 per 4x8 sheet. The critical installation detail: polycarbonate expands and contracts significantly with temperature, at roughly 0.065 mm per meter per degree Celsius. For a 4-foot panel going through a 40°C seasonal swing, that is about 3 mm of movement. Palram and other major manufacturers require slotted screw holes (not tight round holes), rubber or EPDM washers, and edge seals to accommodate that movement. Drill slots rather than holes, use EPDM gasket tape at the frame, and leave a 3 to 5 mm gap at panel edges. Skip these steps and the panel will buckle or crack in the first hot summer.
Outdoor blinds: installation and stopping the flapping
Outdoor roller blinds mounted on a pergola or covered patio structure are one of the fastest weekend projects: most installations take two to four hours and cost $80 to $350 per blind depending on size and material. The problem everyone runs into is wind making the blind billow, flap, and wear out prematurely. Here is how to solve it properly.
- Choose windproof roller blinds that include built-in side guide channels (aluminum or UV-resistant plastic channels that the blind slides through like a track). These prevent side billowing entirely.
- If your blinds do not have guide channels, retrofit with aftermarket aluminum side guides secured to the frame with stainless or galvanized screws every 16 to 24 inches vertically.
- Add a bottom weight bar if not included. A 3/4-inch aluminum or steel tube slipped into the bottom hem pocket adds enough mass to resist light-to-moderate wind flutter.
- Use magnetic snap closures or hook-and-eye fasteners at the bottom corners to anchor the blind to the deck or patio frame when fully lowered.
- In high-wind regions, consider PVC-coated mesh blinds rated for outdoor wind exposure rather than standard woven or fabric blinds. The mesh material has built-in porosity that reduces wind load on the fabric itself.
Planted hedges and trellis windbreaks
A planted hedge is the lowest-tech windbreak you can build but requires the most patience. For immediate protection while plants fill in, combine a lattice panel installed now with fast-growing climbers planted at its base. Arborvitae, boxwood, and privet are popular hedge choices for formal looks; native shrubs like viburnum or wax myrtle work well in warmer regions and require less maintenance. Plan on one to three full growing seasons before a planted solution reaches working height. Space trellis panels 4 to 6 feet apart if staggering for porosity.
Anchoring, wind loads, and when to check the code
Freestanding panels catch a lot of force in a serious windstorm. ASCE 7's Components and Cladding provisions (Chapter 30) show that small-area elements like fence panels and screens actually see higher unit pressures than large building walls because of local pressure concentration effects. A 6-foot by 8-foot panel facing a 90 mph design wind speed can see uplift and lateral loads that easily exceed what an unbraced post base can handle on its own. Simpson Strong-Tie's own documentation for their CBS and PB series bases specifically notes that standard post bases do not provide adequate resistance to rotation without supplemental concrete embedment or cross-bracing. For anything over 5 feet tall in an exposed location, set your posts at least 24 to 36 inches into concrete-filled holes rather than relying on surface-mounted bases alone.
Permit reality check: many jurisdictions do not require a permit for a freestanding fence or panel under 6 feet in the rear yard, but rules vary widely. Always check before you build something tall or near a property line. If your project involves a permanent masonry element (concrete footings, block walls), a permit is almost always required. When in doubt, a 30-minute call to your local building department costs nothing and could save you a lot of grief.
Design, privacy, and curb appeal: making it look intentional
Function first, aesthetics second, but with a little planning, your windbreak can improve how the whole outdoor space looks rather than just looking like a fence someone bolted to a patio slab. Here are the design principles worth keeping in mind.
Finishes and material choices
Cedar and redwood age gracefully to silver-gray if left unfinished, but seal or stain them within the first season if you want to maintain color. Composite materials from major manufacturers carry warranties up to 50 years for capped composite products, making them worth the premium for a permanent installation. For powder-coated aluminum frames, look for AAMA 2605-rated finishes if the patio is in a coastal or high-UV environment, that spec includes 10-year South Florida exposure testing and means the coating will resist chalking and fading for a decade or more under hard conditions.
Preserving sightlines
If you have a view worth keeping, position your windbreak low enough on the windward side to block wind at body level without cutting off the horizon from a seated position. A 4-foot solid lower section with an open lattice or cable-rail upper section can do both jobs: stop ground-level wind and preserve the view above chair height. Polycarbonate panels do this even more cleanly and are worth the extra installation care if the view matters.
Plant choices for integrated windbreaks
For trellis and hedge windbreaks, match plant selection to your climate zone and the growth speed you need. In Zones 5 to 7, fast-growing options include 'Green Giant' arborvitae (2 to 3 feet per year once established), hornbeam (slower but very dense), or American holly for four-season screening. In Zones 8 to 10, wax myrtle, podocarpus, and Leyland cypress are popular workhorses. Avoid invasive species even if they grow fast, Japanese wisteria and English ivy cause real problems in most of the country and are banned or restricted in some states.
Neighbor and HOA considerations
A windbreak on a shared property line affects the neighbor as much as it affects you. Even where a permit is not required, a quick conversation before you build avoids disputes that are far more expensive than the windbreak itself. If you are in an HOA, check the CC&Rs for height limits, material restrictions, and setback requirements before designing anything. Some HOAs have specific rules about fence colors, materials, and even plant species.
Seasonal maintenance and troubleshooting
No windbreak is truly zero-maintenance, but most are very low maintenance with one annual check. Do this inspection every fall before storm season and every spring after it.
- Check all post bases and anchor bolts for corrosion, looseness, or concrete cracking. Tighten or replace as needed.
- Inspect wood members for checking, splitting, or rot at joints and post bases — these are the first places to fail.
- Re-apply exterior wood finish if the surface looks dry, gray, or chalky. A coat every two to three years keeps wood in good shape.
- For fabric and vinyl blinds: clean with mild soap and water, inspect for UV degradation, and check guide channels for debris that causes the blind to bind or tear.
- For polycarbonate panels: check that expansion gaps are clear and have not been inadvertently filled with caulk or debris. Check EPDM seals for cracking.
- For planted windbreaks: prune for shape and density every late winter before new growth. Remove dead wood and check for pest or disease pressure.
- Before heavy storm season: remove or roll up portable fabric panels, stake portable wind fences with additional ground anchors, and stow patio umbrellas.
If a wood panel starts leaning or a post feels loose, address it immediately rather than waiting. A leaning 6-foot panel in a 30 mph gust becomes a projectile. Resetting a loose post in fresh concrete is a half-day job. Repairing damage after a storm or replacing a neighbor's fence section is not.
FAQ
How do I assess my patio’s wind conditions and set realistic goals for a windbreak?
Collect local wind data (NOAA/NCEI or on-site observations) to determine prevailing directions and typical speeds. Note where gusts funnel, times of day, and how much reduction you need (e.g., reduce comfort wind by ~30–50% vs. block cold drafts entirely). Walk the patio during windy conditions, mark the windward direction(s) and measure distances to nearby obstructions. Use that to decide height, continuity and porosity: taller/continuous barriers give more shelter; 40–50% porosity often gives the best trade-off between near-field reduction and downstream turbulence.
Which windbreak type is best for patios: solid wall, porous panel, plant hedge, or blinds?
Choose by tradeoffs: solid walls give strong close-in shelter but create turbulence and shorter sheltered distance; porous screens/panels (40–60% porosity) usually provide smooth, longer-range shelter and are recommended for windbreak performance. Living hedges are attractive and effective long-term if space/time allow. Patio blinds, curtains and umbrellas are good for temporary or seasonal solutions but need anchoring for wind. Consider aesthetics, permanence, maintenance and local codes when selecting.
How tall and where should I place a windbreak to be effective?
Height (H) is the key variable. Expect meaningful shelter roughly 5–12×H downwind; greatest near-field reduction occurs within ~1–4×H. Place the windbreak upwind of the area you want to protect and keep it continuous for the best results. For example, a 6-ft (1.8 m) panel gives measurable shelter 9–22 ft downwind; to protect a seating area 10 ft from the barrier you’d use a similar height. For corner or multi-directional winds you may need partial enclosures or multiple panels.
What is porosity and why does 40–50% porosity often work best?
Porosity is the percentage of open area in the barrier. Studies and shelterbelt guidance show ~40–50% porosity reduces wind speed effectively while limiting turbulent re-acceleration that solid barriers can cause. Practically, use slatted panels, lattice with climbing plants, or perforated/screen materials to achieve this porosity range when you want both shelter and smoother flow.
Quick decision checklist: how do I choose the right DIY patio windbreak?
1) Define objective: comfort, privacy, or storage protection. 2) Identify prevailing wind directions and distances to be sheltered. 3) Pick permanence: seasonal (blinds/curtains/umbrellas) vs. permanent (full wall, panels, hedges). 4) Choose porosity: ~40–50% for best balance; solid if close-in full barrier required. 5) Consider materials, maintenance and aesthetics (wood, metal, composite, polycarbonate, plants). 6) Check local fence/wall height rules and permit needs. 7) Plan anchoring and safety for expected wind loads; consult pro if uncertain.
What are step-by-step DIY builds for common patio windbreaks (freestanding wood panel, lattice with plants, modular panels)?
Freestanding wood panel: 1) Locate and mark panel line; check utilities and setbacks. 2) Size posts to height and embedment (see anchoring notes). 3) Dig post holes to depth required by code/frost (or use concrete footings); set posts plumb and brace until cured. 4) Attach rails and slats with corrosion‑resistant fasteners; leave spacing to create target porosity. 5) Finish with paint/sealant. Lattice/trellis with plants: 1) Install sturdy posts or frames with through-bolts or anchored bases. 2) Fasten lattice panels or wire mesh allowing ~40–50% open area. 3) Plant climbers at base and irrigate until established. Modular metal/composite panels: 1) Set engineered footings or use rated post sockets anchored to slab with proper anchors. 2) Use manufacturer bracketry and gasketed fasteners to allow thermal movement. 3) Cap and seal connections.
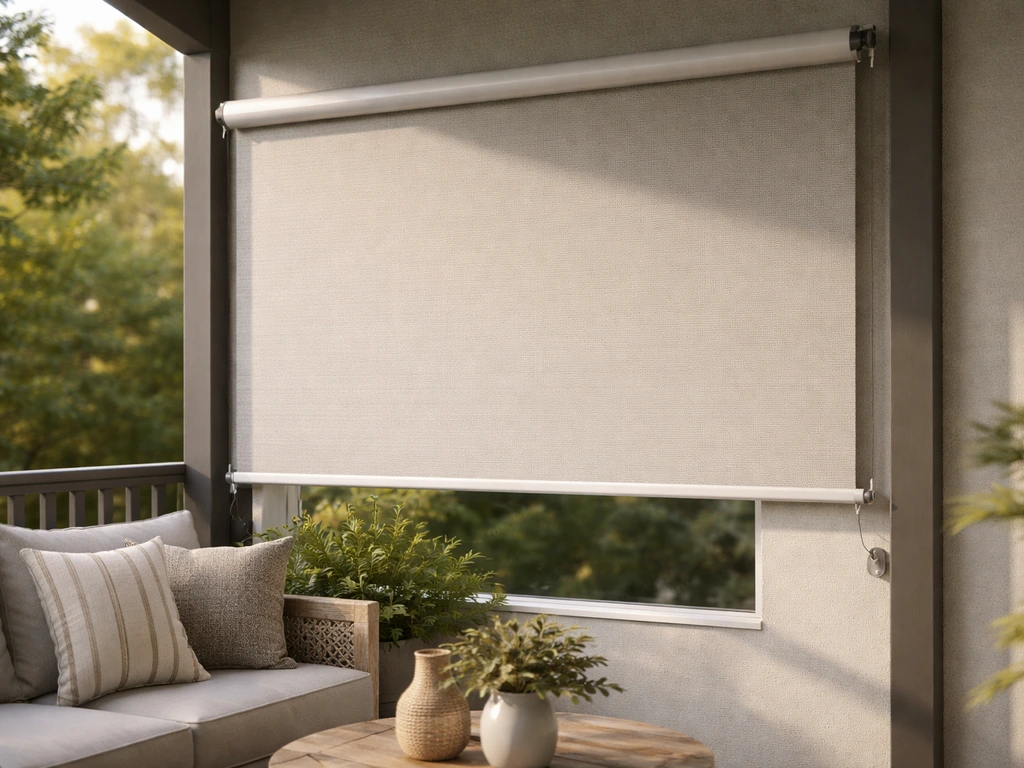
Step-by-step fixes to stop patio blinds from blowing in wind using better tension, mounts, weights, guides, and hardware
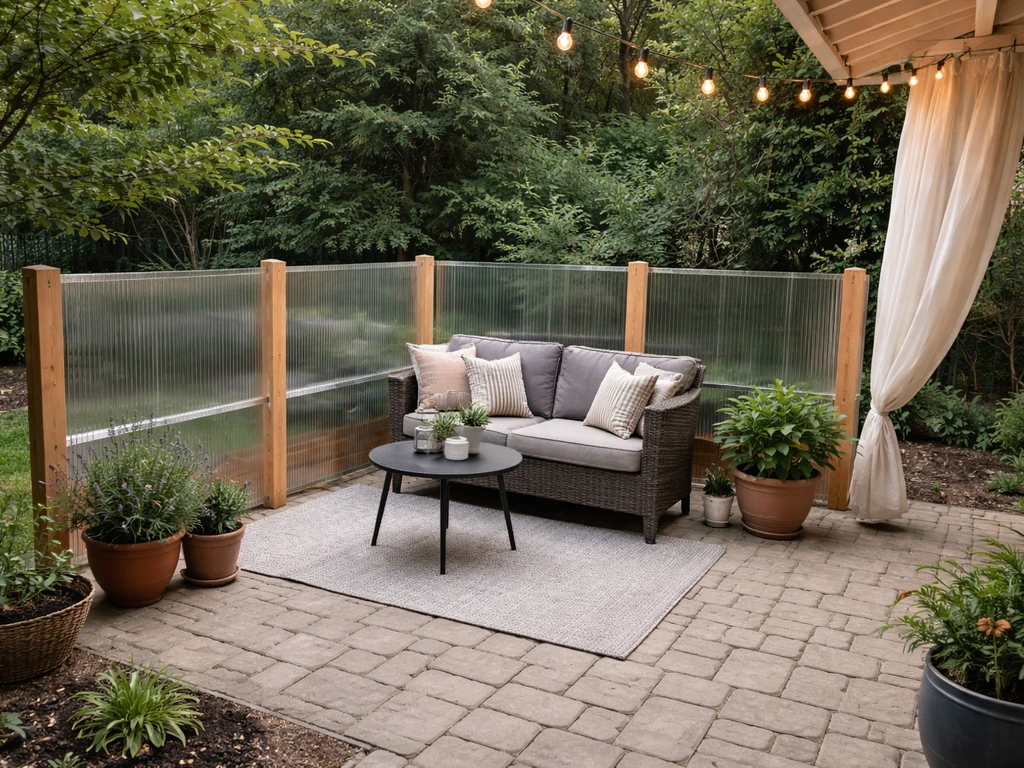
Step-by-step DIY guide to shelter and protect your patio from wind with smart layout, barriers, panels, and enclosures.
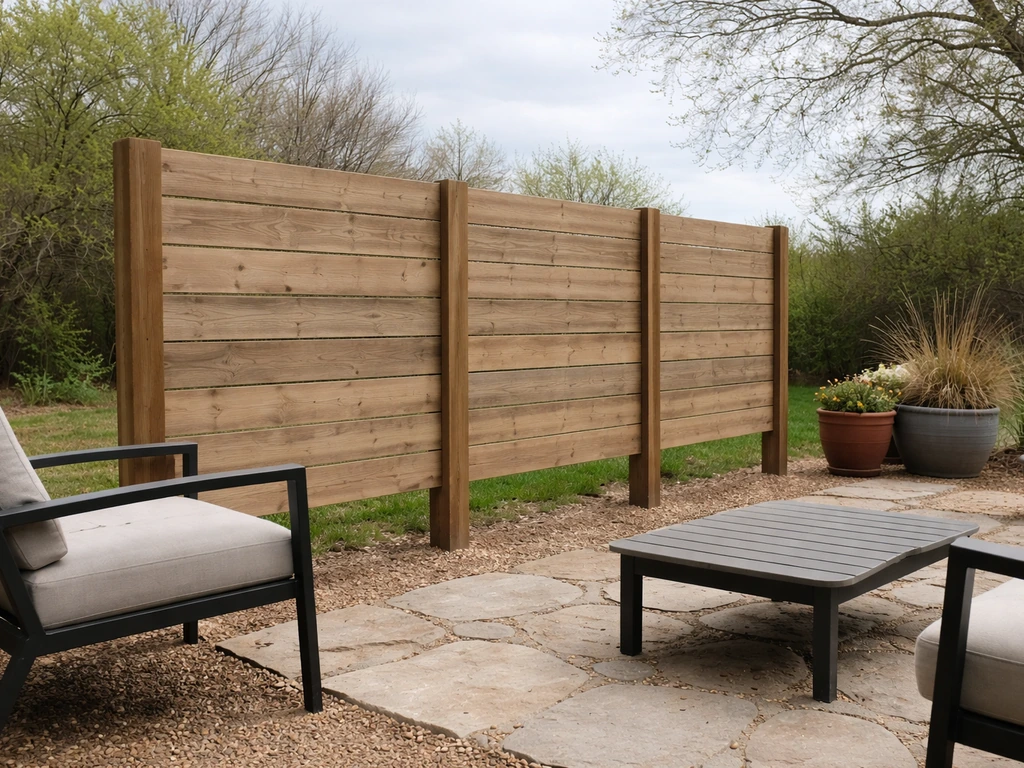
Step-by-step DIY patio windbreak plan: choose style, measure wind, build secure posts and panels, weatherproof, maintain