The best way to build a patio windbreak is to set solid posts (wood or metal) perpendicular to your prevailing wind direction, fill the frame with panels or slats at roughly 50% porosity, and anchor everything so it can handle a real gust without wobbling. A 6-foot-tall barrier built this way can protect a seating zone roughly 60 feet deep behind it, enough to cover most patios entirely. You don't need advanced carpentry skills to pull this off, but you do need a clear plan before you cut a single board.
How to Build a Patio Windbreak Step by Step DIY Guide

Felix Brennan
9 Jun 2026
Choose the right windbreak type and where to put it
Before you pick up any lumber, decide what kind of windbreak actually fits your patio. There are four practical options for a DIY build, and they're not interchangeable.
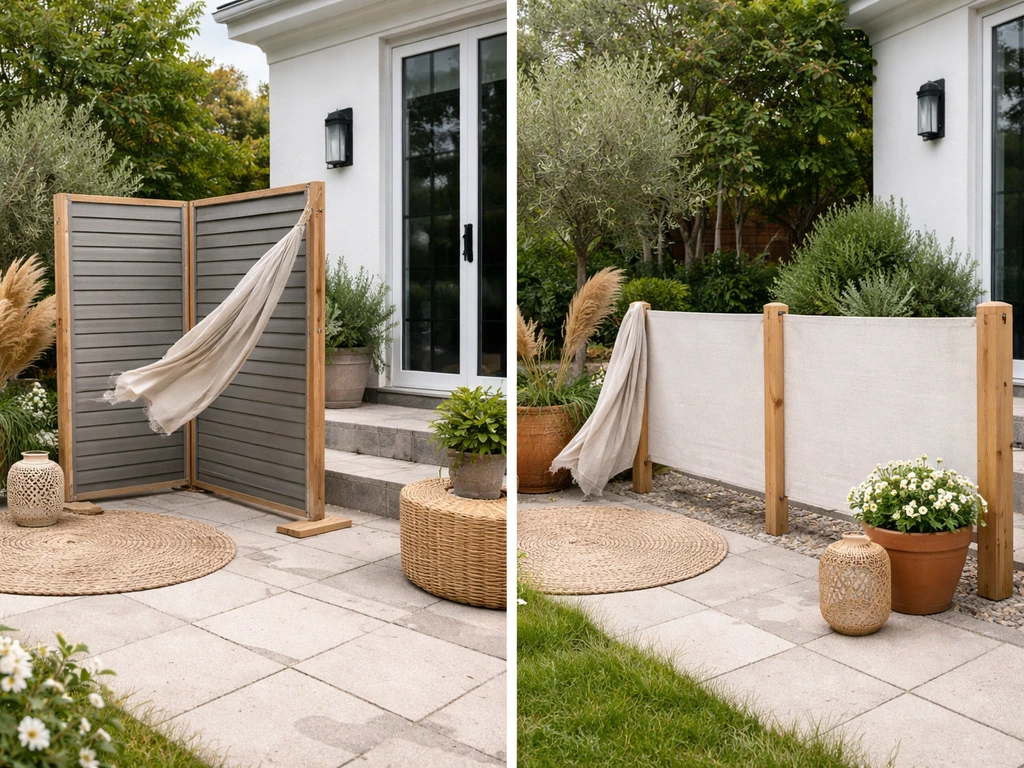
- Freestanding panel screen: The most flexible option. A frame with solid or slatted panels that stands on its own base plates or footings. Great if you rent, don't want permanent construction, or need to reposition seasonally.
- Attached wall or trellis extension: You extend an existing fence, house wall, or pergola post with a new panel section. This gives you the most structural strength because you're tying into something already anchored.
- Slatted privacy screen: A frame filled with evenly spaced boards or slats rather than solid panels. This is your best performer for actual wind reduction (more on porosity below) and looks intentional rather than thrown together.
- Metal post and panel system: Steel or aluminum posts with polycarbonate, composite, or mesh infill panels. More durable long-term and often faster to assemble, but costs more upfront.
For most homeowners, a cedar slatted screen or a pressure-treated post frame with composite panels hits the sweet spot between cost, durability, and DIY difficulty. Freestanding screens work well for apartments or rental patios but need careful weighting or ground anchors to stay safe in high winds.
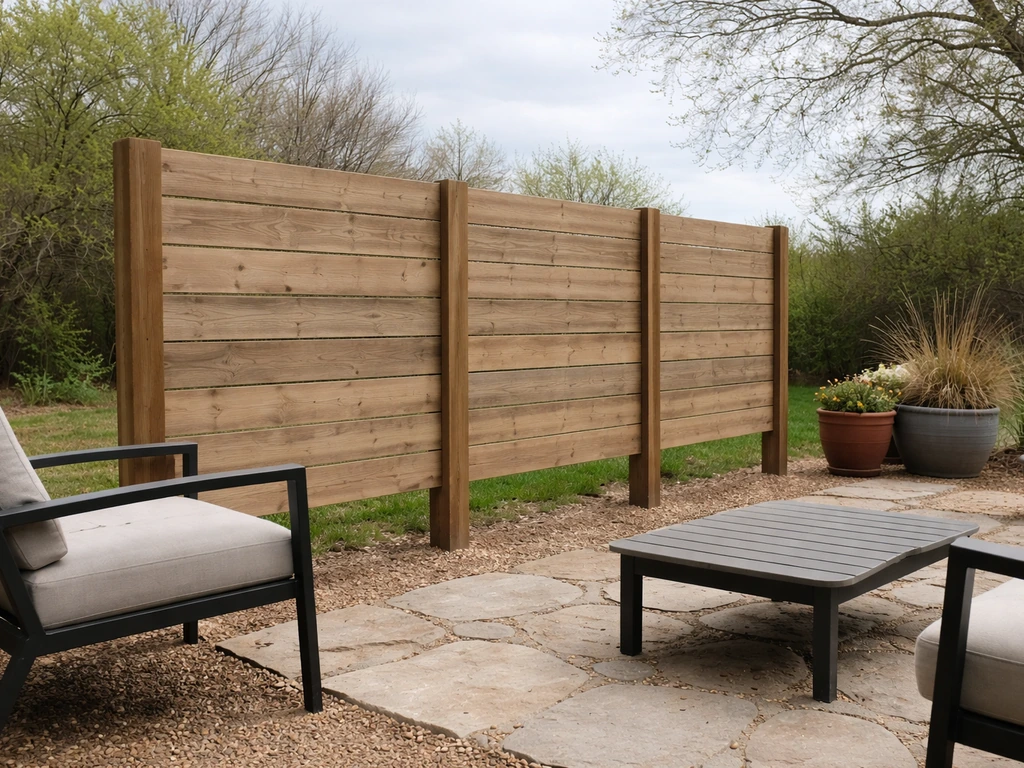
Location matters just as much as type. Walk your patio on a windy day and note exactly where the cold or gusty air enters. Is it coming from the back of the yard, the side, or funneling between your house and a neighbor's fence? The windbreak needs to sit on the upwind side of where you actually sit, not just at the property edge. Think about sight lines too: if you're blocking an ugly alley, a solid panel works great. If you're blocking wind but want to keep a garden view, slatted spacing is the move.
Plan your layout, measurements, and wind direction
Wind direction is everything here. Research consistently shows that a windbreak is most effective when it runs perpendicular (at a right angle) to the prevailing wind. If your dominant wind comes from the northwest, your screen should run roughly northeast to southwest across the path of that wind. A barrier running parallel to the wind does almost nothing useful.
For height: a 6-foot windbreak is the standard for residential patios because it matches typical fence height, clears most permit thresholds, and creates a meaningful protected zone. Using the widely accepted 10x rule, a 6-foot barrier protects roughly 60 feet of leeward (downwind) space at reduced wind speeds. That covers a 15x20 patio with room to spare. If your patio is deeper than that, go taller, an 8-foot screen pushes the protected zone to around 80 feet.
For length: make the windbreak at least 10 times its height. A 6-foot screen should be at least 60 feet long if you want full protection without wind wrapping around the ends. On a smaller patio that's overkill, but the principle still applies: a screen that's too short lets wind curl around both sides and swirl right into your seating area. Aim for at least 3 to 4 feet of extra screen width beyond the edges of where you're sitting.
Sketch the layout on graph paper or a free app like SketchUp before buying anything. Mark your post locations (typically every 6 to 8 feet on center), the total run of the screen, and where the structure will sit relative to your patio furniture. Account for gate openings if you need to walk through. Measure the actual square footage of panel infill so you can price materials accurately.
The porosity question: solid vs. slatted
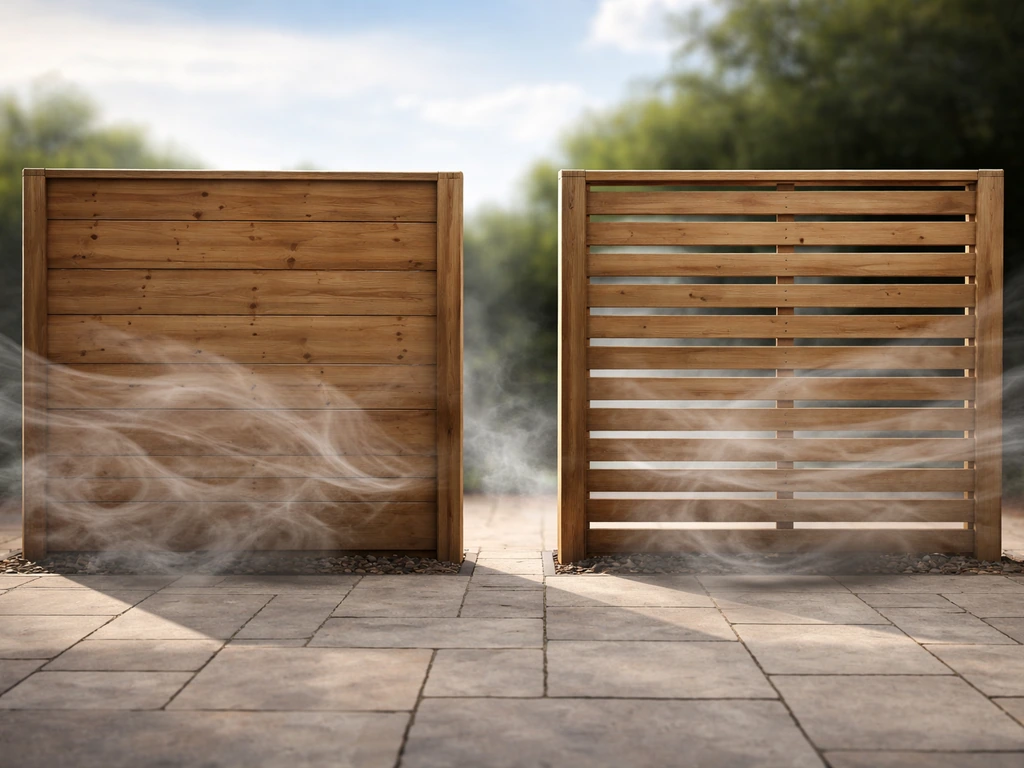
This surprises most people: a completely solid wall is not the best windbreak. A solid barrier creates intense turbulence right behind it, which can actually make your patio feel worse. Wind research points to an optimal porosity of around 40 to 50 percent open space for maximum downwind protection with smoother airflow. In practical terms, that means leaving about half an inch of gap between 1.5-inch-wide slats, or using a semi-privacy fence style with evenly spaced boards. Fully solid panels (like plywood or tongue-and-groove) work fine for a smaller patio where you mainly want privacy and are less concerned about the extended wind shadow behind the screen.
Materials and hardware: what to actually buy
Here's a straightforward comparison of the most common DIY-friendly options for posts, infill panels, and framing.
| Material | Best Use | Lifespan (approx.) | Cost Level | Notes |
|---|---|---|---|---|
| Cedar (posts/framing) | Above-ground framing, slats, decorative boards | 25–30+ years above ground | Mid | Naturally rot-resistant, easy to work with, holds stain well. Not ideal for direct ground contact. |
| Pressure-treated lumber | Ground-contact posts, base framing | 20–40+ years | Low-Mid | Use ACQ or CA-treated; must pair with compatible fasteners (hot-dip galvanized or stainless). |
| Composite decking boards | Infill slats or panel faces | 25+ years | Mid-High | Low maintenance, no painting needed, resists moisture and insects. Heavier than wood. |
| Steel posts (galvanized or powder-coated) | Main support posts | 20–30+ years | Mid-High | Strong, slim profile, no rot. Requires metal-compatible hardware and drilling. |
| Aluminum framing | Freestanding frame systems | 30+ years | High | Lightest option, rust-proof, great for coastal areas. More expensive and harder to source locally. |
| Polycarbonate panels | Solid transparent infill | 10–15 years | Mid | Blocks wind while keeping light. Can yellow over time. Good for covered patios. |
| Bamboo/reed panels | Quick temporary screens | 3–5 years | Low | Easy to install but not structurally strong. Best for light wind, short-term use. |
For most DIY builds, the winning combination is pressure-treated 4x4 posts for ground contact (or metal post bases on concrete), cedar 2x4 rails for the frame, and cedar or composite slats for the infill. This setup is available at any home center, works in most climates, and is beginner-friendly with basic tools.
Fasteners and connectors
Do not use standard interior screws or nails on this project. Pressure-treated wood contains copper-based preservatives that corrode standard zinc-coated fasteners quickly, and coastal salt air adds another layer of risk. Use hot-dip galvanized or ZMAX-coated screws and structural connectors for pressure-treated lumber. In coastal or high-humidity areas, upgrade to 304 or 316 stainless steel fasteners. For post-to-beam and rail connections, Simpson Strong-Tie or equivalent structural connectors (post caps, rail brackets) make the frame significantly stronger than toe-nailing alone. If you're setting posts in concrete, standoff post bases that keep the post end 1 inch above the concrete surface prevent trapped moisture and dramatically slow decay.
Step-by-step construction
This method covers a standard wood post and slatted panel windbreak, which is the most common DIY build. Adjust for your chosen material type as needed.
Step 1: Mark and dig post holes
Mark your post locations with stakes and string. For a 6-foot-tall screen, posts should go every 6 to 8 feet on center. Dig holes with a post hole digger or rented power auger. A standard rule: bury one-third of the total post length, so a post reaching 6 feet above ground needs to be at least 9 feet total with 3 feet in the ground. For anything near or above 6 feet in height, a minimum 3-foot burial depth is a common code requirement. Check your local IRC or city ordinance before you dig.
Step 2: Set the posts in concrete
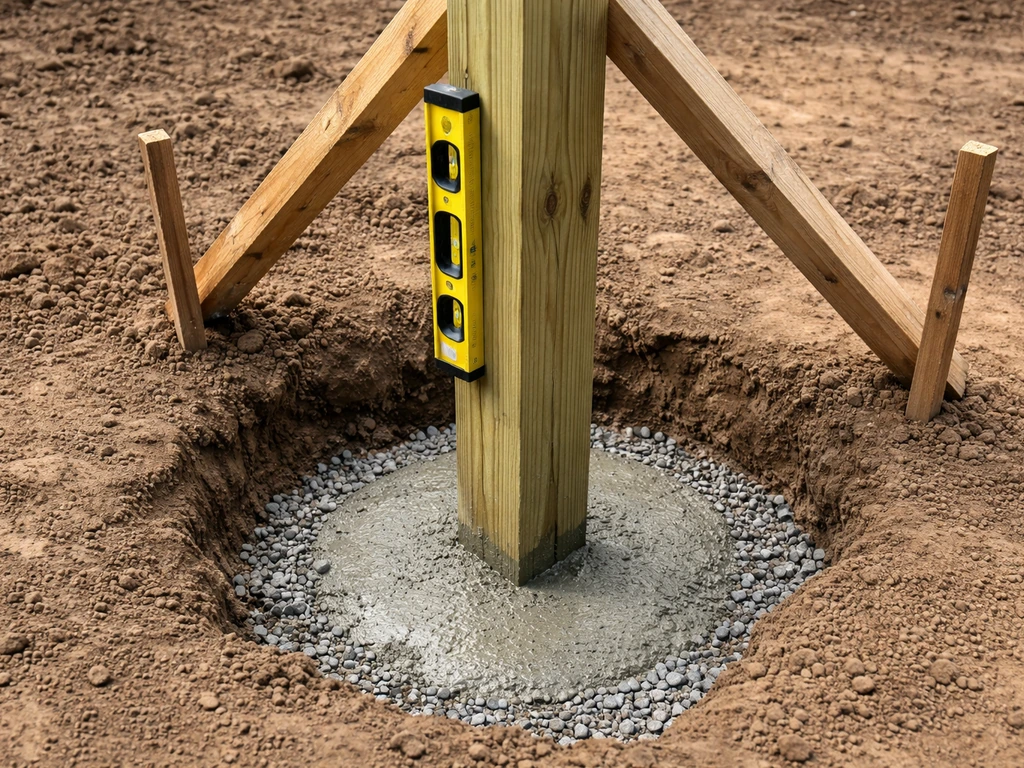
Add 4 to 6 inches of gravel to the bottom of each hole for drainage. Set the post, check it plumb on two adjacent faces with a level, and brace it temporarily with scrap 2x4s staked into the ground. Pour fast-setting concrete mix into the hole (follow bag instructions for water ratio) and slope the surface away from the post at the top so water runs off rather than pooling against the wood. Let it cure at least 24 hours, ideally 48, before attaching any rails or panels.
Step 3: Install the top and bottom rails
Cut 2x4 rails to span between posts. A typical 6-foot screen has a top rail near the top of the post and a bottom rail 4 to 6 inches above grade (not in contact with soil). Use metal post-to-rail brackets or structural screws (at least 3-inch deck screws, minimum two per connection) to attach rails. Check that rails are level before fastening permanently. For long runs, add a middle rail at the 3-foot mark to keep slats from bowing outward under wind pressure.
Step 4: Install infill slats or panels
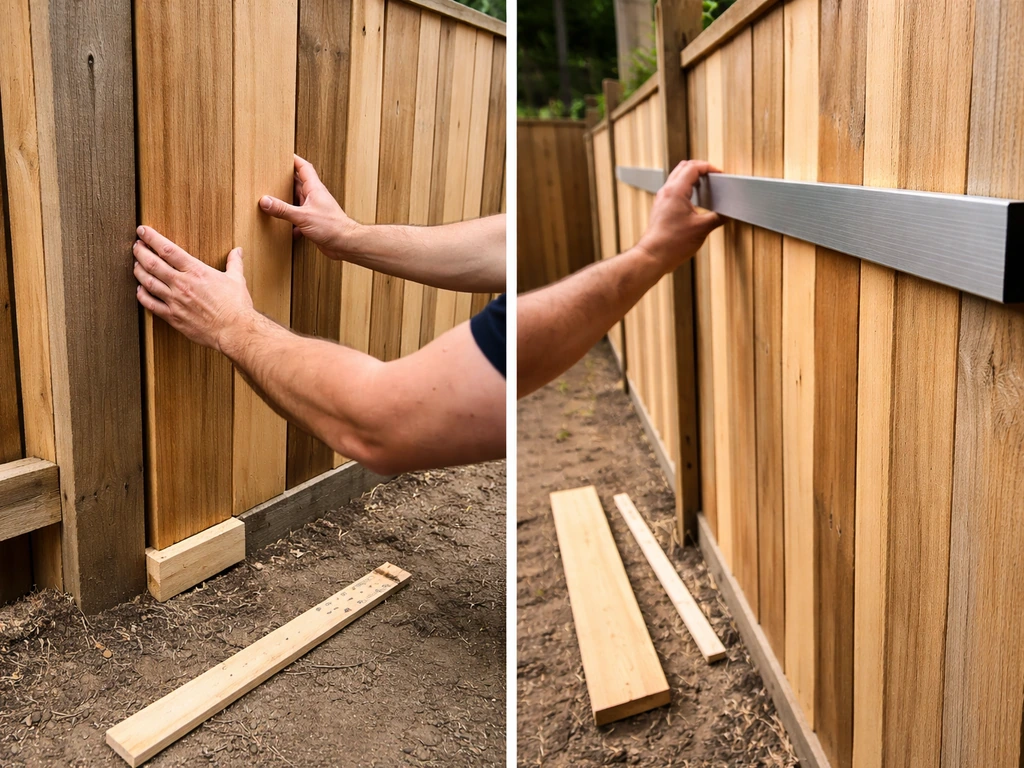
For slatted designs, rip your boards to consistent width or use pre-cut fence pickets (typically 3.5 inches wide). Use a spacer block cut to your target gap width (around 0.5 to 1.5 inches depending on your porosity goal) to keep spacing even as you go. Fasten each slat with two screws per rail, pre-drilling to prevent splitting on cedar. For panel systems (composite or polycarbonate), follow manufacturer channel or clip instructions and leave a small expansion gap at panel edges as directed.
Step 5: Check plumb, level, and alignment
Stand back and sight down the entire run. Posts should be vertically plumb, rails should be level, and slats should be consistently spaced and vertical. Fix any issues now before the concrete fully cures or before you add finishing hardware. A windbreak that leans into the wind will eventually fail at the post base; one that leans away will look terrible and can tip.
Anchoring, stability, and weatherproofing
A windbreak takes a beating. Unlike a decorative fence that mainly deals with people leaning on it, your windbreak faces continuous lateral wind load, especially in gusts. Stability is not optional here.
Bracing for wind
For runs longer than about 12 feet, add diagonal or horizontal bracing between your end posts and the nearest intermediate post. NRCS fence standards call for a minimum 6.5-foot horizontal brace between corner and brace posts under tension loads, a useful benchmark for residential builds too. On a patio, a knee brace (a diagonal 2x4 running from the top corner of an end post down to a concrete anchor or deck framing) adds tremendous resistance to racking without taking up much visual space.
Freestanding anchoring options
If you're building a freestanding screen rather than setting posts in the ground, you have a few solid options. Cast-in-place or wet-set post base connectors (like the Simpson Strong-Tie CB series) let you bolt posts to an existing concrete patio slab without digging. These work well if your slab is in good condition. Alternatively, heavy steel base plates with ballast (concrete blocks or sandbags inside a decorative planter base) work for temporary or rental-friendly setups, but need to be rated for the expected wind load. Don't underestimate this: a 6x8-foot solid panel in a 50 mph gust generates hundreds of pounds of lateral force.
Weatherproofing wood and metal
For cedar and pressure-treated wood, apply a penetrating exterior oil or water-repellent sealer within a few weeks of construction. This slows moisture cycling that causes cracking and checking. Reapply every 2 to 3 years. For cut ends of pressure-treated lumber (especially any ground-contact member), brush on an end-cut preservative immediately after cutting. For metal posts and connectors, check that powder-coat or galvanizing is intact after installation, touch up any scratched areas with a compatible cold-galvanizing compound or outdoor metal primer before rust has a chance to start. Keep the bottom rail and slats off the soil surface; direct ground contact kills wood finish fast regardless of species.
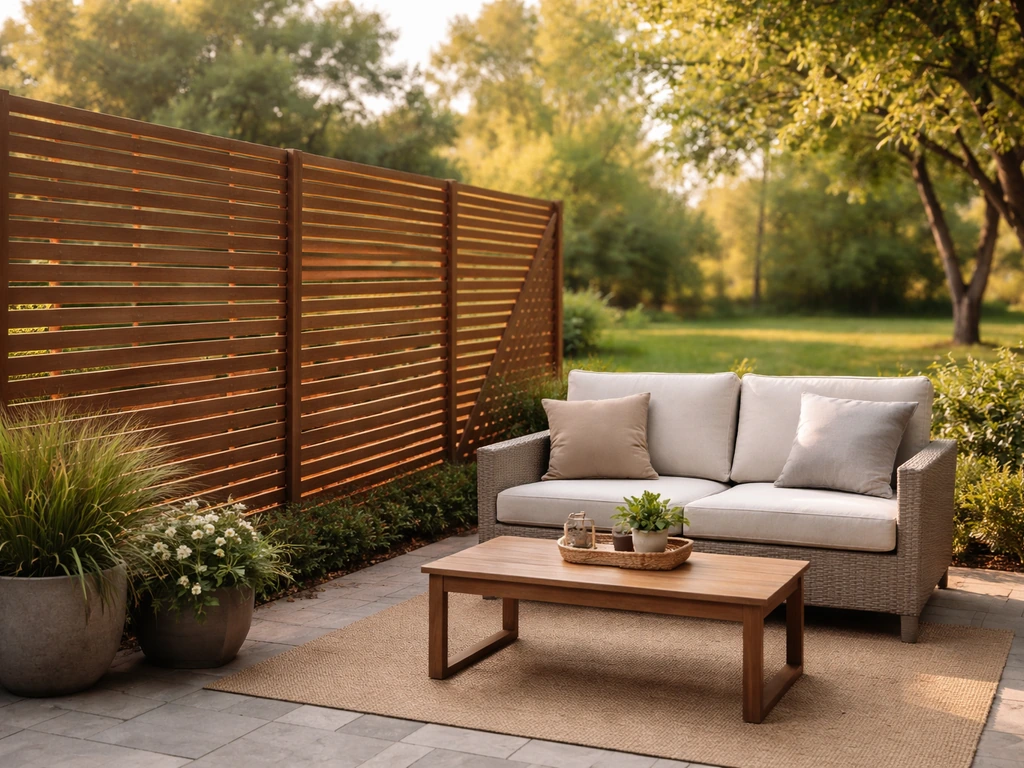
Finishing, privacy upgrades, and keeping it looking good
Once the structure is up, a few upgrades can turn a functional windbreak into a real design feature without compromising the wind protection.
- Add a top cap rail: A 2x6 or 2x8 board laid flat on top of the posts caps the screen neatly, protects post tops from rain, and gives you a shelf for plants or lights.
- Run outdoor string lights along the top rail or weave them through the slats for evening ambiance that actually makes you want to use the patio.
- Attach a trellis panel section to one end and train climbing plants (like clematis or jasmine) to fill it. This softens the look and adds another wind buffer layer over time.
- Hang outdoor fabric panels or canvas curtains on one side of the screen for quick solid coverage when you need it, then tie them back when you want the airflow.
- Mount narrow planter boxes on the windward face of the screen at mid-height. This adds visual interest and helps break up the wind shadow edge without blocking the protected zone.
- If you want shade integration, attach a simple shade sail or polycarbonate roofline to the top rail—turning the windbreak into a partial enclosure wall.
Ongoing maintenance
Check fasteners and connectors annually, especially after the first winter. Look for loose screws, cracked boards, post movement, or rust staining from hardware. Tighten or replace hardware early, a loose post that moves an eighth of an inch in fall will move an inch by spring. Clean wood surfaces with a deck wash product each year before resealing. Inspect post bases for signs of decay or moisture damage. For composite or metal panel systems, rinse with a hose and check clip or channel connections for corrosion or UV embrittlement at the panel edges.
Safety, permits, and fixing common problems
Permits and setbacks
This is the part most people skip and later regret. In many municipalities, a fence or screen over 6 feet tall requires a permit. Even under 6 feet, setback requirements from property lines vary by residential zone, Portland, for example, uses a table-based setback system that differs by zone. Before you dig a single hole, call your local building department or check their website for fence permit requirements. It takes 10 minutes and can save you an expensive tear-down order. If your windbreak attaches to the house structure, a building permit is more likely to be required. Structures subject to wind load may also need to meet ASCE 7 wind design load standards depending on your jurisdiction.
Safety during construction
- Call 811 (in the US) before digging to locate underground utilities. Post holes only go 3 feet deep but that's enough to hit a gas or water line.
- Wear eye protection and gloves when cutting pressure-treated lumber—the preservatives are not something you want on your hands or in your eyes.
- Have a second person help hold posts plumb while you pour concrete. Bracing a post alone while trying to check a level and fill concrete is a recipe for a crooked result.
- Don't stand tall panel sections in wind without them being secured. An unsecured 4x8 panel in even a modest gust becomes a sail.
Troubleshooting the most common problems
If your windbreak wobbles after a few months, the first place to check is the post base. Either the concrete didn't fully cure before the posts were loaded, the hole wasn't deep enough, or water is pooling at the base and softening the surrounding soil. The fix is usually to add concrete around the base or install a metal post base connector to redistribute the load onto the slab. If you're still getting strong wind through the screen despite a good build, check the gaps: even a consistent 1-inch gap between slats can let more air through than expected if there's no middle rail and the slats are bowing outward under pressure. Add a mid-height rail and consider temporarily testing with a tarp over the frame to see if the protected-zone improves, if it does, you need denser infill. If wind is curling around the ends of the screen and swirling into your seating area, extend the screen by at least one additional bay, or add a return panel at each end running perpendicular to the main screen face, which creates an L- or U-shape that captures the protected zone much more effectively. To reduce wind from reaching your seating area, make sure the windbreak captures the airflow and doesn't leave openings around the sides how to protect patio from wind. For more ideas on reducing wind from different directions, the broader topic of blocking wind on a patio or protecting a patio from wind covers additional layout approaches that can complement a fixed windbreak.
If your infill panels are rattling or vibrating in the wind, the slats are too loosely attached or there's play in the rail-to-post connections. Add a screw to any slat or picket that has only one fastener per rail, and tighten all rail brackets. Persistent rattle from outdoor patio blinds or fabric panels attached to the windbreak frame is a slightly different problem, that's covered in detail in guidance on keeping patio blinds from blowing in the wind.
Your next steps
Start today by going outside and standing in your patio's windiest spot to identify exactly where the air is coming from. Then sketch your layout on paper: mark north, the prevailing wind direction, your seating zone, and where a screen would need to go to intercept the wind before it reaches you. That sketch will tell you what length and height you need, what type of build makes sense, and whether you're likely to need a permit. From there, it's a lumber run and a weekend to get the posts in. The actual building is the easy part once the planning is solid.
FAQ
What if I cannot tell the prevailing wind direction for my patio?
If you cannot clearly identify the prevailing wind direction, prioritize the worst gust source you observe from your seating spot during multiple windy days. Then position the windbreak to intercept that flow, not the average breeze. Even small angle mistakes can reduce protection, so aim for a screen face that is within about 15 to 30 degrees of perpendicular to the dominant gust path.
Can I build the windbreak at the property line or does it have to be exactly at my seating area?
Yes, but only if the windbreak is placed upstream of your seating zone for the wind that bothers you most. If you are trying to block wind that funnels between your house and a fence, you may need the screen closer to the funnel opening rather than at the property edge, otherwise you protect the wrong corridor and still feel gusts where you sit.
How do I handle wind that still hits my patio corners after building a straight screen?
Generally, a windbreak that is taller and aligned correctly will protect more distance, but it does not always fix end-wrapping. If your patio feels windy at the far corners, add returns (short perpendicular sections) or extend the run by at least one additional bay so the airflow cannot reach your seating by traveling around the ends.
My windbreak looks properly built, but it still feels drafty. What should I change first?
If you want partial wind reduction with less visibility, increase porosity rather than trying to make a wall taller. For slatted designs, keep the spacing consistent and avoid over-gapping boards. If you are seeing too much airflow, the best adjustment is adding a mid-height rail (or another horizontal member) to reduce slat bowing and keep gaps from widening.
What causes rattling or vibration, and how do I troubleshoot it step by step?
On slatted screens, the first sign of structural looseness is often slat movement, vibration, or visible changes in spacing. Add fasteners to any slat mounted with only one screw per rail, tighten rail brackets, and recheck post plumbness. If the posts are stable but the screen flexes, add knee bracing at end posts or add bracing for longer runs.
Which fasteners should I prioritize, and do I really need stainless in coastal areas?
For pressure-treated wood, fasteners matter more than many people expect. Use hot-dip galvanized or ZMAX-rated screws in ground-contact and high-humidity situations, and avoid mixing different coating types on the same connection. In coastal air, upgrading to 304 or 316 stainless at least for the rail-to-post connections reduces long-term corrosion failures.
Can I build a windbreak on top of a concrete patio without digging holes?
You can, especially if you use a system rated for your slab and wind load. The key is anchoring posts with standoff post base connectors to keep the wood end above the slab and then checking that the connector is bolted into solid concrete (not a weak overlay). If your patio slab is cracked or thin, ground-set posts may be safer than trying to rely on anchors.
When and how should I seal the wood so it lasts through seasons of wind-driven rain?
Finishing too soon or finishing the wrong way can trap moisture in cut ends. For best results, seal after assembly but only once the structure has dried out from fresh construction moisture, and immediately coat any cut pressure-treated ends with an end-cut preservative. Keep the bottom rail and slats off the soil, direct water runoff away from posts, and plan to reapply sealant every few years.
Is a tarp test actually useful, and what does it tell me if it improves protection?
A tarp test is a practical diagnostic, but use it carefully: do it briefly and do not leave it in gusty conditions for long. If covering the gaps improves the protected zone, the issue is usually too much porosity or slat bowing, so add a mid rail, tighten spacing, or slightly reduce open area rather than building a fully solid wall.
What if wind wraps around the screen and blows straight into the seating area?
Most DIY failures happen when the screen is too short or not properly captured at the ends. If wind curls in from both sides, add length by at least one extra bay, or create an L or U shape with return panels perpendicular to the main face. This is more effective than simply adding more slats because it changes the airflow path around the structure.
How often should I inspect and maintain my patio windbreak, and what should I look for first?
Yes, but schedule it based on exposure. In regions with strong freeze-thaw cycles, inspect after the first heavy winter and again after the first major spring storms, then at least once each year. Look for concrete cracking at bases, rust streaks on metal hardware, and any widening gaps between slats that appear after temperature swings.
Next Articles
How to Block Wind on Patio: Quick Fixes and Best Options
DIY ways to block wind on patio: quick fixes and best long-term windbreaks with placement, height, steps, and tips.

How to Decorate a Long Narrow Patio: Layout Tips
Practical DIY layout and decor tips to widen a long narrow patio using zoning, furniture spacing, lighting, greenery, an

How to Decorate a Rectangular Patio Step by Step
Step-by-step plan to decorate a rectangular patio with smart layout, zones, furniture fit, lighting, plants, and seasona