
Adding curtains to a patio is one of the most practical upgrades you can make to an outdoor space. A few panels of outdoor fabric on a properly anchored rod or wire system can block afternoon sun, cut wind, create real privacy, and make a bare concrete slab feel like an actual room. Most installs take a single weekend, cost anywhere from $50 for a drop-cloth setup to $400+ for a full track system, and require no advanced carpentry skills. If you measure correctly, pick the right fabric for your climate, and use anchors rated for your mounting surface, you'll end up with curtains that stay put through wind, rain, and years of UV exposure. Community discussions, DIY photos, measurement tips, and windproofing tricks are available on r/HomeImprovement and r/DIY (https://www.reddit.com/r/HomeImprovement/search/?q=patio+curtains&restrictsr=1) Search results: 'patio curtains' — r/HomeImprovement (Reddit).
How to Add Curtains to Patio: Complete DIY Guide with Windproofing

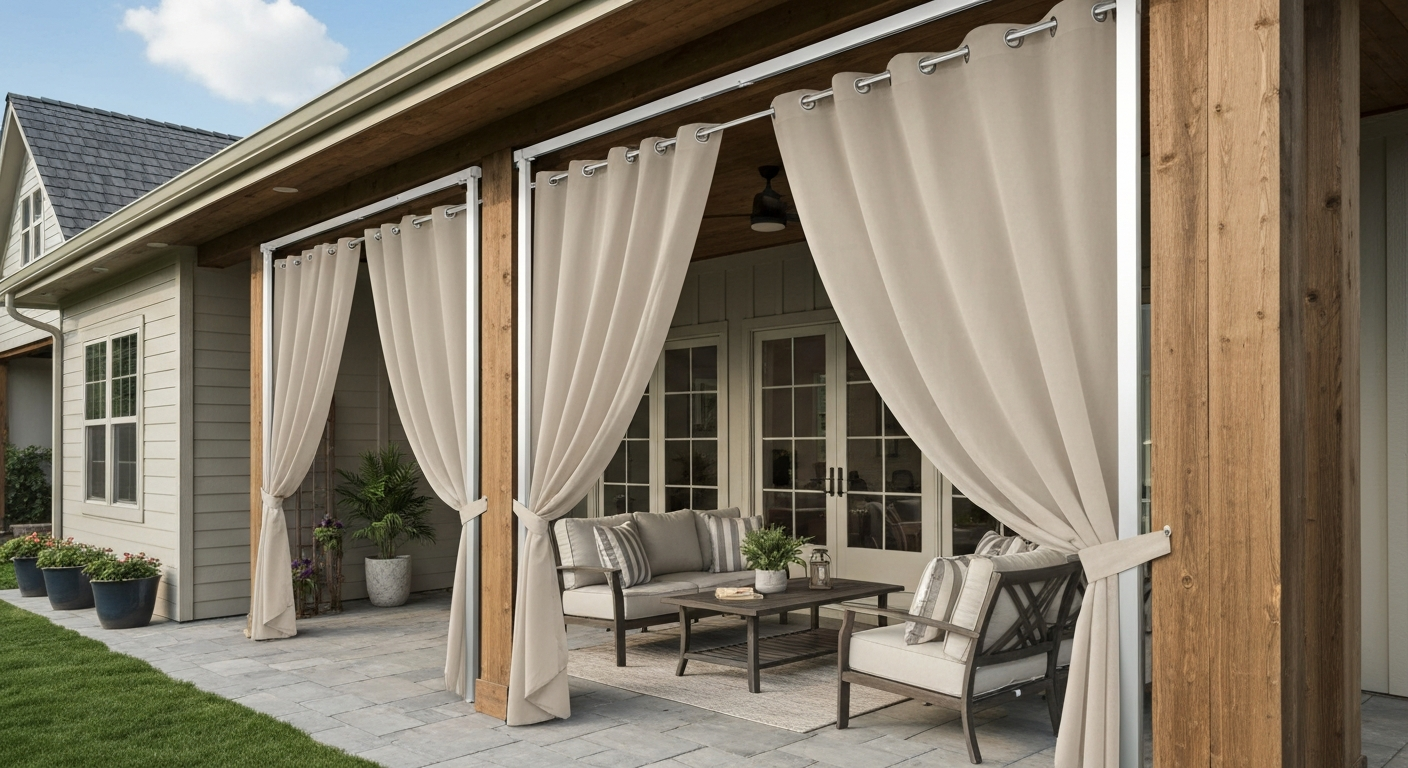
Why patio curtains are worth the effort
Shade is the most common reason people add curtains, and it's a good one. A single wide panel of solution-dyed acrylic or canvas can drop the perceived temperature on a west-facing patio by 10 to 15 degrees in late afternoon. But the other benefits stack up quickly too. Privacy screening turns a patio that feels exposed into one that actually gets used. Wind blocking makes outdoor meals possible on blustery days. And from a pure design standpoint, floor-length panels on a pergola or covered patio transform the space visually, making it feel enclosed and intentional rather than tacked-on.
Unlike a permanent screen enclosure, curtains are reversible. You can tie them back during a party, unhook them before a named storm, swap panels when you redecorate, or take them down entirely for winter. That flexibility is a genuine advantage for homeowners who aren't ready to commit to a full screened-in structure.
Quick planning checklist before you buy anything
Spending 20 minutes on these questions before you order fabric or hardware will save you two trips to the hardware store and a lot of frustration on install day.
- Define the primary purpose: shade, privacy, wind block, or decoration? This drives your fabric choice and how fully you need to cover each opening.
- Assess wind exposure: Is your patio open on multiple sides, on a corner lot, elevated, or in a coastal or high-plains region? Heavy wind means heavier hardware, bottom anchors, and wind-resistant fabrics — not just a rod and a pretty panel.
- Identify your mounting surface: wood beam, concrete ceiling, brick wall, metal post, or hollow stucco? Each requires a different anchor. Wrong anchors are the number one reason curtain hardware fails.
- Set a realistic budget: drop-cloth panels run $5–$15 per panel in materials; sewn outdoor-fabric panels run $20–$60 each; commercial outdoor-fabric panels $40–$120 each. Hardware adds $30–$200+ depending on the system.
- Decide on a mounting method before you measure: rod systems, ceiling tracks, cable/wire systems, and eye-bolt-and-grommet setups each need slightly different measurements and hardware prep.
- Check HOA rules or rental restrictions if applicable — some communities restrict outdoor fabric colors or installations on shared walls.
Full materials and tools checklist
What you need depends on which installation method you choose. Here's a breakdown by system so you can pull exactly the list that applies to your project.
Rod or tension-rod systems
- Outdoor curtain rod (rust-resistant — stainless, powder-coated steel, or aluminum) sized to your opening plus 6–12 inches
- Matching rod brackets (at least 3 for rods over 60 inches)
- Lag screws or appropriate anchors for your substrate (see hardware section below)
- Curtain rings with clips or grommet panels
- Level, tape measure, pencil
- Power drill and appropriate bits (masonry bit for concrete/brick, wood bit for beams)
- Stud finder if mounting into a wall with studs
- Outdoor curtain panels or fabric yardage
Ceiling track systems
- Ceiling-mounted curtain track (aluminum with outdoor-rated gliders)
- Track end stops and mounting brackets
- Masonry anchors or lag screws per substrate
- Drill and appropriate bits
- Curtain panels with header tape or grommets
- Level and chalk line
Cable or wire systems
- Stainless steel cable (1/8" or 3/16" diameter, 316-grade for coastal areas)
- Turnbuckles for tensioning
- End anchors — eye bolts or wall plates rated for the cable diameter
- Cable clamps or swage ferrules
- Grommet panels or curtain rings with clips
- Drill, masonry or wood bits
- Cable cutter or heavy bolt cutters
- Wrench for tensioning turnbuckles
Eye-bolt and grommet method
- Stainless or galvanized eye bolts (minimum 3/8" shank for load-bearing spans)
- S-hooks or carabiner clips
- Curtain panels with grommets already installed, or grommet kit (grommet punch, setter, and grommets in 1" or 1.5" size)
- Drill and appropriate bits
- Reinforcing fabric patches if grommets are being added to heavy or frayed panels
Wind-securing extras (all methods)
- Hem weights or drapery weight chain (sold by the foot) for bottom hems
- Outdoor curtain tiebacks or cleats
- Magnetic snap anchors or heavy-duty outdoor Velcro (3M Dual Lock or similar) for bottom corners
- Curtain snap kits (marine-grade snaps and socket rivets) for windy locations
How to measure your patio correctly
Measurement mistakes are where most patio curtain projects go wrong. Panels that are two inches too short or six inches too narrow ruin the whole look and often don't function properly either. Take your time here.
Width
Measure the full width of the opening you want to cover. For a single panel meant to stack to one side, the panel should be 1.5 to 2 times that opening width when you want a full, gathered look, or 1.1 to 1.25 times for a flat, modern panel. For panels that meet in the middle (two-panel setups), each panel should be 1.25 to 1.5 times half the opening. If you're doing a strictly functional wind or privacy block with no gather at all, a 1:1 ratio works, but add 4–6 inches of overlap per panel to prevent gaps when they meet in the center.
Drop (length)
Measure from your intended mounting point (bottom of rod, bottom of track, or center of cable) down to your target hem location. For a floor-length look on a covered patio, most people hang panels to within 1/2 inch of the deck or floor. If you want that slight puddle look, add 2–4 inches. For panels that need to clear an uneven surface or a threshold, stop 1–2 inches above the floor. Always measure at multiple points across the opening because patio slabs often have a slight drainage slope, sometimes as much as 1/2 to 3/4 inch across a 12-foot span.
Mounting height
Mount your rod or track as high as your structure allows, ideally at the ceiling line of a covered patio or at beam height on a pergola. Higher mounting makes the space feel taller and ensures panels fully cover the opening. Mark your bracket or anchor locations, hold a level across them, and confirm they're even before you drill. A 1/4-inch difference in bracket height makes a panel look noticeably crooked.
Common measurement mistakes to avoid
- Measuring to the floor before deciding on mounting height — always establish mount height first, then measure the drop.
- Forgetting to account for ring or grommet height — grommets and curtain rings typically add 1 to 2 inches to the panel above the rod, which shortens the visible hang length.
- Not measuring at both ends and the center of a wide span — rods and beams sag, surfaces slope, and floors are rarely perfectly level.
- Ordering panels sized for the exact opening width with no overlap — wind will expose gaps constantly.
- Forgetting stacking clearance — on a rod system, panels need 6–12 inches of clear rod on each side to stack when pulled open.
Choosing the right fabric for outdoor use
Not all fabric holds up outside. The main enemies are UV degradation, moisture leading to mildew, and wind stress on seams and attachment points. Here's how the main fabric categories compare.
| Fabric Type | Weight (oz/yd²) | UV Resistance | Water Repellency | Mildew Resistance | Expected Lifespan | Best For |
|---|---|---|---|---|---|---|
| Solution-dyed acrylic (e.g., Sunbrella) | 8–10 | Excellent — colors won't fade for 5+ years | High — sheds water, dries fast | Excellent | 7–10 years | Full-sun, high-humidity, or coastal patios |
| Solution-dyed polyester | 6–9 | Very good | Good — needs periodic re-treatment | Good | 5–7 years | Budget-friendly outdoor panels with moderate sun |
| Olefin (polypropylene) | 6–8 | Good | Very good — hydrophobic fiber | Very good | 5–7 years | Pool areas, high-moisture environments |
| Marine/outdoor canvas (treated) | 10–14 | Good — needs UV treatment | Good when treated | Moderate — needs mildew treatment | 3–6 years treated | Structural wind blocks, DIY heavy-duty panels |
| Cotton duck canvas / drop cloth | 8–12 | Poor untreated — fades and weakens | Poor untreated | Poor — molds quickly if wet | 2–4 years with treatment | Budget shaded patios in dry climates; low-humidity use |
If you're in a hot, humid, or coastal climate, solution-dyed acrylic is worth the extra cost. The color is locked into the fiber during manufacturing, not applied to the surface, so it genuinely doesn't fade the way printed polyester does. For a moderate climate with a covered patio that won't get direct rain, quality solution-dyed polyester panels (widely sold at home improvement and outdoor furniture stores) offer a reasonable middle ground at lower cost.
Drop cloths and canvas alternatives: a real budget option
Cotton painter's drop cloths are genuinely useful for patio curtains, especially on covered patios in drier climates. A standard 9x12 foot canvas drop cloth costs $10–$20 and can be cut, hemmed, and grommeted into two or three floor-length panels. The main catch: untreated cotton will mildew fast, fade unevenly, and rot at the seams within a season or two if it gets wet regularly. You have to prep them properly.
How to prep and seal a drop cloth for outdoor use
- Wash the drop cloth on hot to pre-shrink it fully before cutting — cotton can shrink 5–10%, which will wreck your measurements if you skip this step.
- Dry thoroughly and press flat. Cut panels to your measured dimensions, adding 2 inches on all sides for hems.
- Apply a fabric waterproofing spray (silicone-based or fluoropolymer spray such as Scotchgard Outdoor Water Shield or Thompson's Water Seal Fabric). Spray in a well-ventilated area, apply two coats, and let cure for 24–48 hours.
- Apply a fabric mildew inhibitor spray or a combined waterproof/mildew product. Some products do both — check the label.
- Hem all four edges: fold twice and sew, iron-bond with outdoor hem tape, or use a strong fabric adhesive rated for canvas. A double-folded bottom hem of 3–4 inches creates a channel for hem weights if you need them.
- Install grommets every 6–8 inches across the top, at least 1/2 inch from the top fold. Use 1-inch or 1.5-inch grommets with a grommet setter — the hole punches and setting tools usually come in a kit for under $15.
- Reapply waterproof treatment each season or whenever the fabric stops beading water.
Drop cloth pros, cons, and best uses
- Pro: Very low cost — a set of 4 panels can cost under $50 in materials total.
- Pro: Easy to cut, sew, and work with — no special tools needed beyond a grommet kit.
- Pro: Substantial, heavy look that works well for farmhouse and rustic patio styles.
- Con: Requires treatment every season to stay water- and mildew-resistant.
- Con: Will shrink, wrinkle, and discolor more than synthetic outdoor fabrics over time.
- Con: Not suitable for patios with direct rain exposure or high humidity without diligent maintenance.
- Best use: Covered patios in dry or moderate climates, seasonal setups that are stored in winter, or any project where budget is the primary constraint.
Duck canvas is a step up from standard drop cloths, it's a tighter, heavier weave and takes waterproofing treatment better. If you want to DIY your own panels from scratch rather than repurposing drop cloths, 10–12 oz duck canvas is a practical choice. A guide specifically covering how to make curtains from drop cloths walks through the full sewing and no-sew construction process in more detail if you want to go that route. For detailed step-by-step instructions on how to make patio curtains out of drop cloths, see this guide. For step-by-step instructions and templates, see the guide on how to make curtains for outdoor patio.
Choosing your mounting hardware
The hardware is what makes curtains functional and safe. If you want an alternative to curtains, see our guide on how to make patio blinds for step-by-step instructions and hardware suggestions. A beautiful panel on an undersized rod or the wrong anchor is a liability in wind. Here's what to know about each type.
Curtain rods
For outdoor use, stick to stainless steel, powder-coated aluminum, or powder-coated steel. Avoid chrome-plated or nickel-plated rods, the plating corrodes outdoors within a season. Standard outdoor curtain rods run 3/4 to 1 inch in diameter and handle spans up to about 66 inches reliably. For spans of 66–120 inches, use a heavy-duty 1-inch or 1.25-inch rod with a center bracket to prevent sag. For anything wider, consider a ceiling track or cable system instead, long rods deflect noticeably under the weight of fabric and wind pressure.
Ceiling and beam track systems
Aluminum ceiling tracks (sometimes called panel tracks or ripplefold tracks) mount directly to a ceiling, soffit, or beam face. They give the cleanest look, panels slide smoothly along the track with no visible rod. Outdoor-rated tracks use aluminum extrusions with stainless gliders, and they handle longer spans without sag because they're supported by multiple ceiling anchors along the full length. This is the best option for full enclosures of a pergola or when you want panels that slide fully open and stack flat. Budget $60–$150 for track hardware on a typical 12-foot span.
Cable and wire systems
Stainless steel cable or wire rope strung between two anchor points makes an extremely low-profile mounting system. Use 1/8-inch cable for lighter fabrics up to about 8 feet of span, and 3/16-inch for heavier fabrics or longer spans. In coastal or marine environments, always use 316-grade stainless, it's significantly more corrosion-resistant than 304-grade. A turnbuckle at one end lets you tension the cable after installation and re-tension as needed when the cable stretches slightly under load. Grommet panels thread directly onto the cable. This method looks very modern and minimal, but it does have a ceiling span limit of about 10–12 feet before sag becomes a problem without an intermediate support.
Eye bolts and grommets
Eye bolts are the simplest anchor option, screw them into a beam or post, clip S-hooks or carabiners through the grommet holes in the panel, and you're done. Use hot-dipped galvanized or stainless steel eye bolts with at least a 3/8-inch shank diameter for anything structural. Space them to match your grommet spacing (typically every 6–8 inches) so the panel hangs flat. This method works best for smaller panels on pergola beams or fence posts and is the easiest to remove and reinstall seasonally.
Anchor selection by mounting surface
| Surface | Recommended Anchor | Notes |
|---|---|---|
| Wood beam or post (solid) | Lag screws, 3/8" x 2.5" minimum | Pre-drill to prevent splitting; check for rot before loading |
| Concrete ceiling or wall | Sleeve anchors or wedge anchors, 3/8" x 2" | Drill with hammer drill and masonry bit to exact anchor diameter |
| Brick (solid) | Masonry sleeve anchors or screw anchors | Drill into brick, not mortar — mortar is weaker |
| Hollow block or CMU | Toggle bolts or hollow-wall anchors rated for the load | Do not use standard sleeve anchors in hollow block — they won't hold |
| Stucco over wood frame | Find studs behind stucco; use lag screws into studs | Stucco alone has no load capacity; always hit backing material |
| Metal post (hollow) | Through-bolts with backing plate, or self-tapping screws into thick-wall tube | Self-tappers only work in tube steel 1/8" wall thickness or greater |
| Vinyl or thin-wall post | Not recommended for structural loads — add a wood insert or use a freestanding solution | Vinyl posts deform under sustained tension loads |
Whatever anchor you choose, always apply a safety margin. Patio curtain fabric can generate surprising wind load on a gusty day, a 6-foot wide, 9-foot tall panel can experience 15–30 lbs of pull force in a 30 mph gust. Use anchors rated for at least 3x your expected load, and if you're unsure, err toward more anchors spaced closer together.
Installation methods, step by step
Method 1: Wall or beam-mounted curtain rod
This is the most familiar method and the right choice for most straightforward patio setups with a solid wood beam, concrete beam, or wall at the top of the opening. For step-by-step installation details and common pitfalls, see our guide on how to put up patio curtains.
- Mark bracket locations: place end brackets 3–4 inches in from each end of the rod. For rods over 60 inches, mark a center bracket location. Hold a level across all marks and adjust until they're even.
- Pre-drill anchor holes sized to your fastener. For a wood beam, use a wood bit slightly smaller than your lag screw. For concrete or masonry, use a hammer drill and masonry bit sized exactly to your sleeve anchor diameter.
- Install anchors: tap sleeve anchors flush with the surface using a hammer, then drive or tighten per the manufacturer's spec. For lag screws into wood, drive until snug but don't overtighten — you can strip softwood easily.
- Mount brackets onto anchors and tighten fully.
- Thread curtain rings or slide grommets onto the rod before inserting the rod into brackets.
- Insert the rod, attach finials, and hang your panels.
- Test by pulling the panels horizontally with moderate force — brackets shouldn't flex noticeably. If they do, add a center bracket or upgrade your anchors.
Pros: Familiar, widely available hardware, easy to adjust or remove. Cons: Long spans sag; limited to surfaces where you can mount brackets at the right height.
Method 2: Ceiling-mounted track system
- Snap a chalk line along the ceiling at your desired track position to ensure a straight run.
- Hold the track against the ceiling and mark anchor hole locations — most tracks have pre-drilled holes every 8–12 inches.
- Pre-drill and install ceiling anchors along the full track length. For a concrete soffit, this requires a hammer drill; budget an extra 30–45 minutes.
- Screw the track to the ceiling anchors along its full length, starting from the center and working outward.
- Insert gliders into the track before closing the track ends. Load your curtain panels by threading header hooks or clips into each glider.
- Install track end stops so panels can't slide off.
- Test slide action and adjust glider tension if the track system has an adjustable friction setting.
Pros: Clean look, handles long spans, smooth slide action. Cons: More expensive, requires consistent ceiling surface, harder to remove seasonally.
Method 3: Tension cable or wire system
- Install anchor eye bolts or wall plates at both ends of the planned cable run. Use the anchor type appropriate for your surface (see the table above). Ensure both anchors are at the same height.
- Cut cable to length: opening width plus 12–18 inches for threading through anchors and attaching a turnbuckle.
- Thread one end of cable through the anchor eye, loop back, and secure with two cable clamps or a swage ferrule — leave no more than 1 inch of cable tail beyond the clamp.
- Attach a turnbuckle to the opposite anchor, then thread the other end of the cable through the turnbuckle eye and secure with clamps.
- Thread your grommet panels onto the cable before tightening the turnbuckle.
- Tension the cable with the turnbuckle until there's minimal sag under panel weight. Don't overtension — you'll bow the anchor points inward.
- Add end caps or tape raw cable ends to prevent snags.
Pros: Very modern aesthetic, very low profile, panels thread on easily. Cons: Sag on long spans, requires careful anchor sizing, panels can't slide smoothly on cable the way they do on a track.
Method 4: Eye-bolt and grommet method
- Install eye bolts along your beam or post at spacing that matches your panel's grommet spacing — usually every 6–8 inches.
- Clip an S-hook or small carabiner through each eye bolt.
- Hang the panel by clipping each grommet directly to an S-hook.
- Adjust panel position so it hangs flat and covers the opening fully.
- Add bottom anchors (see wind-securing section) to keep the lower edge from lifting.
Pros: Simplest and fastest to install, fully removable in minutes, very low cost. Cons: Panels don't slide, you unhook them entirely to open the space. Best suited to pergola beam attachments where you want panels to be removable.
Method 5: Freestanding and post solutions
If you have no overhead structure to mount to, a freestanding curtain system uses weighted base posts or ground-set posts to support a horizontal rod or cable. Weighted umbrella-base posts work for light panels in low-wind settings. For windier areas, concrete-set 4x4 or steel posts are the right approach, dig at least 24 inches deep and set in concrete, then mount your rod hardware to the posts. This is the most involved option but gives you full control over placement and doesn't require an existing overhead structure.
Pros: Works anywhere, including open-sided patios and freestanding pergolas. Cons: Most time-intensive, posts need to be set level and plumb, weighted bases can tip in high wind with large panels.
Stopping curtains from blowing in the wind
Wind is the biggest functional problem with patio curtains, and it's almost entirely solvable if you address it at the bottom of the panel. Most curtains that blow and tangle are missing any form of bottom anchoring. For detailed options and step-by-step fixes, see our guide on how to keep patio curtains from blowing.
Hem weights and weight chain
Drapery weight chain (a fine-link metal chain sewn into a hem channel) is the most effective passive wind solution for curtains on a covered patio. It costs about $1–$2 per foot and comes in light, medium, and heavy weights. A heavy chain in a 4-inch bottom hem keeps panels hanging straight in moderate wind without any attachment to the floor. Individual curtain weights (small metal discs sewn to the lower hem corners and seams) are a lighter alternative that works for breezy but not consistently windy locations.
Magnetic anchors and Velcro systems
For patios with a concrete floor or low wall along the perimeter, adhesive magnetic anchors are fast to install and work well for moderate wind. One side adheres to the floor or wall; a matching steel or magnetic plate sews into the panel hem. Neodymium magnetic snap systems pull 10–25 lbs depending on the size, which is enough to hold a panel in a 20–25 mph gust when paired with weighted hems. Heavy-duty loop-and-hook tape (such as 3M Dual Lock, rated for 10+ lbs per square inch) does the same job and holds up well on smooth concrete or tile surfaces.
Marine snap systems
Canvas boats and convertible cars use marine-grade press snaps to secure fabric in high-wind environments, and the same hardware works extremely well for patio curtains in consistently windy locations. Install socket studs (the base component) every 12–18 inches along a baseboard, wall, or post; attach the corresponding snap caps into the curtain hem. Marine snaps typically hold 8–15 lbs per snap, and a series of 4–6 snaps along a panel bottom creates substantial hold. This is the system we'd recommend for open patios with consistent afternoon wind or for coastal locations.
Tiebacks and cleats
Tiebacks hold curtains open when you want airflow and prevent the panel from acting as a sail. Install a cleat or tieback hook at about 2/3 of the panel height on a post or wall. Rope tiebacks are inexpensive and look good on natural-style patios; metal holdbacks suit modern or Mediterranean styles. If your patio faces the prevailing wind, keeping curtains tied back during peak wind and releasing them when you want shade or privacy is an easy habit that extends the life of both the fabric and the hardware.
Securing strategies by patio configuration
| Patio Type | Recommended Bottom Anchor | Additional Strategy |
|---|---|---|
| Covered patio, open on one side | Magnetic snaps or Velcro on floor/low wall | Weight chain in hem |
| Pergola, open on all sides | Marine snaps to posts + weight chain | Tiebacks to posts when not in use |
| Elevated deck or corner lot | Marine snaps to posts + through-grommet tie lines to post hooks | Remove or tie back during high-wind events |
| Pool-area or coastal patio | 316 stainless marine snaps; turnbuckle-tensioned bottom cables between posts | Use solution-dyed acrylic only; store panels in storms |
Maintenance and seasonal care
Outdoor curtains need more maintenance than indoor ones, but not dramatically more if you set them up right. A 30-minute session at the start and end of each season covers most of what's needed.
Regular cleaning
For solution-dyed acrylics and polyester outdoor fabrics, spot cleaning with a soft brush, mild soap, and water handles most dirt and surface mold. For heavier soiling or mildew, a diluted bleach solution (1/4 cup bleach per gallon of water) is safe for most solution-dyed synthetic fabrics, check the manufacturer's spec first. Drop-cloth or canvas panels can be machine washed on a gentle cycle in cold water; air dry only, as dryer heat accelerates cotton degradation.
Mildew treatment
If you see black or green spots, clean with the bleach solution above, then let the fabric dry completely in sunlight. Apply a fabric mildew inhibitor spray after cleaning and before storage. Don't store fabric while it's even slightly damp, that's how mildew gets established quickly.
Re-waterproofing
Synthetic outdoor fabrics with DWR (durable water repellent) coatings need re-treatment every 1–2 seasons. A simple test: sprinkle water on the fabric. If it beads up, the treatment is still active. If it soaks in, it's time to apply a fresh coat of waterproofing spray. For drop-cloth panels, re-treat every single season at minimum.
Seasonal storage
- Clean and fully dry panels before storing — never store damp.
- Roll rather than fold heavy canvas panels to prevent permanent crease lines.
- Store in a breathable cotton storage bag or a pillowcase — not an airtight plastic bin, which traps any residual moisture.
- Remove panels before major wind events or named storms regardless of fabric type.
- Inspect grommets, hems, and seams before reinstalling each season; repair small tears before they become large ones.
Troubleshooting and repairs
Sagging rod or cable
A sagging rod usually means the center support bracket is missing, undersized, or the rod diameter is too small for the span. Add a center bracket for rods over 60 inches, or replace the rod with a heavier-gauge option. For a sagging cable, simply turn the turnbuckle clockwise to add tension. If the cable has permanently stretched and the turnbuckle is maxed out, you'll need to shorten the cable by removing a clamp, trimming an inch, and reclamping.
Replacing a grommet
A torn or pulled-out grommet is a quick fix with a grommet setting kit. Cut away any frayed fabric around the hole, fuse the edges with a lighter or fray-stop product, cut a clean hole with the punch, and set a new grommet with the setter and a hammer. If the fabric is torn for more than an inch around the original grommet location, reinforce with an iron-on patch of canvas on both sides before setting the new grommet.
Patching torn fabric
Small tears in synthetic outdoor fabric can be repaired with outdoor fabric repair tape or a heat-bond patch in the same material. Clean the area, apply the patch to the back of the fabric, and press with a hot iron (use a damp cloth between iron and fabric on synthetic materials). For canvas, a canvas repair patch sewn or glued with outdoor fabric adhesive is more durable than tape alone for anything larger than a 2-inch tear.
Hardware failure
Brackets that pull out of masonry almost always indicate that the wrong anchor was used or the hole was drilled oversize. Remove the bracket, fill the hole with hydraulic cement or anchoring epoxy, let it cure fully (typically 24 hours for epoxy), then re-drill and install a properly sized anchor. Don't try to reuse the same hole with the same anchor, it won't hold. If you're also working on patio blinds, see how to fix patio blinds for step-by-step troubleshooting and common repairs.
Time and cost estimates
Here's a realistic breakdown of what you're looking at in time and money for the main project types. These are materials-only costs; if you hire the installation out, add $100–$250 per day for a handyman depending on your region.
| Project Type | Materials Cost | Install Time (DIY) | Skill Level |
|---|---|---|---|
| 4 drop-cloth panels, eye-bolt method | $40–$80 | Half day (3–5 hours) | Beginner |
| 4 sewn outdoor-fabric grommet panels, rod system | $120–$250 | Full day (5–8 hours including sewing) | Beginner to intermediate |
| 6 commercial outdoor panels, ceiling track | $250–$500 | Full day (6–9 hours) | Intermediate |
| Custom solution-dyed acrylic panels, cable system | $300–$600 | Full day to day and a half | Intermediate |
| DIY roll-up or Roman patio blinds (per panel) | $30–$80 per panel | 2–3 hours per panel | Intermediate |
The biggest cost variables are fabric grade and the difficulty of your mounting surface. Solution-dyed acrylic fabric runs $15–$40 per yard. Standard outdoor polyester panels from big-box stores run $20–$60 per panel. Masonry or concrete ceilings add time and require a hammer drill rental ($30–$50/day) if you don't own one. Budget a contingency of about 15% for extra anchors, additional hardware, and the inevitable one extra trip to the store.
Design ideas for common patio styles
Function should drive your fabric and hardware choices first, but it doesn't mean you have to sacrifice style. Here are specific combinations that work well for the most common patio aesthetics.
| Patio Style | Fabric Suggestion | Color/Pattern | Hardware Finish | Header Style |
|---|---|---|---|---|
| Modern/Minimal | Solution-dyed polyester or acrylic, flat-weave | White, charcoal, or warm greige solids | Matte black or brushed stainless | Ripplefold on ceiling track, no rings visible |
| Coastal/Nautical | Solution-dyed acrylic (Sunbrella-type) | Navy, white stripe, or natural linen-look | Brushed nickel or 316 stainless | Grommets on cable wire |
| Farmhouse/Rustic | Drop cloth canvas or heavy linen-look polyester | Natural, cream, or soft blue-grey | Oil-rubbed bronze or black iron rod | Rod pocket or clip rings on iron rod |
| Mediterranean | Canvas or outdoor linen-look | Terra cotta, warm white, dusty sage | Wrought iron or matte black | Tab top or large rings |
| Tropical/Resort | Sheer solution-dyed polyester for light filter | Crisp white or soft turquoise | Brushed nickel or natural bamboo rod | Grommet or rod pocket with relaxed gather |
For visual inspiration, search for outdoor rooms in shelter magazines and design platforms using your style category plus 'outdoor curtain', you'll quickly see how fabric weight and header type change the feel of the same patio frame. The goal is always a space that invites you to actually spend time outside, not just one that photographs well. Get the function right first, then let the style follow naturally from your material choices.
FAQ
How do I plan and measure for patio curtains or blinds so they fit and function properly?
Measure width and height for each opening: width = finished opening plus stacking/overlap (add 6–12" per side for overlap or full coverage; for multiple panels allow 1.5–2× fabric fullness). Height = mounting point to desired floor clearance (typical 1–3" off the floor or to sill height). If mounting to the beam/ceiling, measure down to the finished floor; for wall mounts measure from the top of the header/trim. Note obstruction clearance (doors, screen doors, light fixtures) and mark structural locations for anchors. Sketch each opening, note substrate type (wood, stucco, brick, metal), and decide single vs. double layers, and whether you need track or rod operation (sliding vs. tie-open).
Which outdoor fabrics work best — including drop cloth and canvas alternatives — and what treatments do they need?
Best long-term: solution-dyed acrylics (e.g., Sunbrella) — excellent UV, mildew, colorfastness. Polyester/olefin outdoor fabrics are lower cost, decent water resistance, and mildew-treated options exist. Marine canvas/duck canvas are heavy-duty but may need water- and mildew-proofing. Cotton painter drop cloths (unglued) and untreated canvas are budget-friendly but require treatment: apply a fabric waterproofing spray and mildew inhibitor; pre-wash and seal seams/hem edges. For frequent damp exposure choose synthetic outdoor fabrics or add a durable water-repellent (DWR) and mildew protector. Consider weight: heavier fabrics hang better in wind but need stronger hardware.
What materials and tools should I gather before starting a patio-curtain project?
Materials: chosen fabric (panels or drop cloths), grommets or rod pockets, outdoor-rated curtain rod/track/cable, stainless/galvanized eye bolts, lag screws or masonry anchors for your substrate, snaps or magnetic anchors or Velcro for bottom anchoring, hem weights or chain, tie-backs, corner reinforcement patches. Tools: tape measure, level, pencil/chalk, drill with masonry/wood bits, stud finder, wrench/screwdriver, rivet tool or grommet kit, sewing machine or fabric glue (for no-sew), hammer, safety glasses. Optional: rivets, snap setter, seam sealer, waterproofing spray.
What mounting hardware options are available and what are their pros and cons?
Curtain rods (outdoor-rated metal): clean look, easy to slide; limited span without support, can sag in long runs. Panel tracks/ceiling-mounted tracks: smooth operation for wide openings, supports heavier panels but costlier and requires more exact installation. Cable/tension wire systems: inexpensive, modern look, flexible mounting but harder to slide heavy panels and limited by sag unless tensioned. Eye bolts + rings or clips: cheap and robust, good for grommet panels, simple to install. Snap systems/magnetic anchors: keep bottoms secure in wind but require matching anchors on ground or posts. Choose stainless or hot-dip galvanized hardware in coastal or damp climates.
How do I choose anchors and fasteners for different substrates (wood, brick, stucco, concrete, metal)?
Wood beams/posts: use stainless-steel lag screws (3/8" or 1/4" depending on load) into solid members; pre-drill pilot holes. Brick or concrete: use sleeve anchors or wedge anchors sized for the load (typically 3/8"–1/2" for curtain loads); drill with carbide masonry bit. Stucco over wood: find backing or use toggles/through-bolts into backing; avoid relying on stucco alone. Hollow block/CMU: use through-bolts into grout-filled cores or heavy-duty hollow-wall anchors designed for exterior use. Metal posts: use self-tapping stainless screws or bolts through pre-drilled holes with lock nuts. Always choose anchors rated for lateral pull; when in doubt oversize by one step and install multiple anchors to distribute load.
Step-by-step: how do I install rod-mounted or track-mounted patio curtains?
Rod-mounted: 1) Locate and mark mounting points above opening (consider stacking/overlap). 2) Find studs or structural backing; for wide spans add center support. 3) Pre-drill holes and install appropriate anchors/lag screws. 4) Attach brackets securely, mount rod and hang panels (grommets or rings). 5) Test sliding action and add tie-backs/snaps. Track-mounted: 1) Unpack track and inspect. 2) Mark track location, ensuring straight run and clearance for top-mounted carriers. 3) Install track with appropriate fasteners into structural backing; use mid-supports every 36–48" or per manufacturer. 4) Install carriers/runners and attach panels (via hooks, snaps, or sewn headers). 5) Adjust stop ends and test. For both types check level and structural integrity before finishing.
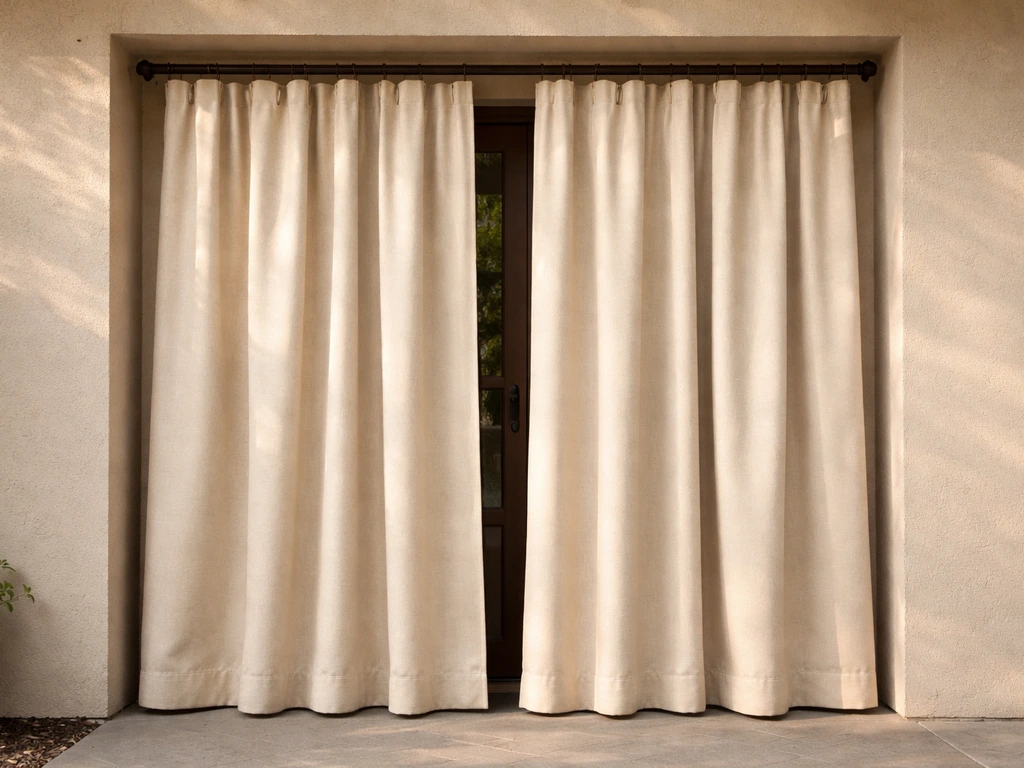
Step-by-step guide to make patio curtains from drop cloths with proper sizing, hardware options, and windproof, weatherp
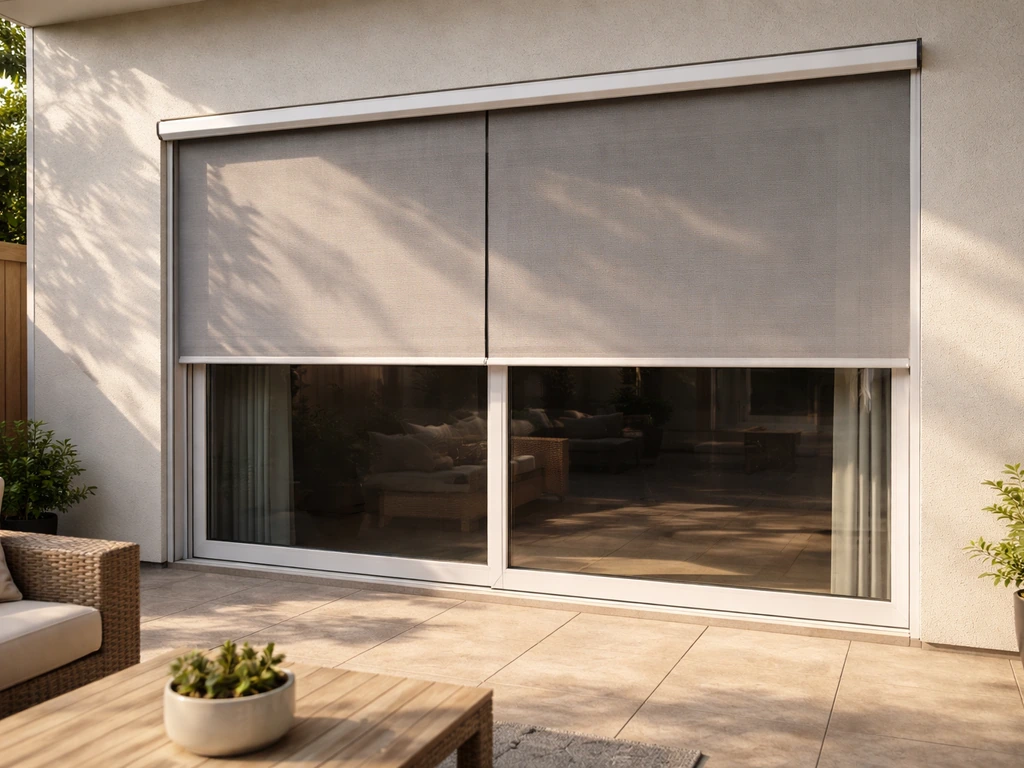
Step-by-step guide to make patio blinds: choose style, measure for your structure, build, install, weatherproof, and mai
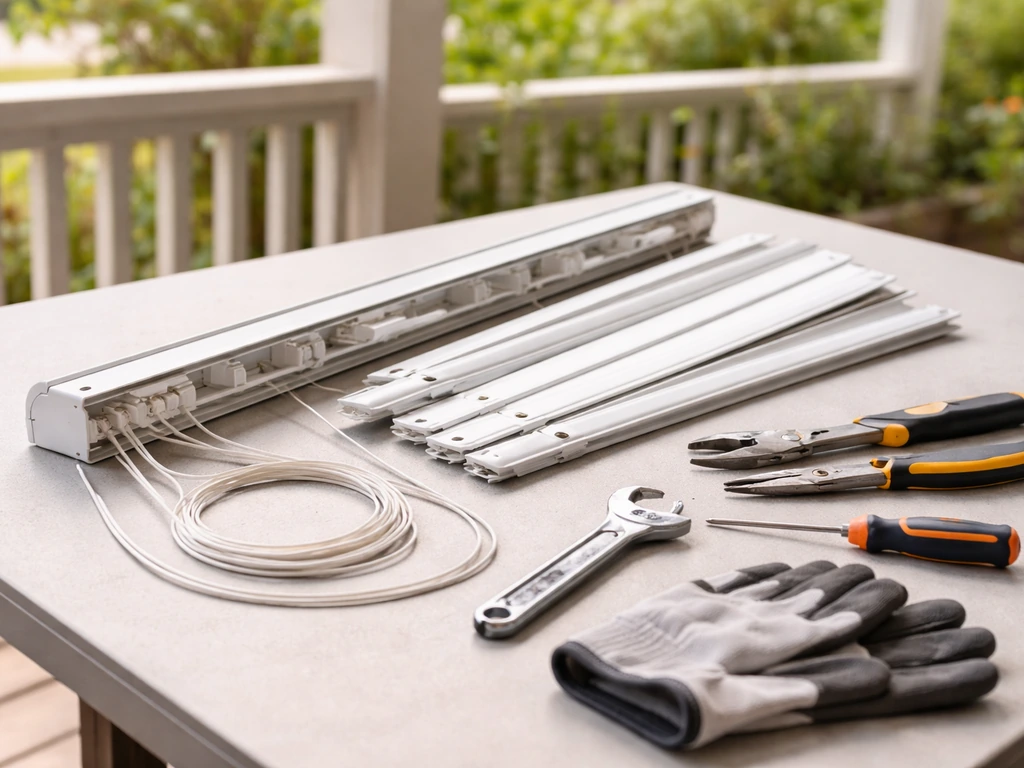
Quick DIY steps to fix patio blinds: diagnose issues, repair cords, slats, tracks, tilt, and brackets safely.