
You can turn almost any patio or deck into a comfortable, functional outdoor room in a single weekend, or stretch the project across a few months if you want structural upgrades like a pergola, screens, or new decking. The key is treating the space the same way you'd treat an indoor room: plan zones, pick durable materials, layer lighting, and choose textiles that can handle whatever your climate throws at them. This guide walks you through every step, from the initial site check and budget estimate to furniture arrangement, color palettes, shade solutions, and code reminders that can save you from a costly do-over.
How to Decorate a Patio Deck: DIY Year-Round Plans & Tips

Felix Brennan
27 Jul 2026
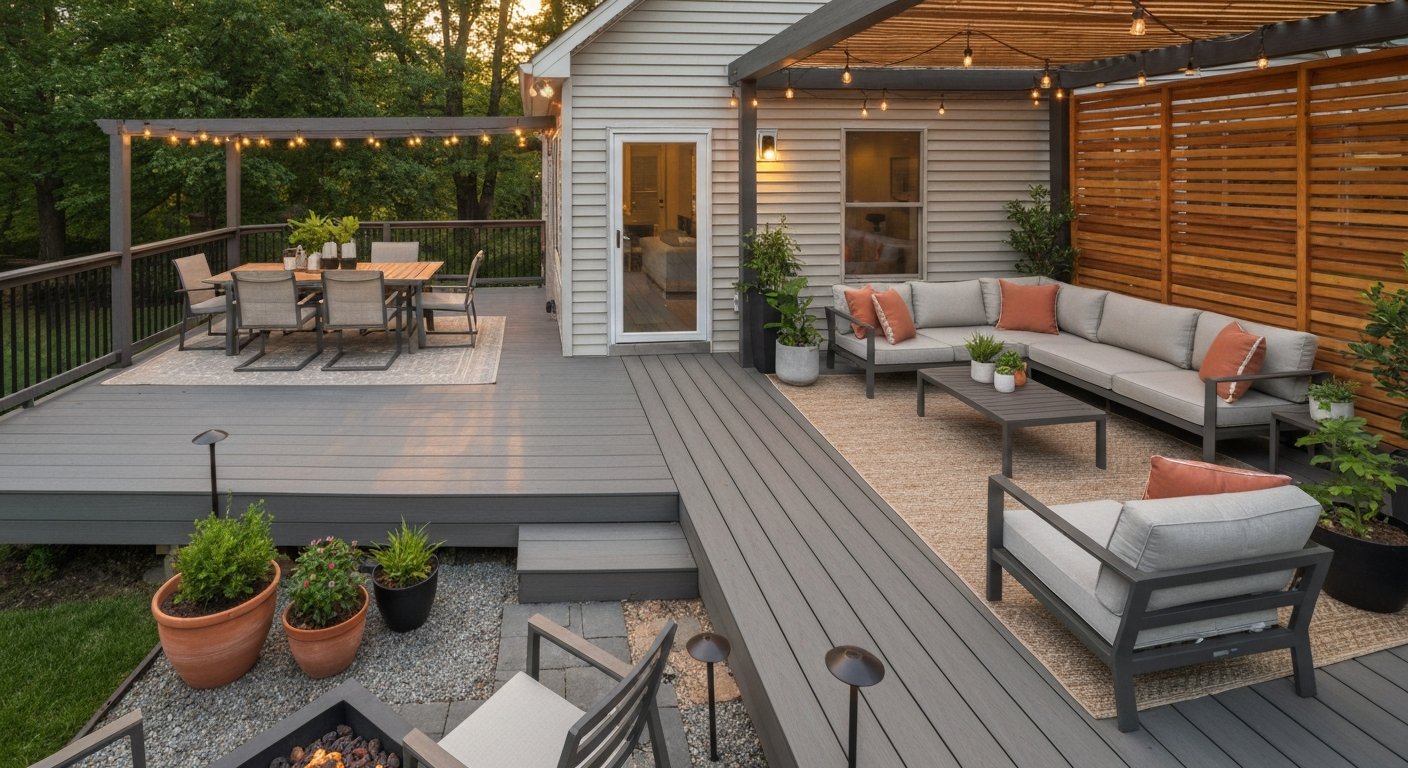
Start here: planning checklist and decision map
Before you buy a single throw pillow or string light, walk your patio or deck with a tape measure and a notepad. A quick site assessment will save you money and prevent the most common mistake we see: buying furniture or shade structures that don't fit, don't match the house, or aren't allowed under local codes.
- Measure the usable floor area and note obstructions (doors, HVAC units, downspouts, steps).
- Check the surface condition: Is the decking, concrete, or pavers in good repair? Cracked or rotting surfaces need attention before decoration.
- Measure the height from the deck surface to grade at its highest point. If any part of your deck sits 30 inches or more above the ground, most U.S. cities (including Seattle and Portland, which follow the IRC threshold) require guardrails at least 36 inches high and likely a building permit before you make structural changes.
- Note sun exposure at different times of day: morning sun, afternoon sun, or shaded by the house. This drives shade structure choices.
- Identify existing electrical outlets and check whether they are GFCI-protected. The NEC (210.8(A)) requires GFCI protection for all outdoor receptacles on dwellings. If yours aren't protected, address that before adding lighting or appliances.
- Write down your primary goals: dining, lounging, cooking, kids' play, entertaining, or some combination.
- Set a realistic budget range and assign a rough split: surface/structure (40%), furniture (30%), lighting and textiles (20%), plants and accessories (10%).
- Check whether your HOA or municipality requires permits for structures like pergolas, shade sails anchored to the house, or screen enclosures. Freestanding furniture and rugs are almost never permit-trigger items, but anything attached to the house or supporting a roof usually is.
Once you've completed that checklist, you have a decision map. If the surface is damaged, start with repairs or replacement. If code issues exist, resolve them first. If the space is sound, jump straight to zone planning and decoration.
Budget, skill tiers, and honest time estimates
One of the biggest frustrations with patio projects is underestimating how long they take. Here's a realistic breakdown by project scope, skill level, and cost so you can plan your weekend (or your month) accordingly.
| Project Scope | Skill Level | Typical Time | Estimated Cost Range | What's Included |
|---|---|---|---|---|
| Cosmetic refresh | Beginner | One day to one weekend | $200–$800 | Outdoor rug, throw pillows, string lights, potted plants, a few pieces of furniture |
| Surface upgrade (stain/paint + rug + lighting) | Beginner–Intermediate | 1–2 weekends | $600–$2,500 | Deck stain or concrete paint, new rug, string lights or low-voltage path lights, accessory swap |
| Shade structure (pergola kit or shade sail) | Intermediate | 1–3 weekends | $1,500–$6,000 | DIY pergola kit, shade sail with hardware, or awning installation |
| New composite or hardwood decking (materials only) | Intermediate–Advanced | 2–4 weekends (plus permit time) | $40–$75/sq ft installed for composite; $60–$120+/sq ft for premium hardwood or PVC | Decking boards, fasteners, framing inspection, possible permit fees ($350–$1,800) |
| Full patio room with screens and enclosure | Advanced or hire specialist | Multi-week | $5,000–$20,000+ | Screened enclosure, framing, electrical, permits, insect/climate control |
A note on decking costs: pressure-treated wood installed runs roughly $25–$45 per square foot; composite typically comes in at $40–$75 per square foot installed; premium PVC or tropical hardwoods can hit $60–$120 or more. These are 2026 national averages from industry cost aggregators and are a starting point, not a final bid. Local labor rates, site complexity, rail work, and permit fees all move the number significantly. Always get at least two local quotes before budgeting structural work.
Materials and tools checklist by project type
The tools and materials you need depend entirely on the scope of your project. Here's a practical breakdown organized by what you're actually doing. Print this list and check off items before you head to the home improvement store.
Cosmetic refresh (beginner)
- Outdoor area rug sized to your zone (measure before buying)
- Weather-resistant throw pillows and cushion covers (look for solution-dyed acrylic fabric like Sunbrella)
- Outdoor string lights (look for UL wet-location listing, not just an IP rating — a UL wet listing is required by the NEC for outdoor wet locations)
- Extension cord rated for outdoor use
- Potted plants and planter stands
- Outdoor-rated side tables or plant stands
- Cleaning supplies: deck cleaner, stiff brush, garden hose
Surface prep and staining (beginner to intermediate)
- Deck cleaner and brightener (for wood) or concrete degreaser
- Pressure washer or stiff-bristle deck brush
- Painter's tape and drop cloths
- Exterior wood stain or solid deck paint (semi-transparent stains show wood grain; solid colors hide weathered wood well)
- Deck/concrete paint or stain rated for foot traffic
- Natural-bristle brush or roller with extension pole
- Sandpaper (60–80 grit for smoothing rough wood)
- Safety glasses and chemical-resistant gloves
- Benjamin Moore Arborcoat or equivalent waterborne protective clear coat (roughly 300–400 sq ft per gallon coverage; follow TDS for recoat times)
Shade structures (intermediate)
- Pergola kit or lumber (check kit instructions for post hole specs)
- Post hole digger or rented auger
- Concrete mix for footings
- Post base hardware and structural screws
- Level, speed square, and tape measure
- Shade sail with stainless-steel hardware and turnbuckles
- Drill/driver and impact driver
- Ladder
Low-voltage lighting (intermediate)
- UL 1838-listed low-voltage transformer with timer
- Low-voltage direct-burial cable (confirm UL listing for burial at your intended depth; NEC Table 300.5 and Article 411 typically require 6-inch minimum burial for secondary low-voltage conductors)
- Low-voltage path lights or deck rail lights
- Wire connectors and cable staples
- Spade or trenching tool for cable burial
- GFCI outlet (if adding a new outdoor receptacle — requires a licensed electrician in many jurisdictions)
Image idea: A flat-lay photo of all tools and materials organized by project tier, labeled clearly. A separate printable checklist version works well here.
How common materials and solutions compare
Choosing between materials is one of the places most homeowners get stuck. This table cuts through the marketing language and gives you a side-by-side reality check on the five most common patio and deck elements.
| Material/Solution | Typical Installed Cost | Durability/Lifespan | Maintenance | DIY Difficulty |
|---|---|---|---|---|
| Pressure-treated wood decking | $25–$45/sq ft installed | 15–25 years with care | Annual cleaning; stain or seal every 2–3 years | Intermediate — framing and fastening skills needed |
| Composite decking (e.g., Trex, TimberTech) | $40–$75/sq ft installed | 25–30+ years; most carry 25–30 year limited warranties | Annual cleaning; no staining or sealing required | Intermediate — follow manufacturer span/spacing tables |
| Tropical hardwood (e.g., Ipe/Brazilian walnut) | $60–$120+/sq ft installed | 25–50+ years with proper care | Annual oiling recommended to retain color; periodic finishing | Advanced — pre-drilling required; dense material |
| Outdoor rug (polypropylene or solution-dyed) | $50–$400 depending on size | 3–7 years depending on sun and moisture exposure | Hose off; allow to dry fully; store in winter if possible | Beginner — no tools needed |
| Pergola (wood kit or custom) | $1,500–$10,000+ depending on size and material | 15–30+ years (cedar, redwood, or aluminum last longer) | Paint or stain wood every 3–5 years; aluminum is low-maintenance | Intermediate to Advanced — post footings required |
| Shade sail | $200–$1,500 installed (DIY hardware) | 5–10 years for quality HDPE fabric | Remove and store in winter; clean seasonally | Beginner to Intermediate — anchor point location is critical |
| Screen enclosure panels | $3,000–$15,000+ installed | 10–20 years for fiberglass screen; aluminum framing longer | Re-screen damaged panels as needed; clean annually | Advanced — framing, permits, and weather sealing required |
A quick recommendation: for most DIY homeowners who want low maintenance and a long product life, composite decking from an established manufacturer like Trex or TimberTech is the sweet spot. The 25–30 year limited warranties on fade and stain, combined with no annual staining obligation, make the higher upfront cost worth it on a deck you plan to keep for more than a decade. If budget is the main driver and you're comfortable with annual maintenance, pressure-treated wood is perfectly serviceable. Ipe is stunning but unforgiving for beginners due to its density and fastening requirements.
Zone planning and layout: turn your patio into rooms
The biggest upgrade you can make to any patio has nothing to do with products: it's treating the space as a series of defined zones rather than one open slab. For step-by-step tips on arranging furniture, selecting textiles, and layering lighting, see our how to stage outdoor patio guide. Think about how you actually use the space, then assign areas the way you would rooms inside the house. Even a 12x16-foot patio can fit two distinct zones if you plan it right.
Common patio zones and sample dimensions
| Zone | Minimum Footprint | Recommended Footprint | Key Furniture/Features | Traffic Clearance |
|---|---|---|---|---|
| Dining area | 8x8 ft | 10x12 ft | Table and 4–6 chairs, overhead lighting | 36 inches around chair backs when pulled out |
| Lounge/sitting area | 8x10 ft | 12x14 ft | Sofa, two chairs, coffee table, side tables | 18–24 inches between furniture pieces |
| Outdoor kitchen/cooking zone | 6x8 ft | 8x12 ft | Grill, prep surface, storage, GFCI outlet | 42 inches clearance in front of grill |
| Fire pit area | 12x12 ft (including clearance) | 14x14 ft | Fire pit, 4–6 chairs in a circle | 3-foot minimum clearance from seating to fire pit edge; 10 feet from structures |
| Kids' play zone | 8x8 ft minimum | 10x12 ft | Soft rug or rubber pavers, low storage bin | Visible from main seating area |
| Entry/transition zone | 3x5 ft | 4x6 ft | Welcome mat, planter, hooks or shelf | 36-inch clear path to door |
Image idea: A simple overhead diagram of a 16x20 patio divided into a dining zone (top left), lounge zone (top right), and fire pit zone (center/bottom), with dimension annotations and a traffic flow arrow showing the path from the door through each zone.
A few layout rules we always follow: leave at least 36 inches of clear pathway from the house door to the yard. Don't push all furniture against the walls, floating a seating group toward the center of the space makes the patio feel more like a room and less like a waiting area. Use rugs to anchor each zone visually even if the entire surface is the same material.
How to handle odd-shaped or small spaces
L-shaped patios work beautifully when you place the dining zone in the wider section and the lounge zone around the corner. The bend naturally separates the zones without needing a divider. For very small spaces (under 100 square feet), choose one primary zone, usually lounge or dining, and use vertical elements like tall planters, a wall-mounted shelf, and overhead lights to make the space feel intentional rather than cramped.
Furniture selection and arrangement
Outdoor furniture takes far more abuse than indoor pieces, UV radiation, rain, temperature swings, and mildew. Buying cheap here almost always means buying twice. Here's how to choose well without necessarily spending a fortune.
Best materials for outdoor furniture
- All-weather wicker (resin wicker over an aluminum frame): lightweight, rust-proof, looks warm and natural. Good mid-range choice for most climates.
- Powder-coated aluminum: the lightest metal option, rust-resistant, and available in almost any color. Excellent for coastal and humid climates.
- Teak: dense, naturally oily hardwood that handles moisture and UV well. Weathers to a silver-gray if left untreated (some people love this; others prefer annual oiling to maintain the honey color). Expensive but extremely durable.
- HDPE (high-density polyethylene) lumber, sometimes called recycled plastic lumber: nearly indestructible, colorfast, and low maintenance. Heavier than aluminum. Great for areas with harsh winters or salty air.
- Wrought iron: heavy, very durable, beautiful, but needs paint or powder-coat maintenance to prevent rust. Best in dry climates.
- Fabric: look for solution-dyed acrylic (like Sunbrella or equivalent). It's fade-resistant, mildew-resistant, and can be cleaned with a mild soap solution. Avoid cotton or standard polyester for cushions that will live outdoors year-round.
Arrangement principles that actually work
Scale matters more than style. A giant sectional sofa on a 10x10 patio doesn't work no matter how beautiful it is, the 18-to-24-inch circulation space between pieces disappears and the area feels claustrophobic. Measure your zone footprint on paper first, then check furniture dimensions before you buy. For a dining zone, allow at least 36 inches from the edge of the table to the nearest wall or railing so chairs can be pulled back comfortably.
Modular sectionals with individual pieces you can rearrange are worth the investment for larger patios, they let you reconfigure for a party (push pieces to the perimeter), a movie night (face everything toward one wall), or daily use (classic L-shape). For smaller spaces, a loveseat with two moveable chairs and a coffee table gives you the most flexibility per square foot.
A note on traffic flow: your eye naturally walks through a space before your feet do. Place larger anchor pieces (sofa, dining table) first, then fill with secondary pieces, always keeping the pathway from the house door to the yard clear. A 36-inch clear path is the code minimum for walkways, it's also just comfortable.
Color palettes and textiles: making your patio feel pulled together
Color is where most people either over-think or under-think patio decorating. The honest truth: pick a palette of three colors maximum (one dominant, one secondary, one accent), make sure the textiles are actually rated for outdoor use, and coordinate loosely with your house exterior. For step-by-step tips on choosing and applying color, see our guide on how to add color to outdoor patio. You don't need to match perfectly, but a teal sofa in front of a red-brick house needs a bridge color in the pillows or rug to avoid a clash.
Four palettes that work for most patios
| Style | Dominant Color | Secondary Color | Accent Color | Best For |
|---|---|---|---|---|
| Coastal | White or soft sand | Navy or sky blue | Coral or natural rope texture | Patios near water; beach-house exteriors; bright sunny climates |
| Tropical | Deep green or palm green | Warm white or cream | Mango, hibiscus pink, or turquoise | Humid climates; homes with lush landscaping; summer-specific styling |
| Modern/Minimalist | Charcoal gray or black | Warm white or light concrete | Single bold accent (mustard, rust, or forest green) | Contemporary homes; small patios where clutter reads as mess |
| Warm Neutral | Warm taupe or sand | Off-white or linen | Terracotta or olive green | Traditional or transitional homes; easy to update seasonally with accessories |
Image idea: Four side-by-side swatch boards showing each palette above, fabric swatches, a painted deck board in the dominant color, and a small planter in the accent color for each style. These work well as visual anchors for readers deciding between themes.
For textiles, solution-dyed acrylic fabrics are the gold standard for outdoor cushions and throw pillows. The dye goes through the fiber rather than sitting on the surface, which means UV fading is dramatically slower. Olefin (polypropylene) is a more affordable alternative with decent fade resistance, though it won't last as long as solution-dyed acrylic under intense sun. Avoid decorative cotton or linen outdoors unless you're willing to bring them inside after every use, they mildew quickly and fade fast.
Outdoor rugs serve double duty: they anchor your zone visually and protect the deck surface underneath. Polypropylene rugs are the practical choice, they're mold and mildew resistant, hose-cleanable, and available in almost every style from traditional to contemporary. Make sure water can drain through or beneath the rug; a rug that traps moisture against a wood deck will accelerate rot. On concrete or pavers, moisture is less of a concern, but still shake and dry the rug periodically.
If you're decorating for a specific season or occasion, like a summer party or a tropical theme, the palette you build here becomes the foundation those looks layer onto. A warm neutral base is the easiest to dress up for summer with bright accent pillows, or dress down to minimalist calm in the off-season.
Lighting your patio: layers, safety, and code basics
Good outdoor lighting does three things: it extends how many hours you can use the space, it creates atmosphere, and it improves safety on steps and paths. The most effective approach is layered lighting, overhead ambient light, task lighting near cooking or dining zones, and accent or path lighting at ground level. Landscape lighting inspections often fail when low‑voltage secondary wiring isn't listed for direct burial or isn't installed to the manufacturer's listed depth, see Landscape Lighting Inspection Failure Codes (PortfolioLighting).
Lighting layer by layer
- Overhead ambient: string lights hung in a canopy pattern (from house wall to pergola or posts) give warm, even light over the whole space. Look for lights with a UL wet-location listing — this is a hard NEC requirement (NEC 410.10 / UL 1598) for outdoor fixtures in wet locations. An IP rating alone is not a substitute for a UL wet-location listing under U.S. code.
- Task lighting: a pendant or wall sconce over the dining table or grill area gives you enough light to see what you're eating or cooking. These must also carry a UL wet or damp location listing depending on placement.
- Path and step lighting: low-voltage deck or path lights at 6–12 inch intervals along steps and walkways prevent trips. Use a UL 1838-listed low-voltage transformer; bury secondary cables at least 6 inches deep per NEC Table 300.5 and Article 411 unless the manufacturer's listing permits shallower burial.
- Accent lighting: uplighting on a feature tree or planter, or small spotlights highlighting a pergola post, adds depth and visual interest after dark.
All outdoor electrical receptacles must be GFCI-protected per NEC 210.8(A). If you're adding outlets for a patio, hire a licensed electrician, this is not a DIY item in most jurisdictions, and a failed inspection can complicate a home sale. If you're simply using existing outlets, verify they are GFCI-protected by pressing the test button on the outlet or on a GFCI breaker in your panel.
Shade, privacy, and screened enclosure options
Sun control and privacy are often what separates a patio you use every day from one you avoid on summer afternoons. The right solution depends on how permanent you want it to be, how much you want to spend, and whether you're dealing primarily with sun, wind, insects, or all three.
Sun and wind control options
- Shade sails: quick to install, affordable (DIY hardware starts around $200–$400 for a quality HDPE sail), and dramatically effective. The key is anchor point placement — triangular sails need three anchor points with a slight pitch to allow rainwater runoff. Remove and store in winter in cold climates.
- Pergola with shade cloth or climbing plants: a pergola kit gives you a permanent structure to hang shade cloth, grow wisteria or hops, or attach a retractable canopy. Mid-range pergola kits run $1,500–$4,000 for materials; plan a weekend or two for installation. Check whether your municipality requires a permit for pergolas attached to the house.
- Retractable awnings: motorized or manual, these offer the most flexibility — full sun when you want it, shade on demand. Professional installation is usually recommended. Motorized versions with wind sensors are worth the premium in exposed locations.
- Outdoor curtain panels: inexpensive and renter-friendly. Hang on a tension rod or curtain wire between posts for privacy and filtered light. Solution-dyed fabrics hold up reasonably well, but all outdoor curtains will need replacing more often than structural shade solutions.
- Privacy screens: lattice panels, bamboo screens, or slatted cedar panels attached to an existing fence or pergola post give you privacy without blocking airflow entirely.
Screened enclosures for insect and climate control
A full screened enclosure is the ultimate upgrade for patios in bug-heavy climates or regions with shoulder seasons where you want to extend outdoor use into spring and fall. Fiberglass screen panels are the standard, they resist corrosion and are easy to re-screen when damaged. Aluminum framing outlasts wood framing in most climates and requires less maintenance. Screened enclosures almost always require a building permit, engineered drawings in many jurisdictions, and inspection of the framing, ledger attachment (if tied to the house), and footings. This is a project where we strongly recommend getting professional estimates alongside a DIY assessment, especially for larger structures.
For climate control inside a screened patio, a ceiling fan rated for damp or wet locations (verify UL listing) is the single most effective comfort upgrade, moving air makes a 90-degree afternoon feel significantly cooler. Portable misting systems are a lower-cost option for dry climates. In cooler climates, infrared patio heaters extend the season by several months; wall-mounted electric versions are easier to install safely than gas, though gas heaters produce more heat output.
Plants, containers, and vertical greenery
Plants do more work than people expect on a patio. They soften hard surfaces, add privacy, introduce fragrance, and give the space a sense of life that furniture and accessories alone can't replicate. The practical approach: use containers for flexibility, group plants in odd numbers, and choose species suited to your light conditions.
- Large statement planters (18 inches or bigger): use one to three near the entrance or at the corners of a zone. Tall grasses, elephant ears, or dwarf palms add height without needing a pergola.
- Herb pots near the cooking zone: practical and aromatic. Basil, rosemary, and thyme thrive in full sun. Mint spreads aggressively — keep it in its own pot.
- Trailing plants in hanging baskets: add vertical interest on pergola posts or fence hooks. Petunias, sweet potato vine, and bacopa handle heat and are widely available.
- Climbing plants on a trellis or pergola: wisteria, clematis, and climbing roses take a season or two to establish but ultimately provide shade and beauty without any shade structure maintenance.
- Privacy hedges in large planters: bamboo (clumping varieties only — running bamboo will take over), boxwood, or Italian cypress in large containers create a living privacy screen on a rooftop or open patio where you can't install a fence.
Use saucers under all pots on a wood deck to prevent standing water, and elevate pots slightly with pot feet or small pavers so air can circulate underneath. Standing water under containers is a fast way to rot or stain a deck surface.
Seasonal styling and event decorating
The zones, furniture, and palette you establish form a flexible base you can dress for different seasons and occasions without starting over. Summer decorating typically means brighter accent colors, more lightweight textiles, and lighting that creates evening ambiance for entertaining. For more seasonal ideas and step-by-step tips, see how to decorate your patio for summer. Tropical styling layers in more greenery, natural textures like rattan and wicker, and bold color in accessories. For step-by-step tips on creating that look, see our guide on how to make a tropical patio. If you're decorating for an event like a wedding or milestone party, the structure stays the same but you layer in tablecloths, candles, floral arrangements, and temporary lighting for the occasion. For detailed tips on styling, lighting, and floral layouts specifically for nuptials, see our guide on how to decorate a patio for a wedding.
For fall and winter in mild climates, swap bright summer pillows for warmer tones (rust, burnt orange, deep green), add an outdoor fire pit or patio heater, and introduce cozy elements like weatherproof throw blankets. In cold climates where outdoor use stops entirely in winter, invest time in proper storage: bring cushions and textiles inside or into a dry shed, cover furniture with fitted outdoor covers, and store shade sails and outdoor rugs to extend their lifespan significantly.
Surface upgrades: staining, painting, and resurfacing
If your deck surface is structurally sound but looks tired, staining or painting is the highest-impact single-day upgrade you can make. Here's how to do it correctly so the finish lasts.
- Clean the surface thoroughly with a deck cleaner and brightener (for wood) or a concrete degreaser. A pressure washer speeds this up significantly — use a 40-degree tip on wood to avoid raising the grain.
- Allow the surface to dry fully — typically 48–72 hours in warm weather. Applying stain to damp wood is the number one cause of peeling.
- Sand any rough or splintered areas with 60–80 grit sandpaper. Feather the edges so the stain absorbs evenly.
- Apply painter's tape along the house siding, railings, and any areas you don't want stained.
- Apply stain or paint with a brush for edges and gaps between boards, then roll the field with a 3/8-inch nap roller. Work with the grain on wood. For a protective clear coat like Benjamin Moore Arborcoat Waterborne, follow the TDS for coverage (roughly 300–400 sq ft per gallon depending on porosity) and recoat timing.
- Allow to cure before placing furniture — typically 24–48 hours for foot traffic, longer before placing rugs or heavy furniture.
- Plan to re-stain semi-transparent stains every 2–3 years; solid stains and paints last longer but require more prep when recoating because they must be fully removed before reapplication if they begin to peel.
For concrete patios, exterior concrete paint or stain in a solid color is fast and effective. Concrete stains penetrate the surface and won't peel the way paint can. Epoxy floor coatings offer the most durable finish but require the most prep (acid etching or grinding) and are best suited to covered patios where standing water isn't an issue.
Safety reminders and code basics before you build
We want to be direct about this section because skipping it is how decorating projects turn into expensive problems. Most decorating work, furniture, rugs, lights, plants, requires no permits. But the moment you attach something to the house, install a roof or shade structure overhead, add electrical, or modify a deck surface at height, code requirements kick in and they matter. Per the 2018 International Residential Code (IRC) R312.1.2, guards on open-sided walking surfaces must be at least 36 inches (914 mm) high, and where the guard top serves as a stair handrail the required height is 34–38 inches (864–965 mm) 2018 International Residential Code (IRC) - R312.1.2 Height.
- Guardrail height: if your deck or elevated patio is 30 inches or more above grade, IRC R312.1.2 requires guardrails at least 36 inches high. Many U.S. cities (Seattle, Portland, and others) use this same threshold for permit requirements on new or modified decks.
- Stair dimensions: IRC R311.7 sets maximum riser height at 7-3/4 inches, minimum tread depth at 10 inches, and minimum stair width at 36 inches. Non-compliant stairs are a fall hazard and a liability.
- Electrical: all outdoor receptacles must be GFCI Class-A protected per NEC 210.8(A). Outdoor fixtures must carry a UL wet-location or damp-location listing appropriate to their exposure (NEC 410.10 / UL 1598). Do not substitute an IP rating for a UL listing — they are different systems.
- Low-voltage lighting: use a UL 1838-listed transformer and direct-burial rated cable. Bury secondary conductors at least 6 inches deep per NEC Table 300.5 and Article 411 unless the manufacturer's listing specifies otherwise. Inspectors frequently flag this as a failure point.
- Permit triggers: attached structures (pergolas tied to the house, screened enclosures, roofed additions) almost always require a permit. Check with your local building department before starting — permit fees typically run $350–$1,800 for residential deck projects.
- HOA rules: many HOAs restrict colors, materials, and structure types. Check before buying materials.
Maintenance and weatherproofing to protect your investment
The best-decorated patio in the neighborhood becomes an eyesore fast if it isn't maintained. Most of the upkeep is straightforward and takes a weekend per year if you stay on top of it.
| Task | Frequency | Notes |
|---|---|---|
| Clean deck surface (sweep and wash) | Monthly during use season | Use a deck cleaner appropriate to your material; avoid harsh bleach on composite |
| Inspect and re-tighten hardware | Annually (spring) | Check post bases, rail connections, pergola fasteners; tighten or replace as needed |
| Re-stain or seal wood decking | Every 2–3 years | Semi-transparent stains need more frequent reapplication; solids less often but more prep |
| Clean and store outdoor cushions | End of season | Hose down, air dry fully, store in a dry container or bring inside |
| Inspect screen panels (if screened patio) | Annually | Re-screen any damaged panels before insect season; fiberglass screen is easiest to DIY |
| Check and test GFCI outlets | Annually (spring) | Press the test button; replace any outlets that don't trip and reset correctly |
| Clean gutters and check drainage near patio | Fall and spring | Standing water near a patio or deck accelerates surface and structural deterioration |
| Inspect and clean low-voltage lighting fixtures | Annually | Clear debris from fixture lenses; check burial depth of cables if ground has shifted |
A well-maintained patio deck isn't just more beautiful, it holds its value and avoids the kind of structural deterioration that turns a decoration project into a full rebuild. Spend a few hours each spring doing a thorough inspection and you'll catch small issues before they become expensive ones. That's the foundation everything else in this guide sits on.
FAQ
What are the essential sections and deliverables a complete, code‑aware DIY patio/deck decoration and upgrade guide must include?
A complete guide must include: 1) A clear planning checklist (scope, measurements, desired uses, access, drainage, and local‑code/permit triggers). 2) Material and tool lists tied to each upgrade (decking, rails, screening, awnings, lighting, finishes, fasteners). 3) Budget/skill tiers with time estimates (DIY beginner, intermediate, pro recommendations). 4) Zone‑by‑zone layout examples (dining, lounge, grill, storage, traffic). 5) Color and textile palette suggestions and lighting schemes. 6) Shade and enclosure solutions (awnings, pergolas, shade sails, screen systems) with pros/cons. 7) Insect/climate control and screened‑patio specifics (materials, screening types, door hardware, HVAC/ventilation tips). 8) Electrical and lighting considerations referencing NEC/UL requirements (outdoor receptacles, GFCI, fixture listings). 9) Simple step‑by‑step DIY procedures for common upgrades (deck staining/painting, installing composite boards, laying an outdoor rug, hanging shade sails, installing a screen kit). 10) A short comparison table of common materials/solutions (cost ranges, durability, maintenance, typical installation complexity). 11) Maintenance and weatherproofing schedules. 12) Safety and local‑code reminders (guard heights, stair geometry, permit triggers) and links to detailed how‑tos for structural/screening/enclosure work. 13) Images/diagrams and lists/tables to illustrate choices, layouts and costs.
What specific code and permit points must the guide cite and explain to homeowners?
The guide should explicitly cite: 1) Guard/railing heights per IRC: minimum 36 inches for open sides and 34–38 inches where the top serves as a handrail (IRC R312.1.2). 2) The common 30‑inch trigger for guards and permits—many jurisdictions require guards and permits where the walking surface is ≥30" above adjacent grade (examples: Seattle, Portland). 3) Stair geometry limits (IRC: max riser 7 3/4", min tread 10", min stair width 36" per IRC R311.7). 4) Permit triggers for ledger attachments, decks supporting roofs, and decks with complex footings—explain typical plan requirements (ledger detail, footings/post/connectors). 5) Electrical code basics: outdoor receptacles must be GFCI‑protected per NEC 210.8(A)/210.8(F); outdoor luminaires must be listed for wet locations (UL 1598) and follow manufacturer instructions. 6) Note that local amendments vary—advise readers to verify city/county requirements and to obtain permits when required.
What cost information and budget ranges should the guide provide, and how should they be presented?
Provide layered cost detail: 1) Material‑level price ranges (examples: composite decking material ~$10–$30/sq ft; Trex guidance for material ranges). 2) Installed cost ranges including labor and ancillary items: pressure‑treated wood ~$25–$45/sq ft; composite ~$40–$75/sq ft; premium hardwood/PVC $60–$120+/sq ft (industry aggregator ranges; site complexity affects price). 3) Typical permit fee ranges ($350–$1,800) and note large local variance. 4) Line‑item examples for common upgrades (deck stain/paint per gallon coverage and cost, screening kit price, shade sail kit). 5) Budget tiers tied to skill and time: DIY budget (materials + rental tools), Hybrid (specialty trades for structural/electrical), Full pro (contractor labor + permits). 6) Recommend using RSMeans or local contractor quotes for precise localized estimates. Present costs in tables, with low/median/high columns and notes on factors that change cost (site access, complexity, utilities, rail/stairs).
Which images, diagrams and the required comparison table should be included to make choices and costs clear?
Include: 1) Scaled layout diagrams showing zone examples for typical deck sizes (e.g., 10x12, 12x16, 16x20) with furniture footprints and clearances. 2) Before/after photos of common upgrades (stain vs. paint, rug/furniture staging, screened kit installed). 3) Detail diagrams: ledger attachment, typical footing/post detail, guardrail cross‑section, stair geometry with dimensions. 4) Photo examples of shade/enclosure options (pergola, retractable awning, shade sail, screen kit). 5) Wiring layout sketch for outdoor lighting/receptacles (GFCI location, conduit/low‑voltage routing). 6) Comparison table (required) that lists common material/solution options against columns: typical installed cost per sq ft, lifespan, maintenance frequency, DIY difficulty (low/med/high), pros and cons. Use captions to explain assumptions and link to manufacturer installation/warranty docs for technical details.
What material and tool lists are required, and how should they be organized for different project types?
Provide organized lists by project type: 1) Surface refresh (stain/paint): materials—sanders, paint/stain, brushes/rollers, cleaners/brighteners, sealant; tools—orbital sander, pressure washer (or rental), drop cloths, respirator. 2) Decking replacement (wood/composite/PVC): materials—deck boards, joist hangers, fasteners recommended by manufacturer, flashing/ledger tape, post anchors; tools—circular saw with deck blade, jigsaw, drill/impact driver, framing square, chalk line, level. 3) Rail/stair upgrades: materials—post hardware, balusters, top rails, guard connectors; tools—miter saw, jig, clamps. 4) Screening/enclosure: materials—screen panels or spline and rolls of screening, screen frames or retrofit kit, self‑closing hinges/thresholds, weatherstripping; tools—screen roller, utility knife, drill, rivet gun. 5) Lighting/electrical: materials—GFCI outdoor outlets, weather‑rated fixtures (UL wet‑location listed), conduit and wire per NEC, low‑voltage transformer and landscape lights (UL 1838 listed); tools—voltage tester, conduit bender (or EMT fittings), fish tape. 6) Furnishing/decor: outdoor rug, weather‑rated cushions, planters, hanging hardware. For each list include estimated quantities per typical deck sizes and callouts to manufacturer fastener lists (e.g., Trex/TimberTech) for composite/PVC.
What step‑by‑step DIY procedures should the guide provide for common upgrades, and how detailed must they be?
Provide concise, numbered steps with safety and code callouts for each common upgrade plus links to deeper construction how‑tos: 1) Deck cleaning and restaining (prep, pressure‑wash guidelines, drying time, sanding/spot repairs, stain application rates and recoats with TDS reference). 2) Installing composite deck boards (joist spacing check per manufacturer, starter boards, hidden‑fastener/face‑screw patterns, end gaps, cutting tips, fastening schedule reference to Trex/TimberTech guides). 3) Installing a basic retrofit screen kit or building a framed screen (measure, cut frames, spline/screening, install door with self‑closer). 4) Hanging a shade sail (site assessment, anchor selection and hardware, recommended angles/tension, load considerations). 5) Installing outdoor lighting and GFCI receptacle (shut power, route conduit/wire per NEC, install GFCI, use wet‑location listed fixtures, test GFCI). 6) Simple railing replacement (remove old rail, set posts to required height, secure connectors, ensure guard height ≥36" and baluster spacing). Each procedure should include: required tools, estimated time, materials list with quantities, safety PPE, when to hire a pro, and references to code/manufacturer installation documents for structural/electrical steps.
Next Articles
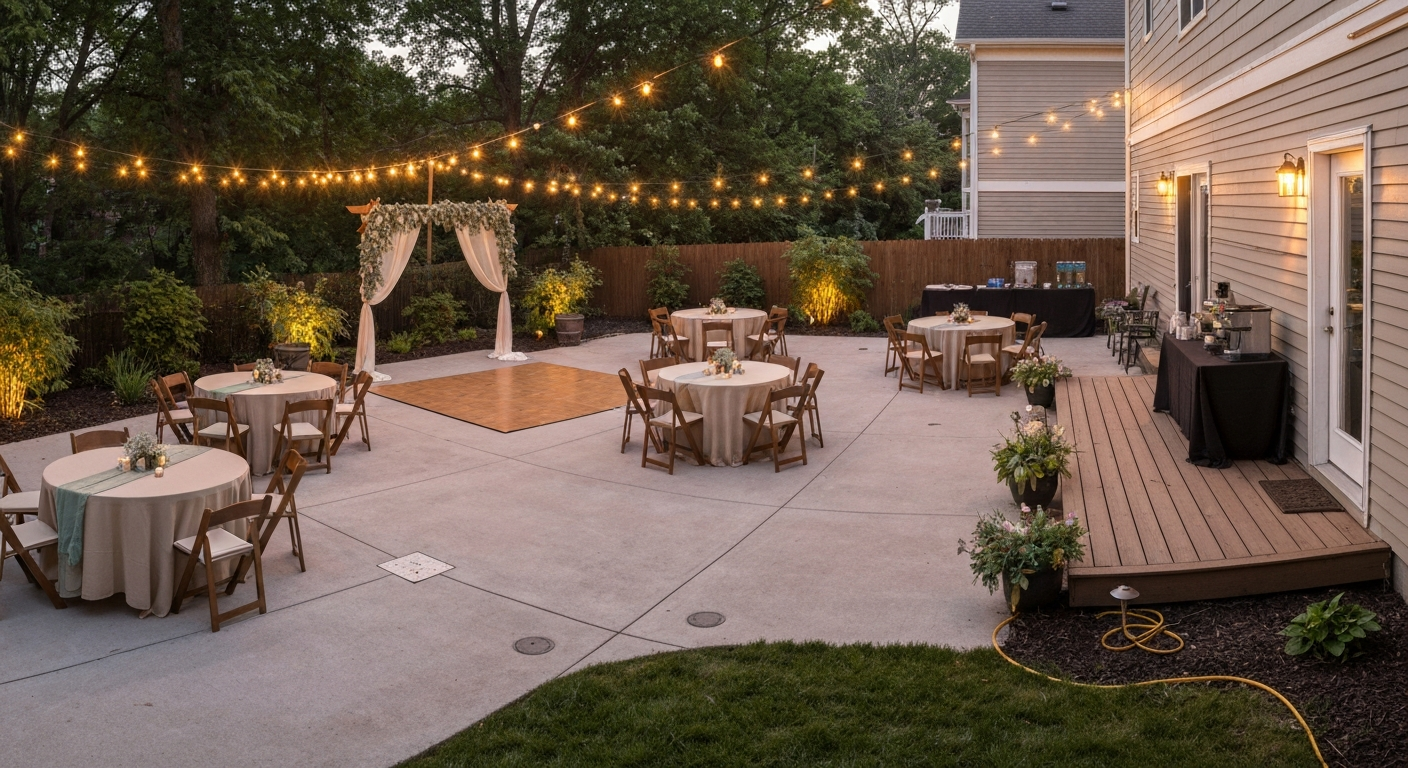
How to Decorate a Patio for a Wedding: DIY Plan & Checklist
How to decorate a patio for a wedding: DIY checklist, layouts, lighting, weatherproofing, seating & budgets.
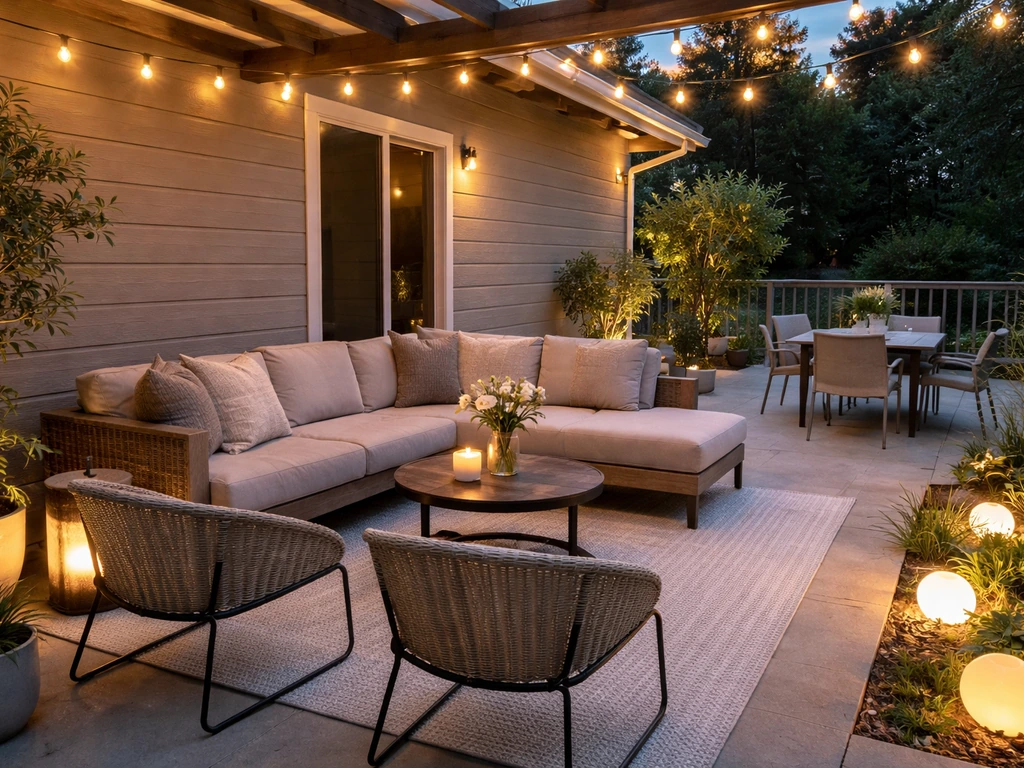
How to Stage Outdoor Patio: Layout, Decor, and Lighting
Step-by-step guide on how to stage an outdoor patio with layout, furniture, decor, lighting, shade, and listing-ready ti
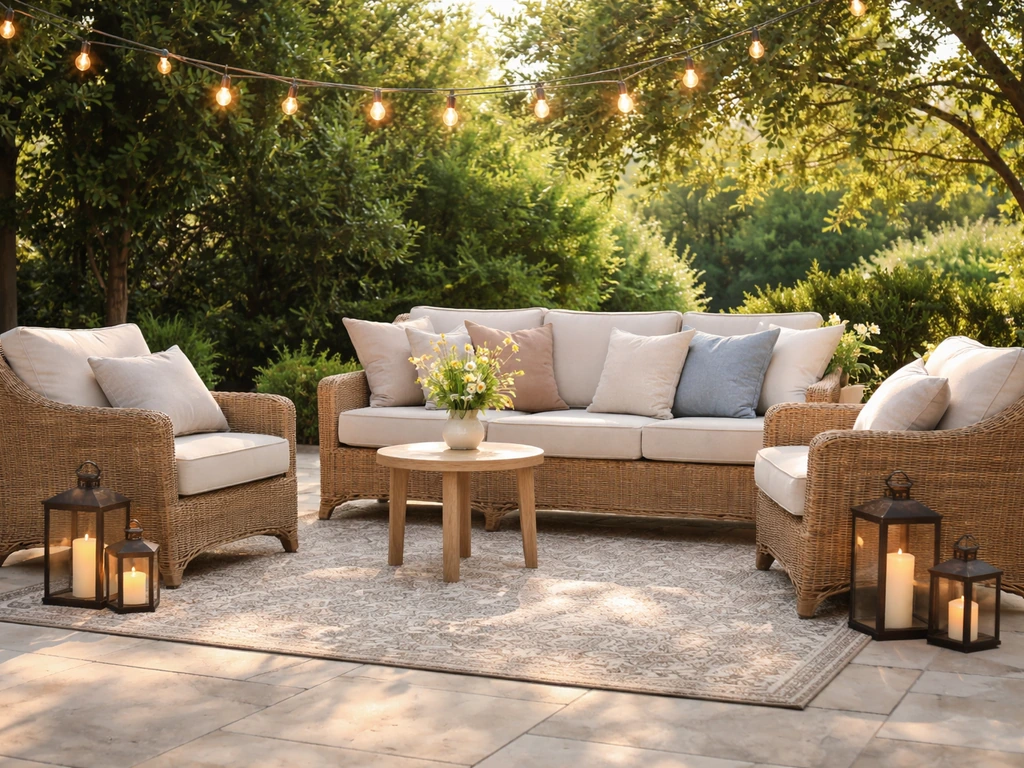
How to Decorate Your Patio for Summer: Step by Step
Step-by-step patio summer decor plan with furniture, lighting, textiles, zones, and maintenance tips for lasting comfort