The best way to add color to an outdoor patio depends almost entirely on what your patio is made of. Concrete slabs, wood decking, pavers, and metal furniture each need a different product and a different prep process. Get the match right and your color can last 2 to 5 years before it needs touching up. Get it wrong and you're dealing with peeling, blotchiness, or a finish that looks great for two weeks and then flakes off in chunks. This guide walks you through every step: picking the right approach for your surface, prepping it correctly, applying it in the right conditions, and keeping it looking good after the fact.
How to Add Color to an Outdoor Patio: DIY Guide

Felix Brennan
21 Jun 2026
Start with a color plan that matches your patio
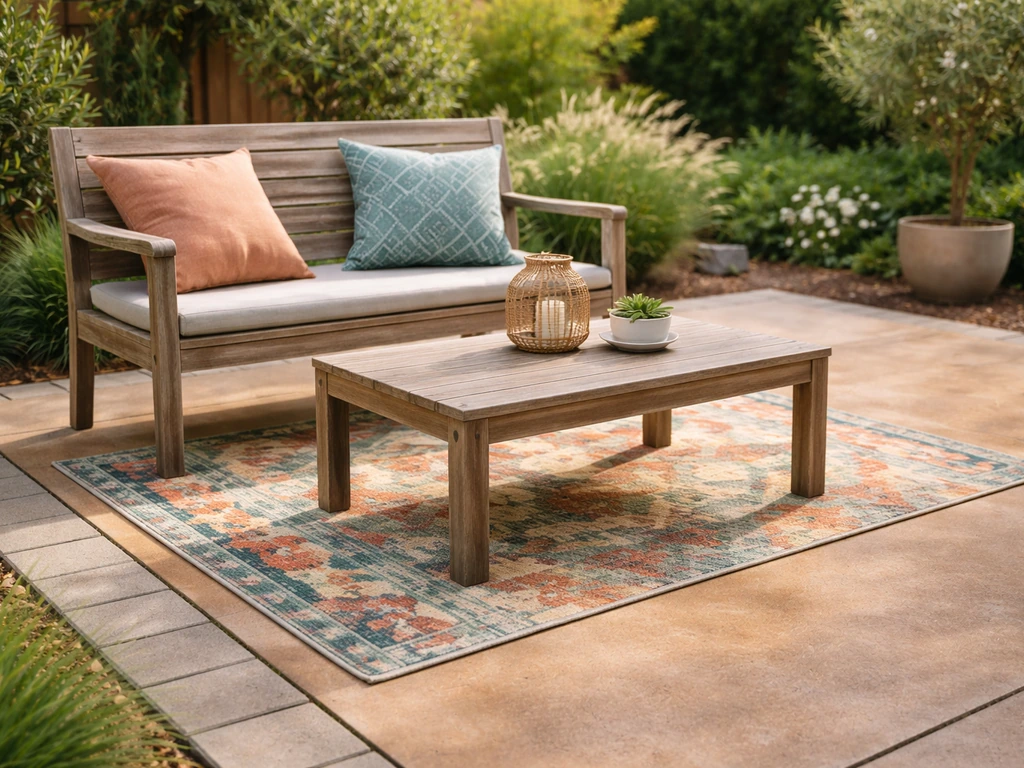
Before you buy a single can of paint or stain, it helps to think about color in two layers: the surface color (your concrete, wood, or pavers) and the accent layer (cushions, rugs, planters, shade structures). Most patios look cohesive when you anchor the palette to the surface finish and then bring in 2 to 3 supporting accents that complement it. For example, a warm gray concrete stain reads completely differently depending on whether you pair it with terracotta planters or navy blue cushions. Pick your surface color first, then build around it.
Also be realistic about what surface color can do for you. Concrete develops natural undertones as it weathers and may not take color perfectly evenly across a large slab. Wood grain absorbs stain at different rates depending on density and moisture. Neither of those is a problem as long as you go in expecting it. If you want a truly polished look, the accents you add around the surface (furniture, textiles, planters) do a lot of the visual work regardless of surface imperfections. If you're planning a summer refresh, pairing surface color with coordinated decor is the most effective approach for a put-together result. For specific summer ideas, focus on outdoor furniture, textiles, planters, and shade so the space feels fresh all season summer refresh.
Paint vs stain vs sealer vs direct color: what actually makes sense
These terms get used interchangeably but they behave very differently outdoors. Here's how to think about each one before you commit.
| Product type | How it works | Best surface | Durability | Reversible? |
|---|---|---|---|---|
| Exterior paint | Forms a film on top of the surface | Concrete, wood, metal | 3–5 years with good prep | No, must be stripped |
| Penetrating stain | Soaks into the surface, no surface film | Wood, pavers | 1–3 years depending on exposure | Fades naturally, easier to recoat |
| Color sealer | Tints and seals in one step | Concrete, pavers | 2–4 years | Difficult, requires stripping |
| Resurfacing coating | Thick film-forming overlay that fills minor imperfections | Weathered concrete, wood | 4–6 years with proper prep | No |
| Accent/decor color | Cushions, rugs, planters, shade fabric | Any patio type | Seasonal, easy to swap | Yes |
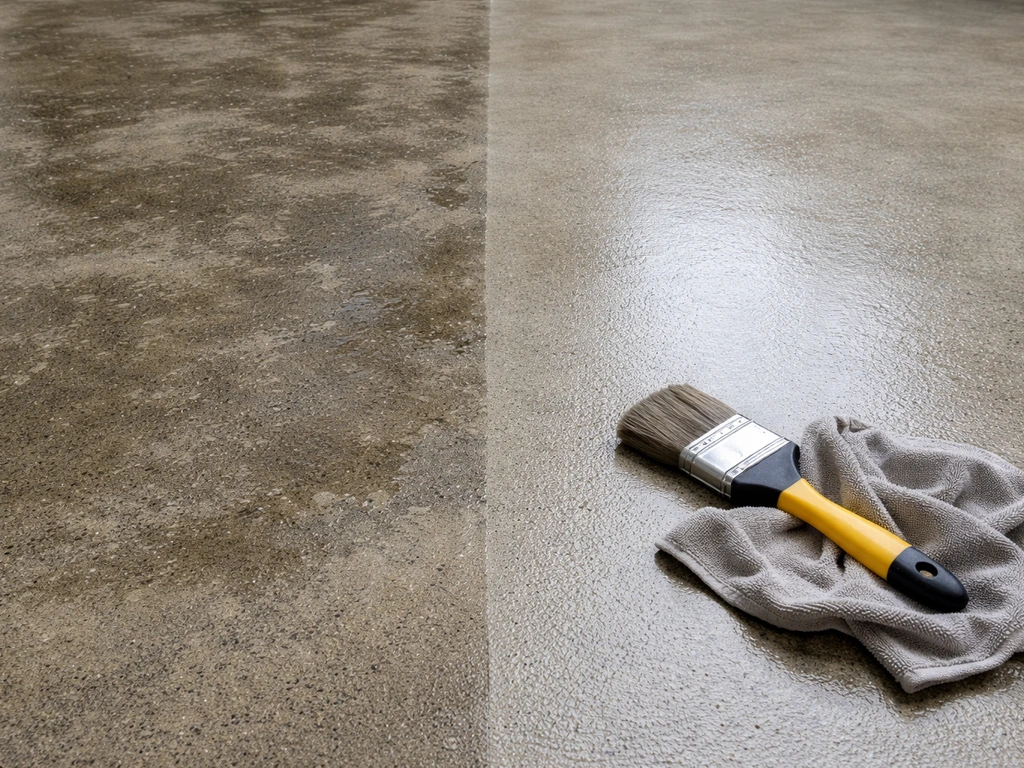
For concrete, a color sealer or a resurfacing product like BEHR's Advanced DeckOver gives you the most coverage and protection in one application, but prep is non-negotiable. For wood decking or furniture, a penetrating stain is usually the better long-term choice over paint because it doesn't form a surface film that can peel. For metal furniture and frames, a rust-inhibiting exterior paint specifically formulated for metal is the right call. For pavers, you can use a tinted sealer or simply lean into accent decor and leave the pavers their natural color.
How to prep patio surfaces so the color actually sticks
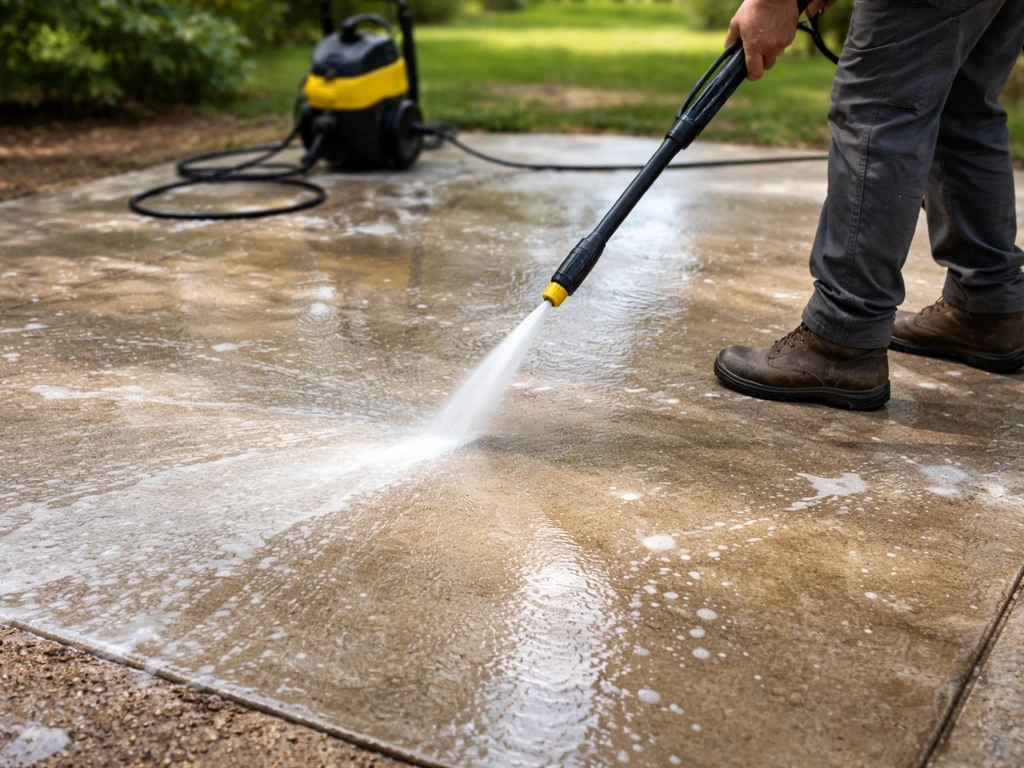
Prep is where most DIY color projects fail. You can use the best product on the market and still end up with peeling or blotchiness if the surface isn't clean, dry, and properly profiled. Cleaning is the single most important step, regardless of surface type. Every product manufacturer says this, and they mean it.
General prep rules that apply to every surface
- Remove all furniture, plants, and obstacles before you start
- Sweep and then pressure wash the entire surface to remove dirt, mildew, oil, and old loose coatings
- Let the surface dry completely before applying anything, at minimum 48 hours after power washing
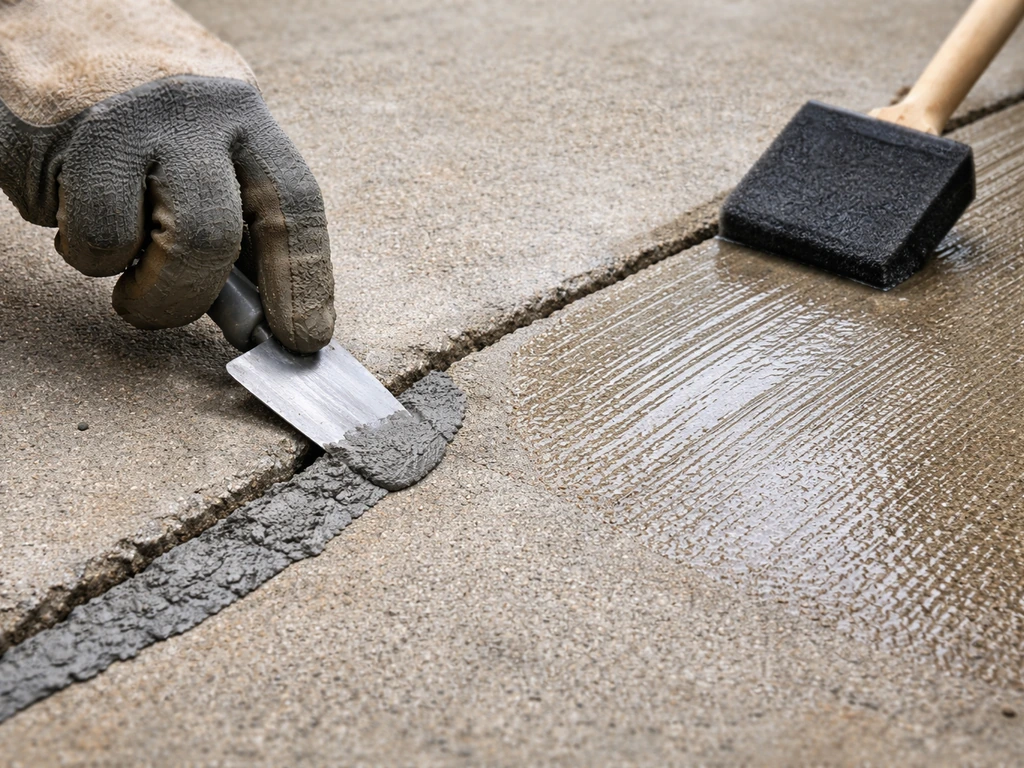
- Fill cracks and divots with a compatible patching compound and let it cure fully
- Tape off and protect adjacent surfaces, plants, and trim with painter's tape and plastic sheeting
- Check the weather forecast: you need air and surface temps between 50°F and 90°F, no rain in the next 24 hours
Concrete-specific prep
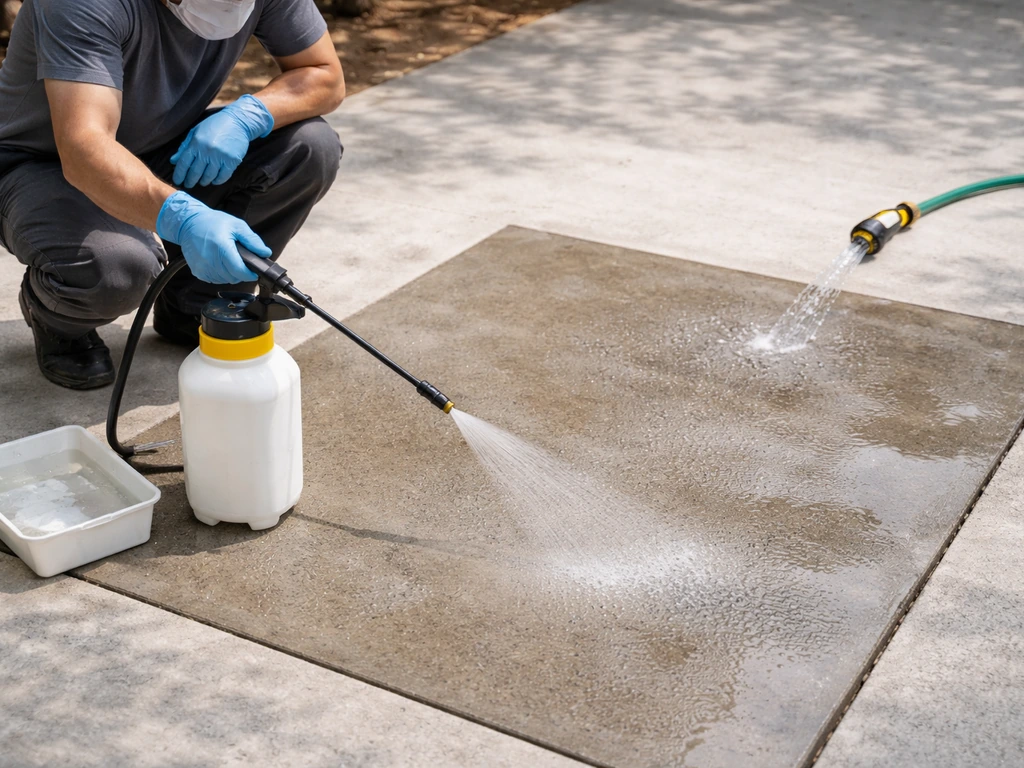
Bare concrete needs to be etched before most coatings will bond properly. Products like Rust-Oleum's Concrete Etch (a citric acid formula) open up the surface pores so the coating has something to grip. Apply the etch after cleaning, scrub it in, rinse thoroughly, then wait at least 48 hours for the surface to dry completely. If you're painting rather than sealing, follow up with a concrete and masonry bonding primer, which is what BEHR recommends before their paint systems on difficult surfaces. Also check for moisture: if your slab is below grade or in a shaded area, moisture vapor can push up through the concrete and cause coatings to peel prematurely. A simple plastic sheet test (tape a 12-inch square to the slab for 24 hours) will show you if there's condensation forming underneath. For serious moisture issues, ASTM F2170 in-situ relative humidity testing is the industry standard, though most DIYers can rely on the plastic sheet method as a practical first check.
Wood-specific prep
For wood decking or furniture, cleaning comes first, then sanding if the surface is rough or has raised grain. When you sand, always go with the grain, never against it. Sanding against the grain leaves scratches that become very visible when stain absorbs differently across the surface, giving you a streaky, uneven result. After sanding and rinsing, give wood a minimum of 48 hours to dry before applying stain. In cooler or humid weather, budget more time than that. Also, remove all loose, flaking, or peeling old stain before you start. If water beads on the surface, the wood is either still too wet or sealed with something the new stain can't penetrate.
Pavers and metal prep
Pavers just need a thorough clean and dry before sealing or staining. Use a paver cleaner or diluted muriatic acid wash if there's efflorescence (the white powdery mineral bloom you see on older pavers), then rinse well and let dry. For metal furniture and frames, sand off any rust with 80 to 120 grit sandpaper, wipe down with a degreaser, and apply a rust-inhibiting primer before painting. Skipping the primer on metal is one of the most common reasons paint peels off metal furniture within a season.
Application steps by surface type
Concrete slabs
- Clean and etch the surface as described above; rinse and dry for at least 48 hours
- Fill any cracks or imperfections with a concrete patching compound; let cure fully per product directions
- Apply concrete and masonry bonding primer with a roller, work it into the surface, and allow to dry
- Apply your color sealer or coating in thin, even coats using a 3/8-inch nap roller; avoid puddling or over-applying in one spot
- Let the first coat dry to the touch before adding a second coat (check your product label, typically 4 to 8 hours)
- Allow full cure before foot traffic, typically 24 to 72 hours; full hardness takes up to 7 days
Pavers
- Clean pavers and remove efflorescence; let dry 48 hours minimum
- Apply tinted paver sealer with a pump sprayer or roller in thin, even passes
- Avoid applying too much at once; thin coats prevent the white haze that comes from trapped moisture or heavy application
- Allow first coat to dry per product label before applying a second coat if desired
- Keep off the surface for 24 hours after the final coat
Wood decking or furniture
- Clean and sand with the grain; remove all old flaking stain
- Rinse thoroughly and allow to dry for at least 48 hours
- Apply penetrating stain with a brush, pad applicator, or roller, working it into the wood grain
- Apply at temperatures around 70 to 80°F when possible; cold weather slows absorption and warm weather above 90°F can cause the stain to flash dry on the surface before soaking in
- Wipe off any excess product that hasn't soaked in within 15 to 20 minutes to prevent a sticky residue
- Allow to dry fully before use: expect 12 to 72 hours depending on temperature and humidity
Metal furniture and frames
- Sand off rust and rough spots; wipe down with a degreaser
- Apply a rust-inhibiting primer and let dry per label instructions, typically 1 to 2 hours
- Apply metal-rated exterior paint in light coats with a brush or spray can for the smoothest finish
- Let each coat dry fully before adding the next; 2 to 3 thin coats are better than one thick coat
- Allow final coat to cure 24 hours before use
Making your color last: weather, UV, and maintenance
Outdoor color takes a beating from sun, rain, temperature swings, and foot traffic. UV exposure is the biggest enemy of color vibrancy, especially on concrete and wood. When you're shopping for products, look specifically for exterior-rated or UV-resistant formulas. To decorate your patio deck successfully, choose products and decor materials that can handle sun and rain without fading or peeling exterior-rated or UV-resistant formulas. Interior products, even if they're the same color, will degrade much faster outdoors.
Temperature at application time matters a lot. Most exterior coatings have a working window of 50°F to 90°F for air and surface temperature. Below 40°F, liquid-applied coatings won't cure properly and should not be applied if temperatures are expected to drop to 40°F within 24 hours after application. Too hot and the product can dry before it bonds well. Check both the air temp and the surface temp with an infrared thermometer if you're working in shoulder seasons.
For wood stains specifically, color typically starts fading within 12 to 24 months depending on the product, exposure level, and color choice. Darker colors tend to show fading more noticeably than naturals. Plan to do a light clean and recoat every 1 to 2 years for exposed surfaces. For concrete sealers, plan on resealing every 2 to 3 years. Most products just need a good cleaning and a fresh top coat rather than a full strip and redo, as long as you catch it before the old coating starts failing.
For day-to-day maintenance, keep the surface clean with a mild soap and water rinse a few times a year. Avoid harsh degreasers or pressure washing the color directly once it's applied, as that can strip protective coatings prematurely. For wood especially, a quick re-sealing with a clear or lightly tinted coat before the rainy season can significantly extend the life of your color.
Color ideas and building a cohesive patio look
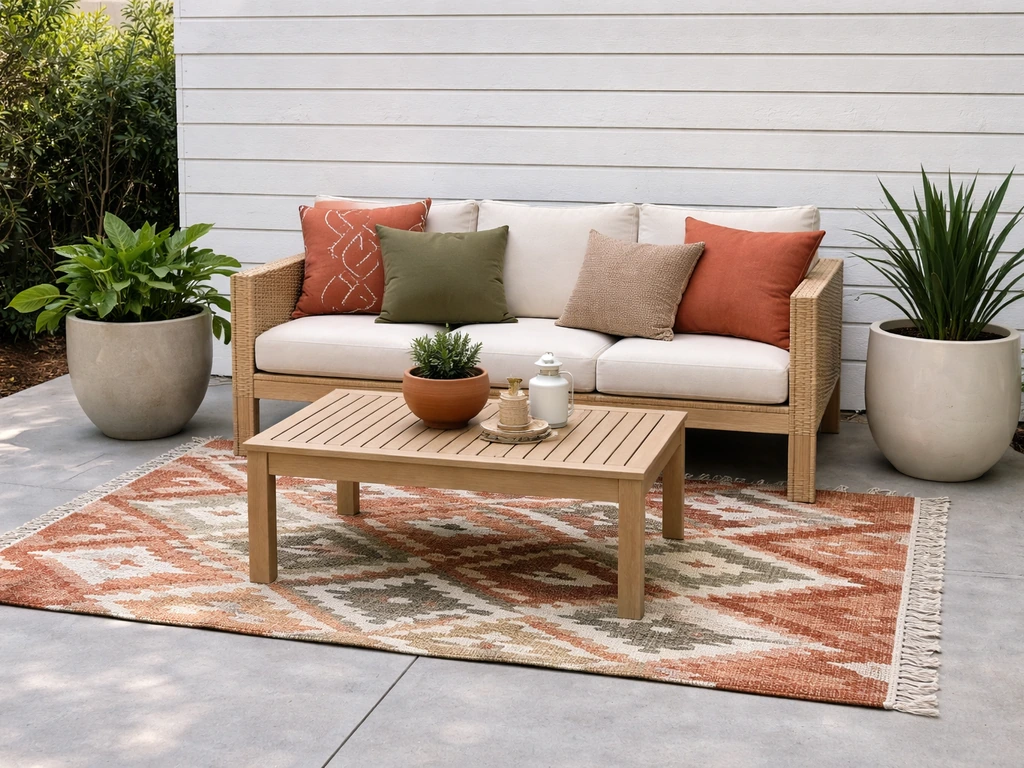
The most livable patios aren't the ones with the boldest surface colors. They're the ones where the surface color, furniture, textiles, and plants feel intentional together. Start with the surface as your neutral anchor and build your 2 to 3 accent colors from there. For wedding styling specifically, plan your decor around a clear color palette, then add comfortable seating, florals, and lighting that match your patio finish. A warm charcoal-stained concrete pairs well with warm wood tones in furniture and rust or ochre in cushions and planters. A cool gray paver patio with a tinted sealer reads clean and modern next to white or navy furniture with green plant accents.
- Warm tan or terracotta concrete stain: pair with natural rattan furniture, rust-colored cushions, and terracotta planters for a Mediterranean feel
- Cool gray concrete sealer: pair with charcoal or white furniture, navy or sage cushions, and metal planters
- Natural cedar or redwood stain on decking: let the wood be the star and keep furniture in neutrals with deep green or burgundy accents
- Slate blue paver tint: works well with white furniture, coastal-striped textiles, and driftwood-tone accessories
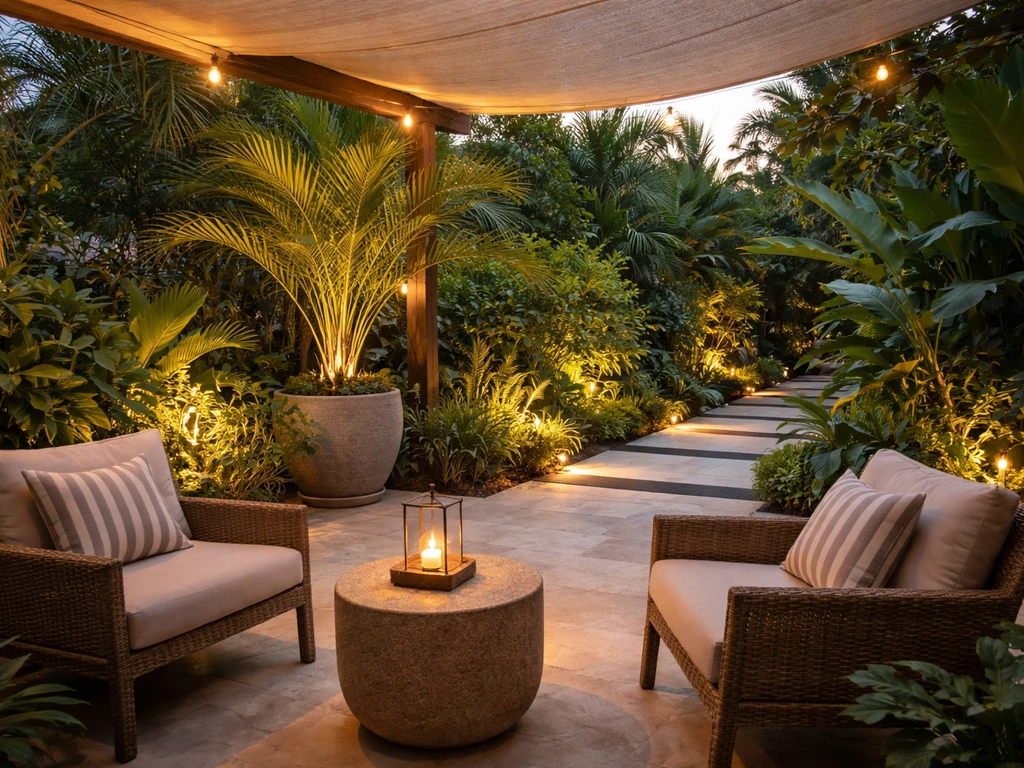
- Earthy brown wood stain: combine with warm-toned outdoor rugs, terracotta pots, and warm white string lights for evenings
Don't overlook vertical color. A painted or stained fence panel behind the patio, a colored pergola or shade structure, or even a bold outdoor rug adds color without requiring you to touch the patio surface at all. This is especially useful if your surface is in good shape and doesn't need repainting. If you're building out a more immersive theme, a tropical direction with bold greens and coral accents, or a dedicated summer update with seasonal textiles and planters, can completely change the feel of a patio without committing to a permanent surface color.
Common mistakes and how to fix them
Using the wrong product for the surface
This is the most common and costly mistake. Using an interior paint outdoors, applying a wood stain to concrete, or using a concrete sealer on pavers without checking compatibility will lead to early failure. Always read the product label and confirm it's rated for your specific surface type and for exterior use. If you're not sure, call the manufacturer's customer line. They're usually helpful and can save you from a $200 mistake.
Skipping or rushing prep
Applying color to a dirty, damp, or unprimed surface is the number one reason DIY patio color fails. If the surface isn't clean and dry, the coating can't form a proper bond. Don't try to accelerate drying with fans or heat guns on large surfaces. Just wait. The 48-hour drying rule after power washing is there for a reason.
Applying in bad weather or outside the temperature window
Applying any exterior coating when rain is expected within 24 hours, when temps are below 50°F or above 90°F, or when humidity is very high will cause the product to cure incorrectly. You'll end up with a tacky surface, blotchy color, or premature peeling. Check the forecast the night before and give yourself a full day of suitable weather, not just the morning.
Over-applying product
More is not better with concrete sealers and wood stains. Over-application is a leading cause of blotchy, dark, or hazy finishes on concrete and sticky, uneven finishes on wood. Apply thin, even coats and let each one dry fully before adding another. If you're seeing puddles or thick wet spots, you've applied too much. For concrete sealers, if the finish looks blotchy or hazy after drying, you may need to apply a solvent-based stripper and start over, or lightly buff the surface with a fine abrasive to break up the uneven film.
Tacky finish on wood
If your wood stain or sealant is still tacky after 24 hours, you likely applied too much or applied in cool, humid conditions. For mild tackiness, try wiping the surface down with a clean cloth dampened with mineral spirits to remove the excess. For severe tackiness or areas that never cure, you may need to strip and restain. Going forward, apply one coat, wipe off the excess within 15 to 20 minutes, and wait for full dry time before assessing whether a second coat is truly needed.
Mismatched sheen between sections
If part of your surface looks glossy and another part looks flat, the most likely causes are uneven application, different drying times across the surface, or spot-treating patches with a different product. To fix it, clean the surface lightly and apply a uniform thin topcoat across the entire area at once, in the same direction, at the same temperature. This typically blends out the sheen variation. On concrete, if the problem is tied to over-application in certain spots, a light buff with a fine diamond pad before the topcoat can help even things out.
The bottom line is that adding lasting color to a patio is completely doable as a DIY project. Inspect your surface and identify what it's made of, pick the product specifically rated for that surface and exterior use, prep it correctly (clean, dry, patch, prime if needed), apply in the right weather window, and plan to maintain it every 1 to 3 years. That process, done right, gives you color that holds up through seasons and actually improves the way you use your outdoor space. If you want to get the best results, stage your patio color and staging plan around the surface type and the weather window before you apply anything.
FAQ
How can I tell if a stain or sealer color will look different once it cures in my yard?
Do a small test patch in a hidden spot first. Let it cure fully, then check in the sun for at least a full day, because many products darken slightly as they cure and can look uneven under shade versus direct light.
What should I do if my patio has old coating peeling in spots before I add new color?
If your patio surface is older and flaking, scrape until you reach solid material, then sand lightly to feather edges. Spot-priming over peeling edges without removing loose coating often causes the failure to spread later.
How can I check whether concrete is stable enough to accept a new color coating?
For concrete, avoid painting over powdery residue or weak concrete. After cleaning and etching, do the “tape test” again with a small piece of tape, if it lifts gritty material the surface isn’t stable, and you should stabilize or resurface before coating.
Is 48 hours after power washing always enough for outdoor color projects?
Don’t rely on just “dry to the touch.” If you recently power washed, wait at least the recommended dry time and re-check with the plastic sheet test for condensation. High moisture is a common cause of peeling that looks fine at first.
Can I change products later, like switching from a sealer to a stain on the same patio surface?
Yes, but only when the product allows it. Many penetrating stains and sealers do not bond well to a glossy or film-forming base. If you’re changing product families (for example from film-forming to penetrating), you may need an approved scuff or full removal step.
Can I thin exterior stains or sealers to make them go on easier or more evenly?
Use the product’s label guidance for thinning and cleanup, and match solvent type for any additives. For example, using a random mineral spirit amount to thin a stain can alter tint strength and slow curing, leading to patchy finish.
What if water beads on my deckboards after cleaning, will the stain still work?
For wood, check how water behaves before staining. If water beads instead of soaking, something is already on the surface (like an old sealer) that can block penetration, and you’ll likely need the correct cleaner and possibly light abrasion or stripping.
How do I fix a blotchy or hazy finish on concrete after it cures?
If you see hazing on concrete after it dries, it’s often residue, over-application, or an incompatibility issue. Start by cleaning the haze per the product instructions, then if it persists, a light abrasion or stripper may be needed before reapplying an evenly thin topcoat.
When is the right time to recoat, especially if my patio is in full sun?
Plan your recoat schedule based on exposure and color depth, not just time. A dark wood stain or high-UV color can start losing vibrancy sooner, so inspect monthly during peak summer and recoat when water no longer repels as it should.
If my patio surface is already coated and looks okay, how can I add more color without repainting the whole thing?
Yes, but choose spot-color methods strategically. If your surface coating is still solid, you can use vertical color (fence, planter boxes, shade structures) plus outdoor rugs and cushions to introduce palette changes without stressing adhesion on the patio slab or deck.
What’s the best way to protect landscaping and neighboring surfaces during a DIY patio color job?
Cover plants, grass, and nearby hardscape carefully with plastic sheeting and tape, then rinse immediately if product splashes. Some stains and sealers can be hard to remove from foliage and can leave long-lasting discoloration on adjacent surfaces.
Next Articles
How to Make a Tropical Patio: DIY Step by Step Guide
Step-by-step DIY guide to turn your patio tropical with plant picks, shade and privacy, outdoor upgrades, and maintenanc

How to Decorate a Long Narrow Patio: Layout Tips
Practical DIY layout and decor tips to widen a long narrow patio using zoning, furniture spacing, lighting, greenery, an

How to Decorate a Rectangular Patio Step by Step
Step-by-step plan to decorate a rectangular patio with smart layout, zones, furniture fit, lighting, plants, and seasona