
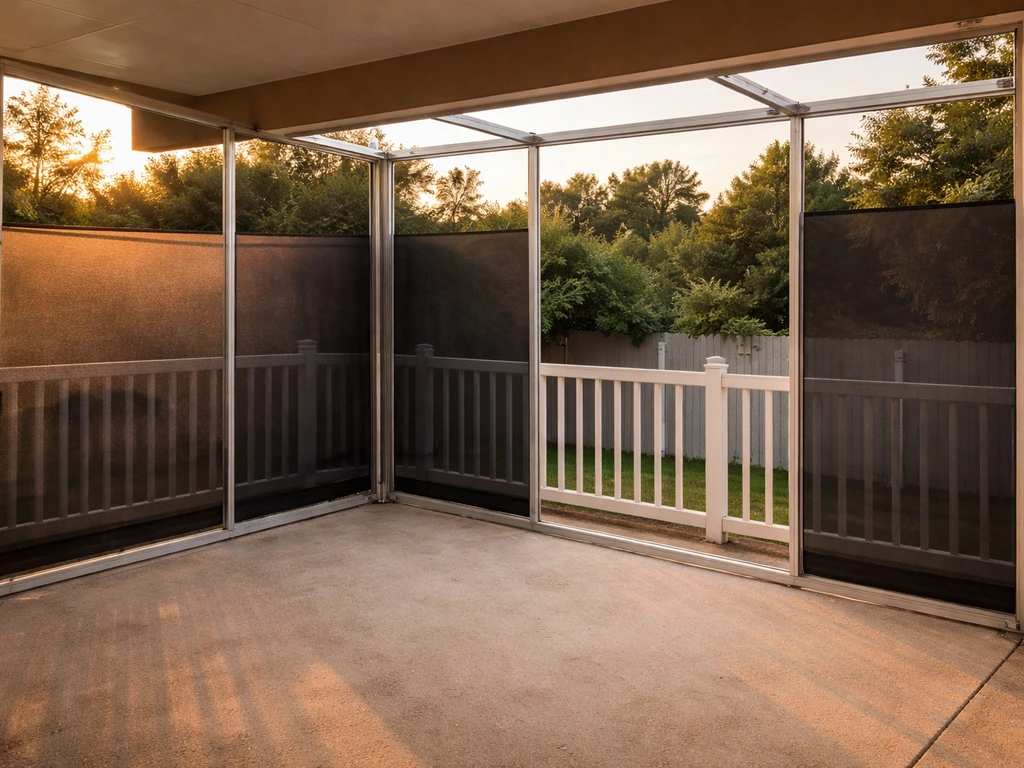
The cheapest practical way to enclose a patio is a DIY screen enclosure built onto an existing covered patio. Using aluminum framing, fiberglass or aluminum mesh, and a spline-based installation system, most homeowners can enclose a standard 12x16 ft patio for $500 to $1,500 in materials alone. If you want a DIY walkthrough, see our guide on how to build a patio enclosure step by step, from measuring openings to installing the door.
How to Enclose a Patio on a Budget: Cheap DIY Steps

Felix Brennan
5 Jun 2026
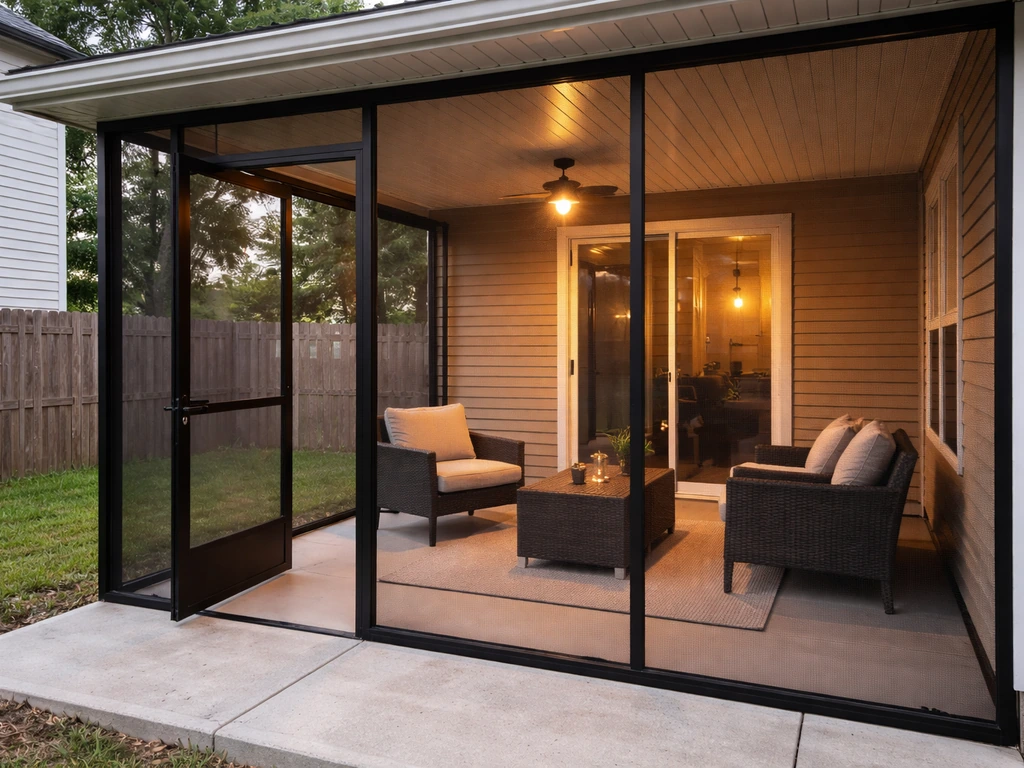
That gets you solid bug protection, partial wind and debris blocking, and a genuinely usable outdoor room without touching your savings account. If you need more weather protection, polycarbonate panel walls or a corrugated roof layer can be added later as a second phase for another $300 to $800. The key is picking the right enclosure type for your actual goal before you spend a dime.
What 'Enclosing a Patio' Actually Means (and What It Costs)
The word 'enclosure' covers a wide range of projects, and the cost gap between them is enormous. On the budget end you have a simple screened-in enclosure: screen mesh walls on an existing covered patio, no solid walls, no windows, no insulation. On the expensive end you have a fully enclosed four-season sunroom with glazed windows, HVAC, and a proper roof system. In between you have three-season rooms with polycarbonate or tempered glass panels that block wind and rain but aren't insulated. For a budget guide, we're focused on the first two: screened enclosures and lightweight panel enclosures.
| Enclosure Type | What It Blocks | Typical DIY Material Cost | Best For |
|---|---|---|---|
| Screen walls on existing roof | Bugs, light debris, some wind | $500–$1,500 | Warm climates, bug protection |
| Polycarbonate/plastic panel walls | Wind, rain, some UV glare | $800–$2,500 | Year-round mild climates |
| Screen + polycarbonate roof combo | Bugs, rain, wind, debris | $1,200–$3,000 | Mixed climates, phased builds |
| Three-season room (full panels) | Wind, rain, cold drafts, bugs | $2,000–$6,000+ | Cooler climates, high use |
Under the 2024 International Residential Code (Appendix BF), screened enclosures are recognized as a legitimate category of patio cover construction, which means they aren't a workaround or a temporary hack. They're a real, code-recognized structure. That matters when it comes to permits and resale value, both of which we'll cover below.
Pick the Cheapest Enclosure Type for Your Actual Goal
Before you price materials, decide what problem you're actually solving. A lot of budget builds fail because someone bought screen mesh when they really needed wind protection, or spent money on solid panels when all they needed was bug control. Match the enclosure type to the goal and you'll spend less and be happier with the result.
Bug and Insect Protection
A basic screen enclosure is your answer here, and it's the cheapest option on the list. For a practical “screened enclosure” per-square-foot range, Precision Glass & Mirror’s 2025 pricing guide also frames screened enclosures as a budget-friendly option that keeps out bugs and debris while still allowing airflow screened enclosure per-square-foot range. Fiberglass mesh (18x16 weave) costs around $0.15 to $0.25 per square foot, and aluminum mesh costs a bit more but resists stretching, tearing, and oxidizing better over time. Aluminum is worth the small premium if you're in a humid or coastal climate. Either way, a spline-based screen system with aluminum or wood framing is the most cost-effective build for bug control.
Wind and Privacy
Screen alone won't do much for strong wind or nosy neighbors. For privacy and wind blocking, you have two affordable options: outdoor fabric privacy screens (essentially heavy shade cloth stapled or zip-tied to a frame, around $1 to $3 per square foot) or polycarbonate twin-wall panels (around $1.50 to $4 per square foot depending on thickness). Polycarbonate is more durable and lets in light while blocking wind. Privacy screen fabric is cheaper but degrades faster in UV and doesn't handle hard rain well.
Weather and Rain Protection
If you need real weather protection, you need a solid roof and panel walls, not just screens. A corrugated polycarbonate roof layer over an existing pergola or patio frame is the cheapest route here. Multiwall polycarbonate sheets run $1 to $5 per square foot, seal reasonably well when installed with proper fasteners and polycarbonate-compatible sealant, and let in diffused light. Pair that with polycarbonate or acrylic side panels and you have a functional three-season room at a fraction of sunroom pricing.
Temporary or Seasonal Enclosures
If you only need protection for part of the year and want to avoid permits entirely, a temporary enclosure approach using clear vinyl curtain panels, snap-on screen kits, or removable fabric walls can work well. These are the easiest to install and take down, and they don't require any framing modification. Temporary builds are covered in more depth as their own project type, but for a budget permanent build, a simple screen or polycarbonate panel system is the better long-term investment.
Materials and Tools You'll Need
For a basic screen enclosure on an existing covered patio (roughly 12x16 ft, around 200 sq ft of screen), here's what to gather before you start. Prices are approximate as of mid-2026 and will vary by region and supplier.
Materials
- Aluminum screen frame stock (7/16" or 5/8" channel): $0.30–$0.60 per linear foot; buy pre-cut kits or by the stick
- Fiberglass mesh screen roll (48" or 60" wide): $0.15–$0.25 per sq ft; or aluminum mesh for $0.25–$0.40 per sq ft
- Screen spline (vinyl, matching groove size—measure before buying): $0.10–$0.15 per linear foot
- Corner connectors and tension clips for aluminum frame
- Screen door kit (aluminum framed with hardware): $40–$120 depending on size
- 2x4 or 2x6 pressure-treated lumber for base plate and top plate if framing is needed: $1.50–$3.50 per linear foot
- Exterior-grade screws (2.5" and 3" decking screws, stainless if near the coast)
- Construction adhesive and weatherproof caulk
- Post anchors or concrete anchors if adding new posts
- Drip cap or aluminum flashing if attaching to the house
Tools
- Tape measure, speed square, level
- Circular saw or miter saw (for lumber and aluminum channel cuts)
- Cordless drill and driver bits
- Spline roller (a $5–$10 tool, do not skip this)
- Utility knife for trimming mesh and spline
- Staple gun (for tacking mesh temporarily while working)
- Ladder
- Pencil, chalk line
How to Build a Budget Patio Enclosure: Step by Step
These steps cover a screen enclosure added to an existing covered patio with an existing roof. If your patio doesn't have a roof, that's a separate project. The goal here is to frame the open sides, install screen panels, and add a door so you get a sealed, bug-proof outdoor room.
Step 1: Measure and Plan Your Openings
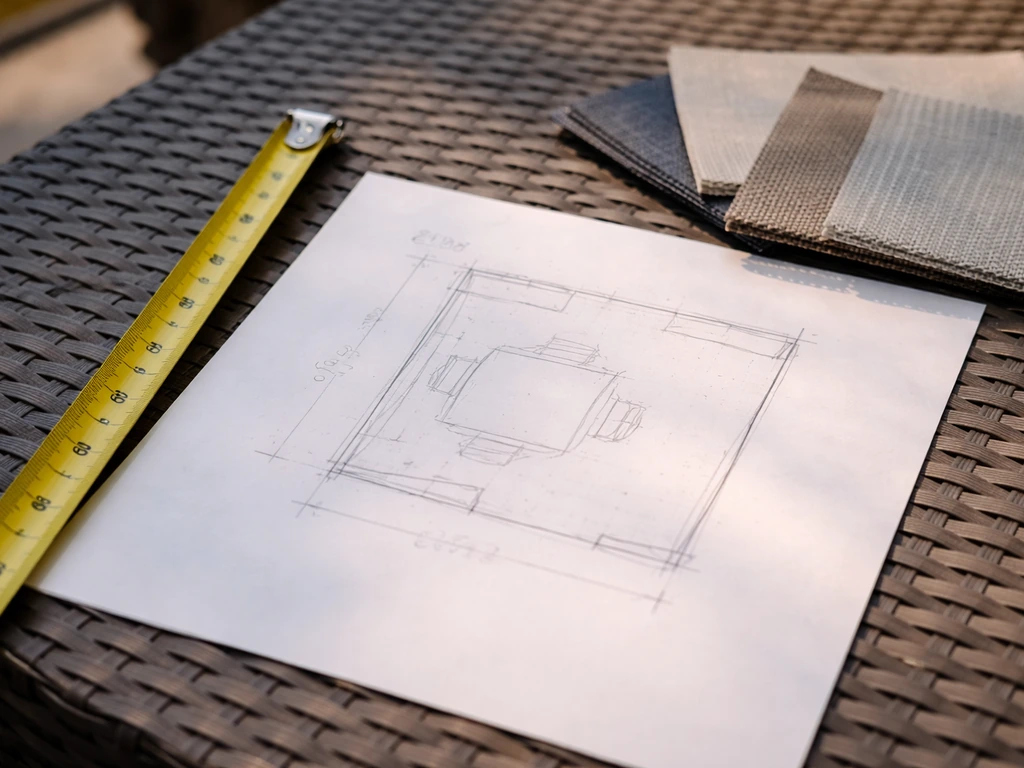
Measure every opening you need to screen: height from the existing floor or deck to the underside of the roof beam, and width between existing posts or columns. Write down every opening separately because they're rarely identical. Also decide now where your door goes. A single 36" screen door in the most-used corner is standard. Sketch a simple layout showing post locations, panel widths, and door placement. Large openings (anything over 6 feet wide) should be divided into two or more panels with a center framing member for wind resistance.
Step 2: Install or Confirm Your Frame Structure
If your patio already has posts at the corners and a beam overhead, you may just need to add horizontal nailers: a bottom plate anchored to the deck or slab, and a top plate attached to the beam or existing header. Use 2x4 pressure-treated for both. Space any intermediate vertical studs no more than 6 feet apart, and tie everything in with metal post anchors or structural screws rated for the load. The IRC Appendix BF is specific about this: screen enclosures transmit wind drag forces to the ground, so the framing needs to be positively attached, not just toe-nailed and hoped for.
Step 3: Build and Install Screen Panels
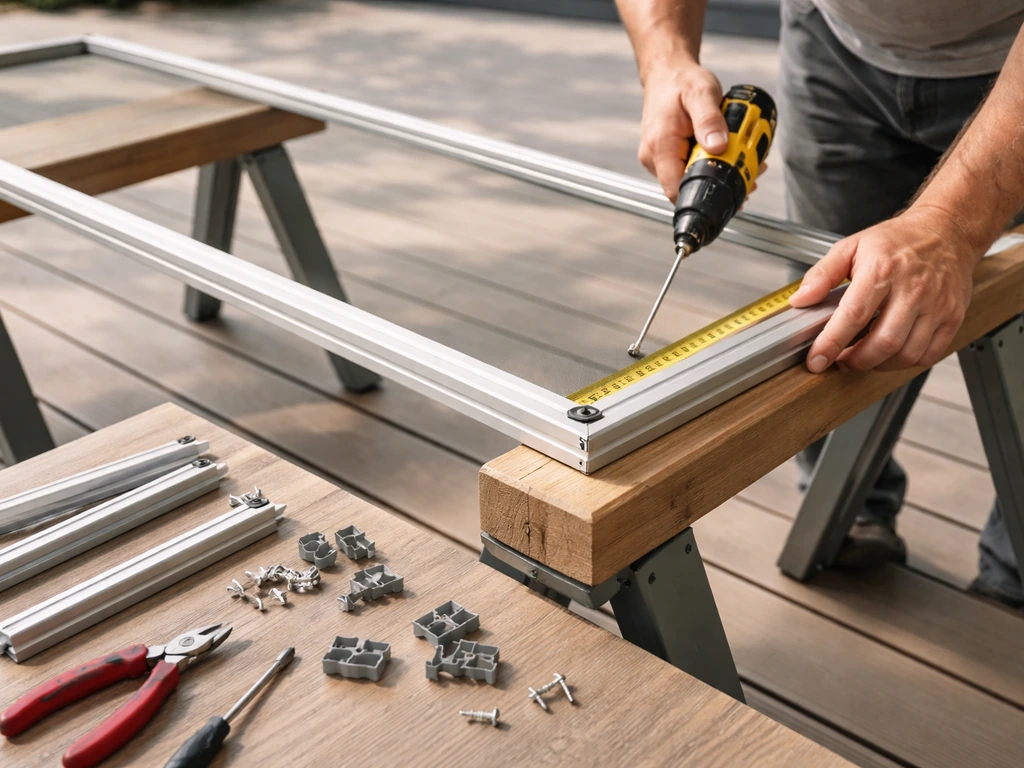
Cut your aluminum frame channel to length for each panel. Connect the corners with plastic or aluminum corner keys and snap the frame together to form a rectangle. Lay the assembled frame flat on a clean surface, roll your mesh over it leaving about 1 inch of overhang on all sides, and use the spline roller to press the spline into the groove on one side first, stretching the mesh slightly as you go.
Work from side to opposite side, not around the perimeter, to keep the mesh taut. Loose mesh billows in wind and wears faster at the edges. Trim the excess mesh flush with a utility knife. If you're using a manufacturer kit like a system designed for existing covered patios and decks, follow the kit's specific sequence, but the spline principle is the same.
Step 4: Secure Panels to the Frame
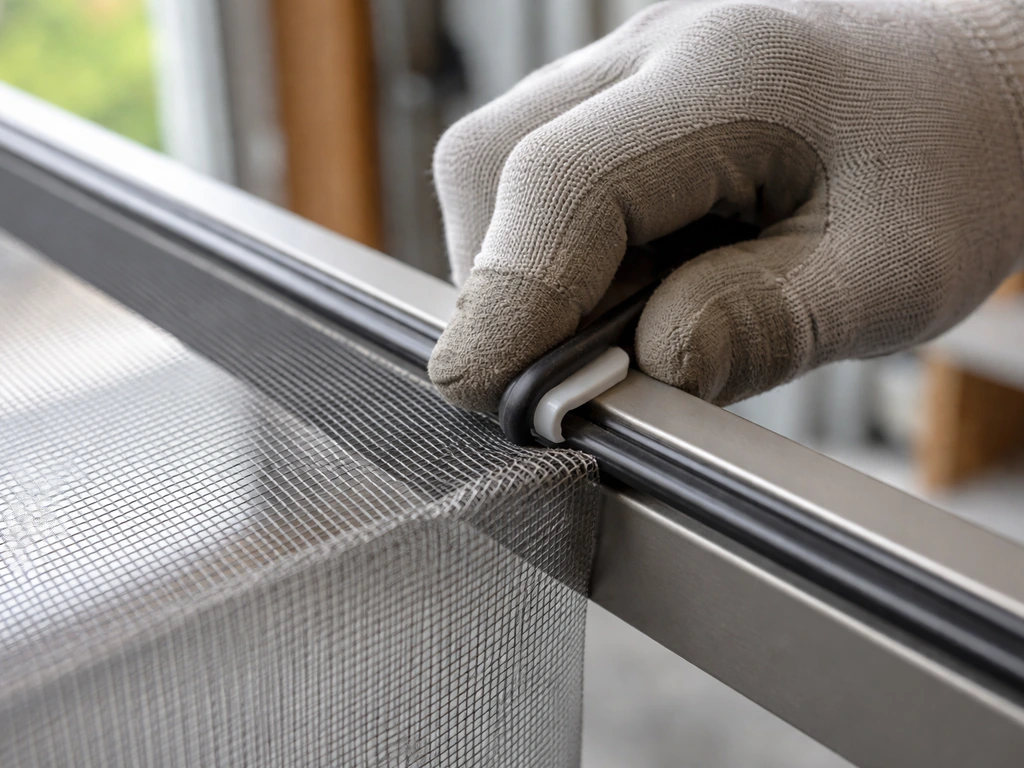
Press-fit or screw your finished screen panels into the framed openings. Most aluminum frame systems use friction clips or tension splines to lock into a channel mounted on the wood framing. Screw the mounting channel to the wood first, then press panels in. For wood-framed builds, you can face-staple and cap-strip the mesh directly to the wood, but aluminum frame panels are more durable and easier to replace if one gets damaged. Make sure every panel is positively attached at the top, bottom, and both sides, not just resting in a channel.
Step 5: Install the Screen Door
Frame the door opening with doubled 2x4s on the sides and a header across the top. The rough opening should be about 1/2 inch wider and 1/2 inch taller than your door kit's listed size. Hang the door frame, check for level and plumb with a long level, and shim as needed before fastening permanently. Attach hinges to the hinge-side jamb first, then hang the door and check swing and gap consistency. Install the latch hardware, adjust, and add a door closer spring if you want the screen to shut automatically, which you do.
Step 6: Seal and Finish
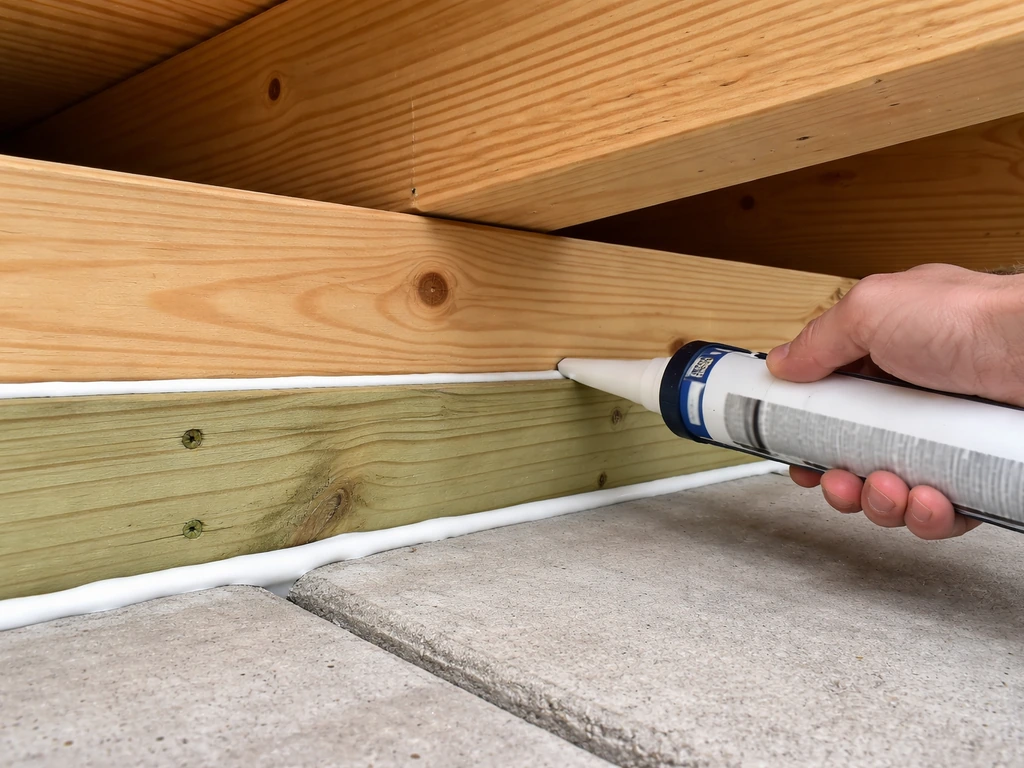
Run a bead of exterior caulk where the top plate meets the existing roof beam, and where the bottom plate meets the deck or slab. Any gap larger than 1/4 inch is a bug highway. If you're attaching to the house wall, install drip cap flashing above the ledger to direct water away from the wall and prevent rot. Check every corner and seam for daylight before calling it done.
Budget Planning: Real Costs and How to Keep Them Down
Here's an honest breakdown of what a DIY screen enclosure costs in 2026. These figures assume you're doing all labor yourself on an existing covered patio with posts already in place.
| Cost Item | Low Estimate | High Estimate | Notes |
|---|---|---|---|
| Screen mesh (200 sq ft) | $30 | $80 | Fiberglass low, aluminum high |
| Aluminum frame channel + hardware | $80 | $200 | Buy a kit to save vs. buying by the stick |
| Screen door kit | $40 | $120 | Aluminum prefab is the budget pick |
| Lumber (pressure-treated 2x4s) | $60 | $150 | Depends on how much framing you need |
| Fasteners, anchors, caulk | $30 | $60 | Don't cheap out on anchors |
| Spline roller and tools (if needed) | $15 | $40 | One-time buy |
| Permit fee (if required) | $50 | $250 | Varies widely by jurisdiction |
| Total DIY estimate | $305 | $900 | Labor is your biggest saving |
If a contractor installs the same screened enclosure, expect to add $1,500 to $4,000 in labor on top of materials, which is why DIY is so powerful here. For larger or more complex enclosures (solid panels, added roof, or new construction patio), professional screen room installation typically runs $3,000 to $10,000 or more. A full sunroom starts at $15,000 and goes up fast.
Smart Ways to Save Without Cutting Corners on Safety
- Buy a complete screen enclosure kit instead of individual components. Kits are designed to fit together and often cost less per square foot than buying channel, spline, and mesh separately.
- Check Facebook Marketplace and Craigslist for salvaged aluminum screen frames, sliding glass doors, and polycarbonate panels. Patio renovations generate a lot of usable material.
- Phase your build: do screen walls first, add polycarbonate panels or a roof overlay later. This spreads cost over two or three seasons and lets you test what you actually need.
- Use fiberglass mesh instead of aluminum in low-humidity inland climates where corrosion isn't a factor. It's half the price and holds up fine.
- Rent a miter saw for a day ($30–$50) rather than buying one if this is a one-time project.
- Do not skip proper anchoring to save money. A poorly anchored enclosure in a windstorm can cause serious damage to your house and injury. The $30 in structural screws and anchors is non-negotiable.
Permits, Measurements, and the Code and HOA Checklist
This is the part a lot of budget DIYers skip, and it's the part that causes the most headaches later. Permit requirements for patio enclosures vary significantly by city, county, and state, but the general rule is: if you're adding permanent framing, a roof, or any enclosed structure attached to your home, you likely need a permit. Even a screened-in porch often triggers a review.
What to Check Before You Start
- Call or visit your local building department and ask specifically whether a screened patio enclosure or patio cover addition requires a permit in your jurisdiction. Get the answer in writing or via email.
- Check your HOA's CC&Rs (Covenants, Conditions, and Restrictions) for rules about patio enclosures, approved materials, colors, and whether you need architectural review approval before starting.
- Measure your setbacks: most municipalities require a minimum distance (often 5 to 10 feet) between any structure and the property line. Your enclosure can't cross that line.
- Confirm your patio's square footage and ceiling height. Permits often have thresholds (e.g., structures over 200 sq ft require a full permit; smaller ones may qualify for a simpler over-the-counter permit or exemption).
- If you're attaching to the house, your permit application will likely need a ledger attachment detail showing anchor type, size, and spacing, plus flashing details. Some jurisdictions also require a site plan showing the structure's location on the lot.
- For any enclosure with a solid roof, check whether your climate zone requires snow load calculations. This matters in the northern US and high-altitude regions.
- If your enclosure will enclose an exit door from the house, most codes require minimum ventilation clearances, typically a gap between the top of the enclosure wall and the underside of the roof.
Skipping the permit doesn't just risk a fine. It can void your homeowner's insurance claim if the structure causes damage, create problems during a home sale when an unpermitted structure shows up on inspection, and mean you have to tear the whole thing down. A $75 permit is cheap insurance.
Common Mistakes to Avoid and How to Make It Last
Mistakes That Kill Budget Enclosures
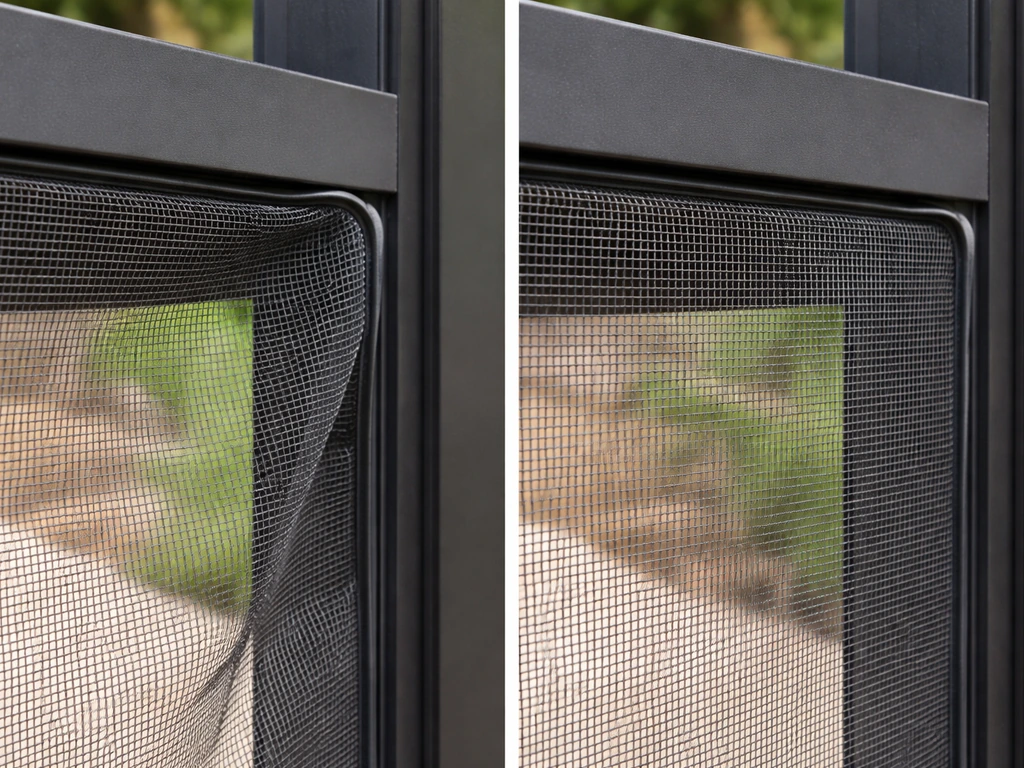
- Loose mesh installation: if the screen isn't taut when you press the spline in, it will sag and flutter in wind, wearing out at the edges within a season. Stretch firmly and use the spline roller properly.
- Wrong spline size: spline that's too thin won't grip the mesh firmly in the groove. Measure your channel groove width before buying spline. Even a 1/32" difference in diameter matters.
- Skipping the bottom plate anchor: a bottom plate that's just resting on the deck will shift and rack in wind. Anchor it to the deck frame or slab with concrete anchors spaced every 24 inches.
- No intermediate framing on wide openings: screen panels wider than 6 feet without a center vertical will bow and fail. Add a mid-span stud or divider.
- Attaching to a fascia board instead of the structural header: fascia is cosmetic wood, not structural. Screw the ledger to the house's rim joist or beam, not the fascia.
- Skipping sealant at the roof attachment: water that gets behind the top plate will rot your house's rim joist or sheathing quietly for years. Install flashing and caulk every penetration.
Basic Maintenance to Keep It Going Season After Season
A well-built screen enclosure can last 10 to 20 years with minimal upkeep. Fiberglass mesh typically needs replacement every 5 to 10 years depending on UV exposure and physical wear. Aluminum mesh lasts longer but costs more upfront. Every spring, do a quick walkthrough: press on each screen panel to check for loose spline, look for tears or holes at the corners (that's where failure starts), check that the door closes flush and the latch catches, and look for any rust at screw heads or frame joints. If you're in a coastal environment, rinse the aluminum framing with fresh water once or twice a year to clear salt deposits.
For polycarbonate panel sections, check fastener seals annually. Polycarbonate-compatible sealant (not standard silicone) around each fastener head is what keeps water from wicking in along the screw threads. Reapply where you see cracking or shrinkage. Use the correct screw spacing recommended by the panel manufacturer, typically every 12 to 18 inches along the panel, and never overtighten screws or you'll crack the panel at the fastener hole.
If you're planning to go beyond a basic screen build and want to tackle a full enclosed patio with solid walls and a roof, that's a more involved project covered in more detail as a full enclosure build. If you want a shelter over your patio for real all-weather use, follow the same framing-and-sealing logic but scale up for a solid roof and wall system full enclosed patio with solid walls and a roof. If you want to take on do it yourself patio enclosures, start with a screened enclosure and upgrade only where you truly need more weather or privacy. For anyone just starting out or working with a tight budget, the screened enclosure approach described here is the most accessible entry point, and it delivers real, usable results from the very first weekend you spend building it.
FAQ
Should I choose screen mesh or solid panels for my budget patio enclosure?
If your goal is bug control and light airflow, stick with insect screen mesh. If you’re trying to block wind, add polycarbonate or privacy panels, because plain screening will flutter and can still let gusts through.
Are temporary clear vinyl curtain panels truly gap-free enough for windy seasons?
Don’t assume “clear” means removable. Many clear vinyl curtain systems still need a plan for bottom anchoring and overlap so wind doesn’t blow them inward and expose gaps at the floor, especially in breezy corners.
Can I start with a screen enclosure and upgrade later without redoing everything?
Yes, but only in a “second phase” way. If you add solid roof or wall panels later, plan the framing now to carry extra load and consider whether the permit category changes once it becomes more enclosed.
What’s the best door size and placement for a DIY screened patio enclosure?
For most homeowners, start by using a standard door location where it doesn’t break wide spans, then set the frame rough opening to the kit’s specified size with your extra 1/2 inch tolerance. After hanging, verify the latch engages at both the top and bottom of the strike, not just one point.
Why do some screen panels look wavy or billow after installation?
Use a spline-based system as described, and keep the mesh tension consistent by working straight across the panel (not around the edges). If you see billowing after installation, it usually means the spline wasn’t seated fully or the mesh wasn’t stretched evenly.
How do I prevent water leaks where the enclosure ties into an existing roof or wall?
Yes, but you need to treat the interface as part of the structure, not a quick caulk job. Use a drip-cap style flashing where required, confirm water sheds away from framing, and recheck the seal after the first heavy rain because roofs can shift slightly.
What should I do if my patio has no corner posts to anchor the enclosure?
If your patio doesn’t have posts at corners, you’ll need to add structural posts or a code-compliant frame extension before you can safely attach horizontal nailers. Don’t rely on attaching the screen channel to trim boards or non-structural elements.
How can I make screen panels last longer and avoid early replacement?
Replace a few damaged panels when possible, choose aluminum mesh in humid or coastal areas, and do an annual spline check. The biggest early warning sign is damage concentrated at corners where fasteners and spline edges see the most movement.
Where do enclosures usually leak bugs from, and how do I fix it cheaply?
Check for the “bug highway” failure points first, gaps at corners and along the top plate seam. A gap under a quarter inch can still let small insects in, so adjust hardware alignment and re-seat channels before final sealing.
What’s a practical way to decide if I likely need a permit in my area?
Even if a permit is uncertain, you can still reduce risk by selecting the least structurally invasive option, like screening on an existing covered patio rather than adding a new roof or fully enclosed walls. If you’re unsure, call your local permitting office with a sketch of the proposed enclosure type and footprint.
Which enclosure type is best for extending patio use into shoulder seasons?
If you want a budget enclosure that feels usable year-round, the limiting factor is typically air sealing and roof insulation, not just wall panels. Screen enclosures are best for bug control and seasonal use, three-season panel builds for wind and rain reduction, and anything beyond that needs a more weather-tight approach.
What maintenance changes should I make if I live near the ocean?
For coastal areas, aluminum frames benefit from periodic fresh-water rinsing, and you should also watch screw heads and joints where salt spray collects. If you see early corrosion at fastener heads, tighten or replace the worst points instead of waiting for mesh failure.
Next Articles
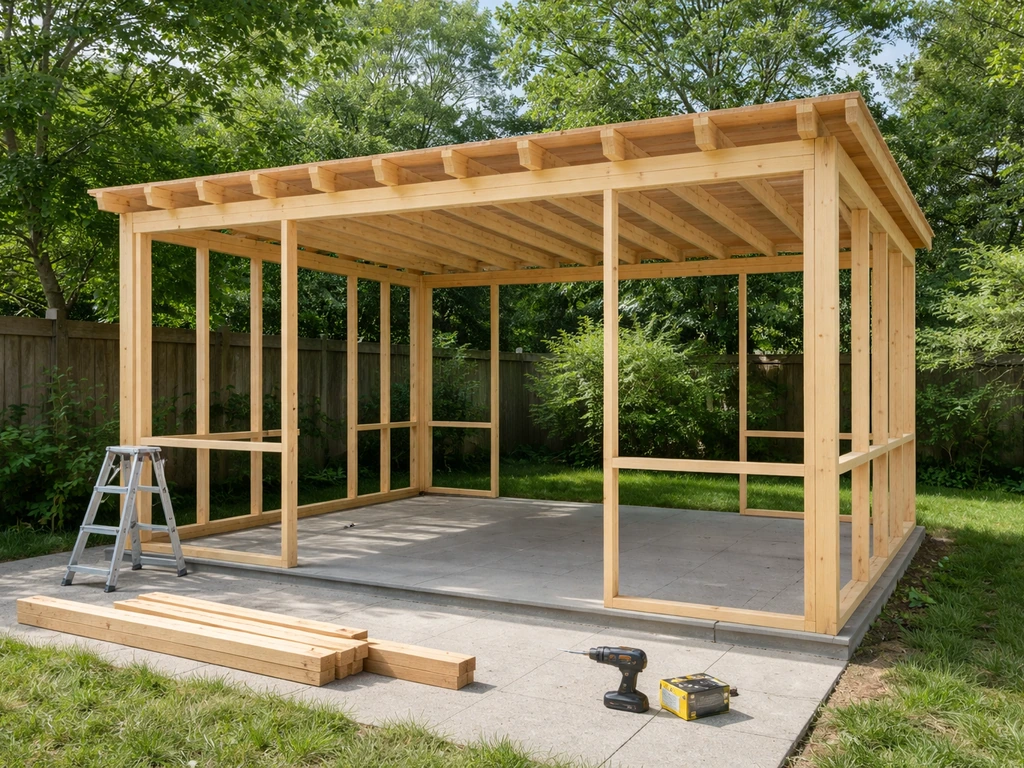
How to Build a Patio Enclosure: Step-by-Step DIY Guide
Step-by-step DIY guide to build a patio enclosure with planning, framing, roofing, glazing or screens, sealing, and upke
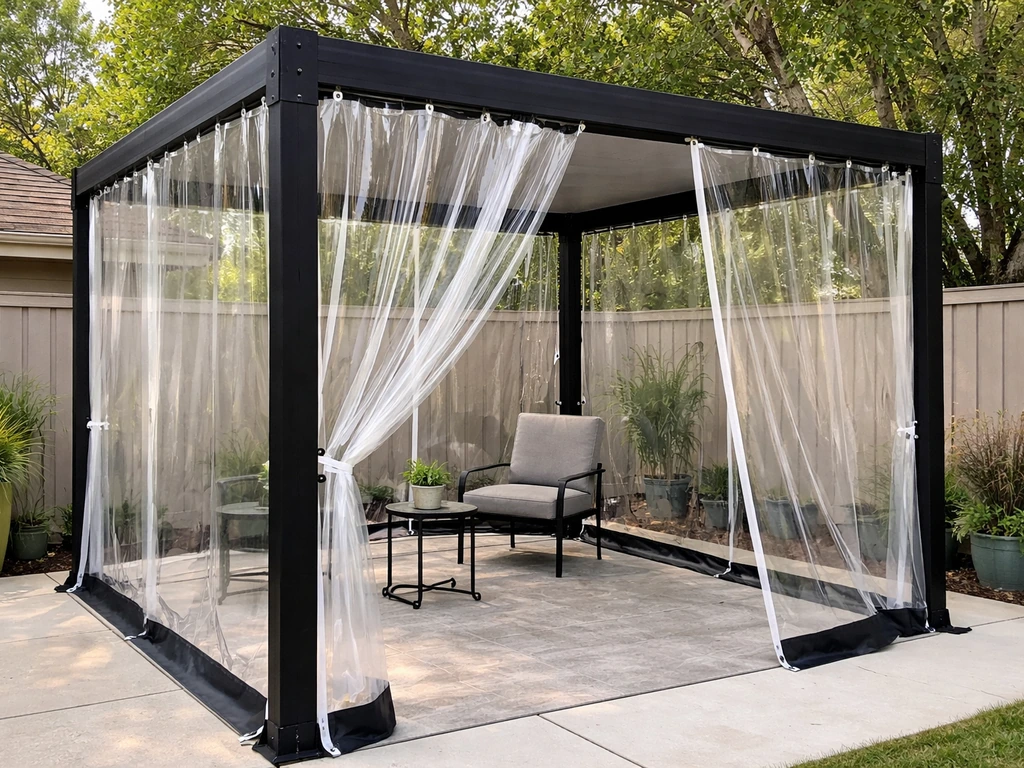
How to Enclose a Patio Temporarily: DIY Step by Step
Step-by-step DIY options to temporarily enclose a patio, measure, install safely, weatherproof, and remove without damag
How to Enclose a Patio: DIY Steps, Costs, and Options
DIY guide to enclose a patio with screen, glass, or vinyl. Costs, steps, materials, and common mistakes.