
You can enclose an existing patio with windows by building a simple stud-framed wall system around the perimeter, setting window units into rough openings, and tying the new structure into your existing roof or adding a lean-to roof above. Significant changes to the 2018 International Residential Code (International Code Council) notes that Glazing used in guards and balusters is treated as a higher‑risk location in the IRC; 2018+ IRC revisions require safety glazing for guards and additional top‑rail support for structural (non‑laminated) glass balusters to resist prescribed loads if glazing fails. Most homeowners with basic carpentry skills can complete a small to mid-size project over two to three weekends, spending anywhere from $1,500 for a basic polycarbonate or screen-window setup to $15,000 or more for a full glass enclosure with operable casements. The key decisions you need to nail down before you buy a single board are: what window system fits your climate, what your local building department requires for permits, and whether your existing slab and roof can carry the added load.
How to Enclose a Patio with Windows: DIY Guide & Checklist

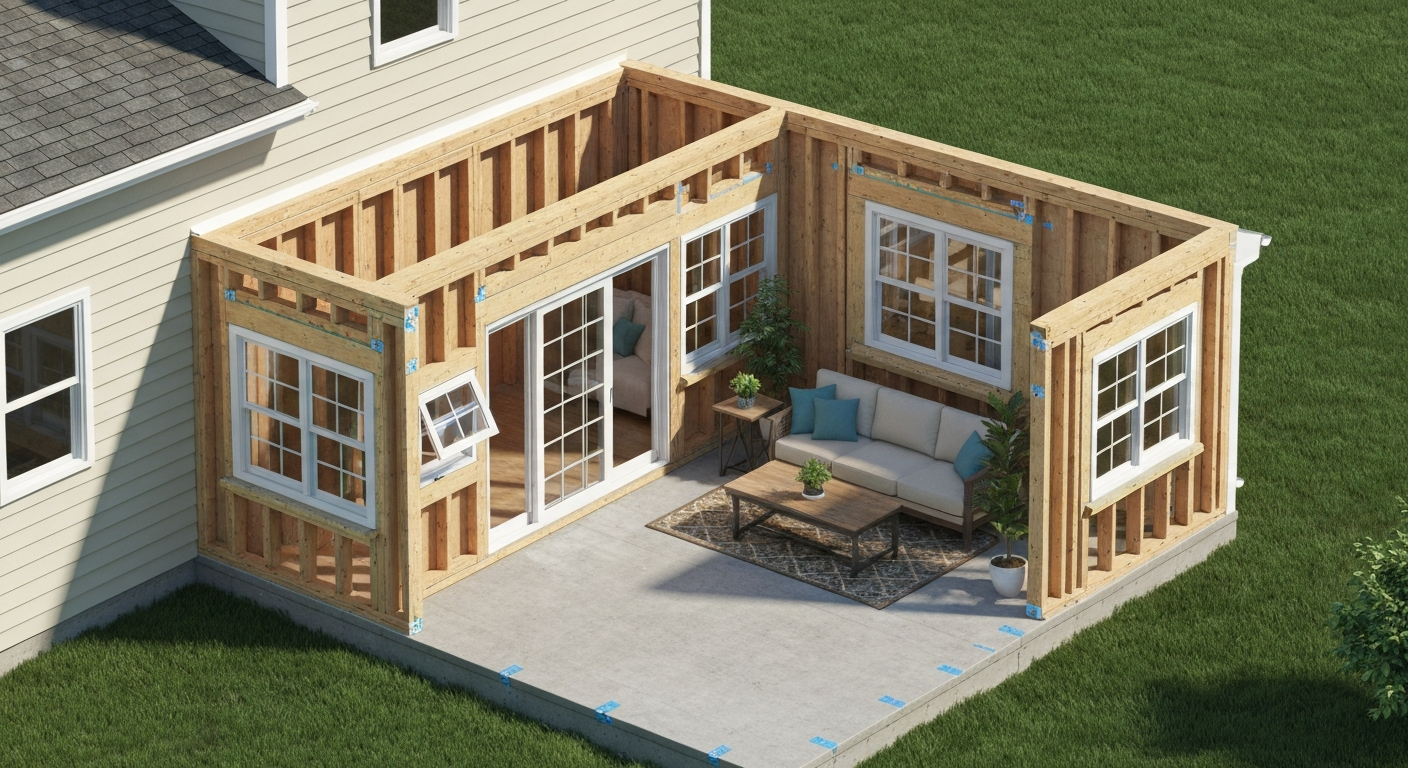
Why bother enclosing your patio with windows
The biggest payoff is usable square footage, not just a prettier porch. A windowed enclosure turns a space that sits empty for five or six months of the year into a comfortable three-season or even four-season room. Rain, wind, bugs, and UV-driven furniture fade all get handled in one project. From a resale standpoint, a properly permitted enclosed patio adds conditioned or semi-conditioned living area that shows up favorably in appraisals, especially when safety glazing and code-compliant framing are documented. Homeowners in cold climates report using their enclosed patios well into November and resuming in March by simply adding a small electric heater or mini-split. In hot southern climates, low-SHGC glazing and operable windows turn the same structure into a shaded, well-ventilated room that stays tolerable through summer afternoons.
Before you build: the decision checklist
Work through these five questions before you price materials. Skipping even one of them is how projects stall mid-construction or end up with stop-work orders.
- Budget: Establish a hard ceiling and a comfortable target. Small enclosures (under 120 sq ft) can be done for $1,500–$4,000 in materials. Medium projects (120–300 sq ft) typically run $4,000–$10,000 in materials, or $10,000–$20,000 if you hire a contractor. Large or fully glazed enclosures can exceed $30,000 installed. Decide now whether you are doing labor yourself or hiring out, because it changes material selection entirely.
- Climate: Cold climates (DOE Climate Zones 4–7) need low U-factor windows (U-0.30 or below) to prevent heat loss and condensation. Hot climates (Zones 1–3) prioritize low SHGC (0.25 or below) to limit solar heat gain. Mixed climates benefit from a balanced low-U/low-SHGC unit with a low-e coating.
- Permits: In most U.S. jurisdictions, adding a windowed enclosure triggers a building permit because you are adding structural elements and potentially changing the conditioned area of the home. Call your local building department before you draft plans. If your patio is attached to the house, an electrical or HVAC permit may also be required.
- Timeline: A small DIY project takes 2–4 weekends for an experienced builder. Budget 4–8 weekends if this is your first framing project. Permit approval can add 2–6 weeks. Factor in window lead times, which for custom or special-order units can run 4–12 weeks.
- When to hire a pro: Hire a licensed contractor if your existing roof structure needs modifications, if the project involves cutting into load-bearing walls, if your jurisdiction requires engineer-stamped drawings, or if the glazed wall area is large enough to require design-pressure testing per AAMA/FGIA guidelines. For straightforward infill framing with standard window units, an experienced DIYer can handle it.
Comparing your enclosure options
Windows are only one of several ways to enclose a patio, and the right choice depends on your budget, desired transparency, and how weathertight you need the space to be. Here is how the main options stack up.
| Option | Pros | Cons | Best For |
|---|---|---|---|
| Framed windows (fixed or casement) | Weathertight, wide window selection, familiar DIY process, best thermal performance | Higher material cost, requires full stud framing, longer build time | Year-round use, cold or mixed climates, high-quality finish |
| Sliding or folding glass wall systems | Maximizes open-air feel, elegant look, wide panels open fully | Expensive ($300–$800+ per linear foot installed), requires precise level tracks, heavy units need help | Large patios, warm climates, premium builds |
| Full glass enclosure (curtain wall style) | Maximum light and views, very upscale appearance | Highest cost, requires engineered design pressures, professional installation typically needed | High-budget remodels, showpiece outdoor rooms |
| Polycarbonate or plastic panels | Lightweight, low cost ($1.50–$4/sq ft for panels), good UV protection if UV-coated side is outward | Scratches easily, expands/contracts significantly (~3.6×10⁻⁵ /°F), lower clarity than glass | Budget builds, covered pergolas, workshops, casual use |
| Lattice partial enclosure | Very affordable, good airflow, easy DIY | No weather protection, insects pass through, no thermal benefit | Privacy screening, aesthetic borders only |
| Full framed walls (solid) | Maximum weather and thermal protection, highest structural strength | Blocks views and light, feels enclosed rather than outdoor | Storage rooms, workshops, utility spaces |
If you are deciding between a windowed enclosure and a full glass enclosure, the difference is mainly cost and complexity. Standard framed windows with double-pane glazing hit the sweet spot for most homeowners: better thermal performance than polycarbonate, far lower cost and complexity than curtain-wall glass systems, and a familiar build process. Polycarbonate panels make sense if you are building a casual workshop or garden room on a tight budget, but they are not a substitute for real windows in a living space. Lattice enclosures are covered separately on this site and work well as a partial privacy solution rather than true weather protection.
Choosing the right window system for your enclosure
Frame materials
Vinyl (uPVC) frames are the most common choice for DIY patio enclosures: they are relatively affordable, do not need painting, and have decent thermal performance. Aluminum frames are stronger and slimmer, which helps if you want more glass and less frame, but they conduct heat and cold more readily unless they use a thermal break. Wood frames look great and insulate well but require more maintenance in a semi-exposed patio environment. Fiberglass frames (like Andersen's Fibrex composite or Milgard's Fiberglass line) offer the best dimensional stability and long-term performance but cost more.
Operation types
- Fixed (picture) windows: lowest cost, no air leakage path, best for views and light where ventilation is handled elsewhere
- Casement windows: crank open outward, excellent ventilation, good seal when closed, work well in wind-prone locations
- Single or double-hung: familiar operation, moderate ventilation, easy to screen
- Sliding windows: no outward swing clearance needed, lower cost than casement, moderate ventilation
- Awning windows: hinge at top and open outward at bottom, can stay open in light rain — useful on side walls
- Multi-slide or bi-fold glass walls: essentially large-format moving windows, premium cost, maximum open-air conversion
Glazing performance: what the NFRC label tells you
Every certified window carries an NFRC label with four key numbers. U-factor measures heat loss through the whole window (lower is better; target U-0.30 or below for cold climates). SHGC (solar heat gain coefficient) measures how much solar energy passes through (lower is better in hot climates; target 0.25 or below in DOE Climate Zones 1–3). Visible transmittance (VT) tells you how much natural light comes through (higher means brighter). Air leakage, when listed, should be 0.30 cfm/sq ft or less. NFRC ratings are the only standardized, third-party way to make apples-to-apples comparisons across brands, so always check the label rather than relying on marketing language like 'triple-pane equivalent.'
Screen and insect compatibility
Most operable window units accept a standard manufacturer screen. If bug control is a priority, plan for full-height screen panels in the wall sections between windows, or choose windows that accept integrated screen tracks. In areas with heavy mosquito pressure, combining operable windows with a perimeter screen system gives you the flexibility to go full-open in cool bug-free weather and fully screened when insects are active.
Design and comfort considerations
Glass type and coatings
Standard double-pane insulated glass units (IGUs) with a low-e coating are the baseline for a comfortable patio enclosure. Low-e coatings reflect infrared energy, reducing heat transfer in both directions. For south- or west-facing walls in sunny climates, look for a 'solar control' low-e with an SHGC below 0.25. For north-facing or heavily shaded walls in cold climates, a 'passive' low-e with SHGC around 0.35–0.45 lets in solar heat while still blocking radiant heat loss. Safety glazing is required by code in many locations in a patio enclosure, especially in panels adjacent to doors and in any glazing close to the floor. Look for permanent etched markings on the glass referencing ANSI Z97.1, CPSC 16 CFR 1201, or ASTM C1048 to confirm the glass meets safety standards.
UV protection, shading, and sightlines
Standard low-e glazing blocks roughly 70–95% of UV-A and UV-B, which significantly reduces furniture fade compared to bare screen enclosures. If you have valuable outdoor furniture or flooring, look for windows with a UV transmission value listed by the manufacturer. For shading, exterior overhangs are more effective than interior blinds because they stop heat before it enters the glass. A 12–18 inch overhang above south-facing windows eliminates most of the summer direct sun while allowing low winter sun in. Keep sightlines in mind when placing windows: position the sill height no higher than 24–30 inches if you want seated views, and keep window heads at 7 feet or higher to avoid a cramped feel.
Acoustics and insect control
Double-pane windows with an air gap of 1/2 inch or more typically reduce noise by 26–32 dB (STC 26–32), which makes a meaningful difference if your patio faces a street or neighbors. Laminated glass provides better sound attenuation than tempered glass of the same thickness because the PVB interlayer damps vibration. For insect control, make sure all frame connections are caulked, install door sweeps on any new entry doors, and use foam backer rod plus sealant at every wall-to-frame transition.
Code, permits, and regulations: what to check before you start
This checklist is not exhaustive because codes vary by state, county, and municipality, but it covers the items that most commonly trip up DIY patio enclosure projects.
- Building permit: Required in most jurisdictions when you add a structural enclosure to an existing patio. Submit a site plan, floor plan, and elevation drawings. Some jurisdictions require engineer-stamped structural drawings if the enclosure attaches to the house or adds roof load.
- Zoning/setbacks: Your enclosure must meet rear- and side-yard setback requirements. In many areas a patio cover has a different (larger) setback allowance than a 'room addition,' so how you describe the project matters.
- HOA rules: Many HOAs require pre-approval for any visible exterior change. Get written approval before you pull a permit.
- Egress: If the enclosed space will be used as a sleeping room or habitable room, windows must meet egress requirements (minimum 5.7 sq ft net opening, 24-inch minimum height, 20-inch minimum width, maximum 44-inch sill height).
- Guards and fall protection: IRC Section R312 requires guards on open-sided walking surfaces more than 30 inches above grade. Guard height must be at least 36 inches (34 inches on stairs), and openings must not allow passage of a 4-inch sphere. Any glazing used as a guard or baluster is a hazardous location requiring safety glazing.
- Safety glazing (IRC R308): Glazing within 24 inches of a door, within 60 inches of a tub or shower floor, in any panel within 18 inches of the floor and larger than 9 sq ft, or in any structural guard application must be safety-glazed (tempered or laminated). Confirm glass markings reference ANSI Z97.1 or CPSC 16 CFR 1201.
- Structural/load requirements: Attached patio roofs and glazed walls must be designed for local wind and snow loads using ASCE 7-22 procedures. For most residential DIY projects, using prescriptive span tables from your local code and manufacturer-rated design pressures for window units satisfies this requirement. For larger or unusual configurations, an engineer review is wise.
- Anchor/foundation connections: Attaching new sill plates or ledger boards to an existing concrete slab requires post-installed anchors (epoxy or mechanical) engineered per ACI 318 Chapter 17. Use anchors with ICC-ES evaluation reports (like Hilti HIT-RE 500 V4 or Simpson SET-3G) and follow manufacturer torque and embedment specs exactly.
- Inspection triggers: Permit-required work is inspected at framing, rough-in (electrical/HVAC if applicable), and final stages. Do not cover framing or set window units permanently until your framing inspection is signed off.
Site prep and measurements: assessing what you are working with
Before you frame a single wall, spend a full afternoon assessing your existing patio. This step prevents the two most common mid-project surprises: an out-of-level slab and a roof that cannot carry additional load.
Checking the slab
Use a 6-foot level and a tape measure to check flatness across the entire slab in both directions. Note any low spots, cracks, or areas where water pools. A patio slab typically slopes 1/8 to 1/4 inch per foot away from the house for drainage. That slope is fine under your walls as long as you account for it when setting sill plates (use pressure-treated lumber with a capillary break, and shim to level). Serious cracks or heaving need to be addressed before you build, either by patching with hydraulic cement or consulting a concrete contractor.
Checking the existing roof
If your patio already has a roof or cover, inspect the rafters or purlins for rot, checking every member at the connection points and at any low spots where water could have sat. Confirm what the roof is attached to at the house: a ledger bolted into a rim joist or structural wall is good; a ledger toe-nailed into siding or fascia is not adequate and needs to be reinforced before you enclose the space below. If you are adding a new lean-to roof as part of the enclosure, you will need to flash and attach a ledger board to the house, which may require opening the wall to tie into structure.
Measuring for window rough openings
Rough opening (RO) size is the window unit's listed RO width and height, typically 1/2 inch larger than the unit in each direction for shimming clearance. Measure and mark every rough opening on your layout before ordering windows. Triple-check your header heights: all window tops in a given wall should share the same head height (standard is 6 feet 10 inches to 7 feet from finished floor to window head) so the framing looks intentional rather than improvised. Write your ROs on the layout plan before you order anything.
Tools and materials you will need
Site prep and framing
- 6-foot and 4-foot levels, torpedo level
- Tape measure (25-foot minimum), chalk line, speed square
- Circular saw and reciprocating saw
- Cordless drill/driver and impact driver
- Hammer drill with SDS bit set (for concrete anchor holes)
- Pressure-treated 2x4 or 2x6 lumber for sill plates, studs, headers, and top plates
- Post-installed concrete anchors with ICC-ES report (e.g., Simpson Titen HD or epoxy anchor system) and appropriate bit diameter per manufacturer
- Galvanized joist hangers, hurricane ties, and structural screws (Simpson Strong-Tie LSD or equivalent)
- Capillary break / sill gasket tape (e.g., Vycor or similar) under all sill plates on concrete
- 3-inch and 1-5/8-inch framing screws, 16d galvanized nails
Glazing and window installation
- Window units (sized to your rough openings, NFRC-rated for your climate zone)
- Self-adhering flexible flashing tape (minimum 4-inch wide, compatible with your sheathing type)
- Sloped sill pan flashing or manufactured sill pan
- Exterior-grade shims (composite or hardwood, not cedar shingles which compress over time)
- Low-expansion window and door foam (not standard expanding foam, which can bow frames)
- Exterior silicone sealant rated for windows
- OSB or plywood sheathing for wall sections between windows
- House wrap or vapor-permeable weather-resistive barrier
- Exterior trim (PVC trim board is low-maintenance around windows)
- Window lift assist suction cups for large units, safety glasses, leather gloves
Finishing
- Interior drywall or beadboard paneling and screws
- Fiberglass batt insulation (R-13 to R-21 for walls depending on climate)
- Vapor retarder (in cold climates only, on the warm-in-winter side of insulation)
- Interior trim (casing, stools, aprons)
- Caulk (paintable latex-silicone blend for interior trim, pure silicone for exterior)
- Paint primer and exterior/interior paint
- Door hardware, door sweep, and threshold for any entry doors
Step-by-step: how to build the enclosure
Step 1: Lay out and anchor the sill plates
Snap chalk lines on the slab for the outer face of each wall. Cut pressure-treated sill plates to length, place them on the chalk lines, and mark anchor locations every 24 to 32 inches, keeping anchors at least 2 inches from any slab edge. Drill anchor holes with your hammer drill per the anchor manufacturer's depth requirement (typically 2–3 inches embedment for a 1/2-inch anchor in a 3.5-inch slab). Clean holes thoroughly with a blow-out bulb and wire brush. Set capillary break tape under the sill plate before driving anchors. Torque anchors to manufacturer spec with a torque wrench, not just snug-tight.
Step 2: Frame the walls
Frame standard stud walls at 16 inches on center using 2x4s for walls up to 8 feet tall, or 2x6s if you want thicker insulation (and if your window units have a 2x6 installation profile). Cut and install cripple studs, jack studs, and king studs around each rough opening. Size your headers based on the span and local load requirements: for openings up to 4 feet in a non-load-bearing wall, a doubled 2x6 header is typically sufficient. For openings 4–6 feet, use doubled 2x8 or an engineered LVL header. Always confirm with your local code or a quick conversation with the building department's plan checker.
Step 3: Install sheathing and weather-resistive barrier
Sheath the wall with 7/16-inch OSB or 1/2-inch plywood, nailing to studs at 6 inches on edge and 12 inches in the field. Apply house wrap over the sheathing, lapping upper layers over lower layers (like shingles) by at least 6 inches. Tape all seams. This layer is your last line of defense against water infiltration if the window seals ever fail.
Step 4: Install sill pan flashing
Before setting any window, install a sloped sill pan. You can use a manufactured vinyl or aluminum pan, or fabricate one from flexible flashing tape sloped 1/8 inch per foot toward the exterior. The pan directs any water that enters the rough opening back outside rather than into the wall cavity. This step is the single most important waterproofing detail in the entire project. Do not skip it or replace it with just sealant.
Step 5: Set and fasten window units
Follow the manufacturer's installation instructions for your specific window unit: they vary by brand, and following them exactly protects your warranty and code compliance. General process: set the window in the rough opening, check for level and plumb, shim the sill first (use composite shims, not cedar, which compresses), then shim the sides minimally to hold position without racking the frame. Drive fasteners through the nailing fin or through the jamb per the manufacturer's schedule. Use low-expansion foam to fill the gap between the window frame and the rough opening framing, leaving 1/4 inch of space on all sides for the foam to expand without distorting the frame. Confirm the window opens and latches properly before foaming.
Step 6: Flash and seal windows
Apply flexible flashing tape in sequence: sides first, then head (top) last, so each layer overlaps the one below it. The head flashing must integrate with the weather-resistive barrier above. Apply a continuous bead of exterior silicone sealant at the junction between the window frame and the finished exterior cladding, but leave a weep gap at the sill so any water that gets behind the cladding can exit. Never seal the sill tight on the exterior.
Step 7: Install exterior cladding and trim
Choose an exterior cladding that matches or complements your house. Fiber cement, PVC trim board, or composite siding all work well in wet or humid climates and require minimal maintenance. Install trim around windows with a back-bevel on the top piece so water sheds rather than sits. Prime and paint all cut ends of wood or fiber cement before installation.
Step 8: Insulate, finish interior, and add doors
Fill stud bays with fiberglass batt insulation: R-13 in 2x4 walls, R-19 or R-21 in 2x6 walls. In cold climates (Zones 5–7), add a vapor retarder on the warm-in-winter (interior) face of the insulation before hanging drywall. Install interior casing around windows with a consistent reveal (1/4 inch is standard). For entry doors, choose a pre-hung exterior door rated for the wind loads in your area, and install door sweeps and weatherstripping on all four sides. If ventilation is a concern, a screened door or awning windows provide natural cross-ventilation without requiring mechanical systems.
Sample costs and timelines
These ranges are based on U.S. material prices and contractor rates as of mid-2026. Your local costs may vary by 20–30% in either direction depending on region and supply chain.
| Project Size | Sq Footage | DIY Materials Cost | Hired Labor + Materials | Permit Cost (est.) | DIY Timeline |
|---|---|---|---|---|---|
| Small | 80–120 sq ft | $1,500–$4,000 | $6,000–$12,000 | $150–$400 | 2–4 weekends |
| Medium | 120–300 sq ft | $4,000–$9,000 | $12,000–$22,000 | $300–$700 | 4–8 weekends |
| Large / full glass | 300+ sq ft | $9,000–$18,000+ | $22,000–$40,000+ | $500–$1,200+ | 8–16+ weekends |
Window units alone account for roughly 40–60% of material costs. Choosing vinyl double-pane units over aluminum-clad wood or fiberglass units can cut window costs by 30–50% with only modest performance trade-offs. On a 200-square-foot enclosure with six windows, that difference can be $2,000–$4,000. If you are hiring a contractor for any portion, get at least three bids and confirm that permit fees and inspection scheduling are included.
Condensation, leaks, and thermal comfort: common problems and fixes
Condensation on glass
Interior condensation on windows means the glass surface temperature is dropping below the dew point of the indoor air. The fix is either better glazing (higher condensation resistance, listed on the NFRC label as CR), more ventilation to lower indoor humidity, or a small heat source to keep the glass surface warmer. Condensation between the panes of an IGU means the seal has failed and the unit needs to be replaced. Exterior condensation on the outside of a window is normal on humid mornings and means your low-e coating is working correctly.
Water leaks
Most post-construction leaks in windowed enclosures come from three places: a missing or improperly installed sill pan (water enters below the window), failed head flashing (water enters above the window), or gaps at the wall-to-roof transition. Diagnose by running a garden hose over each section in sequence while a helper inside watches for drips. Fix sill pan issues by removing the window, adding flashing, and reinstalling. Fix head flashing failures with compatible flashing tape integrated into the weather-resistive barrier. Roof-to-wall transitions need step flashing and counterflashing, not just sealant.
Overheating in summer
If the enclosure becomes uncomfortably hot, start with the lowest-cost fix: add exterior shade (retractable awning, shade sail over south and west walls) and open windows for cross-ventilation during cooler parts of the day. If that is insufficient, solar-control window film (applied to existing glass) can reduce SHGC by 15–30% for around $5–$10 per square foot installed. A ceiling fan costs $100–$300 and moves a surprising amount of heat out through open operable windows. A mini-split heat pump is the nuclear option: $1,500–$3,500 installed, but it handles both summer cooling and winter heating and makes the space a true four-season room.
Seasonal maintenance to keep your enclosure in shape
- Spring: Inspect all exterior sealant lines for cracks or gaps. Re-caulk any failed areas with silicone rated for exterior use. Clean weep holes on window frames to ensure drainage is clear.
- Summer: Clean window glass with a mild soap-and-water solution and a soft cloth. Check screens for tears and repair or replace. Inspect flashing at the roof-to-wall junction after the first major rainstorm.
- Fall: Lubricate casement and awning window hardware (hinges, cranks, locking cams) with a silicone spray. Check weatherstripping on all doors and windows and replace if compression is lost. In cold climates, verify that heating is adequate to keep the space above 40°F to prevent pipe freeze if any plumbing runs through the enclosure.
- Winter: After heavy snow, clear snow loads from any glazed roof sections. Inspect for ice dam formation where the enclosure connects to the house roof and ensure attic ventilation above the connection is not blocked.
A note on related enclosure approaches
A windowed enclosure using standard framed windows is the middle path between a screen room and a full glass enclosure. For a deeper dive into full glass options, see our guide on how to enclose a patio with glass for step‑by‑step installation tips and system comparisons. If you are weighing whether to go with a full glass enclosure instead, there is more detail on that approach elsewhere on this site, including how curtain-wall style glazing is designed and priced. If budget is the main constraint, enclosing with polycarbonate or plastic panels is a legitimate option for casual use spaces. For step-by-step tips specifically on using plastic or polycarbonate panels, see guidance on how to enclose a patio with plastic. And if your goal is mostly privacy or partial wind blocking rather than full weather protection, a lattice enclosure can be a simpler starting point. Whatever direction you choose, the framing and permit principles in this guide apply across all of them. For step-by-step instructions on how to enclose a patio with walls, see our detailed guide on methods, materials, and permitting considerations.
FAQ
What key decisions should I make before committing to enclosing a patio with windows?
Confirm budget (materials + labor + permits + contingency 10–20%); assess climate (heating/cooling needs, snow/wind loads, humidity); check site constraints (roof tie‑in, slab condition, drainage, sightlines); review local codes/HOA requirements and whether permits are needed; decide intended use (year‑round living, seasonal sunroom, bug‑free porch); and determine skill level — if structural roof work, complex glazing, or code compliance is required, plan to hire a licensed pro.
What are the main enclosure types and pros/cons for each?
Framed windowed enclosure (traditional framed walls with operable windows): good thermal control, relatively DIY‑friendly; requires framing, flashing, insulation. Sliding/folding glass systems (multi‑slide or bi‑fold): modern look, large openings, higher cost and requires precise installation. Full glass curtain or fixed glass wall: premium daylight and views but needs engineered design for wind loads and higher cost. Polycarbonate/multiwall panels: lightweight, lower cost, good diffuse light and UV protection, expands thermally and needs special fastening. Lattice/partial enclosures: inexpensive, decorative, limited weather protection. Full framed walls (wood/steel stud + windows): best for full thermal enclosure and integration with HVAC; most work and higher cost.
What building code and safety requirements apply to patio enclosures with windows?
Follow local building code; IRC highlights: guards on open sides >30" above grade require 36" height and 4" sphere rule (R312/R321); hazardous glazing locations require safety glazing (tempered/laminated) per R308/CPSC/ANSI; fenestration and roofs must meet structural loads per ASCE 7 (wind/snow); large glazed walls may need manufacturer design pressures or FGIA/AAMA guidance. Always verify local amendments and inspection requirements.
When do I need engineered design or a professional installer?
Hire an engineer/architect or pro when: enclosing changes roof framing or adds a new roof; glazing area is large or continuous requiring design pressures; site wind speeds/exposure are high; existing structure is compromised; anchors to concrete require special anchor design or inspection; or when permits require stamped plans or structural calculations. Also consider pros for complicated flashing, multi‑slide systems, or to preserve manufacturer warranties.
What step‑by‑step plan can I follow to build a windowed patio enclosure (overview)?
1) Evaluate and document existing patio and utilities; 2) Verify permits and HOA rules; 3) Prepare site: repair slab, ensure drainage, remove obstacles; 4) Measure and make layout plan and material list; 5) Choose foundation/anchoring (sill anchored to slab, new concrete footing, or perimeter ledger); 6) Frame walls and openings, tie into existing roof or build new roof structure per plans; 7) Select and install windows/doors per manufacturer instructions, shim and flash; 8) Install flashing, continuous weather barrier, and sealants; 9) Insulate walls/roof and provide ventilation/heating options; 10) Install interior/exterior trim, finishes, and final weatherproofing; 11) Final inspections and commissioning.
What are the foundation and anchoring options for attaching new framed sills to an existing patio slab?
Common options: fasten pressure‑treated sill plate to concrete slab with code‑approved concrete anchors (wedge, sleeve, or epoxy anchors) following manufacturer spacing and ACI/ICC guidelines; use a continuous perimeter footing and framed bottom plate if slab is unsuited; install an isolated concrete strip or piers for new framed posts; or use adjustable post bases on slab with appropriate sealed perimeter flashing. Follow anchor manufacturer torque/edge‑distance specs and pull‑test or inspection if required.
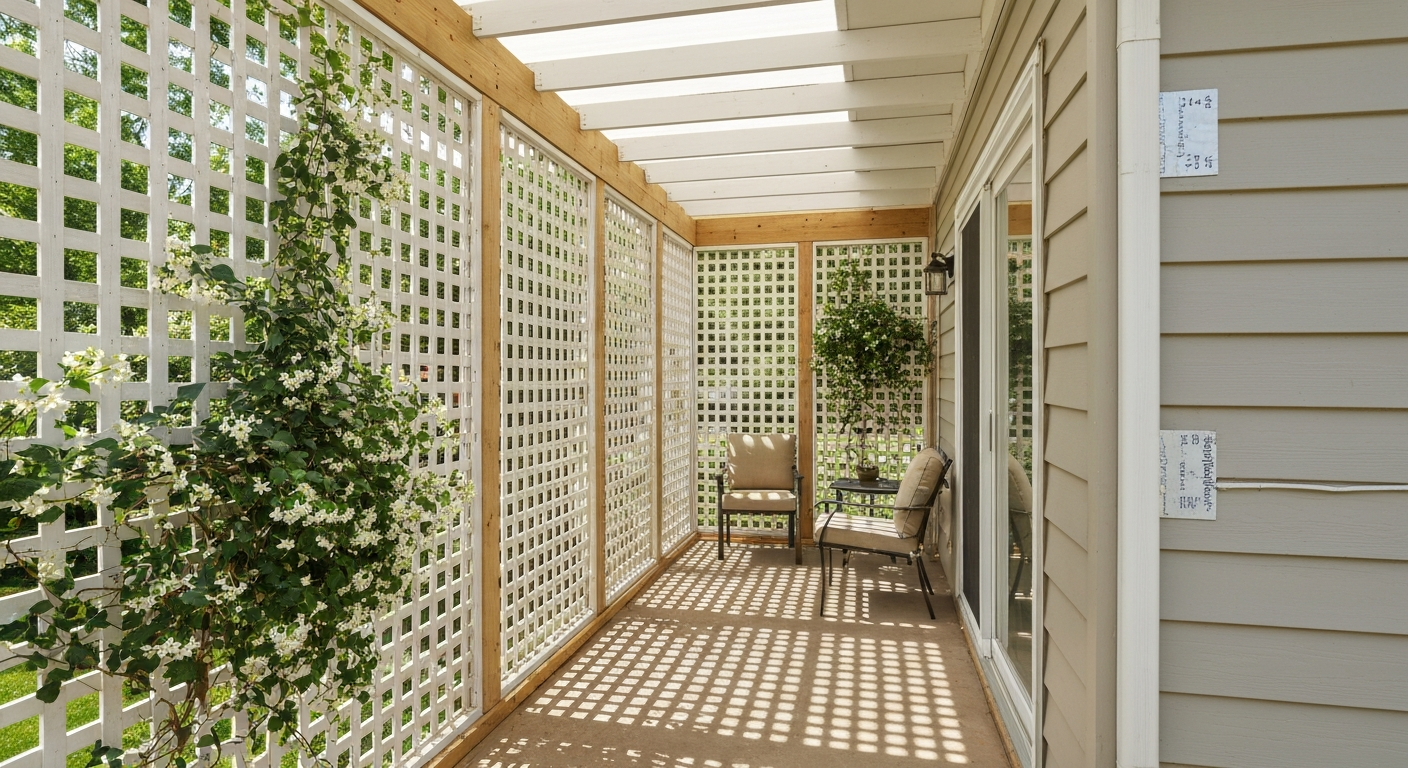
How to enclose a patio with lattice: step-by-step DIY guide, materials, permits, attachments, finishing & weatherproofing
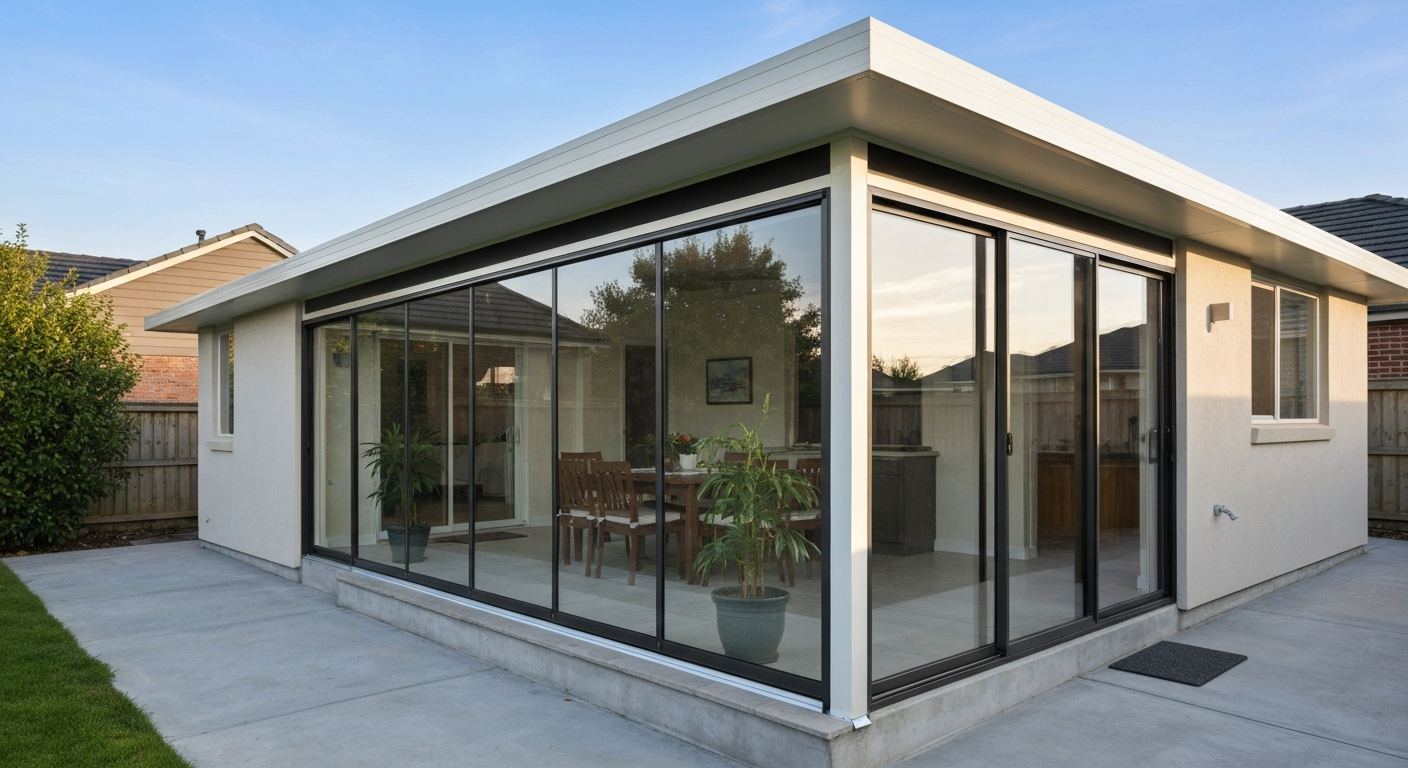
How to enclose a patio with glass: DIY step-by-step guide to a weatherproof outdoor room, tools, costs, permits
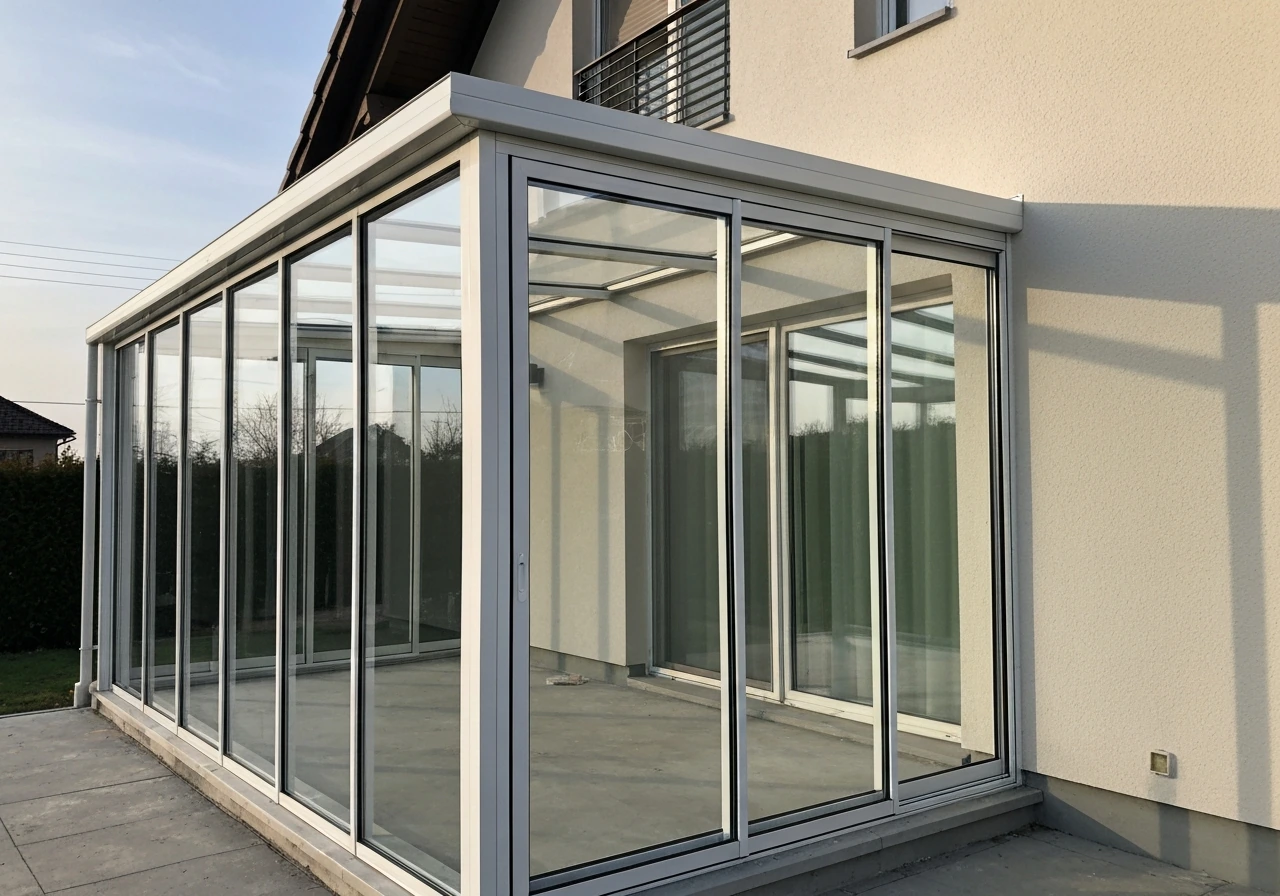
Step-by-step guide to build a glass patio enclosure: permits, measurements, frame, glass, sealing, ventilation, safety,