
You can transform a bare deck or patio into a lush, flower-filled space in a weekend using a handful of well-chosen containers, the right potting mix, and a simple layout plan. The key is matching flowers to your actual light conditions, picking containers with proper drainage, and arranging pots in grouped displays that feel intentional rather than scattered. Whether you have a sprawling timber deck or a tight concrete patio, the same core principles apply: plan before you plant, respect your sun and shade zones, and keep weight loads in check so your structure stays safe.
How to Decorate a Deck or Patio with Flowers: DIY Guide

Felix Brennan
6 Aug 2026
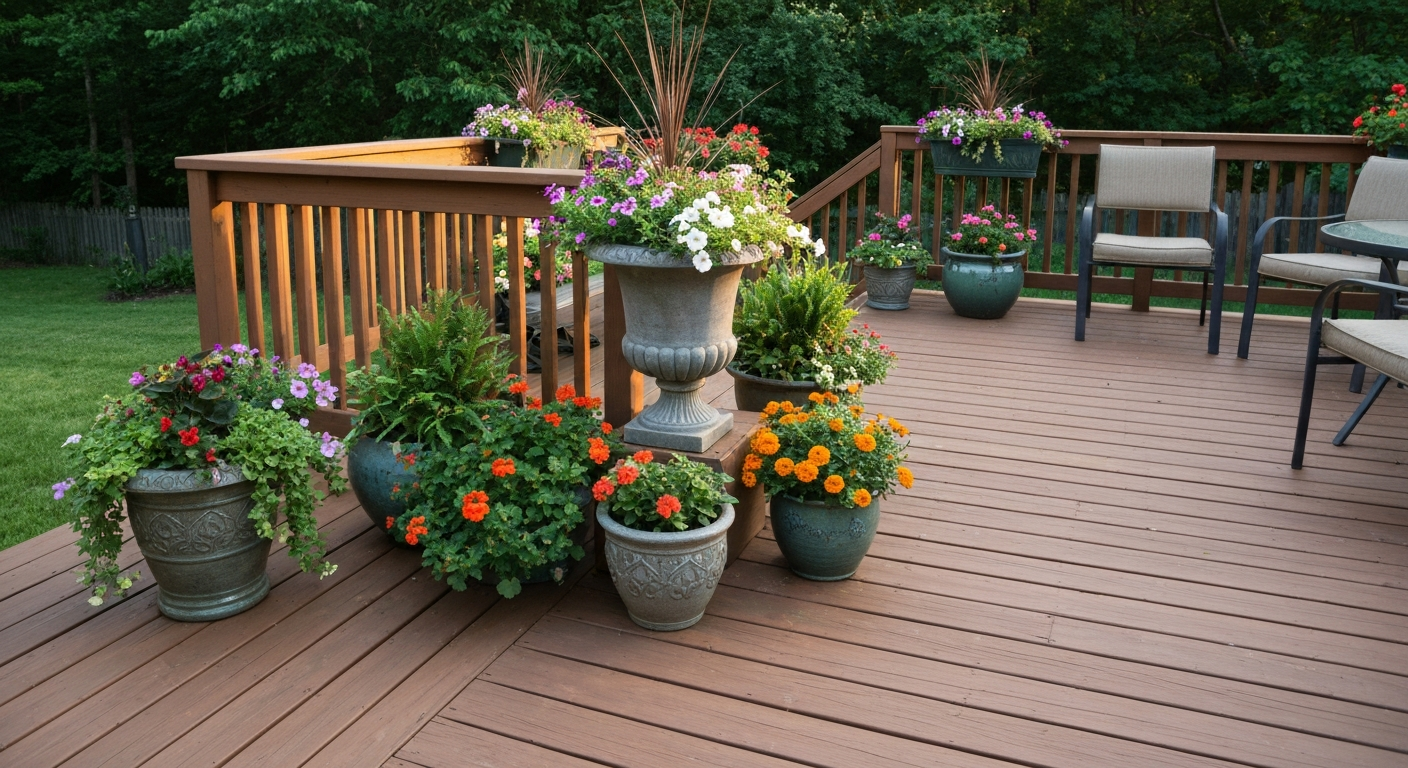
Quick planning checklist before you buy a single pot
Skipping the planning stage is the number one reason patio flower setups look thrown together or fail by midsummer. Give yourself 30 minutes with a notepad and you'll save money, avoid dead plants, and end up with a layout you actually enjoy. Here's what to nail down before you shop.
Sketch your space
A rough hand-drawn sketch on graph paper (each square equals one foot) is all you need. Mark doors, steps, furniture, and the directions the walls or railings face. Note which surfaces are fixed and which move around. You don't need to be precise, but knowing you have 12 feet of railing on the south side and a 4-by-6-foot corner near the back door will shape every decision you make.
Map your sun and shade
Walk out to your patio at 9 a.m., noon, and 3 p.m. on a clear day and mark which areas are in full sun, which are dappled, and which barely see direct light. The standard definitions matter here: full sun means at least 6 hours of direct sunlight per day, partial sun or partial shade falls in the 3 to 6 hour range (and whether that's morning or afternoon sun makes a real difference to plants), and shade means fewer than about 2 hours of direct sun. Most patios have at least two distinct zones, and picking flowers that match each zone is the single biggest factor in whether your display thrives or struggles.
Budget and traffic flow
Set a realistic budget before you walk into a garden center. A solid starter display for a mid-size patio typically runs $80 to $200 in containers and plants, depending on pot size and whether you mix annuals with one or two perennials. Also mark on your sketch where people walk, where chairs pull out, and where the grill or side table lives. Pots in traffic paths get knocked over constantly, and blocking natural movement makes the space feel cramped. Aim to keep pathways at least 36 inches wide.
- Sketch your patio to scale, noting fixed features like doors, stairs, and furniture
- Record sun exposure at three times of day (9 a.m., noon, 3 p.m.) across different zones
- Note which areas get afternoon sun vs. morning sun — this affects heat-sensitive plants
- Identify railing lengths, wall space, and corner spots where displays could anchor
- Measure clear walkways and keep paths at least 36 inches wide
- Set a container and plant budget before shopping
- Flag any weight-sensitive surfaces (elevated decks, balconies, screened enclosures)
- Check for overhead clearance if you plan to hang baskets
Materials and tools you'll actually need
Having the right gear before you start avoids multiple trips to the store mid-project. The lists below cover everything from basic container gardening to building a simple planter box and dealing with patio paving prep.
Container planting supplies
- Containers in a range of sizes (see container section for sizing guidance)
- High-quality soilless potting mix (not garden soil)
- Perlite or vermiculite to improve drainage in dense mixes
- Slow-release granular fertilizer (polymer-coated, such as Osmocote or equivalent — standard formulas release over roughly 3 to 4 months)
- Saucers or drip trays for each pot
- Pot feet or risers to lift containers off the deck surface
- Drainage mesh or fine landscape fabric to cover drainage holes
- Watering can or hose with a soft-spray wand
- Hand trowel and transplanting dibber
- Waterproof gloves
- Drip irrigation kit (optional but useful for 6+ pots): timer, 1/4-inch tubing, emitters rated at 0.5 to 2.0 GPH
Tools and materials for building planters and mounting displays
- Tape measure and pencil
- Circular saw or miter saw (or ask the lumber yard to make cuts)
- Drill and bits (including countersink bit)
- Exterior-grade screws: 1-5/8" and 2-1/2" lengths
- 1x6 and 2x4 cedar, redwood, or pressure-treated lumber rated for ground contact
- Landscape fabric or heavy polyethylene liner for inside planter boxes
- Staple gun with 1/2" exterior staples
- Level and speed square
- Sandpaper (80-grit and 120-grit)
- Exterior wood stain, sealant, or paint
- Joist hangers or L-brackets if wall-mounting
- Railing planter mounting hardware (manufacturer-specific clips or saddle mounts)
- Lag screws and wall anchors rated for the load if attaching to masonry or framing
Paving and edging supplies (brief primer)
If flowers around the perimeter of your patio meet flagstone, pavers, or concrete slabs, you'll want a clean edge between the planting area and the paving surface. For new flag-paved borders, you'll need bedding sand or mortar, a rubber mallet, and pointing compound or jointing sand. The full process of cutting, laying, and pointing patio flags is its own project, we cover both flagging and pointing in dedicated articles on this site. For full step-by-step instructions on laying patio flags, see our guide on how to flag a patio. The short version: keep planting beds at least 4 inches away from unfilled joints to prevent root and water damage, and make sure any planter drainage flows away from flag joints rather than pooling and softening the bed. For step-by-step guidance on joint preparation, mortar mixes, and curing times, see our article on how to point patio flags (internal link).
Choosing the right flowers for your sun and shade conditions
The fastest way to waste money on patio flowers is to buy what looks prettiest at the garden center without checking your light zones. A petunia in a shady north-facing corner will limp along all summer and barely flower. Get the light match right first, then choose colors and forms you love.
Full sun (6+ hours of direct sun)
South- and west-facing patios with open sky overhead are the easiest zones to work with because the widest range of showy annuals thrive here. The challenge is heat and drying out, so choose sun-lovers that tolerate some drought once established, and be ready to water once or even twice a day in midsummer.
| Plant | Type | Habit | Notes |
|---|---|---|---|
| Petunia | Annual | Trailing/mounding | Prolific bloomer, deadhead or use Wave types for self-cleaning |
| Calibrachoa (Million Bells) | Annual | Trailing | No deadheading needed, very heat-tolerant |
| Zonal Geranium | Annual/tender perennial | Upright | Drought-tolerant once established, long season |
| Lantana | Annual/tender perennial | Upright/spreading | Extremely heat-hardy, attracts pollinators |
| Portulaca | Annual | Low/spreading | Thrives in hot dry spots, closes at night |
| Marigold (dwarf) | Annual | Upright | Easy, long-blooming, deters some pests |
| Salvia (annual types) | Annual | Upright | Spiky form adds good contrast in groupings |
| Gaillardia | Perennial (Zones 3-9) | Upright | Drought-tolerant, rebloom season-long |
| Black-eyed Susan | Perennial (Zones 3-9) | Upright | Great in larger containers, native pollinator plant |
Partial sun or partial shade (3 to 6 hours)
Many patios fall into this middle zone, especially those with a pergola, roof overhang, or mature trees nearby. Morning sun with afternoon shade is generally more forgiving than the reverse, since afternoon shade protects plants from the most intense heat. This zone gives you solid options from both the sun and shade plant lists.
- Impatiens (standard and SunPatiens for brighter spots)
- Fuchsia (especially in hanging baskets with afternoon shade)
- Begonia (wax/fibrous types and tuberous types for shadier ends of this range)
- Lobelia (trailing or upright, excellent in baskets)
- Bacopa (trailing, delicate white or lavender blooms)
- Torenia (Wishbone Flower) — underused and beautiful in partial shade
- Diascia and Nemesia for cooler climates with partial sun
- Heuchera (Coral Bells) — grown mainly for foliage but some produce small flowers
Shade (fewer than 2 hours of direct sun)
True shade is the trickiest zone for flowers because most bloomers need at least some sun. Your best bet here is to lean on shade-tolerant flowering plants and supplement with foliage plants that provide color through leaf texture and tone rather than blooms alone.
- Impatiens (traditional Walleriana types — note downy mildew risk in humid areas; use resistant varieties)
- Tuberous begonias in deep shade-tolerant varieties
- Caladium (foliage color, not flowers, but striking)
- Ferns as textural backdrop
- Astilbe in containers for plume-style blooms in light to medium shade
- Bleeding Heart (Dicentra) as a spring container specimen in cool climates
Containers, soil and drainage: what actually works
Choosing your containers
Container material affects weight, durability, watering frequency, and cost. Heavier pots like terra cotta and concrete look beautiful but add significant dead load to your deck, and they break in hard freezes. Lightweight resin and fiberglass pots are far more practical on elevated decks and screened patios, and modern versions look nearly identical to stone or ceramic from 10 feet away. Here's a quick comparison to help you decide.
| Material | Approx. Weight (12" pot) | Durability | Insulation | Cost Range | Best Use |
|---|---|---|---|---|---|
| Terra cotta | 8-15 lbs empty | Moderate (cracks in frost) | Poor (heats/dries quickly) | $5-$25 | Small pots, mild climates |
| Glazed ceramic | 10-20 lbs empty | Good (if frost-proof glazed) | Moderate | $20-$80 | Accent pots, focal points |
| Concrete/hypertufa | 20-40 lbs empty | Excellent | Good | $30-$100+ | Ground-level patios only |
| Resin/plastic | 1-4 lbs empty | Good (UV-stabilized only) | Poor | $10-$60 | Decks, balconies, hanging |
| Fiberglass | 2-6 lbs empty | Excellent | Moderate | $40-$150 | Elevated decks, premium look |
| Fabric grow bags | Under 1 lb empty | 2-4 seasons | Good (air prunes roots) | $3-$15 | Seasonal use, vegetables/annuals |
| Wood (cedar/redwood) | Varies | Good with sealing | Good | $30-$100+ (DIY less) | Planter boxes, railing planters |
Sizing your pots
Pot size determines how many plants fit, how often you water, and how the display reads from a distance. A common sizing guide: 4 to 6-inch pots work for small fillers, 1-gallon pots suit a single small annual, 2 to 5-gallon pots handle larger annuals and most perennials, and 10-gallon-plus containers are needed for shrub-scale specimens or large mixed plantings. When combining multiple plants in one pot, use mature spread as your spacing guide and match water and light requirements across all plants in that container.
Potting mix: skip the garden soil
Standard garden soil compacts in containers and can introduce pests and disease. Use a soilless potting mix instead. A reliable DIY blend follows what commercial growers have used for decades: roughly equal parts peat moss or coir, perlite or vermiculite, and composted bark or finished compost. This gives you the right balance of drainage, air space, and water retention. For most flowering annuals in containers, a quality bagged potting mix from the hardware store works fine, but avoid the cheapest bags, which often use heavy filler media that stays waterlogged.
Drainage: the gravel myth
Here's one that catches almost everyone out. Putting gravel or rocks in the bottom of a pot does not improve drainage. Research on container media shows it actually creates a perched water table, meaning water sits above the gravel layer right in the root zone rather than draining through. Washington State University Extension has addressed this directly: skip the gravel layer, use a well-draining potting medium throughout the entire pot, and make sure you have adequate drainage holes at the bottom. If you want to keep soil from washing out through large holes, cut a small piece of fine mesh or landscape fabric to cover the hole, that's all you need.
Liners, saucers and root rot prevention
Saucers are useful to protect deck surfaces but become a root-rot risk if water pools in them for more than a day or two. Elevate pots on pot feet or risers so the drainage hole isn't sitting directly in standing water. Self-watering inserts with a clear reservoir gap between the water chamber and the soil are different from solid saucers and actually work well for annuals that like consistent moisture. For planter boxes, use a polyethylene liner or landscape fabric (stapled to the interior) to protect the wood and extend its life, but always drill drainage holes through the liner and box floor before planting.
Arranging pots and creating displays that look deliberate
Random pots scattered across a patio look like a flea market. Grouped displays with varied heights, intentional repetition, and a clear focal point look like a designed outdoor room. The principles below work regardless of whether you have 5 pots or 25.
Grouping and the rule of odd numbers
Group containers in odd numbers (3, 5, 7) because even groupings tend to read as formal and flat. Place the tallest pot at the back or center, a mid-height pot beside it, and a low trailing pot at the front edge. This tiered silhouette reads well from a distance. Leave 4 to 6 inches between pots for air circulation, which reduces fungal problems. Repeat a color or plant type across two or three groups elsewhere on the patio to create visual rhythm rather than a chaotic mix of unrelated plants.
Scale and proportion
Pots that are too small for the space disappear visually. As a rough guide, anchor displays with at least one container that's 16 inches or larger in diameter. On a deck with 8-foot-tall walls or fencing, a single 10-inch pot reads as a forgotten afterthought. Conversely, one massive 24-inch urn as a focal-point specimen at the top of the stairs or in a corner can anchor the entire space and requires only one impressive plant.
Creating focal points
Every good patio display has one spot where the eye lands first. That might be a statement container at the top of the steps, a large vertical trellis planter against the back wall, or a pair of tall matching urns flanking the door. Set your focal point first, then arrange supporting displays around it. Use color to reinforce the focal point: saturated or contrasting colors at the center, softer or complementary tones radiating outward.
Color combinations that work outdoors
- Hot palette (red, orange, yellow): energizing, reads well against grey or brown decking
- Cool palette (purple, blue, white, silver foliage): calming, great for shaded patios
- Monochromatic (one color in multiple shades): sophisticated, works in small spaces
- Contrasting anchors (one bold color repeated 3x across the display): creates cohesion without matchy-matchy look
- White as a connector: a white-flowered plant in each group ties mixed-color schemes together
Small-patio solutions: making every inch count
A tight patio or small deck doesn't mean a sparse display. It just means every pot needs to earn its place. The key is going vertical, choosing compact plant forms, and using every structural surface you already have. If you're working with a particularly small or constrained patio, a dedicated look at small-space patio flower decorating is worth exploring for more focused ideas alongside what follows here. For step-by-step ideas and plant lists, see our guide on how to decorate my patio with flowers. For step-by-step tips and layout ideas for tight spaces, see how to decorate a small patio with flowers. For more focused ideas and step-by-step layouts, see our guide on how to decorate a patio with flower pots.
Vertical displays and wall space
Walls, fences, and the posts of a screened enclosure are usable growing space. A simple wall-mounted pocket planter or a vertical pallet garden can hold 6 to 12 small plants in a footprint of 2 square feet. Tiered plant stands (3 to 5 tiers) let you display 8 to 15 pots in a 2-by-2-foot footprint. Position trailing plants on upper tiers so they cascade downward, and use upright or mounding forms at the base.
Railing planters
Railing planters hook over or clamp to deck railings and move your display off the floor entirely. They come in 24-inch and 36-inch lengths and hold 1 to 2 gallons of soil. Use trailing plants like calibrachoa, lobelia, or bacopa that spill over the front face, and keep the pot weight manageable: a 24-inch railing planter filled with wet soil and plants can weigh 12 to 18 pounds. If your railing is a standard deck railing designed to resist a 200-pound concentrated horizontal load as required by code, a single railing planter is not a structural concern, but don't line every linear foot of railing on an older deck without checking that the balusters and top rail are in solid condition.
Compact plant choices for tight spaces
- Dwarf or compact marigolds (8-10" height) instead of standard 18" types
- Miniature roses in 2-gallon pots for a high-impact look in a small footprint
- Calibrachoa — massive flower output from a 10" hanging basket
- Dwarf zinnias like 'Zahara' series for hot spots
- Violas and pansies in early spring before heat-loving annuals go in
- Dwarf begonias for shade spots — mature at under 10 inches
How to display flower pots on a patio: stands, risers and hanging solutions
How you support and position pots changes the visual impact of your display and protects both your plants and your deck surface. Getting this right also makes watering, rotating, and moving plants for the season much easier. For a full deep-dive into displaying pots creatively, the dedicated article on how to display flower pots on a patio covers many more arrangements, but here are the core options and trade-offs.
Stands and risers
Pot feet (small rubber, terracotta, or cast-iron risers placed under a single pot) lift containers just enough to allow drainage and air circulation beneath. They're inexpensive and work for any pot. Plant stands (wrought iron, wood, or powder-coated steel) raise pots 12 to 24 inches off the ground and add visual height to ground-level displays. When stacking pots on stands on a wood deck, use waterproof saucers and check the contact points periodically for moisture damage.
Hanging baskets
A 12-inch hanging basket filled with wet soil and plants can weigh 20 to 30 pounds. Before you hang one, locate the overhead beam or joist, not just the decking or ceiling panel. Use a screw hook with a minimum 3/8-inch shank diameter rated for the weight, driven into solid framing (not just drywall or thin screening). On screened or covered patios, confirm the porch ceiling framing can handle the load, attach to structural members only. Swivel hooks let you rotate baskets toward the light without unhooking them.
Saucers and mobility tips
If you move large pots seasonally, put them on wheeled plant caddies from the start. A 15-gallon pot filled with wet soil and a large plant can weigh 60 to 80 pounds or more. Rolling it is far better than lifting, especially on a wood deck where dragging damages the surface. Caddy wheels rated for 50 to 150 pounds cost $8 to $20 and pay for themselves the first time you need to rearrange.
A word on load limits
Standard residential deck design in the US is based on a minimum live load of 40 pounds per square foot under the 2024 International Residential Code. That's a meaningful number: a dense arrangement of large water-filled planters can add up quickly. One gallon of water weighs 8.34 pounds, and a 15-gallon planter holding wet soil (which holds considerably more water than its pot volume suggests) can weigh 80 to 100 pounds. Spread large pots across the deck surface rather than clustering them all in one corner, and if you're planning a substantial permanent raised bed, a row of concrete planters, or anything that concentrates heavy loads in one area of an older or unknown-specification deck, get a structural engineer's opinion. This is especially true for screened enclosures or balconies where the framing specs may differ from a standard ground-level deck.
Build a simple DIY planter box in an afternoon
A cedar planter box is one of the most satisfying one-day builds for a patio. You don't need advanced woodworking skills, just a tape measure, a saw (or pre-cut lumber from the yard), a drill, and a few hours. The dimensions below make a compact 24-inch by 12-inch box, about 12 inches tall, a versatile size that fits on railings, low benches, or the deck floor, and holds enough volume for a nice mixed annual display.
Materials and cut list
| Part | Material | Dimensions | Qty |
|---|---|---|---|
| Long side panels | 1x6 cedar | 24" long | 4 (2 per side, stacked) |
| Short end panels | 1x6 cedar | 10-1/2" long | 4 (2 per end, stacked) |
| Bottom slats | 1x4 cedar | 22-1/2" long | 3 |
| Corner posts (inside) | 2x2 cedar | 10-1/2" long | 4 |
| Bottom support cleats | 1x2 cedar | 10-1/2" long | 2 |
Step-by-step assembly
- Cut all pieces to length using the cut list. If you don't own a saw, most home improvement stores will make cuts for a small fee.
- Sand all pieces with 80-grit sandpaper, then finish with 120-grit. Pay extra attention to top edges where hands will rest.
- Apply exterior wood stain or sealant to all pieces before assembly — it's much easier now than trying to reach interior corners later. Let dry fully.
- Attach the two bottom support cleats to the inside bottom edges of the two long side panels, flush with the bottom, using 1-5/8" exterior screws (pre-drill to avoid splitting).
- Stand the four 2x2 corner posts upright and attach the long side panels to them using 2-1/2" screws, two per board per post, countersunk. Stack both boards on each side before moving to the ends.
- Attach the short end panels to the corner posts the same way, completing the rectangular box. Check that it sits square by measuring diagonals — they should be equal.
- Flip the box upside down and attach the three bottom slats across the bottom support cleats with 1-5/8" screws, leaving a 1/4" gap between each slat for drainage.
- Flip right-side up. Drill three additional 3/4" drainage holes through any remaining low points if the gaps seem insufficient.
- Cut landscape fabric or polyethylene liner to fit the interior and staple it around all four sides, leaving the bottom slat gaps open. This protects the wood from constant soil contact.
- Fill with a soilless potting mix to within 2 inches of the top. Mix in slow-release granular fertilizer per the package rate. Plant your flowers, water thoroughly, and place on pot feet to allow drainage.
Mounting notes for railings and screened patios
If you want to mount this planter on a railing, add two notches or a saddle bracket on the bottom to keep it from shifting. On screened enclosures, never attach heavy planters directly to the screen framing, those lightweight aluminum or wood screen frames are not structural. Mount any wall-hung or railing planter to the actual framing members behind the screen using lag screws long enough to reach solid wood (typically 2-1/2 to 3 inches of penetration into framing). For anything over 20 pounds, use two mounting points at least 12 inches apart.
Watering, fertilizing, and keeping plants healthy all season
Container plants need more attention than in-ground plantings because the root zone dries out faster and nutrients leach out with every watering. Setting up a consistent routine in the first two weeks of the season means you'll spend less time troubleshooting wilted or yellowing plants later.
Watering frequency and drip systems
In peak summer heat, most containers on a sunny patio need water daily. The finger test is your best guide: push your finger an inch into the mix, and if it's dry, water thoroughly until it drains from the bottom. For 6 or more containers, a simple drip timer system saves significant time. Use 0.5 to 1.0 GPH emitters for small pots and 1 to 2 GPH emitters (or two emitters) for larger planters over 5 gallons. Set the timer to run in the early morning, determine your run time by watering manually and measuring how long it takes to reach thorough saturation, then program that duration. Adjust as the season and heat level change.
Fertilizing container flowers
Mix a slow-release granular fertilizer into the potting mix at planting time. Standard polymer-coated formulas (like Osmocote 14-14-14) release nutrients over roughly 3 to 4 months at moderate temperatures. Supplement with a liquid bloom fertilizer every 2 weeks once plants are actively flowering, container plants exhaust nutrients faster than the slow-release alone can keep up with in heavy bloomers like petunias and geraniums. Use a balanced liquid fertilizer early in the season and shift to a higher-phosphorus formulation once you want to push bloom production.
Deadheading and seasonal maintenance
- Deadhead (remove spent blooms) weekly for plants like geraniums, marigolds, and dahlias to encourage rebloom
- Self-cleaning varieties like Wave petunias and calibrachoa don't need deadheading
- Trim leggy annuals like petunias back by one-third in midsummer to refresh growth
- Remove any yellowing or diseased leaves promptly to reduce fungal spread
- Check pot feet and risers monthly — algae and moisture can cause them to deteriorate or stain the deck
- In late fall, empty non-hardy containers, clean them with diluted bleach solution, and store inside for winter
Common pests in patio containers
Aphids, spider mites, and fungus gnats are the most common container-plant pests on patios. Aphids cluster on new growth and can be knocked off with a firm spray of water or treated with insecticidal soap. Spider mites thrive in hot, dry conditions and appear as stippled, faded leaves with fine webbing underneath, increase air circulation and use neem oil or miticide spray. Fungus gnats come from overwatered soil; letting the top inch dry between waterings usually controls them, or use yellow sticky traps. Avoid broad-spectrum pesticides on flowering plants, since they harm the pollinators that help your blooms thrive.
Integrating flowers with patio paving and edging
If your patio has a flagstone, paver, or concrete surface, flower displays look their best when they respond to the paving layout rather than fighting it. A few practical notes on how flowers and paving interact, plus when to get deeper into flagging and pointing as separate projects.
Keep planting beds and perimeter pots at least 4 inches from unfilled or recently pointed joints in flagstone or paver surfaces. Root growth and irrigation runoff from containers can soften sand-set joints and shift flags over time. If you're planning to lay or re-lay patio flags as part of a wider patio upgrade, that's a separate and detailed project, the full process of how to flag a patio and how to point patio flags each deserve their own step-by-step treatment, including mortar ratios, joint widths, and curing times. For help calculating quantities, see how many flags do I need for my patio. Once paving is complete and joints are cured (allow at least 48 to 72 hours for mortar-set pointing compound), placing potted flowers on or beside the flagged surface is straightforward and safe.
For a cleaner look between the paved area and a planting border, consider a metal or stone edging strip installed flush with the flag surface. This keeps mulch and soil from migrating onto the paving and gives the entire patio a finished edge that looks intentional. Brick or small cobble borders set in mortar work beautifully as a visual frame between a flagged patio and a flower bed, and they provide a stable edge to butt container bases against.
FAQ
What structural and safety regulations should the article cite when advising about weight and mounting on decks and balconies?
Cite model code live‑load and guardrail requirements: IRC/IBC live load minimum 40 psf for decks/balconies (IRC R301.5), and 200 lbf concentrated horizontal load for guards/handrails (IBC/IRC references). Also reference OSHA fall‑protection criteria (29 CFR 1926.502) and American Wood Council guidance on when to consult a structural engineer (DCA6). Provide the exact code citations and link to the model code text and AWC FAQ so homeowners can verify dimensions and limits before adding heavy planters.
How should the article help homeowners calculate pot and planting weights to compare with deck load limits?
Give conversion constants and calculation steps: 1 US gallon of water ≈ 8.34 lb. Provide sample calculations for saturated container weight (pot volume in gallons × 8.34 + dry soil/media and pot weight + plants). Include examples: e.g., a 20‑gal resin planter holds ~20 gal water → ~167 lb water + ~15 lb soil/pot = ~182 lb. Show how to convert total planter weight to pounds per square foot (divide total weight by the deck area supporting it) and flag when to consult an engineer (if near/exceeding 40 psf or when concentrated loads are applied to railings/posts). Reference AWC DCA6 and code resources.
What vetted sources are needed for plant selection and light/exposure definitions?
Use land‑grant extension factsheets for light categories and plant lists (e.g., Rutgers NJAES FS1215, UMN, UMD extension). Define 'full sun' (≥6 hours), 'partial sun/partial shade' (~3–6 hours), and 'shade' (<2 hours). Use extension plant lists to provide region‑appropriate annuals, perennials, hanging‑basket and trailing vs. upright habit recommendations, with expected mature height/spread and bloom season. Include USDA hardiness zone or regional hardiness references for perennials.
Which authoritative sources should inform container mixes, drainage advice and fertilizer use?
Reference university extension and specialty sources: WSU Extension on the perched water table myth (no gravel layer), PLOS ONE experimental paper on drainage layers, ATTRA/NCAT potting mix recipes, and UMass extension on media physical properties. For fertilization, cite UF/IFAS guidance on controlled‑release fertilizers (release profiles vary with temperature) and include recommended CRF formulations and feeding intervals for containers.
What irrigation hardware specifications and practical emitter sizing should the article include?
Provide manufacturer and extension guidance: typical emitters 0.5, 1.0, 2.0 GPH; operating pressures ~10–30 psi. Recommend emitter sizing by pot size (small pots 0.5–1 GPH; larger planters 1–2 GPH or multiple emitters). Walk through a test‑run method (water to first runoff, measure minutes, set timer). Cite Toro product specs and Penn State Extension irrigation practice for containers and overflow/backup guidance.
What concrete materials and tools lists should be provided for DIY builds (planter boxes, railing planters, vertical gardens)?
Provide itemized materials and tool lists for each build: lumber (pressure‑treated, cedar or composite), fasteners (stainless/galvanized screws), exterior wood glue, landscape fabric, potting mix ingredients (peat or coir, perlite/vermiculite, composted bark), drainage‑rated pots and hangers, lag bolts/through‑bolts with washers for mounting, brackets, water‑resistant sealant/paint, drip tubing, emitters, pressure regulator, timer/controller, safety gear (glasses/gloves). Tools: tape measure, level, circular saw, drill/driver, hole saws, jigsaw, clamp, caulking gun, wrench set. Provide example SKU types and list weights to help buyers.
Next Articles
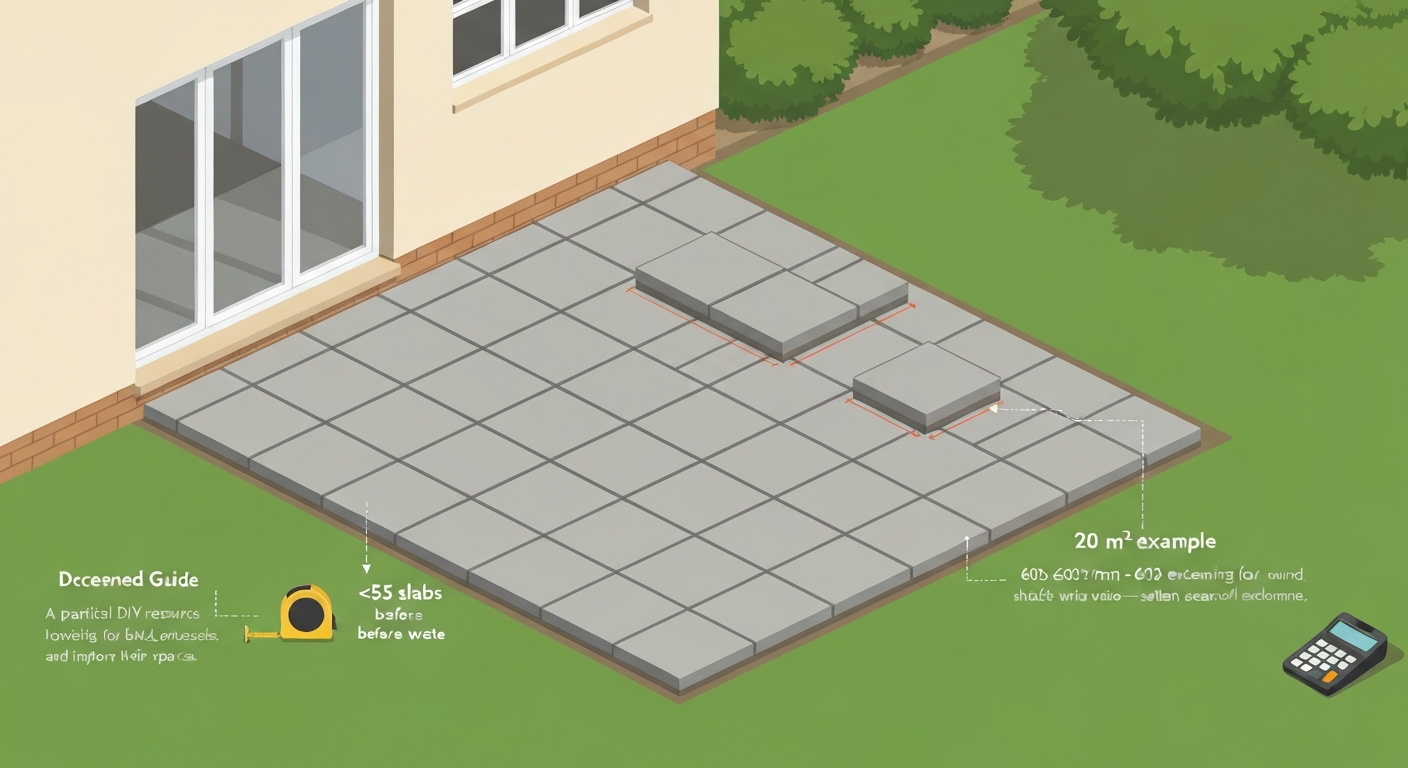
How Many Flags Do I Need for My Patio: Measure, Calculate & Order
Calculate exactly how many paving flags your patio needs, measurements, waste allowance, pack counts & sample examples.
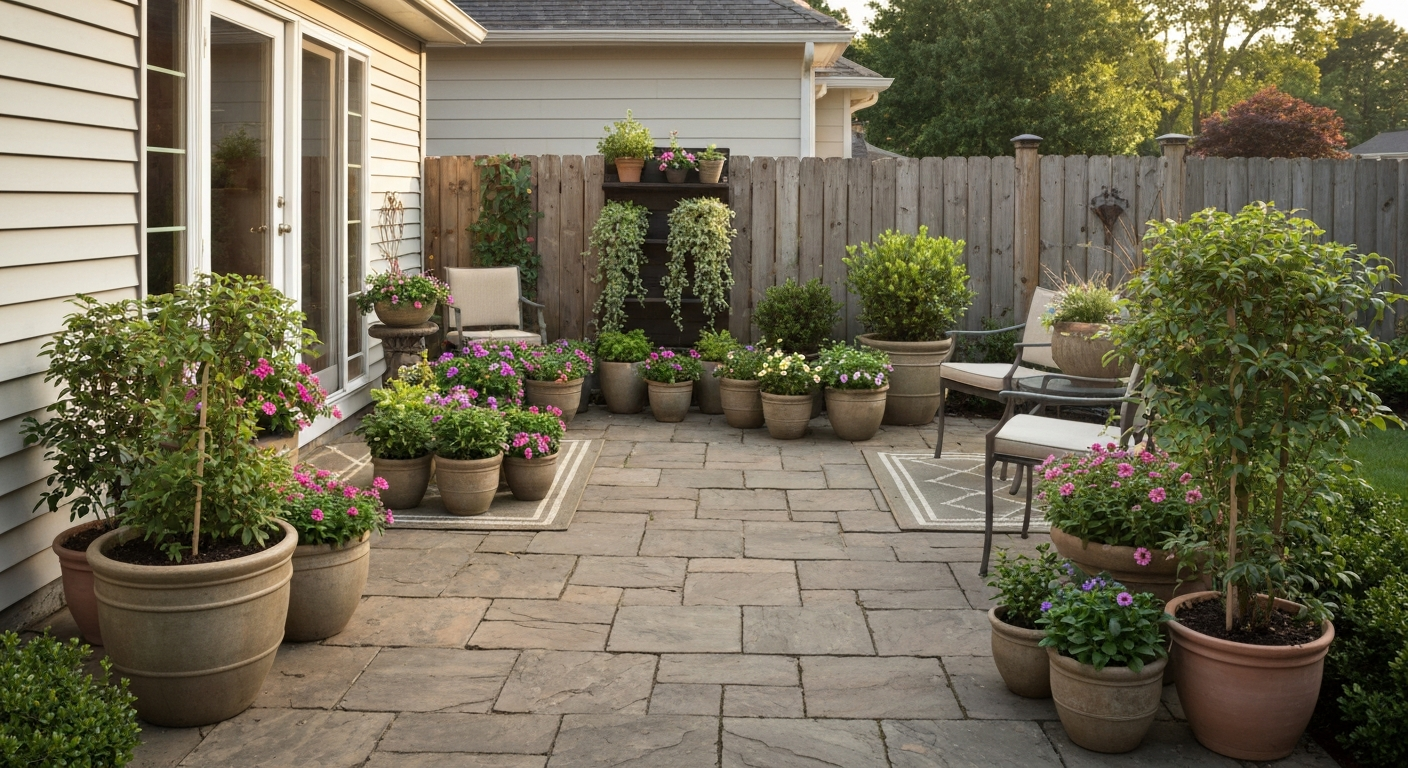
How to Decorate a Patio with Flower Pots: Step-by-Step DIY Guide
DIY patio flower-pot guide: planning, pot & plant picks, small-space layouts, vertical displays, drainage, seasonal care
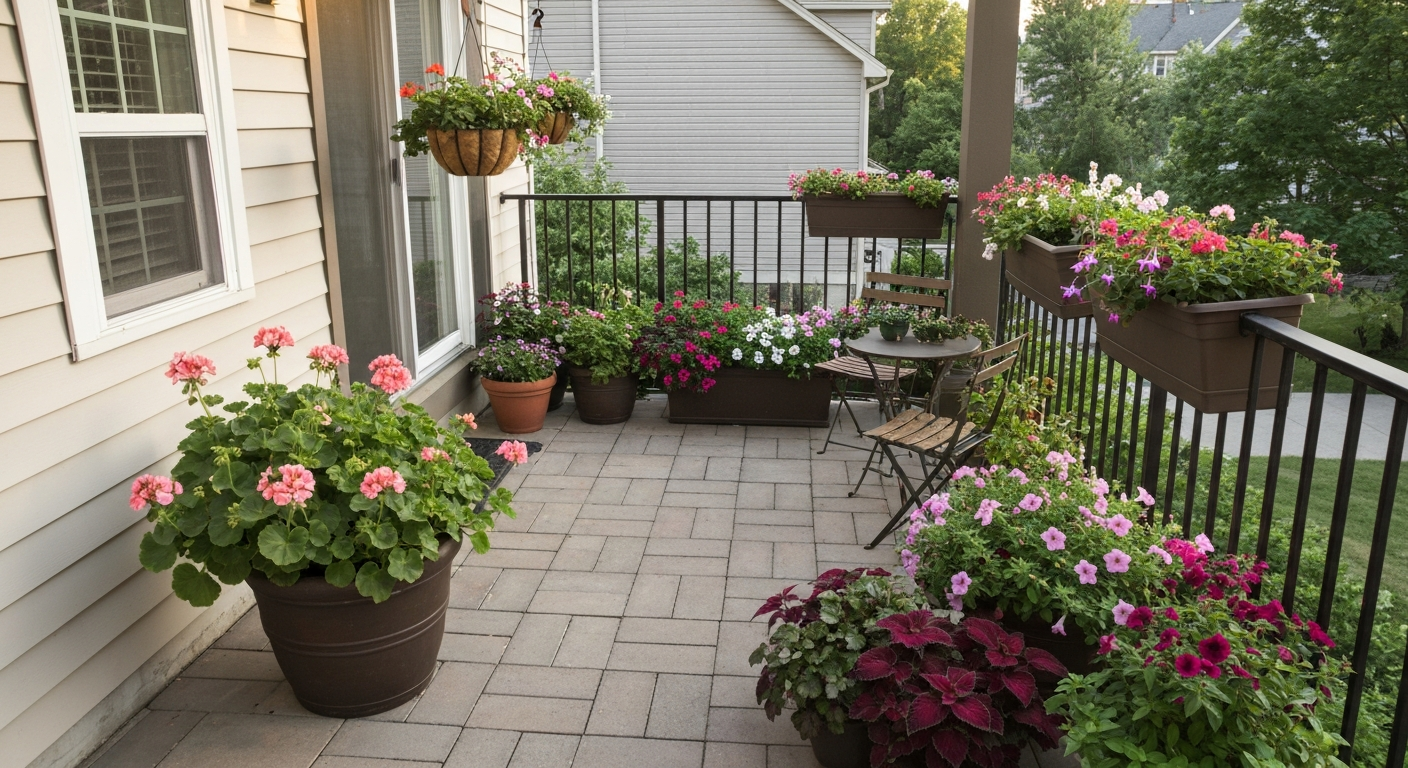
How to Decorate a Small Patio with Flowers: A Practical Plan
Practical step-by-step guide to decorate a small patio with flowers: measurements, plant lists, containers, watering.